Creating Levels, Grids, Layout and model elements for a residential unit using REVIT
- Building Information Modelling (BIM) is a process for creating and managing information on a construction project throughout its whole life cycle. BIM integrates multi-disciplinary data to create detailed representations that are managed in an open-cloud platform for real time collaboration. BIM not only allows design and construction teams to work more efficiently, but it allows them to capture the data they create during the process to benefit operations and maintenance activities.
Main features of BIM includes :
- Easy access to information- BIM is a physical representation of the physical and functional characteristics of the building process, that provides every minute detail of the project. One can easily access the right information at the right time that provides a reliable basis for decision making during a structure’s entire lifecycle.
- Making the process more extensive- CAD software enable users to work accurately in 3 dimensions- length, breadth and depth. However, BIM Modelling servicesproviders, are allowed to work in five dimensions, time and cost being the additional dimensions. They are thus able to produce accurate cost and material estimates and precise time schedules of the project even as the design is being developed.
- More comprehensive overview of the project -BIM models not only present 3D geometric view of the structure, they provide a more comprehensive overview of the entire building process. It covers every component of this process from geometrical aspect of the design to spatial relationships, from light analysis to provision of various services, from topographical information to quantities or properties of building components, and so on.
- Lifelike views- BIM design tools allow you to obtain various views from a building model and produce high-quality, accurate drawings. These views are based on a single definition of each object and thus gives a more realistic and accurate idea of the final structure.
Benefits of BIM over 2D CAD tools include:
- BIM offers a more complete representation of a building’s design. It takes more than the building’s core components into account. For example, BIM allows you to design electrical and HVAC systems, as well as the building itself. This means the project team can take full advantage of the space and resources available.
- BIM pulls your documents into a single database. Several people can work on the same model and save it to the cloud. This allows for instant updates, so you won’t waste time searching for documents when you need to make changes.
- A BIM model will allow you to prefabricate important components ahead of time. You won’t have to adjust them based on the building design. Instead, such components are part of the initial design.
- You can provide much more to your clients using BIM than you could with CAD. The models you give to your clients update constantly as you work on your project. Your client can check in any time, which leads to quicker approval for milestones and more efficient project development.
- Resource tracking is a key component of BIM models. You’ll be able to figure out how much of each resource you need during the design stage. This improves the flow and efficiency of construction.
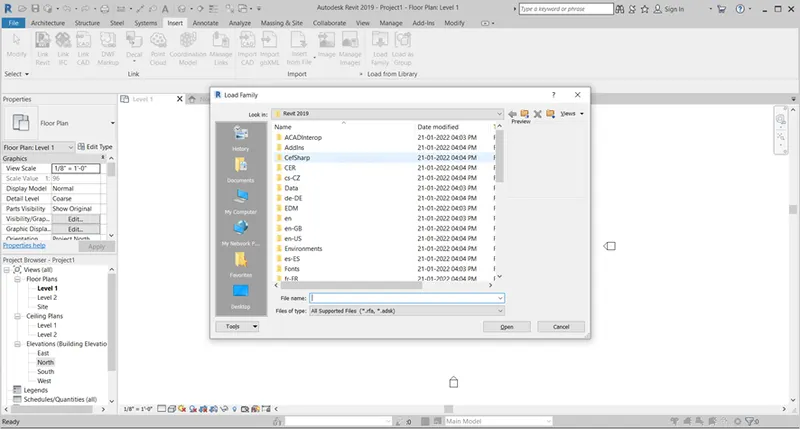
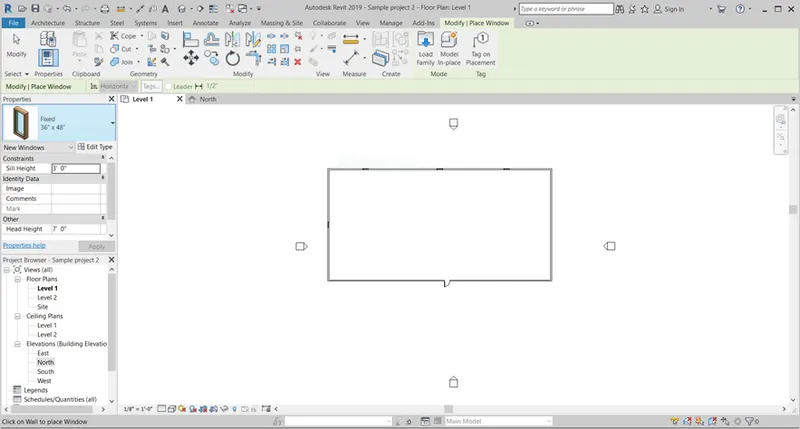
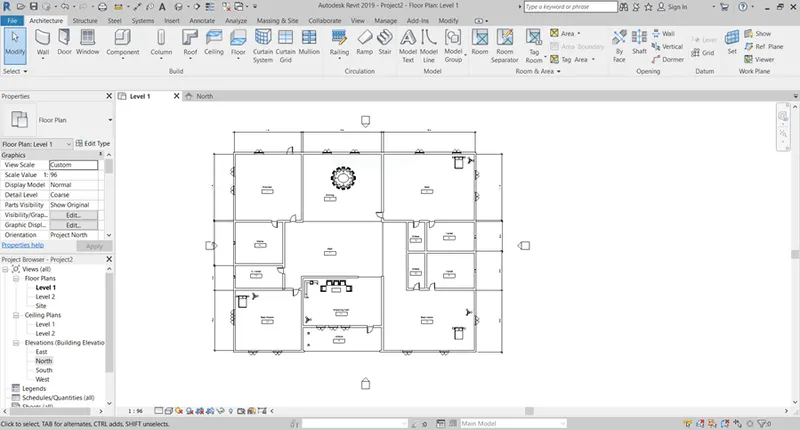
- To insert a door in the model, click on Insert> Load Family> load a family from the files and insert it in the model. Similarly load other family like windows, etc..
3.
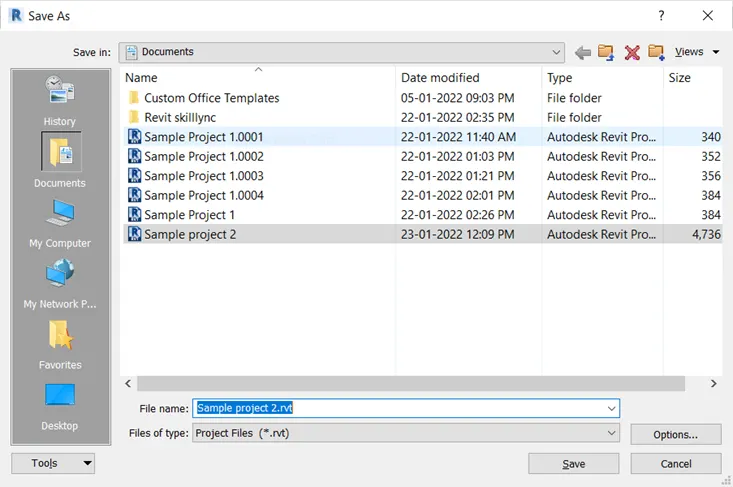
- To save the project, File> Save as> Project> save the project by giving a name.
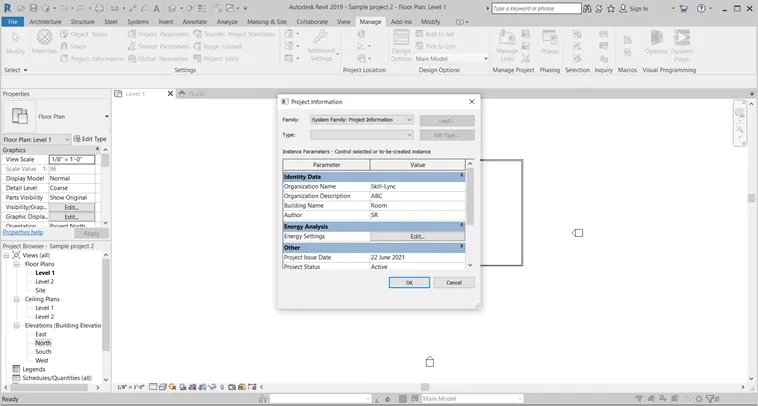
- Now go to Manage tab> Project Information > Fill the details.
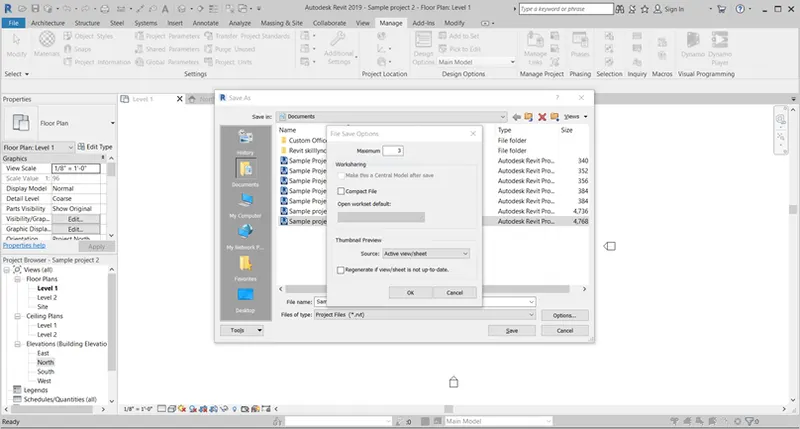
- To set the maximum back-up upto 3, go to File> Save as> Project> Options> Maximum backups: enter 3> OK> Save.
4.
- To create Levels, open the Elevation view, there will be 2 levels present, edit the distance between the levels if needed.
- Change the name of Level 1 to Ground Floor and Level 2 to First Floor.
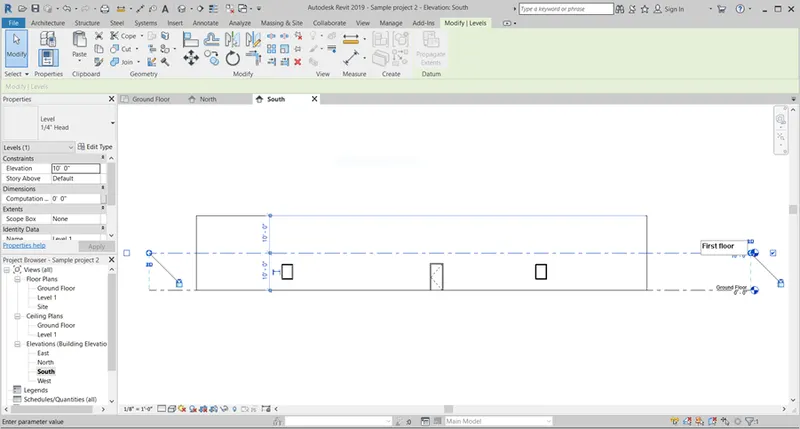
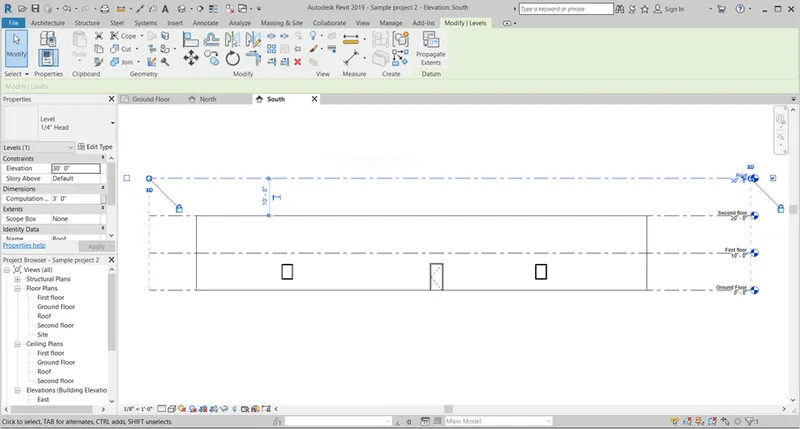
- To add more levels, go to Architecture tab> Level> Pick Line option> set offset as 10’> Enter> click on the existing level above which you have to add the new level, rename the levels.
- To create Grids in the first floor plan, Architecture tab> Grids> Line option, draw horizontal grids and rename them as A, B, C and D from top to bottom at 10’ spacing and vertical grids from 1 to 10 at 20’ spacing.
- Click the Pick line option and mention the offset to add multiple grid line.
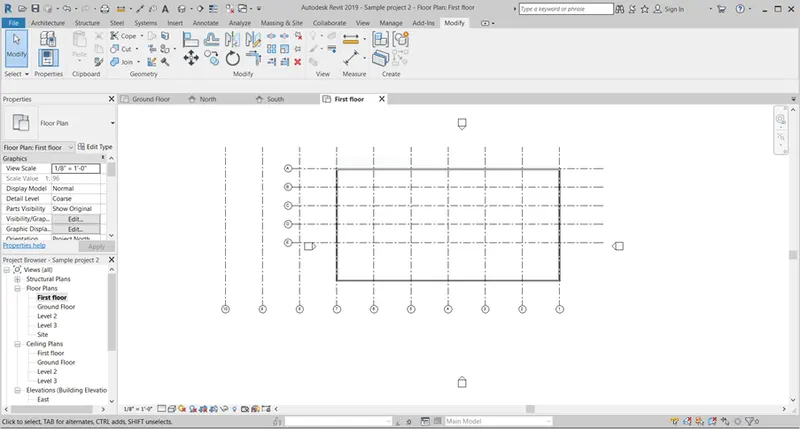
- The conceptual layout of a residential building is created.
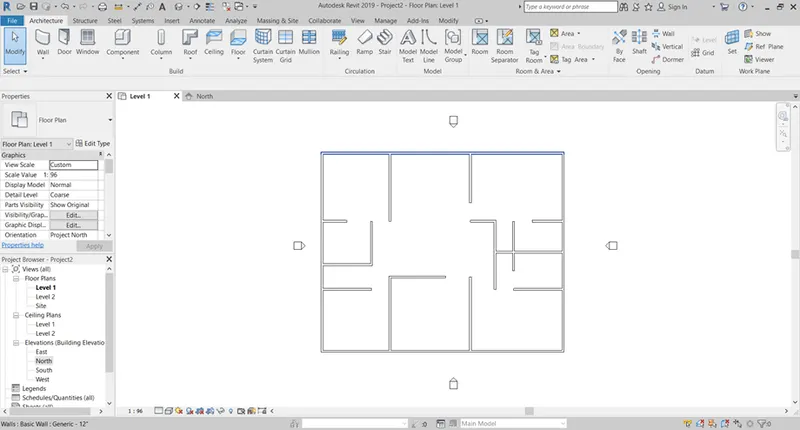
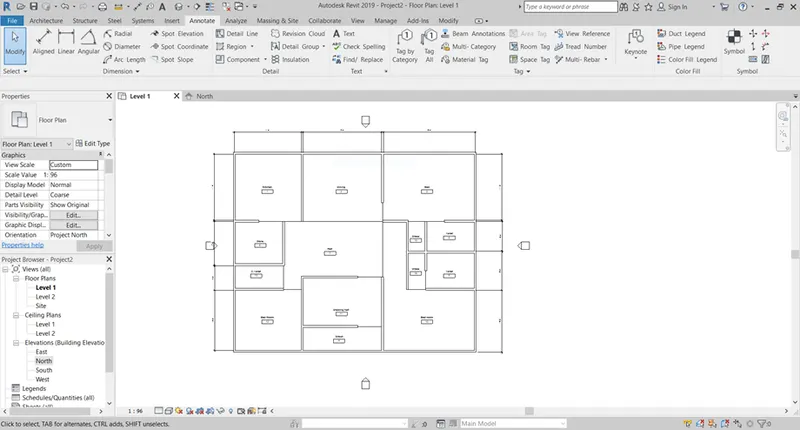
6. The dimensions of the different rooms are marked using the Annotate options.
7.The different elements such as doors, windows, tables, chairs, couch , beds, lamps, are added to the model from Load family option.
The final 3D model is shown below:
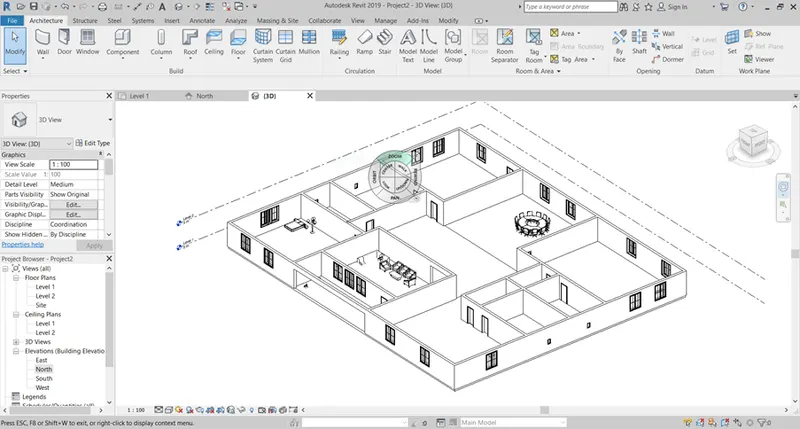
RESULT:
The 3D model of the residential building has been created with the necessary elements.