Creating Kitchen layout, Hatching of Architectural elements and sectional view of an Industrial Building in AutoCad
TASK-1
AIM :
To Create the Kitchen Layout using AutoCAD Software 2015.
COMMANDS USED :
- units
- limits
- line
- rectangular
- trim
- offset
- circle
- arc
- dimlinear
- hatch
- mtext
PROCEDURE :
- To set the units and limits.
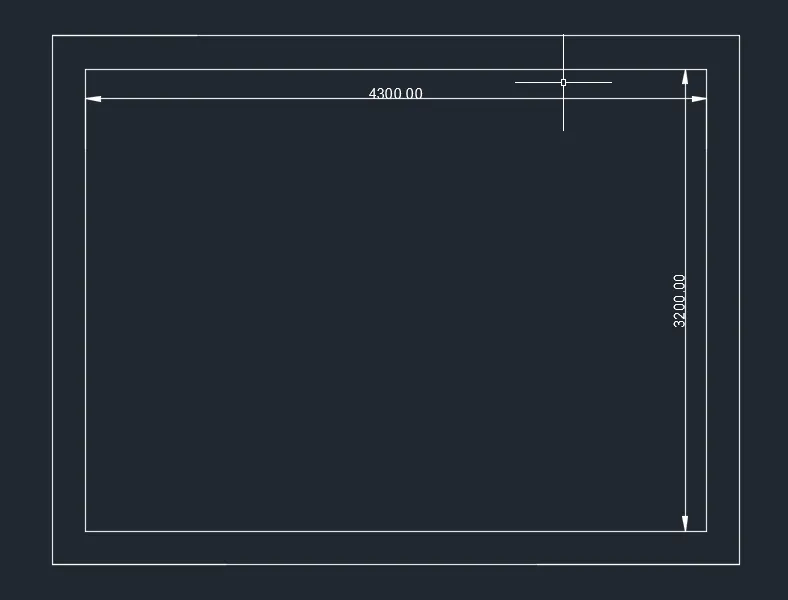
- Draw a rectangle of 4300 and 3200mm and offset 230mm as wall thickness.
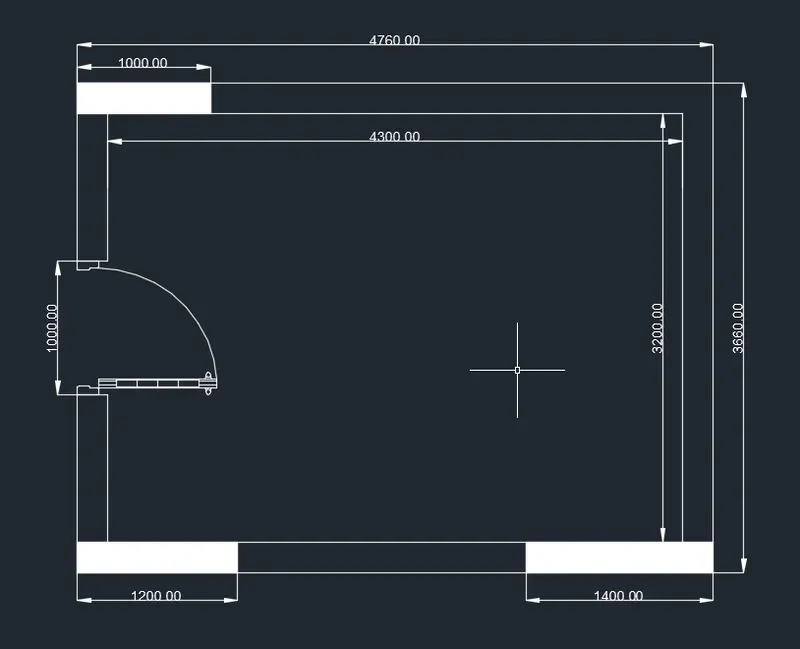
- Draw a below counter storage of fridge 1000mm and mirco oven 600mm respectivly to 450mm,300mm,900mm,900mm for sink and deep of 600mm using rectangle command and offset assume the inbetween distance 10mm or 20mm.
- Then below counter another side same as rectangle command using 900mm,450mm,900mm for stove and 450mm,450mm,450mm,balance space of 572mm.
- Draw snack counter near the stove area side using line 900 x 600 from the distance of wall to 700mm.
- Arc command and line using to draw the door 1000mm placed center of the kitchen and trim to unwanted line.
- Hatch command using to hatch outer wall and line used window creation.
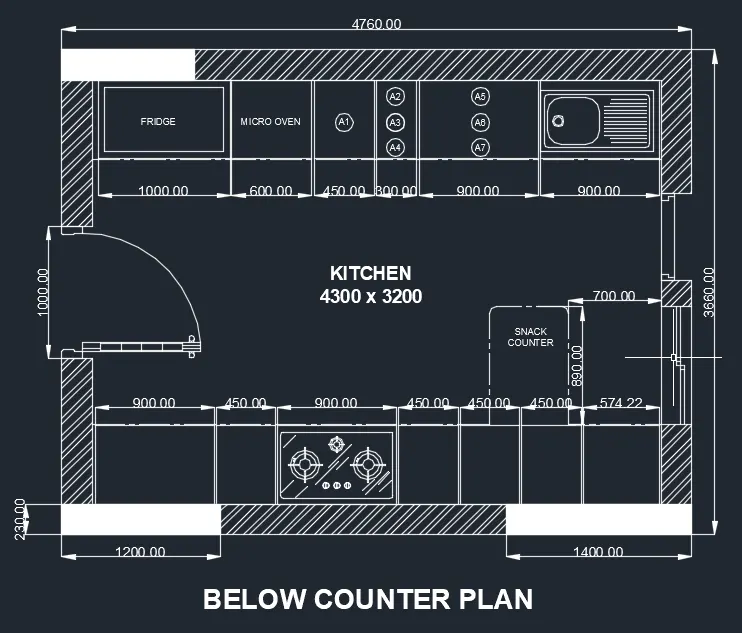
- To apply the hatch command to highlight the objects.
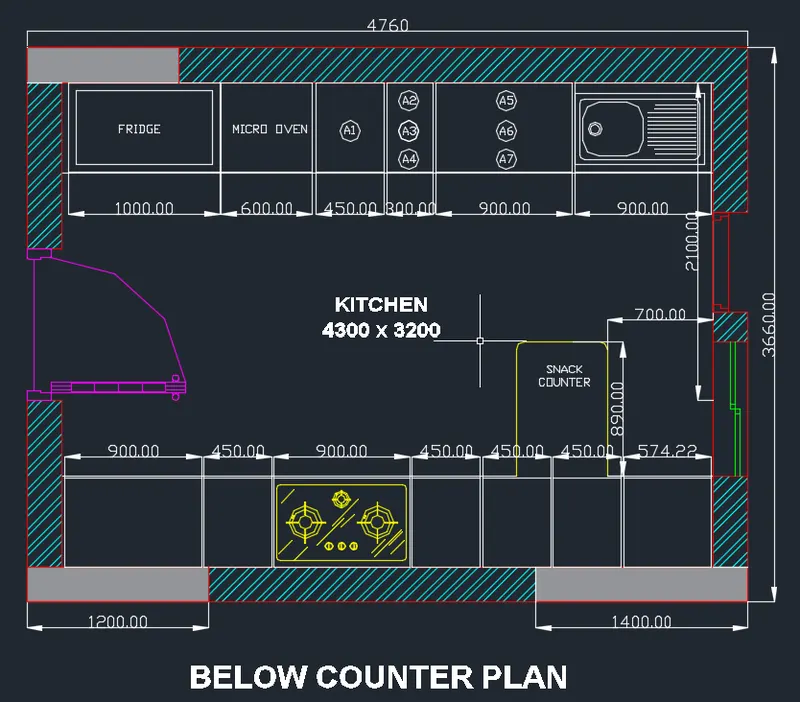
- Draw the above counter storage plan.copy from the below counter erase unwanted counter replace outer sketch.
- Using Rectangle command to draw the top sorage of 900mm ,600mm in depth of 600mm and equal to divide the distance indepth of 300mm.
- Same as the another side of 450mm,900mm for Chiminy and 900mm,balace space to occupy.and mark the chiminy hose center marking.
- The give mtext name & dimention each one objects.
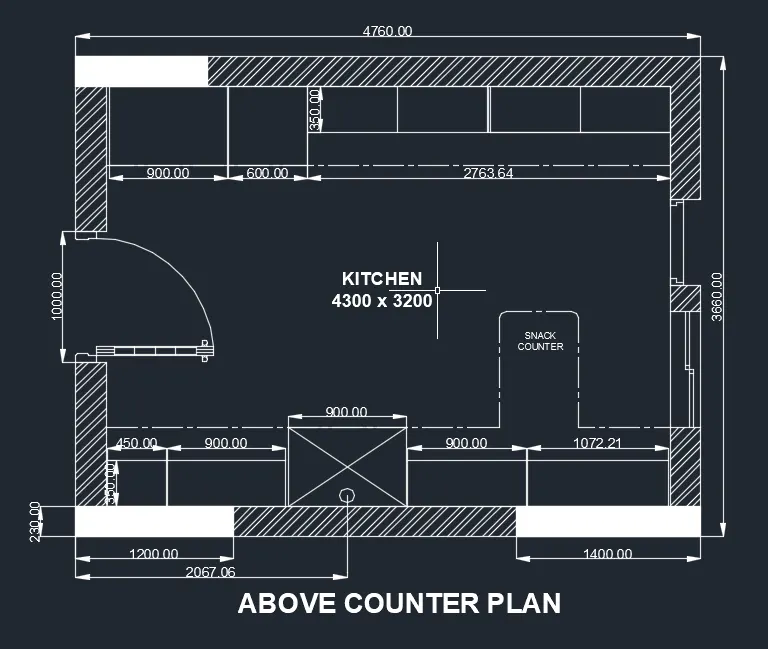
- To apply the hatch command to highlight the objects.
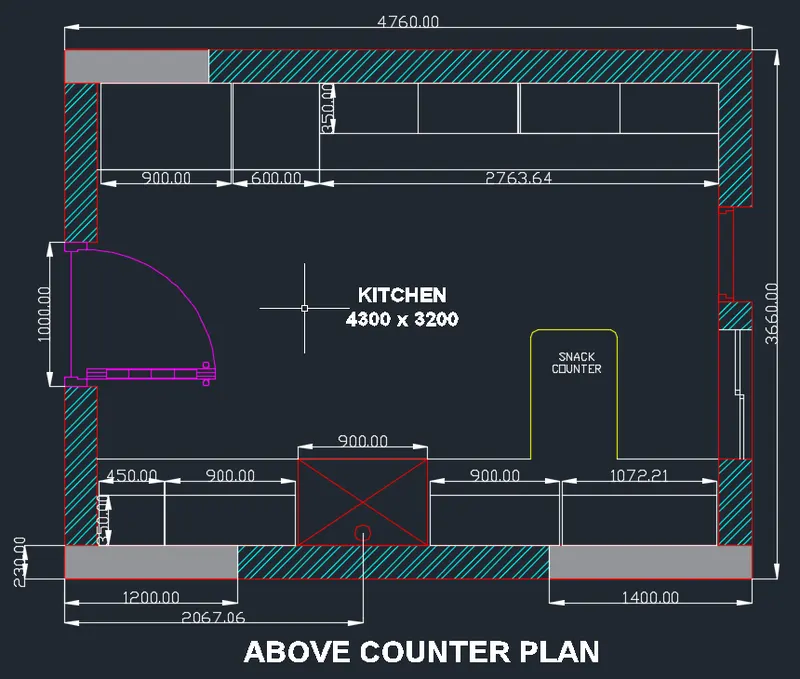
RESULT :
The Kitchen Layout drawn successfully in the AutoCAD.
TASK-2
AIM :
To Create the elevation of the plan and apply proper hatch in the walls, doors, windows, and other architectural elements.
COMMANDS USED :
- units
- limits
- line
- rectangular
- trim
- offset
- circle
- arc
- dimlinear
- hatch
- mtext
PROCEDURE :
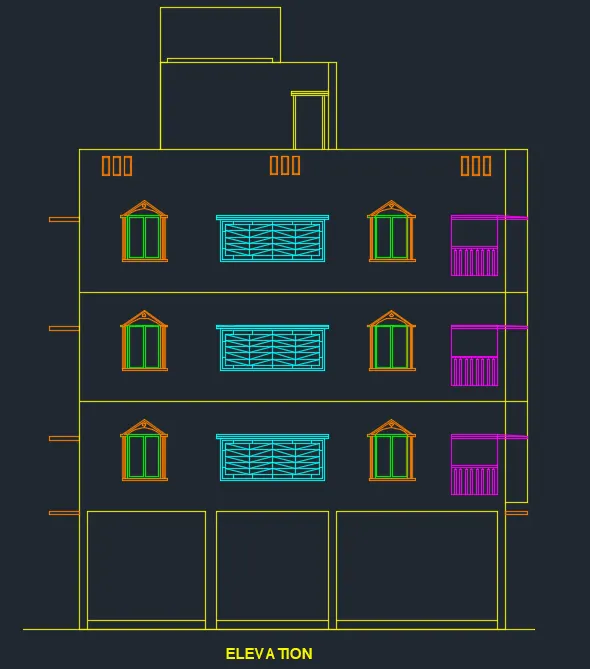
- Then draw the elevation of the chalange 7 plan structure.
- Using construction line draw parallel line of front portion of column window and varanda and balconey.
- Draw the ground level and to offset the groundfloor 3000mm and respectivly offset the 1st floor,2nd floor,3rd floor.
- Then offset 900mm for the parapet wall and offset the staircase room of 2400mm and offset for over head tank 1500mm.
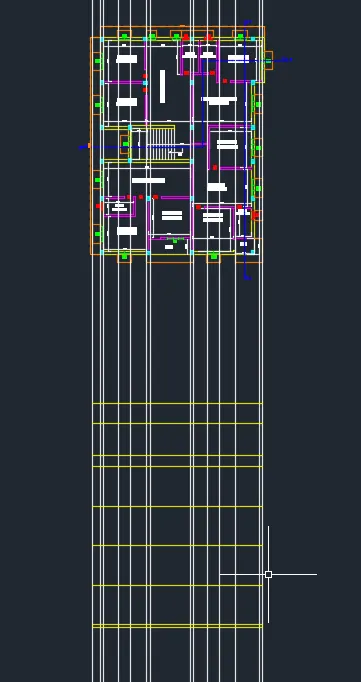
- Trim unwanted lines and to fillet and line join to the object.
- To draw the sunshade level of 2100mm form the finish floor level.
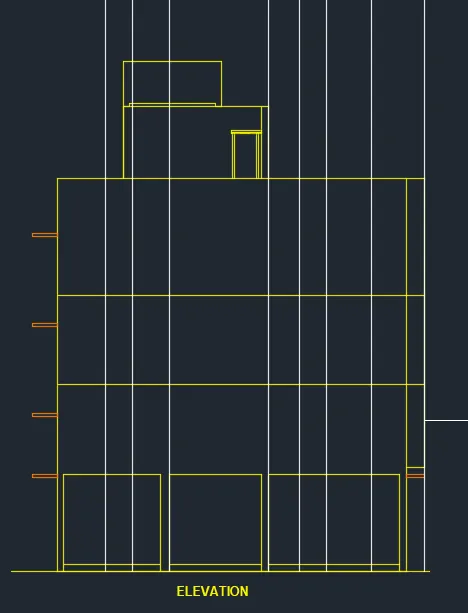
- Then to draw the window form the reference line using to draw the window and varanda MS-frame and Balconey Raillings.
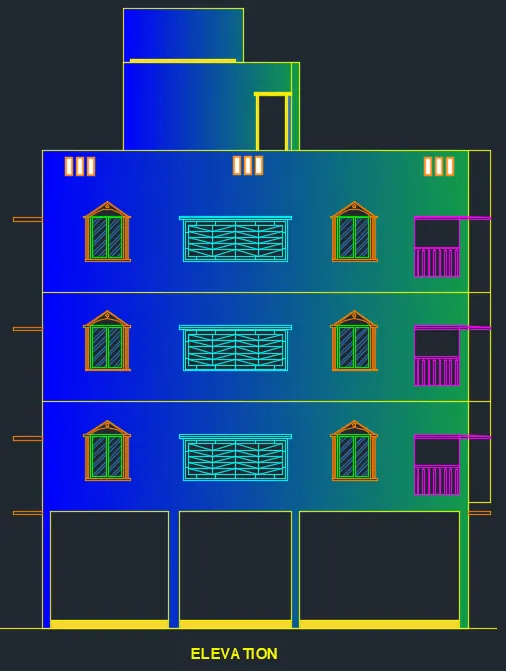
- Then using hatch and layer properties apply the obejets.
RESULT :
The elevation of the plan and apply proper hatch in the walls, doors, windows are drawn successfully using AutoCAD.
TASK-3
AIM :
To Create the section view of an industrial building
COMMANDS USED :
- units
- limits
- line
- rectangular
- trim
- offset
- circle
- arc
- dimlinear
- hatch
- mtext
PROCEDURE :
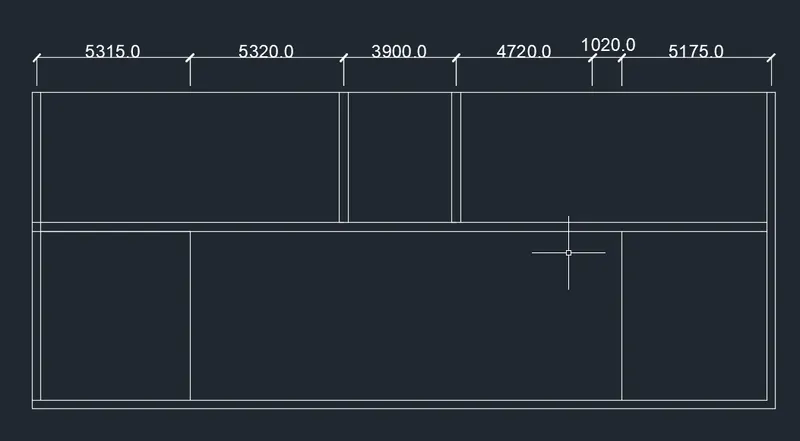
- Using line command to draw the one vertical reference line.
- Offset using to divide segements of 5315mm offset respectivly to 5320mm,3900mm,4720mm,1020mm,5175mm.
- To add the wall thickness 300mm of both side offssey of 150mm.
- Trim to unwanted line and using fillet to join the corner boundary.
- From the basepoint to offset 5850mm also add concretewall thickness of 300mm.
- To draw the fire pipe of pimb room basement to ground floor.
- Then to create the fillter feed tank and create manhole sixe of 750mm x 750mm.
- To draw the duct on basement ceilling and also sprinkeller bulb fixing on the ceilling.
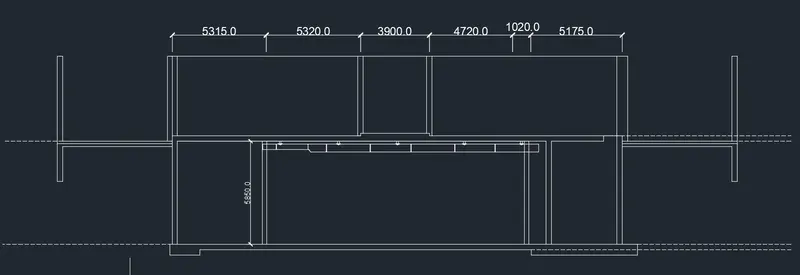
- Using leader to note the name each one objects.
- Using HATCH to apply the concrete wall and colour be change to higlight the wall.
- Then using layer properties to apply the all elements to highlight the objects.
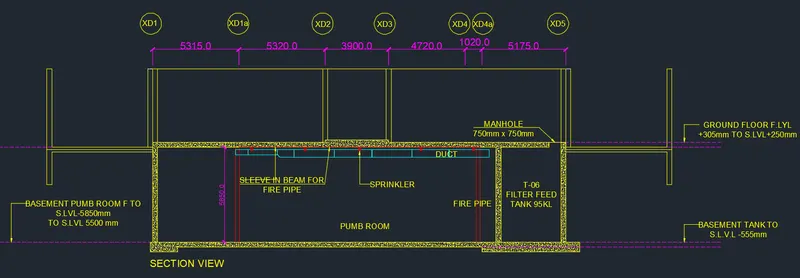
RESULT :
The section view of an industrial building drawn successfully using AutoCAD.