Creating Bar Bending schedule, Different Door types, and Creation of standard drawing templates using AutoCad
AIM:
To create the templates and need to take the size of title block as per industry standards and need to save them as a block names as Custom1_titlebox and Custom2_titlebox.
COMAMANDS USED:
- Block
- Insert
- Rectangle
- Line
- Text
- Array
- Mirror
- Attributes
- Copy
- Offset
- Trim
PROCEDURE:
- Creating the rectangle of size 8'2" and 4' feet and divide it with line for the text box into rows of feom top to offset 5", 5", 5", 5",.
- Then Column divide into 4 parts of offset to right to left 6", 2'3", 6", 9".
- Using offset to divide rows from the top to 6", 1'6", 1', 1', 9", 9",6", 6".
- Mtext using to give the name of each row and columns.
- After the text placement to create layer propertis to apply to highlight the object.
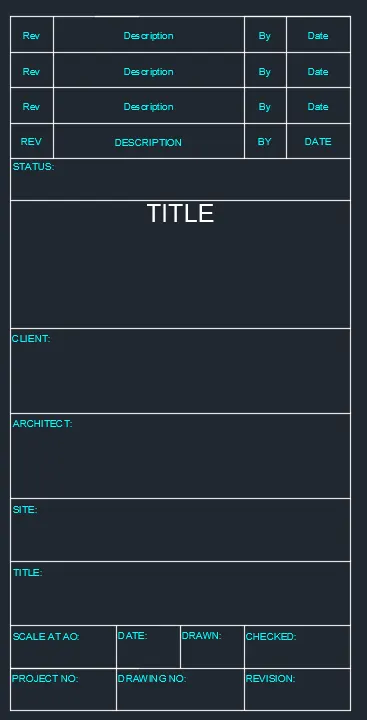
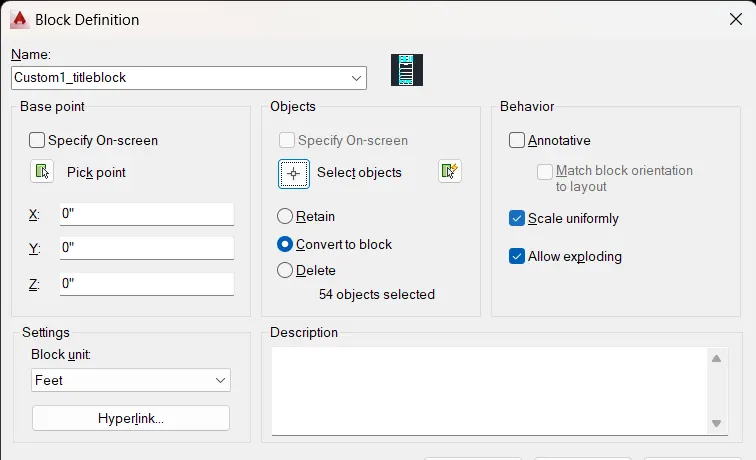
- Then to create the block of Custom1_titlebox using block
- After we draw the Custom2_titlebox template using rectangle to draw dimention of 20' x 2' and explode it.
- From the Left corner to divide column of offset to 8' , 1'9", 1'9", 1'9", 1'9", 5' respectivly and divide the row of offset to 1'.
- Then to draw the Amenent box using rectangle from the right corner to 4' x 2'9" and that to be divide column respectivly 6", 2'3", 6", 9" and row of diveded into 5 segment each one is 6" and last one of 9".
- Mtext using to give the name of each row and columns.
- After the text placement to create layer propertis to apply to highlight the object.
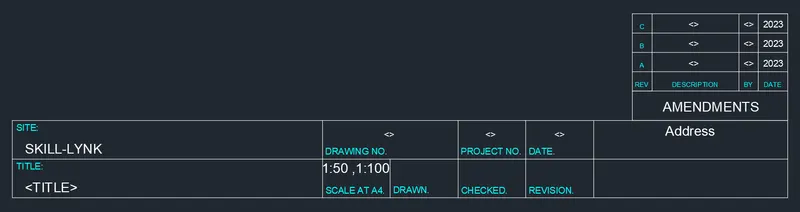
- Then to create the block of Custom1_titlebox using block
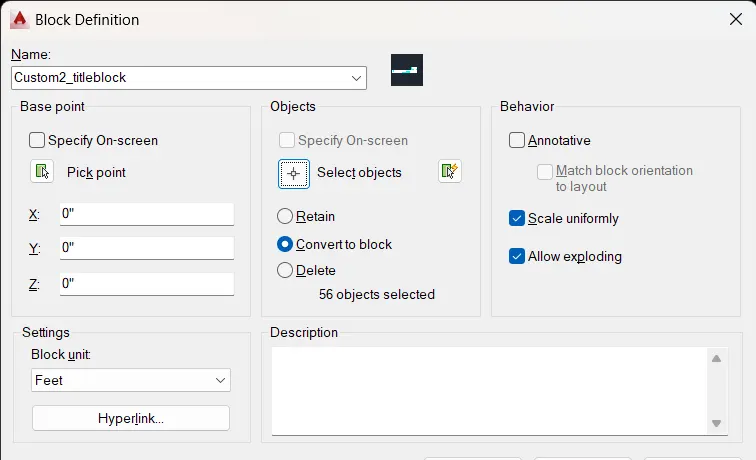
RESULT:
The given templates are drawn and saved as block successfully in the autocad2015.
AIM:
To create the doors type for warehouse and need to create each door type as per standard size And to create the blocks of door type after creating them.
COMAMANDS USED:
- Block
- Insert
- Rectangle
- Line
- Text
- Array
- Mirror
- Attributes
- Copy
- Offset
- Trim
PROCEDURE:
- First we draw the rectangle size of 2330 x 2750mm and offset of frame 50mm.
- Then the door shutters divided into 4 segment columns of fame thick 50mm.
- And Inner panels are divided to 3 segments of the panel size of 750 x370mm and inner beading offset of 25mm and pavilon of 50mm offset respectivly.
- Then copy to equal the panel in the shutters.and to draw the door main handle using line command and circle and trim.
- To create the layer properties to apply the colour to highlight the door frame and shutters.
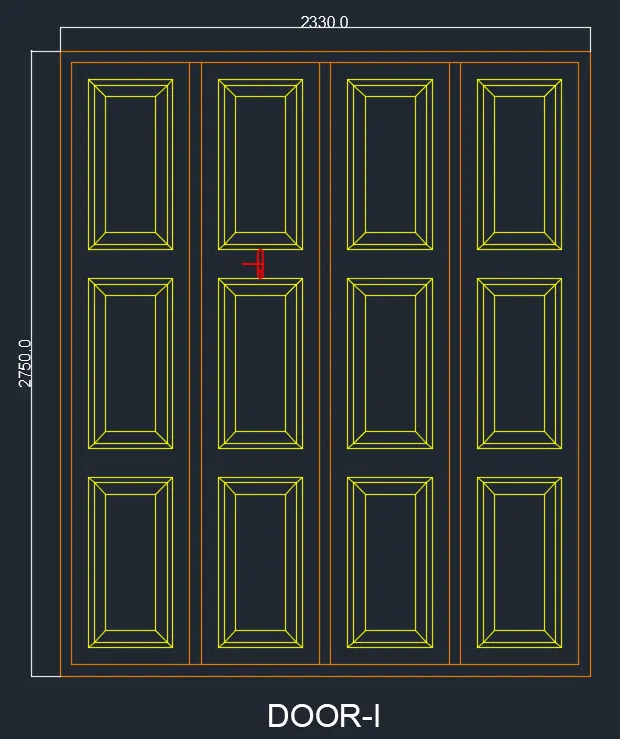
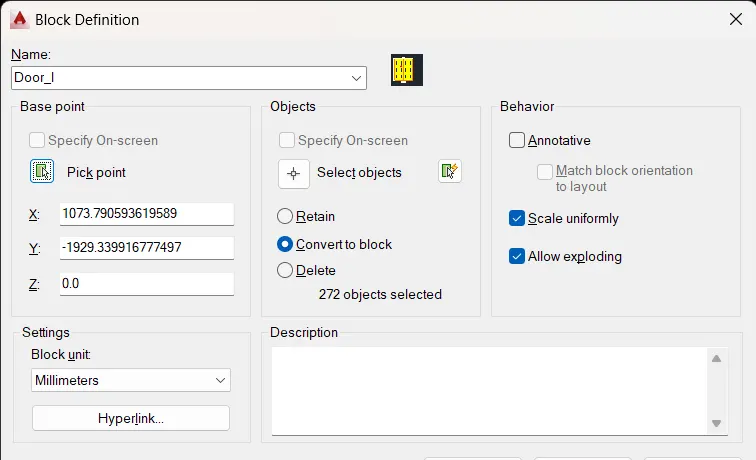
- Then to create the block of Door-I
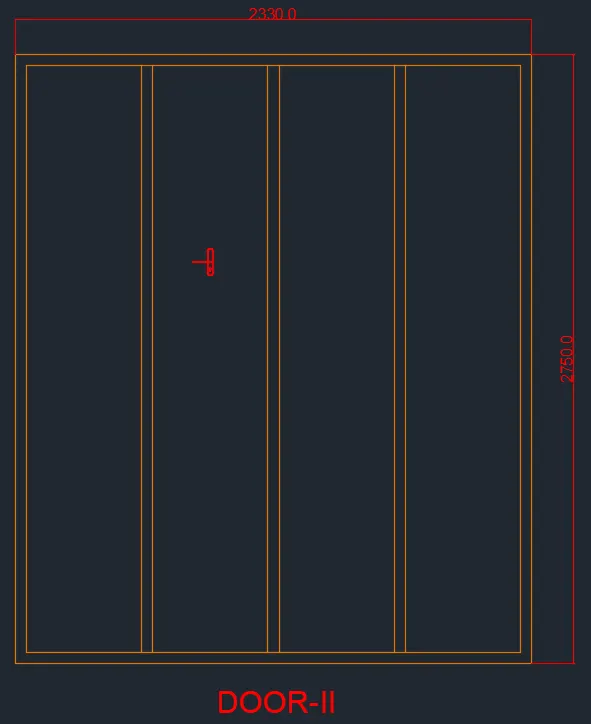
- Then we draw the Door-II type draw the rectangle size of 2330 x 2750mm and offset of frame 50mm.
- Then the door shutters divided into 4 segment columns of fame thick 50mm.
- To create the layer properties to apply the colour to highlight the door frame and shutters.
- Then to create the block of Door-II
RESULT:
The doors type for warehouse are successfully created in the autocad.The blocks of door are also created successfully in the autocad.
AIM:
To create the electric symbols as block with the name and to create the blocks and arrange them in the legend.
COMAMANDS USED:
- Block
- Insert
- Rectangle
- Line
- Text
- Array
- Mirror
- Attributes
- Copy
- Offset
- Trim
PROCEDURE:
- First of we draw the rectangle of 12' x 6' then expolde it divied row of 9 segments of each one 8" and divied column 6 segments of 9" ,3'3", 9", 3'3", 9", 3'3".
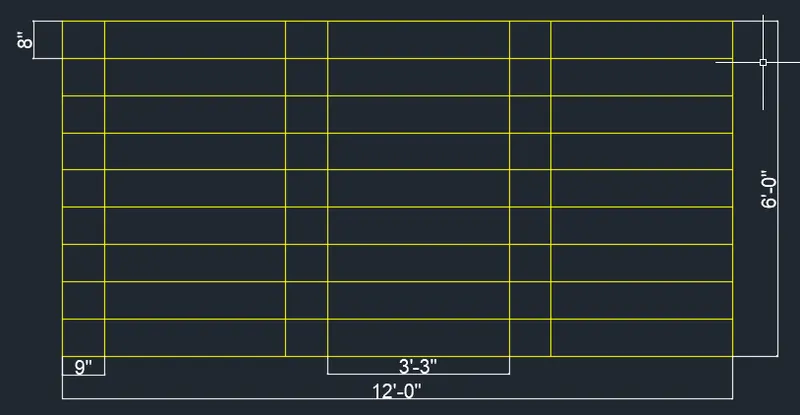
- Then to draw the electric symbols.
- SINGLE_GANG_SWITCH: Draw the circle and draw the inclined line on the circle, next draw the perpendicular line to the inclined line.

- DOUBLE_GANG_SWITCH: Draw the circle and draw the inclined line on the circle, next draw the two perpendicular lines to the inclined line.

- TRIPLE_GANG_SWITCH: Draw the circle and draw the inclined line on the circle, next draw the three perpendicular lines to the inclined line.

- SINGLE_TWOWAY_SWITCH: Draw the circle and draw the inclined line on the circle, next draw the perpendicular line to the inclined line. And we used hatch command to fill the circle.

- DOUBLE_TWOWAY_SWITCH: Draw the circle and draw the inclined line on the circle, next draw the two perpendicular line to the inclined line. And we use the hatch command to fill the circle.

- TRIPLE_TWOWAY_SWITCH: Draw the circle and draw the inclined line on the circle, next draw the three perpendicular line to the inclined line. And we use the hatch command to fill the circle.

- similarlly draw the given electrical sympols and to make the blocks io insert the tables as same lattering to be noted.
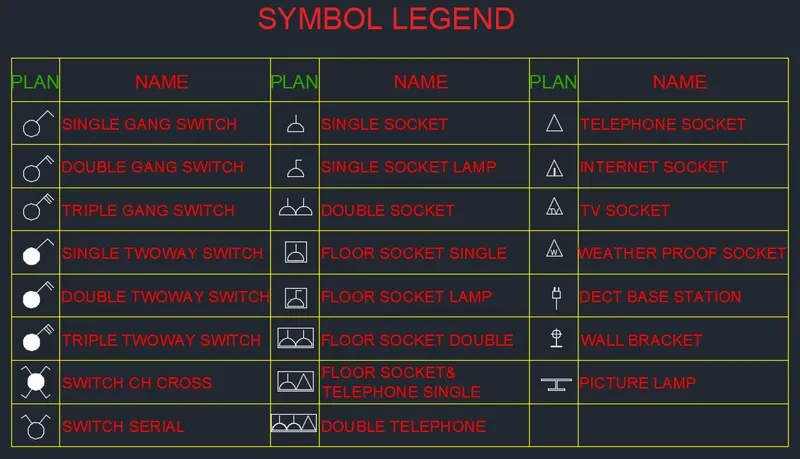
RESULT:
The electric symbols are drawn successfully in the autocad in detail and names of the electric symbols are also saved as blocks.
AIM:
To create the door type for residential building and to save the name of the blocks as type.
COMAMANDS USED:
- Block
- Insert
- Rectangle
- Line
- Text
- Array
- Mirror
- Copy
- Offset
- Trim
PROCEDURE:
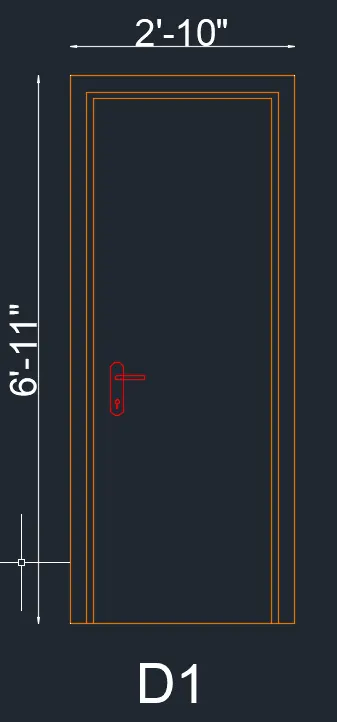
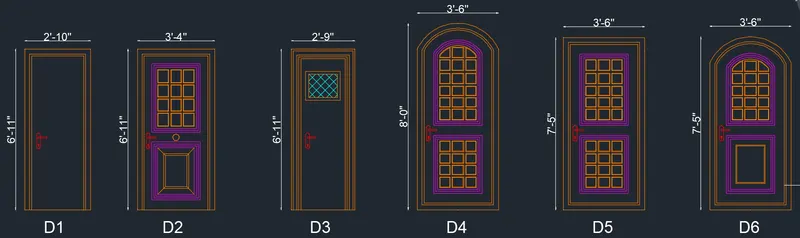
- First we draw the rectangle of 2'-10" x 6'-11" and offset the frame thickness of 2.5" and offset of shutters 1".
- To trim unwanted bottom of door lines and extend to the lines.
- Then draw the door mainhandle using line and circle trim commands.
- To create the layer properties apply to highlight the object and mtext using to give names of D1
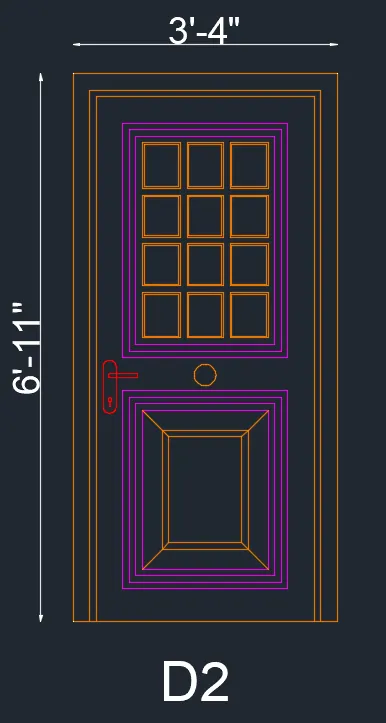
- Draw the rectangle of 3'-4" x 6'-11" and offset the frame thickness of 2.5" and offset of shutters 1".
- To trim unwanted bottom of door lines and extend to the lines.
- Then offset to the center panel of 4" offset of the shuter frame thickness.then offset of beading 1" into 3
- After the center panel divied into 4 segments of small panel to drawn and same as the bottom of the panel be drawn using line and offset.
- Then draw the door mainhandle using line and circle trim commands.
- To create the layer properties apply to highlight the object and mtext using to give names of D2 and covert to block.
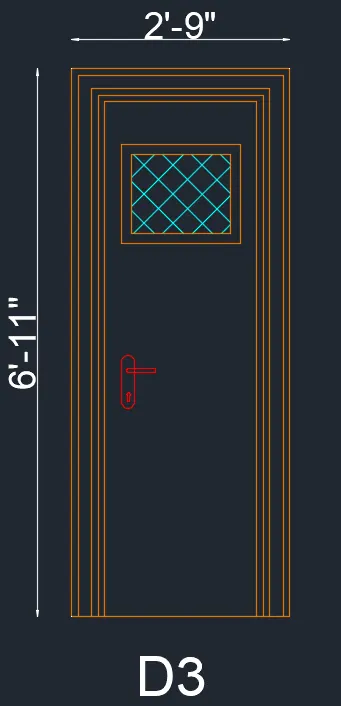
- Draw the rectangle of 2'-9" x 6'-11" and offset 1" and door frame thickness of 2.5" and offset of shutters 1"+1".
- To trim unwanted bottom of door lines and extend to the lines.
- Then draw the Vision panel top of the door and hatch the glass portion
- Then draw the door mainhandle using line and circle trim commands.
- To create the layer properties apply to highlight the object and mtext using to give names of D3 and covert to block.
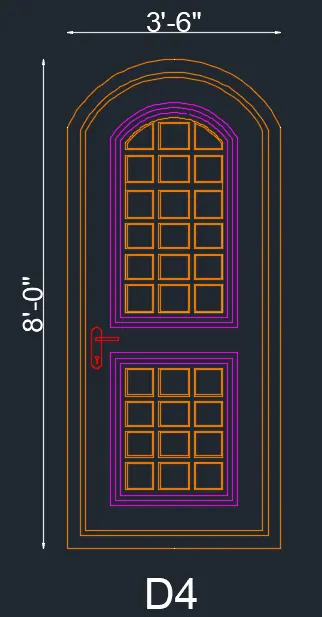
- Draw the rectangle of 3'-6" x 8'-0" and offset the frame thickness of 2.5" and offset of shutters 1".
- To trim unwanted bottom of door lines and extend to the lines top of the door arc using to draw the curved portion.
- Then offset to the center panel of 4" offset of the shuter frame thickness.then offset of beading 1" into 3
- After the center panel divied into equal segments of small panel to drawn and same as the bottom of the panel be drawn using line and offset.
- Then draw the door mainhandle using line and circle trim commands.
- To create the layer properties apply to highlight the object and mtext using to give names of D4 and covert to block.
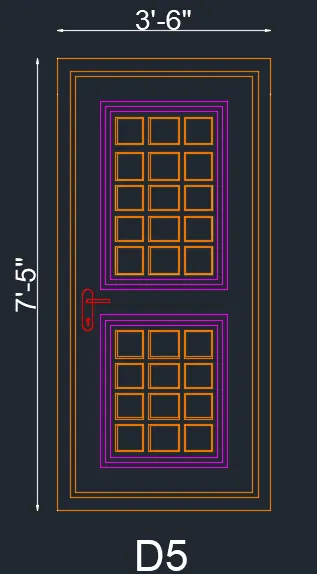
- Draw the rectangle of 3'-6" x 7'-5" and offset the frame thickness of 2.5" and offset of shutters 1".
- To trim unwanted bottom of door lines and extend to the lines.
- Then offset to the center panel of 4" offset of the shuter frame thickness.then offset of beading 1" into 3
- After the center panel divied into equal segments of small panel to drawn and same as the bottom of the panel be drawn using line and offset.
- Then draw the door mainhandle using line and circle trim commands.
- To create the layer properties apply to highlight the object and mtext using to give names of D5 and covert to block.
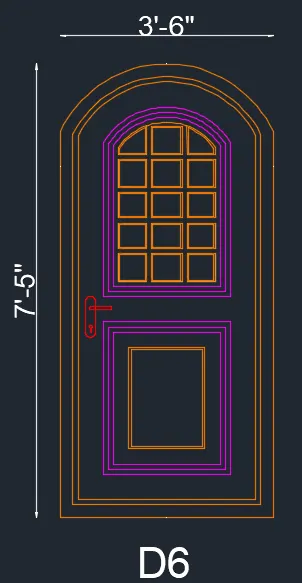
- Draw the rectangle of 3'-6" x 7'-5" and offset the frame thickness of 2.5" and offset of shutters 1".
- To trim unwanted bottom of door lines and extend to the lines top of the door arc using to draw the curved portion.
- Then offset to the center panel of 4" offset of the shuter frame thickness.then offset of beading 1" into 3
- After the center panel divied into equal segments of small panel to drawn and same as the bottom of the panel be drawn using line and offset.
- Then draw the door mainhandle using line and circle trim commands.
- To create the layer properties apply to highlight the object and mtext using to give names of D6 and covert to block.
RESULT:
The door type for residential building are created successfully in the autocad.And names of the door types are also saved as blocks.
AIM:
To create the bar shape as block with the name and to create the blocks and arrange them in the table.
COMAMANDS USED:
- Block
- Insert
- Rectangle
- Line
- Text
- Array
- Mirror
- Copy
- Offset
- Trim
PROCEDURE:
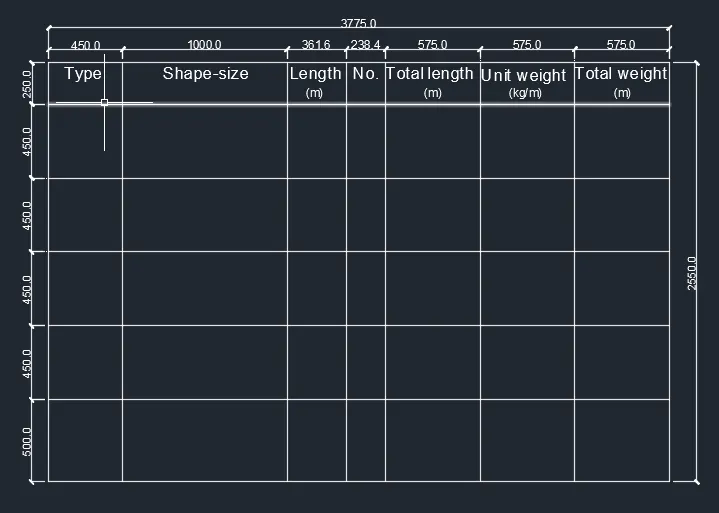
- To draw a BBS table of draw rectangle 3775mm x2550mm and explode it to offset of row 250mm,450,450,450,450,500mm.
- Divied into column of 450mm and 1000,362,238,575,575,575 and using m text to give the discription names.
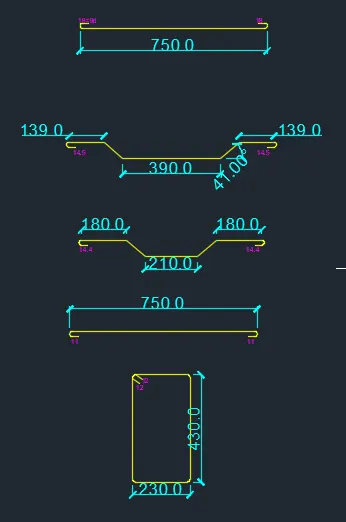
- To draw the line of 750mm for straight bar create arc for the bend create on one side and mirror it on another side.
- Draw line of 300mm for straight bar.Draw vertical line of 41mm and extend a horizontal line and draw a line inclined at 41 degree from the base of vertical line up to horizontal line.Trim off the unwanted lines.Copy the same on the other side.Draw a horizontal line of 139mm and copy it on other side .Draw bend with arc and mirror the same on other side.
- Draw a line of 210mm .Draw vertical line of 41mm and extend a horizontal line and draw a line inclined at 41 degree from the base of vertical line up to horizontal line. Trim off the unwanted lines.Copy the same on the other side.Draw a horizontal line of 180mm and copy it on other side.Draw bend with arc and mirror the same on other side.
- Draw a line of 750mm for straight bar.Draw an arc downwards.Mirror it on the other side.
- Draw a rectangle of 23mm and 43 mm.Fillet the corner with fillet radius 12mm.Draw two line of 120mm.and create all of to blocks.
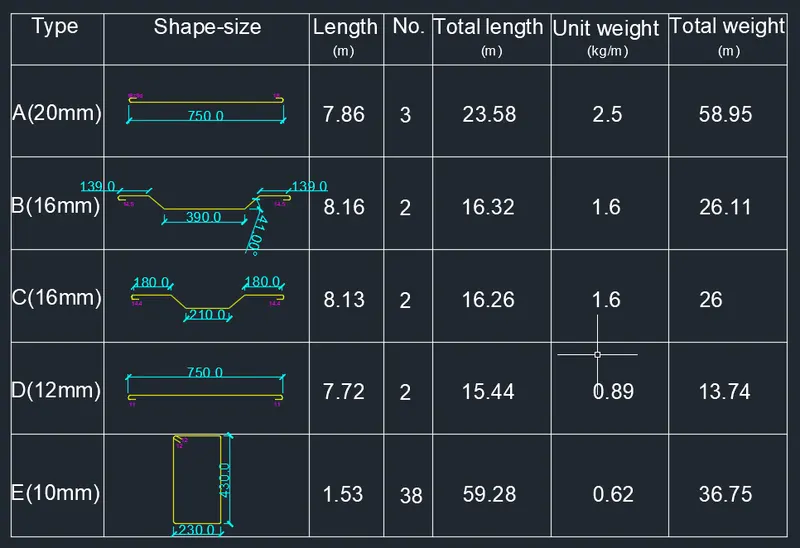
- To place the block into the table and using mtext to give the length and weight of other datas.
RESULT:
The bar shapes are drawn successfully in the autocad in detail and bar shape types are also saved as blocks.