Creating Bar Bending schedule, Different Door types, and Creation of standard drawing templates using AutoCad
To Create Bar Bending schedule, Different Door types, and Creation of standard drawing templates using AutoCad
Commands used:
- Line
- Block
- Layer
- Rectangle
- Trim
- Text
- Copy
- Offset
- Fillet
- Arc
- Circle
- Hatch
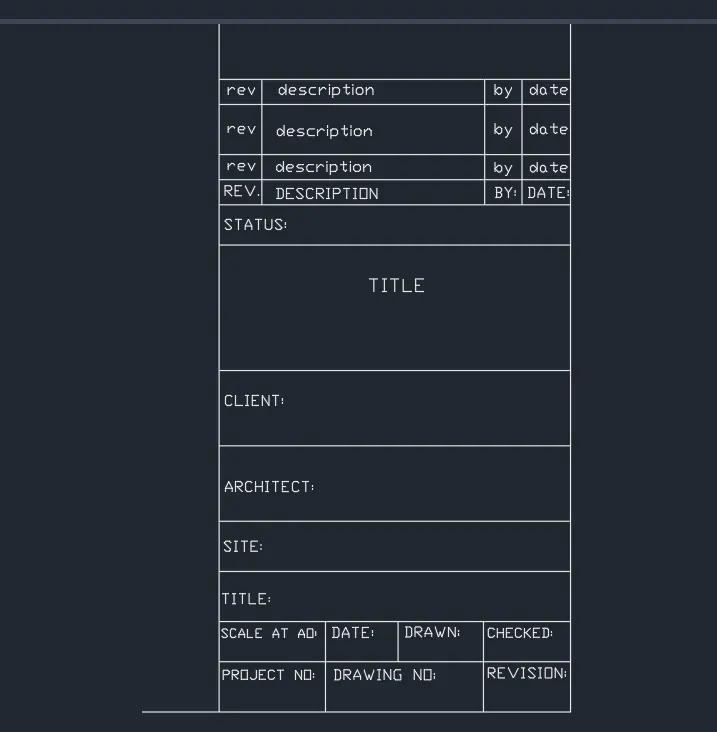
1.Aim : Create the templates as shown in Figures.
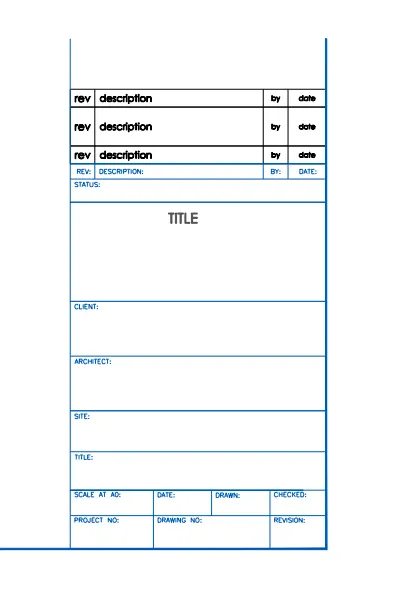
Procedure :
Step 1 :
- Open the Autocad file and set the units
- Command - Startup
- Command - D to change the settings into Decimal units
- Command - UN to change the unit settings, by clicking it and select the decimal units and precision to zero
- Command - LIMITS,set the limits as per the required
- Command - Zoom and select all
- Command - Line
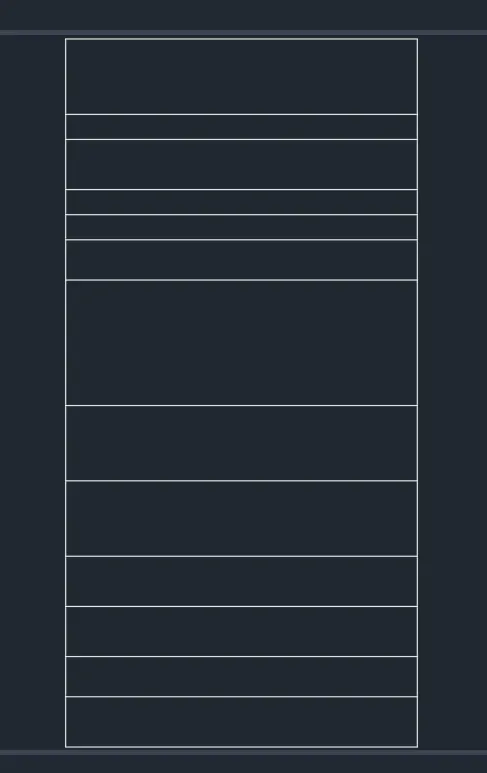
- Specify the 1st point and draw a line along y axis for about 141 units and draw a line along x axis for about 70 units and for a rectangle
- Command - Offset
- Select the through option and oject and give the offset distance to form a table as given in the layout
Step 2 :
- Command - Text
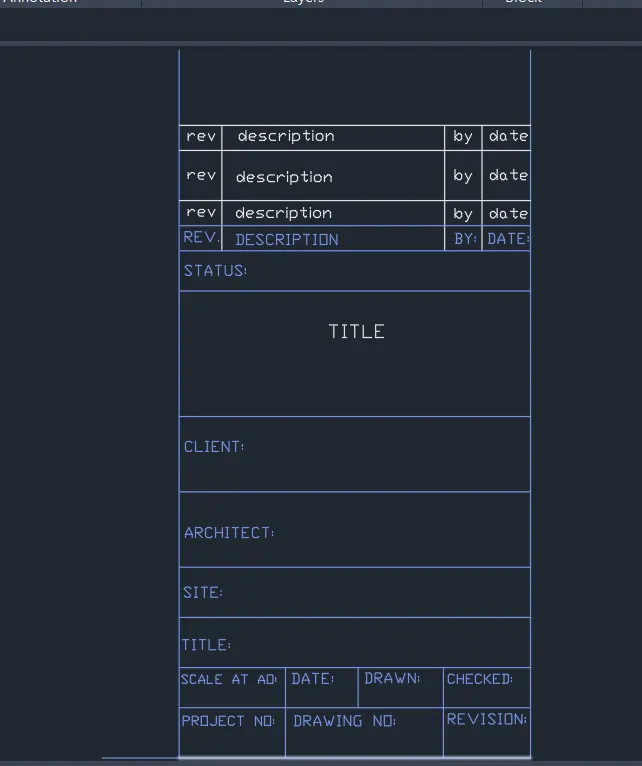
- Specify the 1st point , text height and rotation angle and enter the text as given inthe layout.
- Command - Copy
- Selct the object and place it wherever the texts required and select and renmae the text
- From the menu bar, select layer properties - select new layer - rename the layer
Step 3 :
- Command - B
- Enter the name of the block as Custom1_titleblock
- Select scale unifirmly and Convert to block
- Pick the select object option and select the object for which the block to be created.
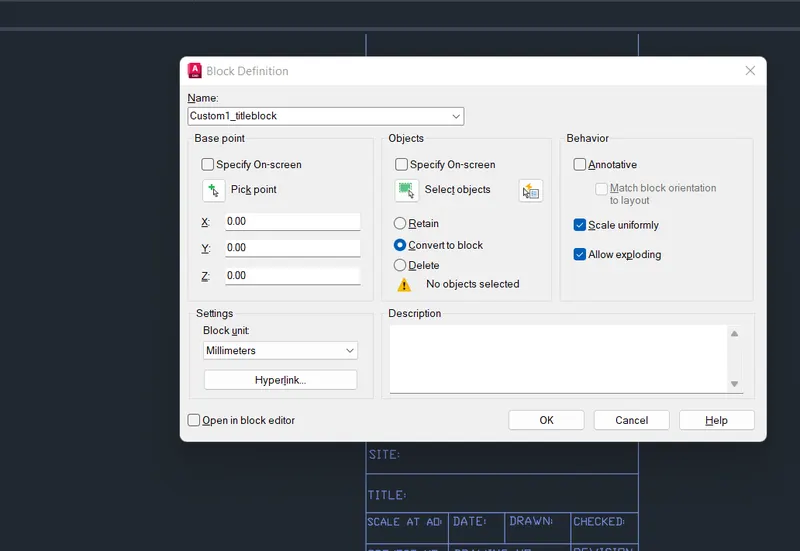
Result : Custom1_titleblock has been created below.
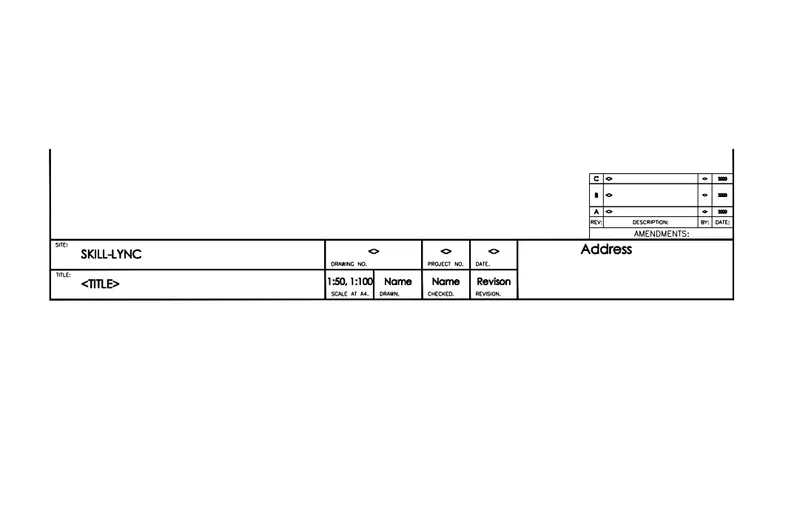
Procedure :
Step 1 :
- Command - Line
- Specify the 1st point and draw a line along y axis and draw a line along x axis to form a rectangle
- Command - Offset
- Select the through option and oject and give the offset distance to form a table as given in the layout
- Command - Text
- Specify the 1st point , text height and rotation angle and enter the text as given inthe layout.
- Command - Copy
- Selct the object and place it wherever the texts required and select and rename the text.
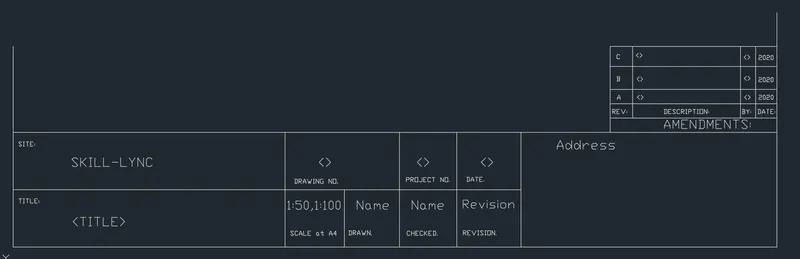
Step 2 :
- Command - B
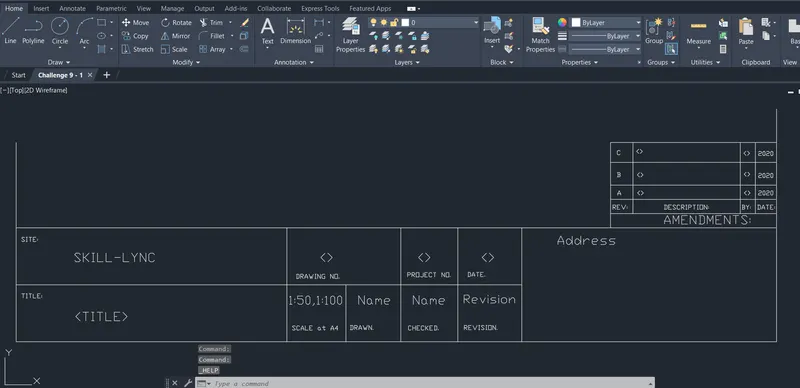
- Enter the name of the block as Custom2_titleblock
- Select scale unifirmly and Convert to block
- Pick the select object option and select the object for which the block to be created.
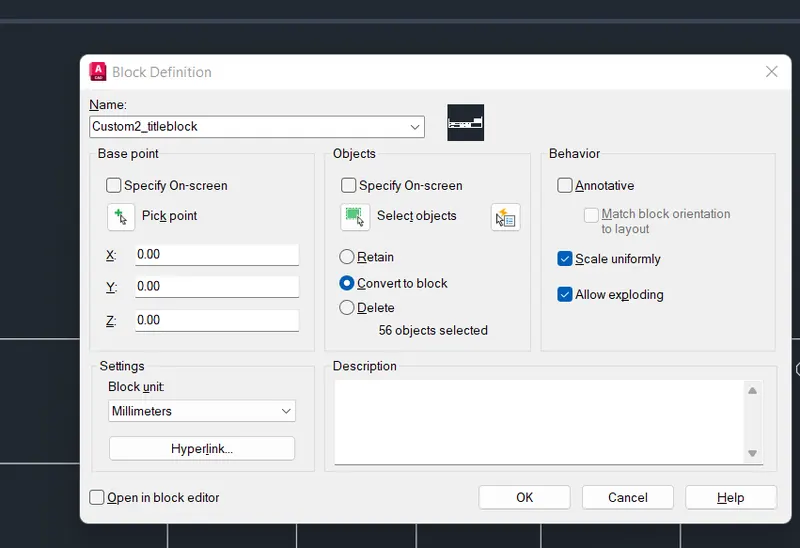
Result : Custom2_titleblock has been created below.
*******************
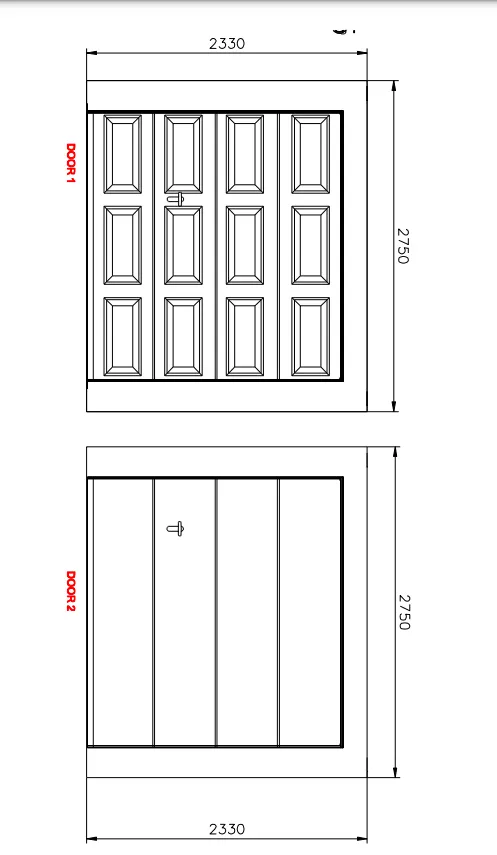
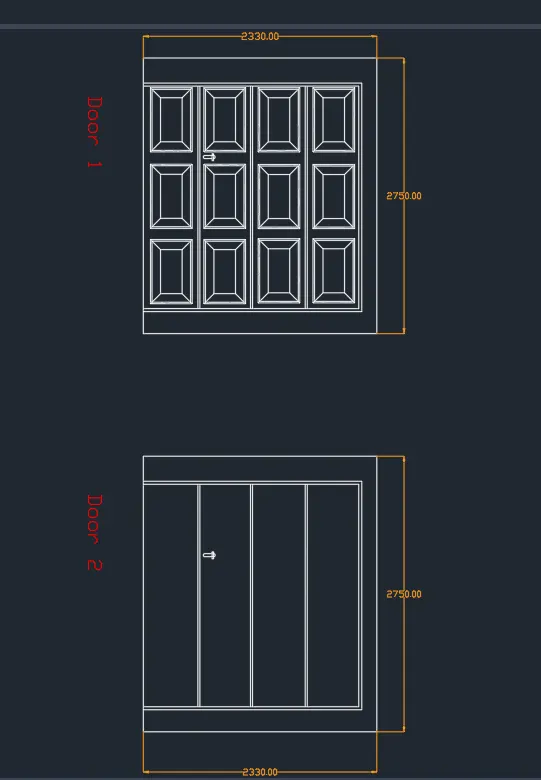
2. Aim : To Create the doors type for warehouse as shown in the Figure
Procedure :
Step 1 :
- Open the Autocad file and set the units
- Command - Startup
- Command - D to change the settings into Decimal units
- Command - UN to change the unit settings, by clicking it and select the decimal units and precision to zero
- Command - LIMITS,set the limits as per the required
- Command - Zoom and select all
- Command - Rectangle
- Specify the 1st point and select the dimension option and form a rectangle of size o length 2750 and width 2330.
- Command - Offset
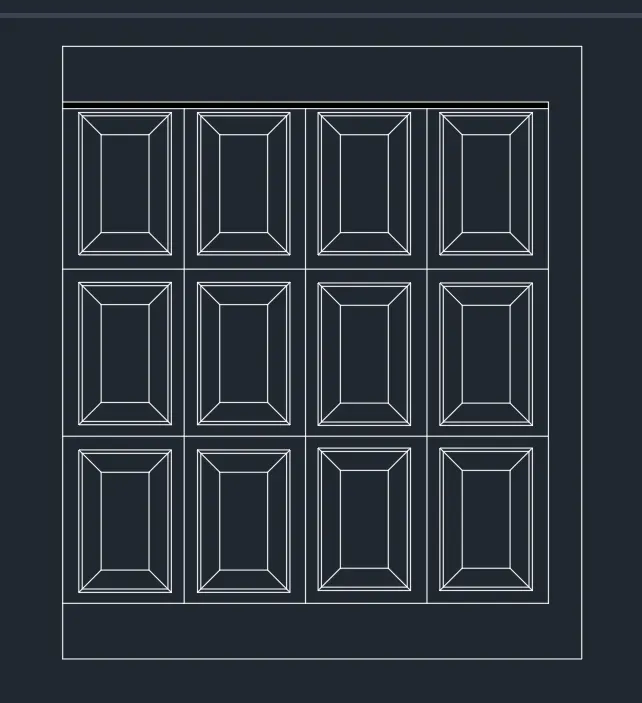
- Select the through option and oject and give the offset distance as given in the layout to form the inner rectangle
- Divide the segment into 4 using offset option and form a door types for warehouse.
Step 2 :
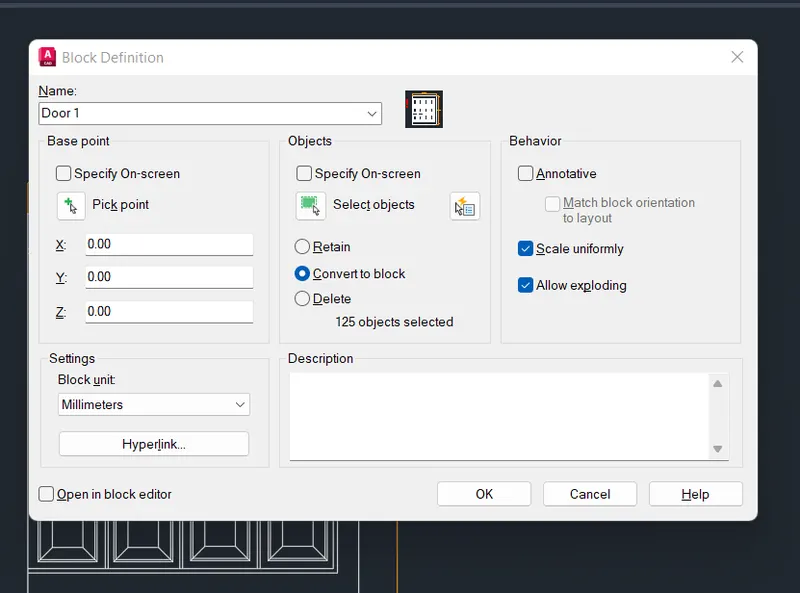
- Command - B
- Enter the name of the block as Door 1
- Select scale uniformly and Convert to block
- Pick the select object option and select the object for which the block to be created.
Step 3 :
- Command - Text
- Specify the 1st point , text height and rotation angle and enter the text as given in the layout.
- Command - Copy
- Selct the object and place it wherever the texts required and select and rename the text.
- Command - Dimlinear
- Select the 1st point and end point to mark the dimension on both sides.
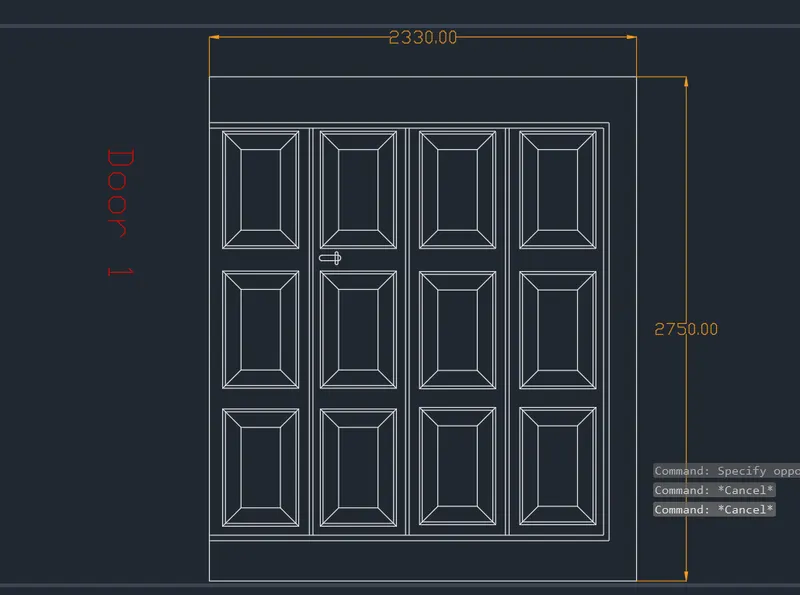
Step 4 :
- Command - Rectangle
- Specify the 1st point and select the dimension option and form a rectangle of size o length 2750 and width 2330.
- Command - Offset
- Select the through option and oject and give the offset distance to form a table as given in the layout tpo form the inner rectangle
- Divide the segment into 4 using offset option and form a door types for warehouse.
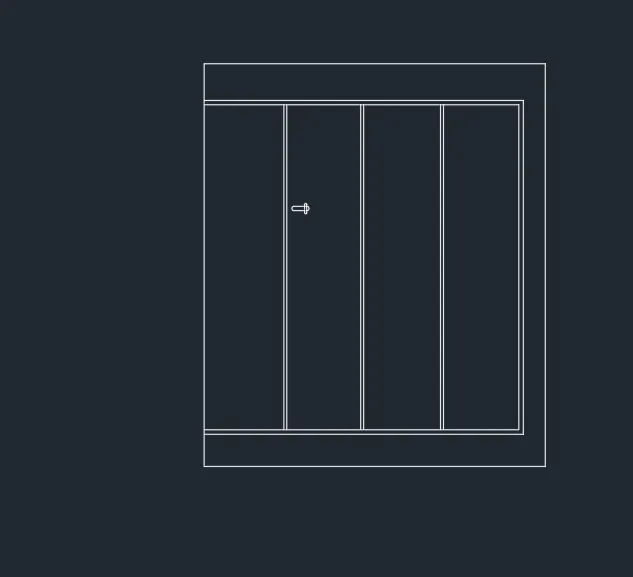
Step 5 :
- Command - B
- Enter the name of the block as Door 2
- Select scale uniformly and Convert to block
- Pick the select object option and select the object for which the block to be created.
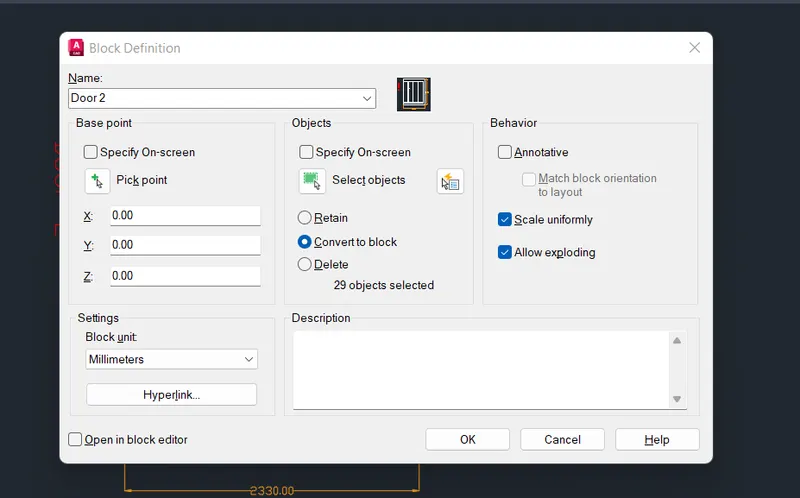
Step 6 :
- Command - Text
- Specify the 1st point , text height and rotation angle and enter the text as given in the layout.
- Command - Copy
- Selct the object and place it wherever the texts required and select and rename the text.
- Command - Dimlinear
- Select the 1st point and end point to mark the dimension on both sides.
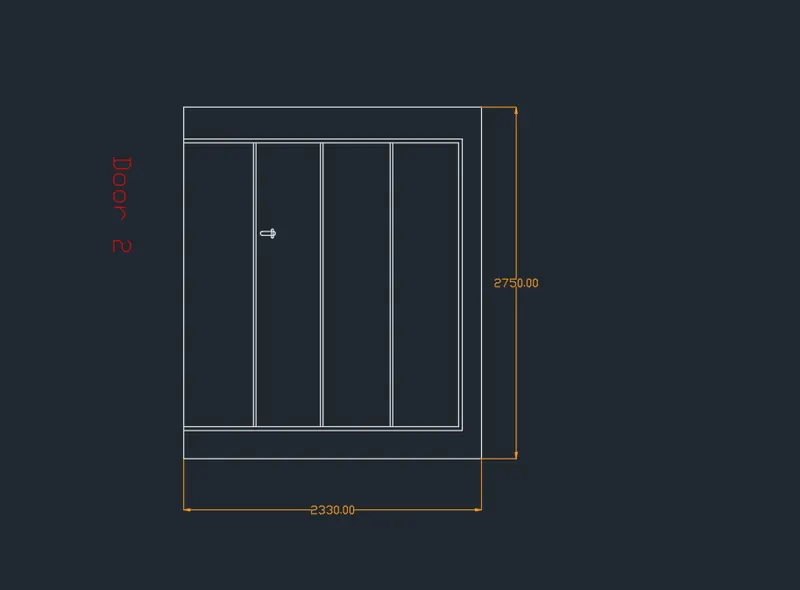
Result : The doors type for warehouse has been created below
***************
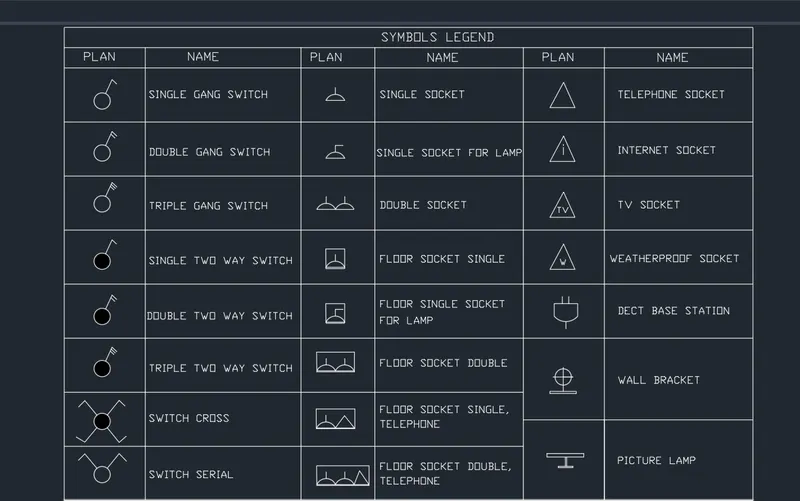
3. Aim : To Create each symbol as a block with the name given in the legend
Procedure :
Step 1 :
- Open the Autocad file and set the units
- Command - Startup
- Command - D to change the settings into Decimal units
- Command - UN to change the unit settings, by clicking it and select the decimal units and precision to zero
- Command - LIMITS,set the limits as per the required
- Command - Zoom and select all
- Command - Line
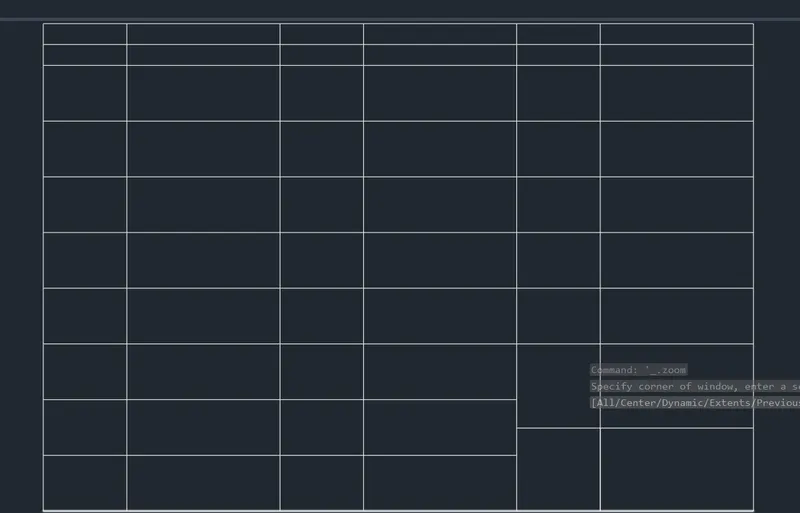
- Specify the 1st point and draw a line along y axis for about 141 units and draw a line along x axis for about 70 units and for a rectangle
- Command - Offset
- Select the through option and oject and give the offset distance to form a table as given in the layout
Step 2 :
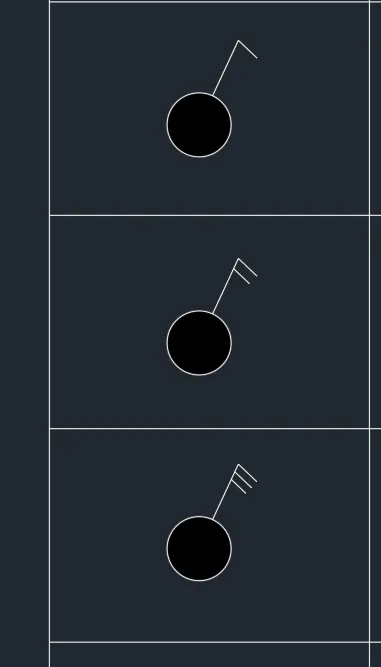
Single Gang Switch
- Command - Circle
- Specify the 1st point and draw a circle
- Command - Line
- SPecify the 1st point and draw a line perpendicular to the circle

Step 3 :
- Command - B
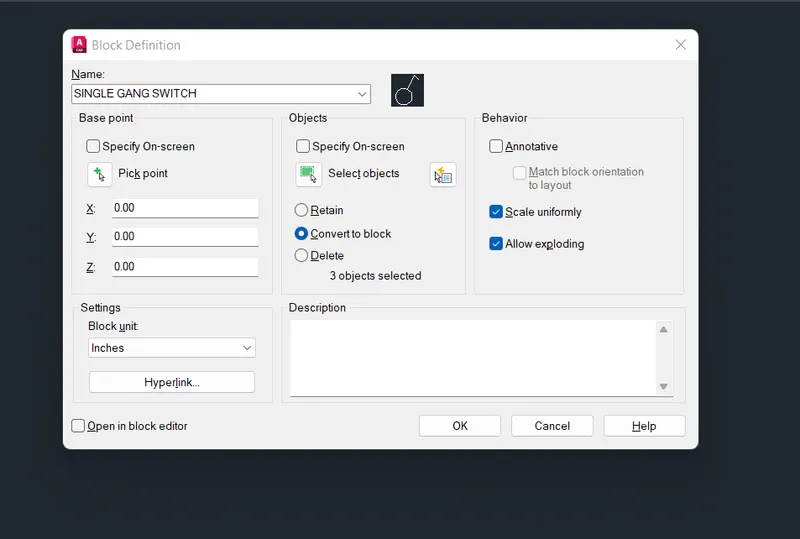
- Enter the name of the block as Single Gang Switch
- Select scale uniformly and Convert to block
- Pick the select object option and select the object for which the block to be created.
Double Gang Switch

Triple Gang Switch

Single Two way switch, Double and Triple two way switch
Switch Cross and Switch serial
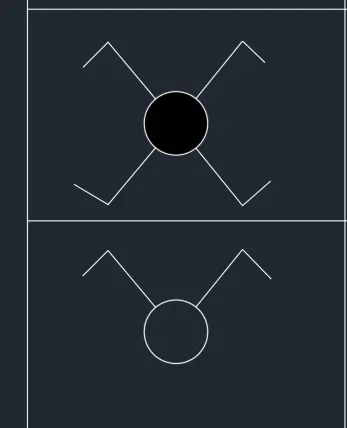
Single Socket, Single socket for lamp and double socket
Floor socket single, Floor single socket for Lamp and Floor socket double
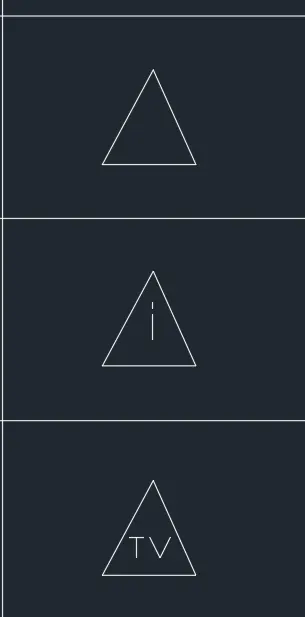
Floor socket single and double telephone
Telephone socket, Internet Socket and TV Socket
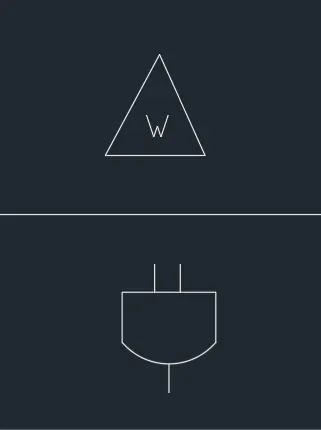
Weather proof socket and Dect base station
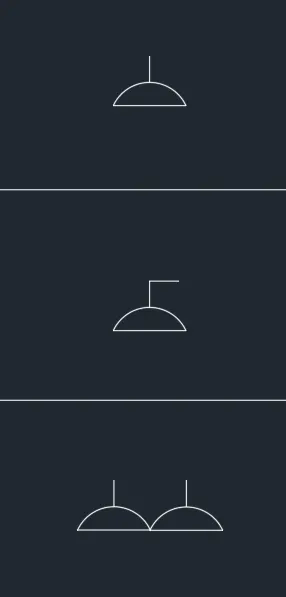
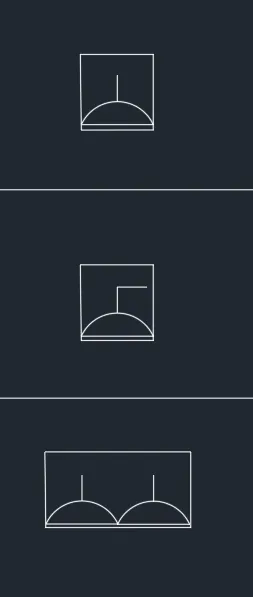
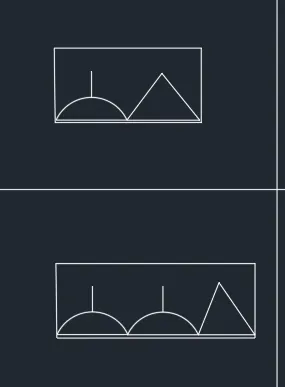
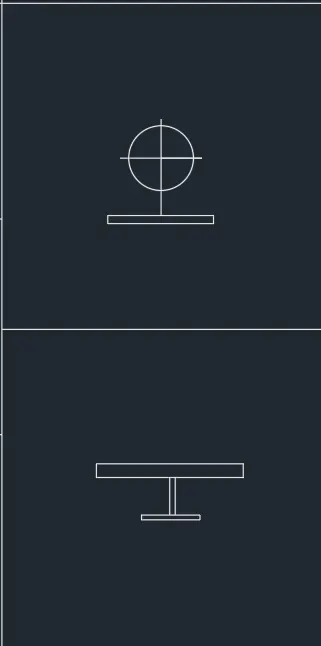
Wall Bracket and Picture Lamp
Step 4 :
- Command - B
- Enter the name of the block
- Select scale uniformly and Convert to block
- Pick the select object option and select the object for which the block to be created.THe same is repeated for all the symbols in the legend
- Command - Text
- Specify the 1st point , text height and rotation angle and enter the text as given in the layout.
- Command - Copy
- Selct the object and place it wherever the texts required and select and rename the text.
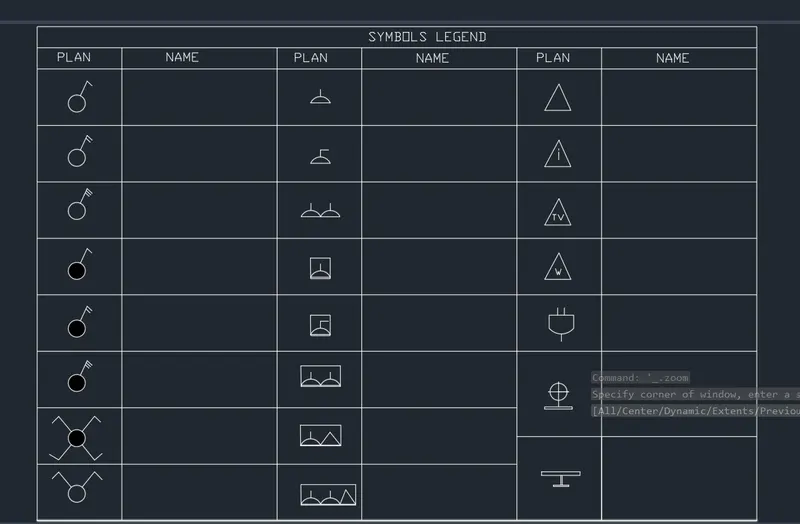
Result :Each symbol as a block with the name given in the legend has been created below
************************
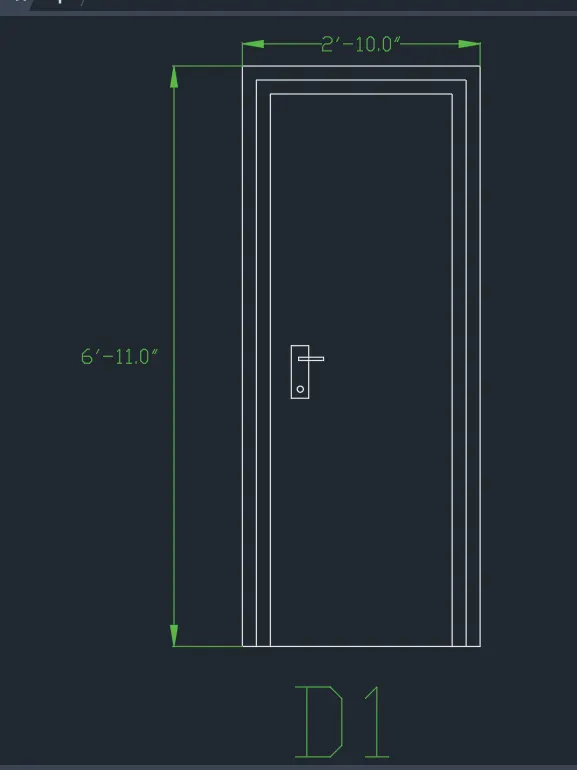
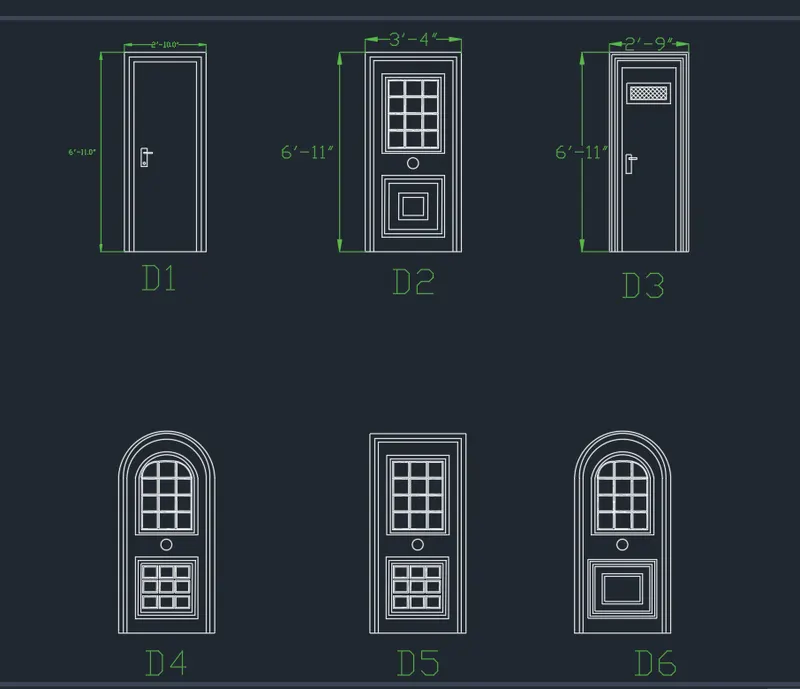
4. Aim : To Create the door type for residential building as a block.
Procedure :
Door 1
Step 1:
- Open the Autocad file and set the units
- Command - Startup
- Command - D to change the settings into Engineering units
- Command - UN to change the unit settings, by clicking it and select the Engineering units and precision to zero
- Command - LIMITS,set the limits as per the required
- Command - Zoom and select all
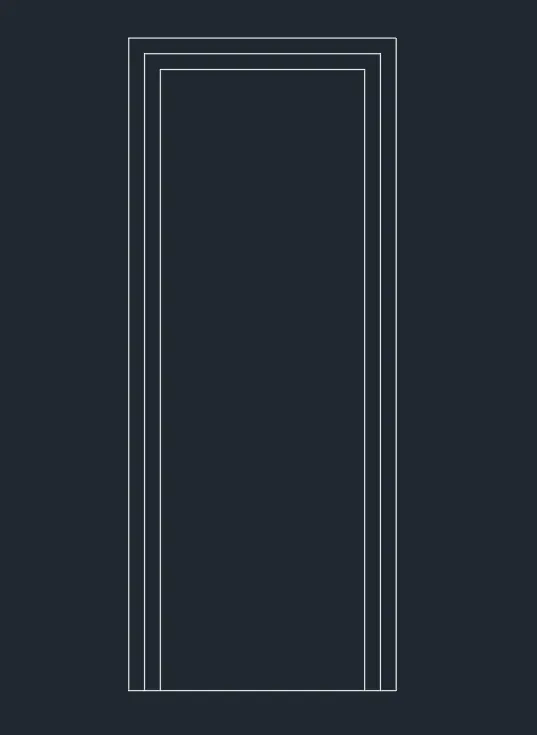
- Command - Rectangle
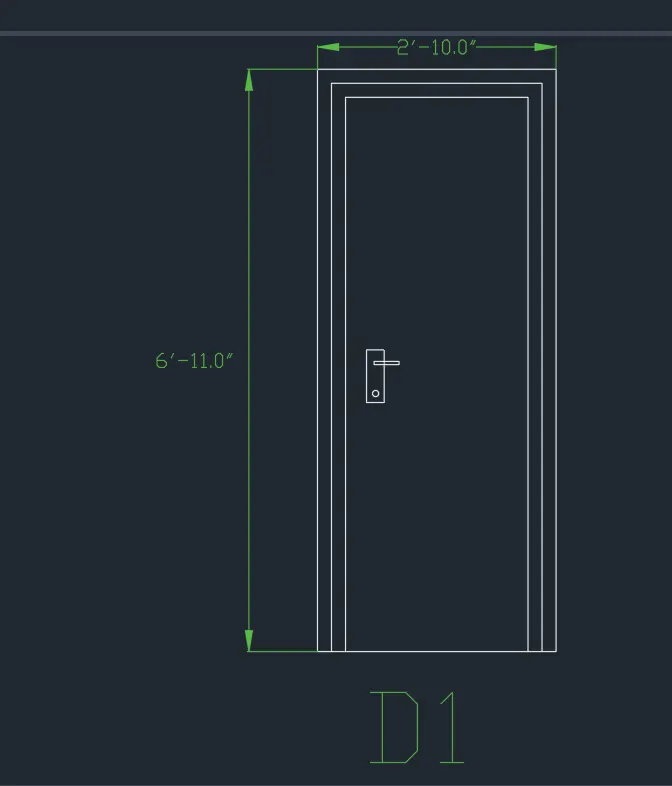
- Specify the 1st point and give the dimension of length 6'11" and 2'10" to form a rectangle
- Command - Offset
- Select the through option and oject and give the offset distance to form a rectangle as given in the layout
Step 2 :
- Command - Text
- Specify the 1st point , text height and rotation angle and enter the text as given in the layout.
- Command - Copy
- Selct the object and place it wherever the texts required and select and rename the text.
- Command - Dimlinear
- Select the 1st point and end point to mark the dimension on both sides.
Step 3 :
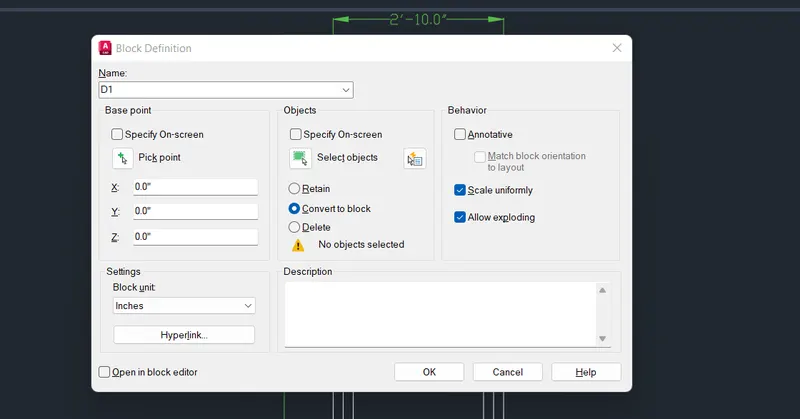
- Command - B
- Enter the name of the block as D1
- Select scale uniformly and Convert to block
- Pick the select object option and select the object for which the block to be created.
Result
Door 2 :
Step 1 :
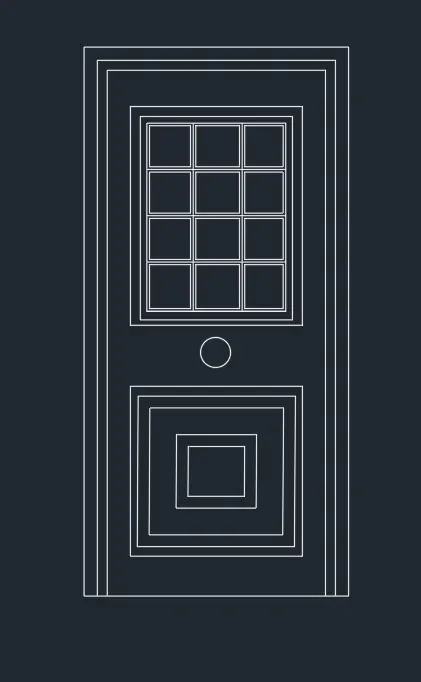
- Command - Rectangle
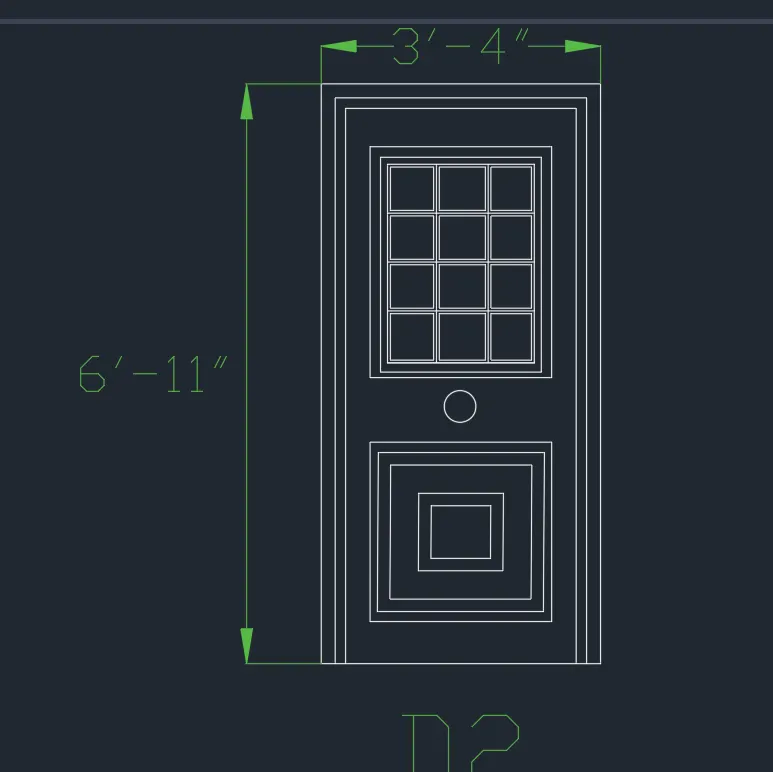
- Specify the 1st point and give the dimension of length 6'11" and 3'4" to form a rectangle
- Command - Offset
- Select the through option and oject and give the offset distance to form a rectangle as given in the layout
- Repeat the same process with offset option and form a inner rectangle for the door
Step 2 :
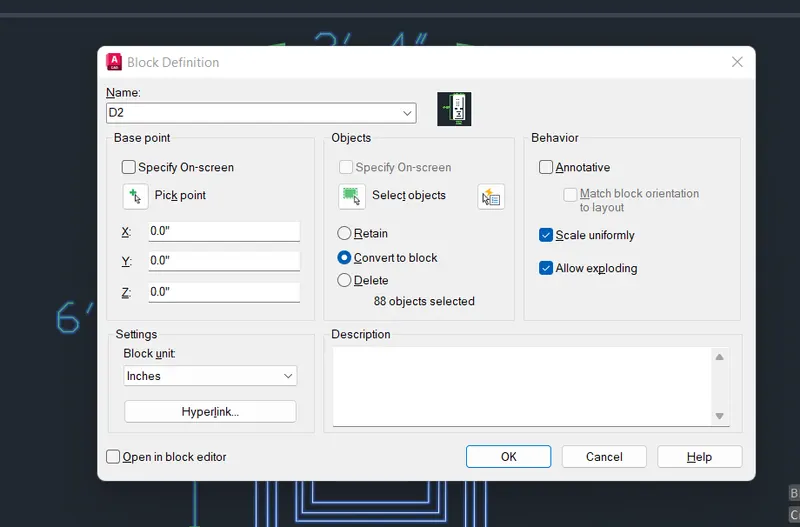
- Command - B
- Enter the name of the block as D2
- Select scale uniformly and Convert to block
- Pick the select object option and select the object for which the block to be created.
Step 3 :
- Command - Text
- Specify the 1st point , text height and rotation angle and enter the text as given in the layout.
- Command - Copy
- Selct the object and place it wherever the texts required and select and rename the text.
- Command - Dimlinear
- Select the 1st point and end point to mark the dimension on both sides.
Door 3:
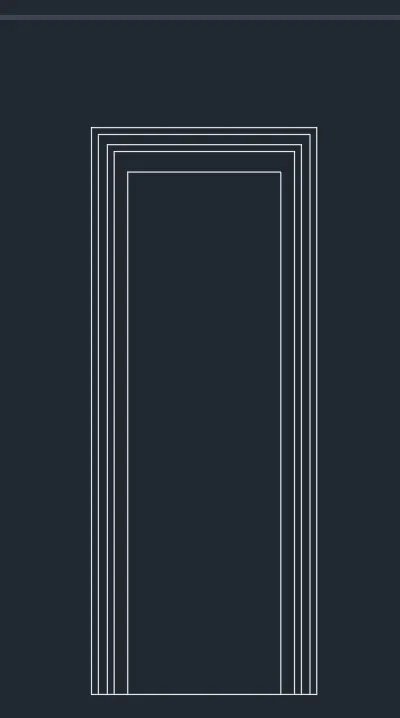
Step 1 :
- Command - Rectangle
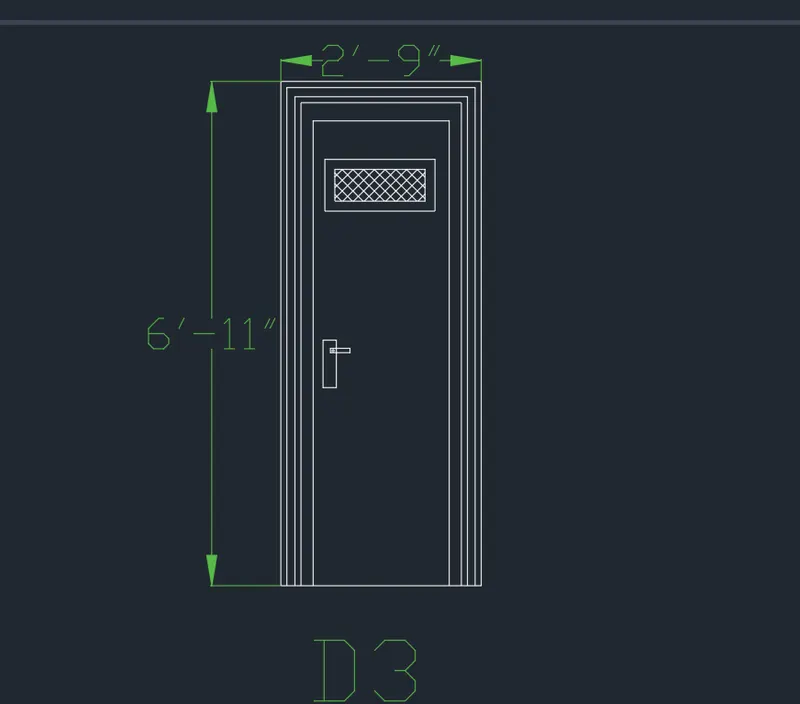
- Specify the 1st point and give the dimension of length 6'11" and 2'9" to form a rectangle
- Command - Offset
- Select the through option and oject and give the offset distance to form a rectangle as given in the layout
- Repeat the same process with offset option and form a inner rectangle for the door
Step 2 :
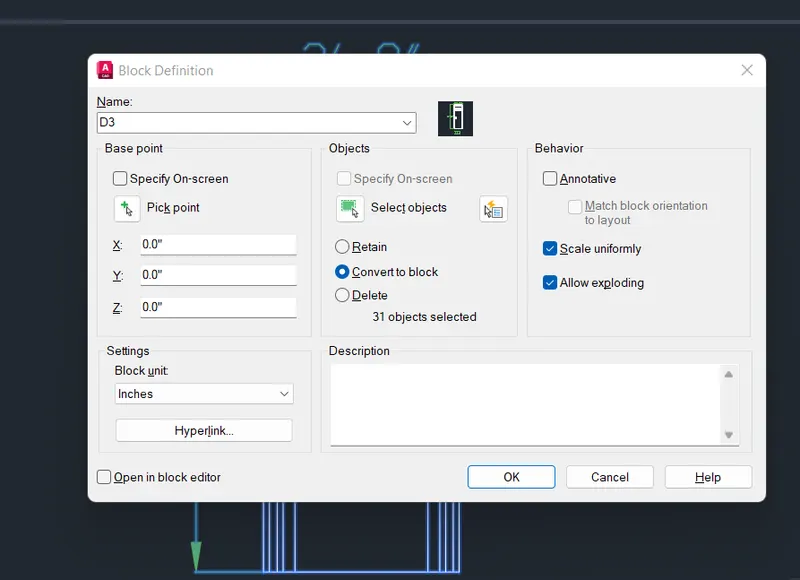
- Command - B
- Enter the name of the block as D3
- Select scale uniformly and Convert to block
- Pick the select object option and select the object for which the block to be created.
Step 3 :
- Command - Text
- Specify the 1st point , text height and rotation angle and enter the text as given in the layout.
- Command - Copy
- Selct the object and place it wherever the texts required and select and rename the text.
- Command - Dimlinear
- Select the 1st point and end point to mark the dimension on both sides.
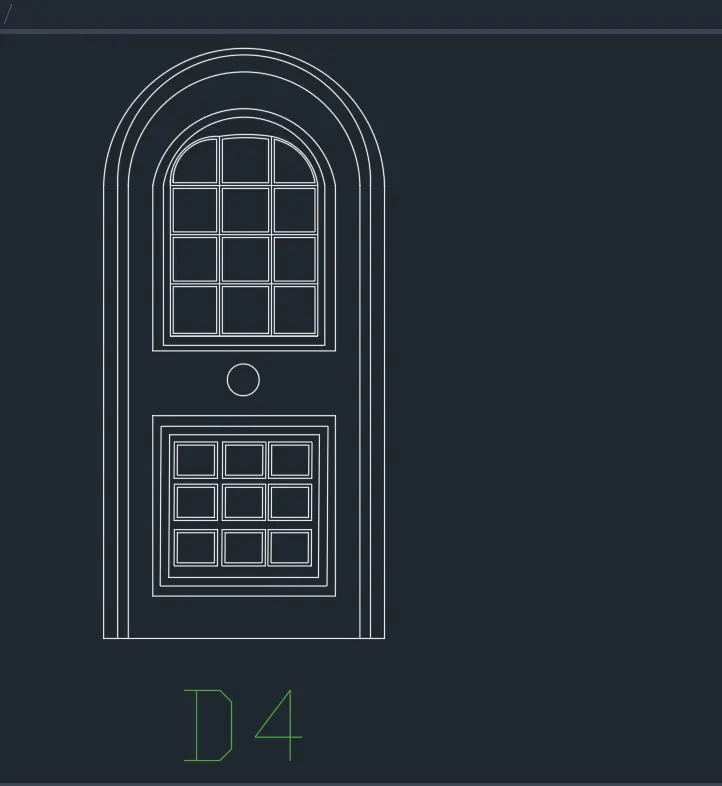
Door 4 :
Step 1 :
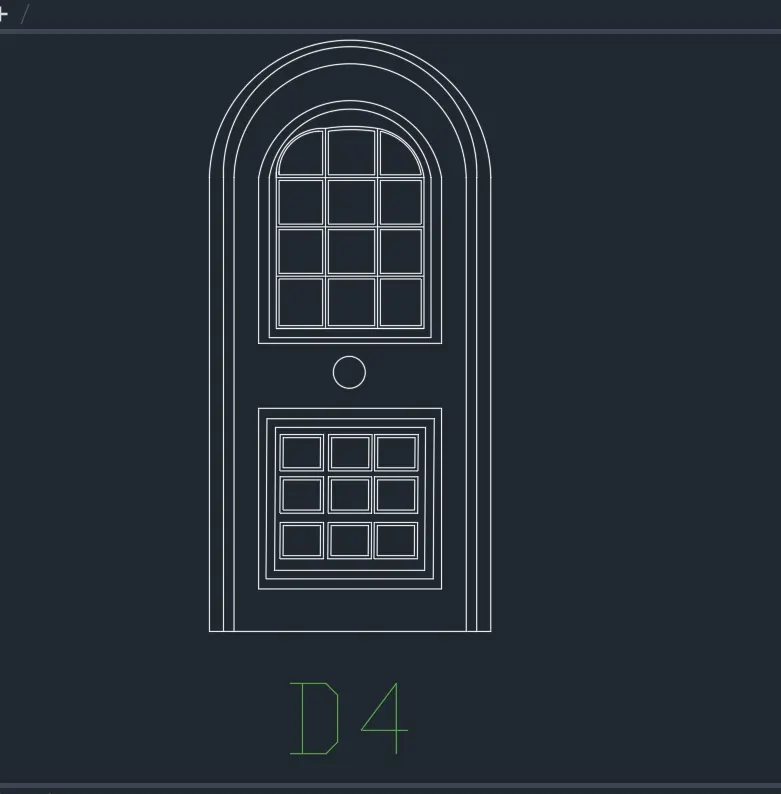
- Command - Rectangle
- Specify the 1st point and give the dimension of length 6'11" to form a rectangle
- Command - Offset
- Select the through option and oject and give the offset distance to form a rectangle as given in the layout
- Repeat the same process with offset option and form a inner rectangle for the door
- Command - Arc
- Specifu the 1st point and end point and draw an arc as per the layout
Step 2 :
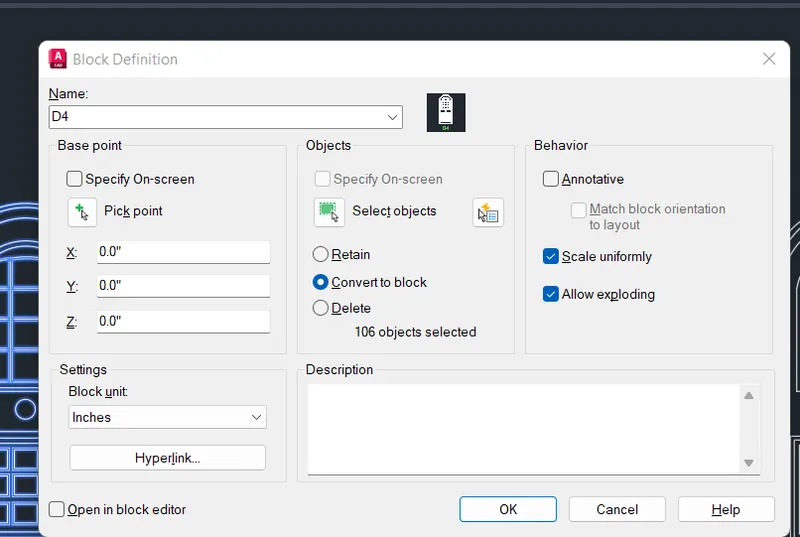
- Command - B
- Enter the name of the block as D4
- Select scale uniformly and Convert to block
- Pick the select object option and select the object for which the block to be created.
Result :
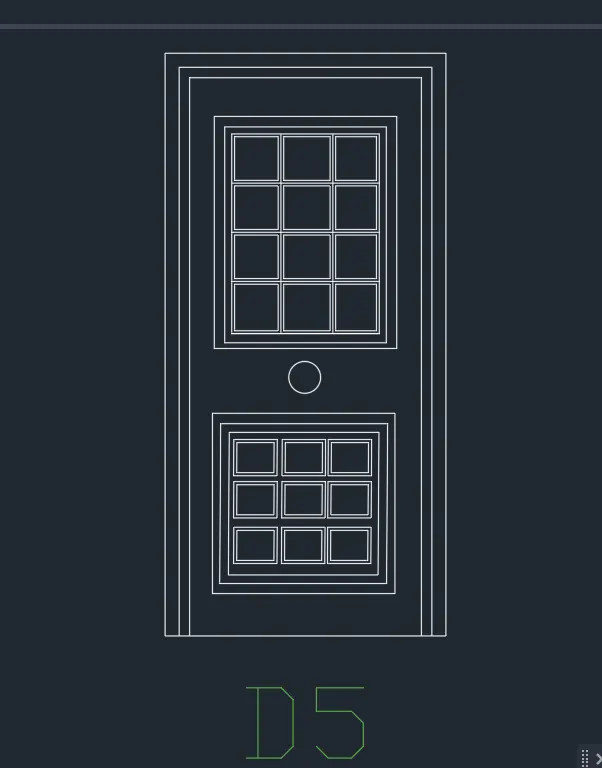
Door 5 :
Step 1 :
- Command - Rectangle
- Specify the 1st point and give the dimension of length 6'11" to form a rectangle
- Command - Offset
- Select the through option and oject and give the offset distance to form a rectangle as given in the layout
- Repeat the same process with offset option and form a inner rectangle for the door
- Command - Arc
- Specifu the 1st point and end point and draw an arc as per the layout
- Command - Text
- Specify the 1st point , text height and rotation angle and enter the text as given in the layout.
- Command - Copy
- Selct the object and place it wherever the texts required and select and rename the text.
Step 2 :
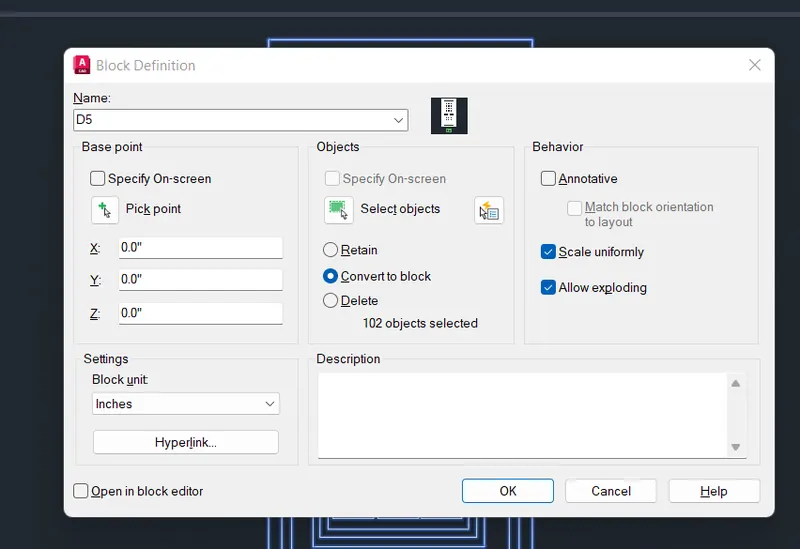
- Command - B
- Enter the name of the block as D5
- Select scale uniformly and Convert to block
- Pick the select object option and select the object for which the block to be created.
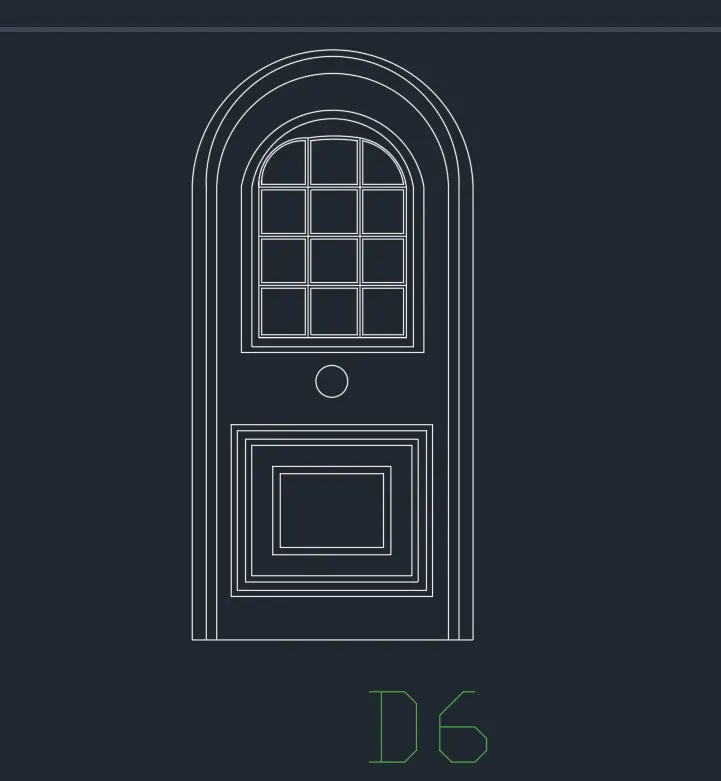
Door 6 :
Step 1 :
- Command - Rectangle
- Specify the 1st point and give the dimension of length 6'11" to form a rectangle
- Command - Offset
- Select the through option and oject and give the offset distance to form a rectangle as given in the layout
- Repeat the same process with offset option and form a inner rectangle for the door
- Command - Arc
- Specifu the 1st point and end point and draw an arc as per the layout
- Command - Text
- Specify the 1st point , text height and rotation angle and enter the text as given in the layout.
- Command - Copy
- Selct the object and place it wherever the texts required and select and rename the text.
Step 2 :
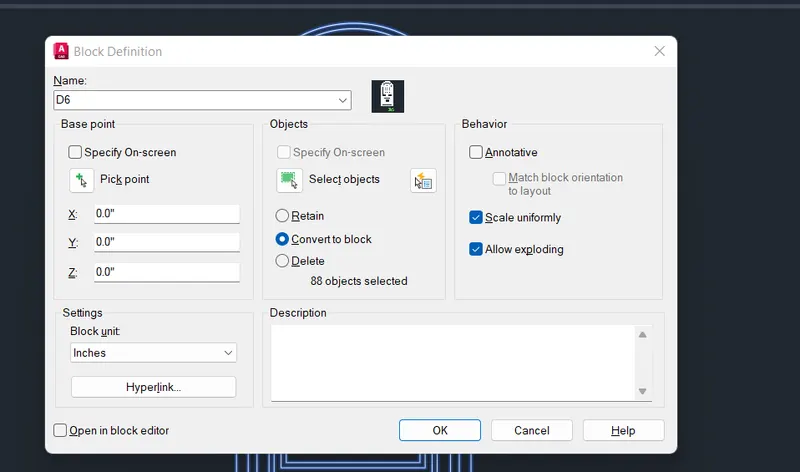
- Command - B
- Enter the name of the block as D5
- Select scale uniformly and Convert to block
- Pick the select object option and select the object for which the block to be created.
Result : The door type for residential building as a block has been created
*****************
5. Aim : To Create each shape as a block as shown in the Figure
Procedure
Step 1:
- Open the Autocad file and set the units
- Command - Startup
- Command - D to change the settings into Decimal units
- Command - UN to change the unit settings, by clicking it and select the Decimal units and precision to zero
- Command - LIMITS,set the limits as per the required
- Command - Zoom and select all
Step 2 :
A (20mm)
- Command - Line
- Specify the 1st point and draw a line along x axis for about 750 units
- Command - Offset
- Select the through option and oject and give the offset distance of 1 units
- Command - Fillet
- Selct the radius option and specify the radius as 0.5 units and select the objects
- Command - Trim to trim the unwanted lines
- Command - Text
- Specify the 1st point , text height and rotation angle and enter the text as given in the layout.
- Command - Copy
- Selct the object and place it wherever the texts required and select and rename the text.
- Command - Dimlinear
- Select the 1st point and end point to mark the dimension
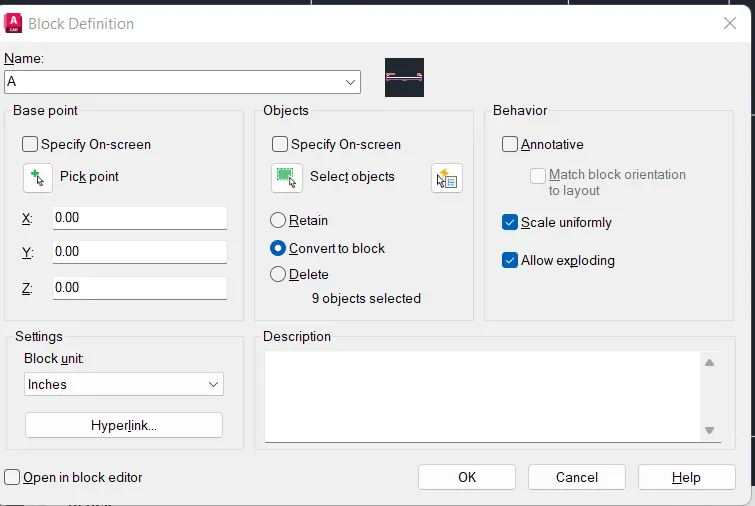
- Command - B
- Enter the name of the block as A
- Select scale uniformly and Convert to block
- Pick the select object option and select the object for which the block to be created.
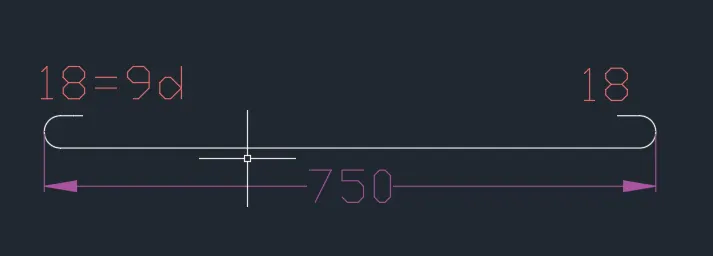
B (16mm)
- Command - Line
- Specify the 1st point and draw a line along x axis for about 750 units
- Command - Offset
- Select the through option and oject and give the offset distance of 1 units
- Command - Fillet
- Selct the radius option and specify the radius as 0.5 units and select the objects
- Command - Trim to trim the unwanted lines
- Command - Text
- Specify the 1st point , text height and rotation angle and enter the text as given in the layout.
- Command - Copy
- Selct the object and place it wherever the texts required and select and rename the text.
- Command - Dimlinear
- Select the 1st point and end point to mark the dimension
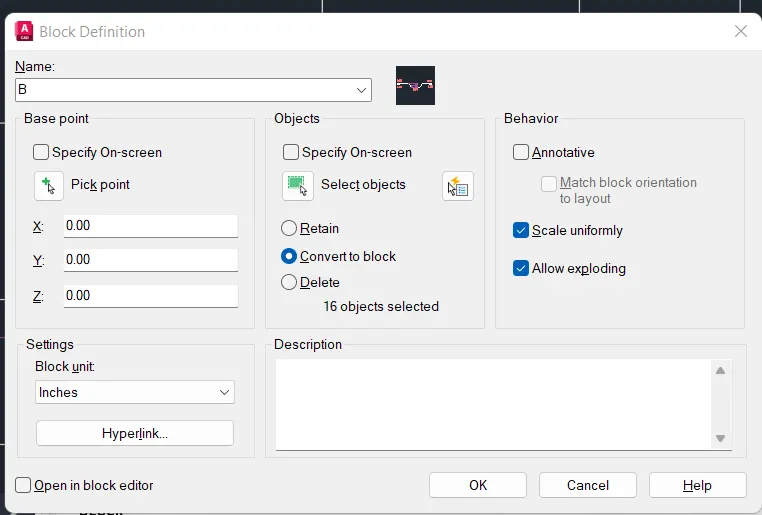
- Command - B
- Enter the name of the block as B
- Select scale uniformly and Convert to block
- Pick the select object option and select the object for which the block to be created.
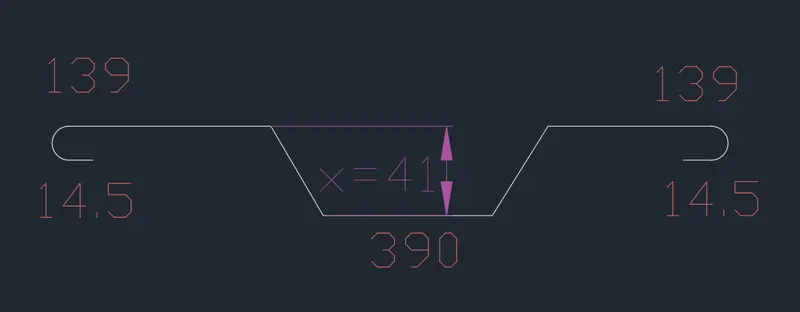
C (16mm)
- Command - Line
- Specify the 1st point and draw a line along x axis for about 750 units
- Command - Offset
- Select the through option and oject and give the offset distance of 1 units
- Command - Fillet
- Selct the radius option and specify the radius as 0.5 units and select the objects
- Command - Trim to trim the unwanted lines
- Command - Text
- Specify the 1st point , text height and rotation angle and enter the text as given in the layout.
- Command - Copy
- Selct the object and place it wherever the texts required and select and rename the text.
- Command - Dimlinear
- Select the 1st point and end point to mark the dimension
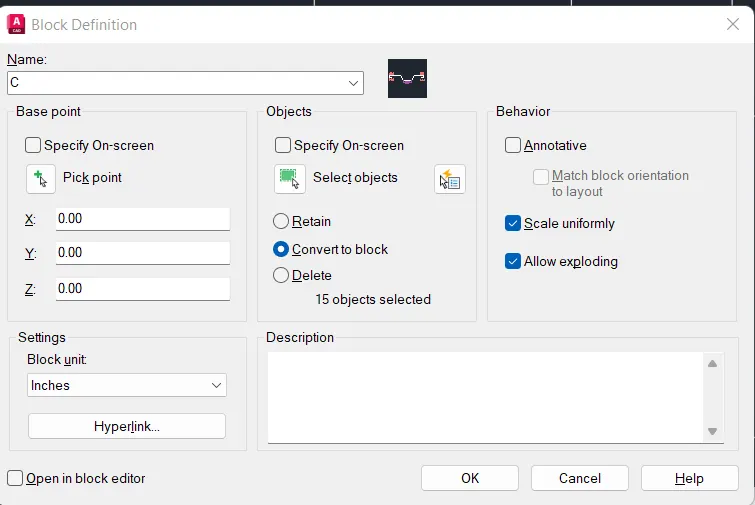
- Command - B
- Enter the name of the block as B
- Select scale uniformly and Convert to block
- Pick the select object option and select the object for which the block to be created.
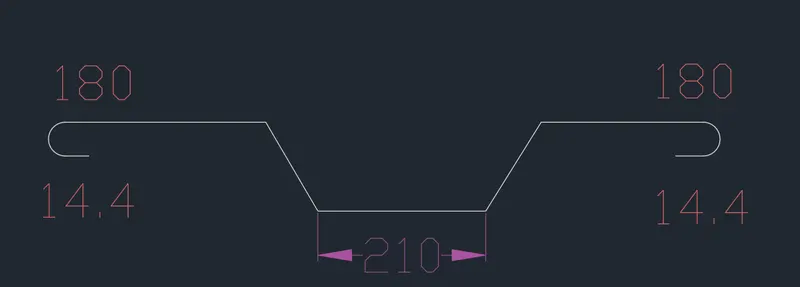
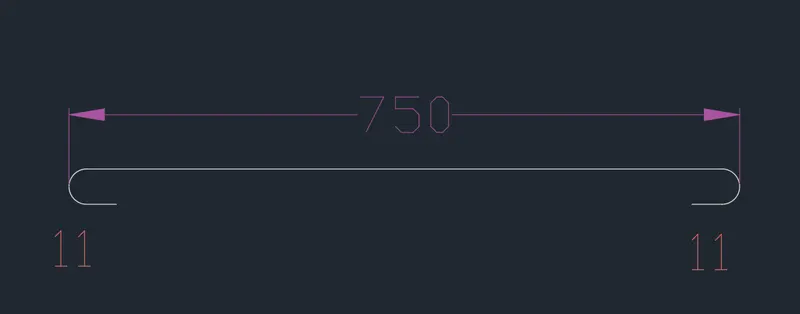
D (12mm)
- Command - Line
- Specify the 1st point and draw a line along x axis for about 750 units
- Command - Offset
- Select the through option and oject and give the offset distance of 1 units
- Command - Fillet
- Selct the radius option and specify the radius as 0.5 units and select the objects
- Command - Trim to trim the unwanted lines
- Command - Text
- Specify the 1st point , text height and rotation angle and enter the text as given in the layout.
- Command - Copy
- Selct the object and place it wherever the texts required and select and rename the text.
- Command - Dimlinear
- Select the 1st point and end point to mark the dimension
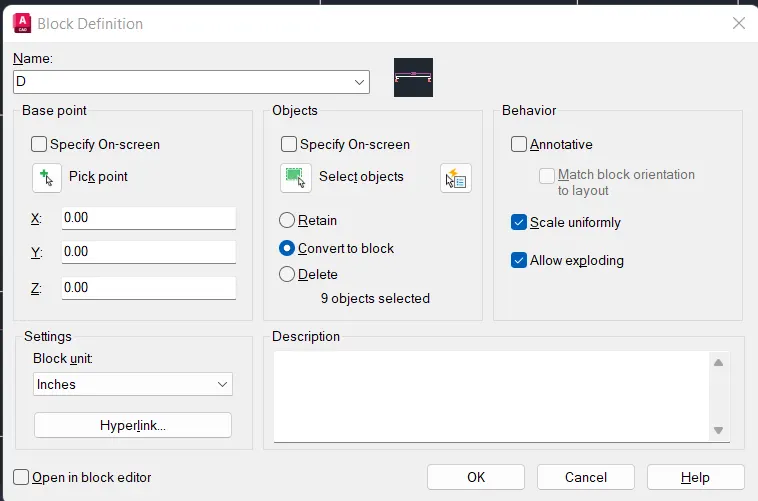
- Command - B
- Enter the name of the block as B
- Select scale uniformly and Convert to block
- Pick the select object option and select the object for which the block to be created.
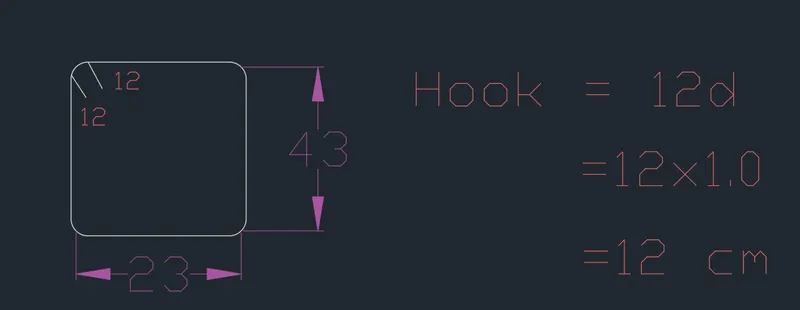
E (10mm)
- Command - Line
- Specify the 1st point and draw a line along x axis for about 23 units and y axis as 43 units and repeat the same to form a rectangle
- Command - Fillet
- Selct the objects
- Command - Text
- Specify the 1st point , text height and rotation angle and enter the text as given in the layout.
- Command - Copy
- Selct the object and place it wherever the texts required and select and rename the text.
- Command - Dimlinear
- Select the 1st point and end point to mark the dimension
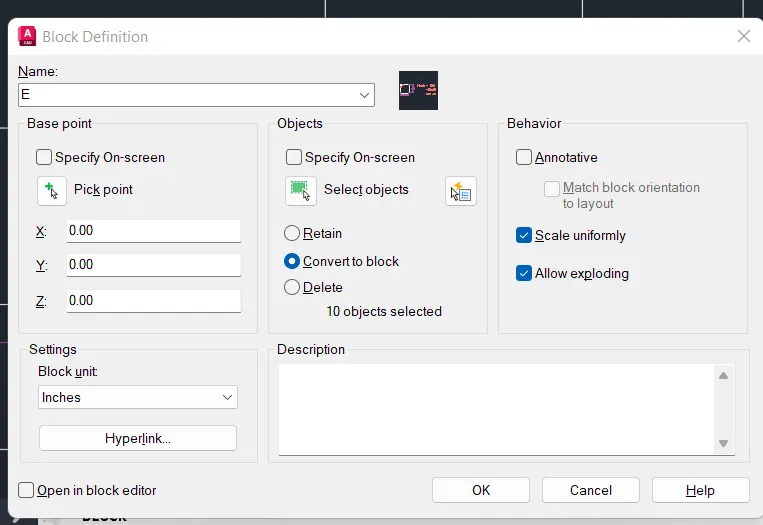
- Command - B
- Enter the name of the block as B
- Select scale uniformly and Convert to block
- Pick the select object option and select the object for which the block to be created.
Step 3 :
- Command - Line
- Specify the 1st point and draw a line along y axis for about 141 units and draw a line along x axis for about 70 units and for a rectangle
- Command - Offset
- Select the through option and oject and give the offset distance to form a table as given in the layout
- Command - Text
- Specify the 1st point , text height and rotation angle and enter the text as given in the layout.
- Command - Copy
- Selct the object and place it wherever the texts required and select and rename the text.
- Command - Layer
- Specify the different layers for the text and dimension.
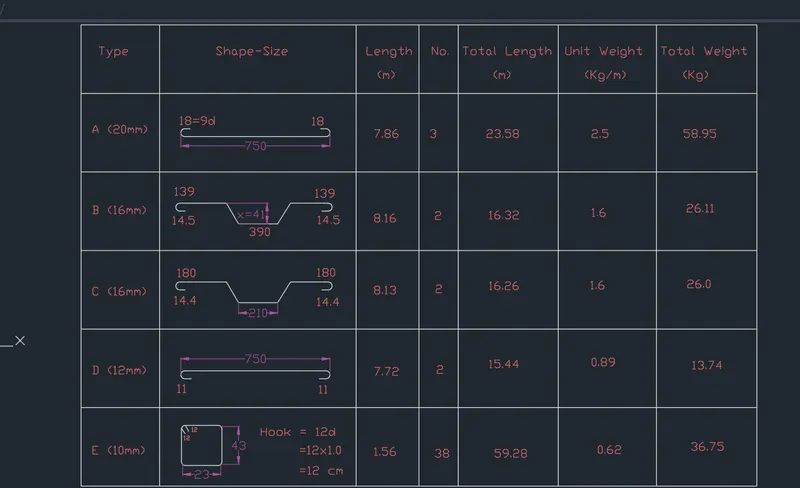
Result : To Create a Bar Bending schedule, Different Door types, and Creation of standard drawing templates using AutoCad is been completed.