Creating a Wardrobe detailed drawing, Floor Plan, Kitchen Layout and Column Detail using AutoCad
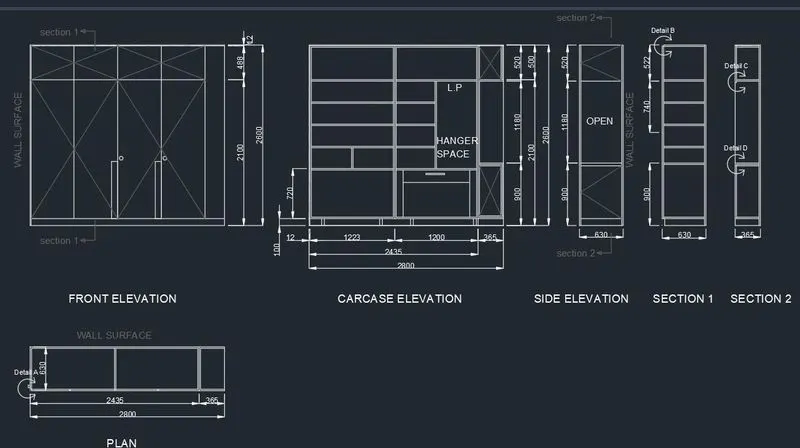
Aim-To draw elevation and details of wardrobe.
Introduction-In this wardrobe details given in different elevations, front elevation, side elevation, carcase elevation. Here sections are also provided in detail. All dimension are in mm.
Procedure-
-Set limit maximum is 100,100 and minimum is 0,0
-Set unit in mm and dimension style also same
-Start a drawing by taking 1st point anywhere line command with respective dimensions draw wardrobe plan and front elevation with respectively.
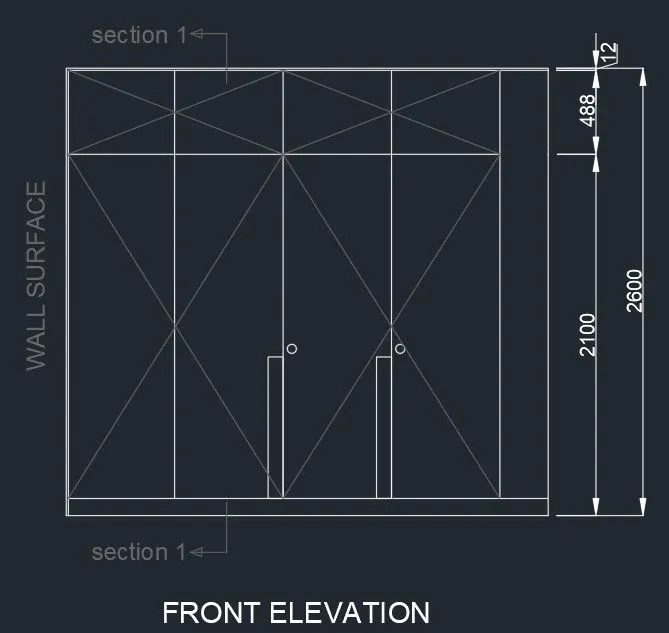
-dt enter for text and for dimension dimlinear and dimcontinue used
-LA enter to create layer with diffrent color
-then carcase elevation draw exact beside of front elevation.
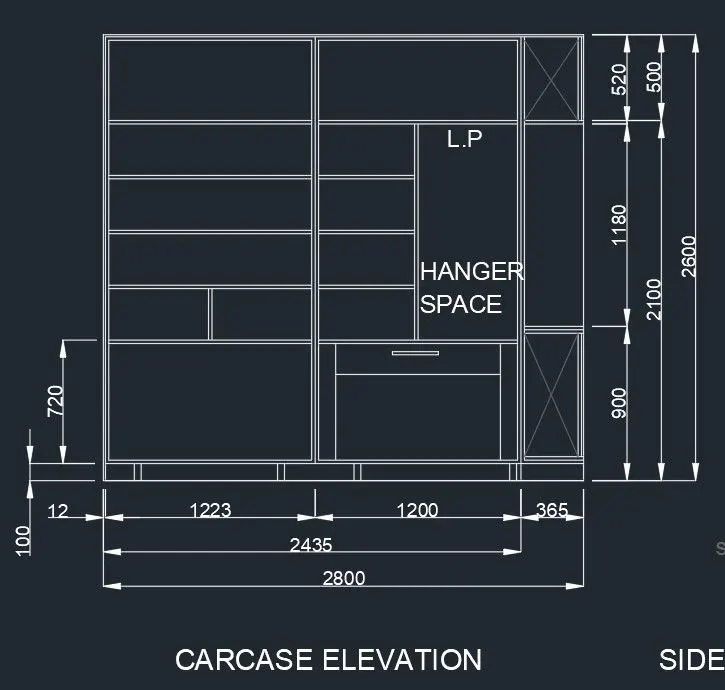
-Then draw a side elevation with given dimension
-Give heading below the diagram to each
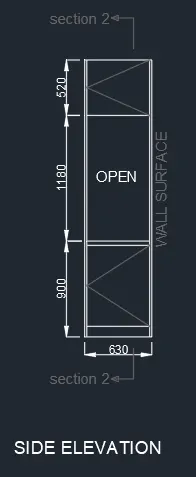
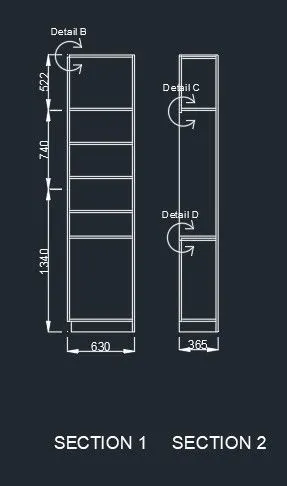
-Now provide a section 1 adn 2 with details
-For section use xl enter for exact projection of wardrobe and then trim extended lines
Result-This is final sketch of wardrobe with elevation and details
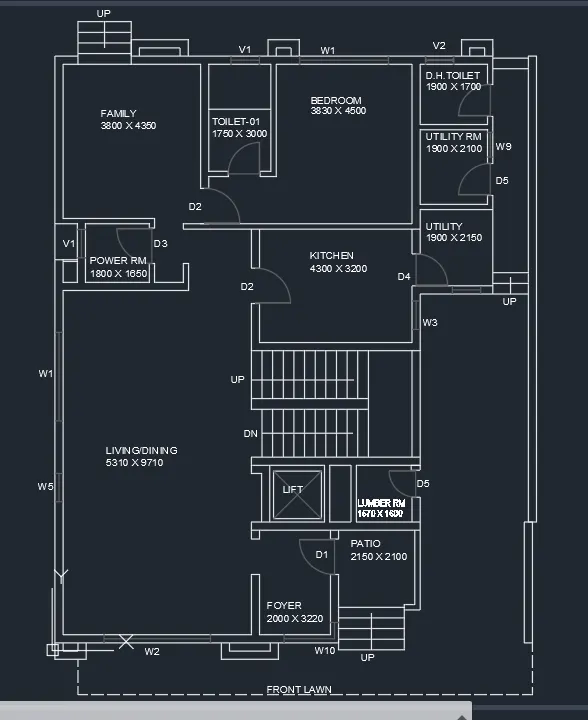
Aim-To draw a floor plan using autocad.
Introduction-All dimension are in mm. Outer wall thickness is 230mm, inner is 150mm. Doors and window dimension varies as per their name. Stairs: tread=300mm, riser=150mm
Procedure-
-Set limit, set unit in mm and dimension style also
-XL enter create corner line and start drawing from downward to upward and left to right by taking offset with respect to their dimension given in plan
-Trim unwanted lines and fillet it properly
-After drawing a room take offset for doors as 1000mm of D1 and D2 and remaining are 900mm
-Then take line to draw window
-Set layer for door and window by LA enter and give specific color to it
-After applying layer enter text DT enter whenever required
-For stair case riser and tread is given and width provided is 1500mm
Result-This is final sketch of floor pplan by using autocad
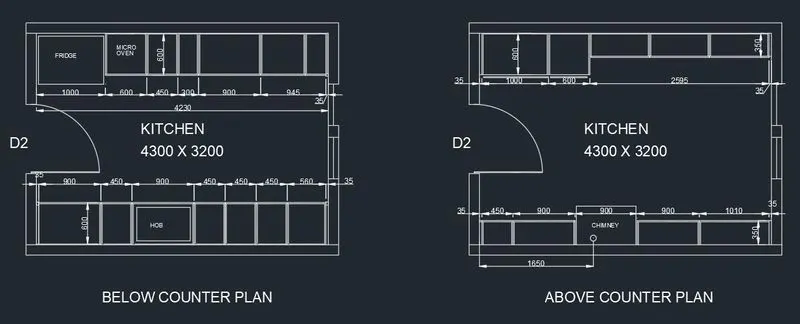
Aim-To create kitchen layout by using autocad
Introduction-All dimensions are in mm. Also positions of kitchen equipment also given. Here assume thickness of wall is 150mm.
Procedure-
-Set limit, unit and dimension style also
-xl enter create corner of lines take offset and make kitchen as per given dimension
-trim extended lines
-Take offset of lines as per given
-dt enter for text
-For door 1000mm offset at midpoint of all
-For dimensiom linear and continue use
Result-This is final sketch
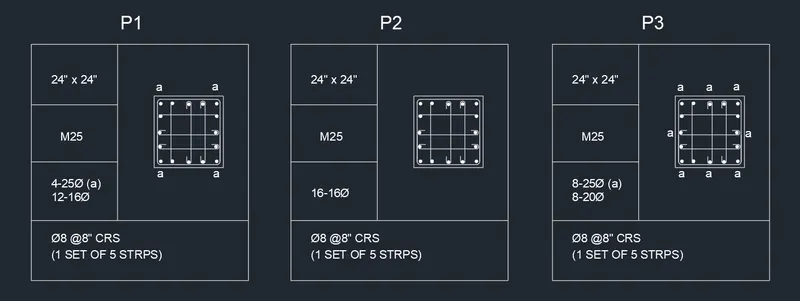
Aim-To sketch column details by using autocad
Introduction-Refer bar sizes from schedule
8mm_ _ _0.31inches
25mm_ _ _1inches
16mm_ _ _0.62inches
Procedure-
-Set limit, unit and dimension style
-By line command draw table
-dt enter to write dimension
-For r/f detail use rectangle, line, circle command and fillet whenever use.
Result-This is column details by using autocad.
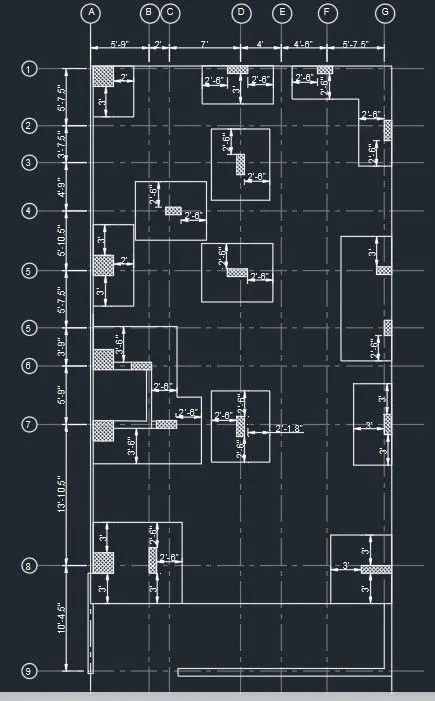
Aim-To draw the raft layout by using autocad.
Introduction-All dimensions are in feet and inches. Column sizes are use in this are 24"x24", 9"x24", 9"x18",9"x36", 9"x30".
Procedure-
-Set limit, unit and dimenson style also
-Draw lines by line command create a layout as per given dimensions by taking offset respectively
-Create new layer by taking center line and apply with respective lines
-Create circle and dt enter to write a text in center as A, 1 etc.
-Take 1st linear dimension and then continue dimension
Result-This is final layout