Creating a Residence Layout, Seating plan, Toilet and Utility room plan using AutoCad
Aim:
- To sketch the layout of a residential building.
- To sketch the seating plan for an outdoor canopy.
- To sketch the part plan for the toilers and utilities room by using the tools in AutoCAD.
Introduction:
Sketch the layout of a residence, the seating plan for out door canopy and the part plan for toilers and utility room.
Key notes for sketching:
- Consider all dimensions as reference to sketch the unit plan. The text in the layout are only for reference. Assume the missing dimensions. Also, refer the schedule for size of the doors.
- Assume the dimensions for the seating. Also, consider the dimensions in mm.
- Consider the outer wall thickness as 300mm and inner wall thickness as 150mm. Also, assume the missing dimension, Texts, dimensions, and hatches are only for references. Also, symbols for toilets and w/c are also for references.
Procedure:
Important work to be done before start the sketching. We have to give the limits to the screen.
- Units = Engineering
Giving the screen resolution by using the command:
- LIMMAX = 1900’,100’)
- ZOOM = all (save the values)
Now set limits for the screen:
- In lower left corner = (0,0)
- In upper right corner = (70’,70’)
- ZOOM = all (save the values)
Residence Plan:
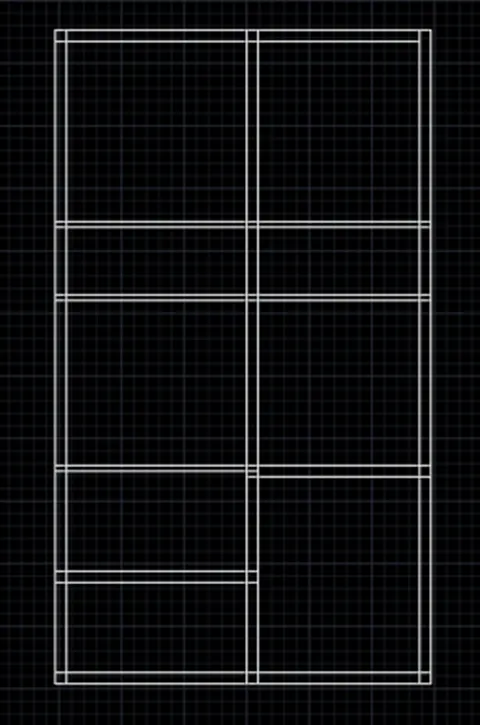
Step-1:
- First, we take the command XLINE, draw the horizontal and vertical lines.
- Then use the command OFFSET, draw the thickness of external wall and draw the interior walls of the residential plan as per given dimensions.
- Use the command TRIM and erase the all the external excessive lines.
Step-2:
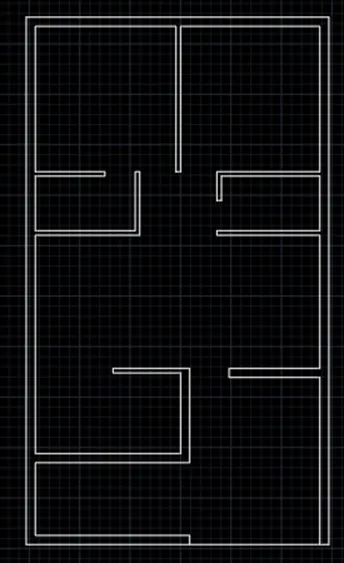
- After completion of external walls, now we have to sketch the interior walls properly.
- We already sketch the interior walls. So, we use the command TRIM, to erase the internal excessive lines by completing the interior walls.
Step-3:
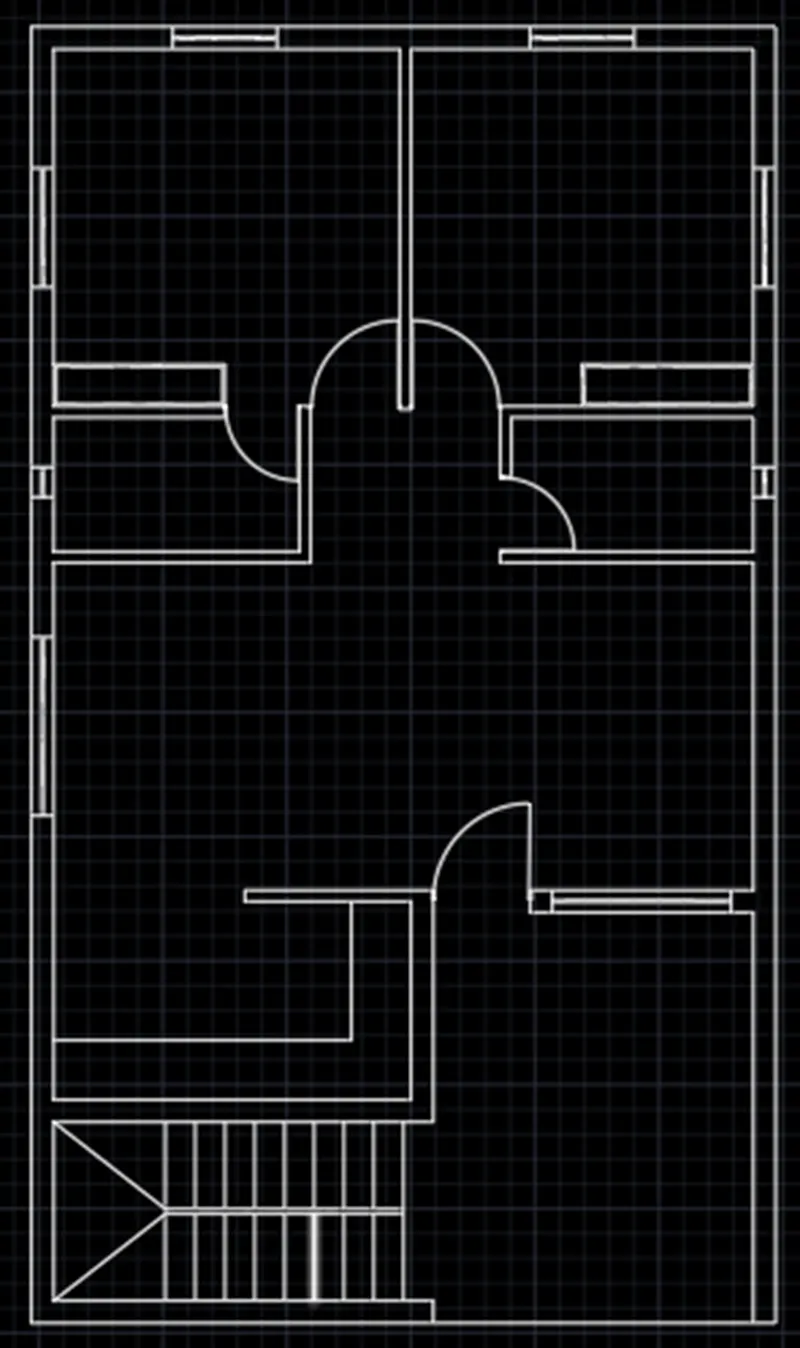
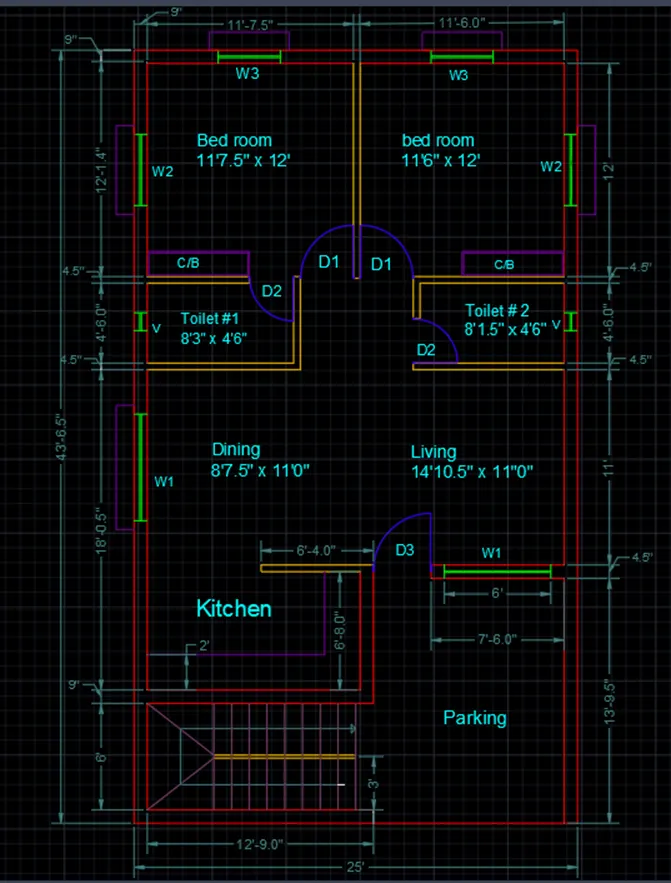
- After completion of interior walls, now we have to sketch the doors, windows, ventilators, staircase, cupboards.
- To sketch the doors, windows, staircase, ventilators, cupboards we use command OFFSET, command LINE and command CIRCLE to complete the works.
- After complete the sketch, use command TRIM to erase the unwanted lines and arcs.
Step-4:
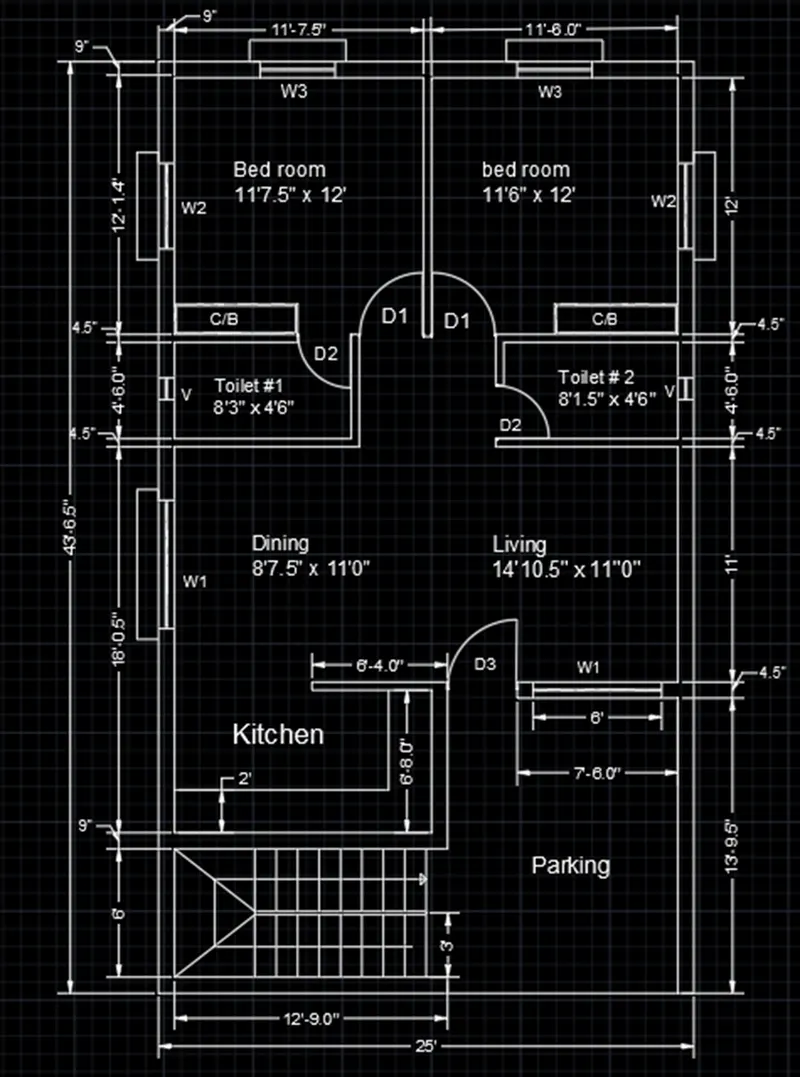
- After completed the sketch of all the parts of plan, then we have to give dimensions to them.
- Use the command DIMLIN and mentioning the dimensions and use command MTEXT to labelling for the residential plan.
Step-5:
- Now we have to create the layers for the sketch.
- Using the layer properties and create the new layers for external walls, internal walls, doors, windows, dimensions, staircase, texts, slabs.
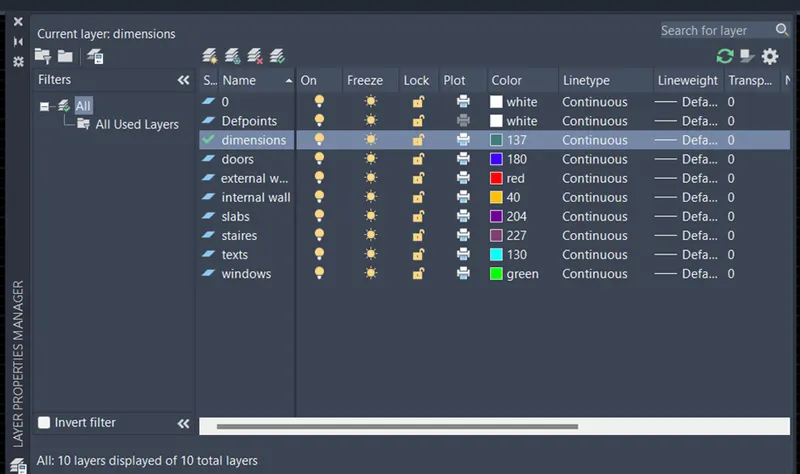
- After completing the layer properties, we should assign the layers for the suitable sketches of residential building.
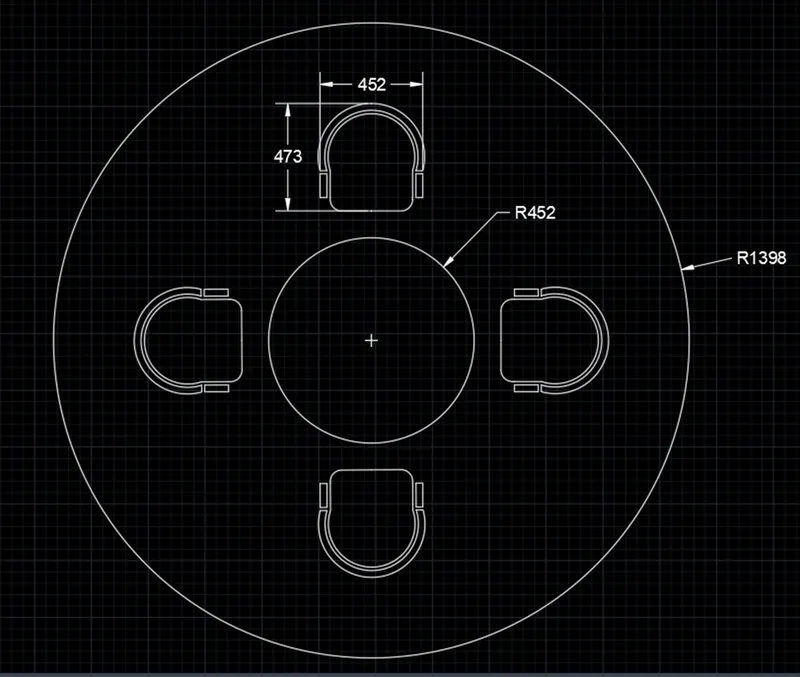
Seating plan for an outdoor canopy:
Step-1:
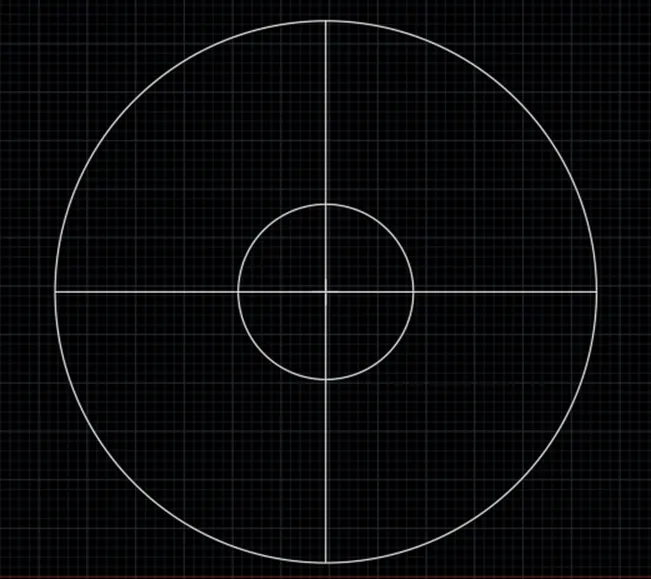
- First, we sketch the outer and inner circles as per the given dimensions using the command
- Use the command LINE to draw horizontal and vertical line at centre of the circle for easy sketching.
Step-2:
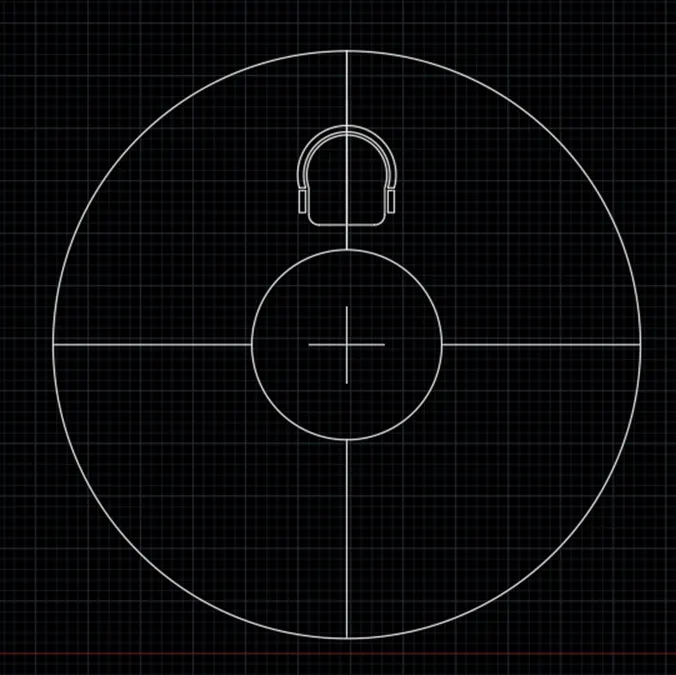
- To sketch the chairs for sitting, first we consider the dimensions of the chair.
- We use command LINE to draw the lines and then use the command ARC and command FILLET to complete the sketch in north and south directions.
- After completion of sketch for chair, we use the command TRIM to erase the unwanted lines.
Step-3:
- after completing the sketch for one chair, we use command COPY, command MOVE and command ROTATE to place the chair in other three directions.
- After that we use the command TRIM to erase the excessive lines.
- After, we use the command POINT and place the single point at the centre of the sketch.
- Last, we use the command DIMLIN and give the dimensions for the sketch.
Part plan for the toilers and utilities room:
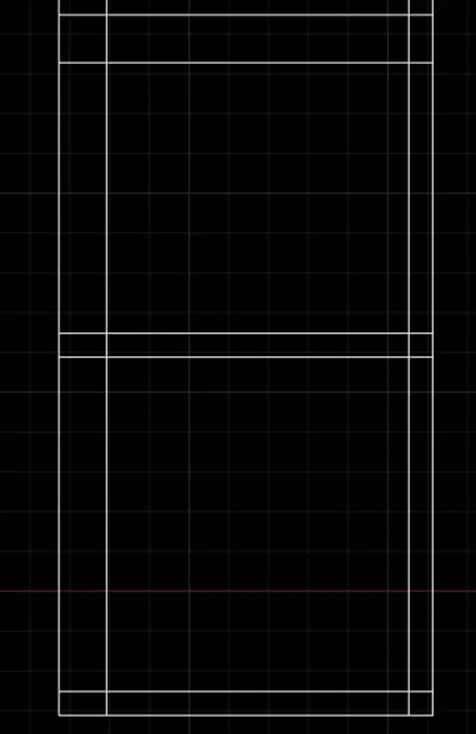
Step-1:
- First, we take the command XLINE, draw the horizontal and vertical lines.
- Then use the command OFFSET, draw the thickness of external wall and draw the interior walls of the plan as per given dimensions.
- Use the command TRIM and erase the all the external excessive lines.
Step-2:
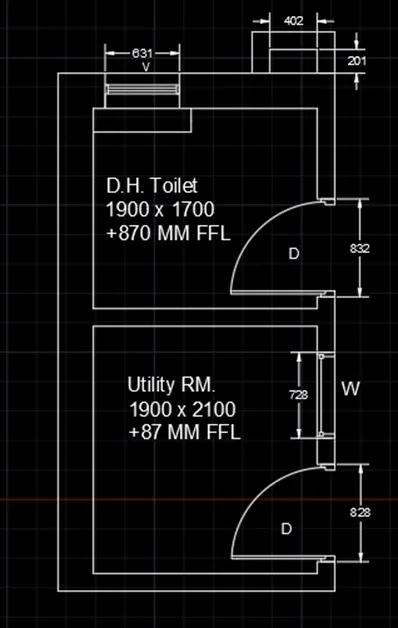
- We already sketch the interior walls. So, we use the command TRIM, to erase the internal excessive lines by completing the interior walls.
- To sketch the doors, windows, ventilators we use command LINE and command CIRCLE to complete the works.
- After complete the sketch, use command TRIM to erase the unwanted lines and arcs.
- Use the command DIMLIN and mentioning the dimensions and use command MTEXT to labelling for the plan.
Result:
The tools used for the completion of the geometries are:
- XLINE
- LINE
- CIRCLE
- ARC
- POINT
- DIMLIN
- MOVE
- COPY
- ROTATE
- FILLET
- TRIM
- ERASE
- LAYER
- EXTEND
- OFFSET
- SCALE