Creating a Residence Layout, Seating plan, Toilet and Utility room plan using AutoCad
1. Residence Plan:
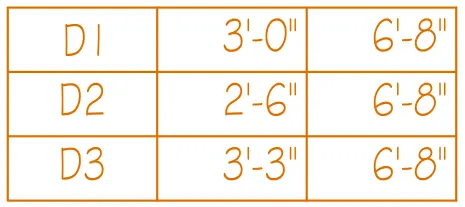
Sketch the layout of a residence as shown in the Figure 1. Consider all dimensions as reference to sketch the unit plan. Also the text in the layout are only for reference. Assume the missing dimensions. Also, refer the schedule for size of the doors.
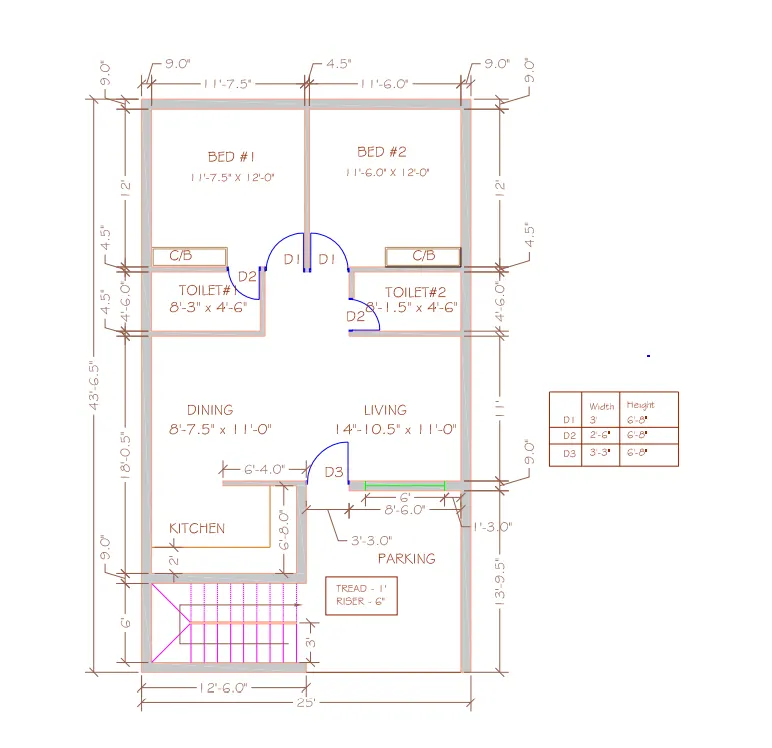
- Aim:
- Sketch the layout of a residence as shown in the Figure.
- Procedure:
- Step 1-
- Enter XLINE command and make one horizontal and one vertical line at (0,0) point.
- Enter the trim command and trim the -x and -y of the XLINE.
- Step 2-
- Enter offset of 9" on Horizontal XLINE for External wall.
- Enter offset command of 6' on inside horizontal line.
- Enter offset of 9" for the new horizontal line formed.
- Enter offset of 6'8" for the new horizontal line formed.
- Enter offset of 4.5" for the new horizontal line formed.
- Enter offset of 11' for the new horizontal line formed.
- Enter offset of 4.5" for the new horizontal line formed.
- Enter offset of 4'6" for the new horizontal line formed.
- Enter offset of 4.5" for the new horizontal line formed.
- Enter offset of 12' for the new horizontal line formed.
- Enter offset of 9" for the new horizontal line formed.
- Step 3-
- Enter offset of 9" on Vertical XLINE for External wall.
- Enter offset command of 8'3" on inside Vertical line.
- Enter offset of 4.5" for the new Vertical line formed.
- Enter offset command of 11' on inside Vertical line.
- Enter offset of 9" for the new Vertical line formed.
- Enter offset command of 11'7.5" on inside Vertical line.
- Enter offset of 4.5" for the new Vertical line formed.
- Enter offset of 3' for the new Vertical line formed.
- Enter offset of 4.5" for the new Vertical line formed.
- Enter offset of 8'1.5" for the new Vertical line formed.
- Enter offset of 9" for the new Vertical line formed.
- Step 4-
- Use Commands :
- Trim
- Extend
- Fillet
- Offset
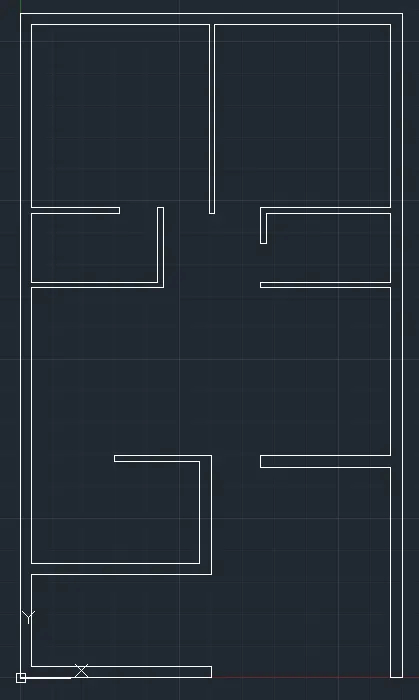
- Finalize the wall layout as per the given plan.
- Use Commands :
- Step 5-
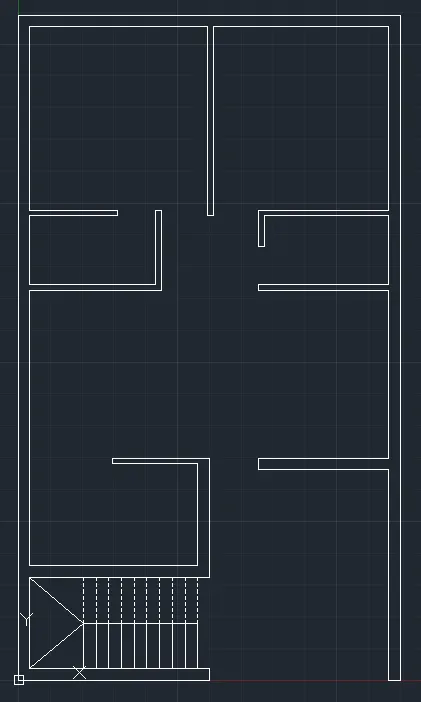
- Now, Draw the staircase.
- Use commands:
- Line
- Offset
- Line-type (Layer Properties)
- Step 6-
- Now Draw the slab of the kitchen.
- Use Commands:
- Offset
- Fillet
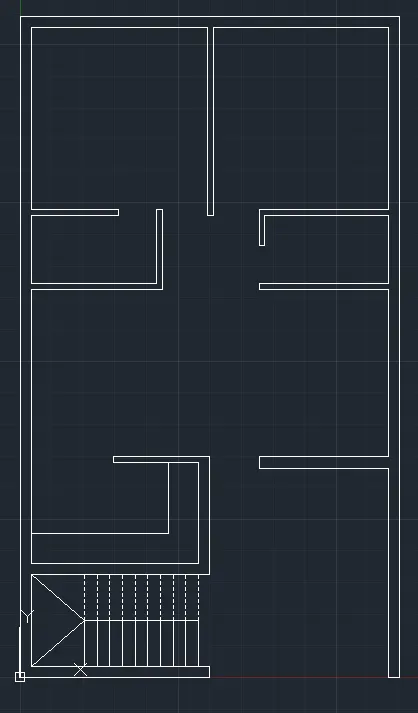
- Step 7-
- Draw C/B in Bed rooms.
- Use Commands:
- Rectangle
- Offset
- Mirror
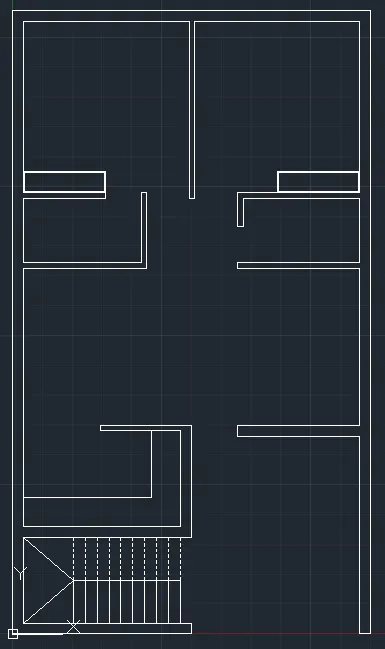
- Step 8-
- Now, Draw Doors of required sizes as per the plan given .
- Use Commands:
- Line
- Circle
- Scale
- Copy
- Move
- Mirror
- Rotate
- Block
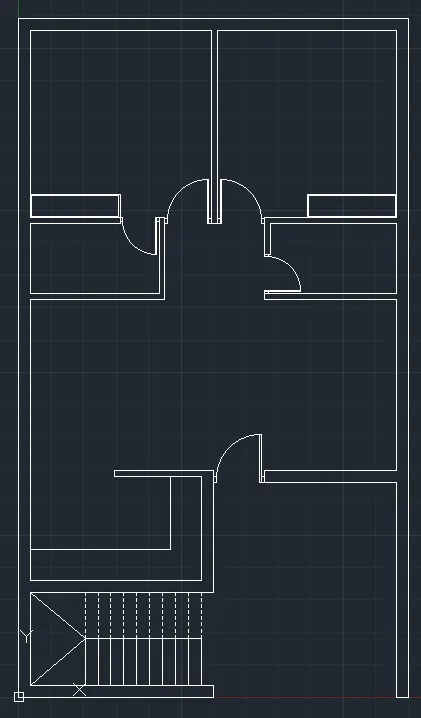
- Step 9-
- Now, Draw Windows of required sizes as per the plan given .
- Use Commands:
- Offset
- Trim
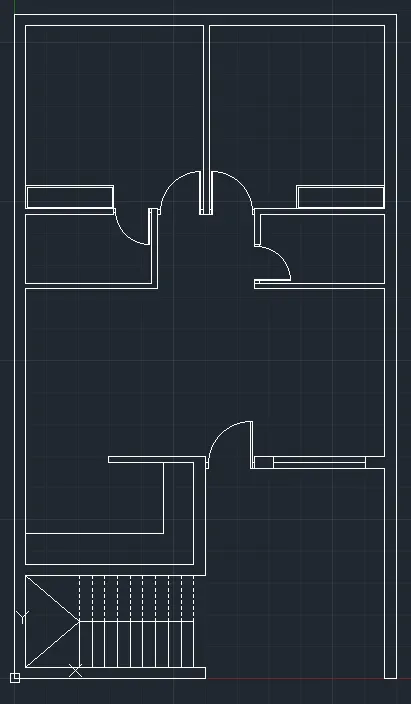
- Step 10-
- Now, Dimensioning & Writing text as mentioned in the drawing.
- Use Commands:
- MText
- Scale
- Linear Dimension
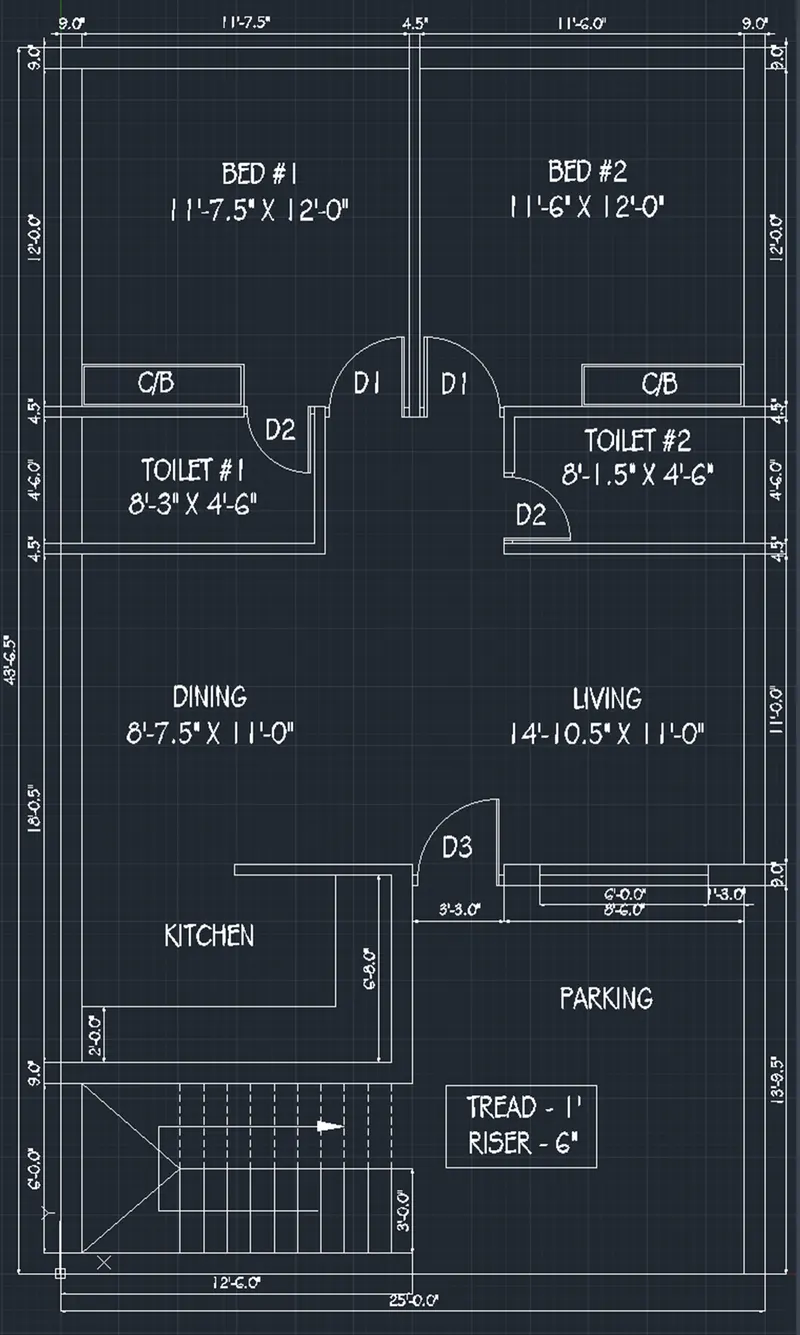
- Step 11-
- Now, Draw the table and Enter the data given.
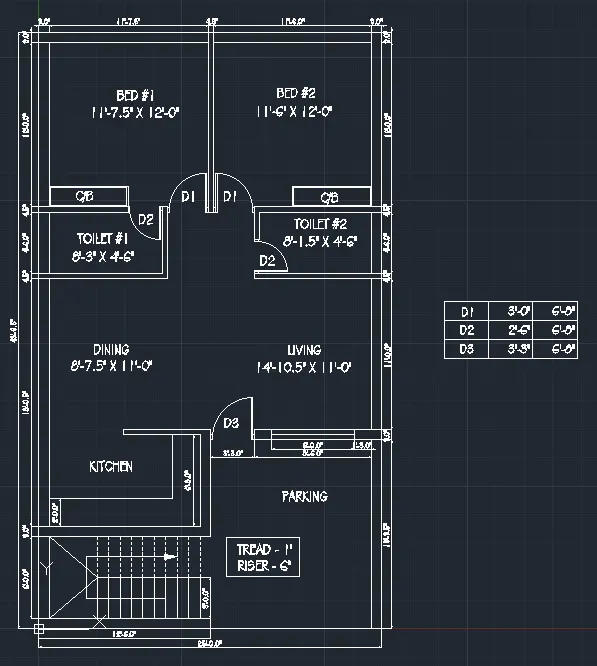
- Step 12-
- Now, Creating Layers as per the given plan.
- Command used:
- Layer
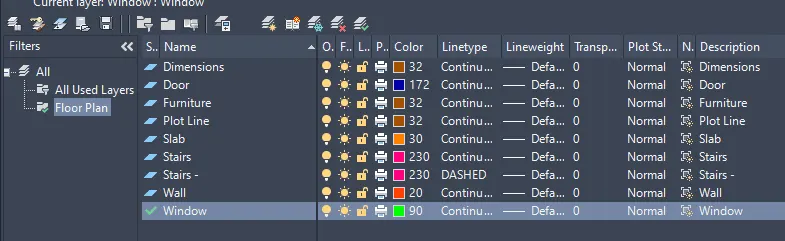
- Step 13-
- Now, Assigning Layer Properties as per the given plan.
- Step 1-
- Result :
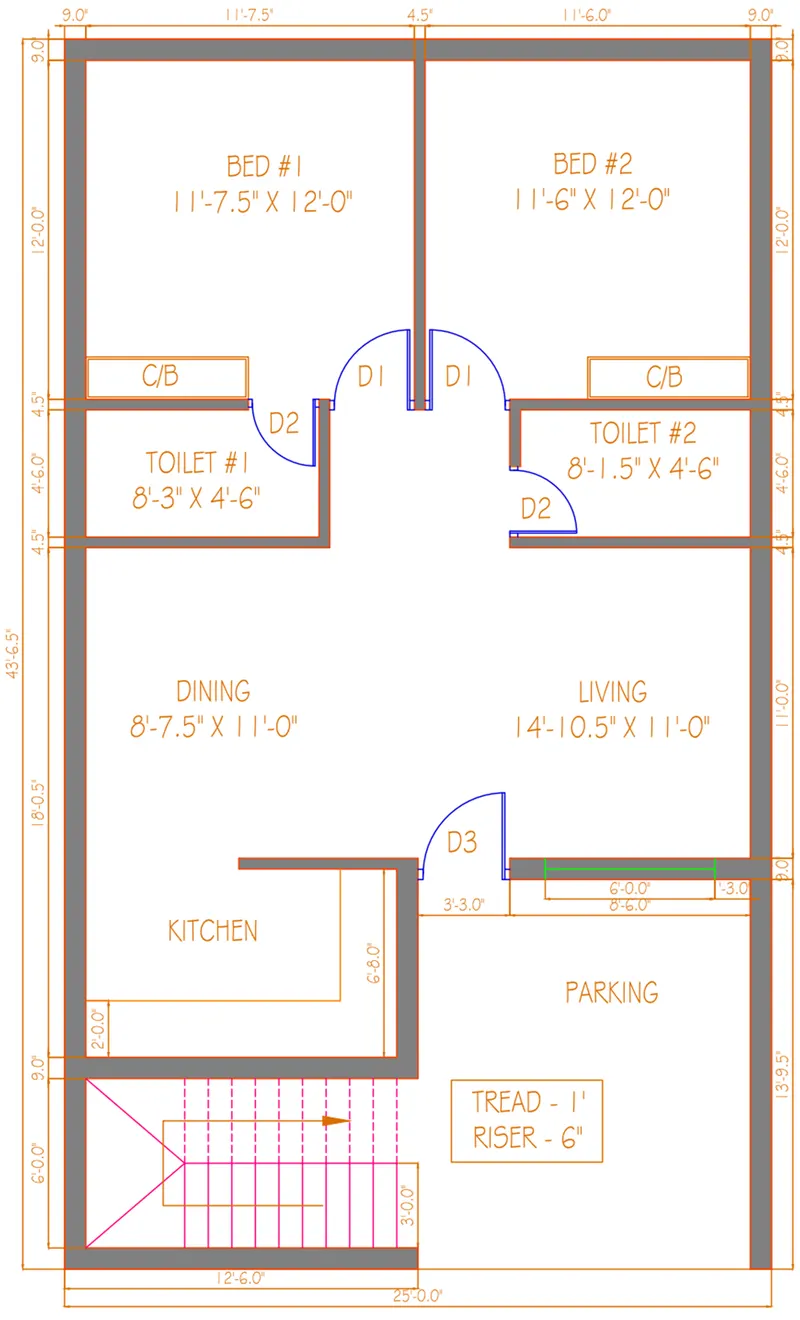
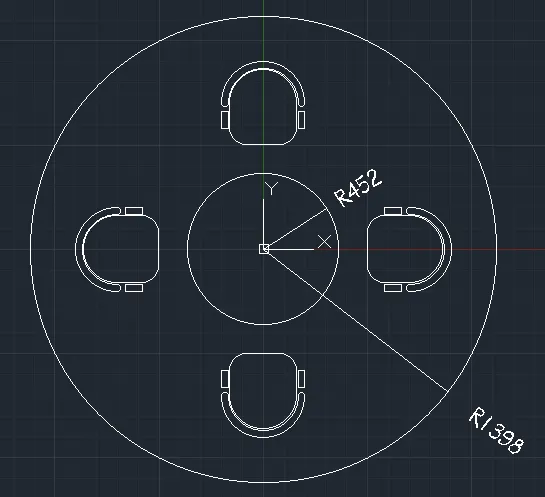
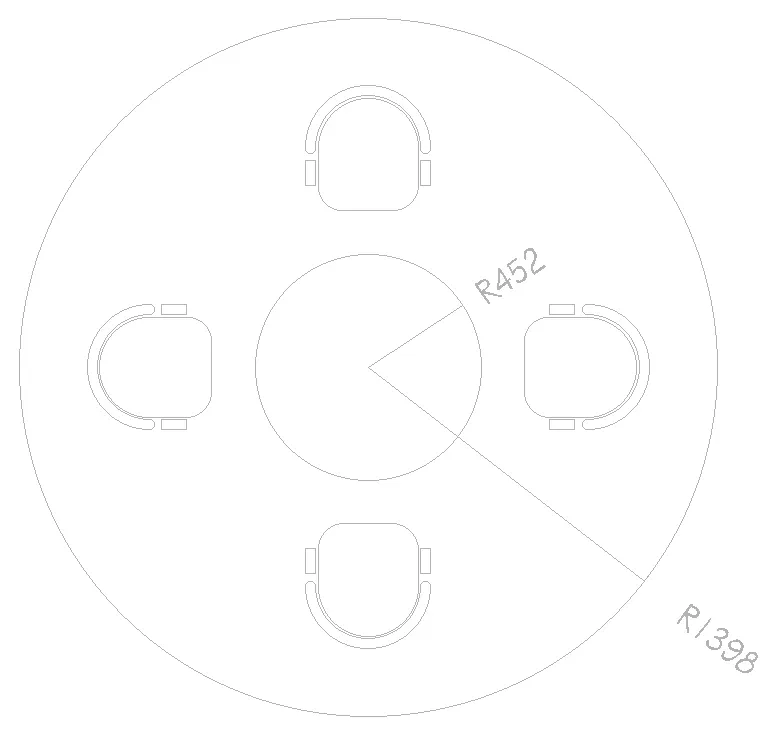
2. Sketch the seating plan for an outdoor canopy. Assume the dimensions for the seating. Also, consider the dimensions in mm.
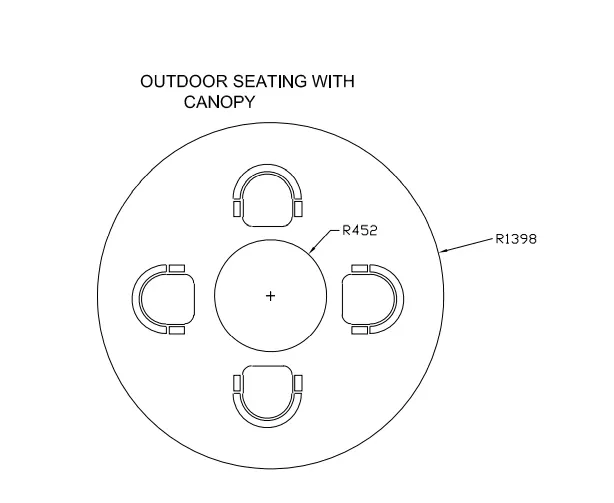
- Aim:
- Sketch the seating plan for an outdoor canopy.
- Procedure:
- Step 1-
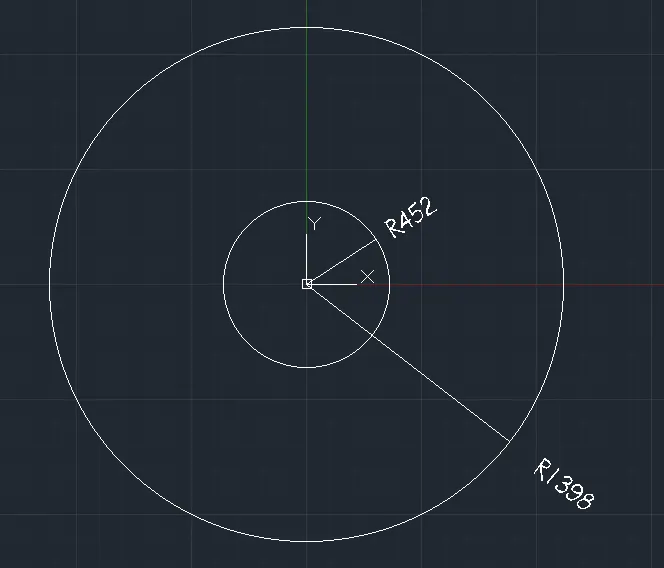
- Enter Circle command and center at (0,0)
- R1 = 452
- Enter Circle command and center at (0,0)
- R1 = 1398
- Step 2-
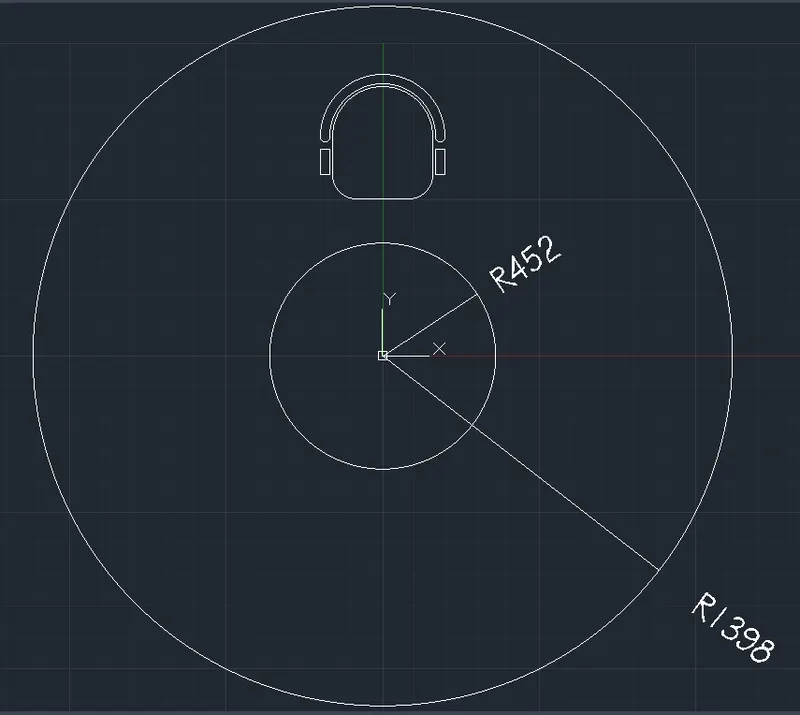
- Draw chair as given in the figure above.
- Command Used:
- Line
- Arc
- Fillet
- Mirror
- Rectangle
- Block
- And place one chair as given in the figure
- Step 3-
- Use Commands:
- Mirror
- Rotate
- Use above commands on chair and finalize drawing as per the given figure.
- Use Commands:
- Step 1-
- Result :
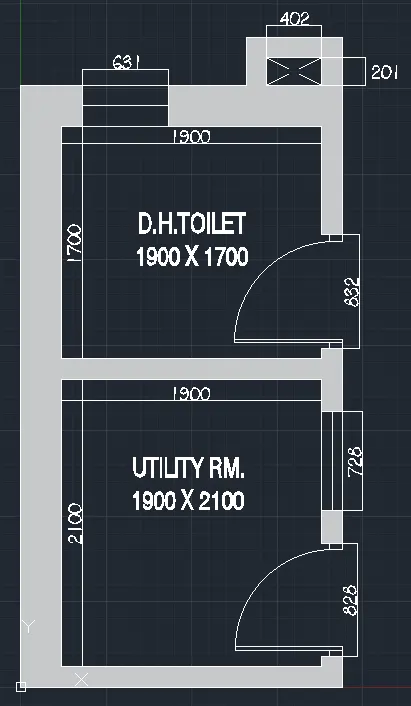
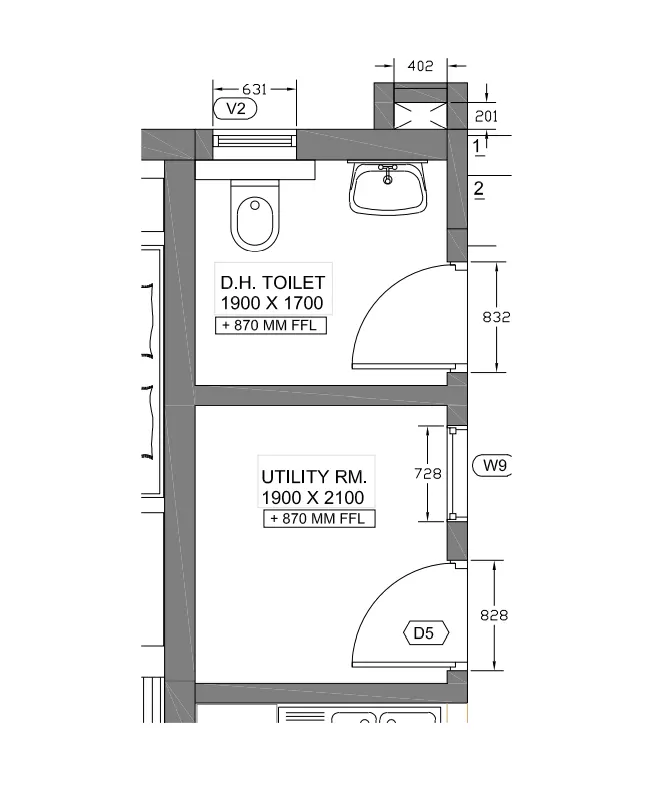
3. Sketch the part plan for the toilers and utilities room. Consider the outer wall thickness as 300mm and inner wall thickness as 150mm. Also, assume the missing dimension, Texts, dimensions, and hatches are only for references. Also, symbols for toilets and w/c are also for references.
- Aim:
- Sketch the part plan for the toilers and utilities room.
- Procedure:
- Step 1-
- Enter XLINE command and make one horizontal and one vertical line at (0,0) point.
- Enter the trim command and trim the -x and -y of the XLINE.
- Step 2-
- Enter offset of 150 on Horizontal XLINE for External wall.
- Enter offset command of 2100 on inside horizontal line.
- Enter offset of 150 for the new horizontal line formed.
- Enter offset of 1700 for the new horizontal line formed.
- Enter offset of 300 for the new horizontal line formed.
- Enter offset of 201 for the new horizontal line formed.
- Enter offset of 150 for the new horizontal line formed.
- Step 3-
- Enter offset of 300 on Vertical XLINE for External wall.
- Enter offset command 1348 on inside Vertical line.
- Enter offset of 150 for the new Vertical line formed.
- Enter offset of 402 for the new Vertical line formed.
- Enter offset of 150 for the new Vertical line formed.
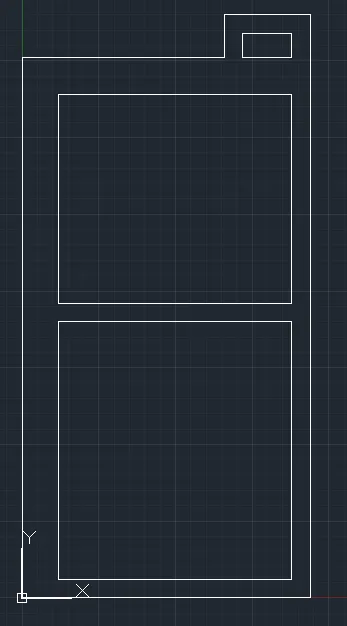
- Step 4-
- Use Commands :
- Trim
- Extend
- Fillet
- Offset
- Hatch
- Finalize the wall layout as per the given plan.
- Use Commands :
- Step 5-
- Now, Draw Doors of required sizes as per the plan given .
- Use Commands:
- Line
- Circle
- Scale
- Copy
- Move
- Mirror
- Rotate
- Block
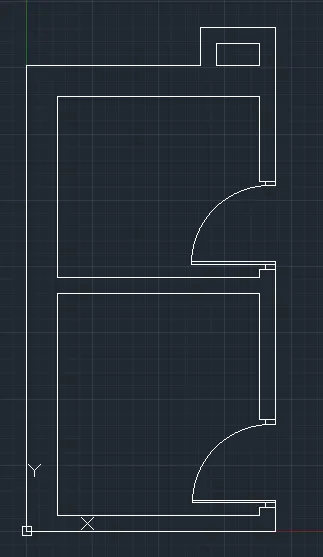
- Step 6-
- Now, Draw Windows of required sizes as per the plan given .
- Use Commands:
- Offset
- Trim
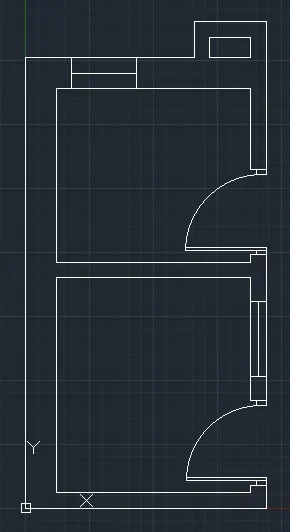
- Step 7-
- Now, Draw Cutouts as per the plan given .
- Use Commands:
- Line
- Line-Type
- Match Property
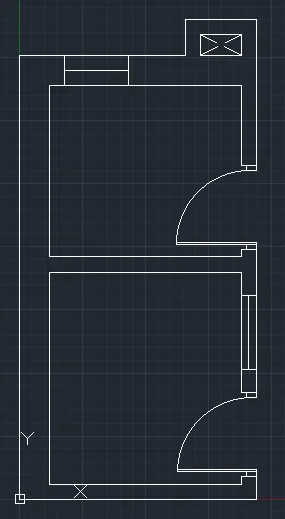
- Step 8-
- Now, Write the Dimension and text as per the plan given .
- Use Commands:
- MText
- Linear Dimension
- Finalize the Plan.
- Step 1-
- Result :