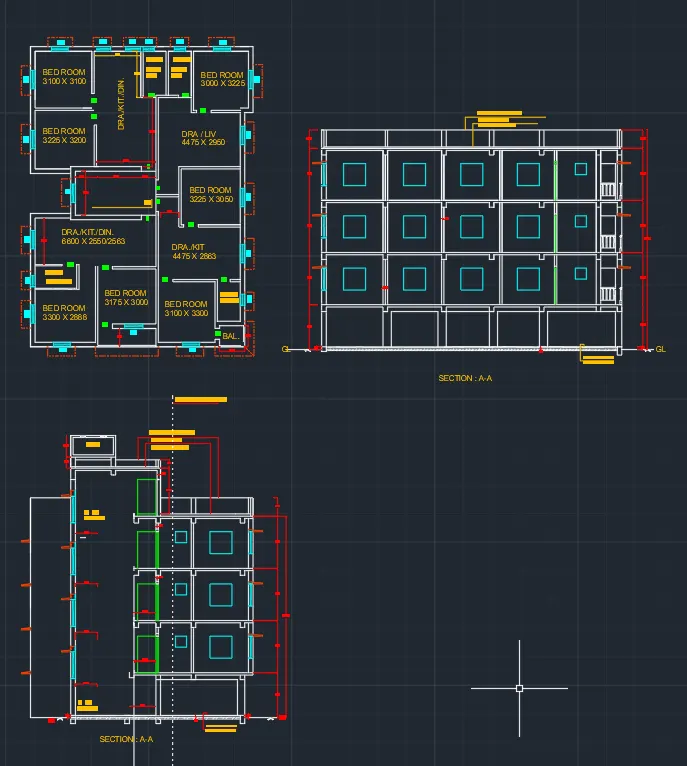
Creating a Layout, Section and Elevation with dimensions using AutoCad
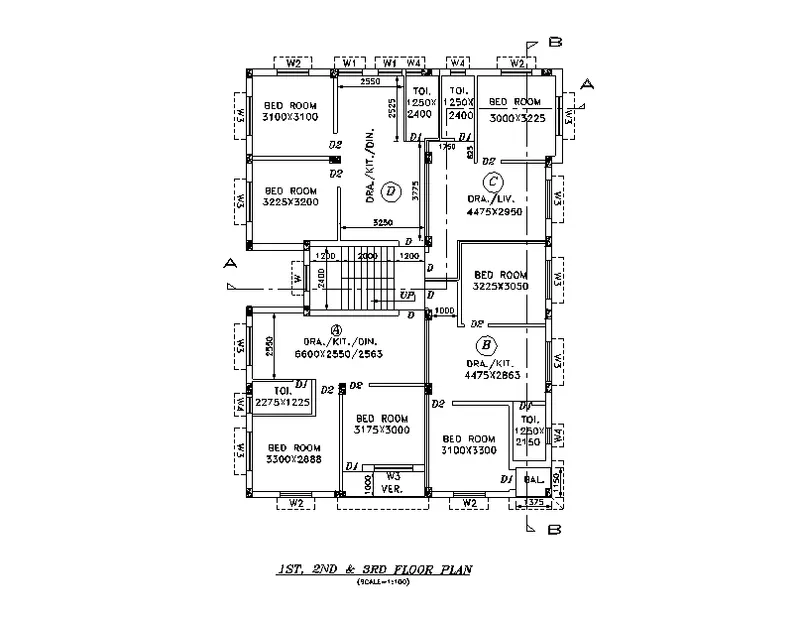
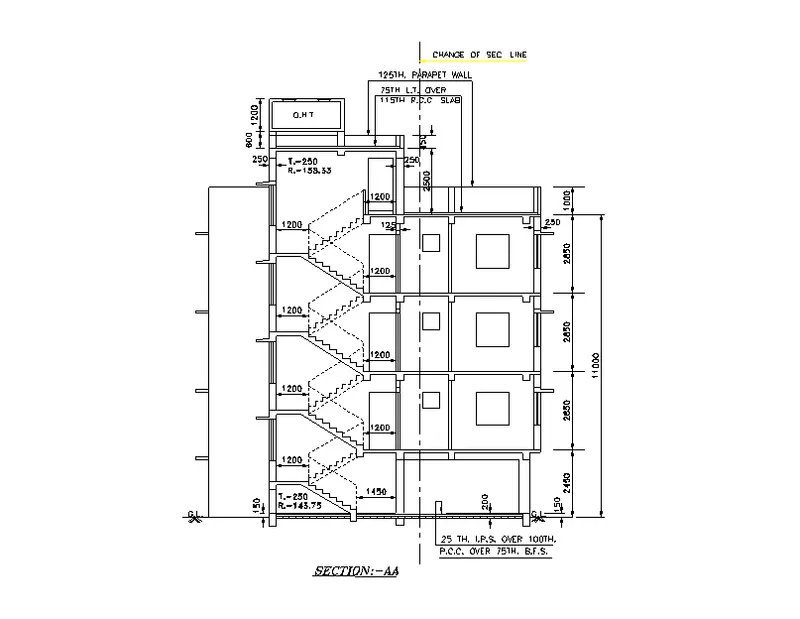
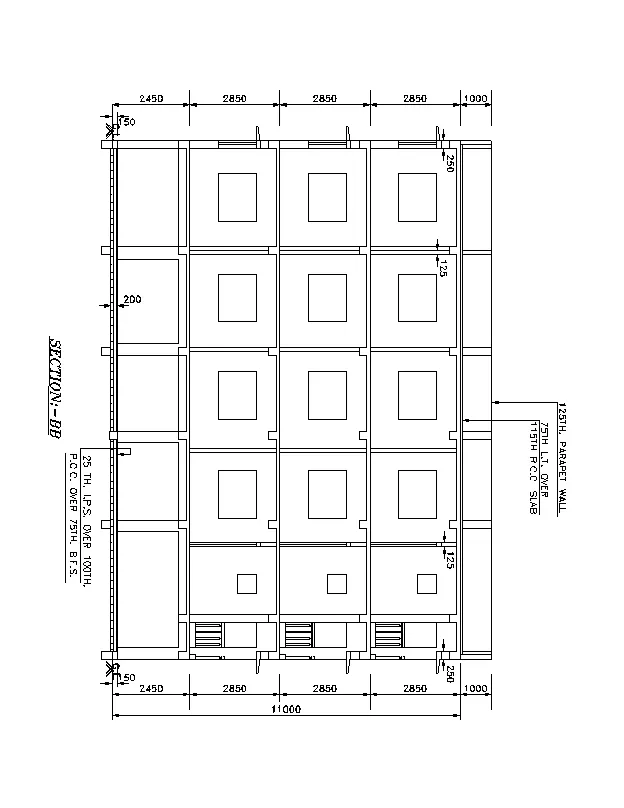
1. Create the Plan and Sections as shown in the Figures. Use proper dimension techniques and dimension styles to document the project. Assume the sizes of the doors and windows as per construction standards. Refer to sections for stair details if required.
AIM :
To Create the Plan and Sections.
INTRODUCTION :
PLAN : In architecture and building engineering, a floor plan is a technical drawing to scale, showing a view from above, of the relationships between rooms, spaces, traffic patterns, and other physical features at one level of a structure.
SECTIION : In terms of design, the term 'section' typically refers to a view of a structure as though it has been sliced in half or cut along another imaginary plane, which is generally, but not always a vertical plane. This is represented as a 'section drawing' or 'sectional drawing'.
PROCEDURE :
1.Createing plan:
Step1:
- Open the cad software and set the units as mm by using the units command and by using limits command create the limit and then zoom all by giving command z and a commands.
- Create layers define properties.
Step2:
- In command prompt xl the create horizantal and vertical straight line.
- Trim the extented left corner.
- In the command prompt offset command create the offset of distance 250mm do offet.
- Again by click enter then the previous command will be running and do offset at distance of the bed room will 3300mm distance then do offset of room distance.
- In command prompt trim command and trim the unwanted line
- By using offset and trim and line command create the walls
- Select all objects assign to the wall layer properties.
-
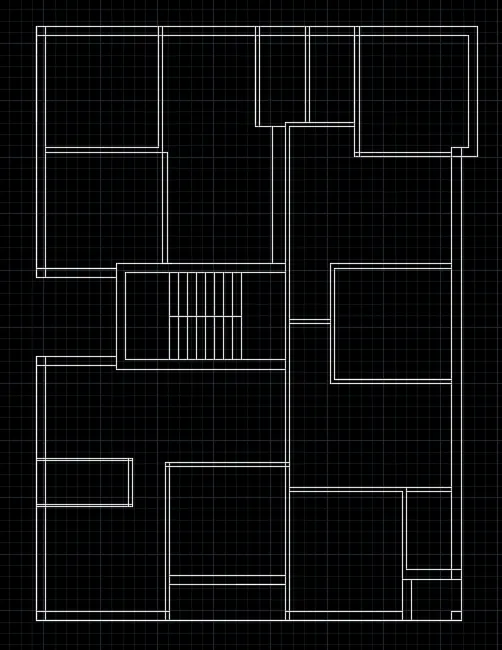
Step 3: Creating doors
- In command prompt give the layer command and change layer to doors
- As per our assumption the door will be created
- By using line command create a horizantal line of 800mm and offset the line at at the distance of 40mm.
- Select the door and copy and paste the door where D1 required.
- Then trim the unwanted lines.
- Do the same procedure for D and D2.
- D=1000mm and D2=900mm.
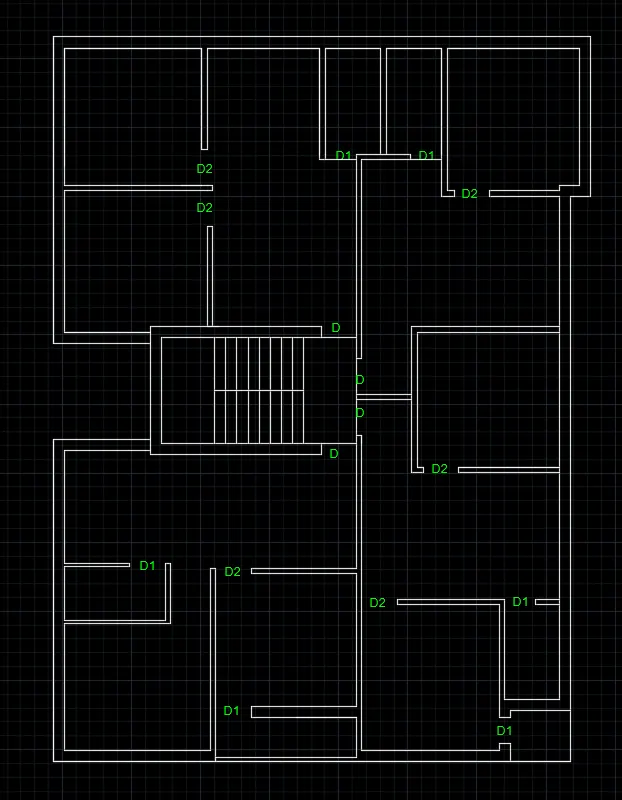
Step 4: Creating windows
- In commandf prompt give the layers and change layers to windows.
- In command prompt line command and draw the line of 800mm and do offset 250mm of the line and again do offset of line at distance 100mm inner side of rectangle top side and bottom side line then the window will be created.
- Select the window created the copy the window by using copy command then paste where the W1 window required
- Then do the same for the W, W2, W3 ,W4 and the width of the windows assumed.
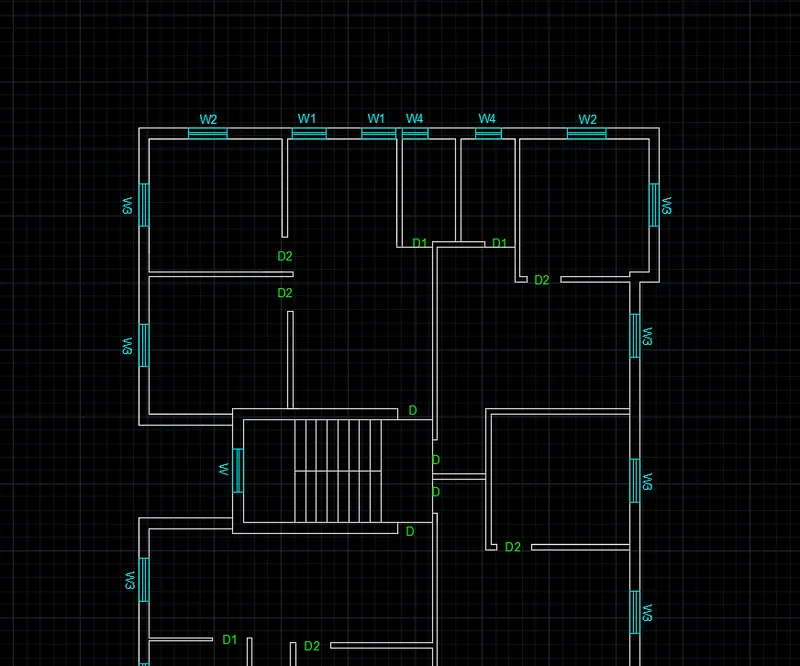
Step 5: Creating columns :
- Change the layer to columns.
- In command prompt rectangle command create a rectangle of 250/300mm (assummmed)
- Now give the hatch command hatch the rectangle.
- Select the rectangle and copy by using copy command then paste at require possition and proper posstion.
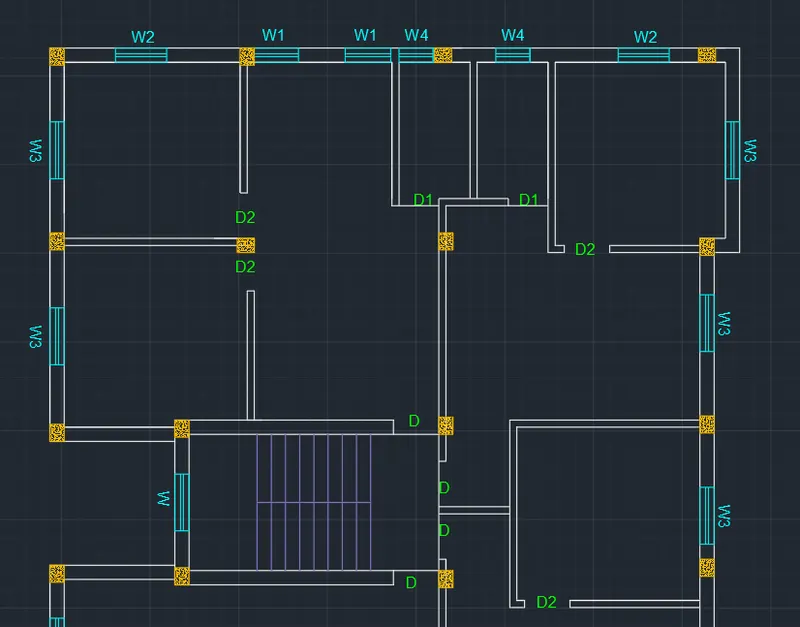
Step 6: Creating lintel and sunsheds :
- In command prompt layers then define layer of linetes and sunsheds and chnage the line type to dash line and give the proper scale too.
- Give the line command draw the line and the projection width os sunshade is 500mm.
- Draw the sunshades at every window and required possition.
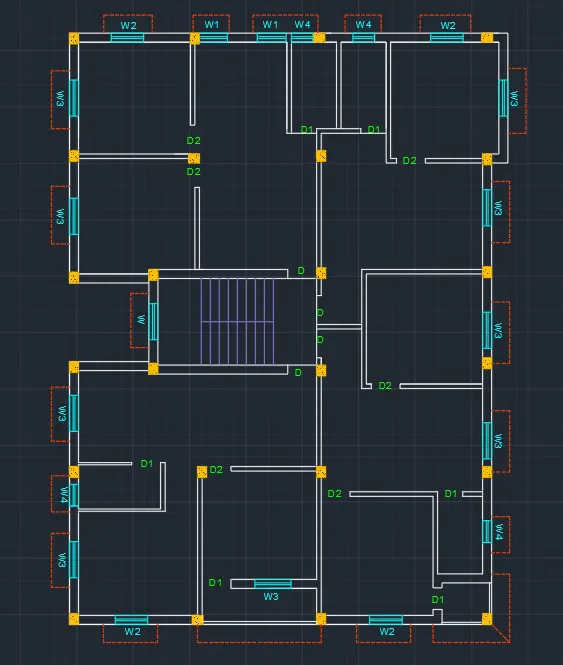
Step 7: Creating Text:
- Change layer to the text and define it.
- In command prompt multi text and specify the dimmention height and define the styles
- Create the text at Require possitin and if need rotate
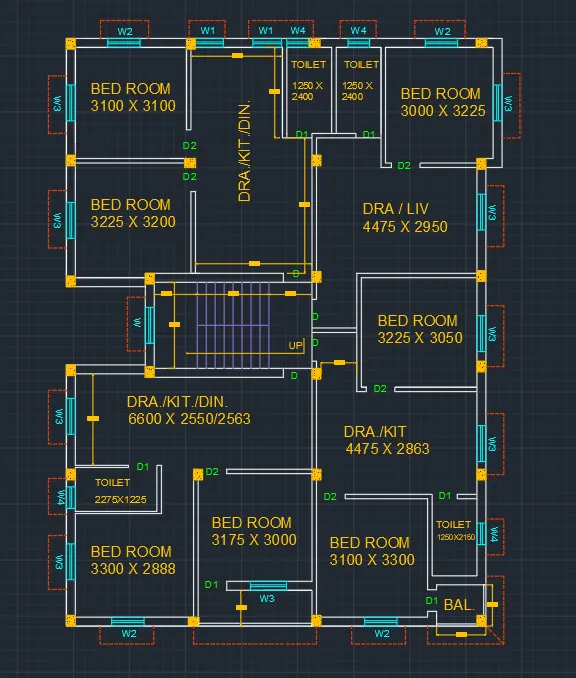
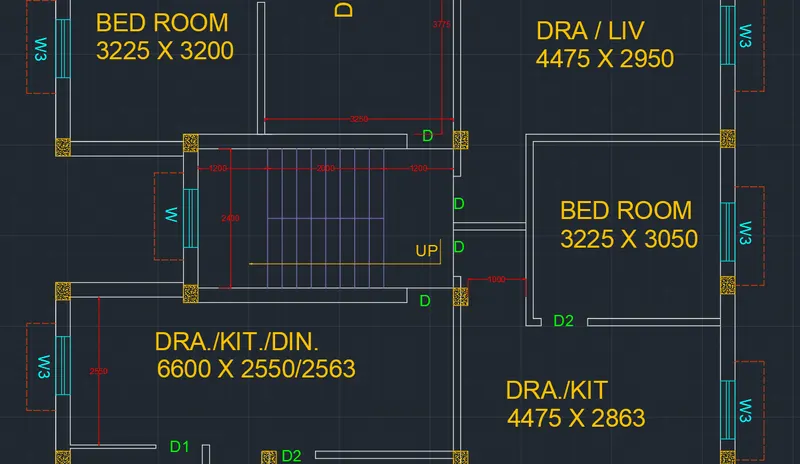
Step 8: Creating Dimentions:
- Change the layer to dimentions and define the layer
- In command prompt DIMS and modify the dimention style and text height.
- In command prompt DIML and mention at linear dimentions.
- And also for continue dimentions give the DIMCONTI command.
RESULT :
The total plan is drafted successfully by Using autocad.
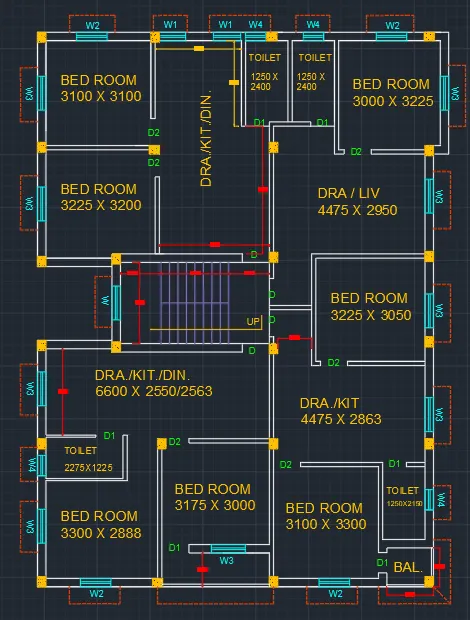
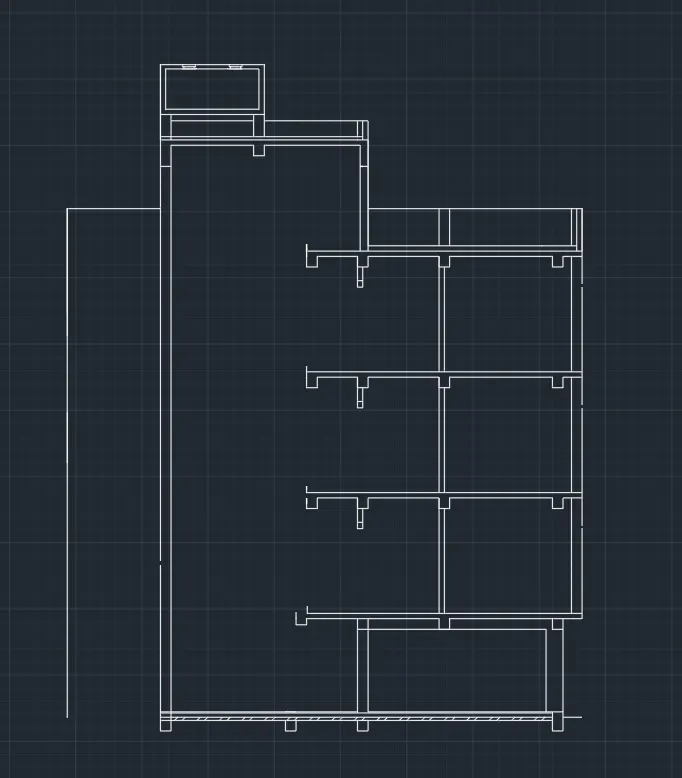
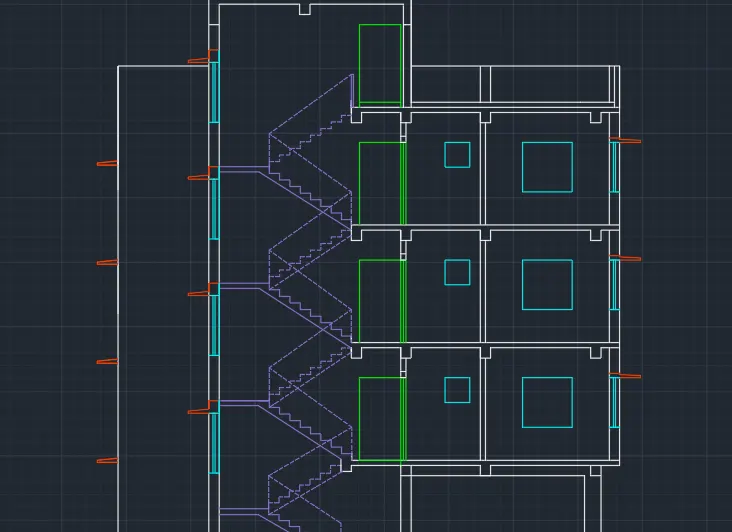
2.Createing Section A-A:
Step 1: Creating walls
- Change the layer to wall
- Now by using line command project lines from plan bottom side of the plan
- In command prompt give the offfest command offest the room dimentions.
- The outer wall is 250mm thick and the inner wall is 125mm thick
- By using TR command trim the unwanted line.
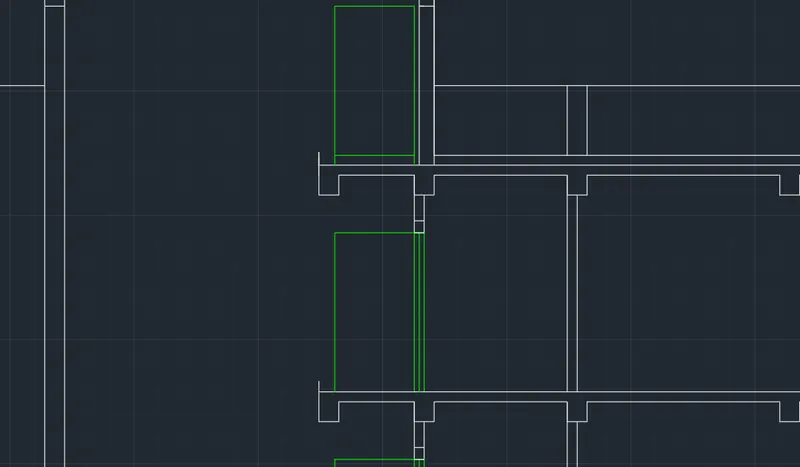
Step 2: Creating doors
- In command prompt give the layer command and change layer to doors
- As per our assumption sizes the door will be created
- By using line command create a horizantal line of 800mm 2000mm height and offset the line at at the distance of 40mm.
- Select the door and copy and paste the door where D1 required.
- Then trim the unwanted lines.
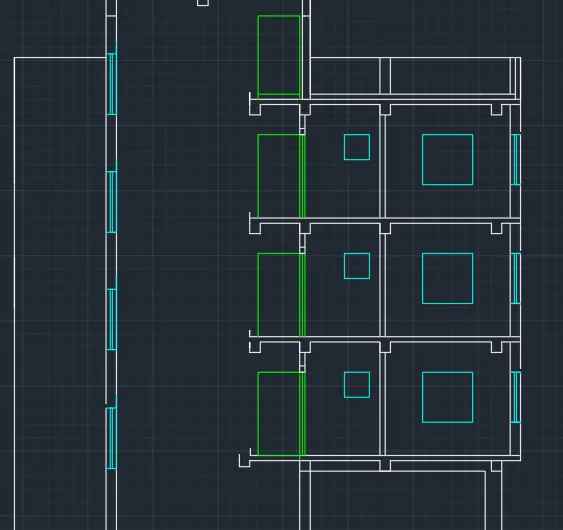
Step 3: Creating windows
- In commandf prompt give the layers and change layers to windows.
- In command prompt line command and draw the line of 800mm and do offset 250mm of the line and again do offset of line at distance 100mm inner side of rectangle top side and bottom side line then the window will be created.
- Select the window created the copy the window by using copy command then paste where the W1 window required
- Then do the same for the W, W2, W3 ,W4 and the width of the windows assumed.
- Then the height of the windows takes as 1500 mm and the height of the W4 windows taken as 600mm.
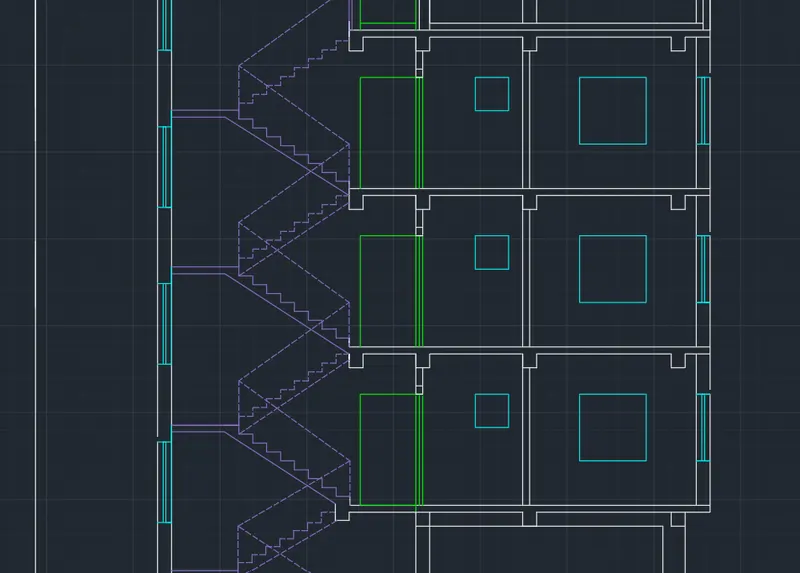
Step 4: Creating stair case :
- Change the layers to stair case
- By using line command draw the stair and the rise is 143.75 and the Trade is 250mm (for ground floor )
- Draw the steps till the landing and then mirror it then it will drawn and connecting to the landig to the first floor.
- Now for the first floor the Riser will be change and the Rise is 158.33mm.
- And mirror it then continue till the floors will finish.
Step 5: Creating lintel and sunsheds :
- In command prompt layers then define layer of linetes and sunsheds and chnage the line type to dash line and give the proper scale too.
- Give the line command draw the line and the projection width os sunshade is 500mm.
- Draw the sunshades at every window and required possition.
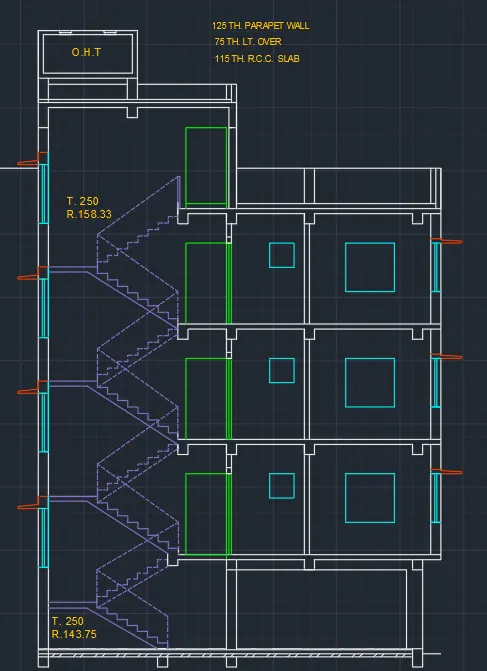
Step 6: Creating Text:
- Change layer to the text and define it.
- In command prompt multi text and specify the dimmention height and define the styles
- Create the text at Require possitin and if need rotate
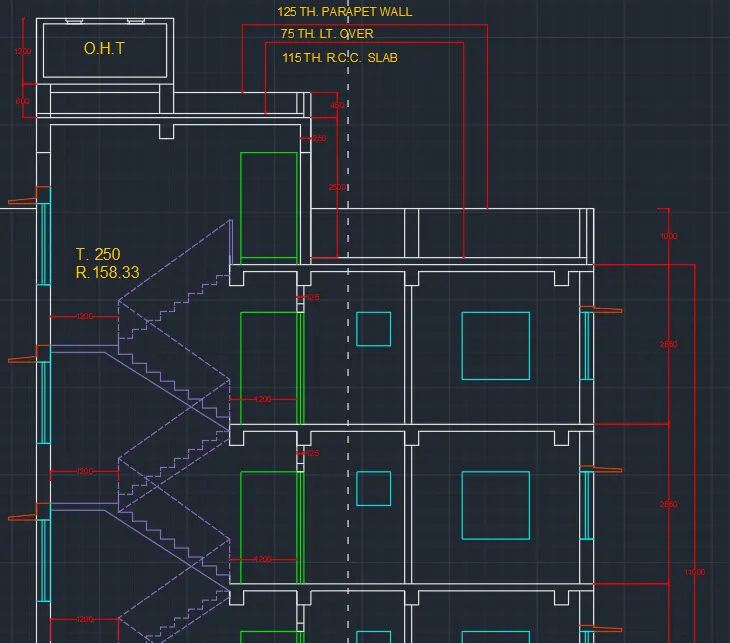
Step 7: Creating Dimentions:
- Change the layer to dimentions and define the layer
- In command prompt DIMS and modify the dimention style and text height.
- In command prompt DIML and mention at linear dimentions.
- And also for continue dimentions give the DIMCONTI command.
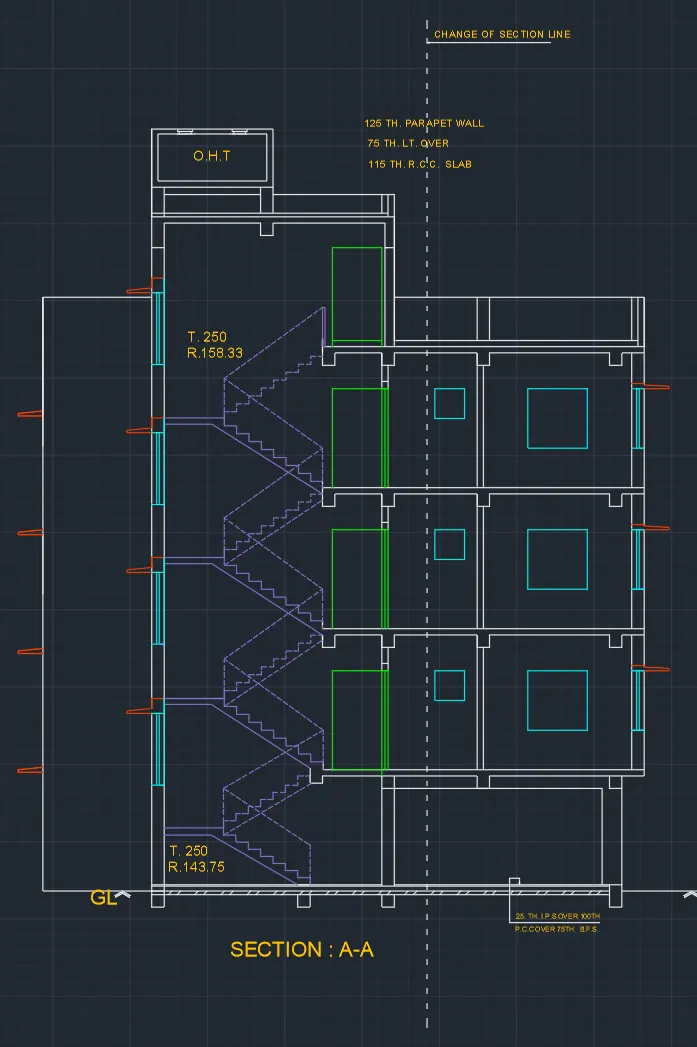
Result :
The Section of A-A is created successfully Drawn by using Autocadd software
2.Createing Section B-B :
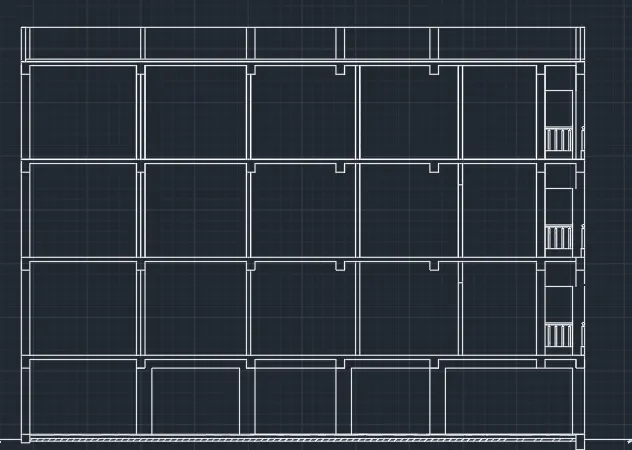
Step 1: Creating walls
- Change the layer to wall
- Now by using line command project lines from plan bottom side of the plan
- In command prompt give the offfest command offest the room dimentions.
- The outer wall is 250mm thick and the inner wall is 125mm thick
- By using TR command trim the unwanted line.
Step 2: Creating doors
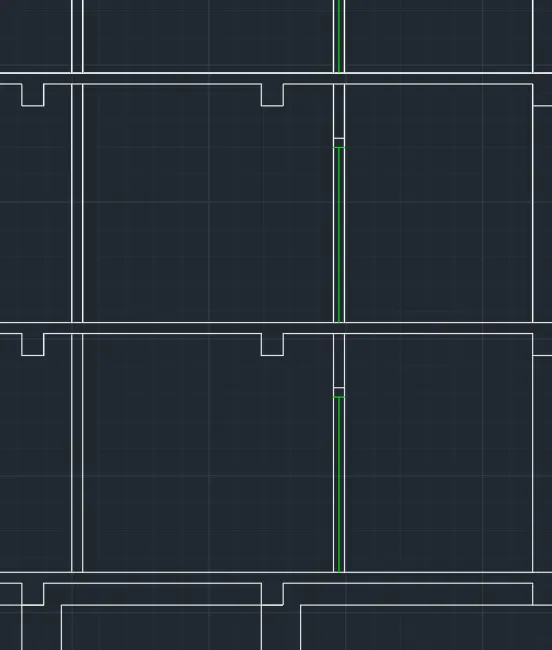
- In command prompt give the layer command and change layer to doors
- As per our assumption sizes the door will be created
- By using line command create a horizantal line of 800mm 2000mm height and offset the line at at the distance of 40mm.
- Select the door and copy and paste the door where D1 required.
- Then trim the unwanted lines.
Step 3: Creating windows
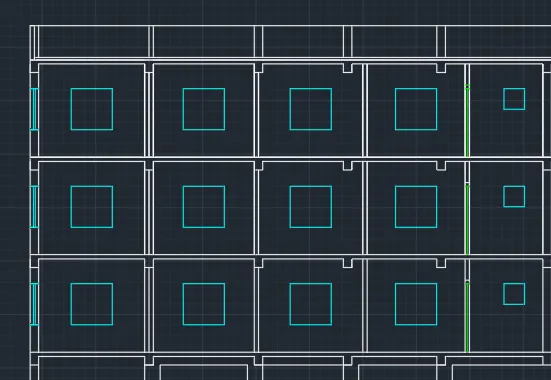
- In commandf prompt give the layers and change layers to windows.
- In command prompt line command and draw the line of 800mm and do offset 250mm of the line and again do offset of line at distance 100mm inner side of rectangle top side and bottom side line then the window will be created.
- Select the window created the copy the window by using copy command then paste where the W1 window required
- Then do the same for the W, W2, W3 ,W4 and the width of the windows assumed.
- Then the height of the windows takes as 1500 mm and the height of the W4 windows taken as 600mm.
Step 4: Creating lintel and sunsheds :
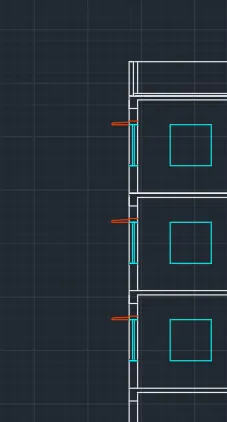
- In command prompt layers then define layer of linetes and sunsheds and chnage the line type to dash line and give the proper scale too.
- Give the line command draw the line and the projection width os sunshade is 500mm.
- Draw the sunshades at every window and required possition.
Step 5: Creating Text:
- Change layer to the text and define it.
- In command prompt multi text and specify the dimmention height and define the styles
- Create the text at Require possitin and if need rotate.
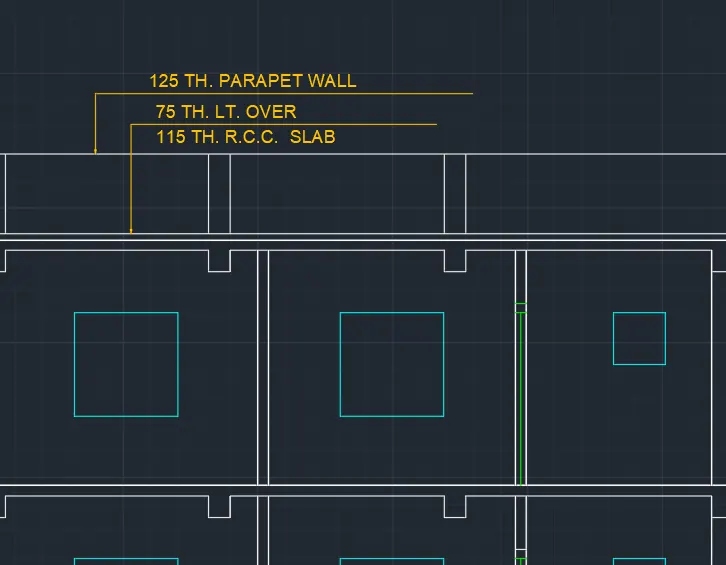
Step 6: Creating Dimentions:
- Change the layer to dimentions and define the layer
- In command prompt DIMS and modify the dimention style and text height.
- In command prompt DIML and mention at linear dimentions.
- And also for continue dimentions give the DIMCONTI command.
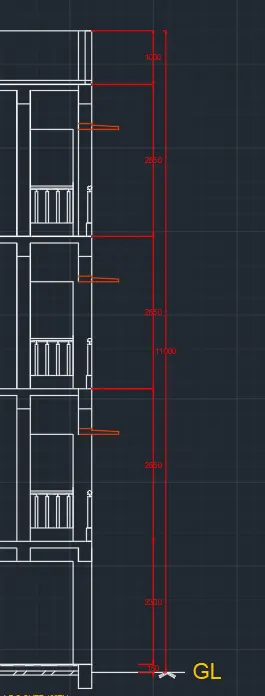
Result :
The section B-B is is successfully created by using Autocadd software
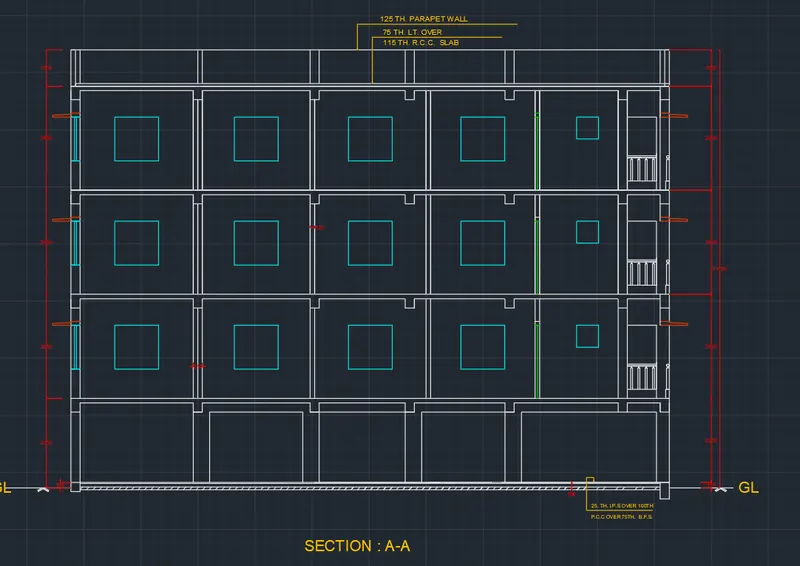
Total Result :
1.Plan
2. Section A-A
3. Section B-B