Creating 3D Isometric view of various structural elements in AutoCAD
AIM :Creating a 3d Isometric view of the building with plan and elevation give
INTRODUCTION : 3d isometric view are 3 dimensions view that we can track the object view in all views
Command used are line , offcet , Trim , Dimensions linear , Text .
PROCEDURE:
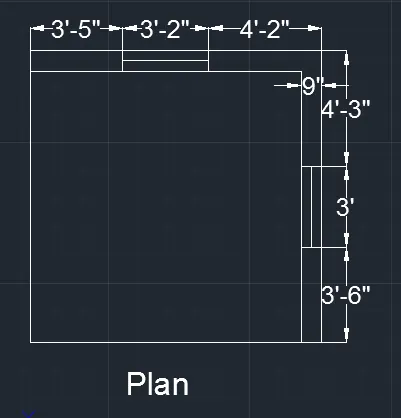
Step : line of distance 3'6", 3', 4'3" in y axis and line of dimesion of 4'2", 3'2",3'5" in x axis
Step : offcet of distance 9" for the wall thickness and offcet of 1'6" and 1'6"in line x and y for window
Step: Trim all the corner edges of the wall
Step : command Dt for the text and edit the text
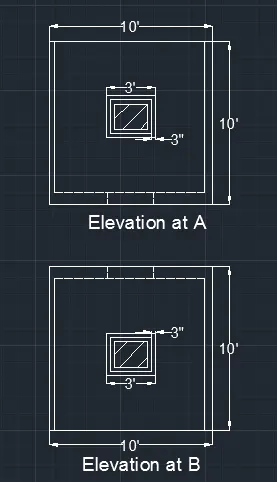
Step 1: line of distance 10'in y axis and line of dimesion of 10' x axis
Step 2: offcet of distance 9" for the wall thickness and offcet of 1'6" and 1'6"in line x and y for window
Step 3: Trim all the corner edges of the wall
Step 4: command move and set the window at the mid point if the room
Step 5: command Dt for the text and edit the text
Step 6: Mirror command to mirror the opposite image
AIM :Creating the 3D View of the Building Façade and Also the detail of the window.
INTRODUCTION : 3d isometric view are 3 dimensions view that we can track the object view in all views
Command used are line , offcet , Trim , Dimensions linear , Text .
PROCEDURE:
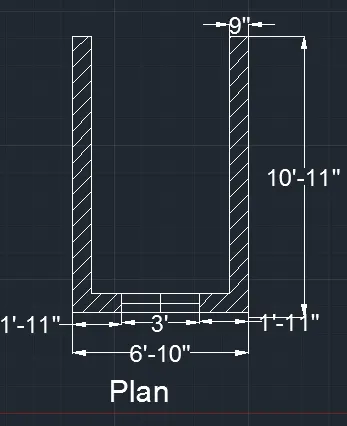
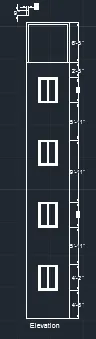
Step 1: line of distance 6'10" in x axis and 10'11"in y axis
Step 2: offcet of distance 9" for the wall thickness and offcet of 1'6" and 1'6"in line x for window
Step 3: Trim all the corner edges of the wall
Step 4: command hatch and set to wall hatch
Step 5: command Dt for the text and edit the text
Step 6: Command DIM of the dimesions linear
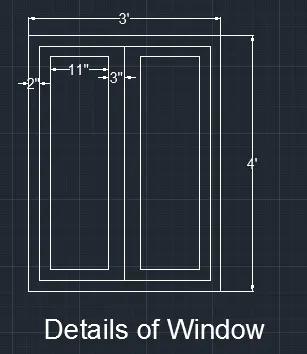
Step 1: line of distance 3' in X and 3' in y axis
Step 2: offcet of distance 3' in x axis and y axis again offcet of 2"in x and y axis and 3"in x and y axis
Step 3: Trim all the corner edges of the wa
Step 4: command Dt for the text and edit the text
Step 5: Command DIM of the dimesions linear
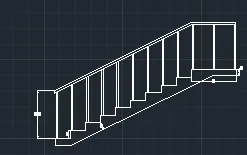
AIM :Create the ismoteric 3d view of a stair with railing as per plan and elevation. Assumimg the size of the balustrades and the hand rails.
INTRODUCTION :Stair case are used in the building for the moment of the floor to floor and it is constructed in the corner of the building and should not create any distabance to any moment in the building
PROCEDURE:
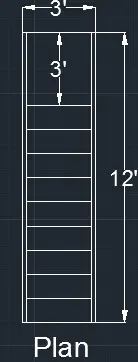
Step 1: line of distance 3' in x axis and 12' in y axis
Step 2: offcet of distance 3' for the stair landing and 2" for hand rails
Step 3: Trim all the corner edges of the stair plan
Step 4: command offcet of 1' in y axis
Step 5: command Dt for the text and edit the text
Step 6: Command DIM of the dimesions linear
Step 1: line of distance 6" in y axis and 1' in y axis and line of distance 3' in y axis for the rallings
Step 2: Command offcet of 1" for the rallings
Step 3: Command copy and copy the 6"line and 1' line in the axis of the of 9 copy
Step 4: Command line of distance 3' in x axis
Step 5: command offcet of 1'6" in x axis and line connecting top and bottom of the stair
Step 6: command Dt for the text and edit the text
Step 7: Command DIM of the dimesions linear
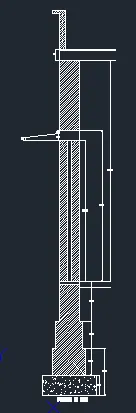
AIM : Creating the 3D view of a Wall with spread footing and aslso Creating the Door opening. Assuming the size of the parpaet and the coping.
INTRODUCTION : Line, offcet , hatch , dim , trim , text , circel , rectangle
PROCEDURE:
Step 1: line of distance 900 in x axis and 7900 in y axis and
Step 2: offcet of distance 3500 , 900 , 3500 in
Step 3: command offcet of 50,50,50 in y axis
Step 4: command circle and join the circle to the line for the door opeaning
Step 4: Trim all the corner edges of the wall plan
Step 5: command Dt for the text and edit the text
Step 6: Command DIM of the dimesions linear
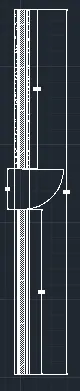
Step 1: line of distance 700 in x axis and 300 in y axis again 700 and 300
Step 2: line dimensions of 150 mm from the upper right corner
Step 3: command offcet of 400,400,700, 2500, 150,1000 in y axis
Step 4: command mirror and mirror the offcet line with mid point
Step 5: command hatch for the concrete footings and wall portion.
Step 6: Trim all the corner edges of the wall plan
Step 7: command Dt for the text and edit the text
Step 8: Command DIM of the dimesions linear