Challenge 8 : Concept Modeling of Seats
1.TITTLE OF THE PROJECT:
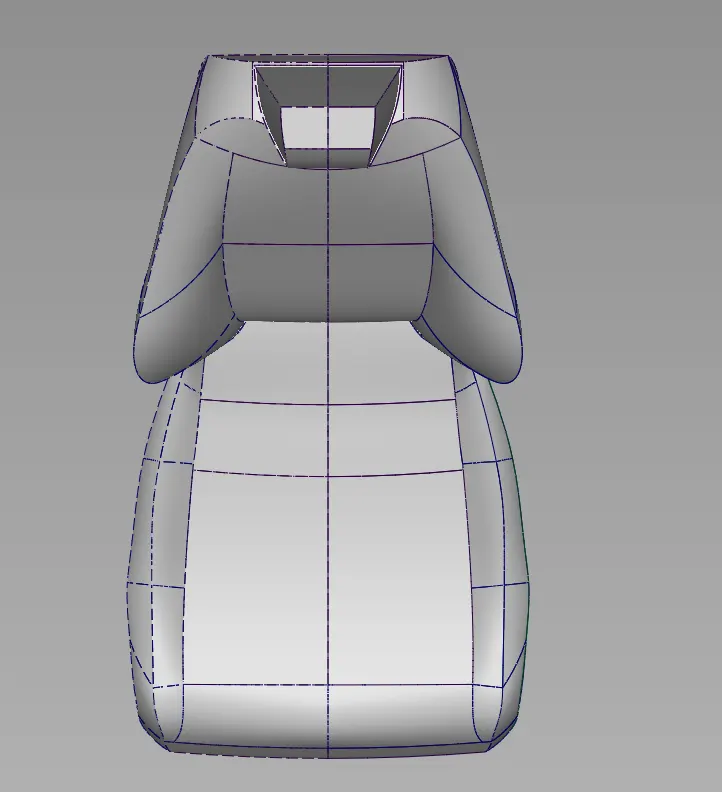
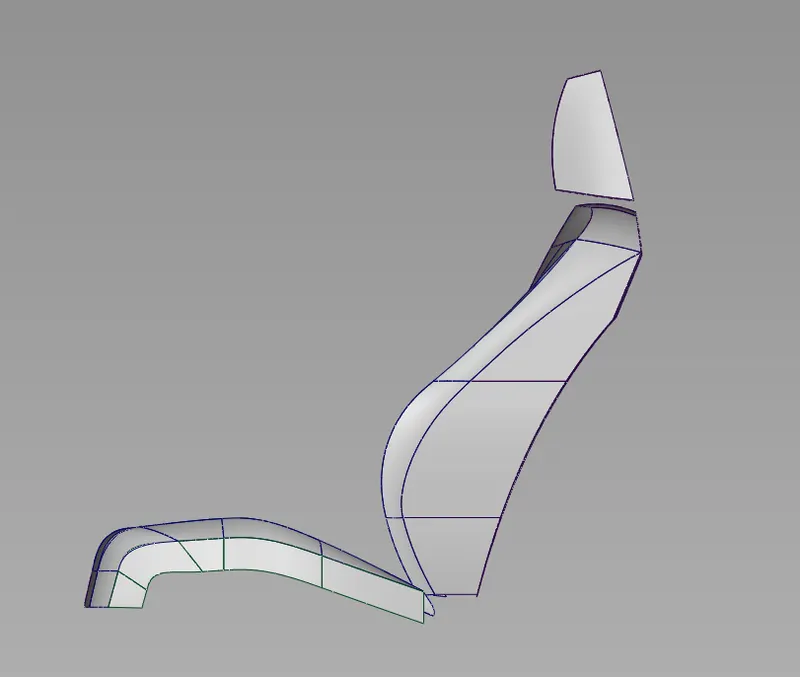
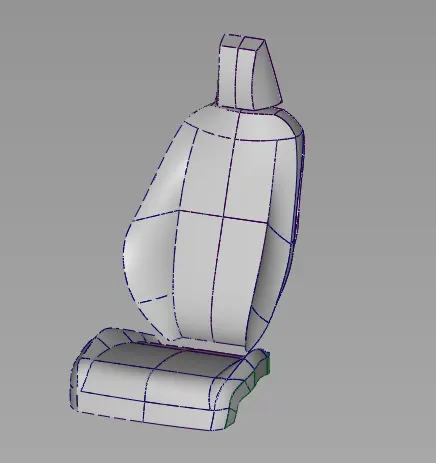
To build the surfaces of seat by using concept modelling.
2.OBJECTIVE:
To achieve good quality shapes of seat by using concept modelling.
3. INTRODUCTION:
Draw the better quality of curve network for achieving the good quality of surfaces.
4.DESIGN METHODOLOGY:
5.DESCRITION:
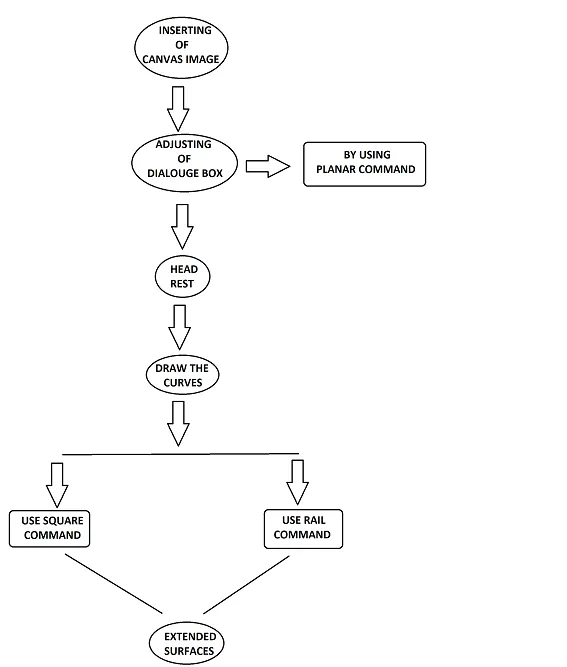
1.Intially insert the canvas image of given blue print.
2.Use the planar surface command for Dialogue box and adjusting of it as required size.
HEAD REST:
3.Intially draw the curves on the head rest.
4.Use rail and square command to generate surfaces.
5.Extended the surfaces and use the Trim command & make it positional.
6.Add the surfaces to one layer and make it symmetrical.
BACK SUPPORT:
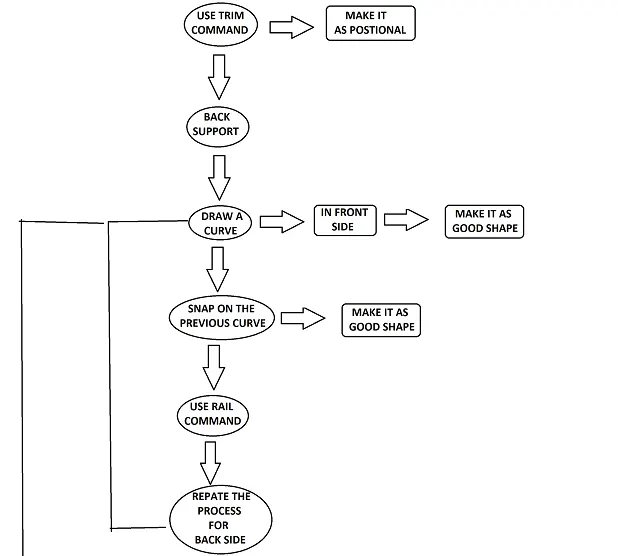
7.Draw the curve at the front side of the back support and adjust it according to the shape.
8.Snap the curve and give it some crown to achieve continuity.
9.Use Rail command to generate front side surface.
10.After that again draw the curve on the back side of back support.
11. Snap the curve and give it some crown to achieve continuity.
12.Use Rail command to generate back side surface.
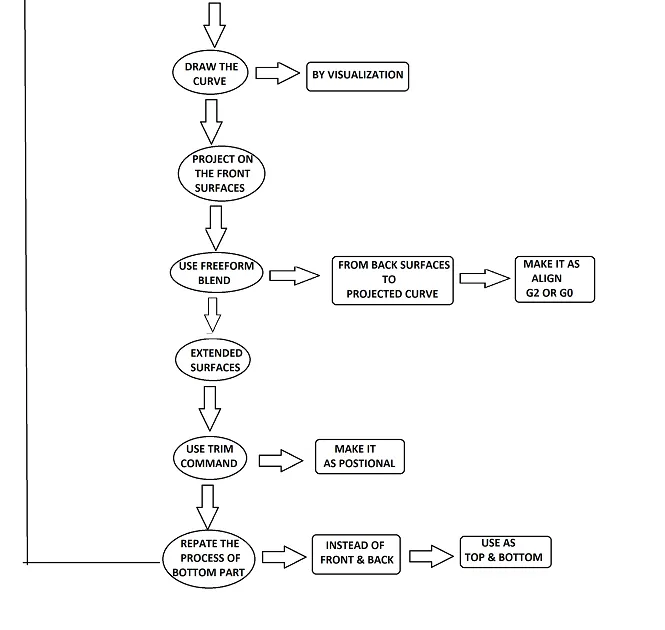
13.Draw the curve according to shape of given blue print and move it according to visualization.
13.Connecting of front & back surfaces we use freeform blend (or) Rail command.
14.Extended the surfaces and use the Trim command & make it positional.
15.After that draw the curve and visualize it to the shape of given blue print.
16.Project the curve on the front side surface.
17.Use freeform blend to the rail surfaces and to the projected curve.
18. Align it to G2 and G0 and add proportional crown.
19.Extended the surfaces and use the Trim command & make it positional.
BOTTOM PART:
20.Draw the curve at down of the bottom part and adjust it according to the shape.
21.Snap the curve and give it some crown to achieve continuity.
22.Use rail command to generate surface.
23.Draw the curve and visualize it according to the shape.
24.Use freeform blend for connecting side surfaces.
25.Align it to G0 and G2.
26.Draw the curve from snapping on the back support.
27.Visualize it according to the shape of given blue print.
28.Project the curve on bottom surfaces.
29.Use freeform blend to the rail surfaces and to the projected curve.
30.Align it to G2 and G0 and add proportional crown.
31.Extended the surfaces and use the Trim command & make it positional.
* ADD ALL THE SURFACES INTO ONE LAYER AND MAKE IT SYMMETRY*
6.UPLOADING OF IMAGES:
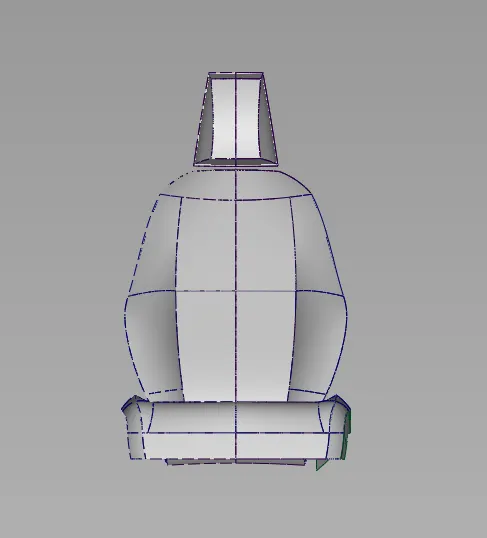
FRONT VIEW
TOP VIEW:
SIDE VIEW:
ISOMETRIC VIEW:
7.CONCLUSION:
Therefore I completed the seat by using concept modelling.