Side crash of BIW Neon car
AIM:-
To setup & run the simulation of Side crash- BIW of NEON and observe the errors and energy changes.
SOFTWARE:-
HYPERWORKS
OBJECTIVES:-
Objectives to check in this model:-
- 1.Check unit system and either follow[Mg mm s] or [Kg mm ms].
- 2.Create appropriate interface ,friction 0.2 and recommended parameters.
- 3.Make sure of no penetrations and intersections.
- 4.Correct rigid bodies if any issues.
- 5.Create rigid walls with friction 0.1.
- 6.Compare the model weight with the full scale 300k nodes model and use added masses to reach target weight 700kg while getting CG about the required range.
- 7.Initial velocity 35 mph.
- 8.Use model checker to ensure good quality.
- 9.Time-step :0.5 to 0.1 microseconds.
- 10.Run 80 ms.
Output requests:-
- Sectional force in the cross member.
- Intrusion at B pillar,hinge pillar and fuel tank region.Provide recommendation on what can help to reduce Fuel tank intrusion.
- Peak velocity of inner node of the door.
PROCEDURE:-
Firstly, select the user profile to RADIOSS.
After changing the user profile, import the solverdeck file.
Goto > menu bar > file > import > solver deck.
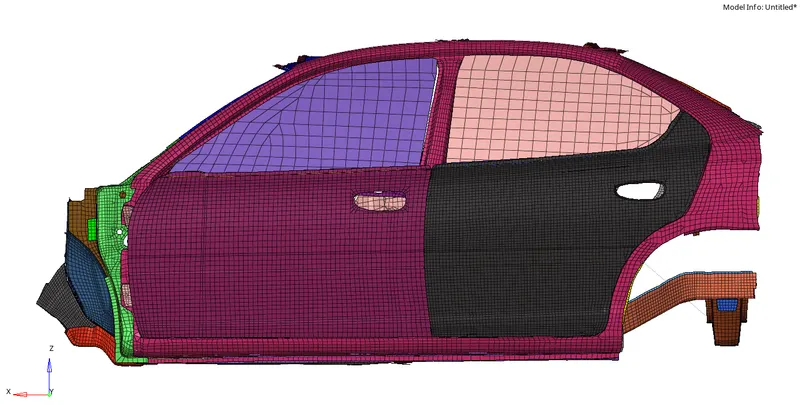
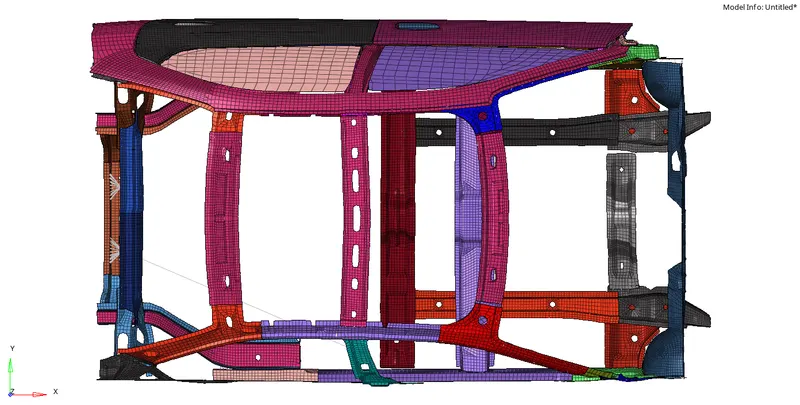
Now check the unit system.
Goto >Tab bar > Cards > Begin card.
In this simulation we are using the [Kg mm ms] unit system.
After checking the unit system, create an interface.
Goto > Tab bar > Groups > right click on it and create.
In this model, we are creating Type 7 Interface.
The recommended parameters are:-
Istf : 4 - It is the gap for stiffness definition, it is the interface stiffness which is the minimum of the master and slave stiffness.
Igap : 2 - It is the gap option flag. Igap = 2 is Variable gap + gap scale correction of the computed gap.
Idel : 2 - It is the node and segment deletion flag. When a 4-node shell, a 3-node shell or a solid element is deleted, the corresponding segment is removed from the master side of the interface. It is also removed in case of explicit deletion using Radioss Engine keyword /DEL in the Engine file.
Additionally, non-connected nodes are removed from the slave side of the interface.
Stmin : 1 - It is the minimum stiffness value which can be used only if Istf value is not equal to 1.
Irem_gap : 1 - The option Irem_gap is used to deactivate slave nodes which are close to elements. But in this case since we put the value as 1 that means there is no deactivation of slave nodes.
Stfac : 2 - Stiffness scale factor applied to the master side of the interface (if Istf is not equal to 1).
Fric : 0.2 - Coulomb friction
inacti : 6 - Deactivation flag of stiffness in case of initial penetrations. But in this case, the value is set to 6 that means the gap is variable with time but initial penetration is computed.
Gapmin : 0.5 - Minimum gap for impact activation.
Iform : 2 - Stiffness (incremental) formulation.
After creating the new interface card delete all the existing interface cards.
Now create a rigid wall with friction 0.1.
Goto > Tab bar > right click > create > rigid wall.
After a rigid wall is created, assign the base node on the center of the bumper and normal z=1 as the car is moving towards the rigid wall.
Slide : 2 - sliding with friction
Dsearch : 1000 - Distance for slave search / Search distance.
Diameter : 254 - Diameter of the rigid wall / pole.
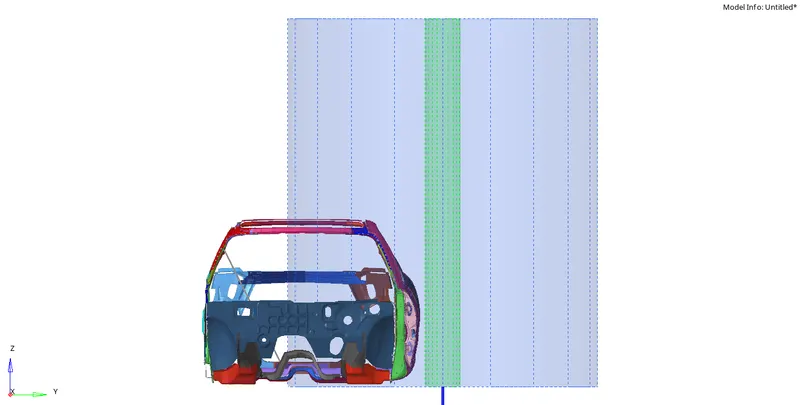
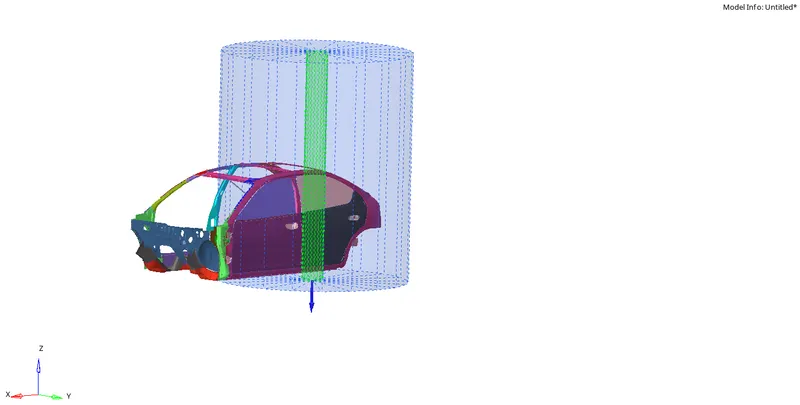
After assigning the values of the rigid wall, create a balancing Mass and COG to the car.
To add the mass on the car body.
Goto > Tab bar > right click on the tab area > Create > Solver Mass.
After solver mass is created, select the nodes on the cross sections and add constant mass on it.
Similarly create another solver, select the nodes on the other cross section and add constant mass on it.
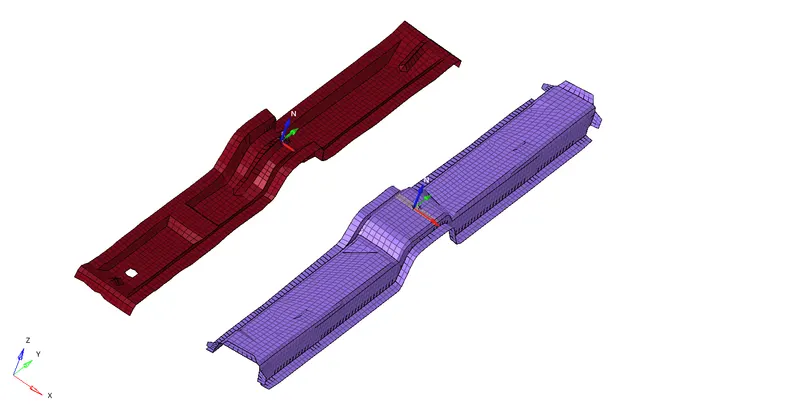
After the mass is created, Check the mass value matching as per required.
Goto > menu bar > Tools > Mass details > Mass, Cog and Inertia.
COG check it point, It should be on the center of the cross section.
After the mass and COG is applied. Create initial velocity.
Goto > Tab bar > right click on the solver browser > create > BOUNDARY CONDITIONS > INIVEL.
Select gmd_id, select nodes of whole components, Enter the value 15.65 in Y-direction as the car collides towards the rigid wall.
After initial velocity, check for penetrations and intersection.
Goto > menu bar > Tools > Penetration check.
Select the interface type 7 which we created, run to check. There are no penetrations and intersections found.
After checking penetrations and intersections, check for errors.
Goto > menu bar > Tools > Model Checker > RadiossBlock.
Select the error right click on it and run.
If there are any errors it will show on the issue count.
After the Model check is done, apply the time-step value tfreq=0.5.
Goto > Tab bar > cards > ENG_ANIM_DT.
After editing the time step, apply run time value Tstop=80.
Goto > Tab bar > cards > ENG_RUN.
Output Request:-
To create a cross section on the Rails.
Goto > Tab bar > solver browser > right click and create > SECT > SECT.
Select three nodes origin node, Axis node and plane node and assign a frame_id
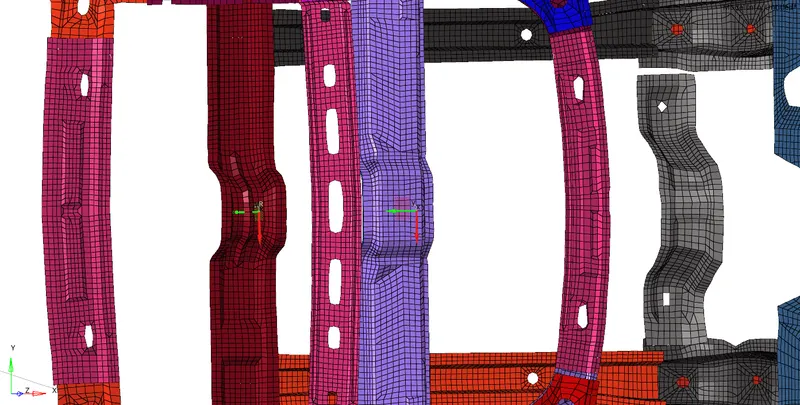
For the cross section we need to assign a local coordinate system using frame.
Goto > Tab bar > solver browser > right click and create > Frame > MOV.
Select the three nodes, enter Iframe= 12 and delta= 0.1, alpha=1.67.
After assigning all the values for the cross section, select grshell_id and create an select element near the frame.
Similarly, create another cross section on rail 2.
After cross sections are created, call them in the output block by creating a card as a cross section.
To create, intrusions on the B pillar, hinge and fuel tank.
Goto > Tab bar > solver browser > right click and create > SKEW > MOV.
Select the origin node, Axis node and plane node and this will create the coordinates system for the intrusion.
Similarly create skew for hinge and fuel tank.
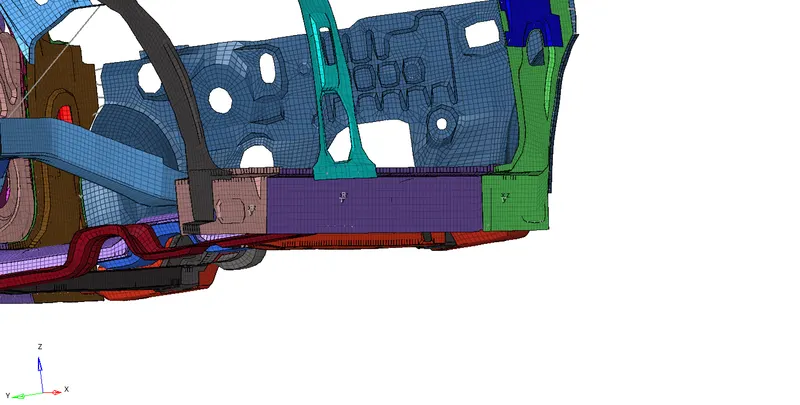
After the skew’s are created. Separately create output block cards for B pillar(rocker box), Hinge and fuel tank.
Assign the entity_id by select nodes for Rocker box (123407), hinge(1291) and fuel tank(125372) and iskew by selecting the local coordinate.
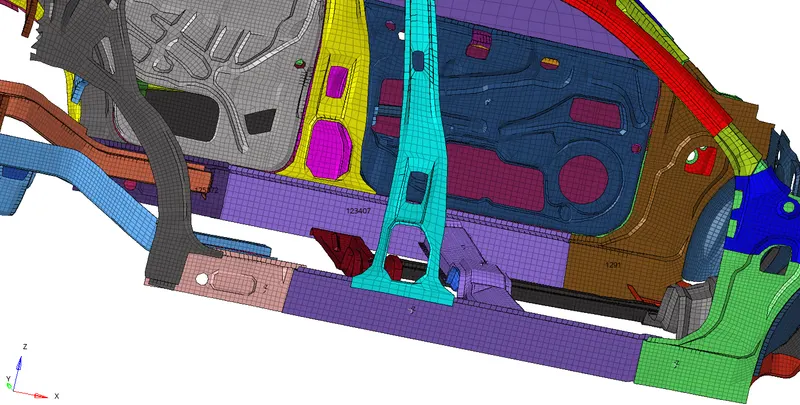
Now applying Peak velocity to the inner node front door.
Goto > Tab bar > Model Browser > Output Blocks > create > Peak velocity.
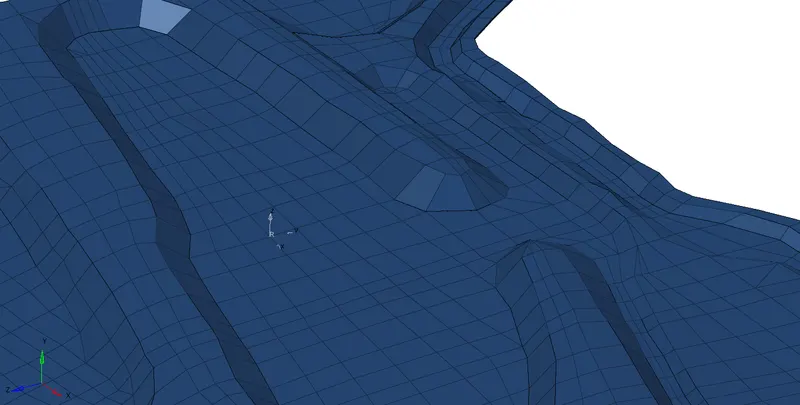
Select entity_id by selecting a node (338504) on the door and assign a iskew by creating a movable skew.
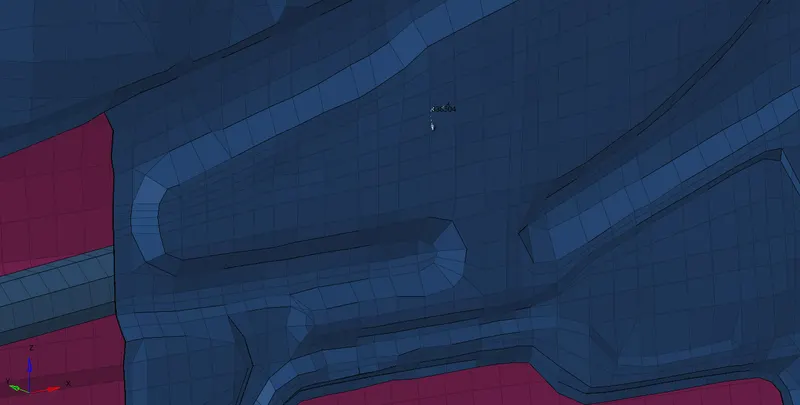
Errors which have been found after running the model checker need to be cleared. There are two methods to clear the errors.
- To export the radioss file and open in hypercrash and then delete the error that is not assigned. Then export it back to hypermesh.
Note: After the file is imported to hypermesh delete the unsupportable card.
2.In hypermesh after running the model checker, Apply auto correction.
After clearing all the errors and checking the values. Run the radioss, including connectors and option value as -nt 4.
After the simulation is runned it creates .h3d,.T01,.out, starter file and engine file.
To view animate file. Open hyperview, load the .h3d file and apply.
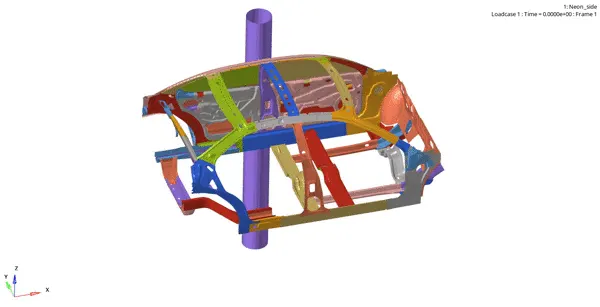
To plot graphs. Open hypergraph, load the .T01 file and apply load conditions.
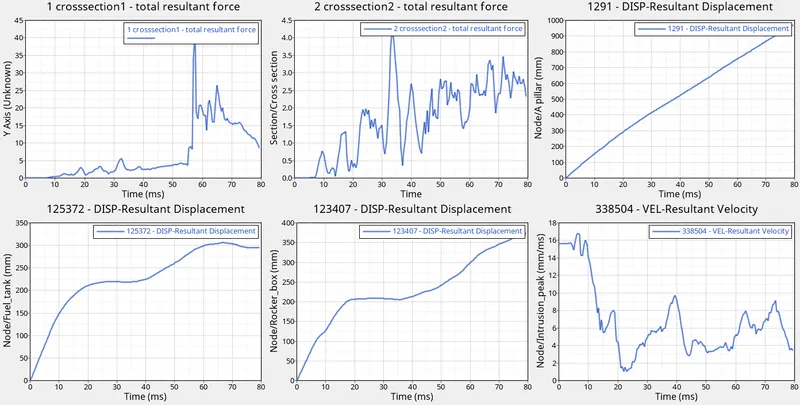
OBSERVATION:-
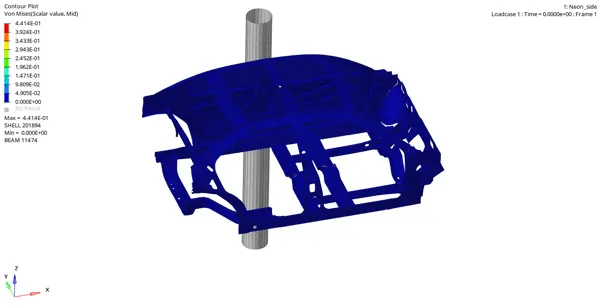
From the animation we can see that the car's left portion is being impacted with a cylindrical rigid body.
During the impact the left portion deforms more than the right portion. Due to which there is risk of life if the car model is sent for production.
Cross section
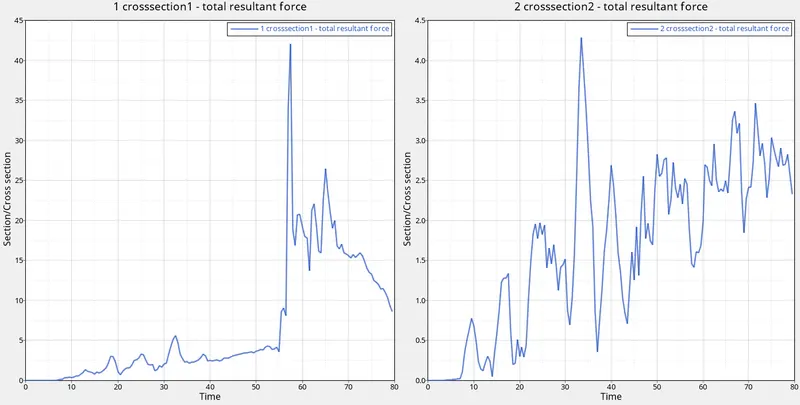
In animation, the rail 2 has more deformation than the rail 1, the point of impact is positioned on the B- pillar as rail 2 is located below the B-pillar.
Fuel tank
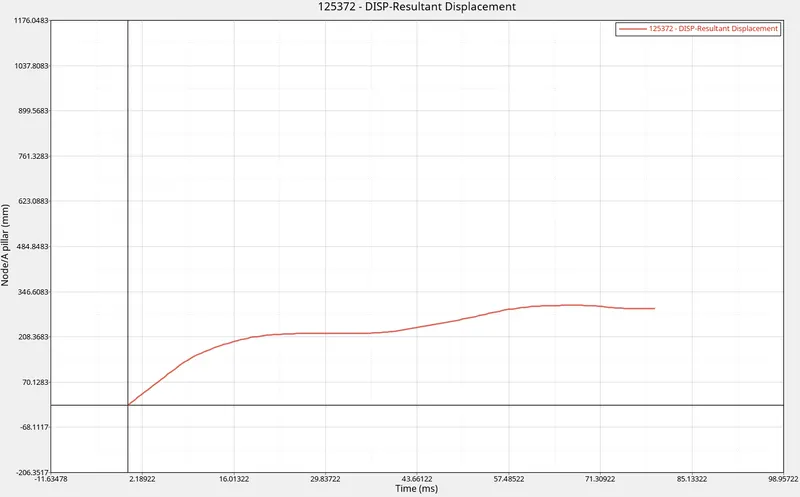
In animation, the fuel tank intrusion has deformed sharply because of less cross sections and stiffness of material.
It can be avoided by adding more rails of higher stiffness value.
Hinge
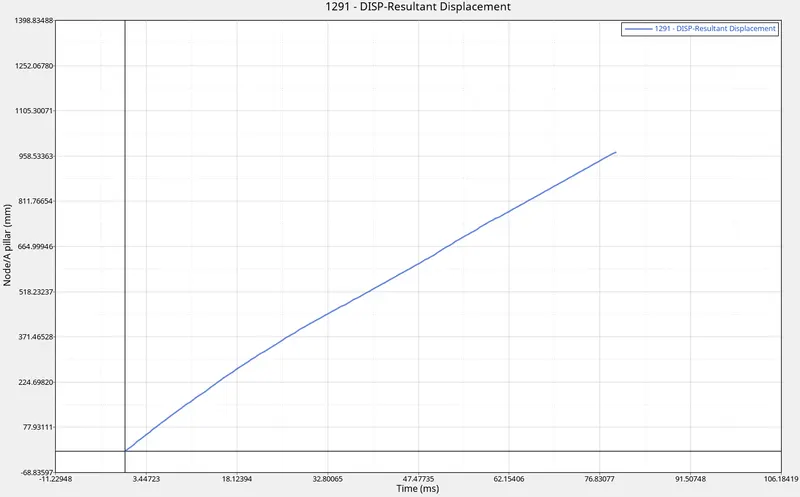
In animation, the hinge intrusion deformation rotated it towards the cylindrical rigid body.
B-pillar
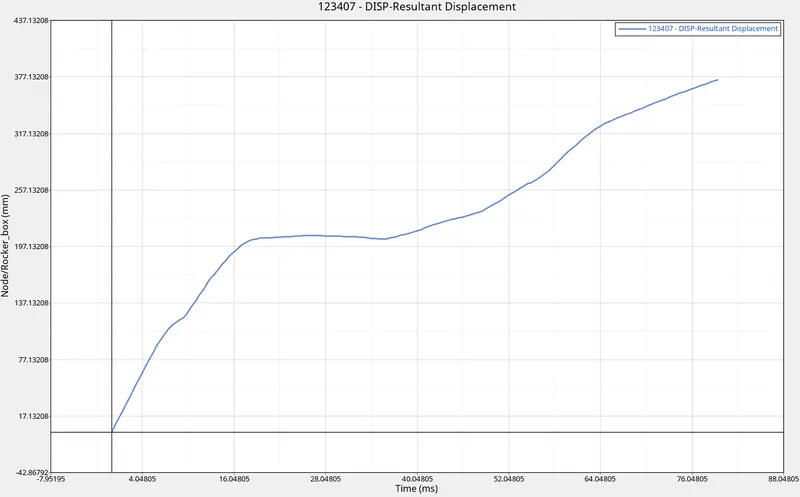
In animation, the deformation is more drastic due to the B-pillar directly contacting the cylindrical Rigid wall.
PEAK VELOCITY
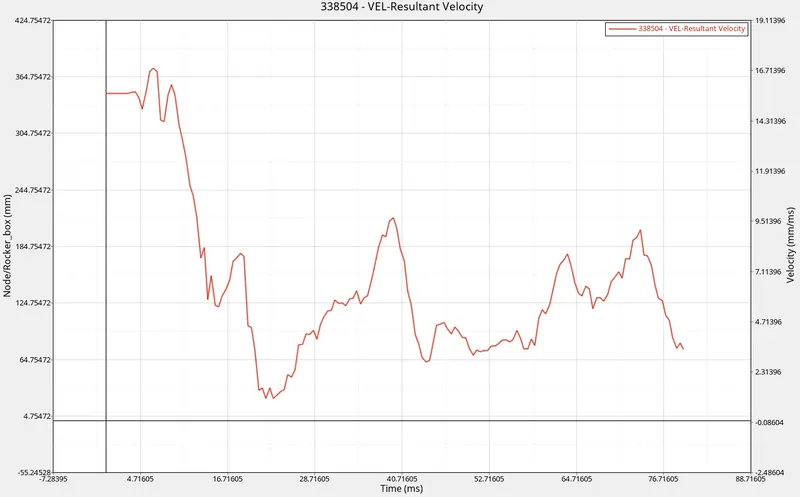
As we see in the graph when the B-pillar collide at 3.9ms the velocity starts fluctuating untill the crash is completed. As the fluction is maintained at 1-10mm/ms.
RESULT & CONCLUSION:-
|
CYCLE |
TIME |
TIME-STEP |
ERROR |
I-ENERGY |
K-ENERGY T |
K-ENERGY R |
MAS.ERR |
|
80000 |
80.00 |
0.1000E-02 |
-7.7% |
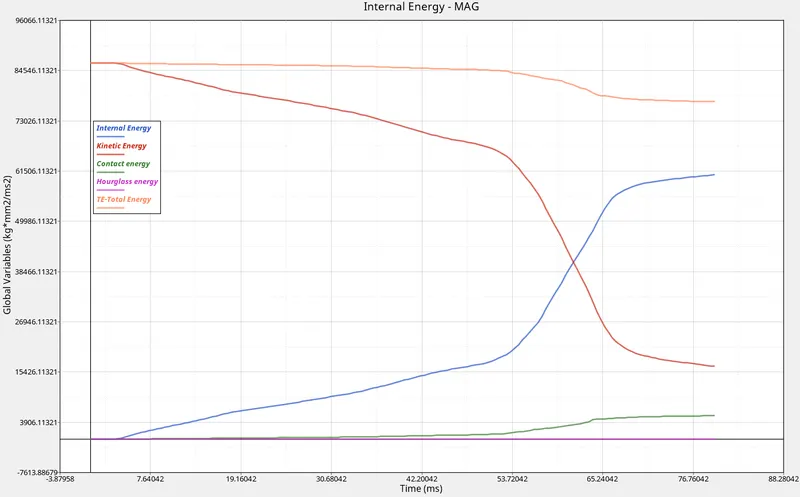
0.6077E+05 |
0.1665E+05 |
16.88 |
0.1111E-01 |
The side crash model is setuped, simulated and runned successfully without any error.
IDIOMS USED:
BIW:
Body in white simply called as BIW is a manufacturing stage in automotive industries where all the components of a car body (before painting), barring moving parts (e.g., hoods, fenders, etc.), trims (e.g., glass, seats, etc.), or chassis subassemblies, have been welded together. All these sheet metal components are welded together to form a vehicle structure.
INTERFACES:
Interfaces are defined to model how parts interact when they come into contact with each other. In this project we are creating a Type 7 interface.
Type 7 interface:
Type 7 interface is a node to surface type of contact. It is a general purpose contact and is used to simulate all conditions. It provides a cylindrical gap area around the edges which makes it more accurate. The main advantage of interface type 7 is that the stiffness is not constant and increases with the penetration preventing the node from going through the shell mid-surface.
RIGID WALL:
Rigid walls allow for an easy way to define an interface between a rigid surface and nodes of a deformable body. A rigid wall is defined by a surface type and a group of slave nodes. It is a concrete wall which will be fixed in one place. It is plotted in this case to perform a crash analysis on the body. It can sustain enough load to perform a crash analysis.
Center of gravity (COG):
Center of gravity simply called a COG is a point from which the weight of a body or system may be considered to act. It is very important that the COG should be at the center of the body during crash analysis so that the animation of the crash looks like a real time scenario.
Initial velocity:
Initial velocity is the velocity of the object before the effect of acceleration which causes the change. It is the velocity of the body at which motion starts where time interval = 0
Penetration and Intersection:
Penetration and intersection plays an important role in simulations. If any solver faces these issues then most of the time the solver may stop or it produces unrealistic results with unrealistic deformations of the component. Penetrations are defined as material thickness of shell elements passing through one another while intersections are defined as individual elements passing through one another.
CROSS-SECTIONS:
A section is a set of nodes and a set of elements. More the sections in the body, better the force distribution and less the pointed load. Less the pointed load we have, less the load will be in a particular region which results in less injuries to the occupant.
Intrusion:
Intrusion results when the energy of the crash exceeds the strength of the vehicle frame, resulting in a violation of the occupant compartment. Injury may then occur either from direct contact with the vehicle structure, or passenger movement as a result of the acceleration imparted to the occupant from the vehicle.
Peak Velocity:
The peak velocity is the highest velocity received during the impact of an object at a given time. We have applied peak velocity at the inner node of the door to calculate the impact an occupant can receive once the car crashes.