Assignment 2
Questions:
-
Check the material properties of the rail component and calculate the speed of sound in steel rail.
-
Calculate the time taken for a shock wave to travel from one end of the rail to the other if the length of the rail is about 1000 mm.
-
Calculate the time taken for sound to travel the length of the rail.
-
Edit the engine file so that the stress wave can be monitored, moving from one end of the rail to the other during impact.
-
Set the frequency of animation output to a time that will give 20 animation steps.
-
Change /print to -10.
a) Initial Setup:
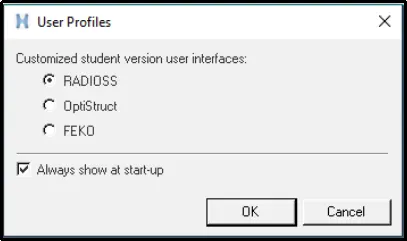
i) Select Radioss from the user interface menu.
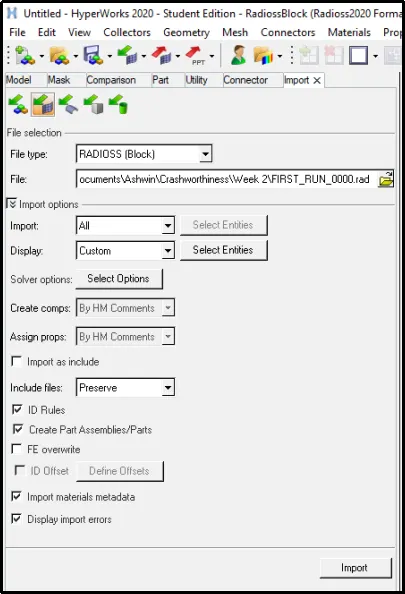
ii) First, we need to import the model into Hypermesh.
iii)To do so, click on Import -> Import Solver Deck -> Choose the starter file -> Import.
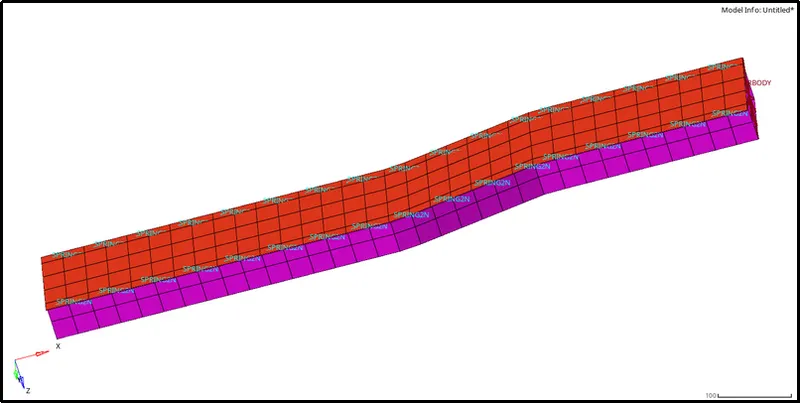
iv) The following model is obtained:
Answers:
A) Check the material properties of the rail component and calculate the speed of sound in steel rail
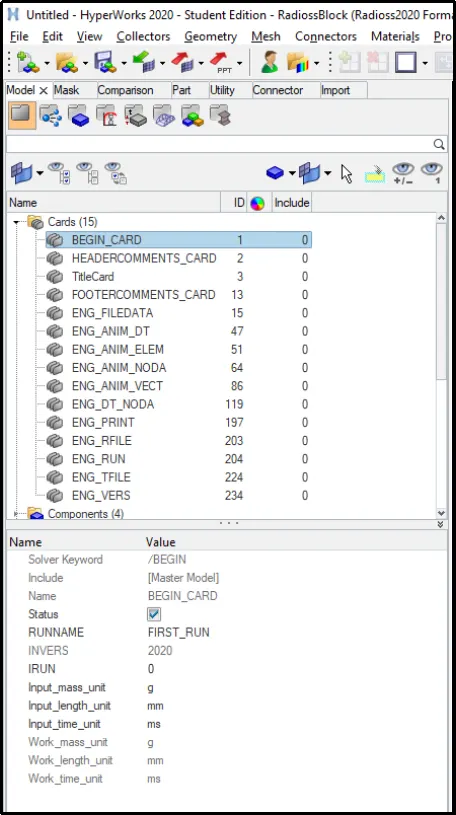
i) To check the units used in the model, click on the BEGIN_CARD.
ii) To check the material properties, click on the Material card.
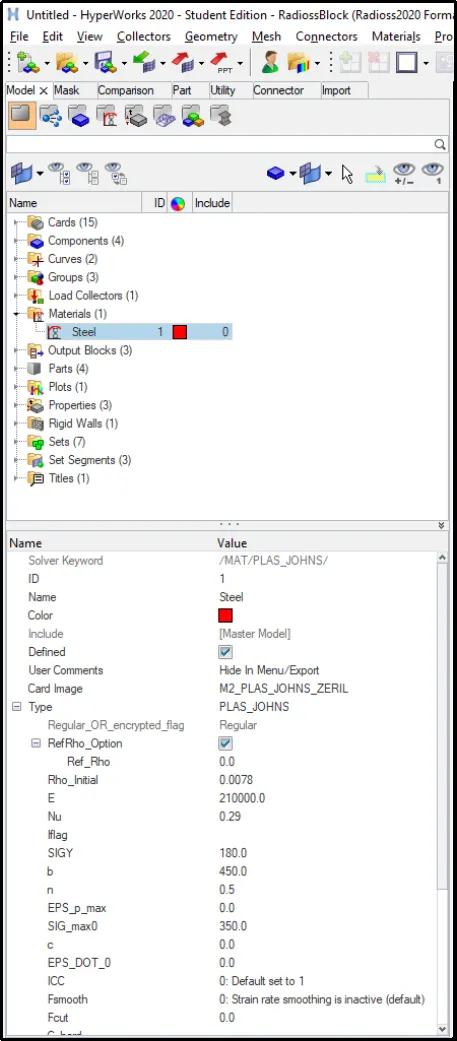
iii) From the above image, we can see that the material is steel and the Young's modulus(E) = 210000 and Density(Rho_Initial)=0.0078.
iv) To calculate the speed of sound in rail,
C =`sqrt(E/rho)`
= `sqrt(210000/0.0078)`
= 5188.75 mm/ms
where,
C= Speed of sound in rail
E= Young's modulus
`rho=`Density of Material
B) Calculate the time taken for a shock wave to travel from one end of the rail to the other if the length of the rail is about 1000 mm
i) To calculate the time taken for the shockwave to travel,
`trianglet=l/C`
= `1000/5188.75`
= 0.193 ms
where,
`trianglet`= Time taken for a shock wave to travel
l= Length of the rail
C= Speed of sound in rail
C) Calculate the time taken for sound to travel the length of the rail
i) Since the time taken for the sound to travel the rail is the same as the time taken for the shockwave to travel the same rail,
`trianglet`= 0.193 ms
where,
`trianglet`= Time taken for a shock wave to travel
D) Edit the engine file so that the stress wave can be monitored, moving from one end of the rail to the other during impact
i) From the question, we can understand that the termination time is equal to the time taken for the sound to travel the length of the rail.
ii) Therefore, `T underset s`=`trianglet` = 0.193 ms
where `Tundersets`=Termination time
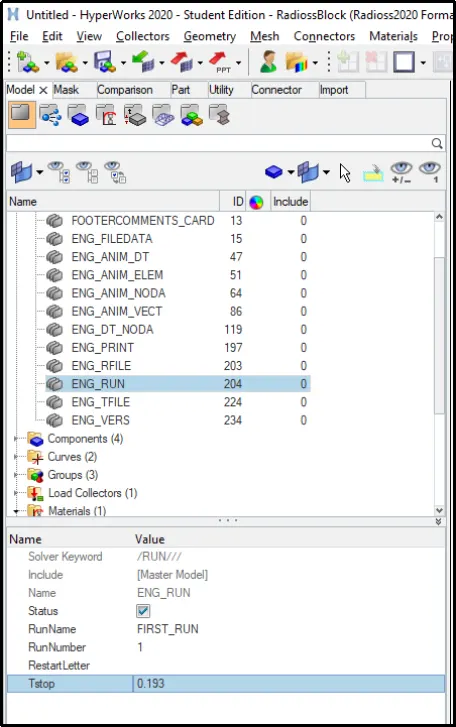
iii) To set the above-shown value, click on the ENG_RUN card -> Set the value of Tstop= 0.193
E) Set the frequency of animation output to a time that will give 20 animation steps
i) To calculate the frequency of the animation output,
`T underset f`=`(Run Time)/(Number of Animation Steps)`
= `0.193/20`
= 0.0097 Hz
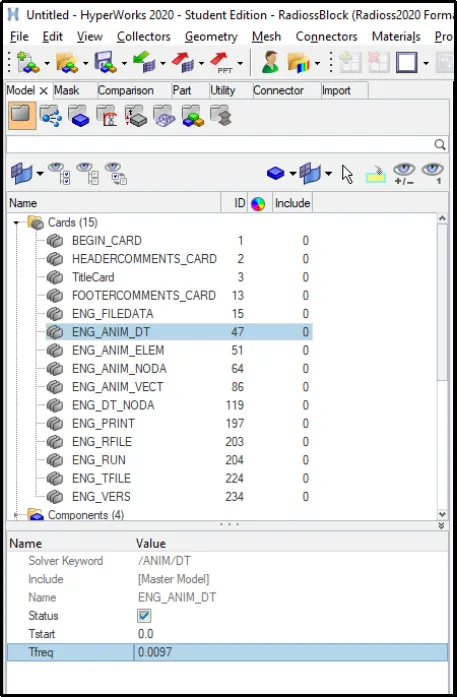
ii) To set the frequency of the animation output in the model, click on ENG_ANIM_DT -> Set the value of Tfreq=0.0097
F) Change /print -10
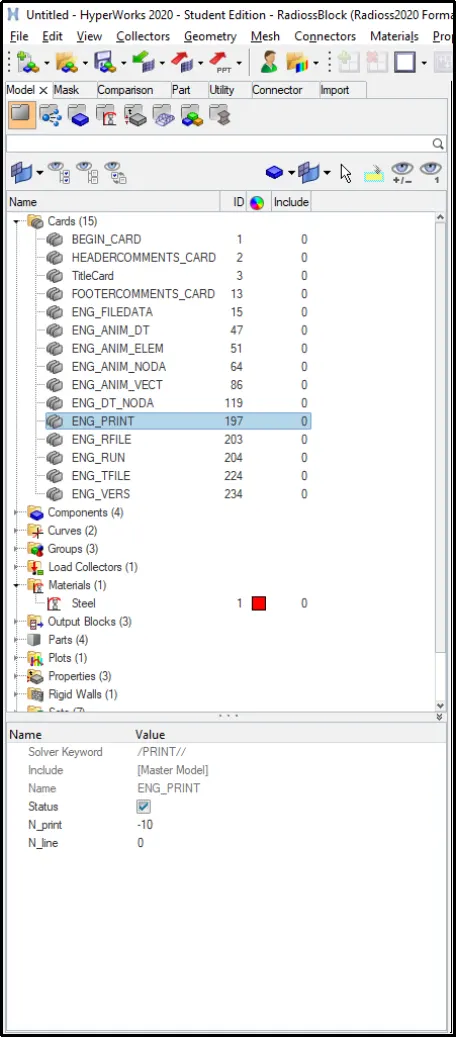
i) To do so, click on ENG_PRINT -> Set the value of N_PRINT=-10.
c) Analysis
i) To run the analysis, click on Analysis -> Radioss -> Select the starter file -> Radioss.

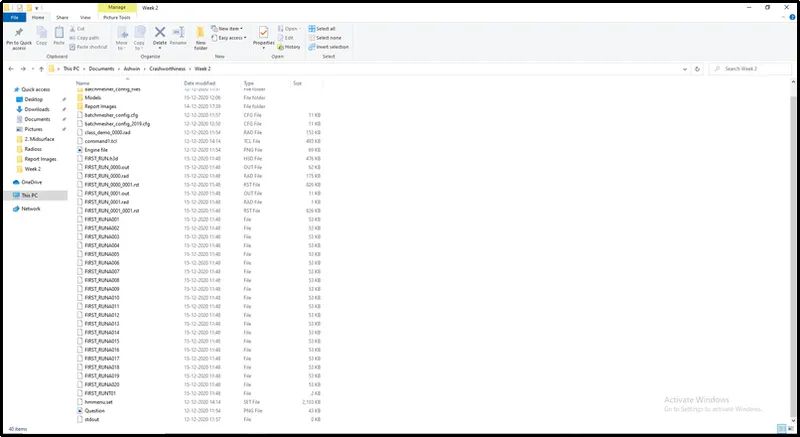
ii) After the analysis is done, we can notice that 20 animation files have been saved in the destination folder.
OBJECTIVE:
- Generate a Tetra mesh for the given component and clear all the elements for tet collapse.
- Generate a Hexa mesh for the given component.
PRE-REQUISITES:
- Finite element method(FEM) is a particular numerical method for solving partial differential equations in two or three space variables.
- To solve a problem, the FEM subdivides a large system into smaller, simpler parts that are called finite elements.
- This is achieved by a particular space discretization in the space dimensions, which is implemented by the construction of a mesh of the object.
- By meshing, we can reduce the number of degrees of freedom from infinite to finite.
- Mathematically, the element thickness specified by the user is assigned half on the element top and half on the bottom side.
- Hence, in order to represent the geometry appropriately, it is important to extract the midsurface and mesh on it.
- A 3-D mesh is the structural build of a 3-D model consisting of polygons. 3D meshes use reference points in X, Y and Z axes to define shapes with height, width and depth.
- There are two types of 3-D meshing:
i) Tetra Meshing (with 3-D Tria Elements)
ii) Hexa Meshing (with 3-D Quad Elements)
- Tetra elements are preferred in the industry as it is easy to mesh a complex geometry.
- Tet collapse is one of the quality parameters, which will be checked while generating Tetrahedral elements.
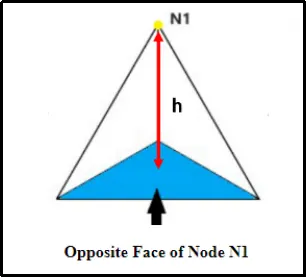
Tet collapse=Min of (h/√A) ÷ 1.24
where, “h” represents the Height, between the Node (N1) and the opposite face of the Triangle, “A” represents the Area of Opposite Face (area of the Triangle).
PROCEDURE:
I) Initial Setup:
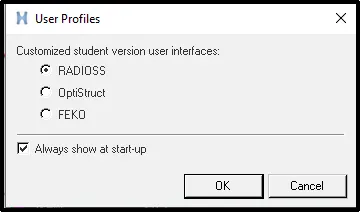
- Select Radioss from the user interface menu.
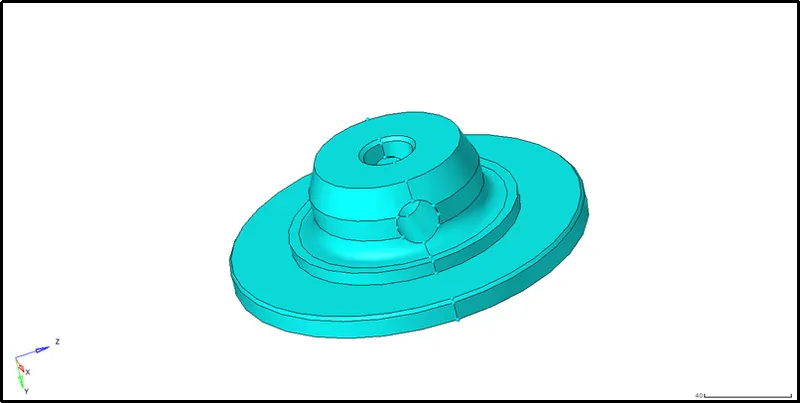
- Click on Import -> Import geometry -> Select the Required file.
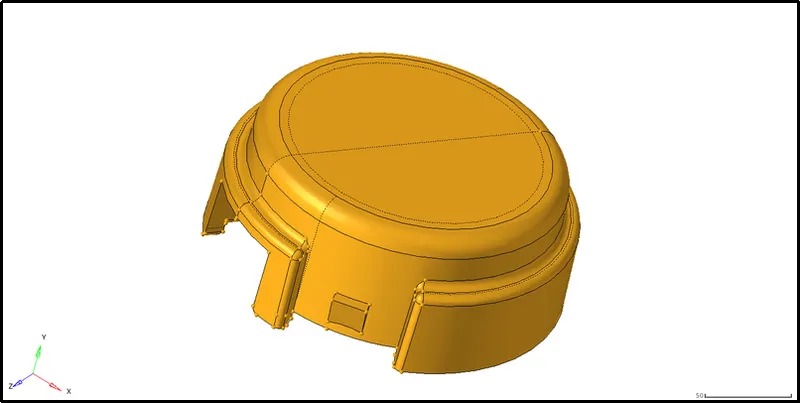
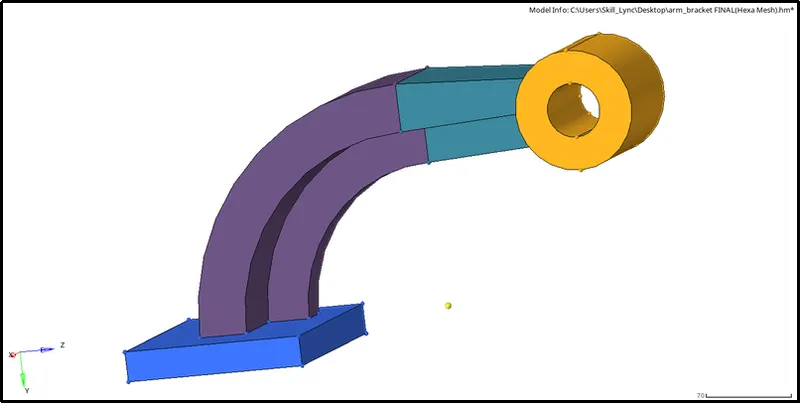
- The following files are displayed:
II)Meshing:
A) Tetra Meshing:
-
There are three methods to generate a Tetra Mesh:
a) Conversion of 2D tria to Tetrahedral Elements:
i) This is one of the best methods to get a tetra mesh.
ii) First, we need to provide a 2-D mesh by clicking on 2-D -> Automesh -> Surface -> Select Surface -> Element size= 5 -> Mesh type= Trias -> Check Align and Size box under Flow -> Mesh.

[Note: Shortcut for Mesh tool is F12]
iii) After obtaining a 2-D mesh make sure all the elements are passing the quality criteria.
iv) Once the quality criterias are met click on 3-D -> Tetra mesh -> Elements -> Mesh.

b) Quick Tetra Mesh:
i) This is one of the easiest methods to generate a tetra mesh.
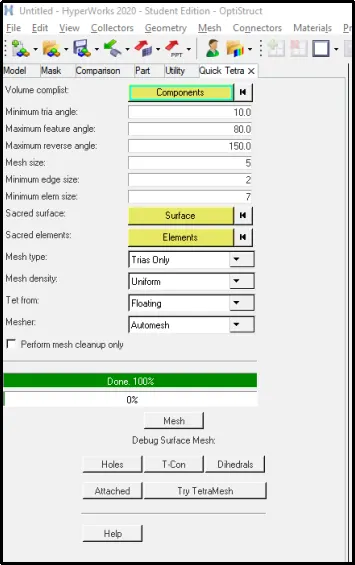
ii) First, we need to click on View -> Utility -> Geom/Mesh -> Quick TetraMesh -> Select component -> Mesh size=6 -> Mesh type -> Trias -> Mesh.
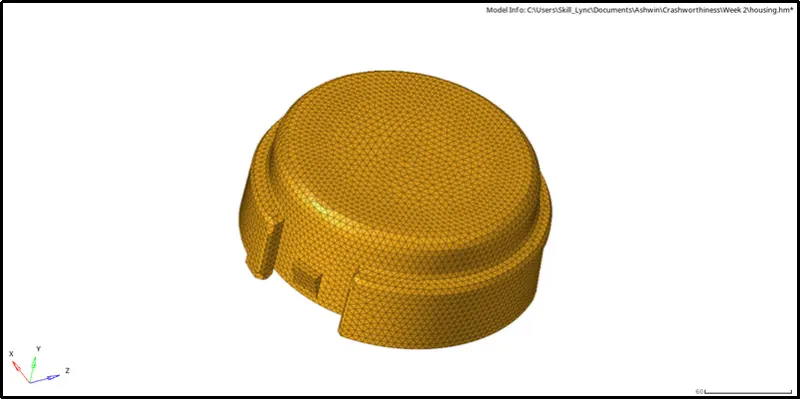
iii)The following image shows the tetra mesh:
c) Using the Volume Tetra Mesh:
i) Click on 3-D -> Tetra mesh -> Volume Tetra -> Surface -> Check the 'Use Curvature' and 'Use Proximity ' boxes -> Mesh.

[Note: By Checking the 'Use Curvature' box we can get a good mesh around curved surfaces]
[Note: By Checking the 'Use Proximity' box we can get the same minimum element size around curved surfaces ]
ii) The following image shows the tetra mesh:
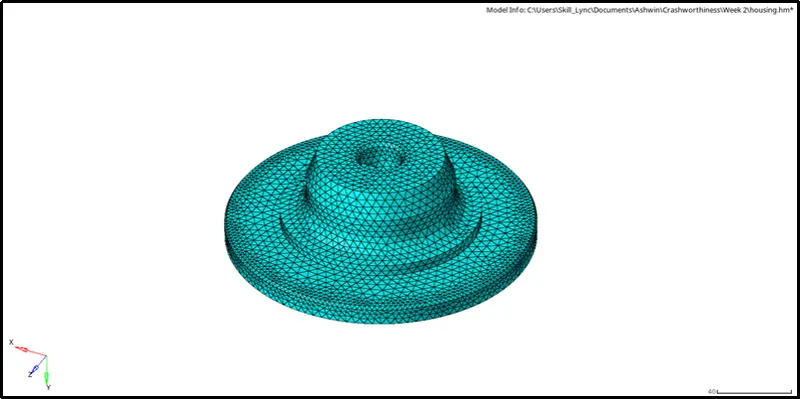
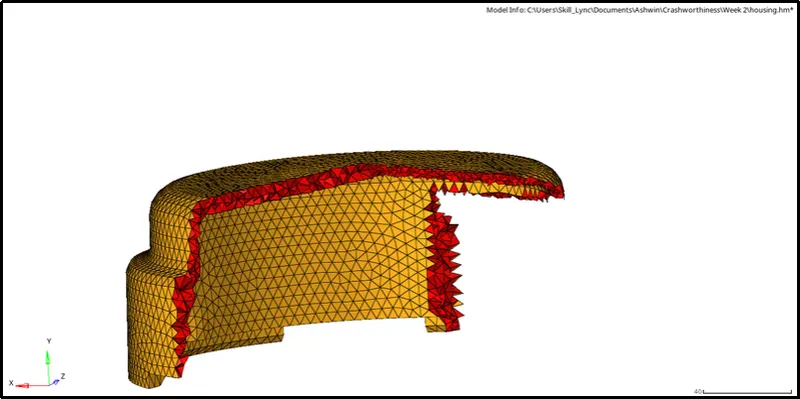
iii) To be sure about getting a tetra mesh, we can mask a few elements and check.
iv) To do so, click on Tool -> Mask -> Elements -> Select a few elements -> Mask.

[Note: Shortcut for Mask tool is F5]
v) The below image shows a successful tetra mesh:
III) Clearing Tet Collapse:
- There are three methods we can use to clear Tet Collapse:
a) Translate tool:
i) Find out all the elements that are failing for tet collapse.
ii) To do so, click on Tool -> Check elements -> 3-D -> Tet Collapse= 0.15 -> Save failed.


iii) To display only the failing elements click on Tool -> Mask -> Retrieve -> Mask -> Reverse All.
iv) Click on Tool -> Translate -> Select Node -> Select N1, N2 and N3 (based on direction the selected node needs to move) -> Magnitude=0.1 -> Translate +/ Translate-.

b) Distance tool:
i) Find out all the elements that are failing for tet collapse.
ii) To do so, click on Tool -> Check elements -> 3-D -> Tet Collapse= 0.15 -> Save failed.
iii) To display only the failing elements click on Tool -> Mask -> Retrieve -> Mask -> Reverse All.
iv) Click on Geom -> Distance -> Two Nodes -> Increase or Decrease distance by entering a value in the box.

[Note: Shortcut for Distance tool is F4]
c) Tetra Remesh:
i) We have to first enter tet collapse value by clicking on 3-D -> Tetra mesh -> Tetra mesh Parameters -> Tet Collapse= 0.15 -> Min Tetra size = 2.

ii) Now click on 3-D -> Tetra mesh -> Tetra remesh -> Select all the elements -> Remesh.

iii) The below-shown image shows all the elements passing for tet collapse:

B) Hexa Meshing:
-
There are a few methods to generate a Hexa Mesh:
a) Element Offset:
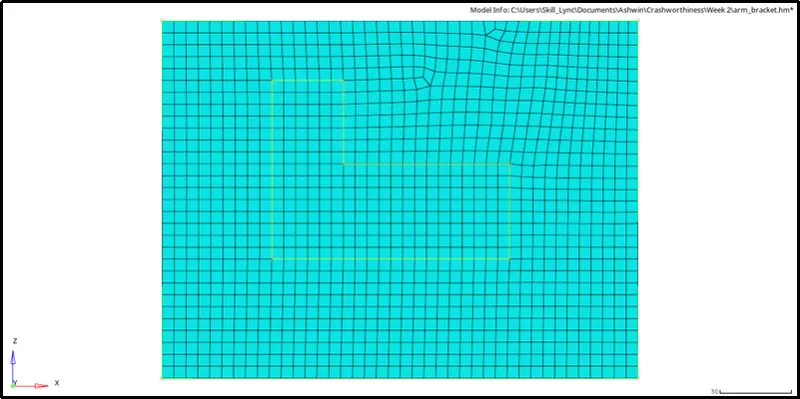
i) Firstly create a 2-D mesh using only quads on the surface.
ii) To do so, click on 2D-> Automesh -> Surface -> Select Surface -> Element size= 10 -> Mesh type= Quads -> Mesh.

iii) The below-shown image shows a 2-D quad mesh on the surface:
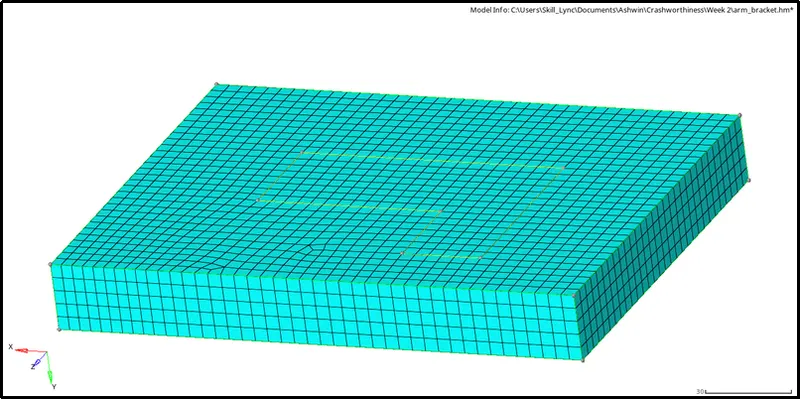
iv) To create a 3-D mesh, click on 3-D -> Element Offset -> Solid Layers -> Select the 2-D elements -> Number of layers=5 -> Initial Offset=0 -> Total thickness =25 -> Offset +.

v) The below-shown image shows a 3-D Hexa mesh:
b) Spin:
i) To use this method we first have to create a central node for the curved arm.
ii) To do so, click on Geom -> Distance -> Three nodes -> Long press and select the three nodes on the curved line -> Circle center.

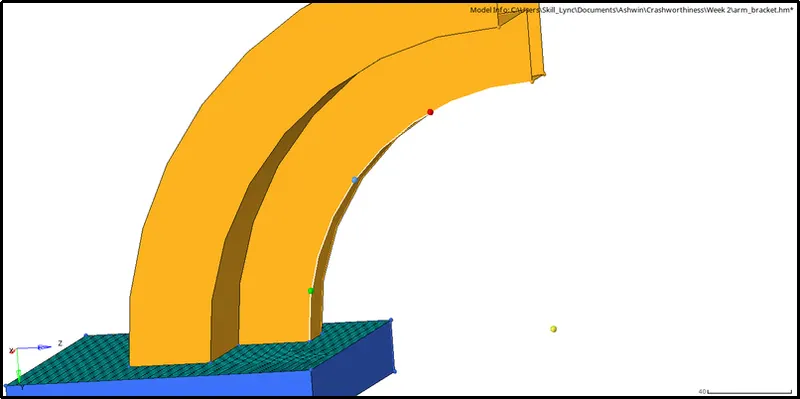
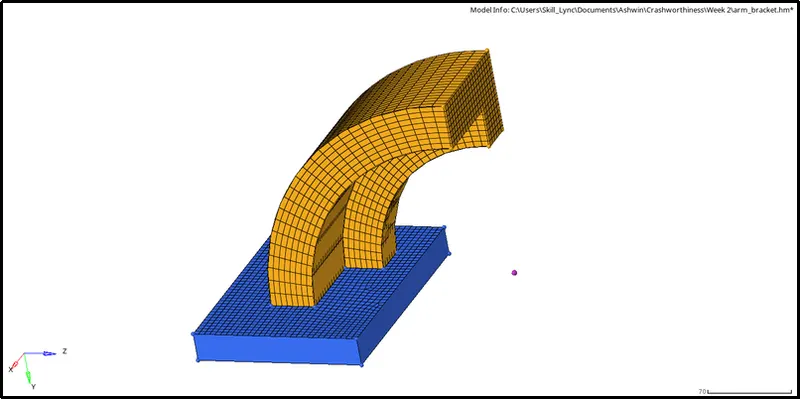
iii) Now, click on 3-D -> Spin -> Select the elements from the base surface -> Angle =90 -> On spin =25 -> Select N1,N2,N3 and B nodes accordingly -> Spin+/Spin-.

iv) The below-shown image shows a 3-D Hexa mesh:
c) Linear Solid:
i) Create a 2-D mesh on the unmeshed end of the straight arm by clicking on 2D-> Automesh -> Surface -> Select Surface -> Element size= 10 -> Mesh type= Quads -> Mesh.
ii) The number of elements on both sides should match perfectly.
iii) To create a face on one end of the arm, click on Tool -> Faces -> Elements -> Select the elements -> Find Faces.

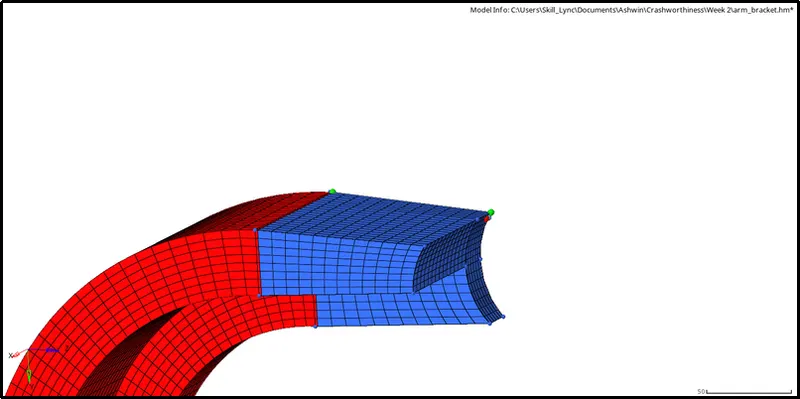
iii) To create a 3-D mesh, click on 3-D -> Linear Solid -> Select Elements from one Side -> Select N1,N2,N3 and B nodes accordingly -> Select Elements from the other Side -> Select N1,N2,N3 and B nodes accordingly -> Solids.

[Note: Select the N1,N2 and N3 nodes on both sides ]
iv) The below-shown image shows a 3-D Hexa mesh:
d) Solid Map:
i) Create a 2-D mesh on one end of the boss by clicking on 2D-> Automesh -> Surface -> Select Surface -> Element size= 10 -> Mesh type= Quads -> Mesh.
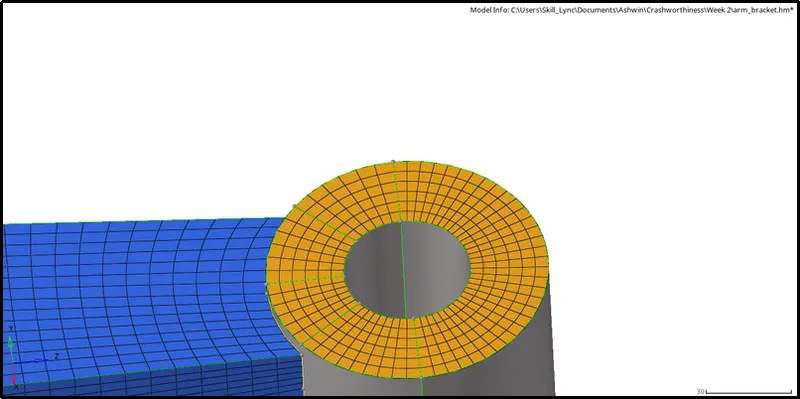
ii) To create a 3-D mesh, click on 3-D -> Solid Map -> General -> Source Geometry-None -> Select Desination Geometry -> Select the 2-D elements -> Along Geometry=mixed -> Select all the nodes and lines accordingly-> Mesh.

iv) The below-shown image shows a 3-D Hexa mesh:
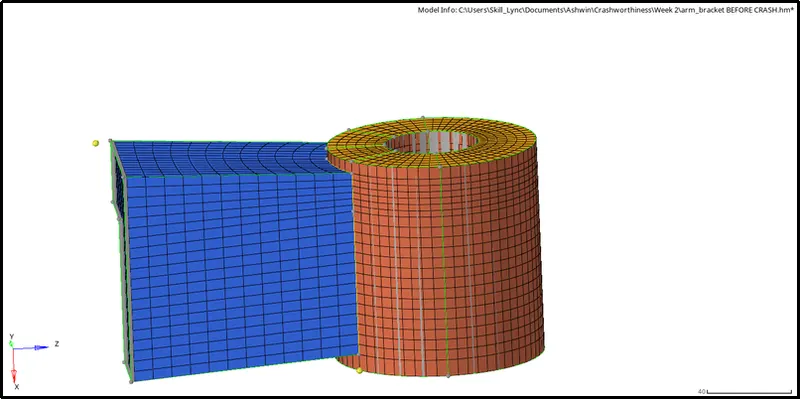
RESULT:
- Calculated all the values needed for the questions and entered them into the model to get the animation file.
- Generated a Tetra mesh using various methods.
- Cleared Tet Collapse for all failing elements.
- Generated a Hexa mesh using various methods.
CONCLUSION:
- Studied about starter and engine files and learnt how to edit them.
- Studied about different types of 3-D meshing.
- Learnt different ways to generate Tetra Mesh.
- Learnt different ways to clear Tet Collapse.
- Learnt different ways to generate THexa Mesh.