Advanced Sheet Metal Design Using NX Cad Challenge_7_ Metal bracket-II
ASSIGNMENT SEVEN -METAL_BRACKET
Objective:-to create metal bracket by performing various operation of advanced sheet metal .to create engineering features like perforating,blanking,bending,embossing etc.
Introduction:-
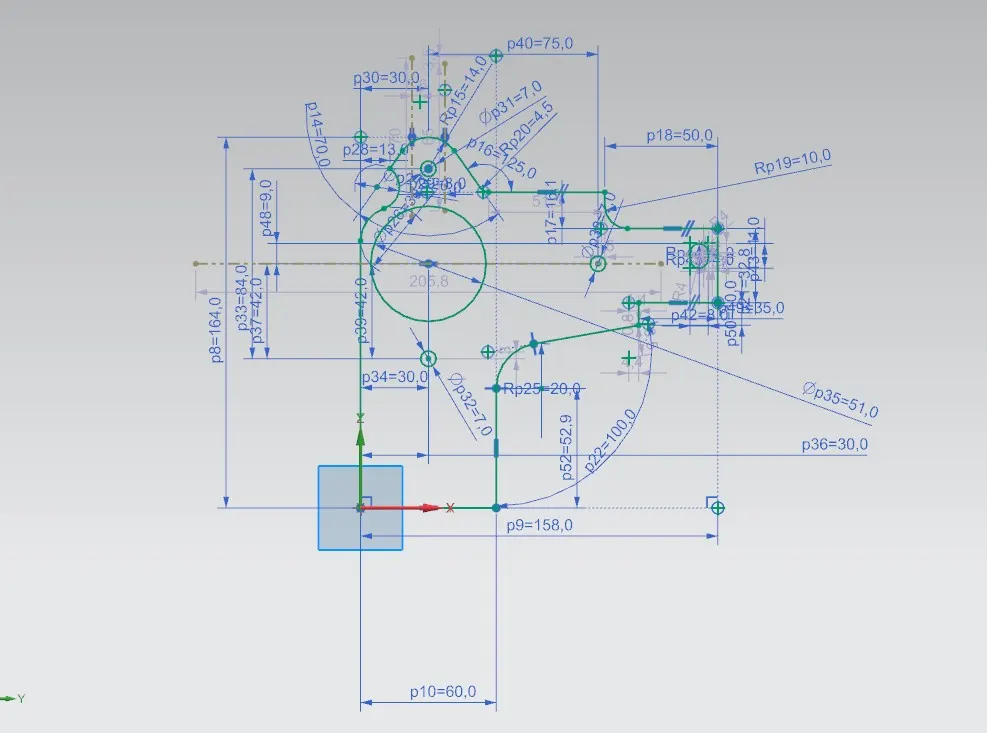
Step:-1 Draw a sketch for metal bracket by taking plane XY.
Go to ribbon bar Direct sketch select sketch and draw a sketch for it.which include various features.
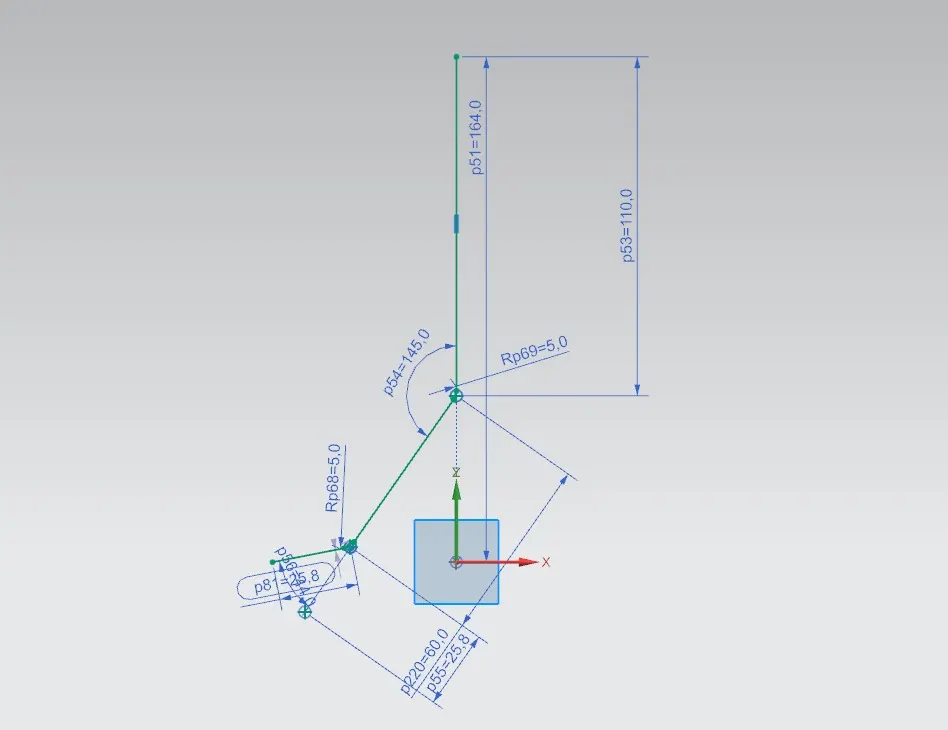
Step:-2 In this will draw a new sketch by taking plane YZ.which is one side view of bracket.draw a line then make an angle of 145 deg.give fillet of radius five at corner then again make an angle of 44 deg with horizontal then fillet of 5mm.
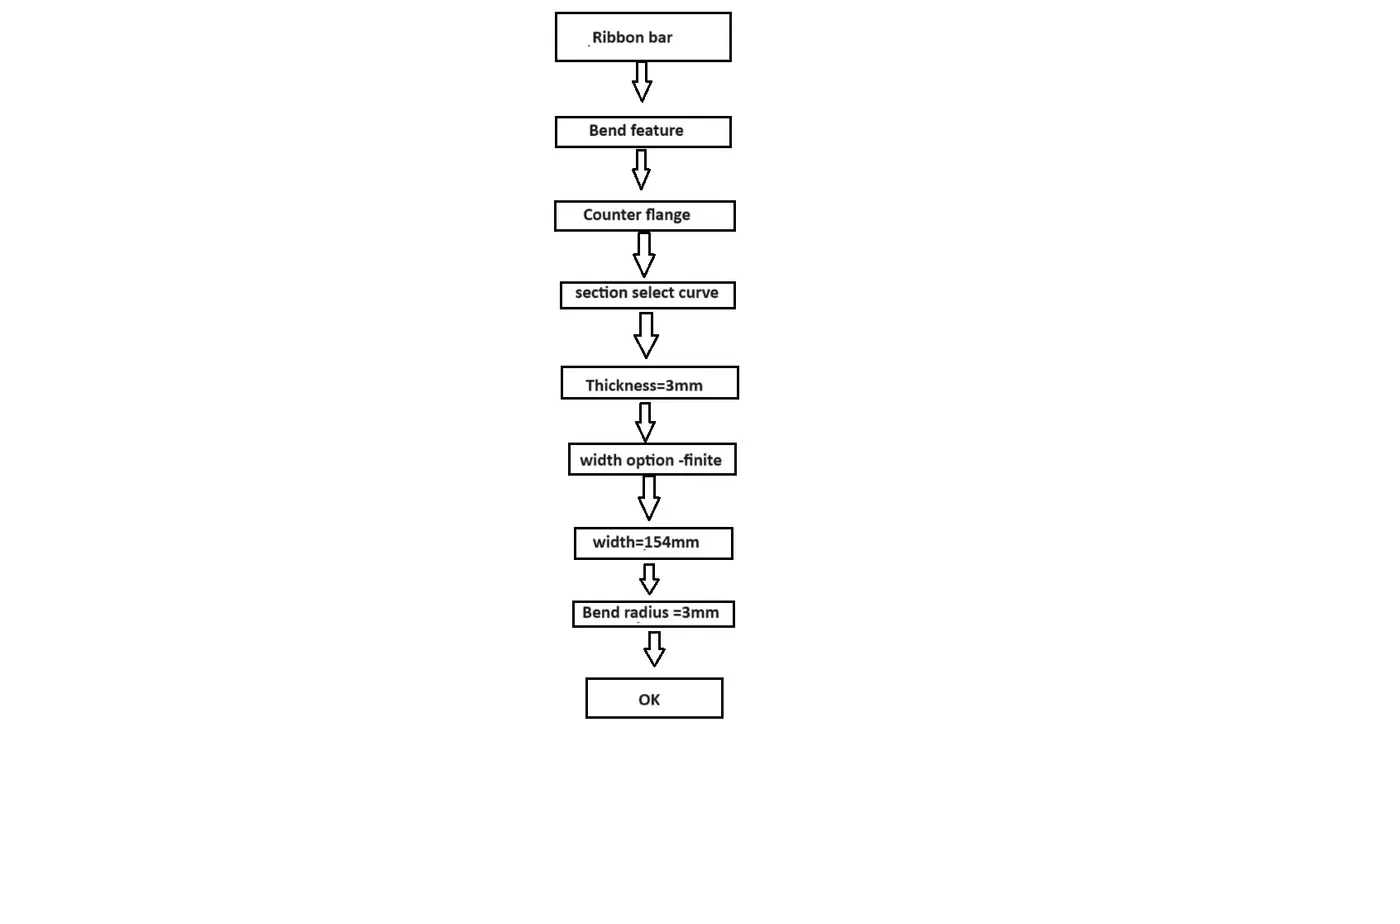
Step:-3 Counter Flange: Ribbon bar-bend feature-counter flange.
To the bend feature there is a counter flange option take that and extrude the sketch by 154mm and 3mm thickness.
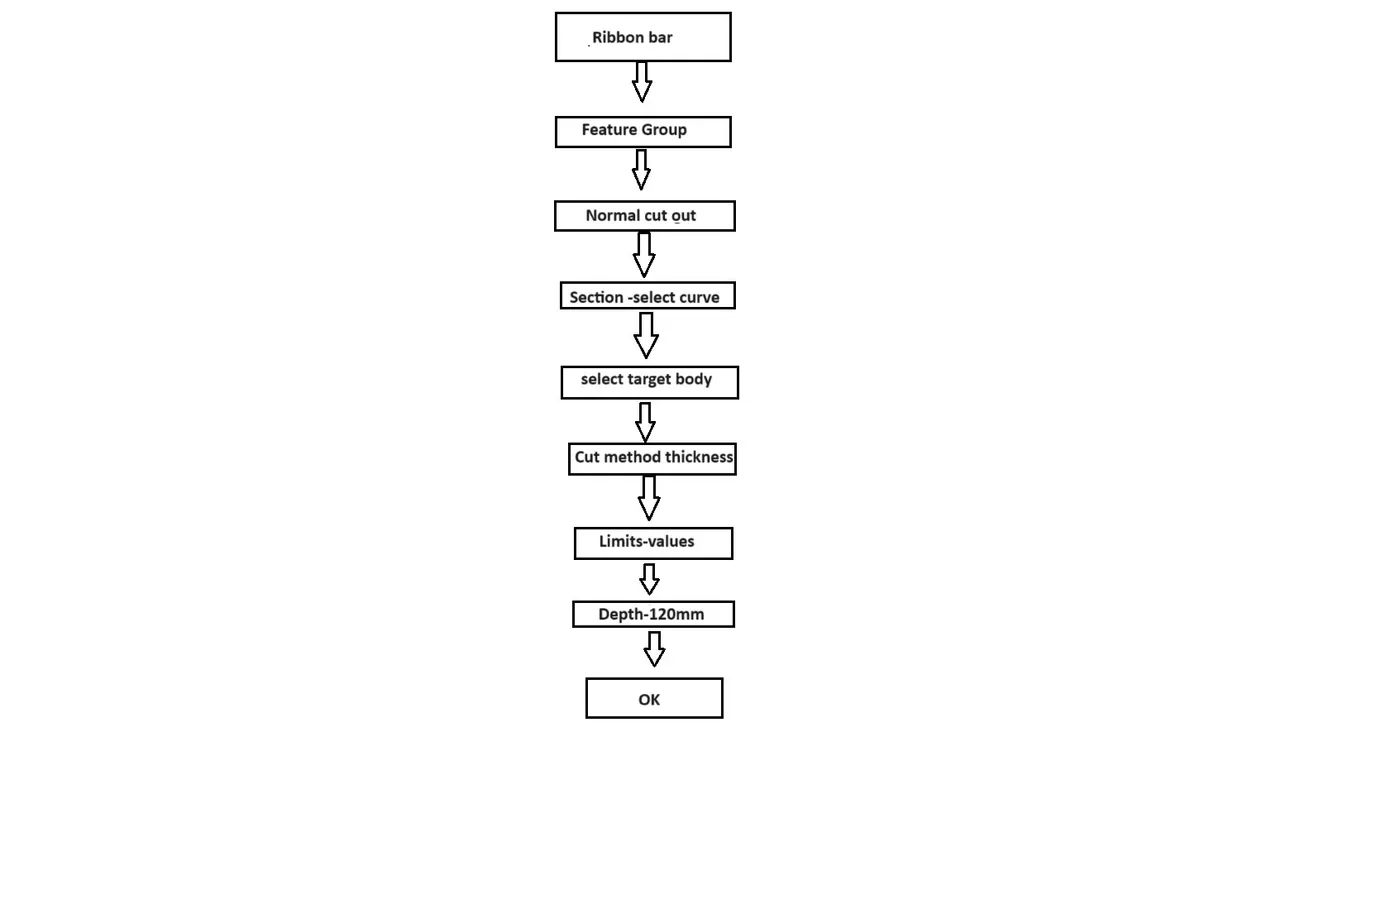
Step:-4 Normal cutout:-Ribbon bar-Features-Normal cut out.
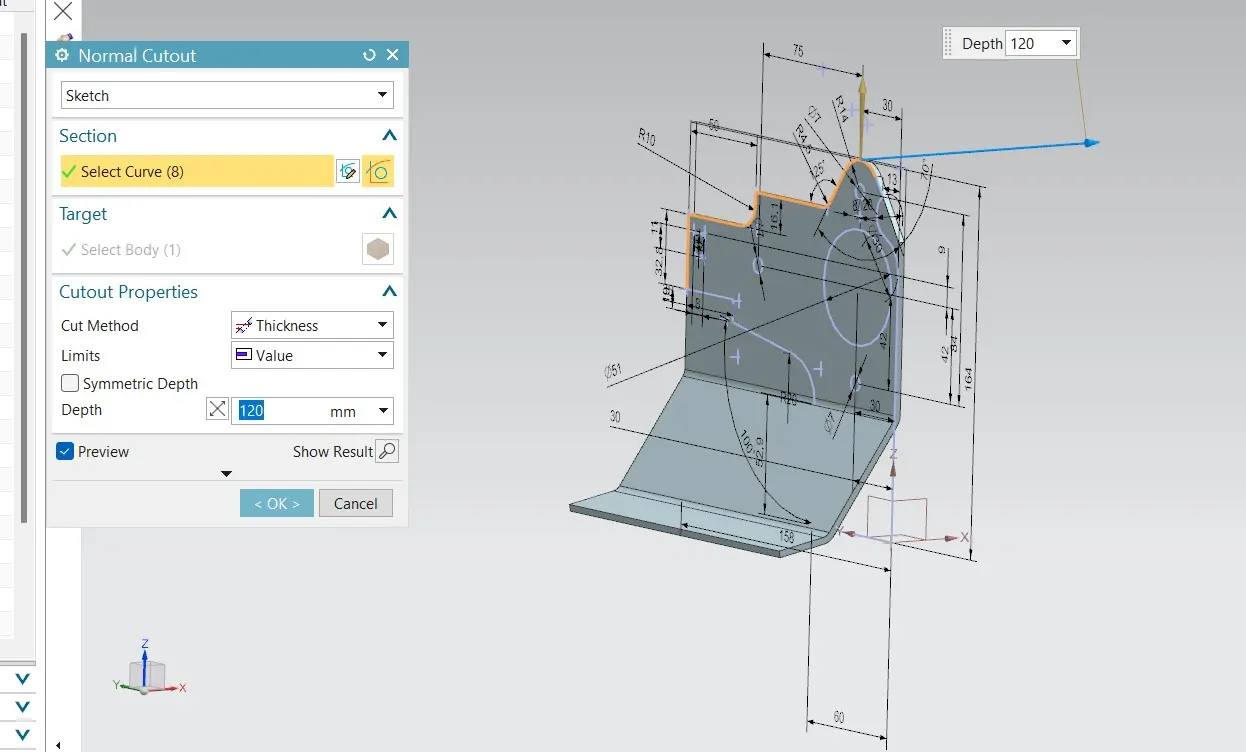
To the feature there is option for normal cut out select it then select sketch option then as a section select top profile of sketch first then as a target select a body then cut out properties cut method thickness limit values and depth is 120mm.
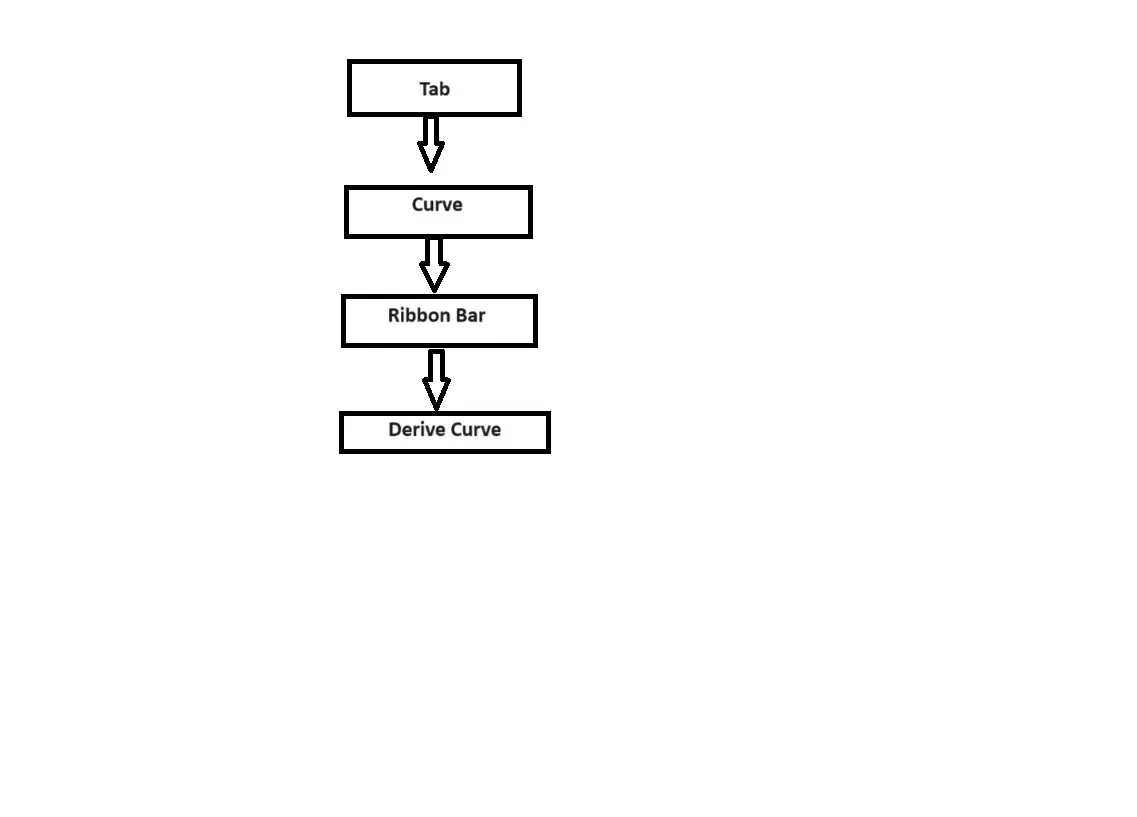
Step:-5 Project curve : Tab/bar there is curve option -Ribbon bar-derived curve.
To the tab there is curve option select that one then go to ribbon bar through it and select project curve then project that curve on target body.
Then use normal cut out method and cut that reaming portion .
Step:-6 Normal cut out:-Ribbon bar-feature group-Normal cut out.
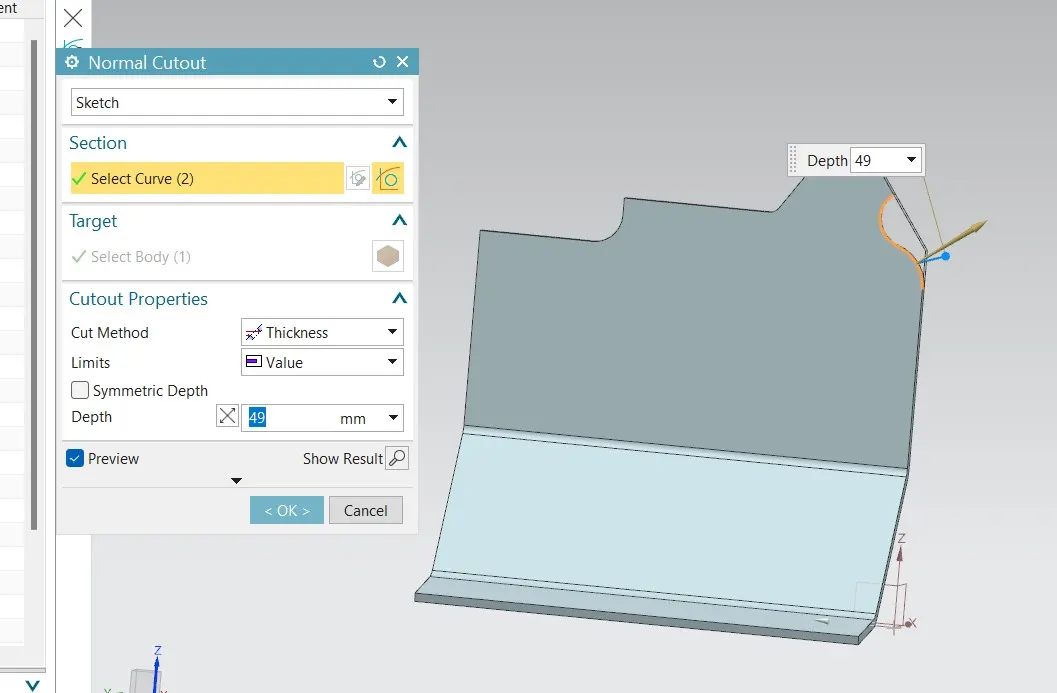
Take this option and select sketch instead of 3d curve, section select curve as a section then ,select target body as a body,cut out properties cut method thickness thickness limits values.
Step 7:-Normal cut out:-Ribbon bar-feature group-Normal cut out.
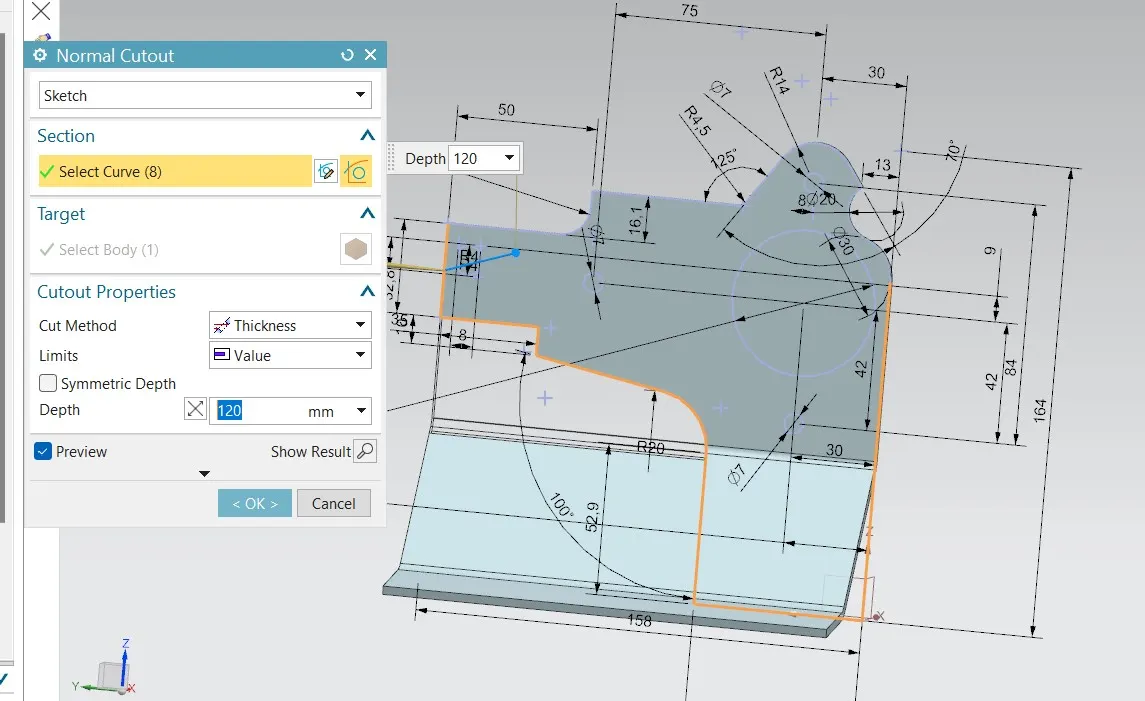
Select sketch -select curve as a section -select target body-method thickness and limit -values depth is 60mm.
This is for various profiles that have to create on sheet metal bracket.
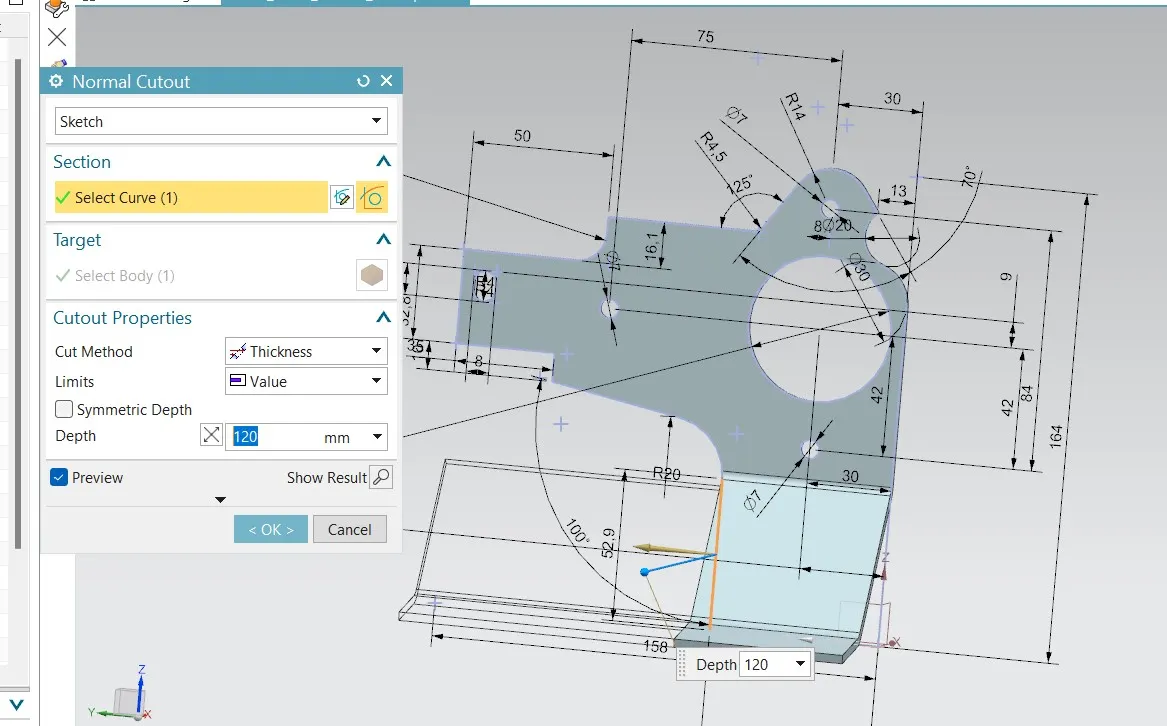
Step 8:-Normal cut out:-Ribbon bar-feature group-Normal cut out.
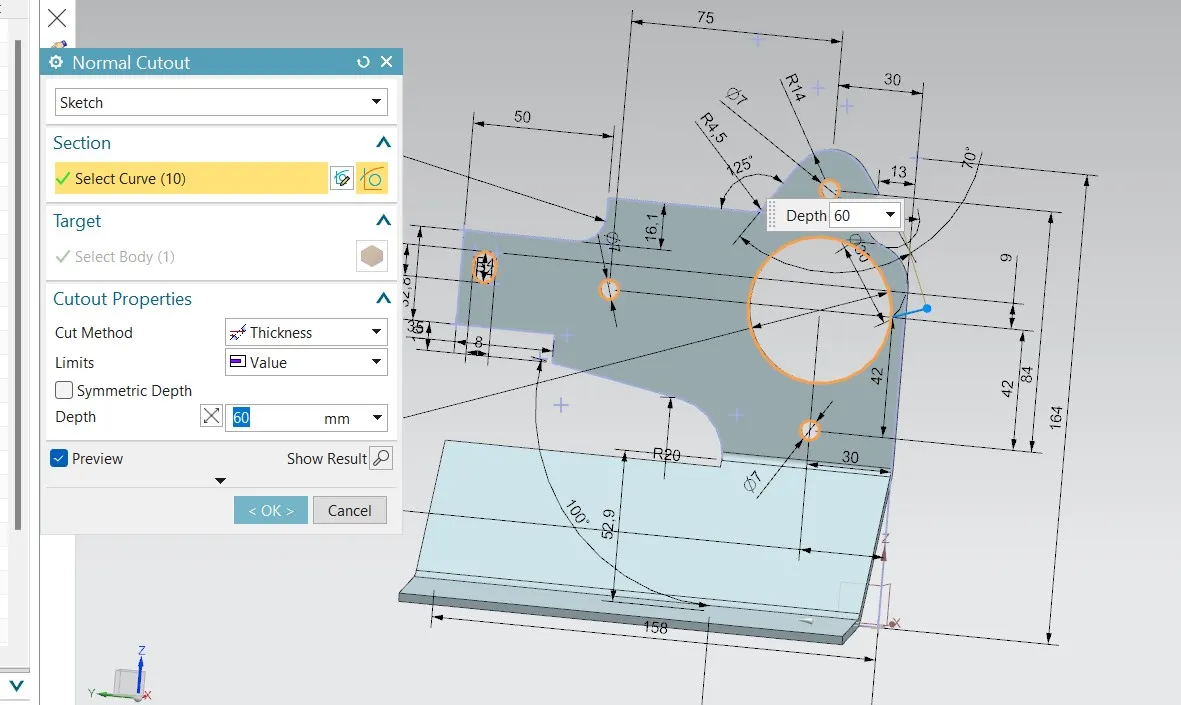
Select sketch -select curve as a section -select target body-method thickness and limit -values depth is 120mm.
This is for rectangular cut out made at corner.
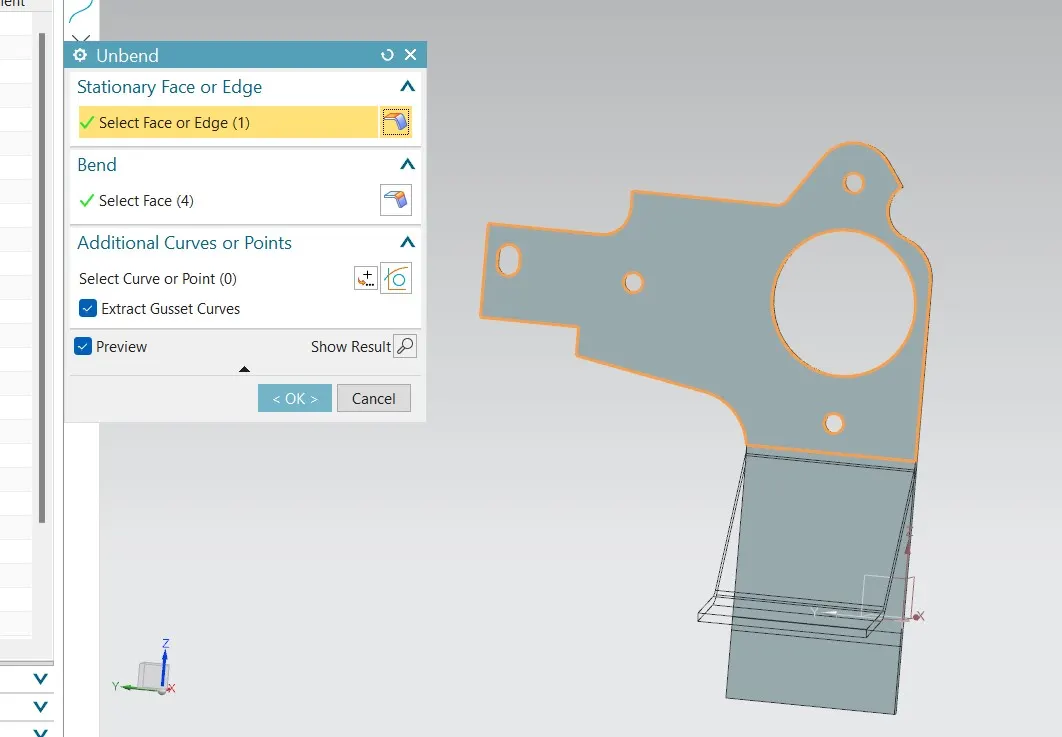
Step 9:-Unbend:-Ribbon bar-form feature-unbend option.
This feature unbend to the sheet metal sheet which is bend to create various feature and profiles on plane surface.
Select select stationary face select bend then unbend it.
Step 10:-Normal cut out:-Ribbon bar-feature group-Normal cut out.
Select normal cut out select select sketch select hole as a curve select target body as body and cutout properties are cut method is thickness and limit as values then take depth as 36mm.
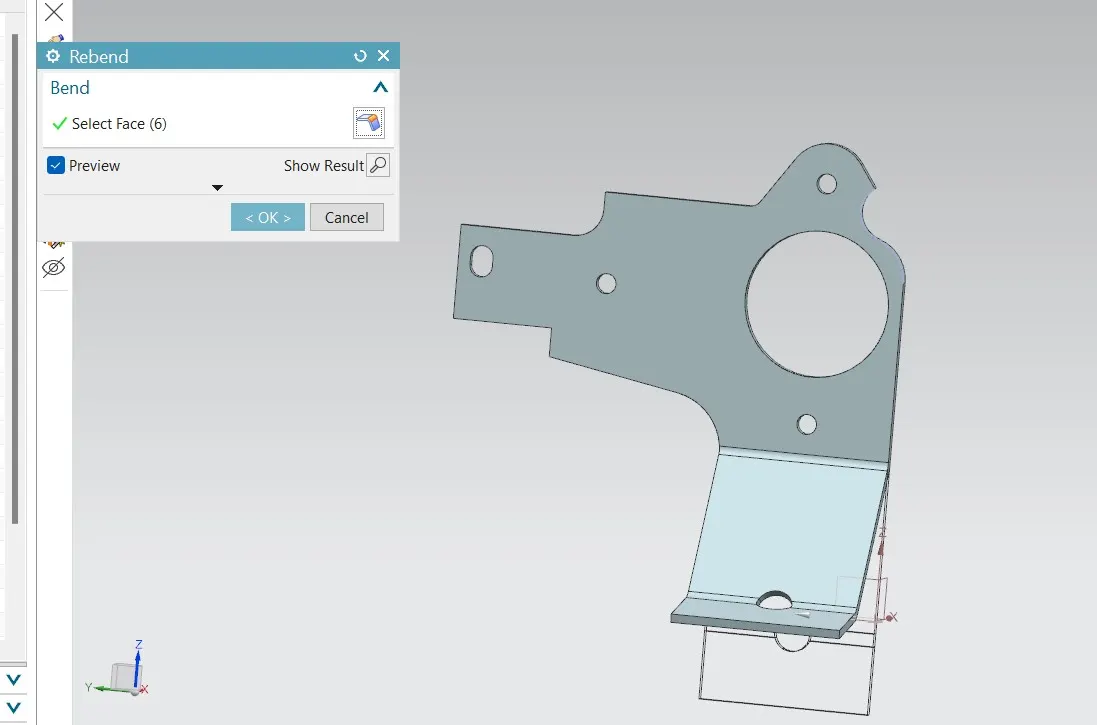
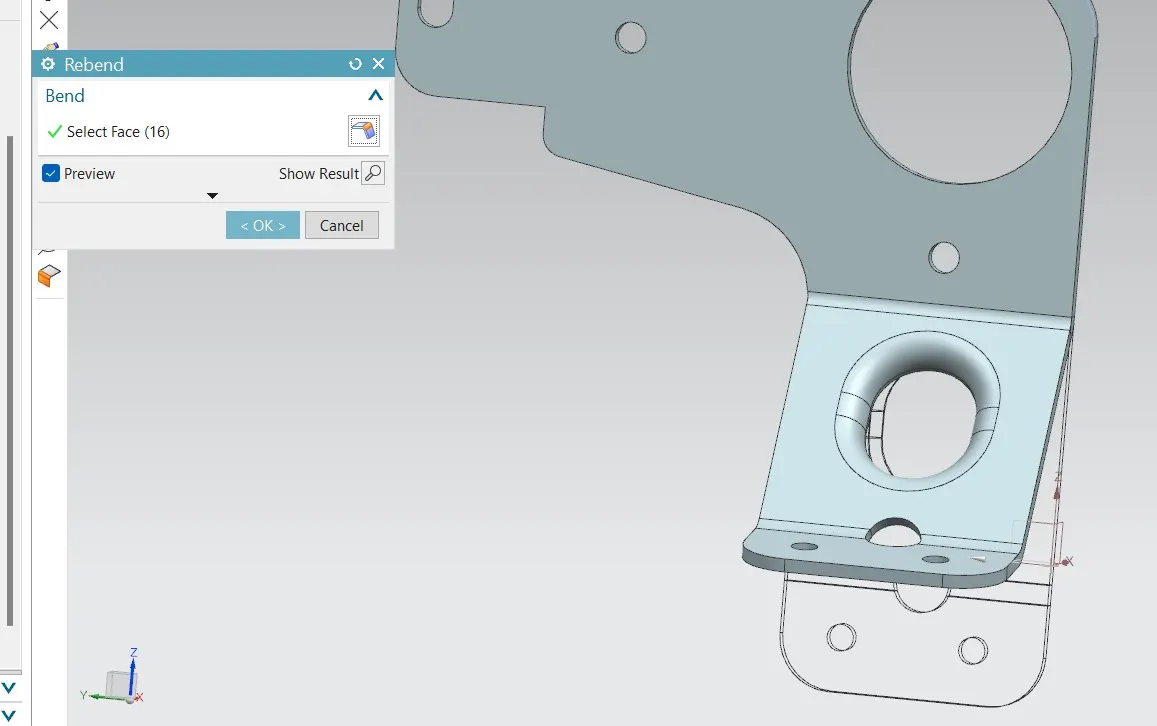
Step 11:-Ribbon bar-Form feature-Re bend.
There is form feature which includes form feature to which re bend option is placed.
Use this Re bend to make sheet to its original position.
Step 12:-Ribbon bar-corner feature-break corner.
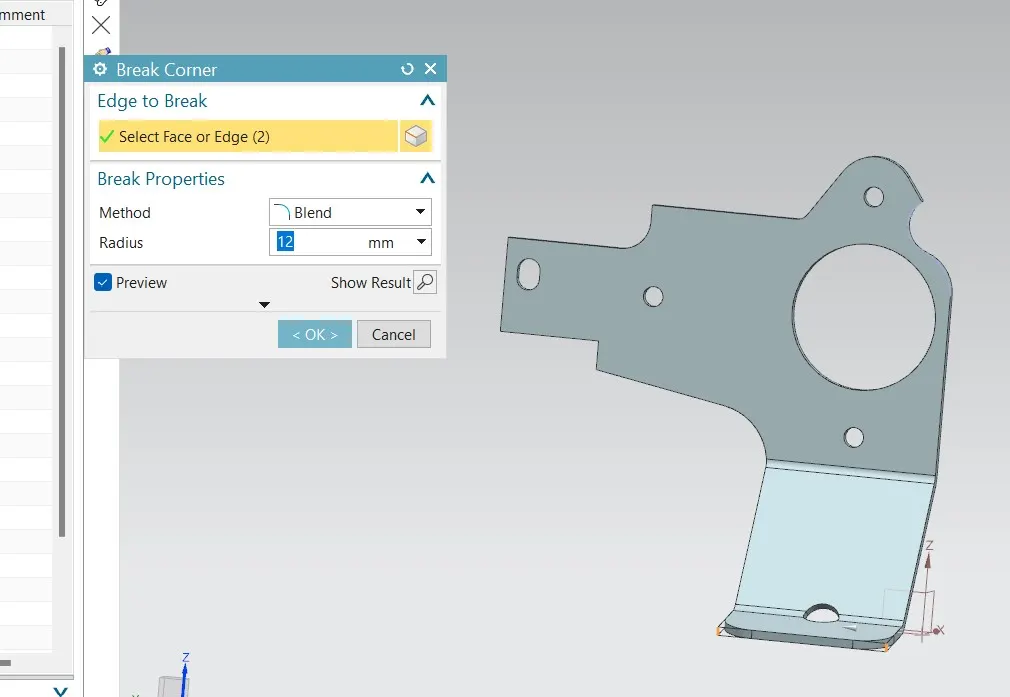
Use this break corner to give fillet to all the sharp corners .
Select edge to break as corners -break properties method blend radius 12mm.
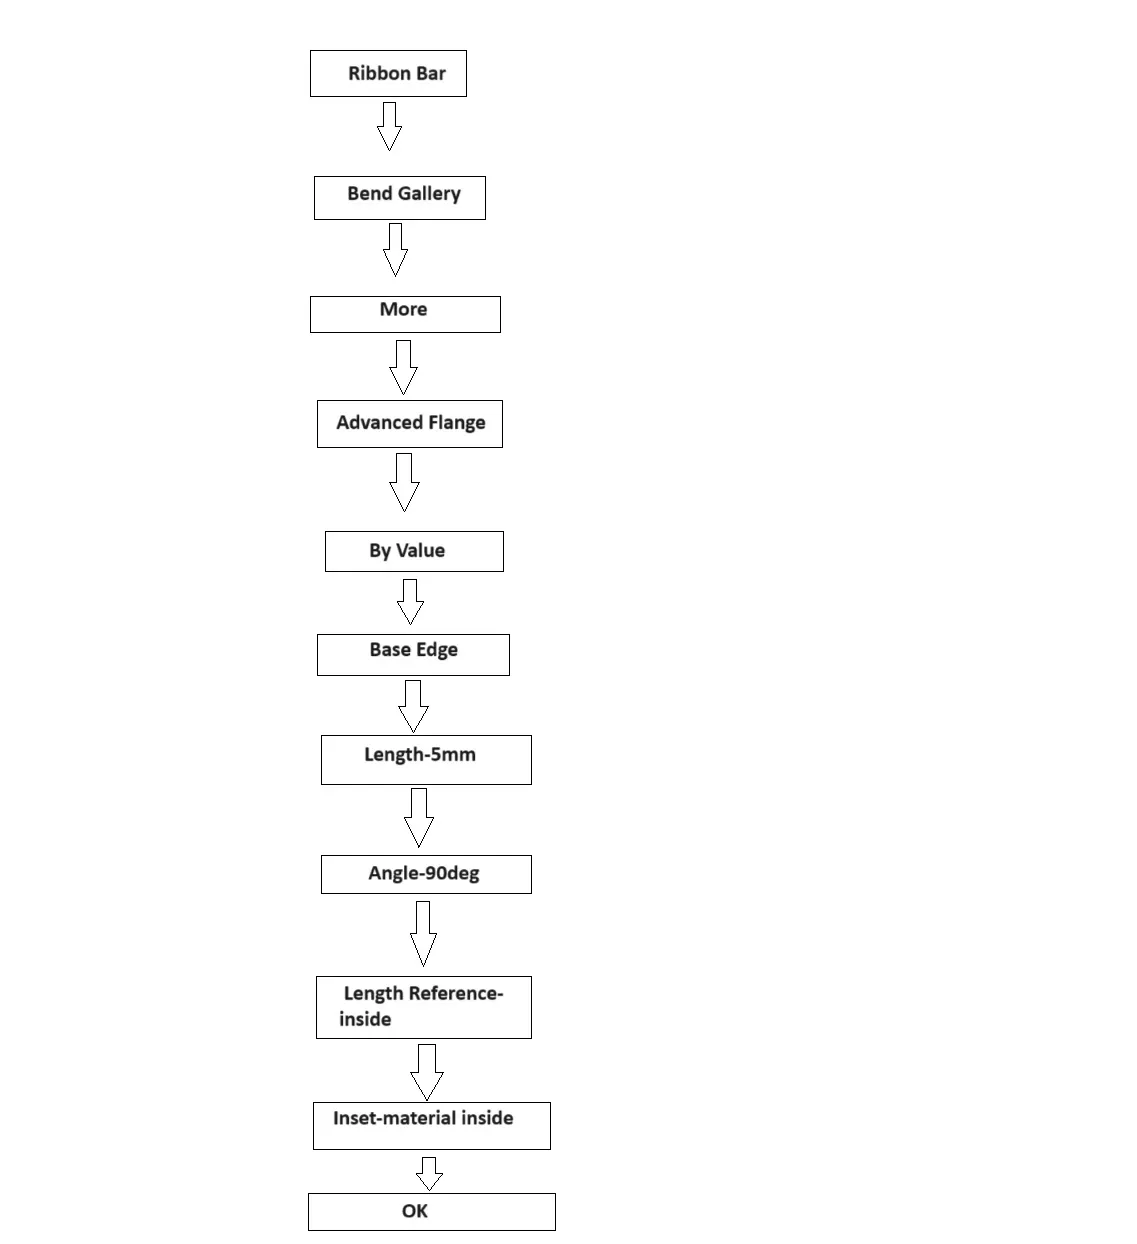
Step13:-Advanced flange:-Ribbon bar-Bend feature-more-advanced flange.
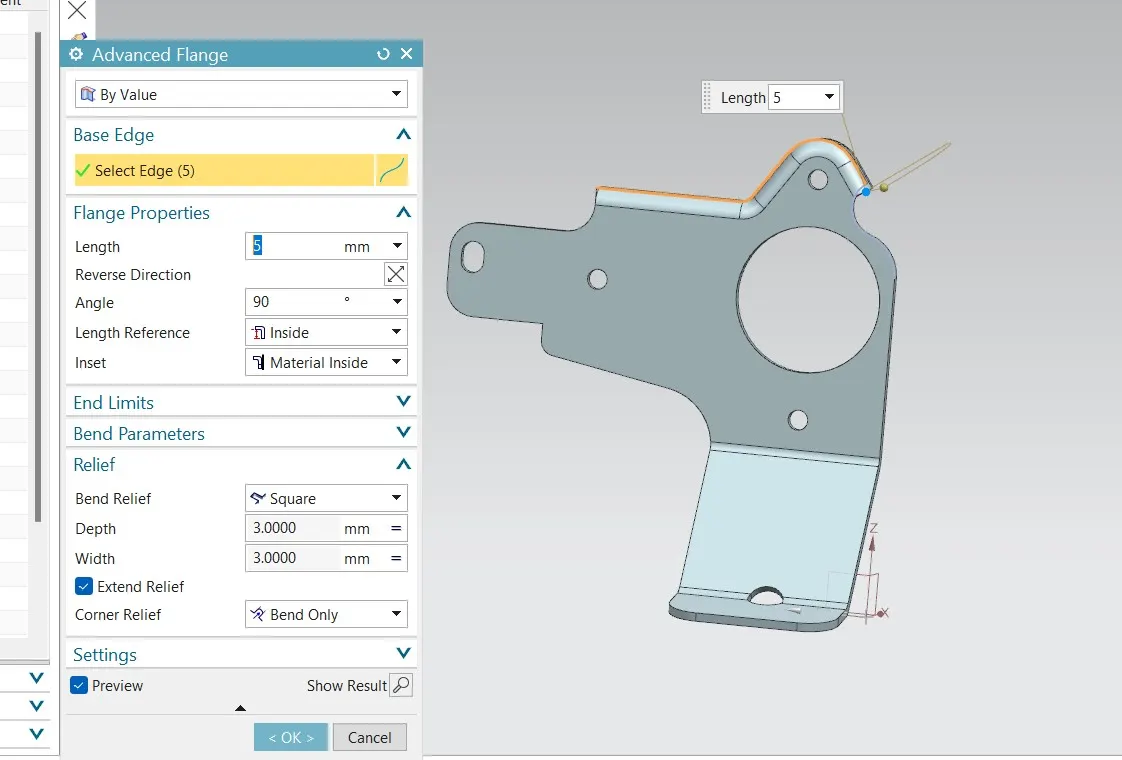
Use this function for making flange with some advance features.
Go to advanced flange set by value instead of reference then base edge select edge then flange properties -length is 5mm angle is 90deg.Length reference is inside and inset is material inside bend relief square depth and width is 3mm.
Step 14:-Ribbon bar-Feature group-More-Hole
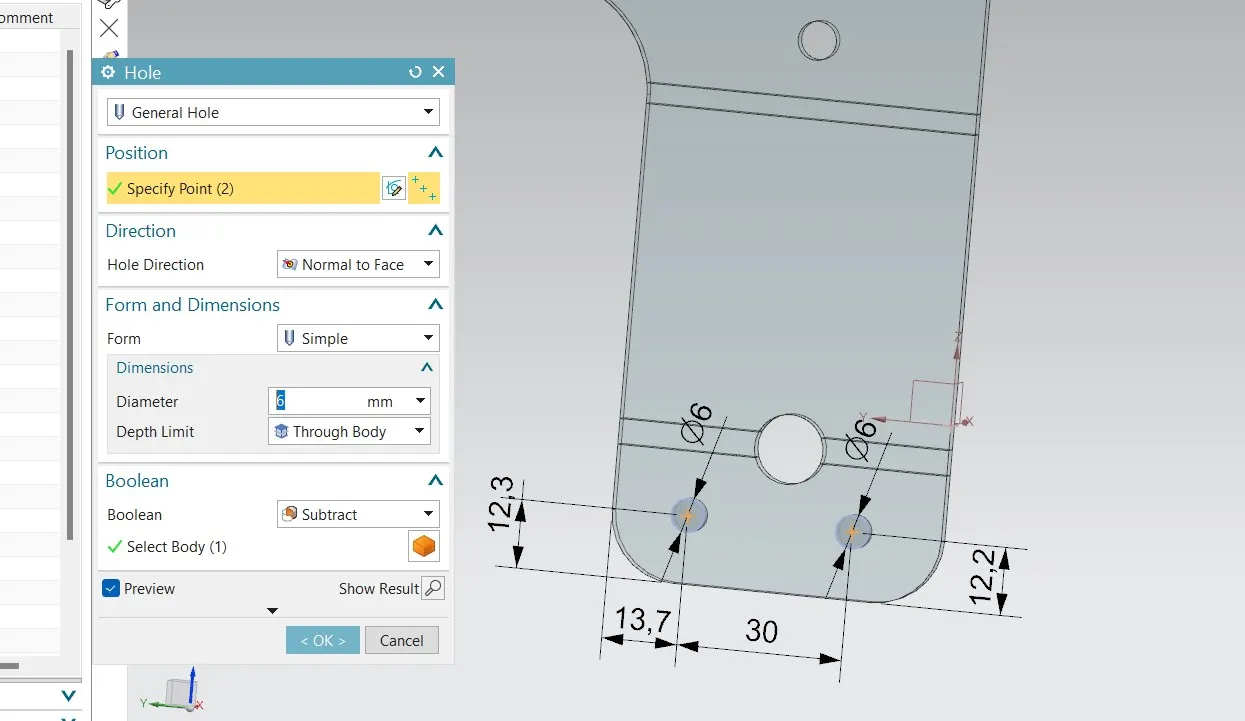
Now use unbend to unbend bracket again.
To drill holes now set it as generate hole-position specify point -Direction normal to face hole direction-form-simple,dimension-diameter is 6mm and depth limit is through body.
Boolean is subtract.
Step 15:-Normal cut out :Ribbon bar-feature group-Normal cut out.
There is sketch option select that one and draw a sketch of dimension 24 by 30 at distance 30mm form corner now gibe fillet to it to make elliptical .
Set it at sketch -section-select elliptical sketch -select target body as body then select cut out properties as cut method thickness and limits values.depth as 5mm.
Step16:-Advanced flange:-Ribbon bar-Bend feature-more-advanced flange.
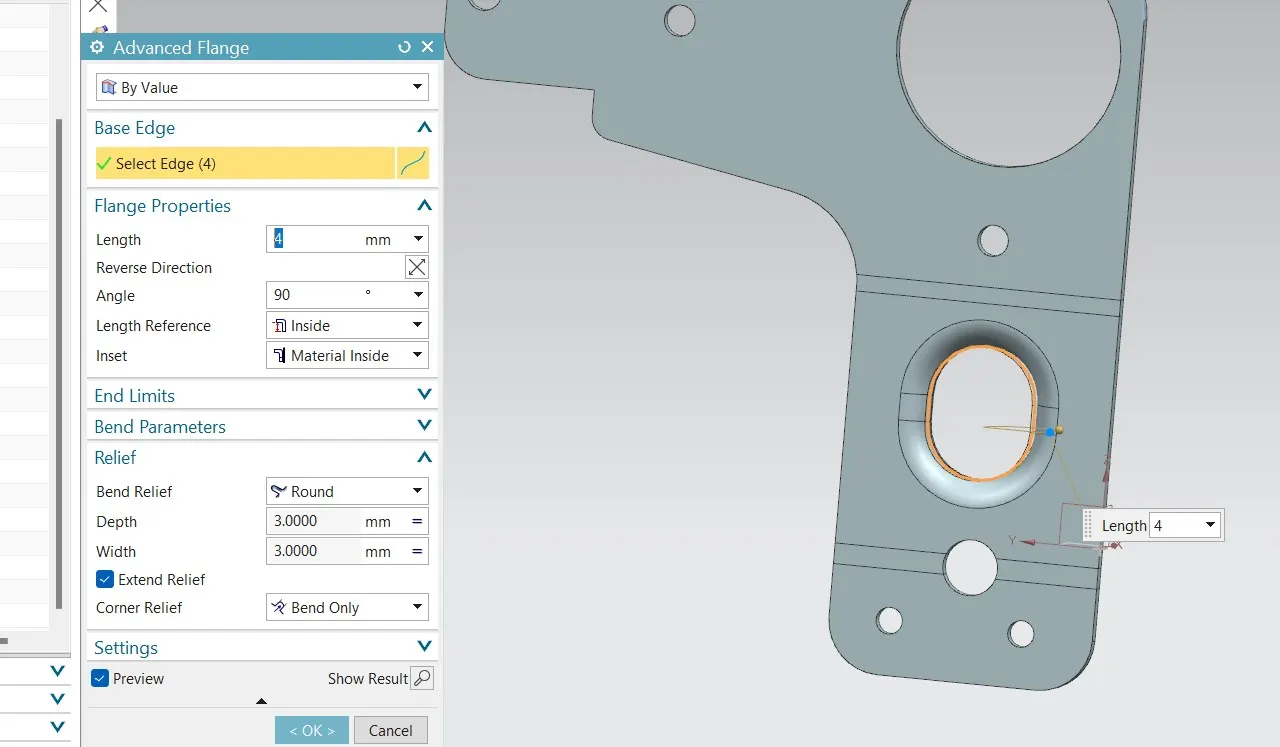
Use this function for making flange with some advance features.
Go to advanced flange set ‘By value’ instead of reference then base edge select edge then flange properties -length is 4mm angle is 90deg.Length reference is inside and inset is material inside bend relief round depth and width is 3mm.
Step17:-Ribbon bar-Form feature-Re bend.
There is form feature which includes form feature to which re bend option is placed.
Use this Re bend to make sheet to its original position.
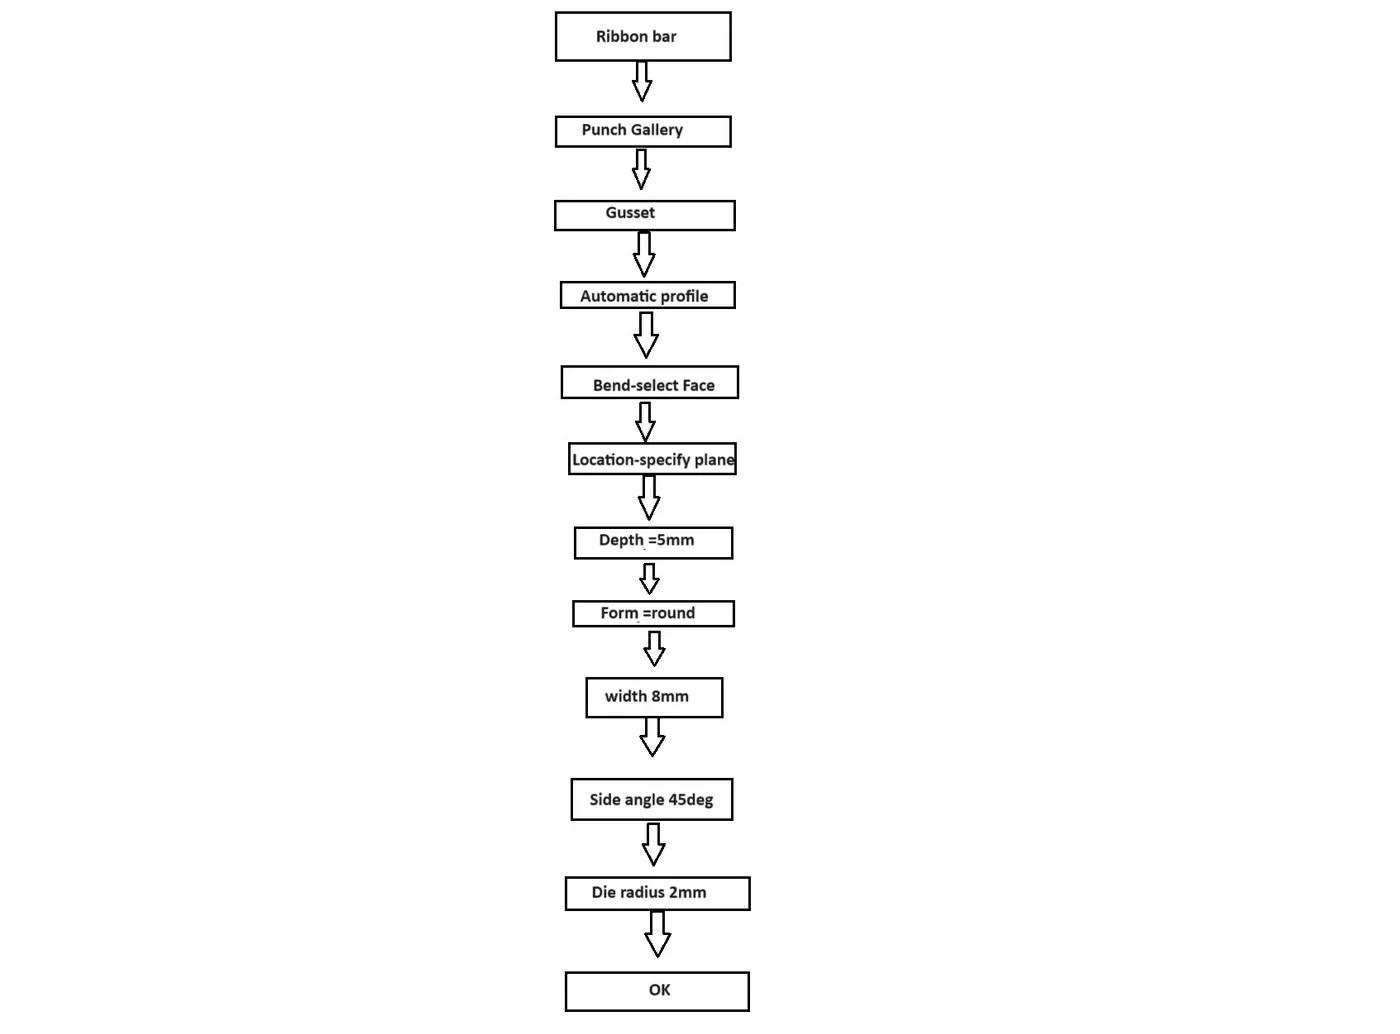
Step18:-Gusset:-Ribbon bar-Punch Gallery-Gusset.
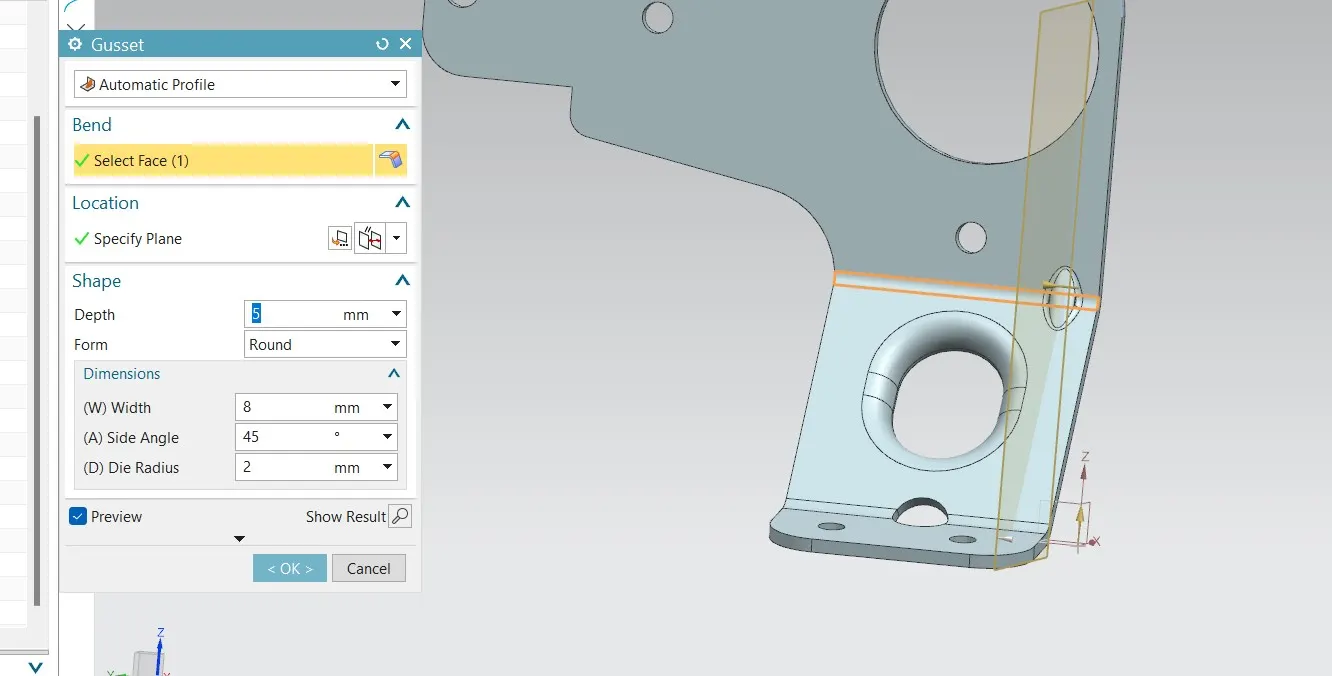
Function : its created to give strength to the bracket its circular or rectangular its given at bend .
Gusset -there is automatic profile and user created profile.
Bend-select face that is bend surface to move plane along it.
Location-specify plane
Shape-depth =5mm and form =round.
Dimensions-width 8mm,Side angle 45deg,die radius 2mm.
OK.
Make 4 gussets at different places.