Advanced Sheet Metal Design Using NX Cad Challenge_1_Casing Design
DESIGN OF CASING BY USING NX CAD :
Objective -
Design a sheet metal casing using NX Cad software with proper commands to achieve the final product for manufacturing as per the inputs.
Introduction -
In Sheet metal Application we can create a uniform thickness Sheetmetal parts using basic features Such as Tabs, flange and jogs, we can also do bend corners, cut out, bead etc…features.
The Sheetmetal application provide an environment for the design metal parts used in machinery, Automotive and Aerospace Enclosures, Brackets and other parts are normally manufactured with break press. The complex sheet metal part can be designed in the Solid model work Bench and then we convert in to Sheet metal part. We can also import, clean up and convert a non Sheet metal part into a valid Sheet metal part. Flat pattern Sheetmetal data can be used for the manufacturing process. The material parameters such as thickness, bend radii and bend relief can be easily set as default settings.
Design approach -
Creat a new 'Model' (Sheet Metal) file in NX cad. 
Save that model with proper name.
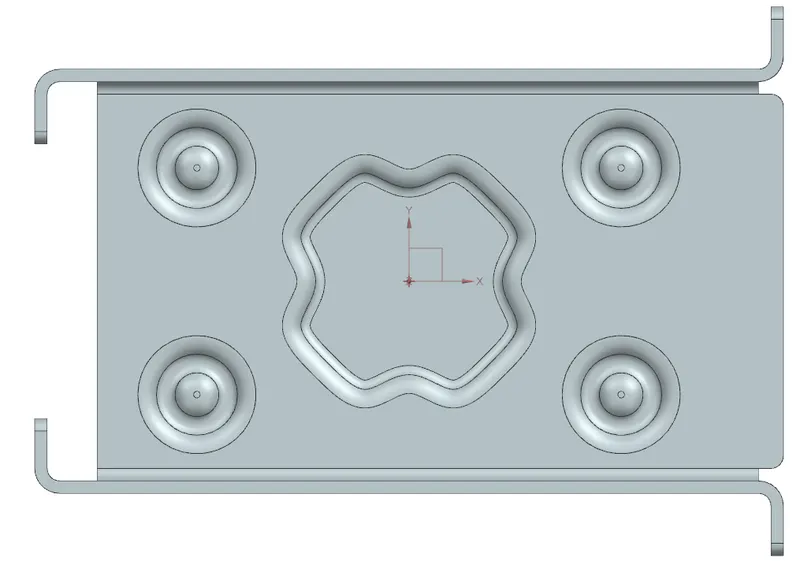
Create a sketch on XY plane & draw a rectangle of 60mm(along X axis) X 50mm(along Y axis), then finish the sketch.
Now go to the 'Menu' 'Preferences''Sheet Metal'Set global parameters as required. Here we have set 1mm for all.
Now 'Tab' that sketch with pre set parameters(1mm thickness).
Next using 'normal cutout' command, material of 5mm(from laft end) X 40mm(equal from X axis) dimension have to remove from left side of XY plane of that sheet.
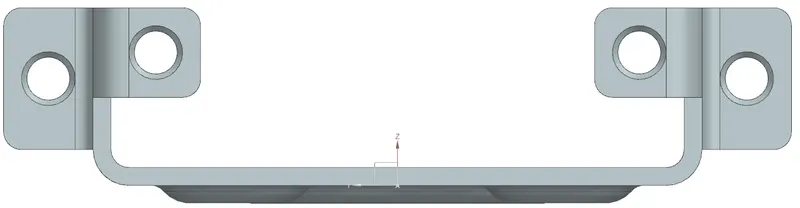
Using 'Bending' command bend the both side with 90deg. angle, of X axis of that sheet with a referance sketch(10mm both side from X axis).
Create flange of 5mm(from edge) on both side of Y axis in perticuler direction using 'Flange' command.
Give 1mm fillet to all flange corner using 'Break Corner' command.
Now unbend the whole sheet using 'Unbend' command. Remember the order of unbend, because at the end we have to rebend the sheet on reverse order of unbend.
Using 'Hole' command create holes on 4 extreme flanges with M2 screw size and M13 fit.
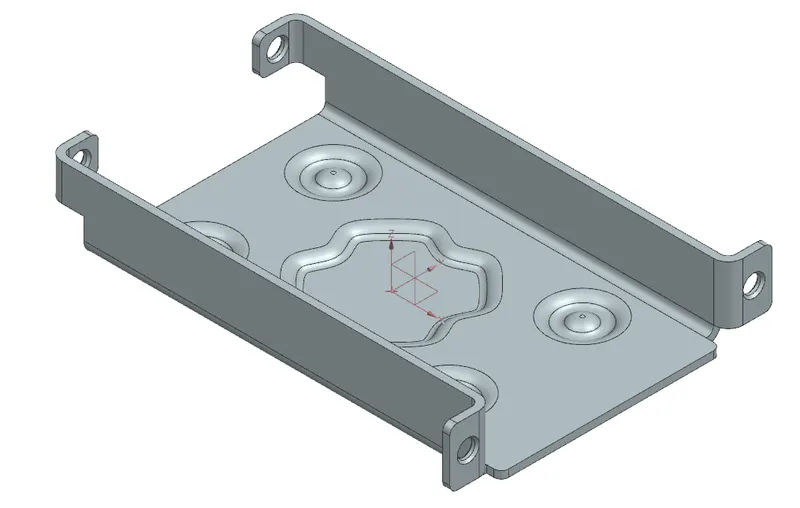
Create a sketch with 'spline' to create a proper and asthetic dimple.
Now use 'Dimple' command to create a dimple on sheet face with referance sketch.
We will also use 'Bead' command with proper referance sketch to create 4 beads on 4 corner side of sheet.
Now 'Rebend' the sheet with proper order.
So, we got our final product.
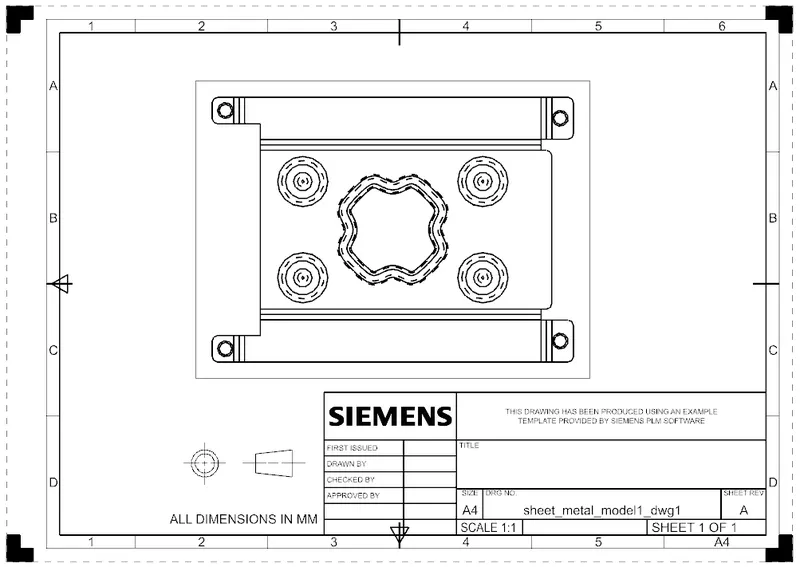
Next we will create a 'Flat Pattern' to transfer the drawing in a 2d 'Drawing' sheet for production.
Description -
Sketch:- It’s a basic command to draw 2d models.
'Tab' :- A command to add parameters of an Sketch
'Bend' :- It’s an operation to bend the tab at a particular position with reference
'Flange' :- It’s an operation to extend of a sheet metal with to one of the edge of an tab
'Unbend' :- It’s an command used to flatten the created 3d model taking one face as a stationary face.
'Hole' :- It’s an command used to create different type of hole like tapping and normal drilling, on the Surface of an Sheet metal.
'Dimple' :- It is a projection command of a particular shape with reference to sketch with certain depth.
'Bead' :- It is also type of projection to deform the shape at a certain point with reference to sketch and also giving strength to the material.
'Rebend' :- This command used to re bend the already flattened sheet metal.
Image -
Isometric View :
Front View:

Top View:
Side View:
Drawing Sheet Image -
Conclusion -
By this challenge I came to know about the application of various commands and using given inputs finally achieve the final product.