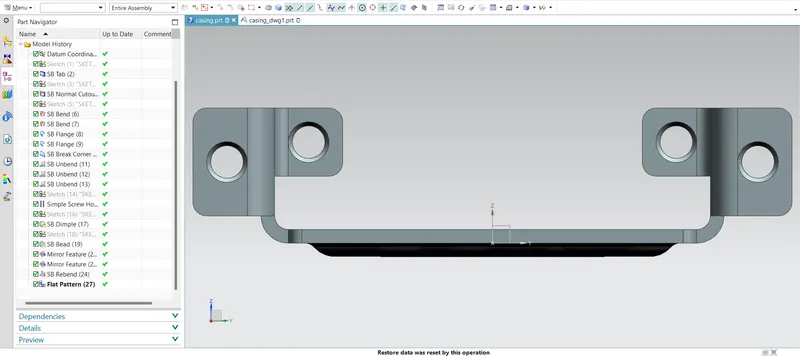
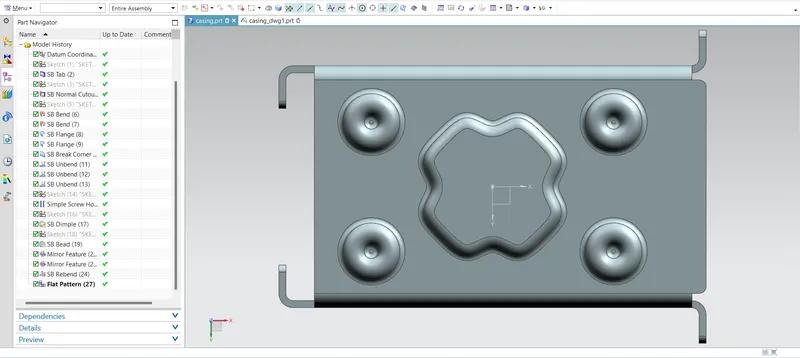
Advanced Sheet Metal Design Using NX Cad Challenge_1_Casing Design
DESIGNING OF SHEET METAL CASING USING NX CAD
OBJECTIVE: To design a casing made out of 1mm thick metal sheet and perform various sheet metal forming operations by using the NX CAD sheet metal application.
INTRODUCTION:
The NX Sheet Metal application provides an environment for the design of sheet metal parts used in Machinery, Automotive, Aerospace etc. Enclosures, brackets and other parts normally manufactured with a brake press.
NX sheet metal application provides a set of tools that allows for easy and fast design of sheet metal parts such as BiW components. NX sheet metal design application incorporates features or commands which are very handy for depicting or representing majority of the mechanical operations involved in sheet metal part formation.
some of the examples of such features are: bends, flanges, tabs, cutouts, beads, dimples, louvers, corner and edge treatments, patterns and other features related to forming process.
Using the NX CAD sheet metal application we can easily convert solid models to sheet metal replica by the technique of wrapping around the sheet of required thickness around the solid model.
DESIGNING METHODOLOGY
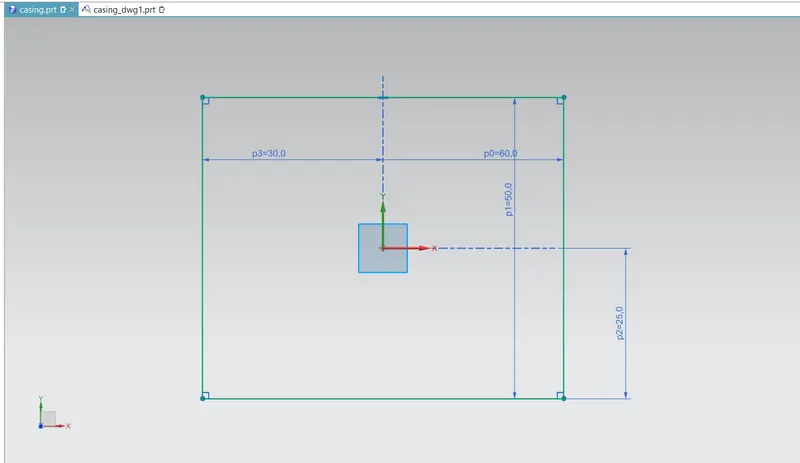
- CREATING A SKETCH OF A RECTANGLE OF DIMENSIONS 60X50 MM IN X-Y PLANE.
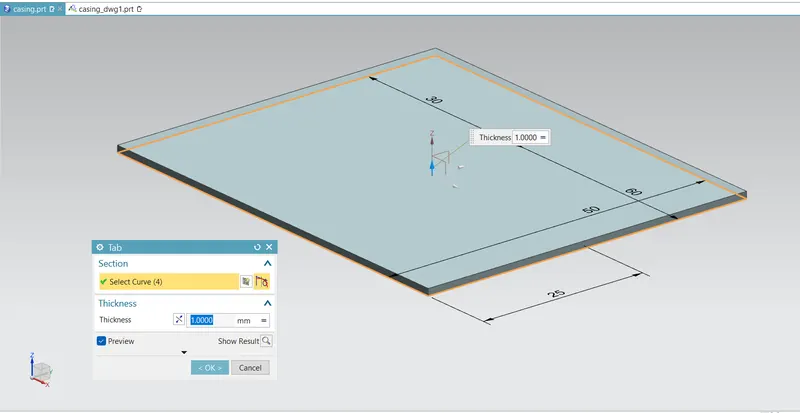
- ADDING MATERIAL TO THE SKETCH WITH TAB COMMAND WITH A THICKNESS VALUE OF 1mm.
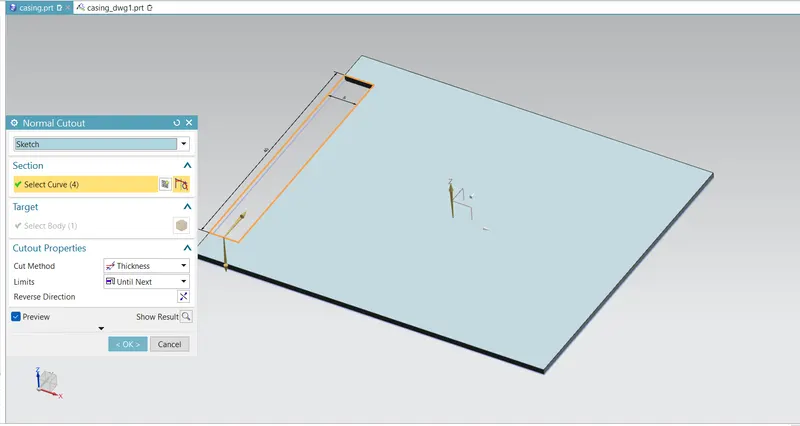
- REMOVING 5mm X 40mm MATERIAL USING NORMAL CUTOUT.
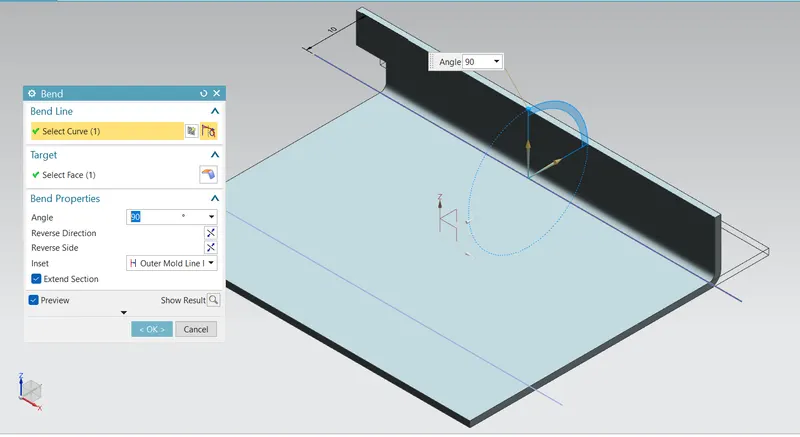
- APPLYING BENDING W.R.T REFERENCE LINE.
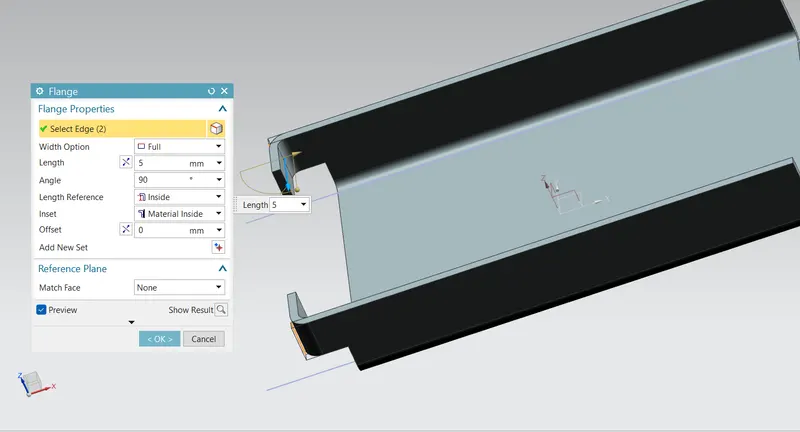
- APPLYING FALNGES OF 5mm ON THE SIDE EXTREMITIES OF THE BENDED WALL.
- ROUNDING THE CORNERS BY USING BREAK CORNER COMMAND.
- UNBENDING THE SHEET METAL.
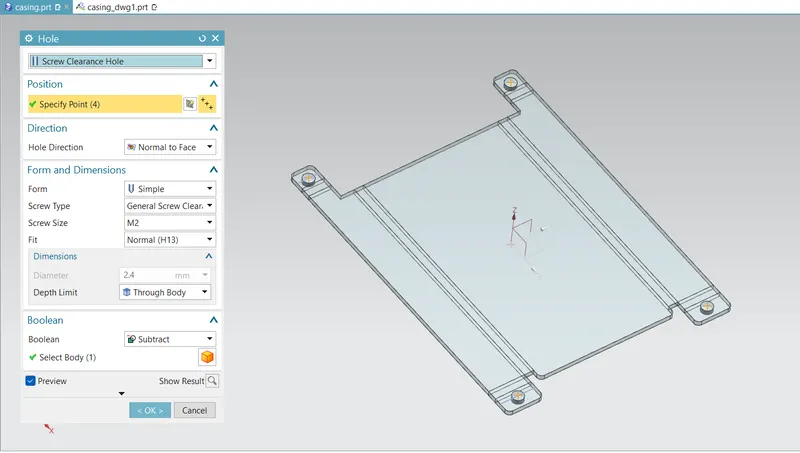
- ADDING THREADED HOLES OF SIZE M2.
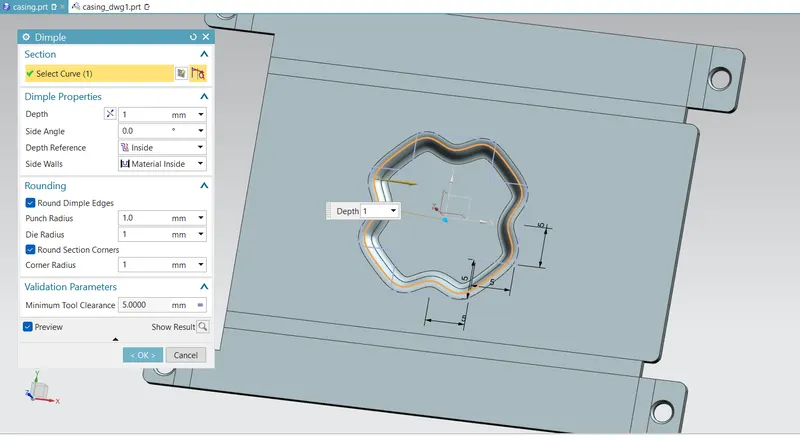
- ADDING DIMPLE AT THE CENTER OF THE CASING USING A CURVE PROFILE.
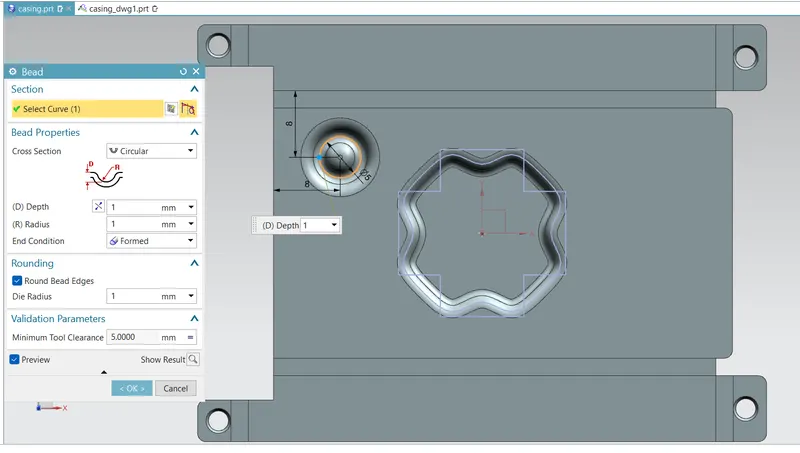
- ADDING CIRCULAR BEADS USING A CIRCULAR PROFILE MADE AS A SKETCH.
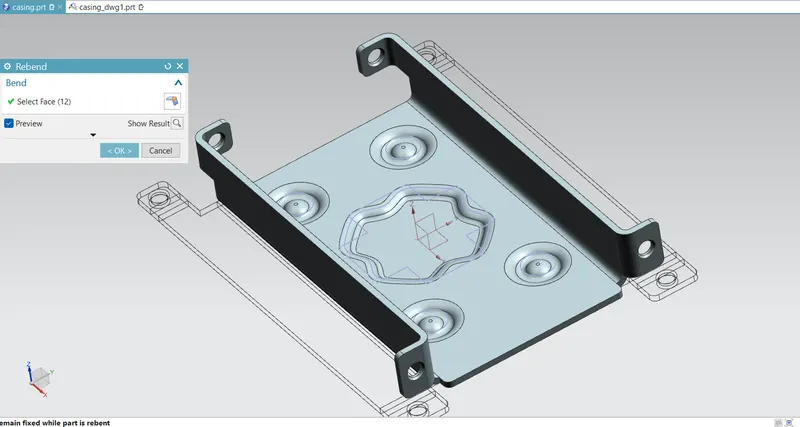
- REBENDING THE UNBENT PORTION OF THE SHEET METAL.
- DRAFTING THE CASING BY USING FLAT PATTERN COMMAND.
DESCRIPTION:
STEP 1: To start with, we need to create a sketch in the XY plane(P) having a rectangle of dimensions 60x50mm and then using the "TAB" command which will lead to addition of material to the sketch with a material thickness of 1mm.
STEP 2: Create another sketch of a rectangle with dimension 5x40 mm along the upper edge of the sheet and symmetric about the x axis. Use this sketch to remove the material from the sheet by applying "Normal Cutout" command.
STEP 3: In the same plane creat another sketch having two horizontal lines which are symmetric about the x axis and separated by a distance of 10mm from the side egdes of the sheet. Bend the sheet along these horizontal lines by using "Bend" command with a bend angle of 90 degrees.
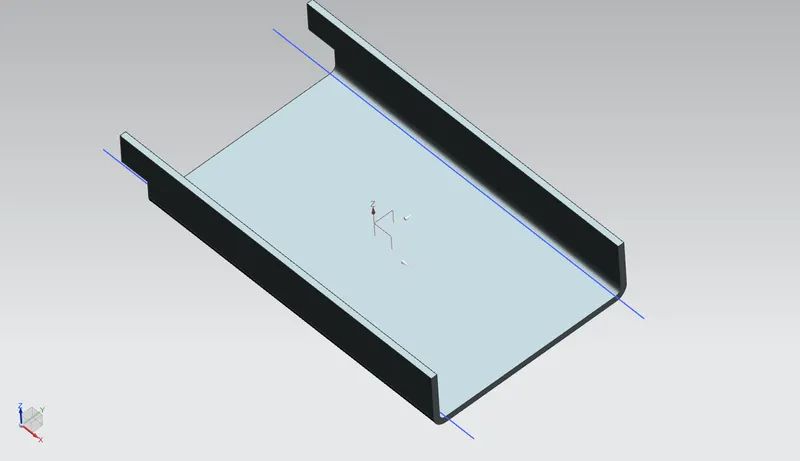
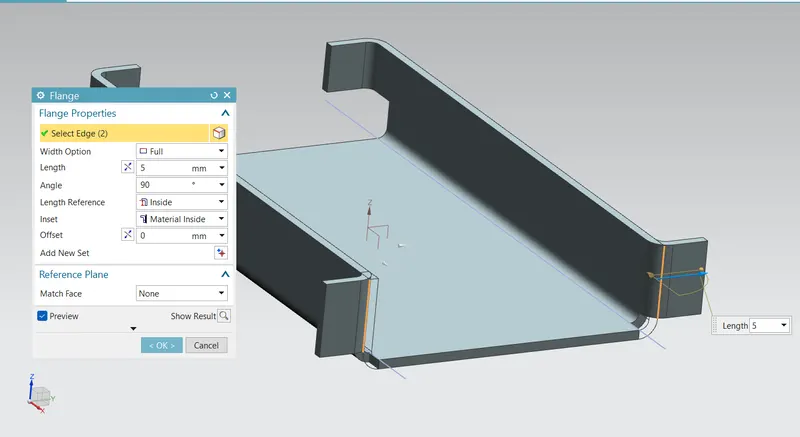
STEP 4: Add flanges of length 5mm to all the extreme edges of the bended portion of the sheet by using "Flange" command. Make sure that the flanges of the upper edges are extending towardes inner. edges and the lower edges are extended away from each other or towards outer edges.By appling the "Break Corner" command we can make the sharp edges rounded.
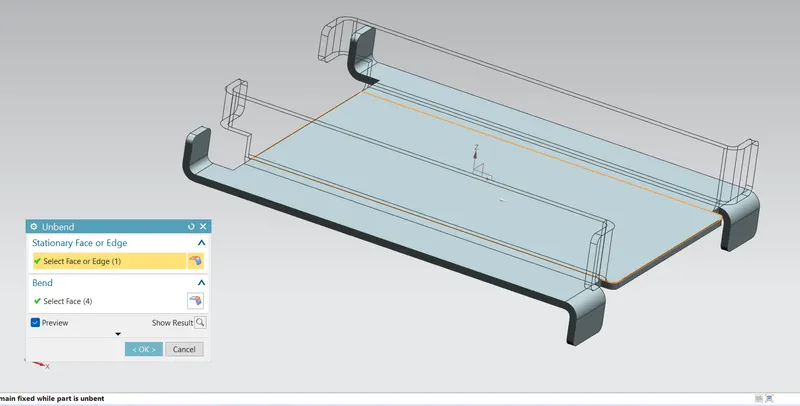
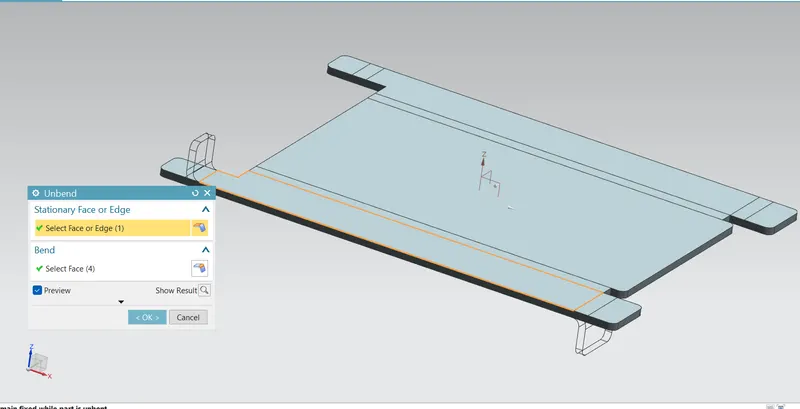
STEP 5: In order to create embossing on the sheet we need to unbend the sheet by using "Ubend command". While using this command we have to select the stationary face with the plane along which the unbending will take place.
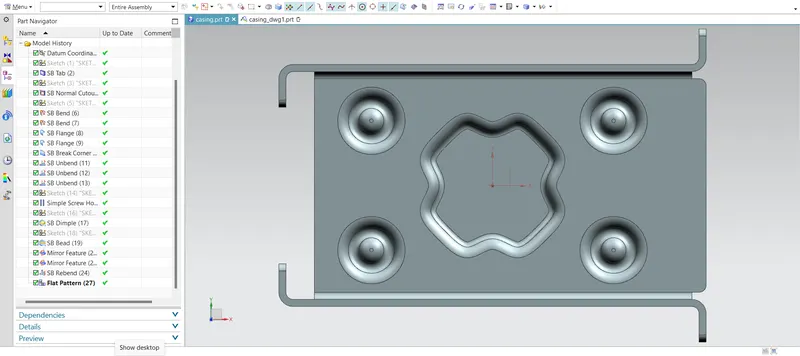
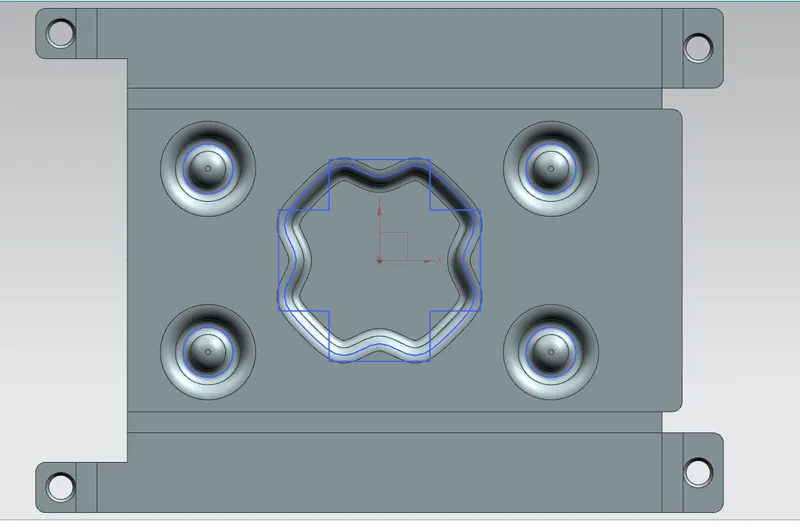
STEP 6: Create another sketch in X-Y plane as shown in the picture below and create a profile using "Studio Curve" command and use this profile to create embossing on the casing sheet metal by applying "Dimple" command. In the similar manner we can create circular beads by using another forming feature called "Bead".
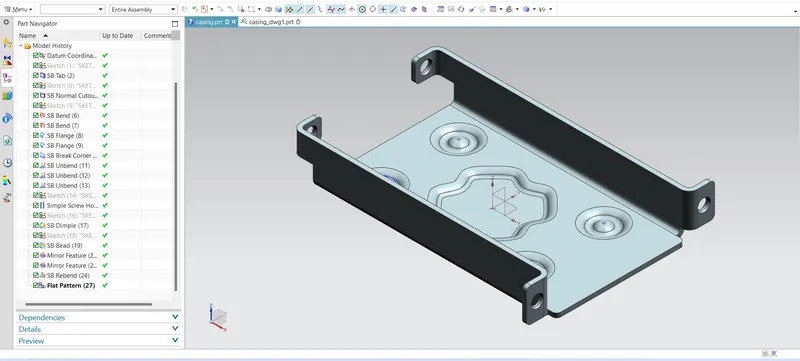
STEP 7: After the completion of all the forming feature we can rebend the casing sheet metal by applying "Rebend" command. One thing we have to make sure is that we have rebend the faces of casing in an order exactly reverse as they were bent.
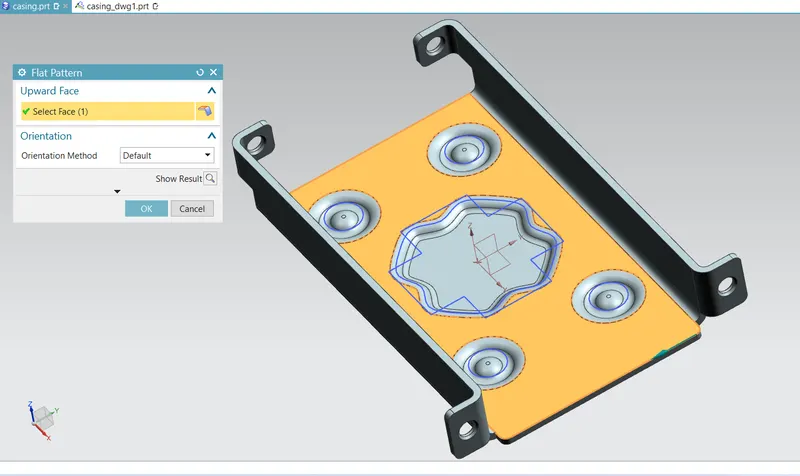
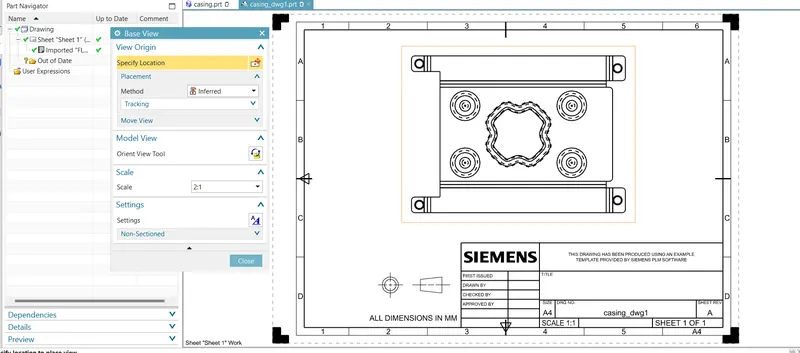
STEP 8: Select the "Flat Pattern" feature under flat pattern menu, select the central flat face of the metal sheet and validate. This will create a flattened version of our metal sheet. For the moment the flattened version is not visible, to make it visible create a new drafting file of size A4, and add a new base view. In the base view dialog box select in the option model view to use FLAT PATTERN#1.