3D Creation of Celing, Roof, Architectural plan, Structural plan, Sectional view, Elevation view and Camera specific view for a house plan using REVIT
1)
Aim - To create a Ceiling from the Architecture tab to the first floor level .
Introduction - 1) Revit is an Building Information Modeling software and is product of an Autodesk.
2) It can be useful for Architects , Civil engineer , Structural Engineer , Mechanical Engineer , Electrical and Plumbing
Engineers .
3) It has Benefits over 2D CAD tools . Such as Real time modeling .
4) There are various templates such as Architectural , Structural , Construction and MEP template and We can work
simultaneously by using Collaborate tool .
Procedure -
Step 1)
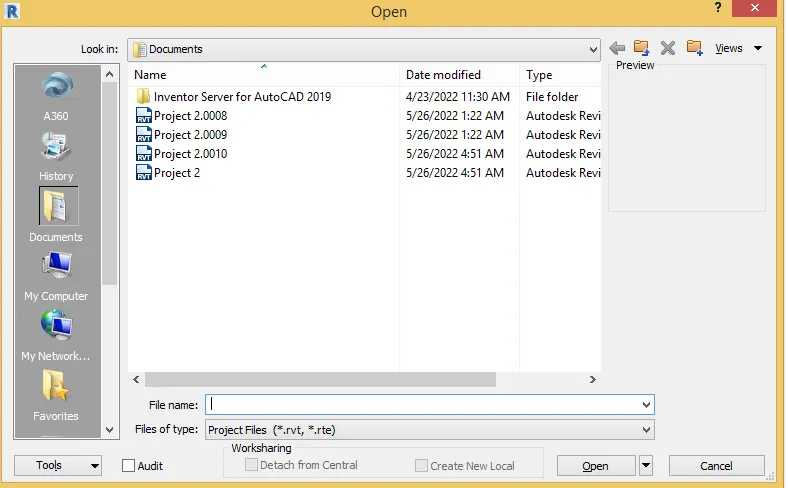
i) Open the Week 3 ( Project 2) assignment from the home page of the revit / by clicking Open option .
Step 2)
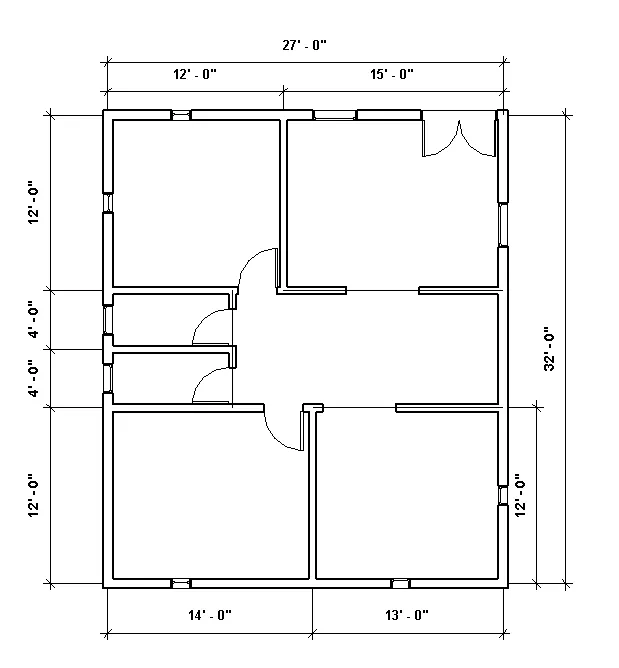
i) After opening the Project 2 file you will see your model in model space area .
Step 3)
i) Now we have to add the Ceiling at the first floor level .
ii) Open Architecture tab - Click on Ceiling
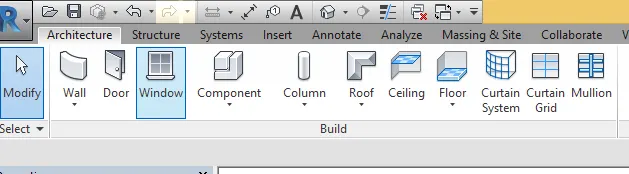
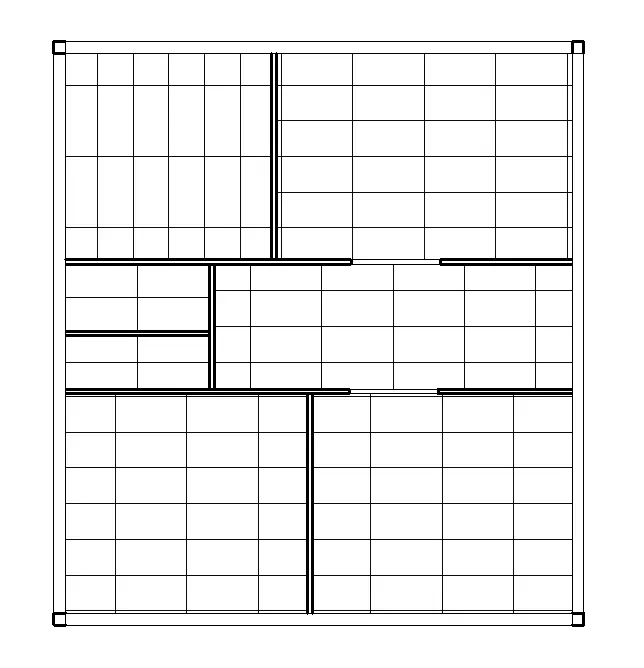
iii) Select the Rooms and apply the Ceilings at first floor level .
iv) Assign the material properties to Ceiling whichever you want .
v) Apply on it .
Step 4)
i) To see the Ceiling , change the Visual Style to Realistic
ii) Change the View to 3D
iii) You can see that Acoustic type Ceiling is applied successfully .
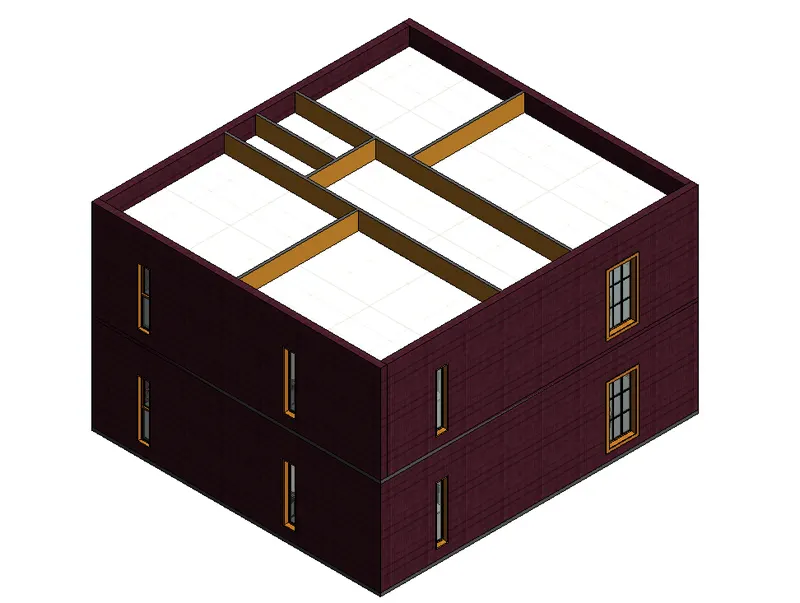
Result - A Acoustic type of Ceiling is added to the First Floor Level .
i) Ceiling Plan of First Floor Level
ii) 3D Realistic View
2)
Aim - To create a Roof above the Ceiling by selecting footprints option .
Introduction - 1) Revit is an Building Information Modeling software and is product of an Autodesk.
2) It can be useful for Architects , Civil engineer , Structural Engineer , Mechanical Engineer , Electrical and Plumbing
Engineers .
3) It has Benefits over 2D CAD tools . Such as Real time modeling .
4) There are various templates such as Architectural , Structural , Construction and MEP template and We can work
simultaneously by using Collaborate tool .
Procedure -
Step 1)
i) Open the Week 3 ( Project 2) assignment from the home page of the revit / by clicking Open option .
Step 2)
i) After opening the Project 2 file you will see your model in model space area .
Step 3)
i) Now we have to add the Roof above the Ceilings
ii) Go to Architectural tab - Select Roof - Roof by Footprint
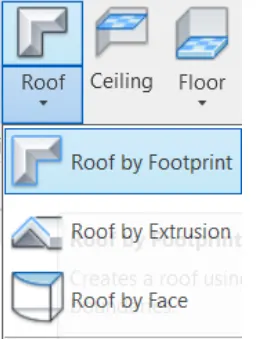
Step 4)
i) Pick up the external walls and click on Okay
ii) Click on Roof and at Properties Browser change the Slope to 10 degree .
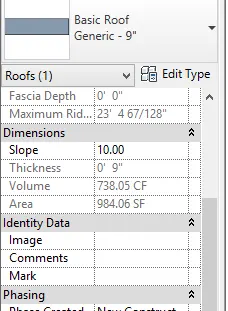
Step 5)
i) Change the Visual style to Realistic
ii) Change the View to 3D
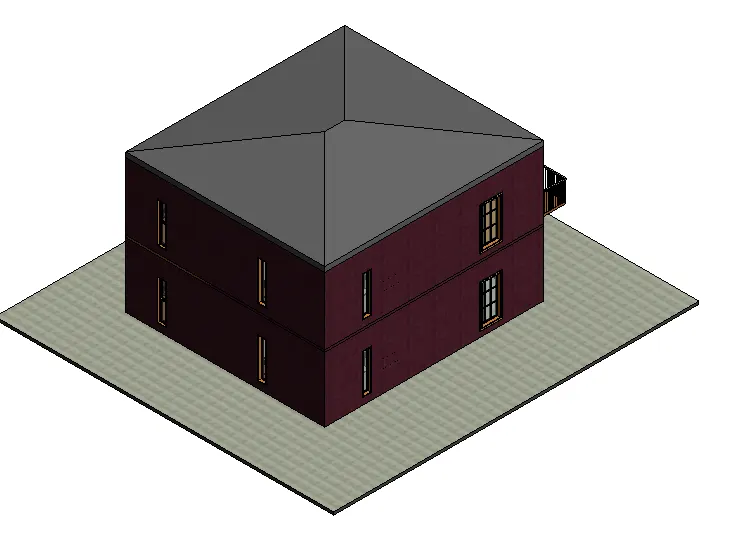
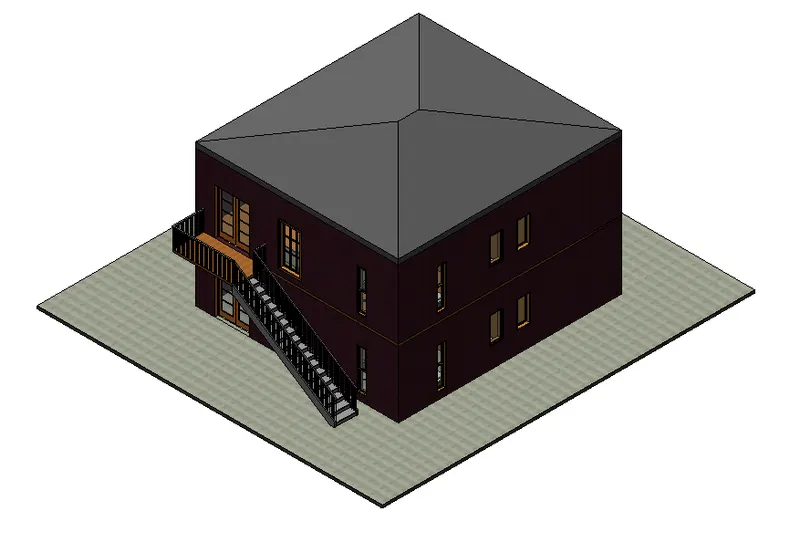
Results - The Roof has been added above the Ceiling by using Footprint option .
i) 3D View of Roof
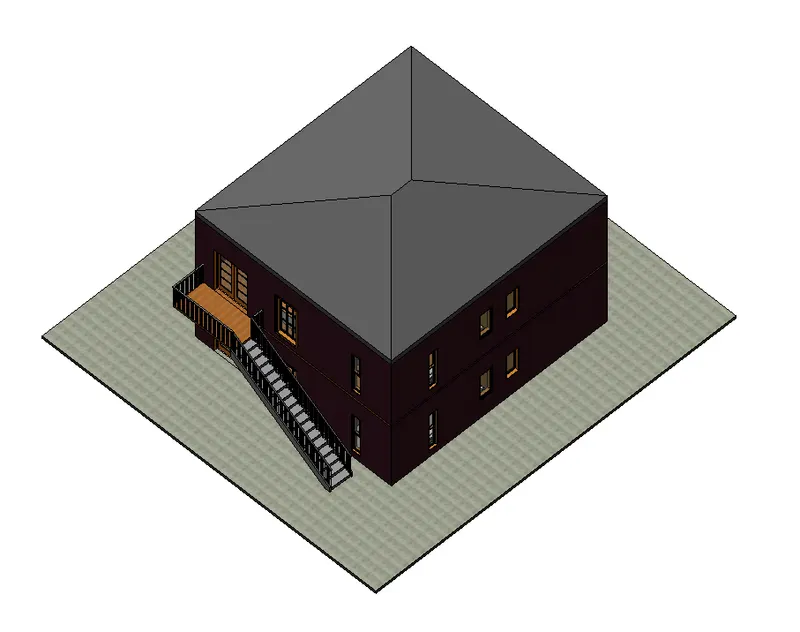
2) Front view
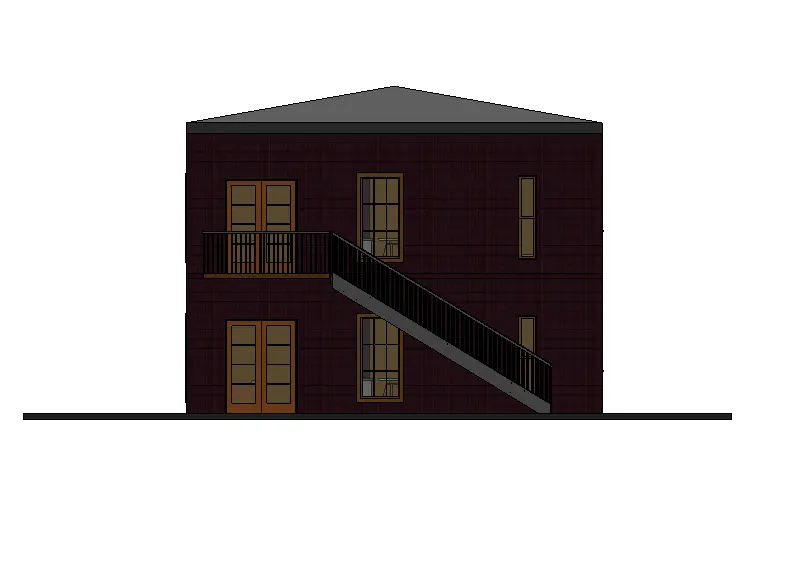
3)
Aim - To create plan views for ground floor level and first-floor level including all the walls, floors, and components and separate them to
architecture and structural plans .
Introduction - 1) Revit is an Building Information Modeling software and is product of an Autodesk.
2) It can be useful for Architects , Civil engineer , Structural Engineer , Mechanical Engineer , Electrical and Plumbing
Engineers .
3) It has Benefits over 2D CAD tools . Such as Real time modeling .
4) There are various templates such as Architectural , Structural , Construction and MEP template and We can work
simultaneously by using Collaborate tool .
Procedure -
Step 1)
i) Open the Week 3 ( Project 2) assignment from the home page of the revit / by clicking Open option .
Step 2)
i) After opening the Project 2 file you will see your model in model space area .
Step 3)
i) We have to create a ground floor plan vie and first floor plan view which includes wall , floors and components
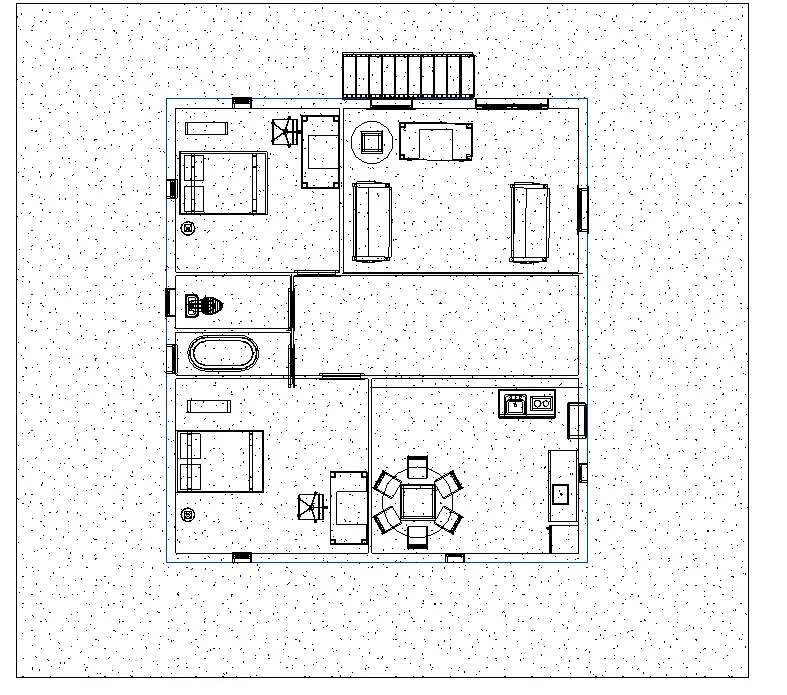
ii) First Floor
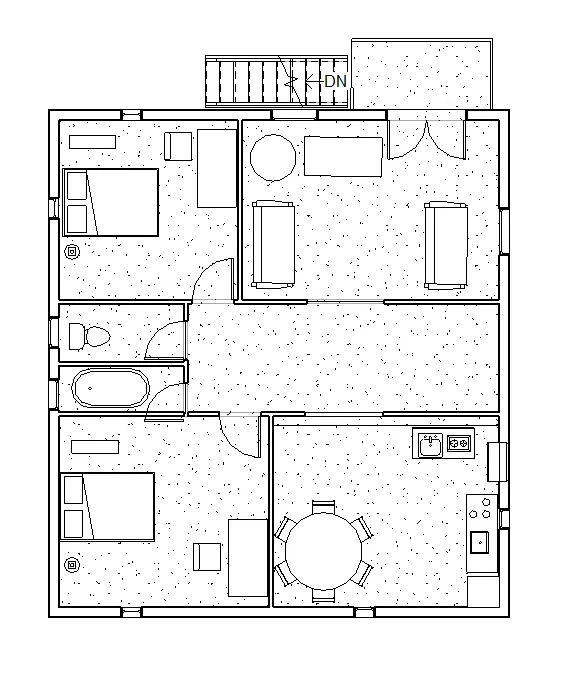
Step 2) Now we have to draw the Structural plan .
i) GF Structural Plan
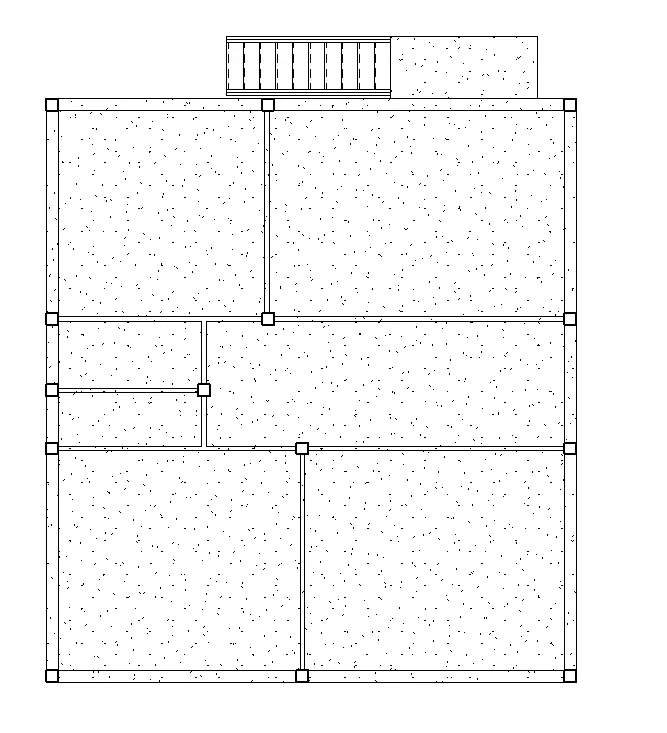
ii) 1st Floor structural Plan
Results - Architectural and Structural plan view is created including wall , floors , and components
ii) It is separated by architectural and structural plan view
i) Architectural view of GF
ii) Architectural View of 1st Floor
iii) Structural View of Gf
iv) Structural view of 1st Floor
4)
Aim - To add dimensions to all the walls and floors with reference to the longitudinal and transverse grids created in the
project file
Introduction - 1) Revit is an Building Information Modeling software and is product of an Autodesk.
2) It can be useful for Architects , Civil engineer , Structural Engineer , Mechanical Engineer , Electrical and Plumbing
Engineers .
3) It has Benefits over 2D CAD tools . Such as Real time modeling .
4) There are various templates such as Architectural , Structural , Construction and MEP template and We can work
simultaneously by using Collaborate tool .
Procedure -
Step 1)
i) As we have already create an Architectural view of Ground Floor plan and First Floor Plan
ii) Open that
Step 2)
i) Click on Annotate tool bar
ii) Click on Aligned to measure the Dimensions
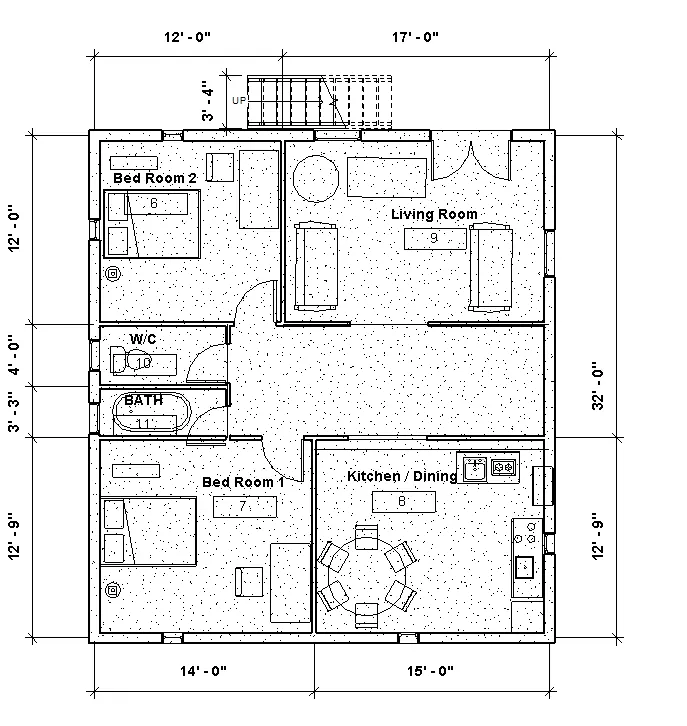
iii) Overall Dimensions are measured , Now we have to measured the dimensions with respective grids which we have created .
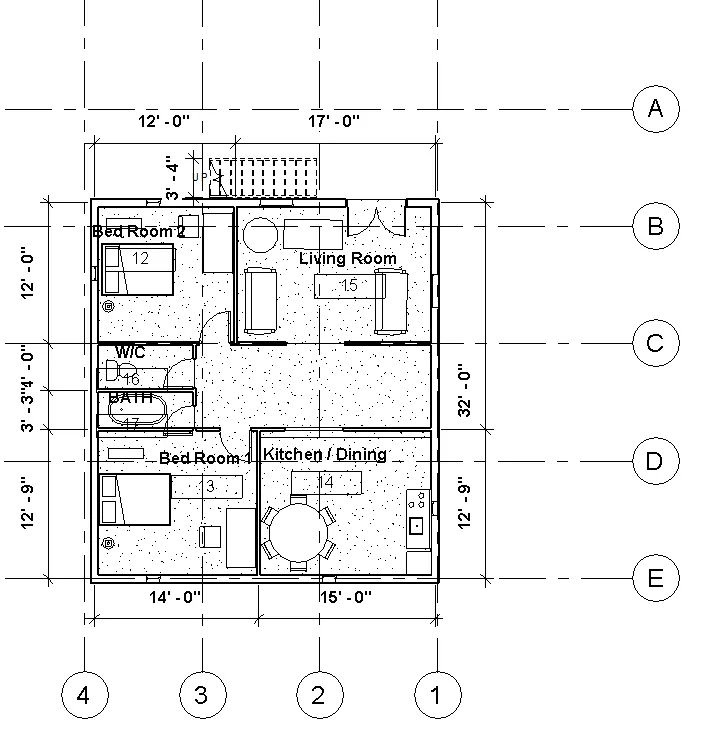
Step 3)
i) Similarly follow the same procedure for measuring the dimension of Structural plan with respect to grids
ii) Use the same grids which we have created in Week 3 Assignment
iii) Place th Structural Plan in such a way Exterior wall should lie at Grid 1
iv) Grid Size = 10' - X and 10' - Y
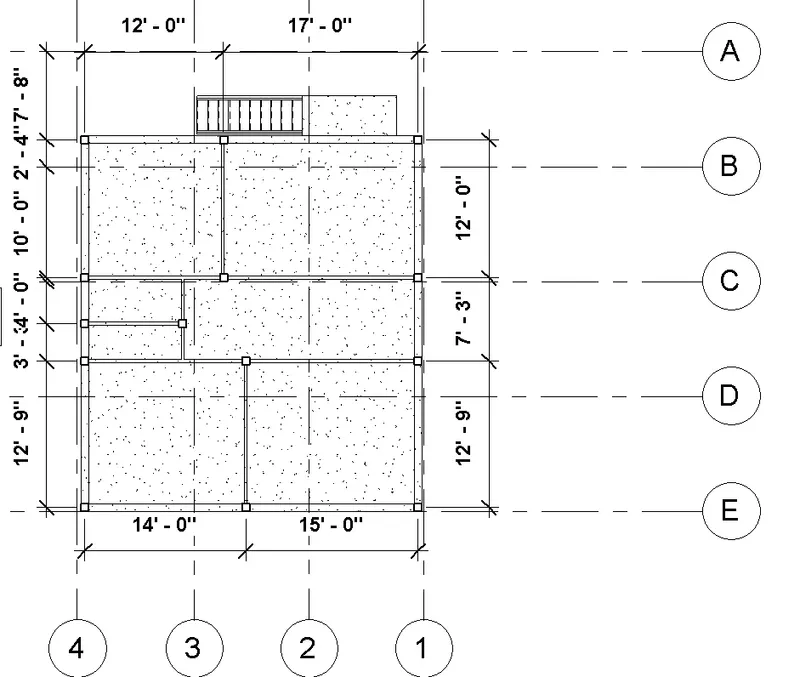
Results - The Dimensions are measured in architectural as well as in Structural plan view with respect to Grids which we have
created in Week 3 Challenged .
1) Architectural plan
2) Structural plan
5)
Aim - To create a sheet template from the view tab and adjust the parameters on the sheet to add appropriate views
Introduction - 1) Revit is an Building Information Modeling software and is product of an Autodesk.
2) It can be useful for Architects , Civil engineer , Structural Engineer , Mechanical Engineer , Electrical and Plumbing
Engineers .
3) It has Benefits over 2D CAD tools . Such as Real time modeling .
4) There are various templates such as Architectural , Structural , Construction and MEP template and We can work
simultaneously by using Collaborate tool .
Procedure -
Step 1)
i) Open the Project file
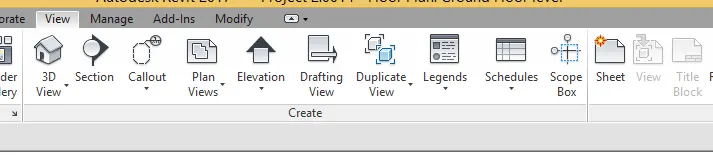
ii) Click on View tab
iii) Click on Sheet tab
Step 2)
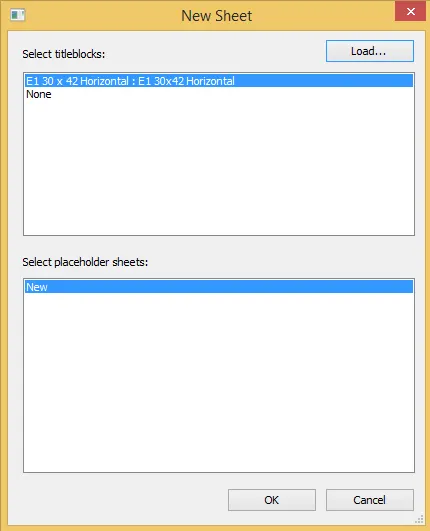
i) Once you Click Sheet , Following Dialog box will open
ii) Click on Load Family
iii) Click on Title Block and
iv) Click E1 30 x 42 title Sheet
v) Click on Okay .
Step 3)
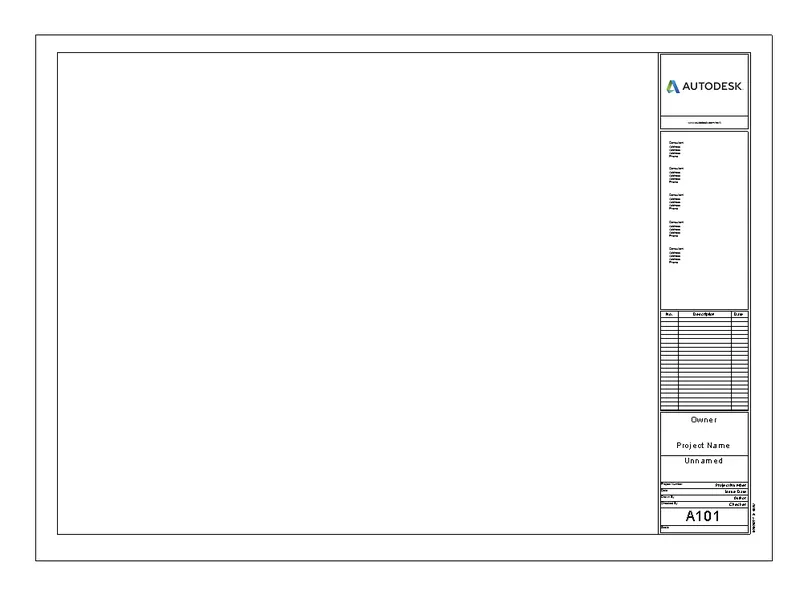
i) After Clicking okay
ii) Sheet will be created in Modal Space
Step 4)
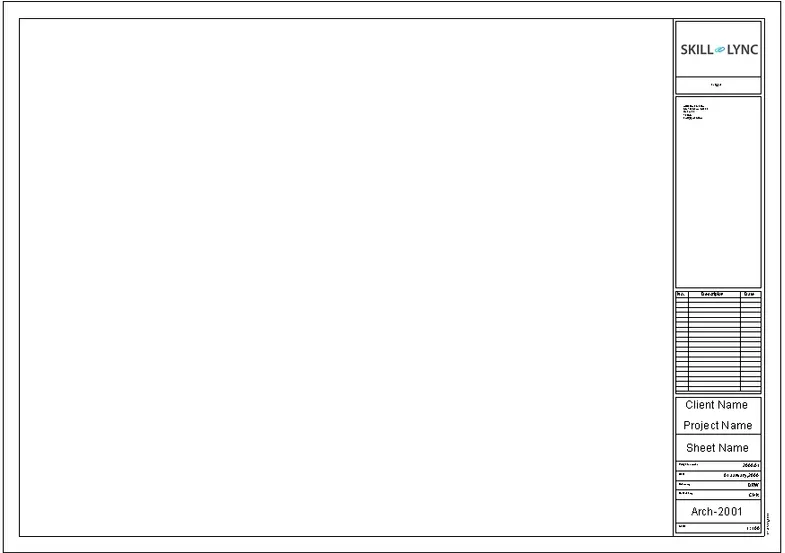
i) Click on Title block and Edit the Family
ii) Edit the title as Skill Lync and So on as shown in Fig
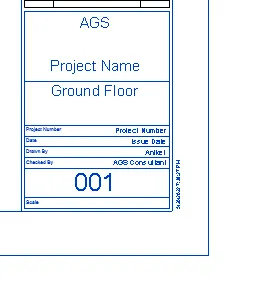
iii) Now edit the Client name and Sheet name as follows
Step 5)
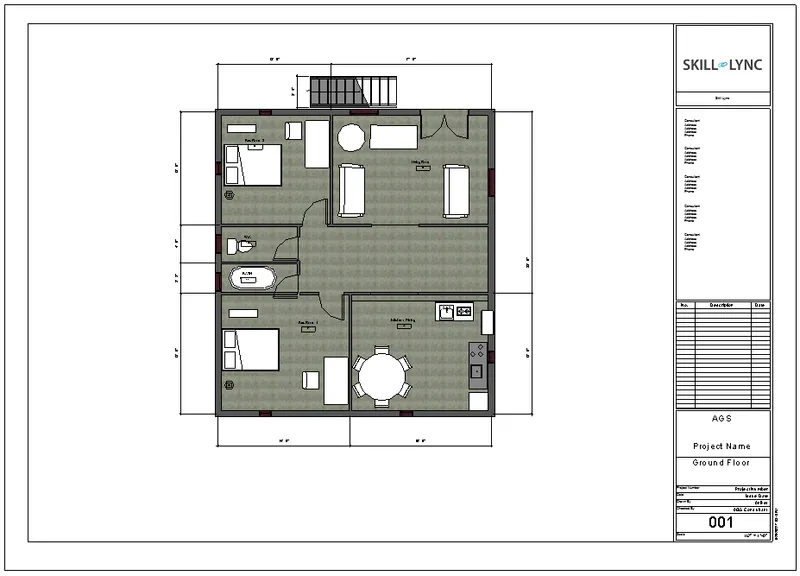
i) Click on view
ii) Select - Ground Floor plan view
iii) Adjust the view
Step 6)
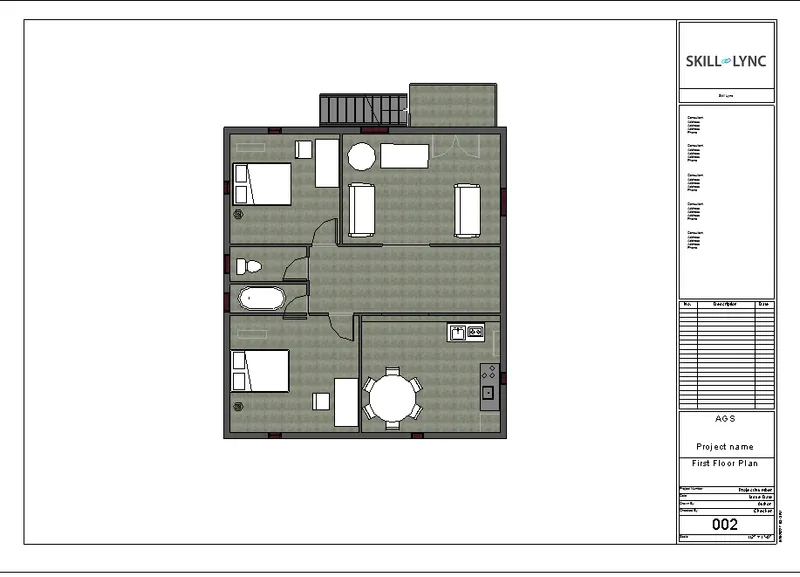
i) Similarly Create a one more sheet and name it as First Floor
Results - A Sheet template is Created and Parameters are adjusted .
1) Ground Floor sheet template
2) First Floor sheet template
6)
Aim -To create the elevation views, looking at your building from East, North, South, and West by using Elevation tab
Introduction - 1) Revit is an Building Information Modeling software and is product of an Autodesk.
2) It can be useful for Architects , Civil engineer , Structural Engineer , Mechanical Engineer , Electrical and Plumbing
Engineers .
3) It has Benefits over 2D CAD tools . Such as Real time modeling .
4) There are various templates such as Architectural , Structural , Construction and MEP template and We can work
simultaneously by using Collaborate tool .
Procedure
Step 1)
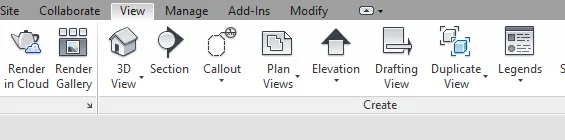
i) Click On View
ii) Click on Elevation
Step 2)
i) Place the view on all sides to see the views .
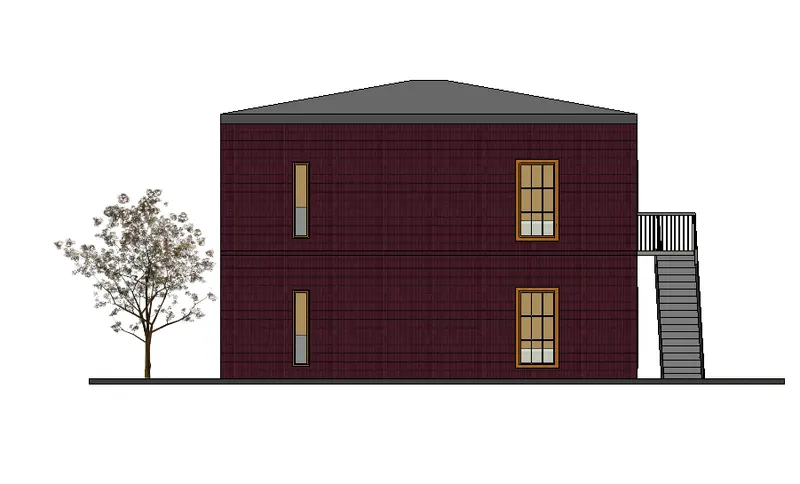
1) East Side views
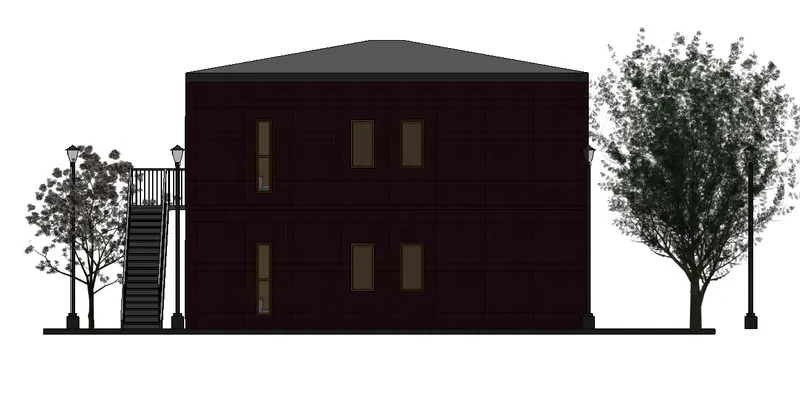
2) West Side views
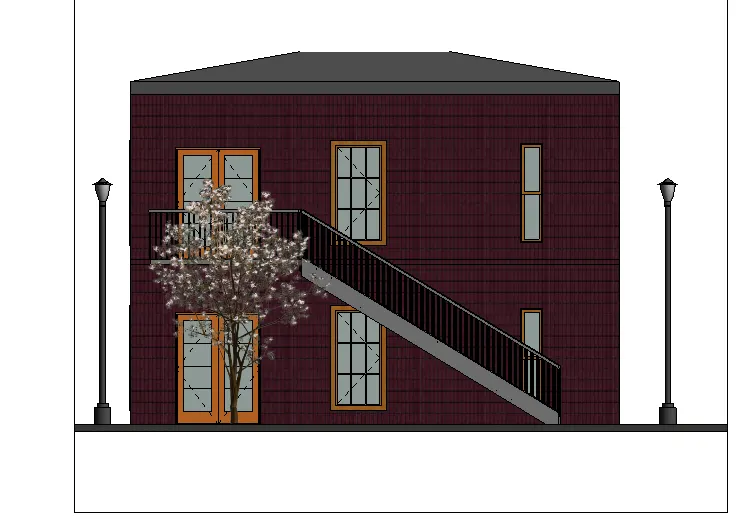
3) North Side View
4) South View -
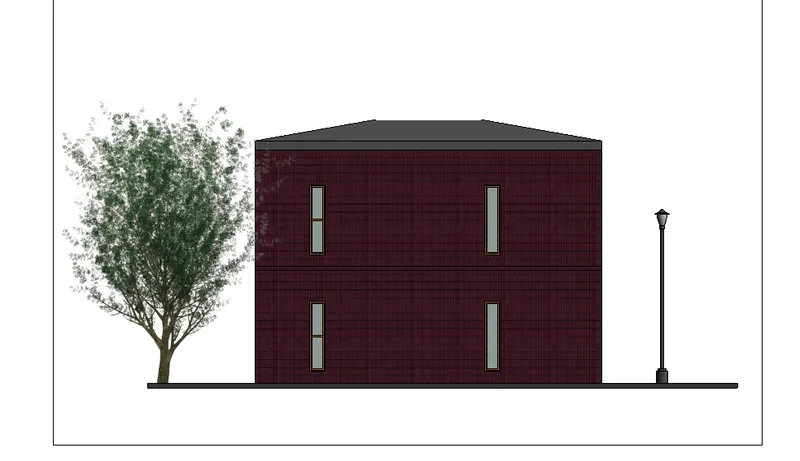
Results - A Elevations views are created by using view tab in East West North and South Direction
1) East Side views
2) West Side views
3) North Side View
4) South View -
7)
Aim - To create a section view through each rooms by cutting it across longitudinally or transverse direction .
Introduction - 1) Revit is an Building Information Modeling software and is product of an Autodesk.
2) It can be useful for Architects , Civil engineer , Structural Engineer , Mechanical Engineer , Electrical and Plumbing
Engineers .
3) It has Benefits over 2D CAD tools . Such as Real time modeling .
4) There are various templates such as Architectural , Structural , Construction and MEP template and We can work
simultaneously by using Collaborate tool .
Procedure -
Step 1)
i) To create a section view we have to cut the section through each rooms
ii) Click on View tab
iii) Click on Section
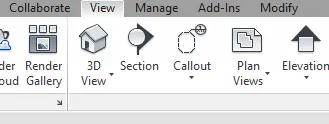
Step 2)
i) Place the Section line across each room
A) Section through Bed Room
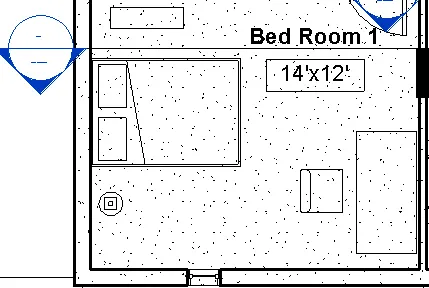
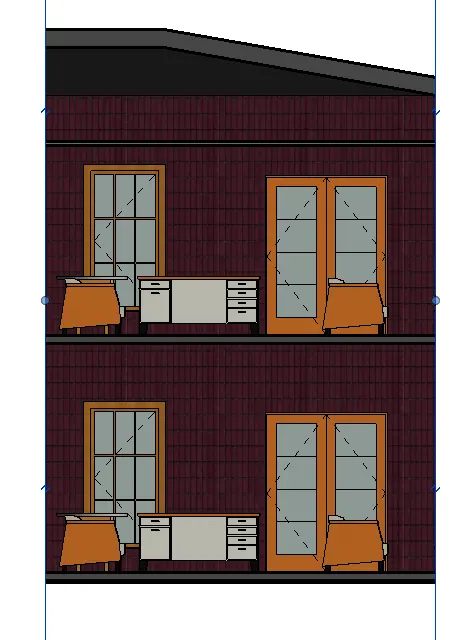
B) Living Room
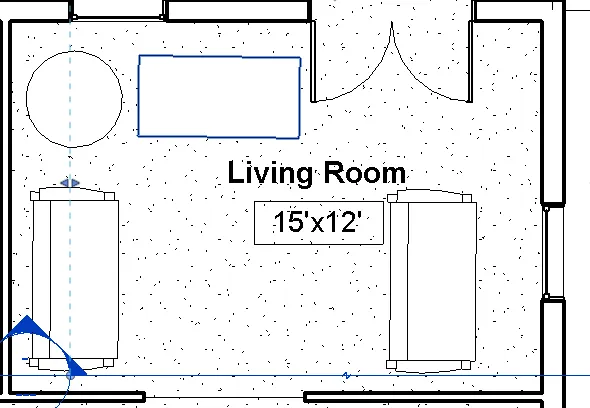
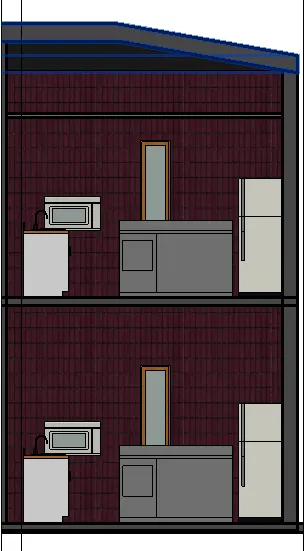
C) Kitchen
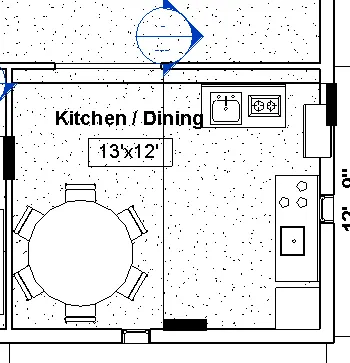
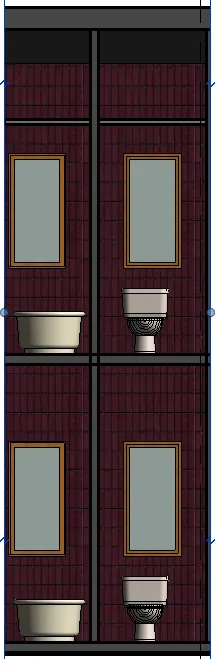
D) Rest Room -
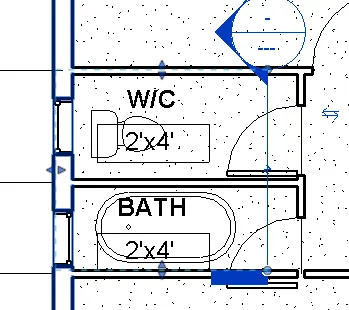
Results - A Section view is created by cutting it across longitudinally and transverse direction .
Following are the 3D Realistic view of the respective rooms
A) Bed Room
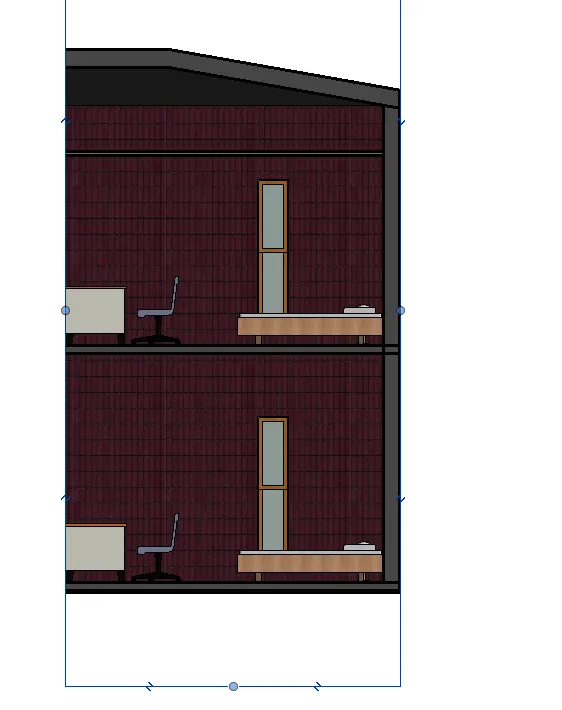
B) Kitchen
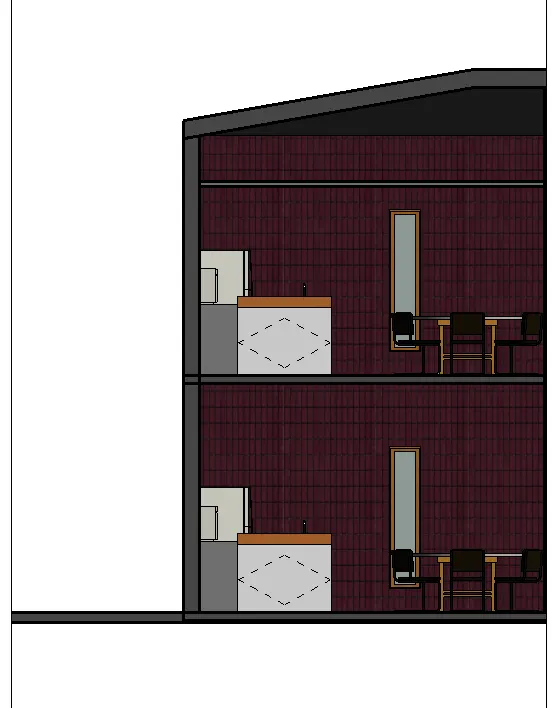
C) Rest Room
D) Living Room -
8)
Aim - To classify the views, Plan Views, Section Views, and Elevation views to either Design or Documentation category using
Properties browser .
Introduction - 1) Revit is an Building Information Modeling software and is product of an Autodesk.
2) It can be useful for Architects , Civil engineer , Structural Engineer , Mechanical Engineer , Electrical and Plumbing
Engineers .
3) It has Benefits over 2D CAD tools . Such as Real time modeling .
4) There are various templates such as Architectural , Structural , Construction and MEP template and We can work
simultaneously by using Collaborate tool .
Procedure -
Step 1)
i) To create a different view of the plan in documentation format we have to create sheets
ii) Click on Sheet tab
Step 2)
i) Once you Click Sheet , Following Dialog box will open
ii) Click on Load Family
iii) Click on Title Block and
iv) Click E1 30 x 42 title Sheet
v) Click on Okay .
Step 3)
i) After Clicking okay
ii) Sheet will be created in Modal Space
Step 4)
i) Click on Title block and Edit the Family
ii) Edit the title as Skill Lync and So on as shown in Fig
Step 5)
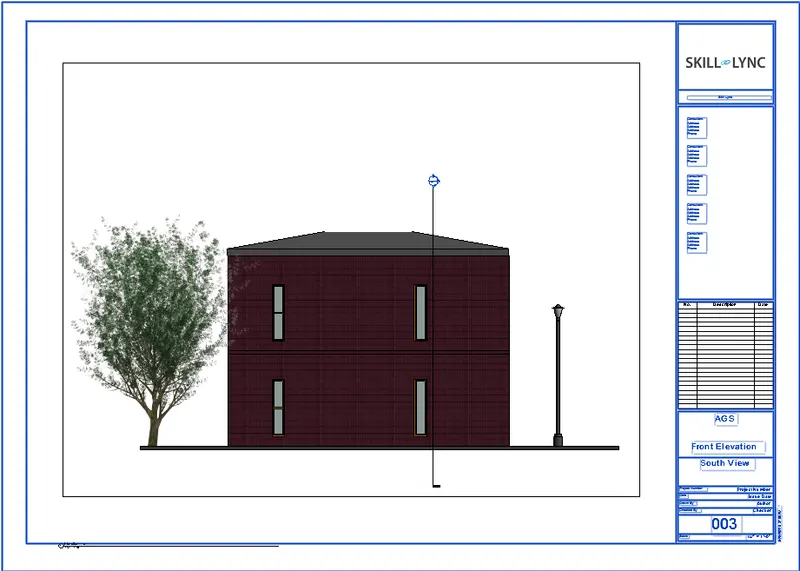
1) Now we have to edit the parameters according to the plan views for eg Ground floor plan , East side view etc
A) Front Elevation - Create a sheet template Name as South View / Front Elevation
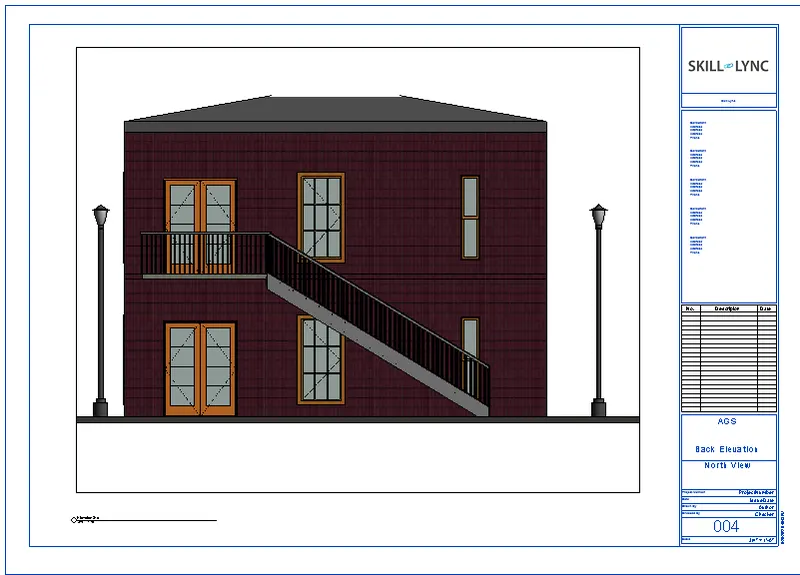
B) North Elevation - Create a Back side elevation and Name it as North view / Elevation
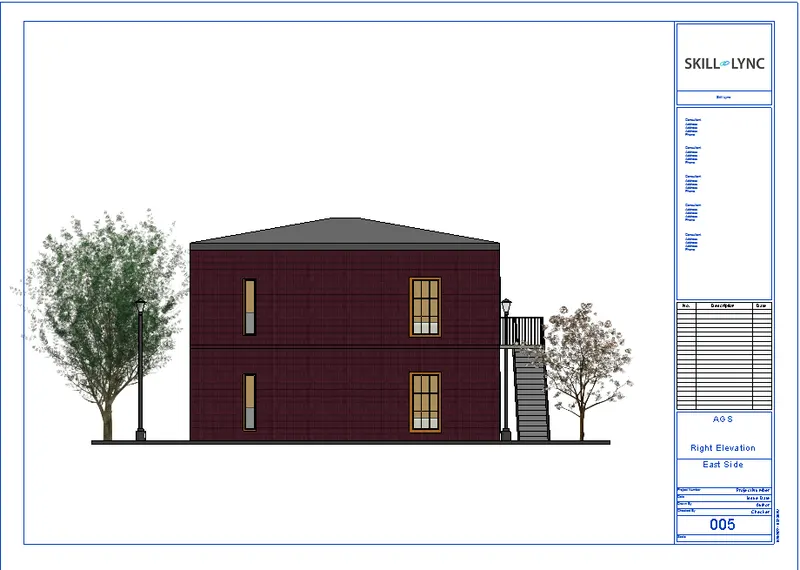
C) East View - Create a Right side elevation and Name it as East View / Elevation
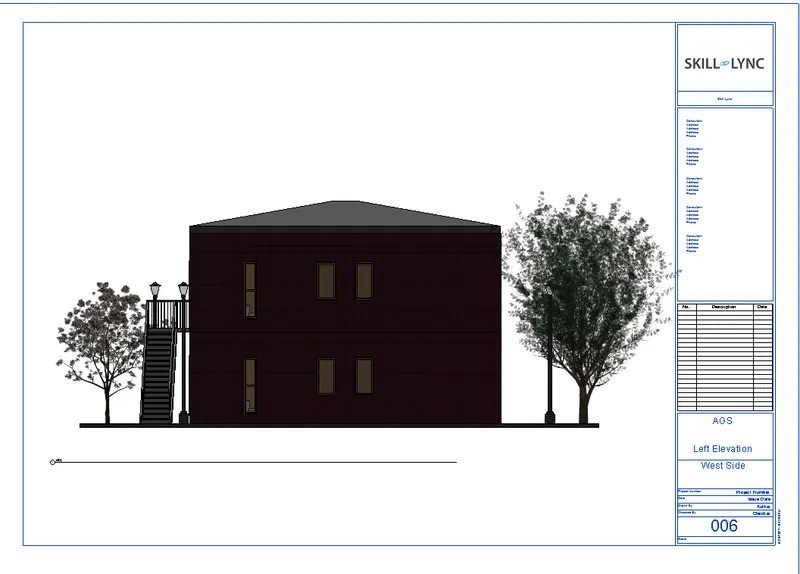
D) West View - Create a Left side elevation and Name it as West View / Elevation .
2) Now Place the Section View
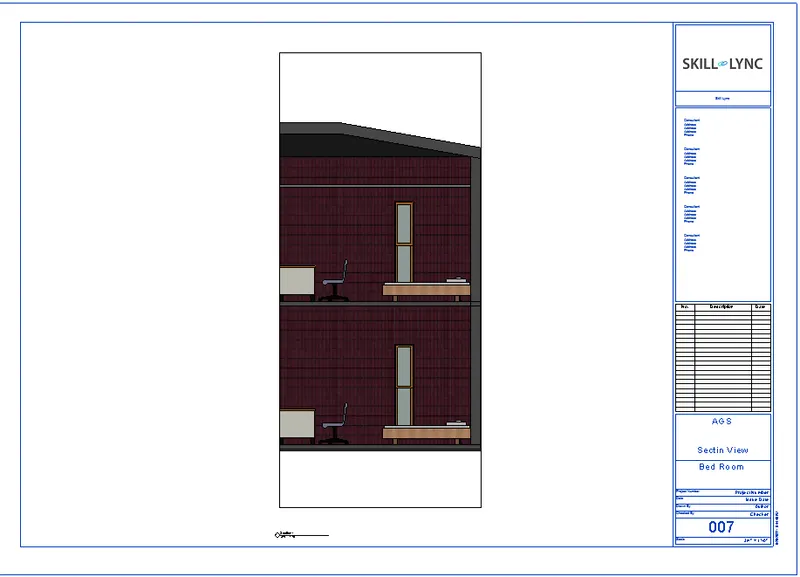
A) Section Through Bed Room
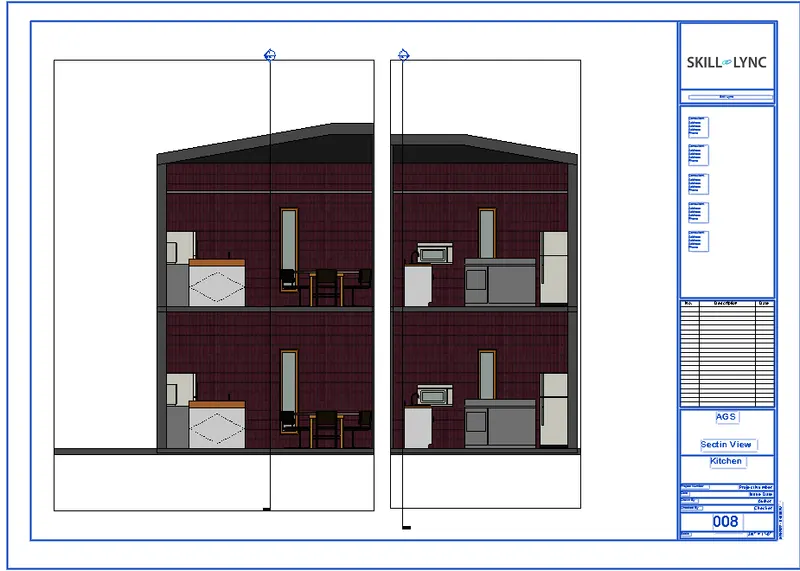
B) Section Throught Kitchen
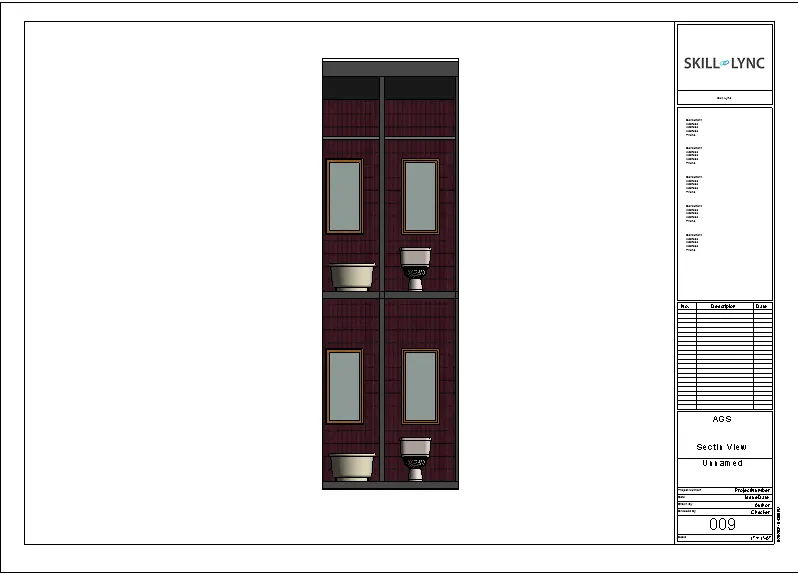
C) Section Through Rest Room
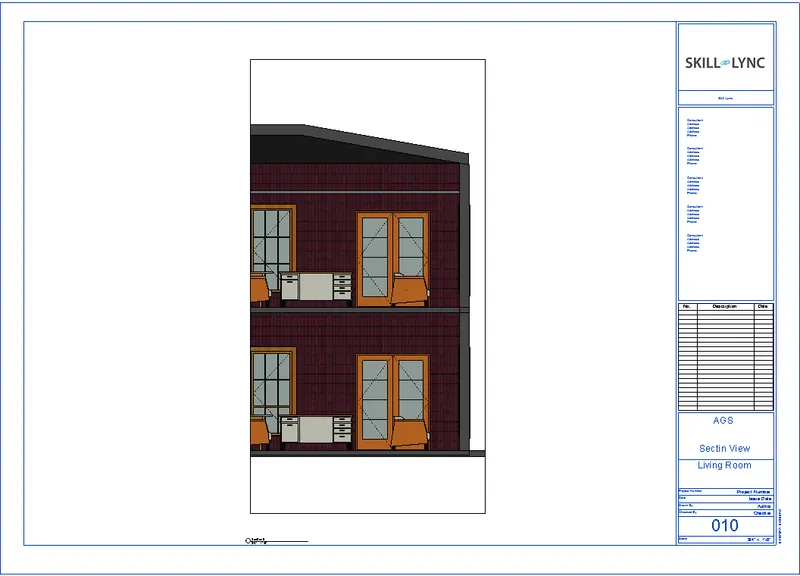
D) Section Through Living Room
3) Plan Views
A) Similarly Create a sheet for Ground Floor Plan
B) First Floor Plan
Results - A Plan views , Section views and Elevation Views are documented by creating Sheet template .
A) Front Elevation -
B) North Elevation -
C) East Elevation -
D) West Elevation -
E) Section view of Bed Room
F) Section View of Kitchen
G) Section View of Rest Room
H) Section view Living Room
I) Ground Floor Plan
j) First Floor Plan
9)
Aim - To Create sheet template of multiple sheets .
Introduction - 1) Revit is an Building Information Modeling software and is product of an Autodesk.
2) It can be useful for Architects , Civil engineer , Structural Engineer , Mechanical Engineer , Electrical and Plumbing
Engineers .
3) It has Benefits over 2D CAD tools . Such as Real time modeling .
4) There are various templates such as Architectural , Structural , Construction and MEP template and We can work
simultaneously by using Collaborate tool .
Procedure -
Step 1)
i) To create a different view of the plan in documentation format we have to create sheets
ii) Click on Sheet tab
Step 2)
i) Once you Click Sheet , Following Dialog box will open
ii) Click on Load Family
iii) Click on Title Block and
iv) Click E1 30 x 42 title Sheet
v) Click on Okay .
Step 3)
i) After Clicking okay
ii) Sheet will be created in Modal Space
Step 4)
i) Click on Title block and Edit the Family
ii) Edit the title as Skill Lync and So on as shown in Fig
Step 5)
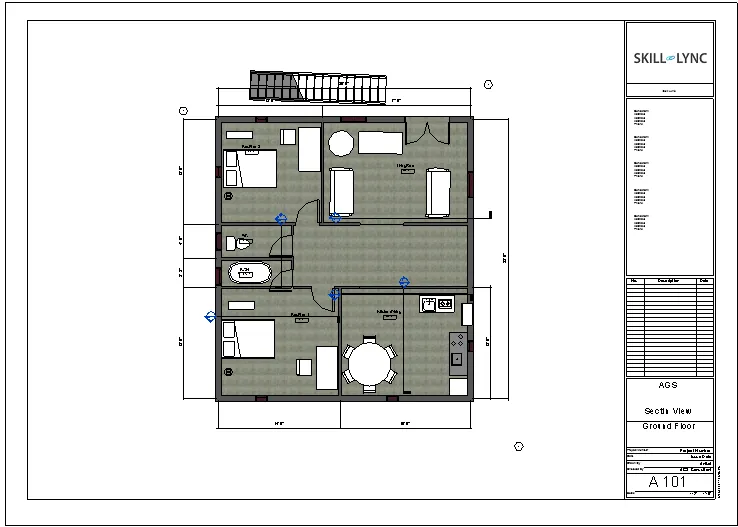
a) To create a view of Ground Floor plan and Change the Sheet Number to A 101
Step 6)
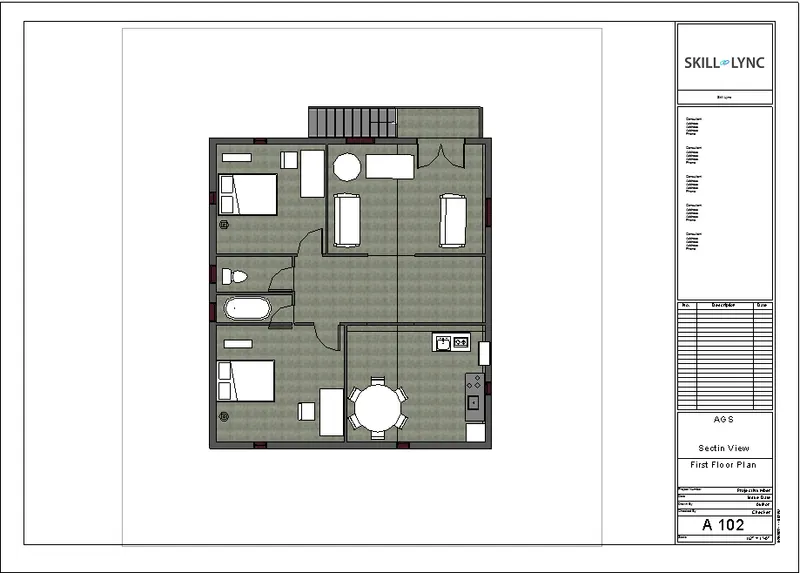
b) To create a view of First Floor plan and Change the Sheet Number to A 102
Step 7)
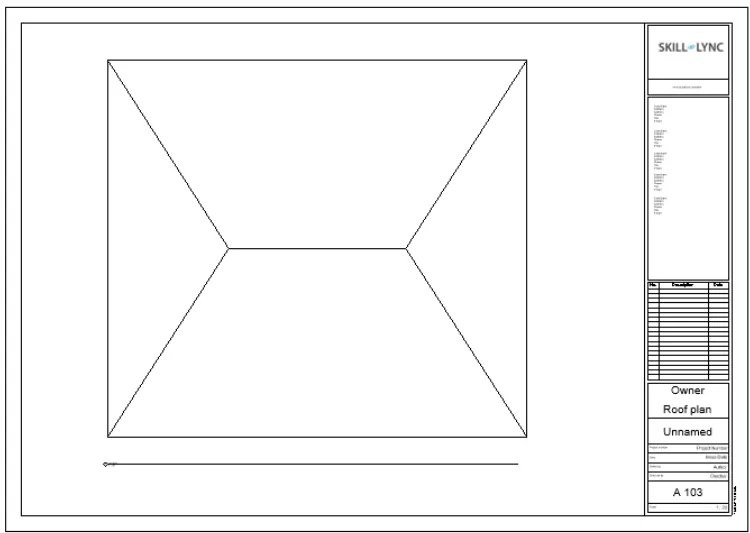
c) To create a view of Roof plan and Change the Sheet Number to A 103
Step 8)
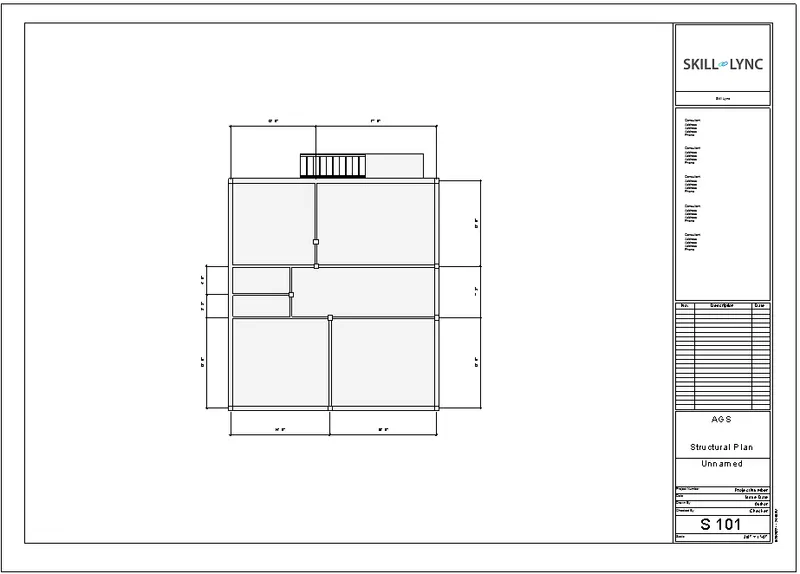
d) To create a view of Ground Floor Structutal plan and Change the Sheet Number to S 101
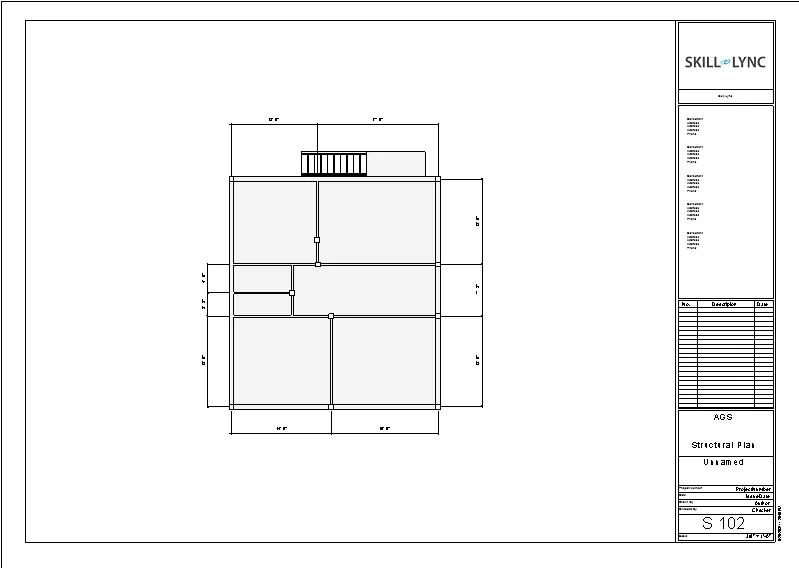
e) To create a view of First Floor Structutal plan and Change the Sheet Number to S 102
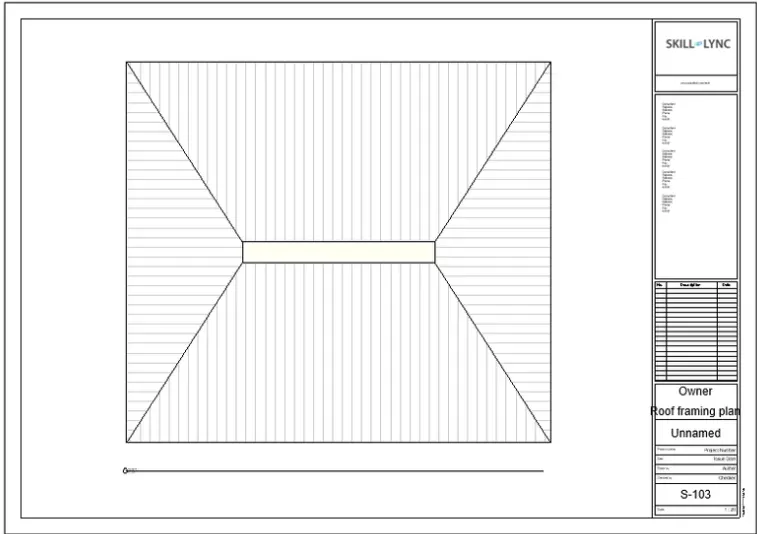
f) To create a view of Roof Framing plan and Change the Sheet Number to S 103
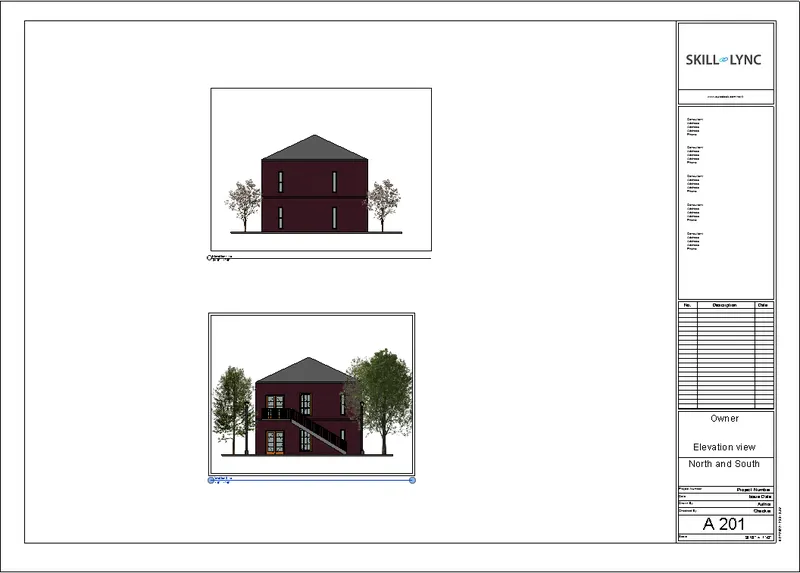
g) To create a view of North South and Change the Sheet Number to A 201
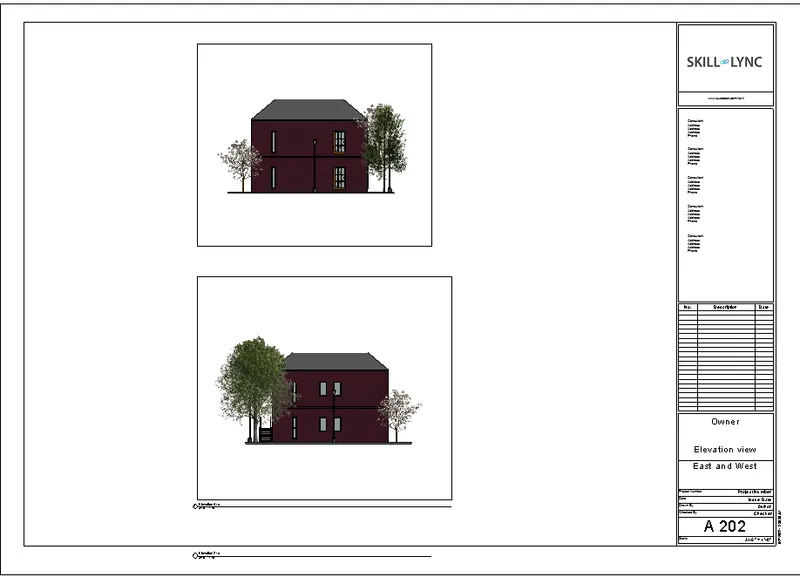
h) To create a view of North South and Change the Sheet Number to A 202
Results - A Multiple Views are created by using Sheet template are as follows -
a) A 101 - Ground Floor Plan
b) A 102 - First Floor Plan
c) A 103 - Roof Plan
d) S 101 Ground Floor Structutal plan
e) d) S 102 First Floor Structutal plan
f) S 103 Roof Framing plan
g) A 201 North South elevation
h) A 202 East West elevation -
10)
Aim - To Create a camera-specific view or a 3D view in each room and Based on the views create a new set of sheets .
Introduction - 1) Revit is an Building Information Modeling software and is product of an Autodesk.
2) It can be useful for Architects , Civil engineer , Structural Engineer , Mechanical Engineer , Electrical and Plumbing
Engineers .
3) It has Benefits over 2D CAD tools . Such as Real time modeling .
4) There are various templates such as Architectural , Structural , Construction and MEP template and We can work
simultaneously by using Collaborate tool .
Procedure -
Step 1)
i) We have already created the 3D view of each Rooms
ii) Place that View on Sheet template and Create a Sheets .
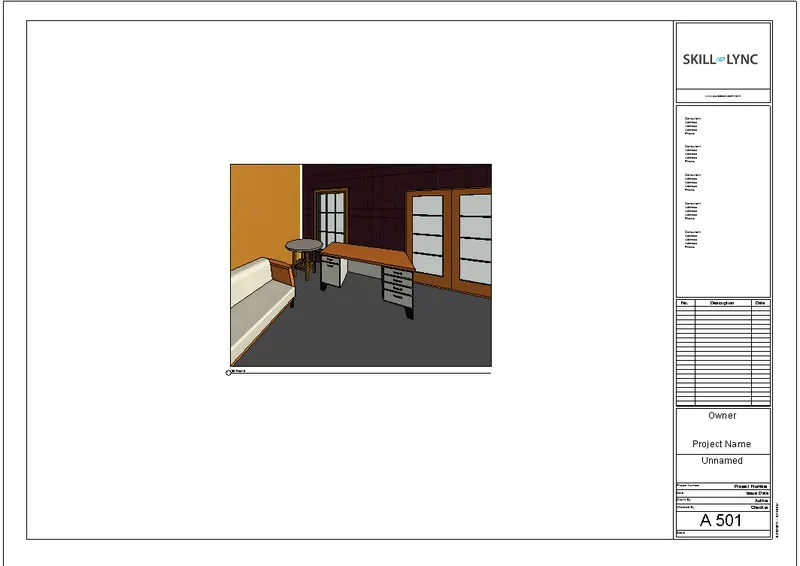
A) Living Room - A 501
i) Change the Sheet Name to A 501
ii) Place the 3D View of Living Room ( which we have already created )
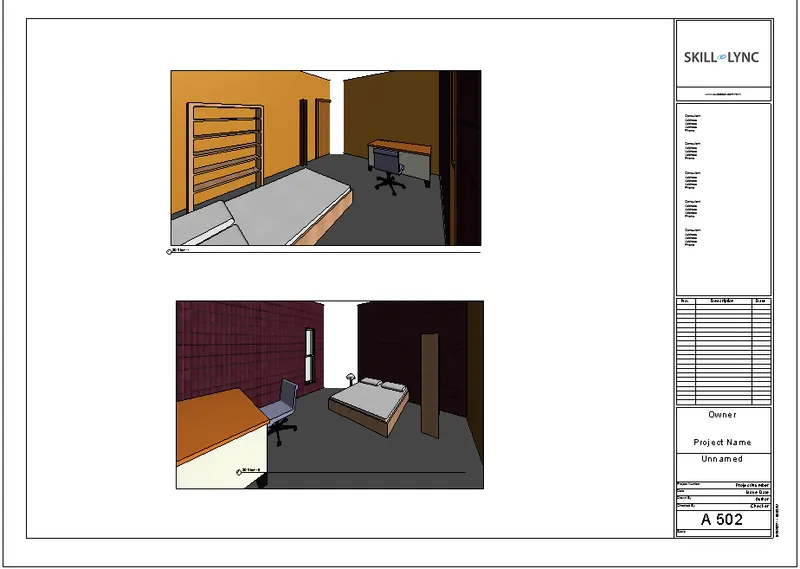
B) Bed Room - A 502
i) Change the Sheet Name to A 502
ii) Place the 3D View of Bed Room ( which we have already created )
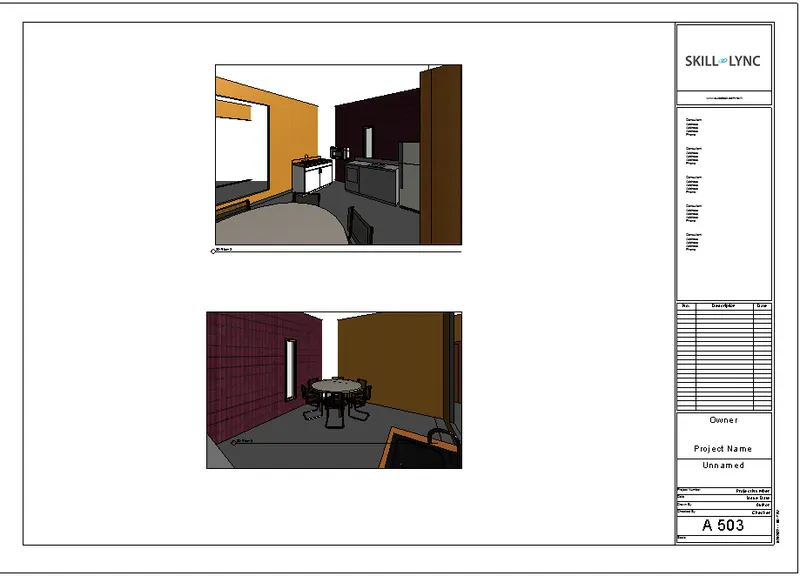
C) Kitchen - A 503
i) Change the Sheet Name to A 503
ii) Place the 3D View of Kitchen (which we have already created )
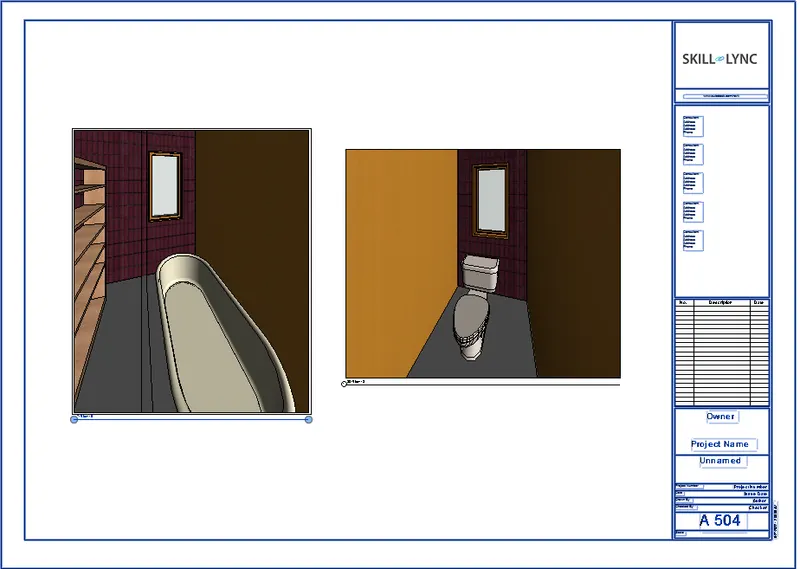
D) Rest Room - A 504
i) Change the Sheet Name to A 504
ii) Place the 3D View of Rest Room (which we have already created )
Results - We have Created a camera specific view in each room and we have created New Sheets of various views
A) A 501
B) Bed Room - A 502
C) Kitchen - A 503
D) Rest Room - A 504