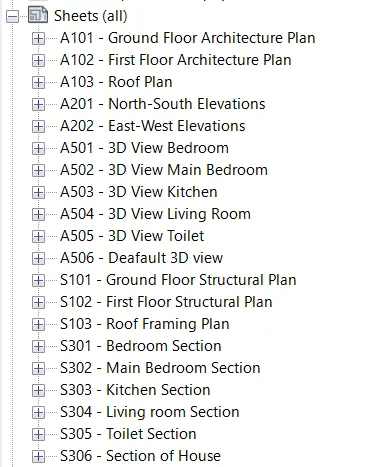
3D Creation of Celing, Roof, Architectural plan, Structural plan, Sectional view, Elevation view and Camera specific view for a house plan using REVIT
1)
Objective: 3D Creation of Ceiling, Roof, Architectural plan, Structural plan, Sectional view, Elevation view, and Camera specific view for a house plan using REVIT.
Software used: REVIT and its tools.
Procedure:
Step 1: Based on the project saved from Week 3, proceed from the First Floor Level. Model a Ceiling from the architecture tab above the walls at the first-floor level.
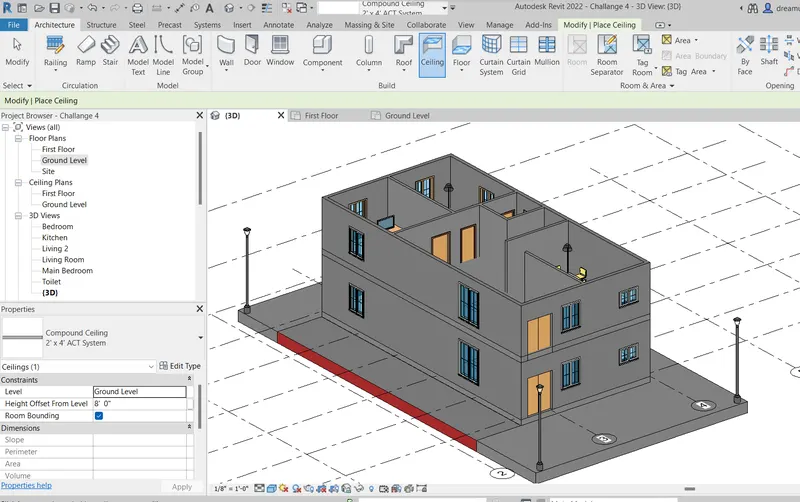
Step 2: From architecture tab select the ceiling. Now create ceiling on first floor by creating boundary.
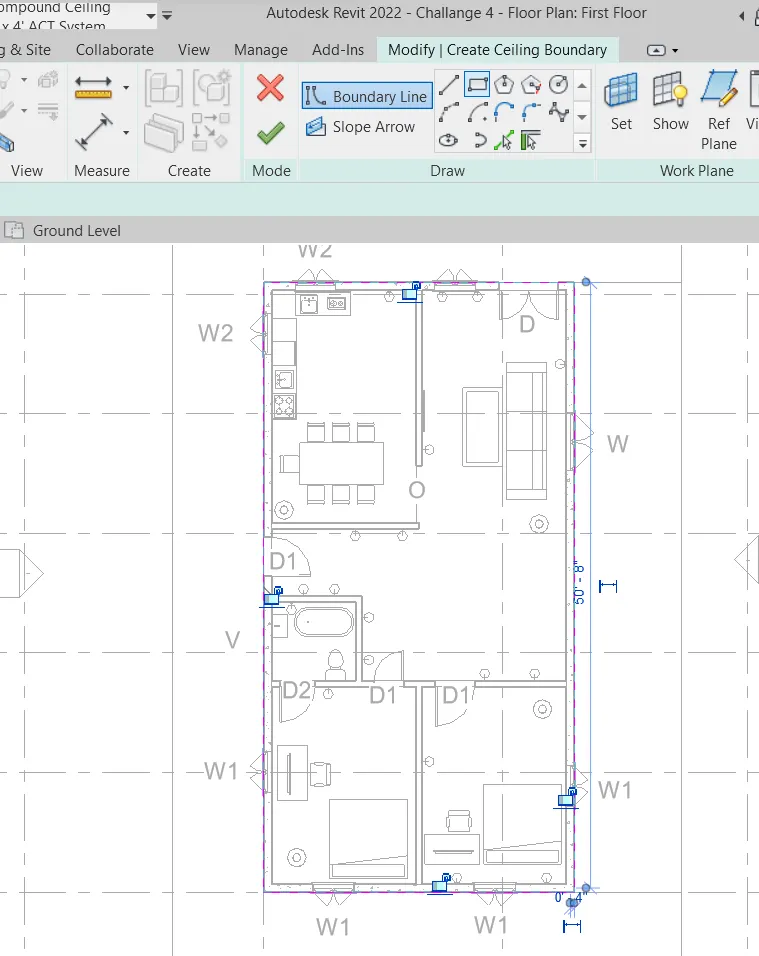
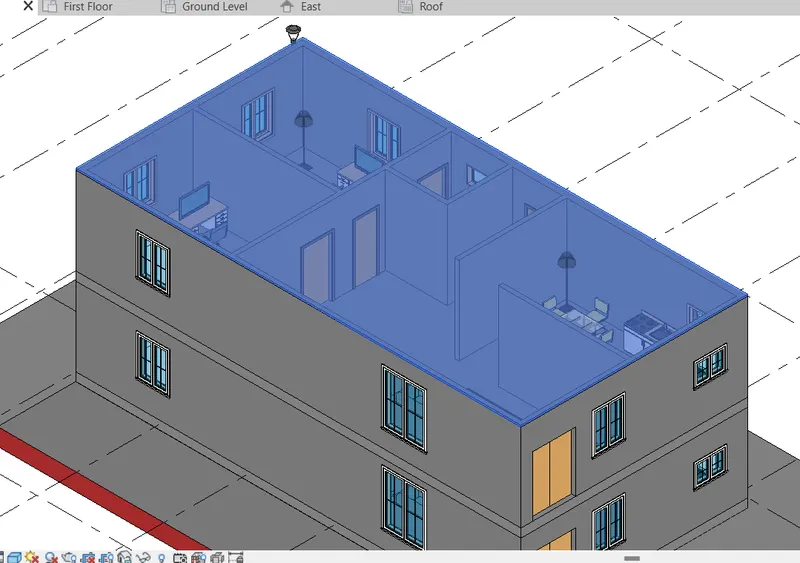
Result: Ceiling is modelled above walls above first floor.
2)
Objective: Model a roof above the ceiling by selecting the footprints of the ceiling. Using the adjustment toolbars appearing on-screen adjust the roof slope to 10 degrees.
Software used: REVIT and its tools.
Procedure:
From the architecture tab select roof and then select roof by footprint. Now create a boundary and from properties browser enter slope parameter.
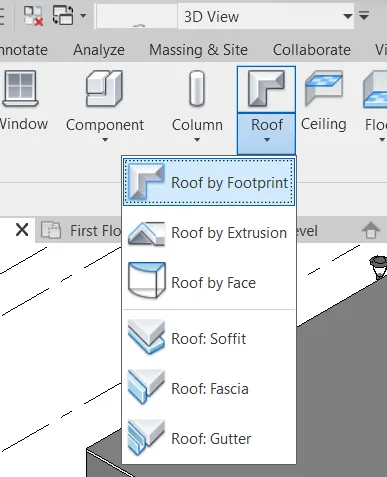
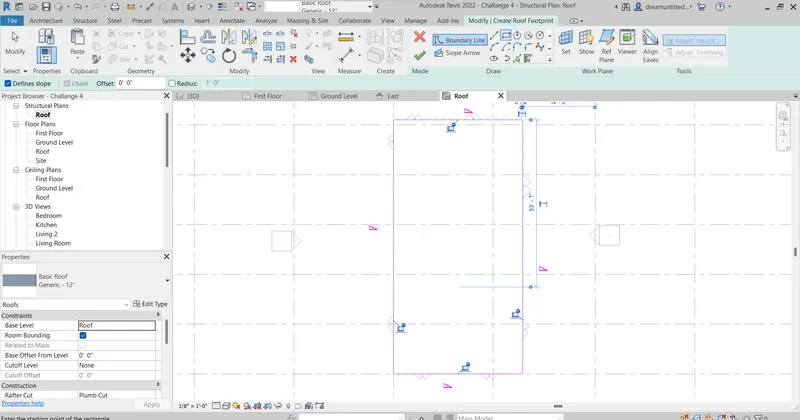
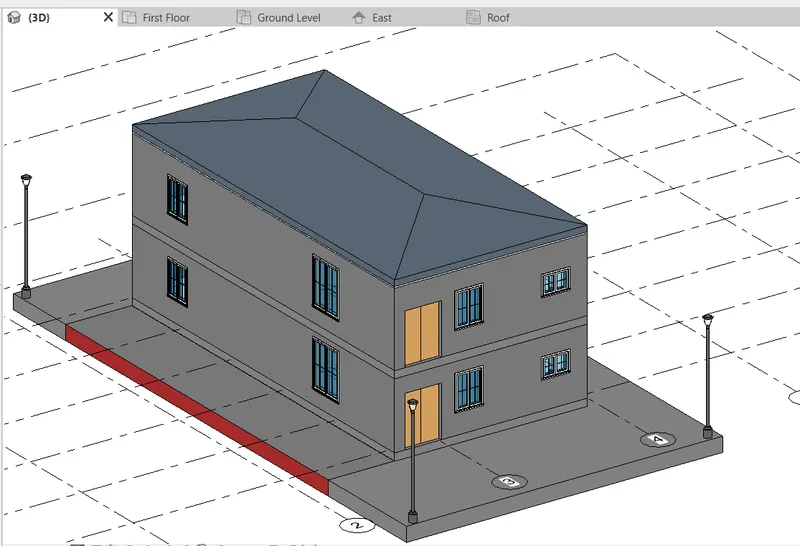
Result: Roof having a slope of 10 degrees is modeled using roof by footprint of ceilings.
3)
Objective: To create plan views for ground floor level and first-floor level including all the walls, floors, and components and to separate them into architecture and structural plans.
Software used: REVIT and its tools.
Procedure:
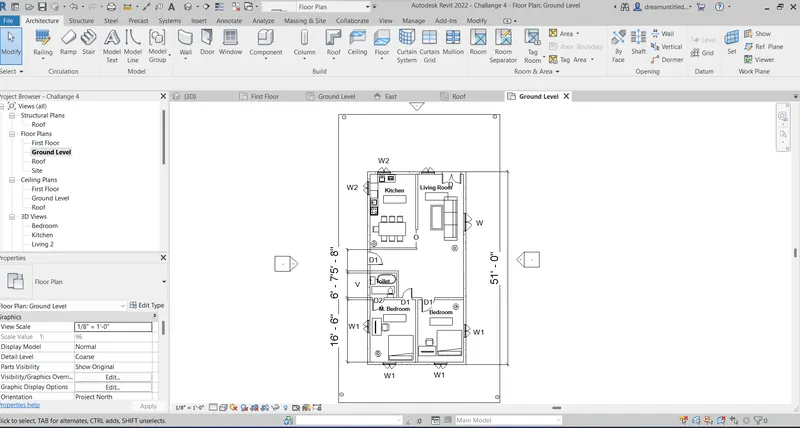
Step 1: Create plan views for the ground floor and first-floor level. As our project template is architectural. So architecture plan can be directly obtained from the default floor plan.
Ground level architectural plan
First Floor architectural plan
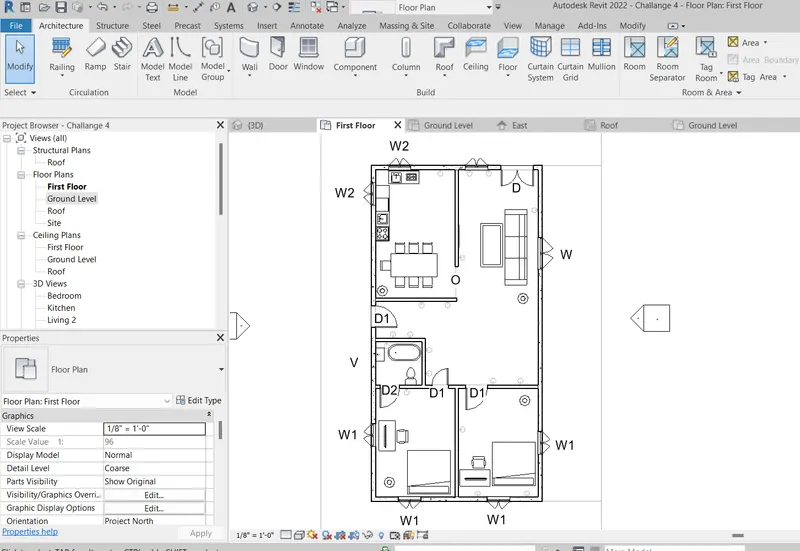
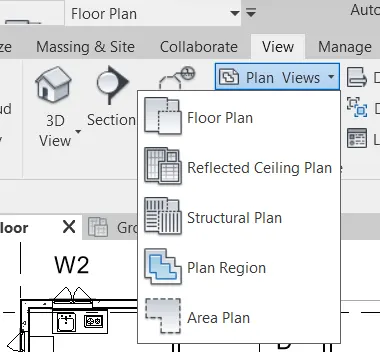
Step 2: From View tab select Plan Viewa --> Structural Plan. Select Ground Level.
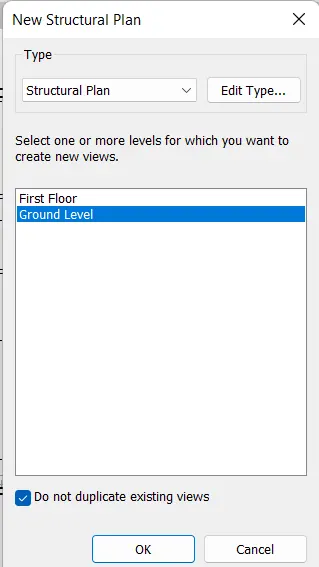
Ground Level Structural Plan
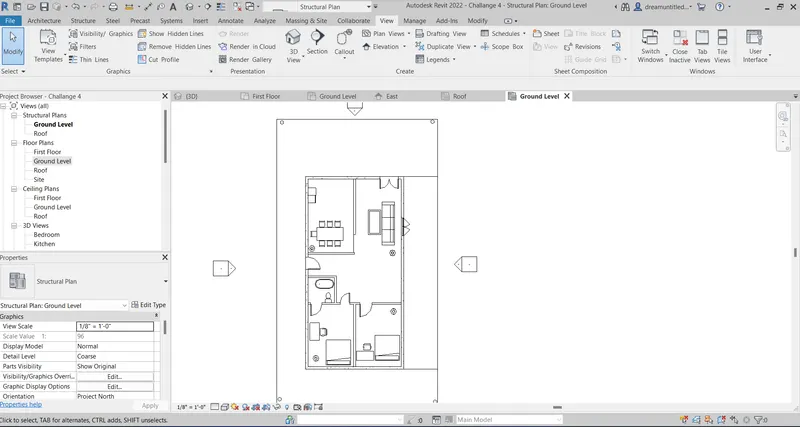
First Floor Structural Plan
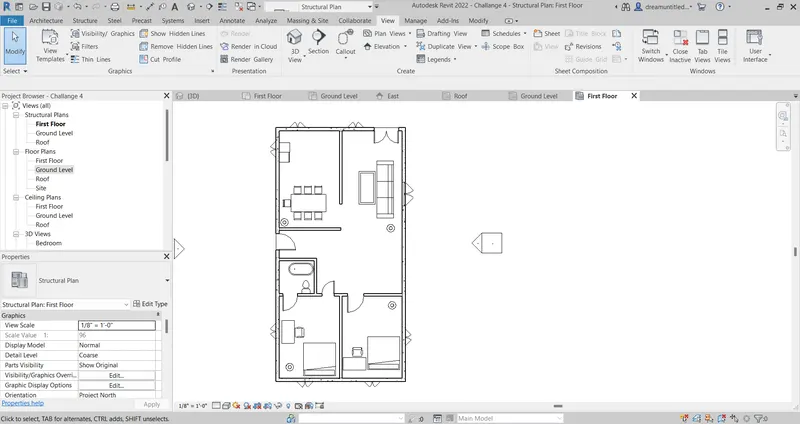
Result: plan views are created for ground floor level and first-floor level including all the walls, floors, and components and separated into architecture and structural plans.
4)
Objective: Using annotate toolbar add dimensions to all the walls and floors with reference to the longitudinal and transverse grids created in the project file.
Software used: REVIT and its tools.
Procedure:
Step 1: Open Architecture plan and draw longitudinal and traverse grids from grids under the architectural tab, if not created earlier.
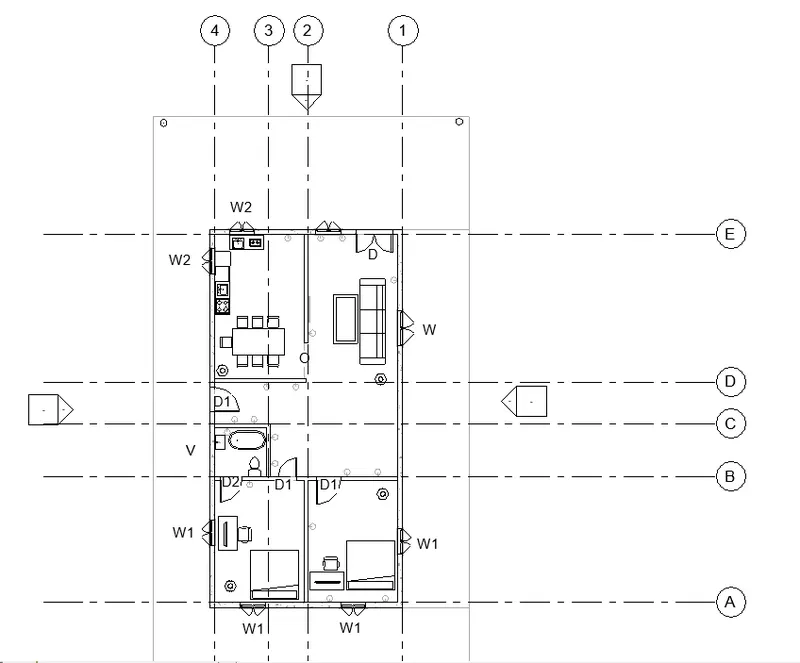
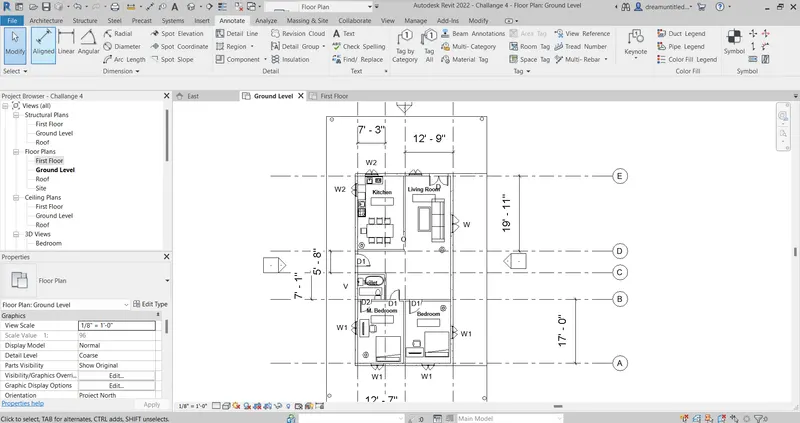
Step 2: From Annotate tab select aligned dimensions and mark dimensions to all walls, and floors with reference to grids. created.
Step 3: Similarly add dimensions to First-floor architectural plan.
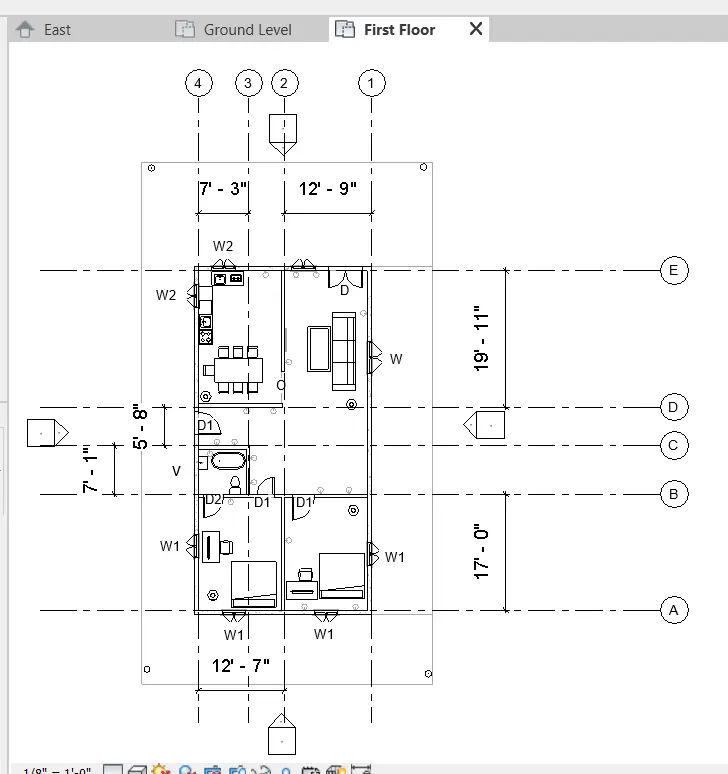
Step 4: Now draw grids in the structural plan if not drawn earlier and mark dimensions along with grids.
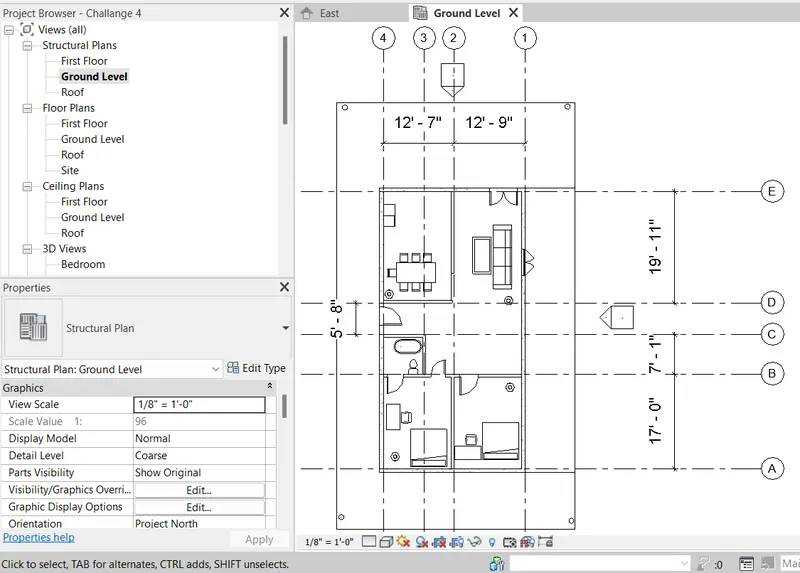
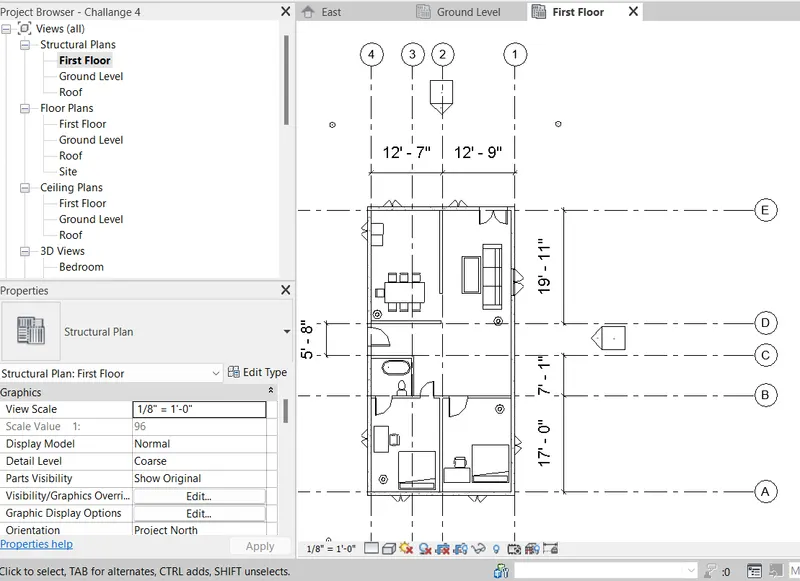
Result: Using annotate toolbar dimensions are added to all the walls and floors with reference to the longitudinal and transverse grids.
5)
Objective: To create a sheet template from the view tab and adjust the parameters on the sheet to add appropriate views
Software used: REVIT and its tools.
Procedure: In REVIT using sheets we can place multiple views and schedules in different documents or sheet templates.
Step 1: From View tab select sheet.
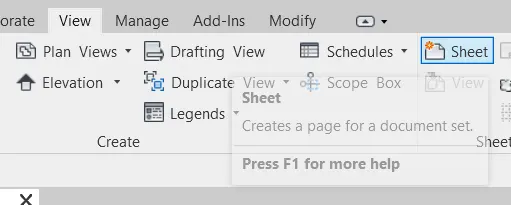
Step 2. Load sheet template from Titleblock folder and create new sheet.
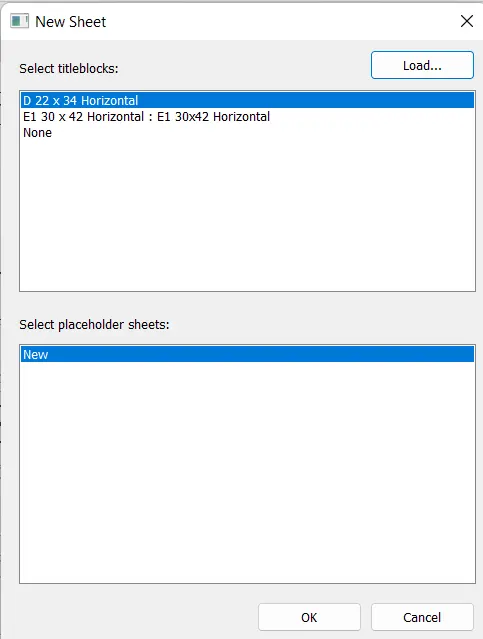
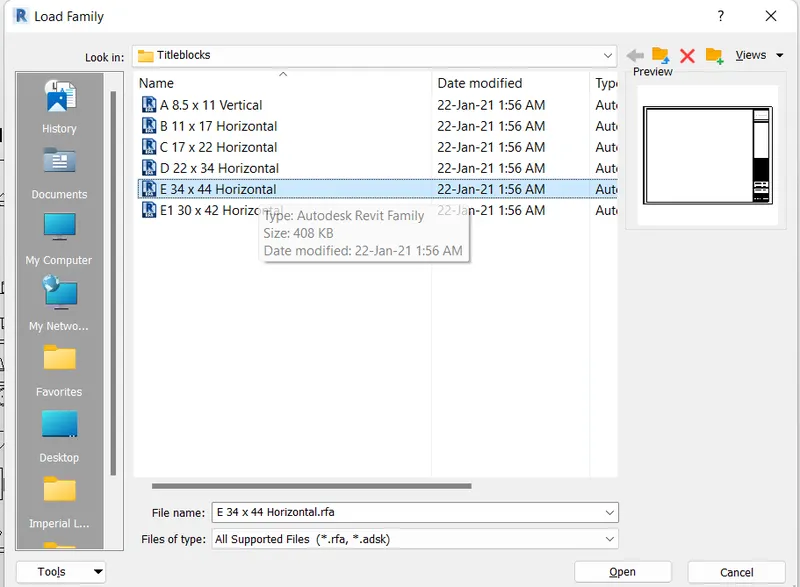
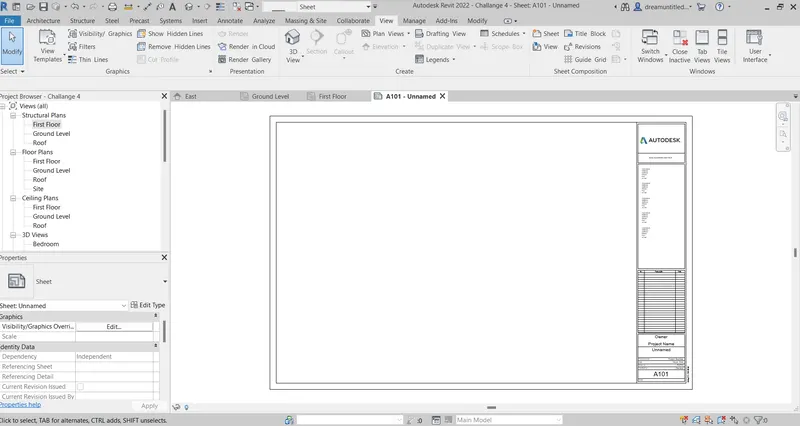
Step 3. Now adjust parameters according to need and add view to sheet.
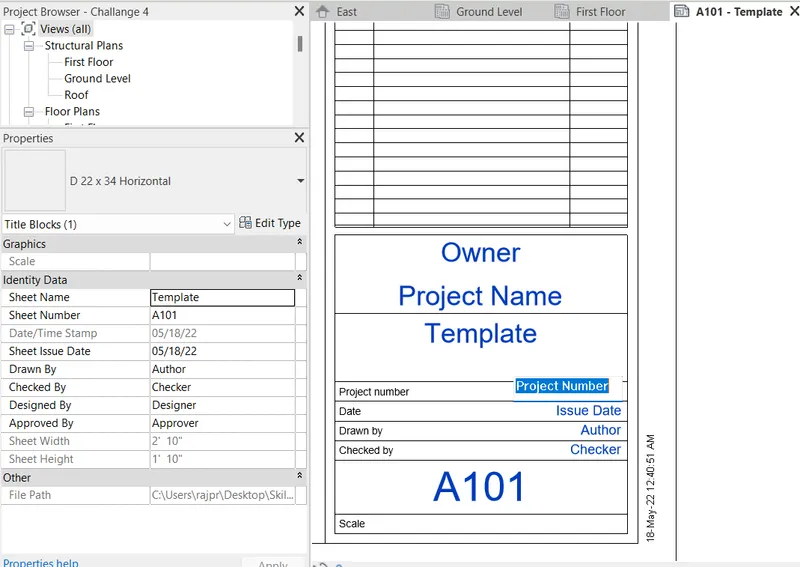
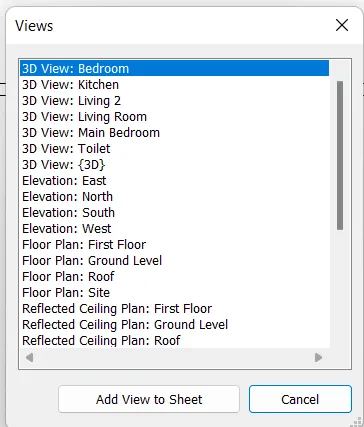
Result: A sheet template is created from the view tab and parameters are adjusted on the sheet to add appropriate views.
6)
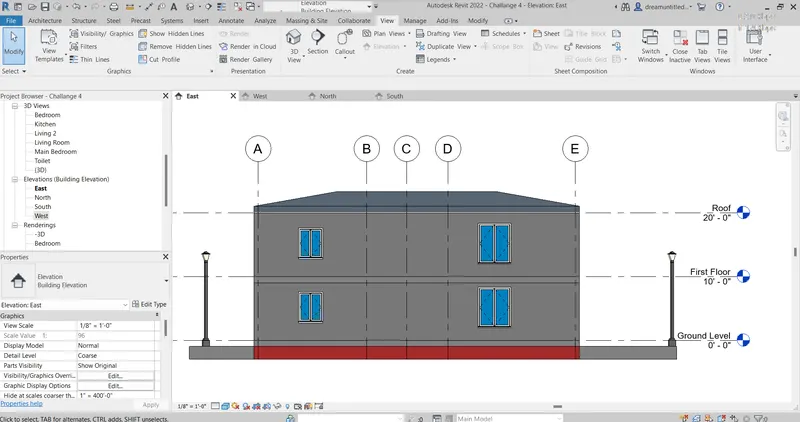
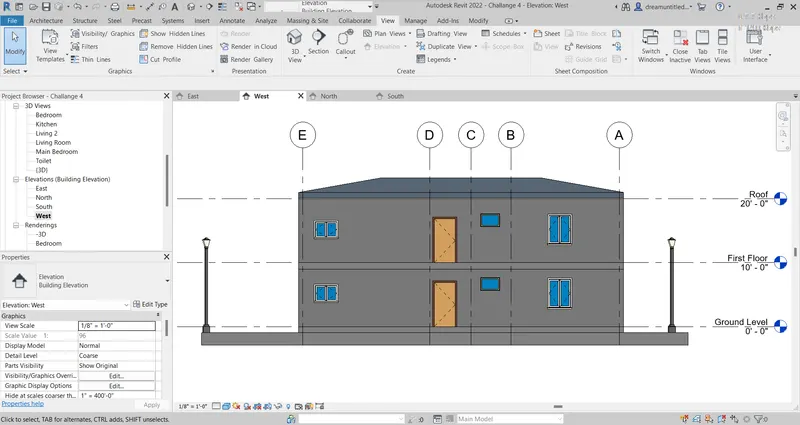
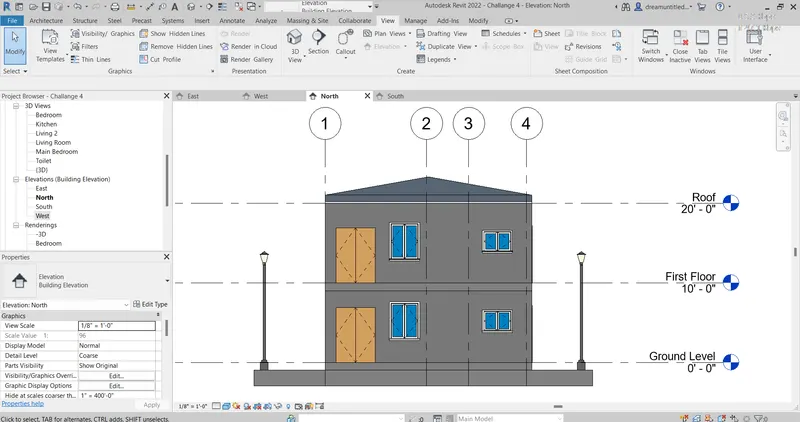
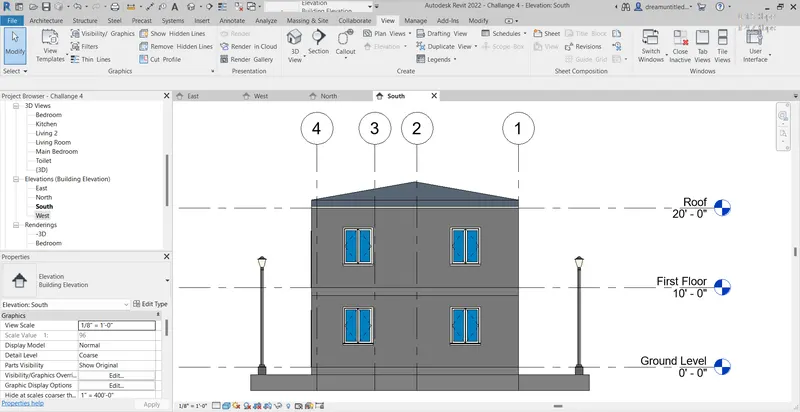
Objective: To create the elevation views using the elevation tab, looking at building from East, North, South, and West
Software used: REVIT and its tools.
Procedure: In REVIT elevation views are created by default in the architectural template. There are four elevation views created by default. These are North, South, East, and West.
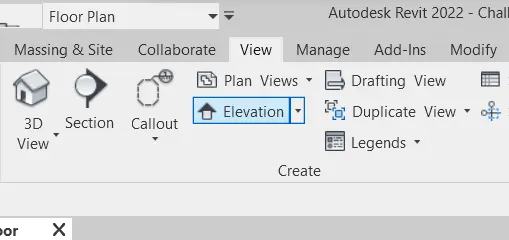
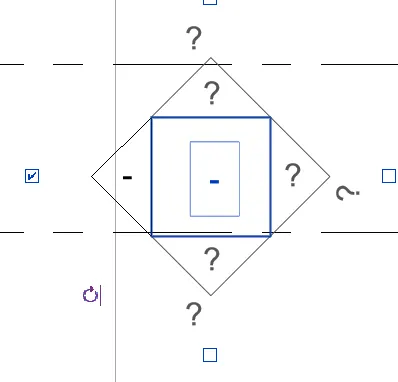
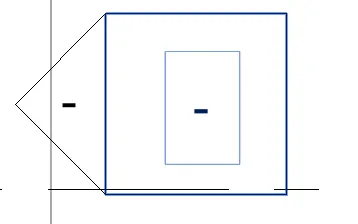
Step 1: To create elevation view, go to view tab and select elevation, and put elevation tool at appropriate location.
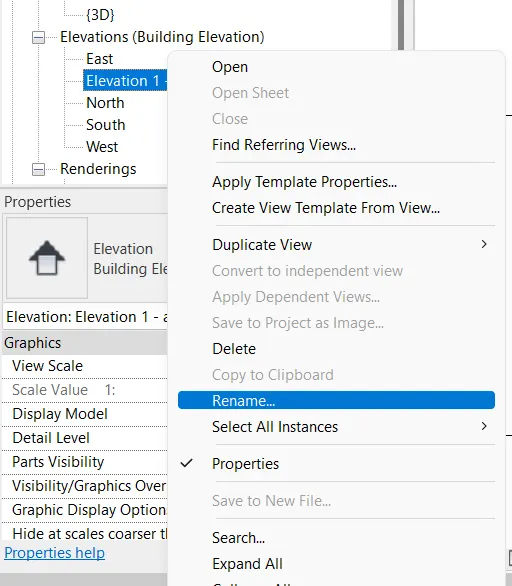
Step 2: From properties toolbar, rename desired elevation view.
Result: Desired Elevation views are created as below.
1. East
2. West
3. North
4. South
7)
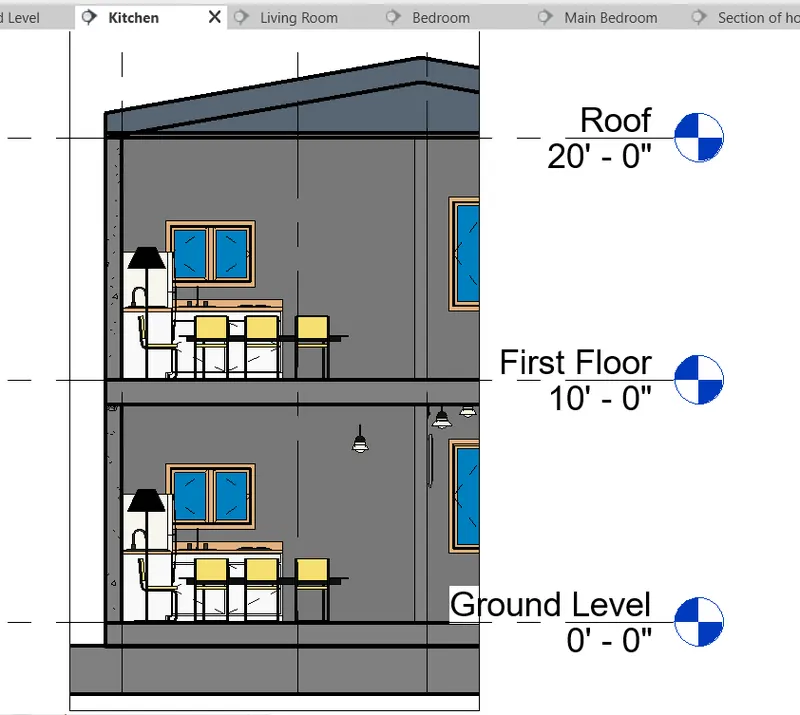
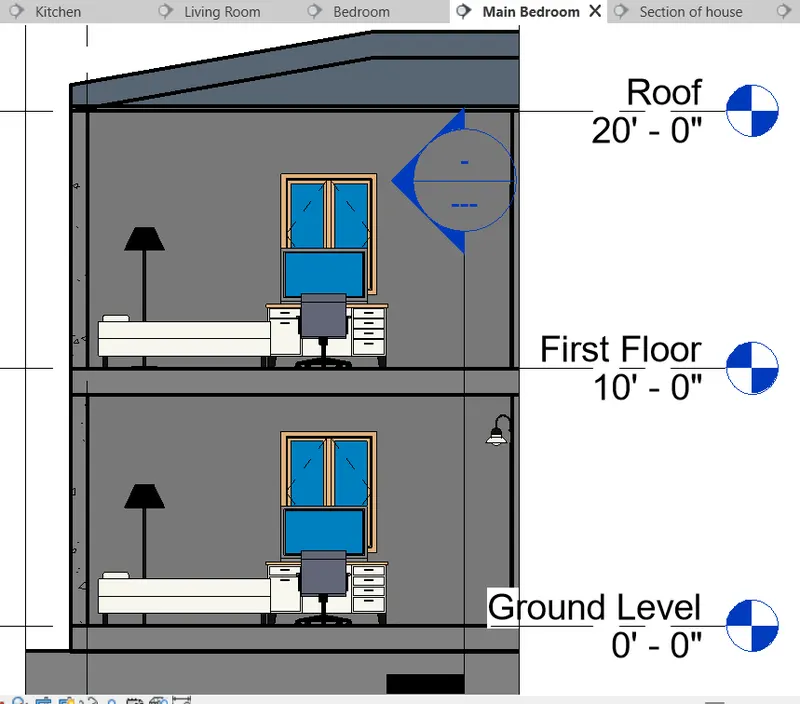
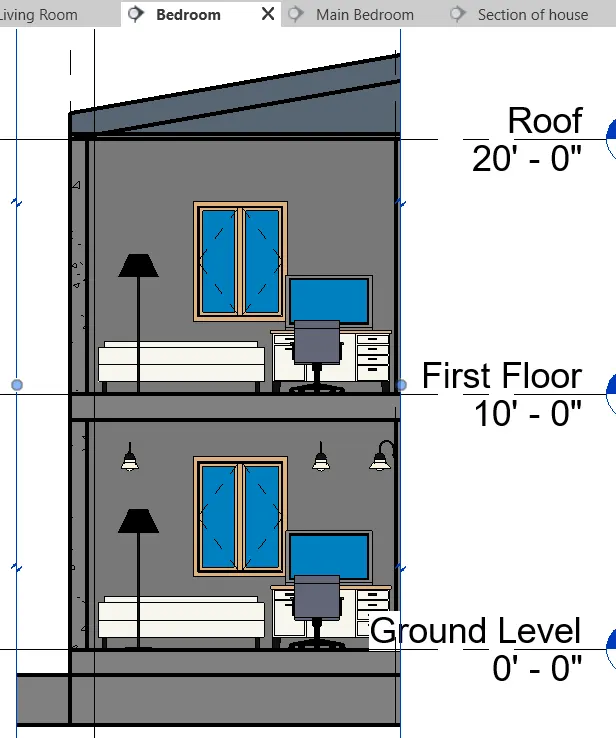
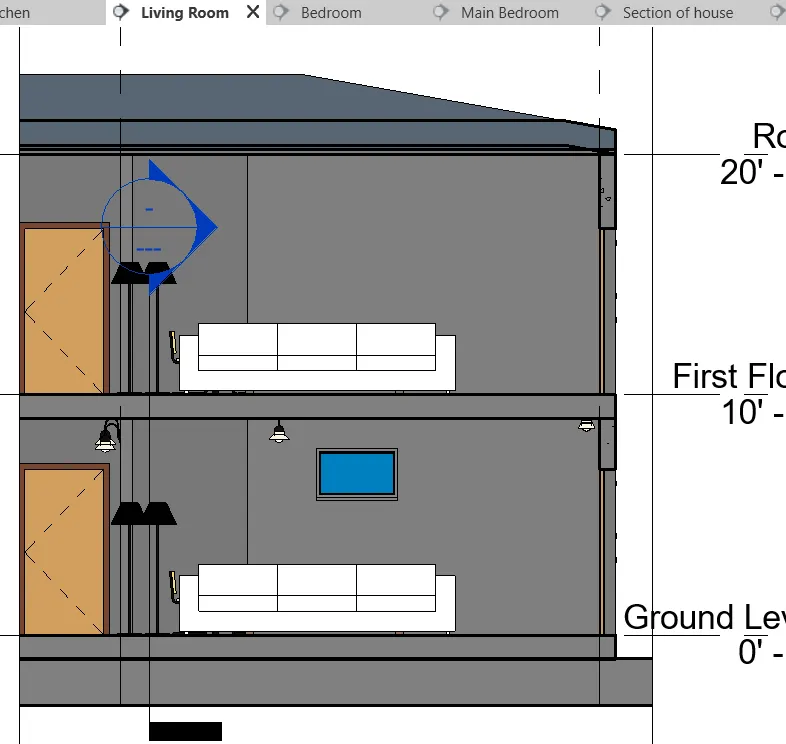
Objective: To produce a section cut through each room either cutting across longitudinally or in a transverse direction.
Software used: REVIT and its tools.
Procedure:
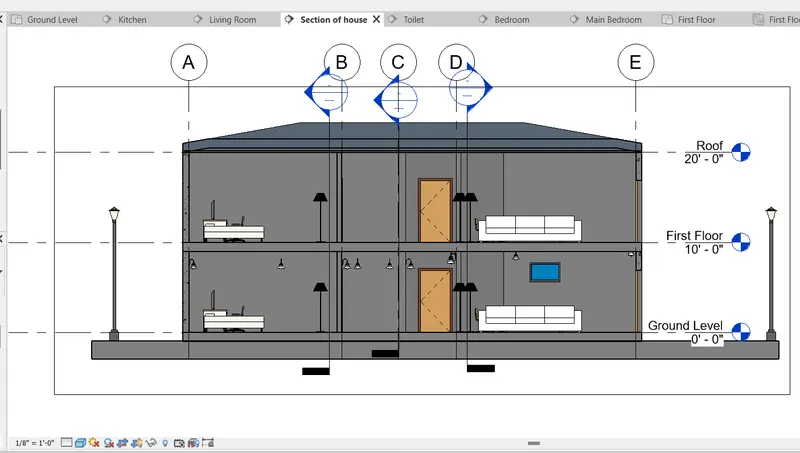
Section Views represent intersection views created either cutting across longitudinally or in a transverse direction.
Step 1: From View tab select section option.
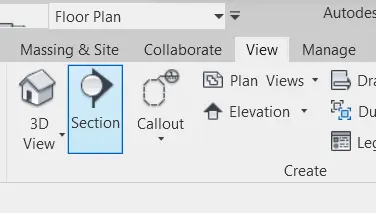
Step 2: Now place the section across the desired room and adjust its boundary. A Section View will be created.
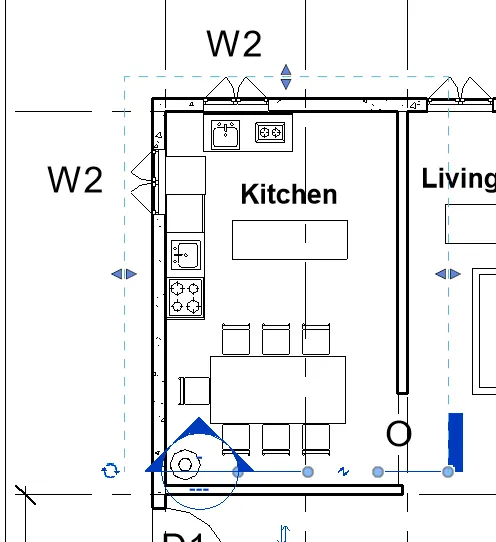
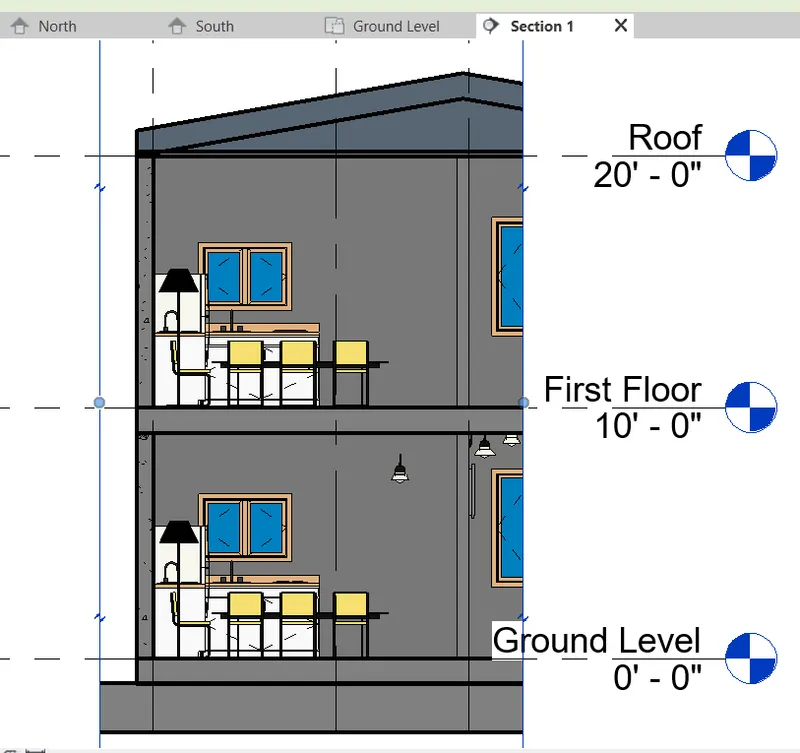
Step 3: Similarly create sections in each room.
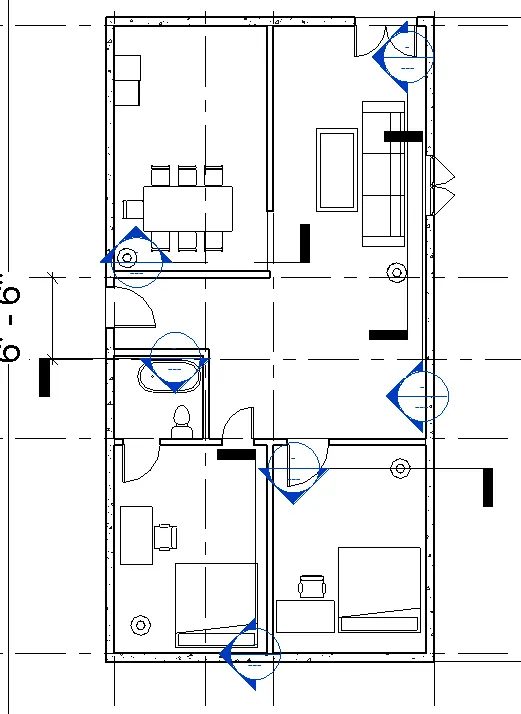
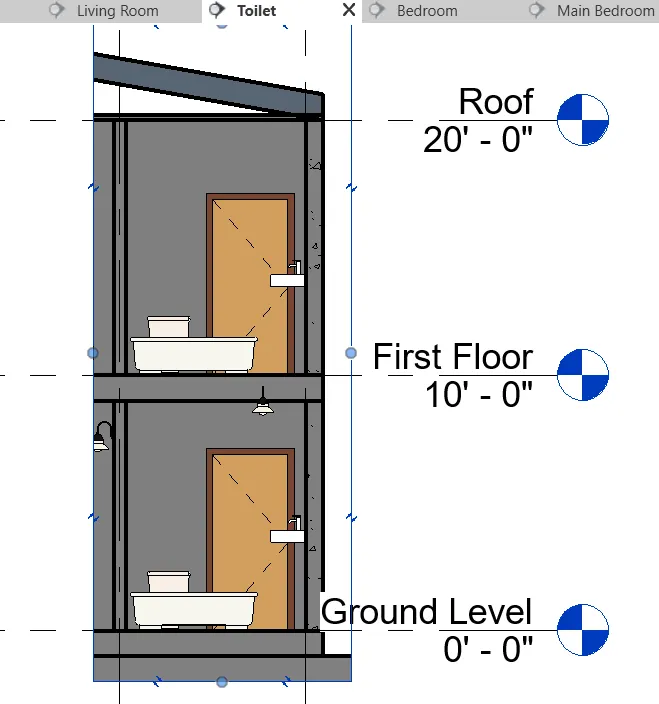
Result: Section Views of all rooms are attached below:
1. Kitchen
2. Main Bedroom
3. Bedroom
4. Living Room
5. Toilet
6. Section of the House
8)
Objective: To classify the views, Plan Views, Section Views, and Elevation views to either Design or Documentation category using Properties browser.
Software used: REVIT and its tools.
Procedure:
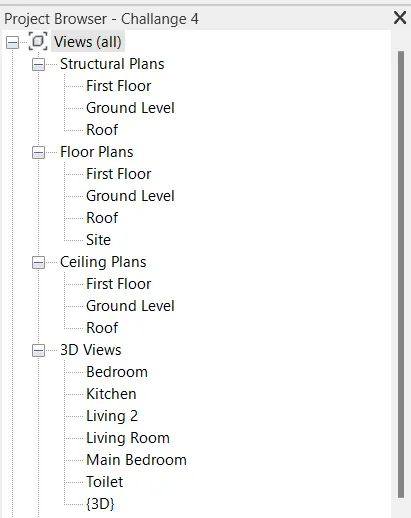
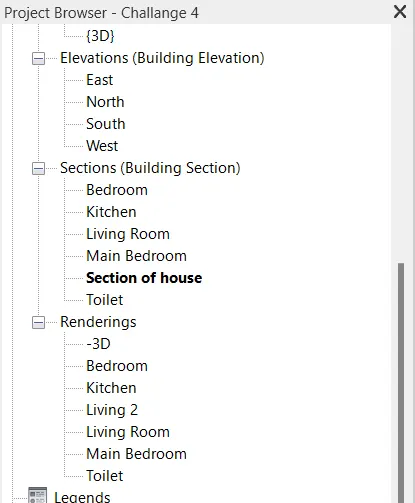
Revit provides some standard views such as 2D views and 3D views. 2D views are further categorized under floor plans, elevation views, and section views. If needed, we can duplicate a view and customize it accordingly. In custom view type, we can apply consistent settings quickly and easily.
These views are visible in the project browser.
Step 1: Go to View tab and select sheet and load a sheet from revit family. Give name to sheet
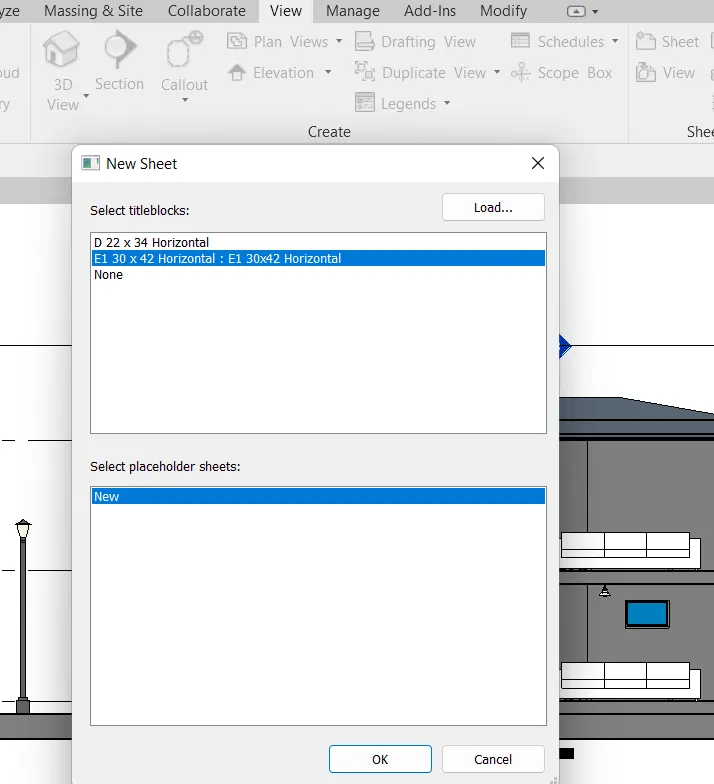
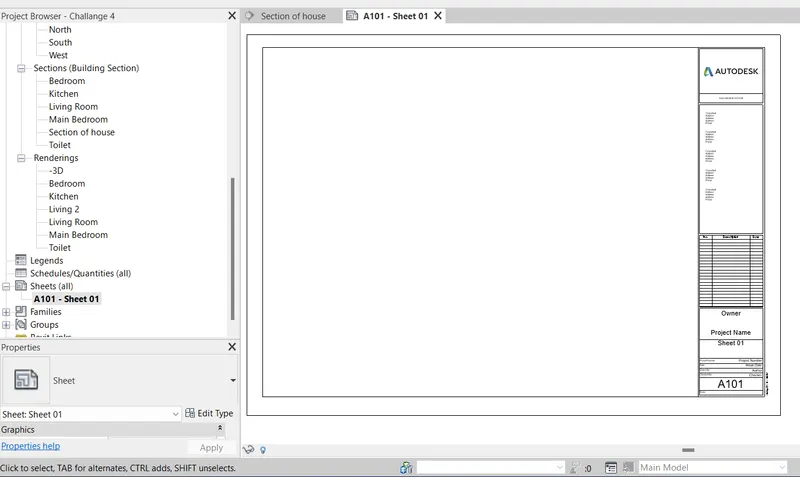
Step 2: Now click on the view option and add the desired view to the sheet.
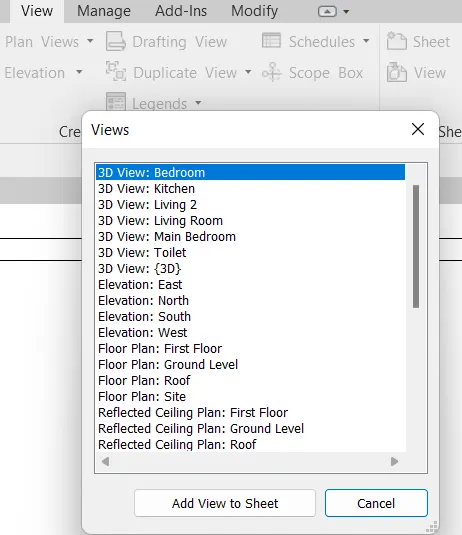
Step 3: Similarly add all views to the sheet.
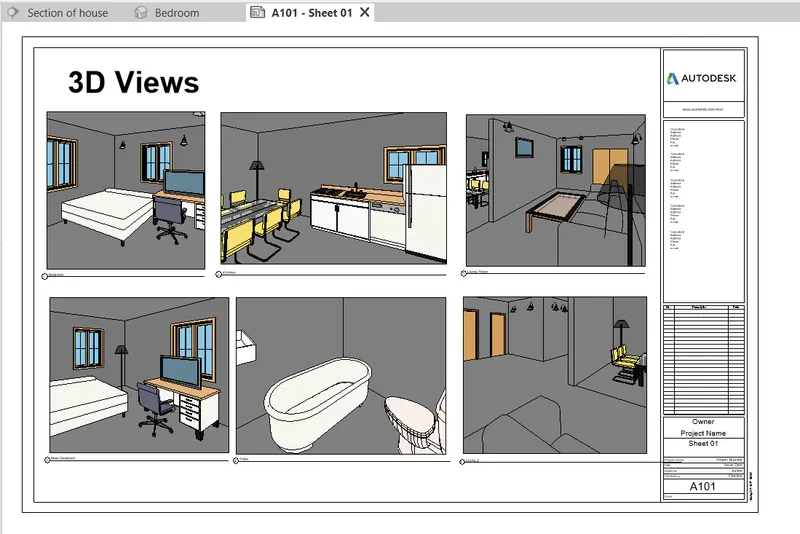
Result: Views are classified into Plan Views, Section Views, and Elevation views, and added to sheet.
8)
Objective: To create multiple sheets given below using the sheet template:
a. A 101- Ground Floor Architecture Plan
b. A 102- First Floor Architecture Plan
c. A 103- Roof Plan
d. S 101- Ground Floor Structural Plan
e. S 102- First Floor Structural Plan
f. S 103- Roof Framing Plan
g. A-201- North-South Elevations
h. A-202- East-West Elevations
Software used: REVIT and its tools.
Procedure:
Step 1: Go to View and create a sheet by loading a template and rename it as mentioned above.
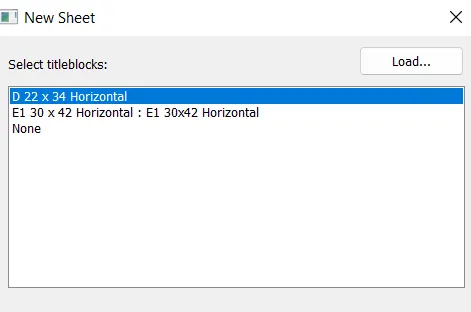
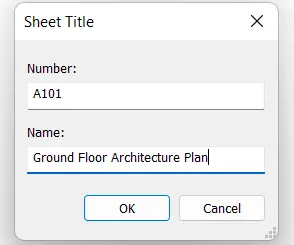
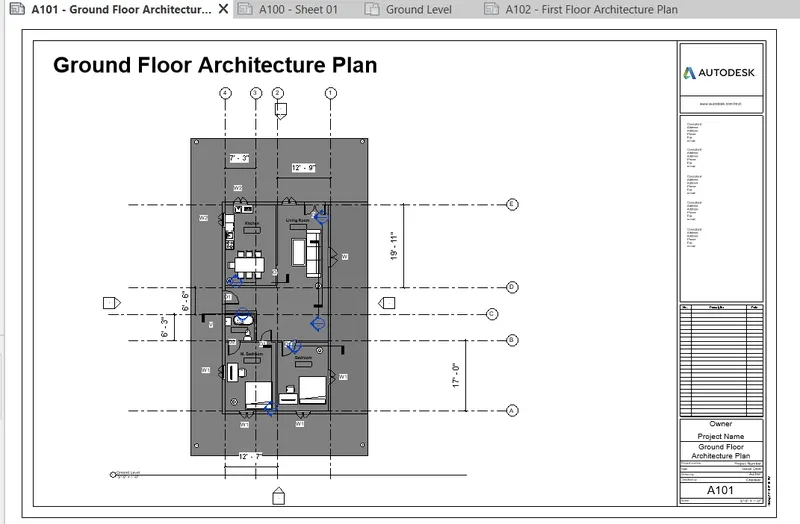
Step 2: From view option add Ground floor architecture plan to sheet.
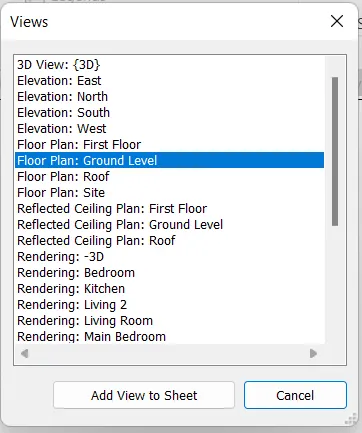
Step 2: Simliarly create a sheet each for the remaining sheets.
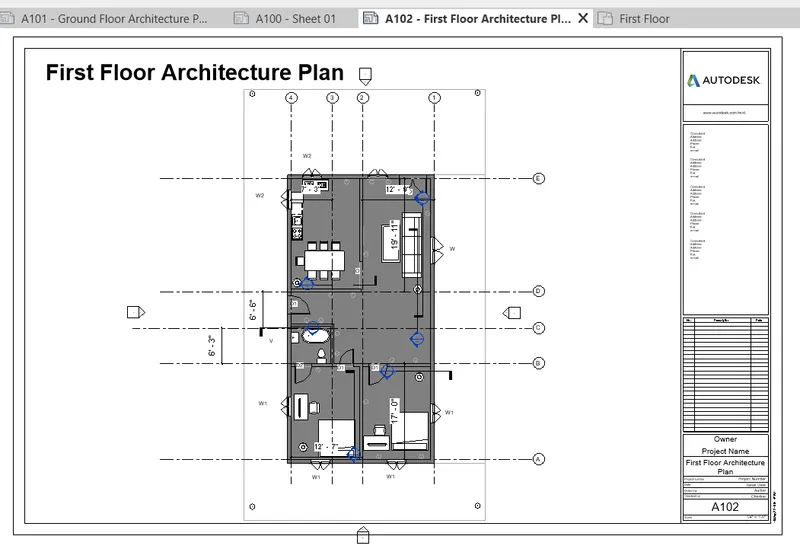
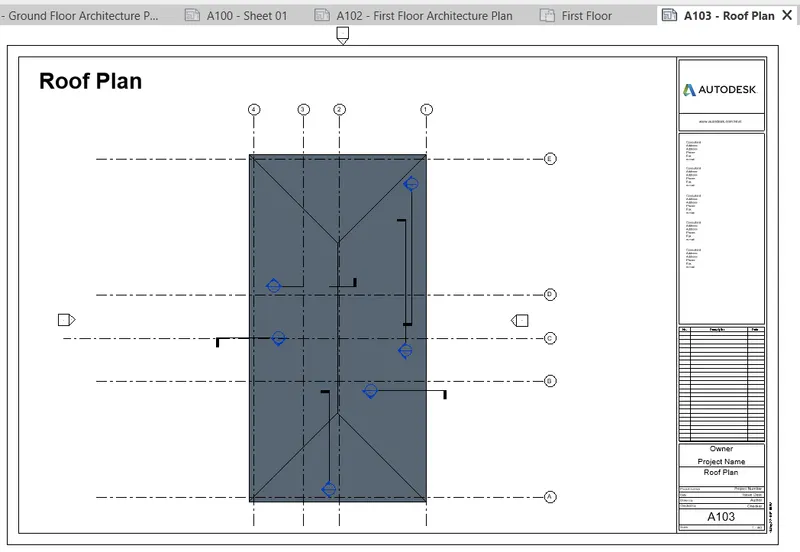
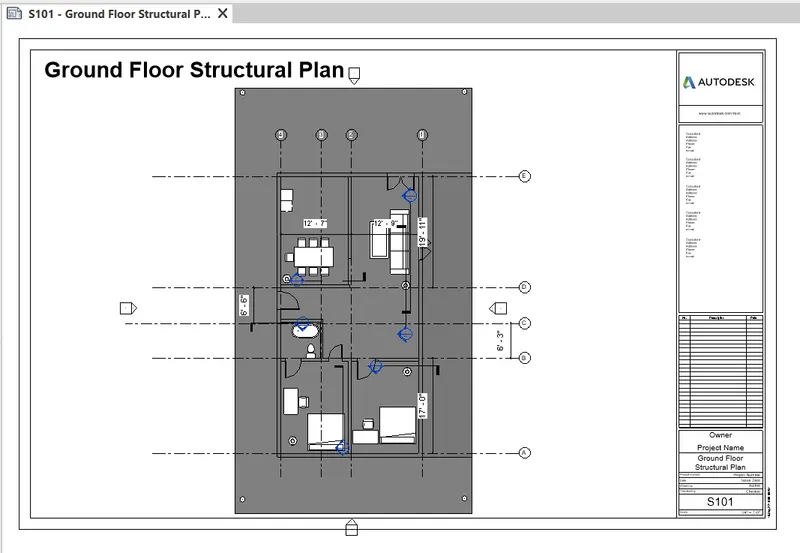
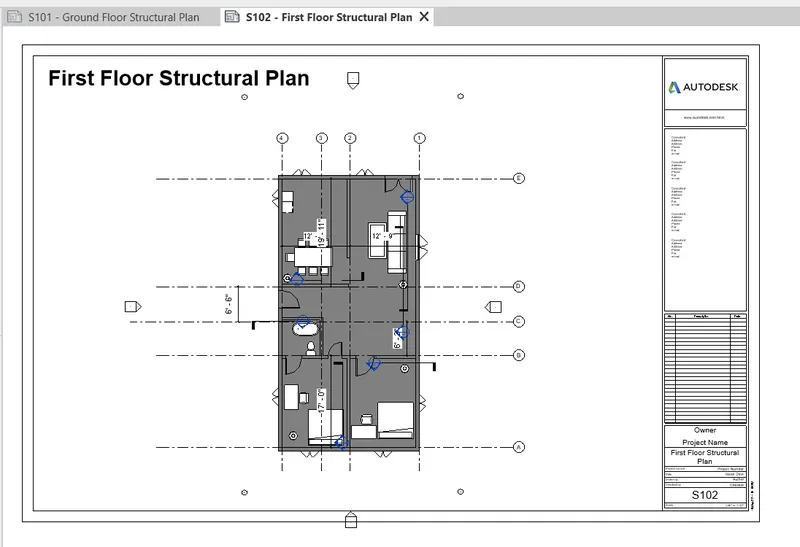
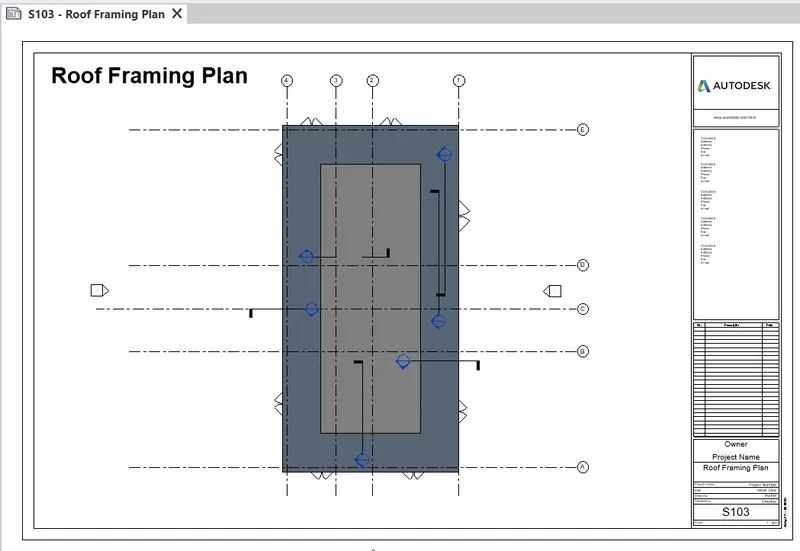
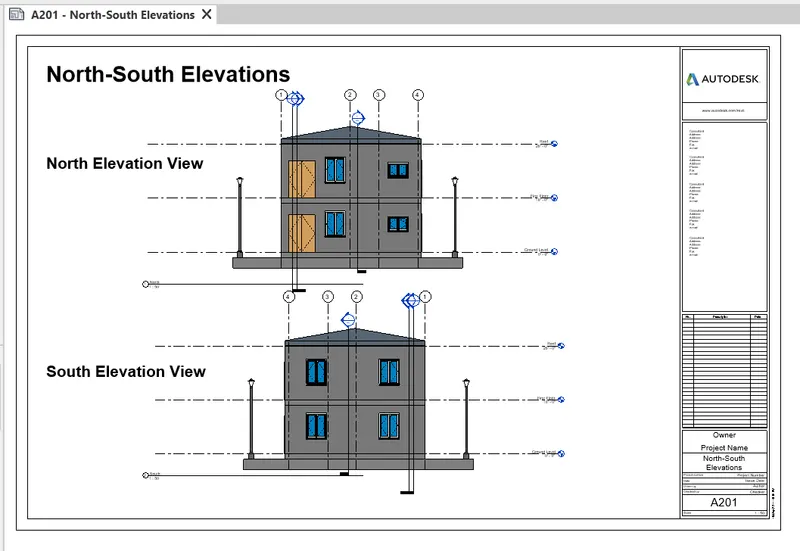
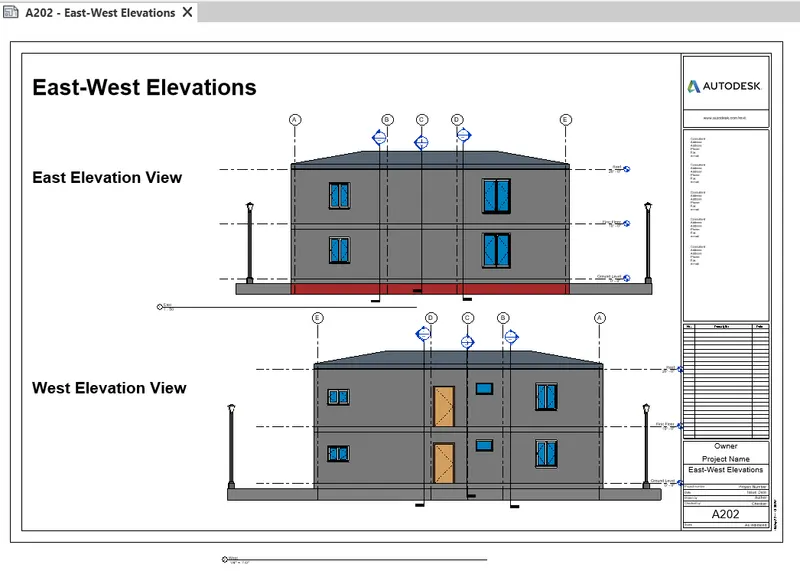
Step 3: Now add sheets for sections.
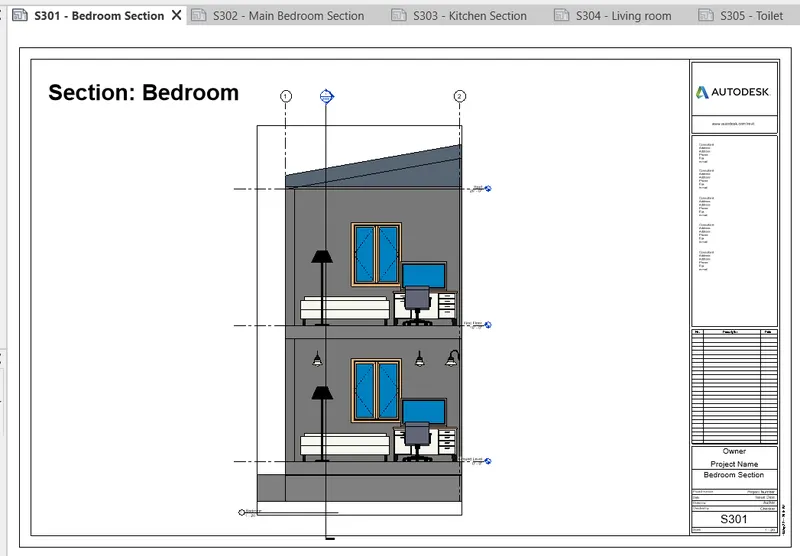
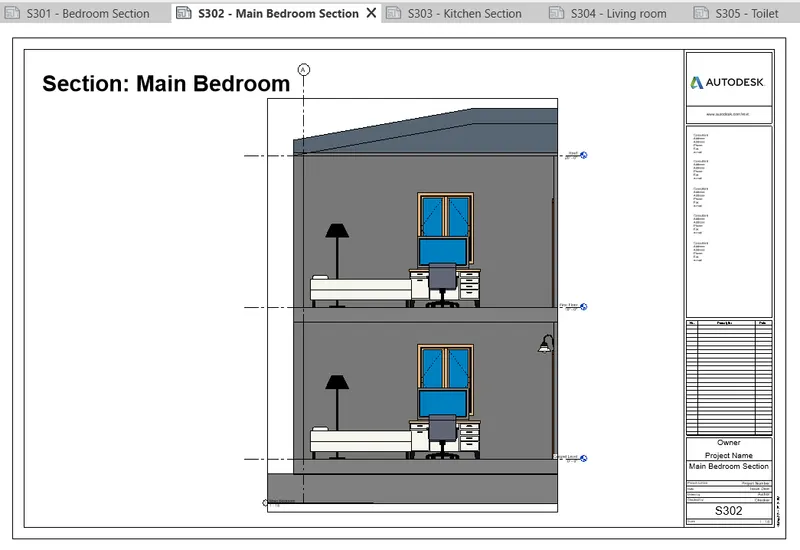
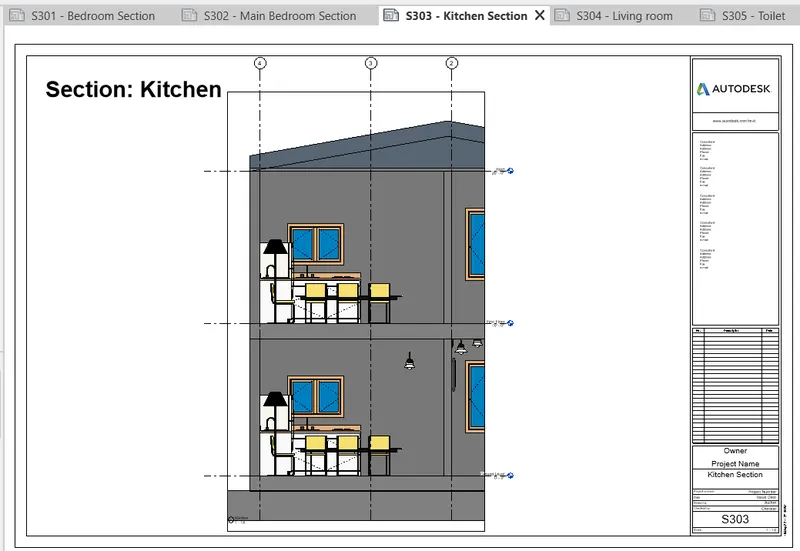
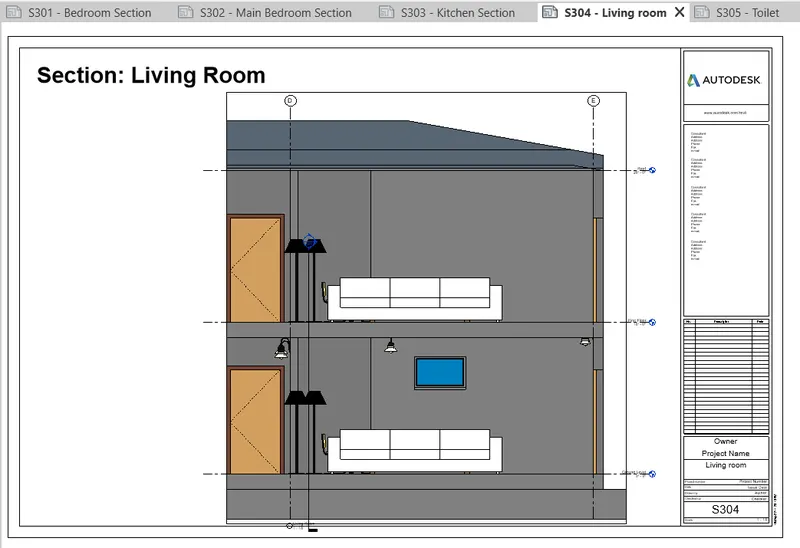
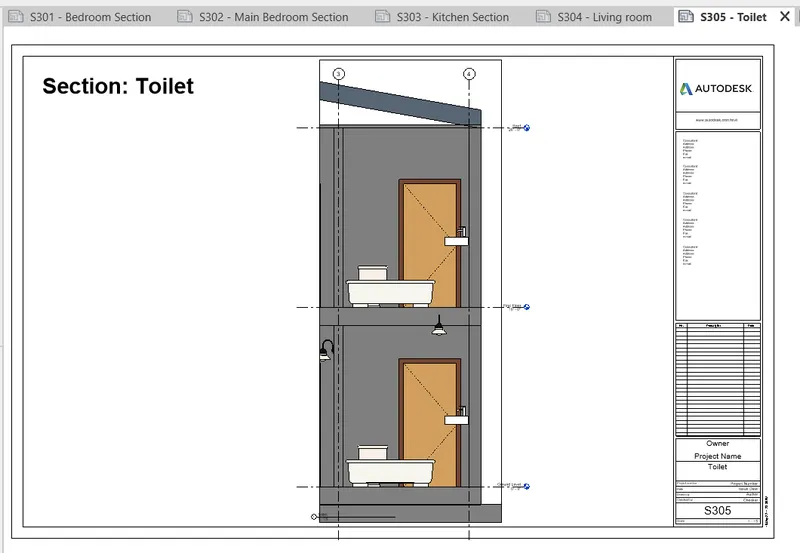
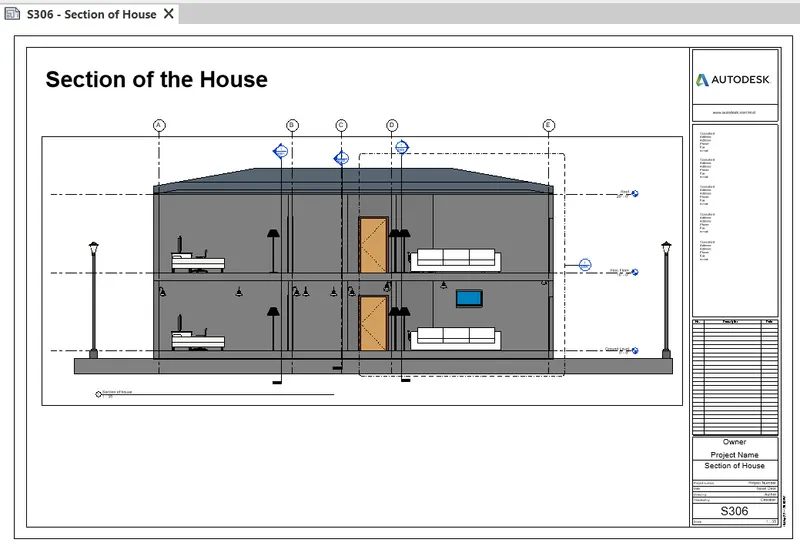
Result: Multiple sheets are created for all above views and plans.
10)
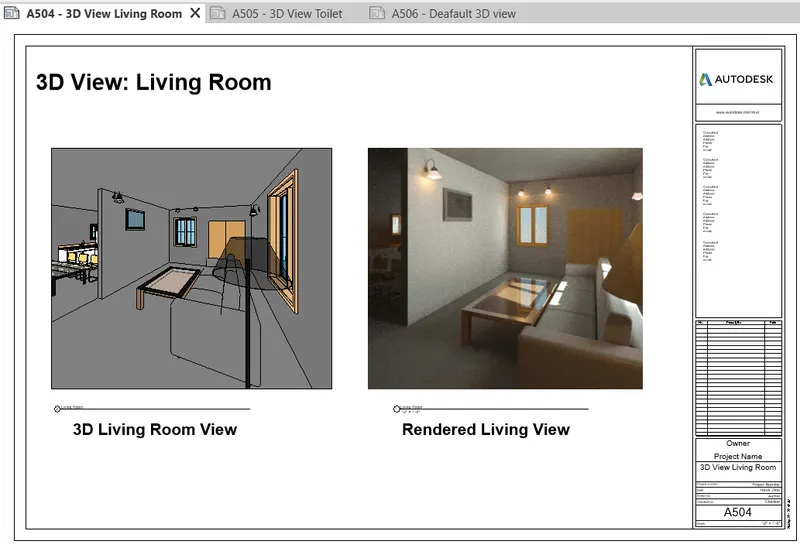
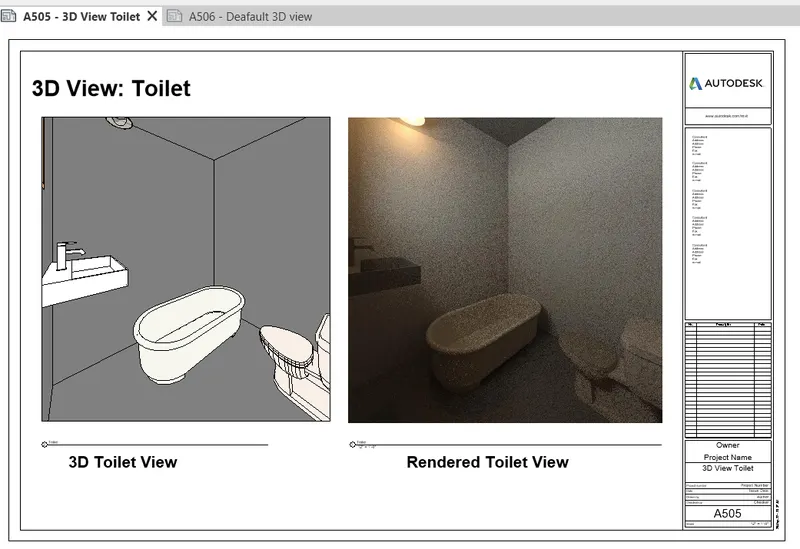
Objective: To create a camera-specific view or a 3D view in each room ( living, dining, bedroom). Based on the views create a new set of sheets starting A-501 (you can add as many sheets after, 502, 503.. n)to place the 3D view images. Produce the sheets as a part of project drafting.
Software used: REVIT and its tools.
Procedure:
Step 1: First open the floor plan at which 3D view is to be generated. Now from View tab click on 3D view menu and select camera.
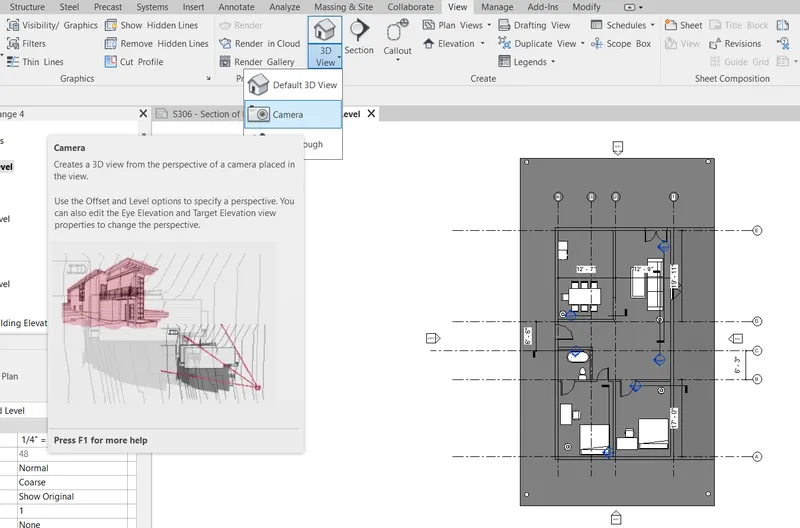
Step 2: Place the camera at the specific location and set its viewing angle and eye elevation level and Target elevation level.
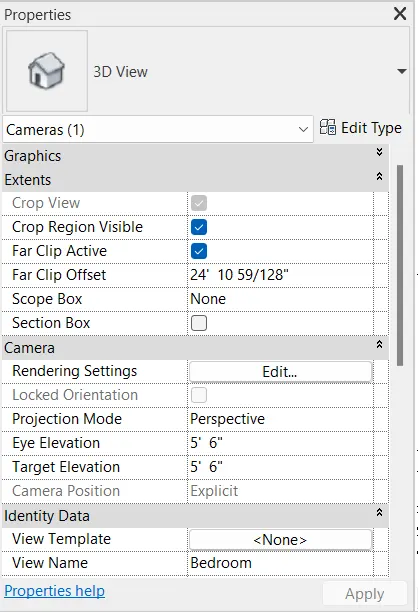
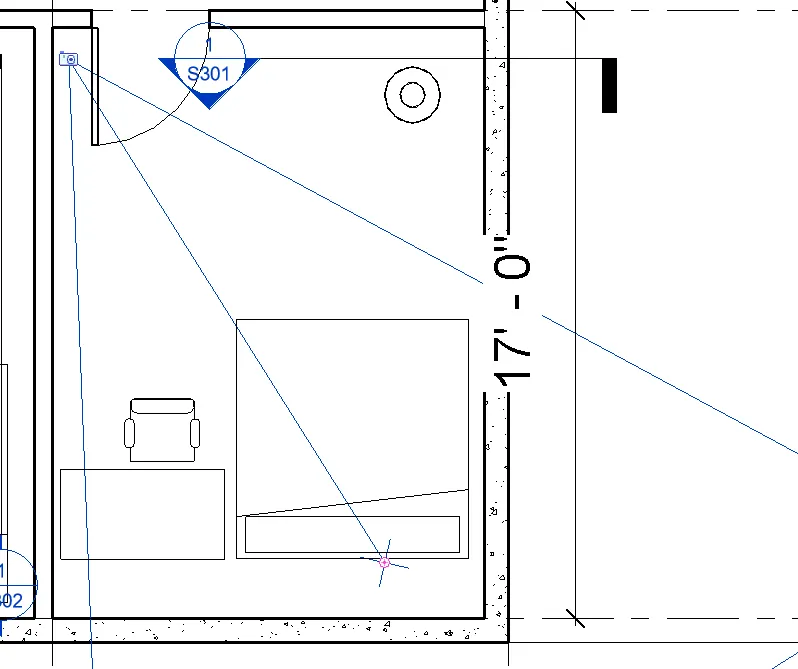
Step 3: A view will be created. Locate it in the project browser.
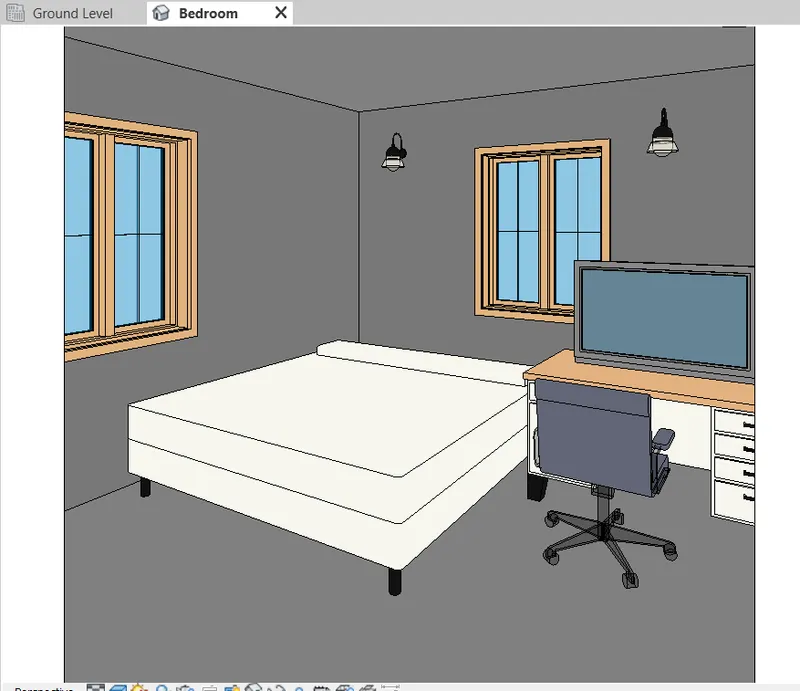
Step 4: Create a sheet and add this view in it.
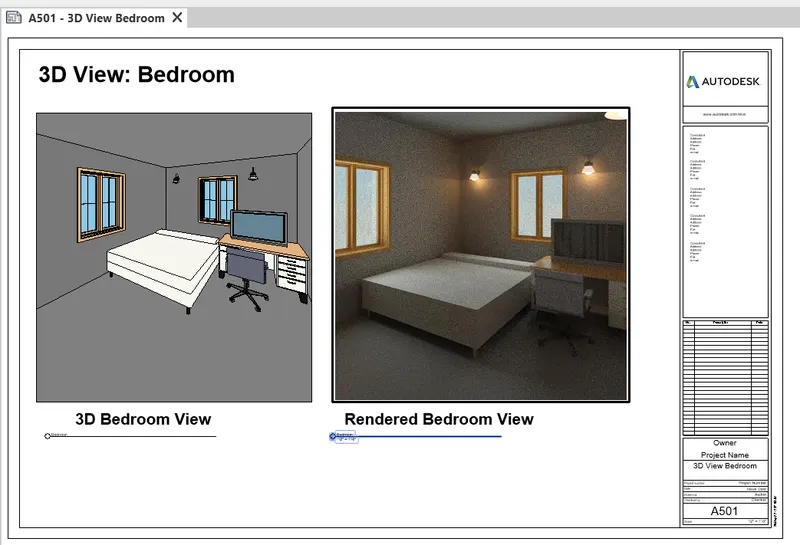
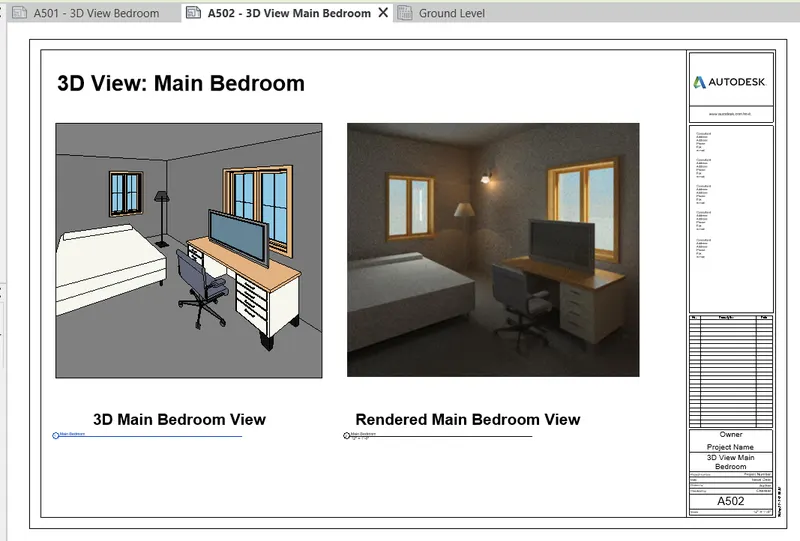
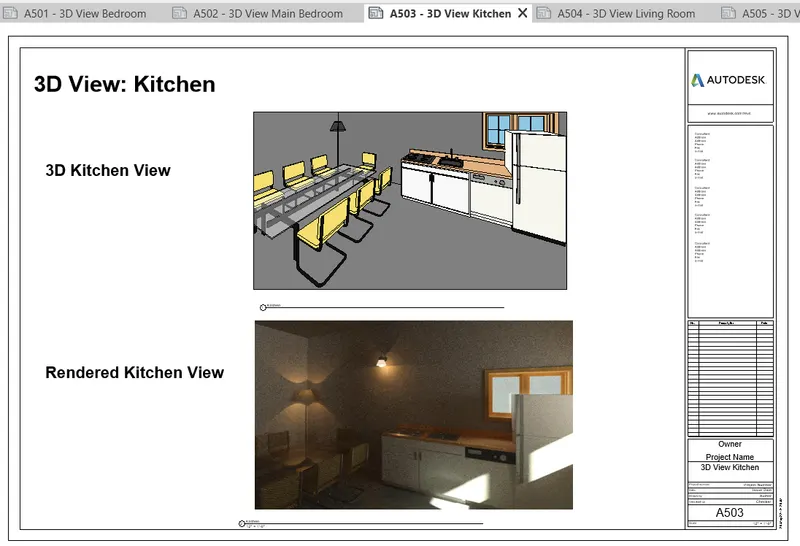
Step 5: Similarly add all 3D views to sheets.
1. Bedroom
2. Main Bedroom
3. Kitchen
4. Living Room
5. Toilet
6. Default 3D View
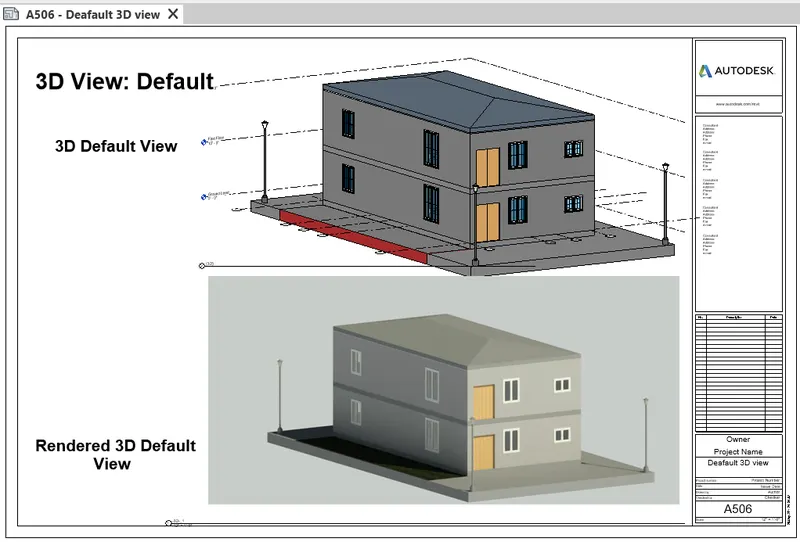
Result: Camera-specific views or a 3D view of each room are created and added to the respective sheets.