3D Creation of Celing, Roof, Architectural plan, Structural plan, Sectional view, Elevation view and Camera specific view for a house plan using REVIT
Aim – To Model a Ceiling from the architecture tab above the walls at the first-floor level.
Procedure –
- Open revit and load the week 3 project.
- Go to ceiling tab in architecture and select it.
- At first floor level set the height offset at 10’ as it is the height of the wall.
- Select the pick line option and select the outer boundary walls.
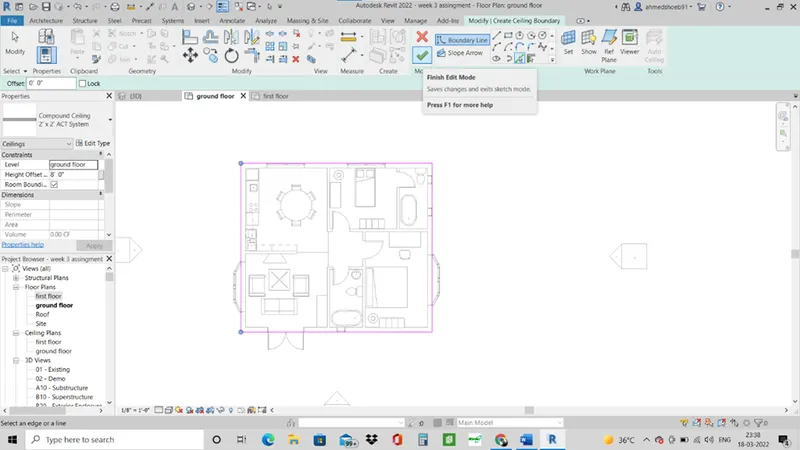
- A ceiling is created at the first-floor level.
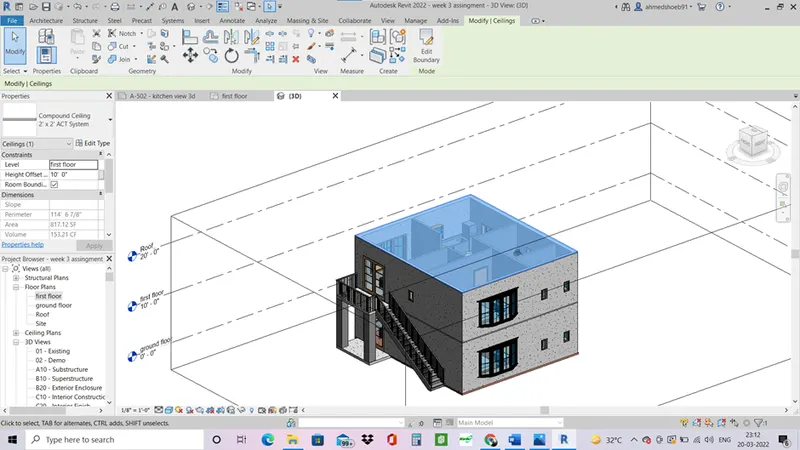
Result –
A ceiling is created at first floor.
Aim – To Model a roof above the ceiling by selecting the footprints of the ceiling. Using the adjustment toolbars appearing on-screen adjust the roof slope to 10 degrees.
Procedure –
- Go to roof floor and select roof option in from toolbar.
- Roof>roof by footprint.
- Select sketching option > pick lines.
- Select outer boundary of walls.
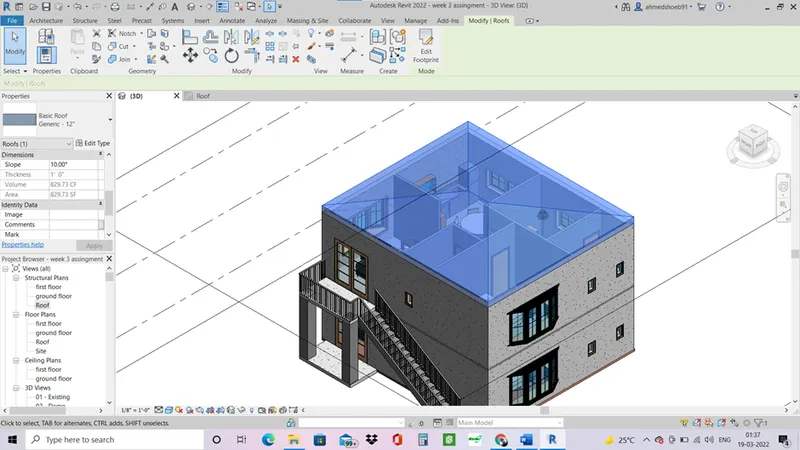
- Roof is created, to change the slope of the roof go in properties browser select and edit the slope to 10 degrees.
- The slope of 10 degrees is created in roof.
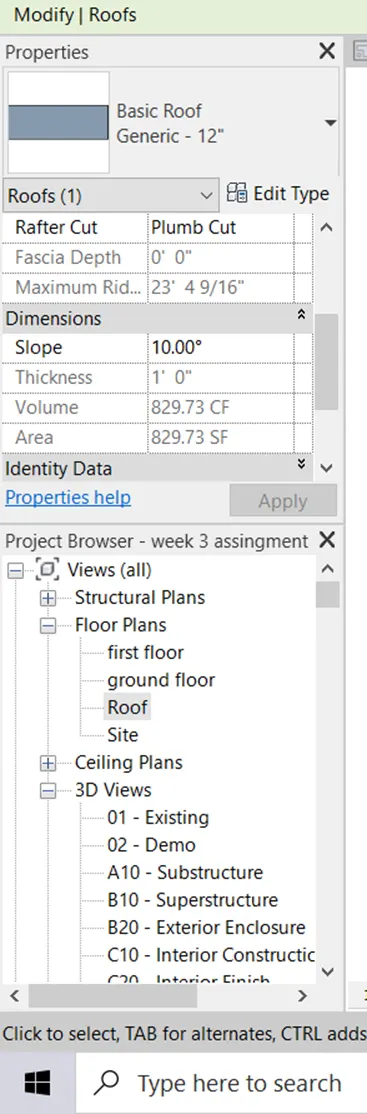
Result –
A roof is created and slope of 10 degrees is added in to the project.
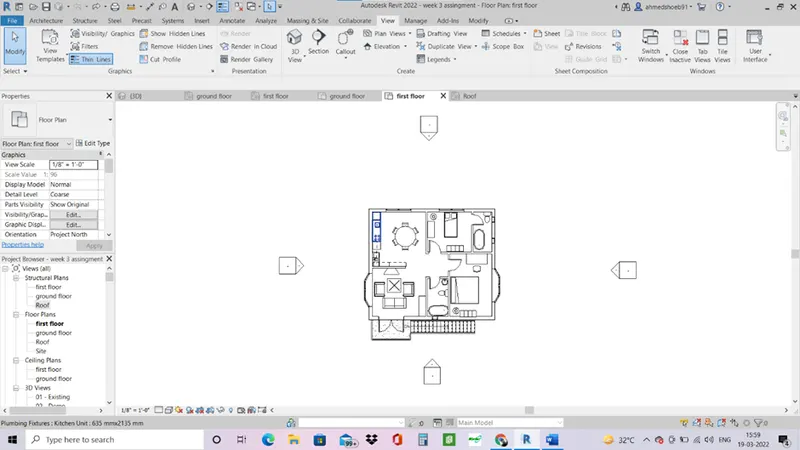
Aim – to show Architectural and structural plans.
Procedure –
- Go in view tab> plan views.
- There is a option for architectural and structural plans.
- Select structural and check the create copy box.
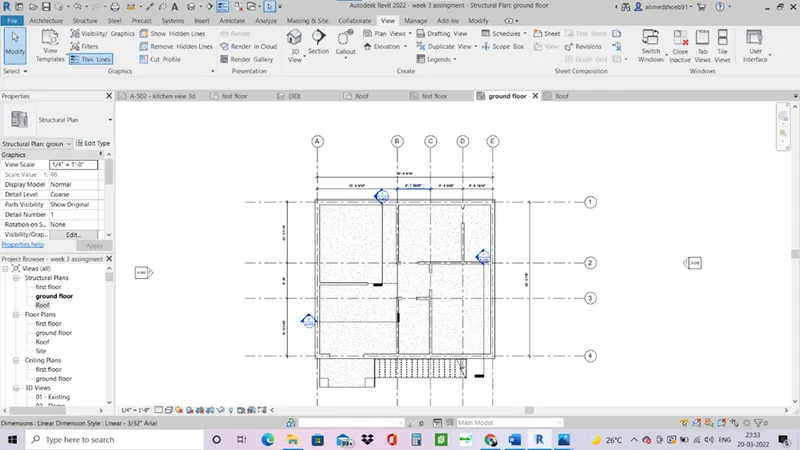
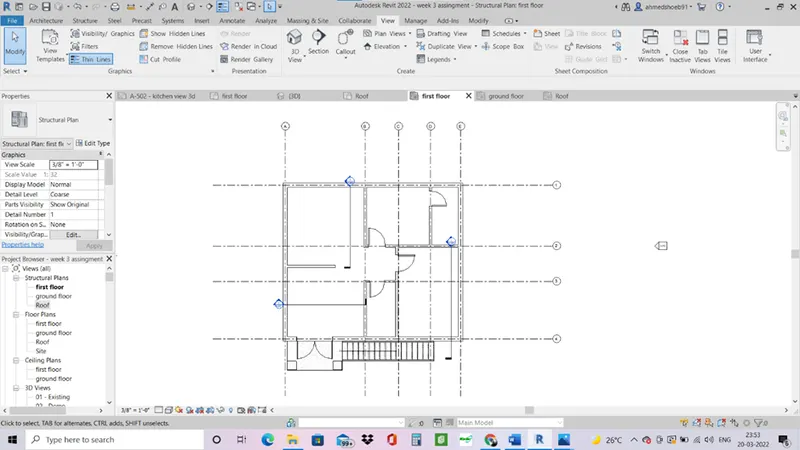
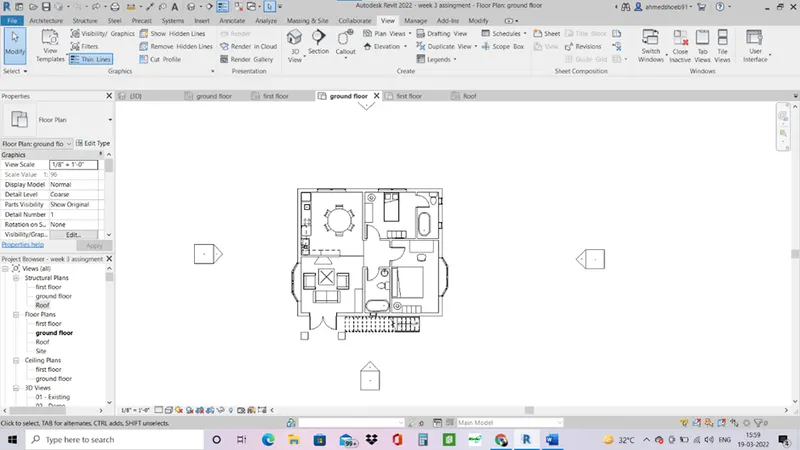
- Architectural and structural plans are created.
- Structural plans include columns, floor, walls etc.
- Architectural plans include everything.
Result –
Structural plans
Architectural plans
Aim- to annotate the plans for dimensions for both architectural plan and structural plans.
Procedure –
- Go in annotate in toolbar>dimensions>linear dimensions.
- Go to architectural plan and make a dimension of length and width of the plan.
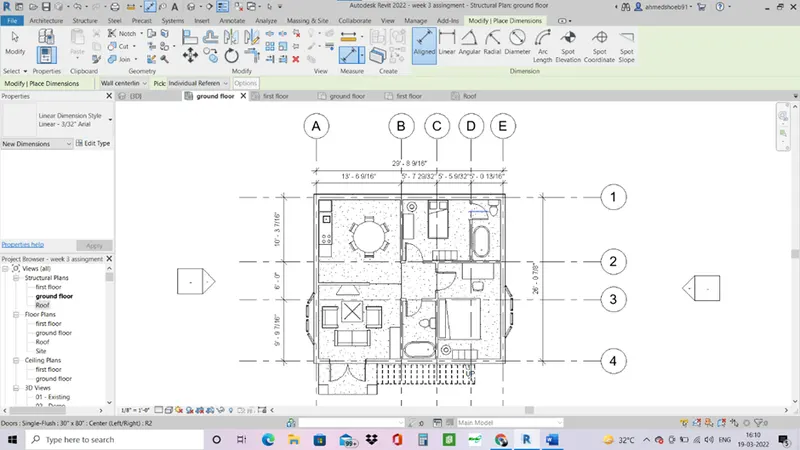
- Now go in structural plan> ground floor plan.
- Repeat the same process for dimension and annotate each grids.
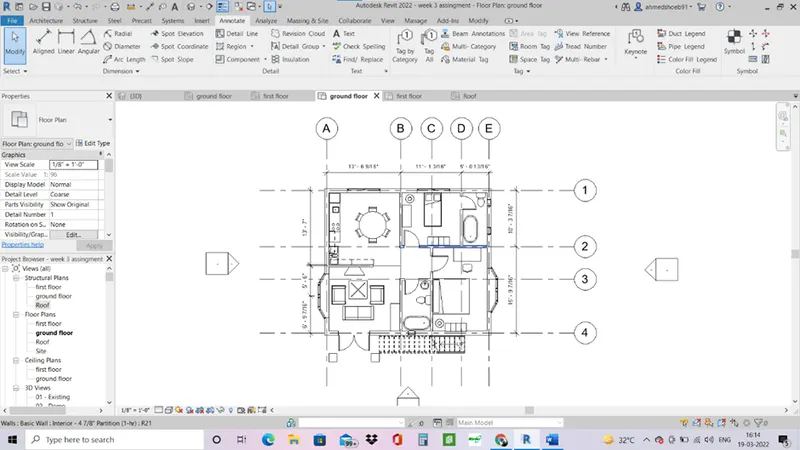
Result –
Dimensions are added for architectural and structural purpose of the building.
Aim – to create a sheet template from the view tab and adjusting the parameters.
Procedure –
- Go in view tab and select the sheet option.
- If your required sheet is not there you can load them in the revit.
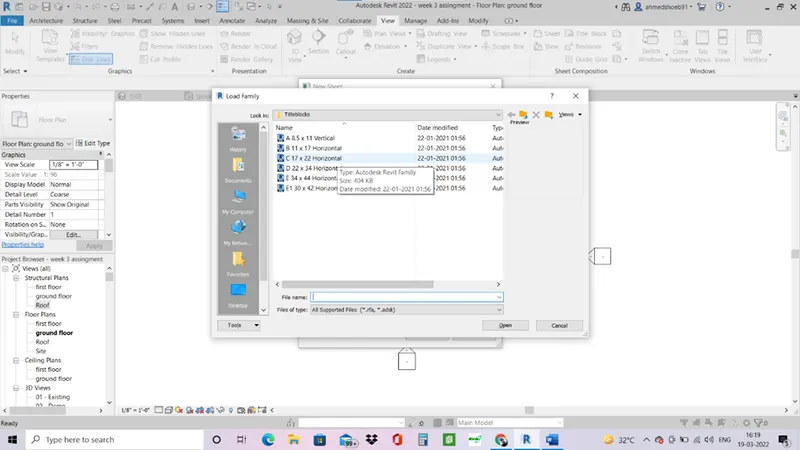
- If project information is set beforehand some of the title is already filled others can be filled by double clicking on them.
- Drag the view required in the sheet.
- Click on the view and scale the view appropriately.
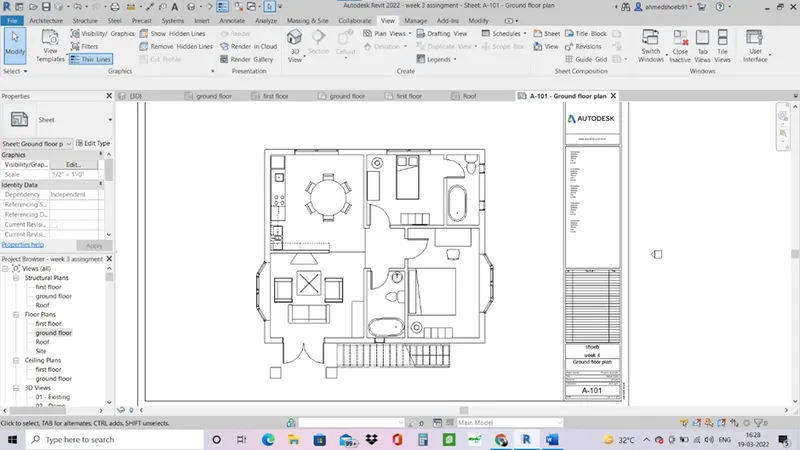
Result –
A sheet is created is created of the ground floor plan.
Aim – create elevations in the Revit.
Procedure –
- Elevations can be created in any plans.
- Go to view>elevations.
- Select the elevation option and add four elevations on four side.
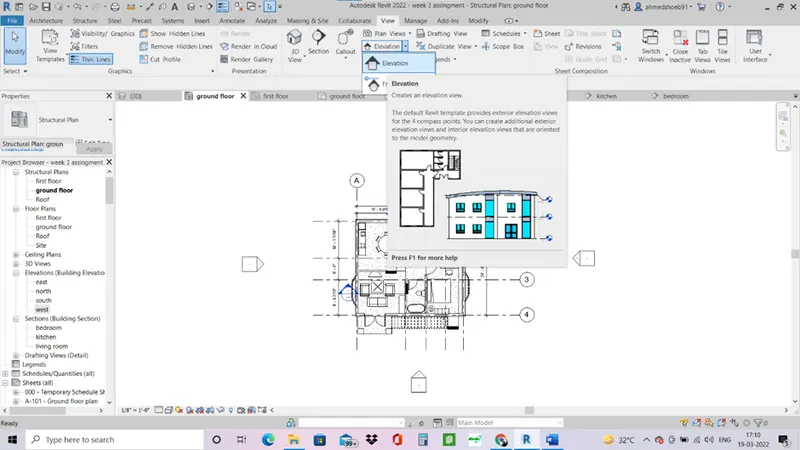
- Add four elevations on north, south, east, west.
- In project browser>elevations>views.
- Rename the views north, south, east and west according to the sides.
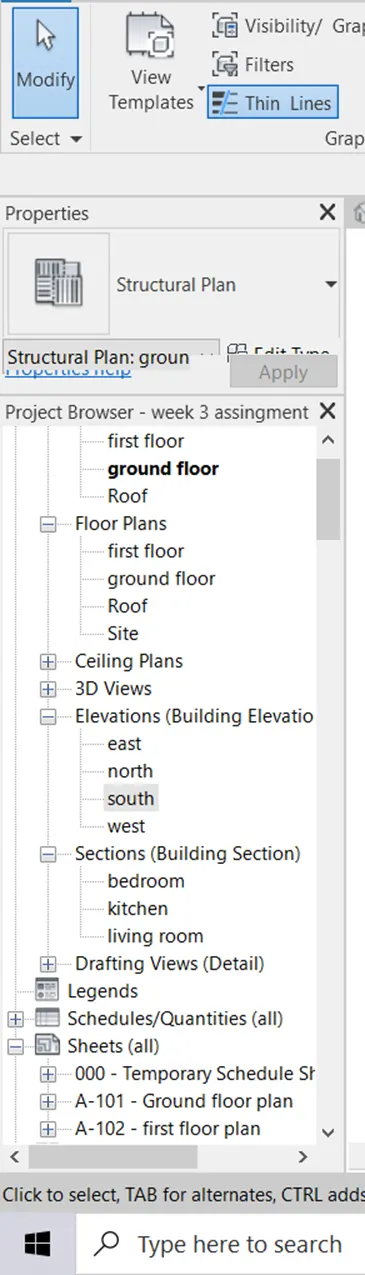
- Elevations are created.
Result-
Elevations are created in revit and renamed N,S,E and W accordingly.
Aim – to create section views of each room transversely and longitudinally.
Procedure –
- Go to view> sections.
- Go in architectural floor plan.
- Draw a section view in rooms.
- You can flip the section views as required.
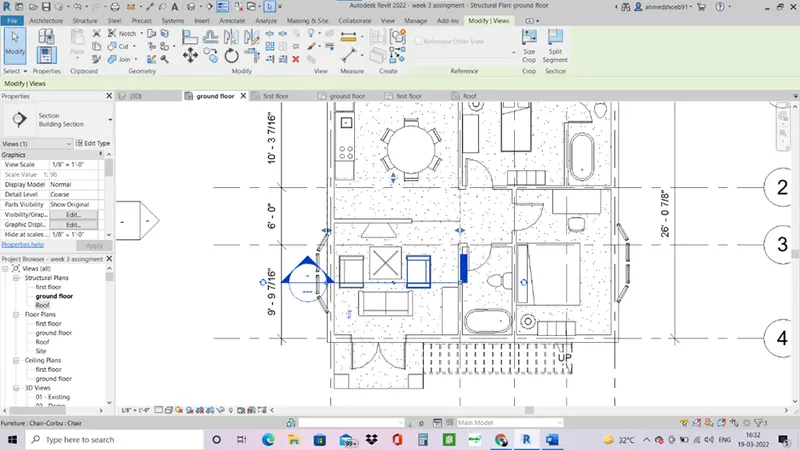
- As you do this section views are created in project browser.
- Click on the that view to see it.
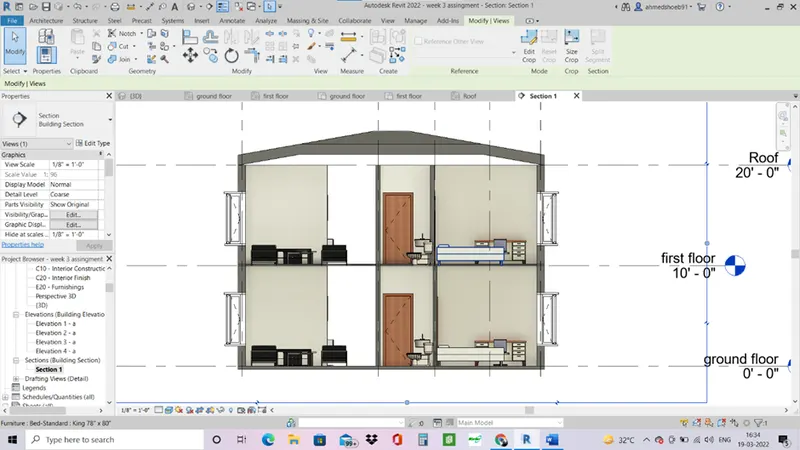
- Now do this for each room and simultaneously views are created.
- Section views are created.
Result –
Section views are created.
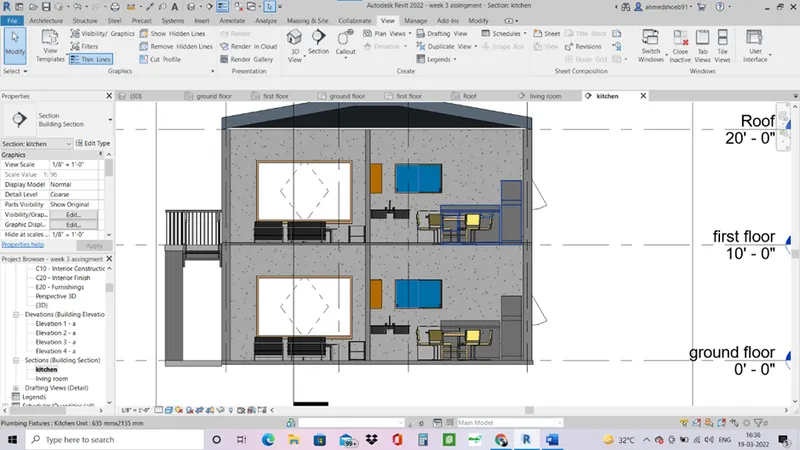
Kitchen section view
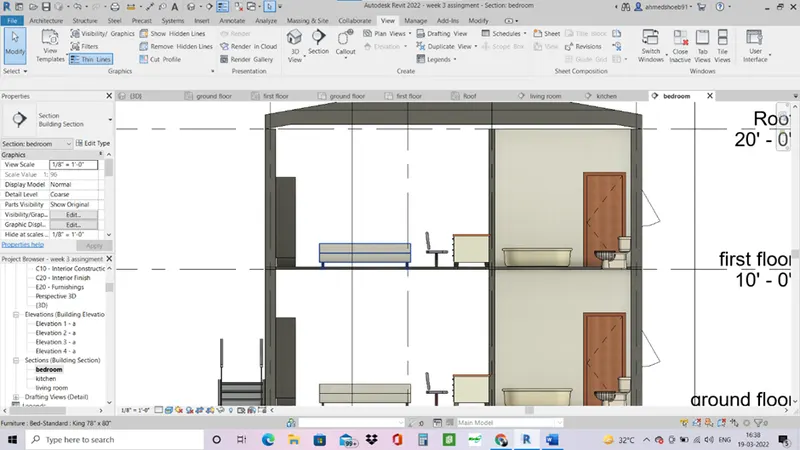
Bedroom view
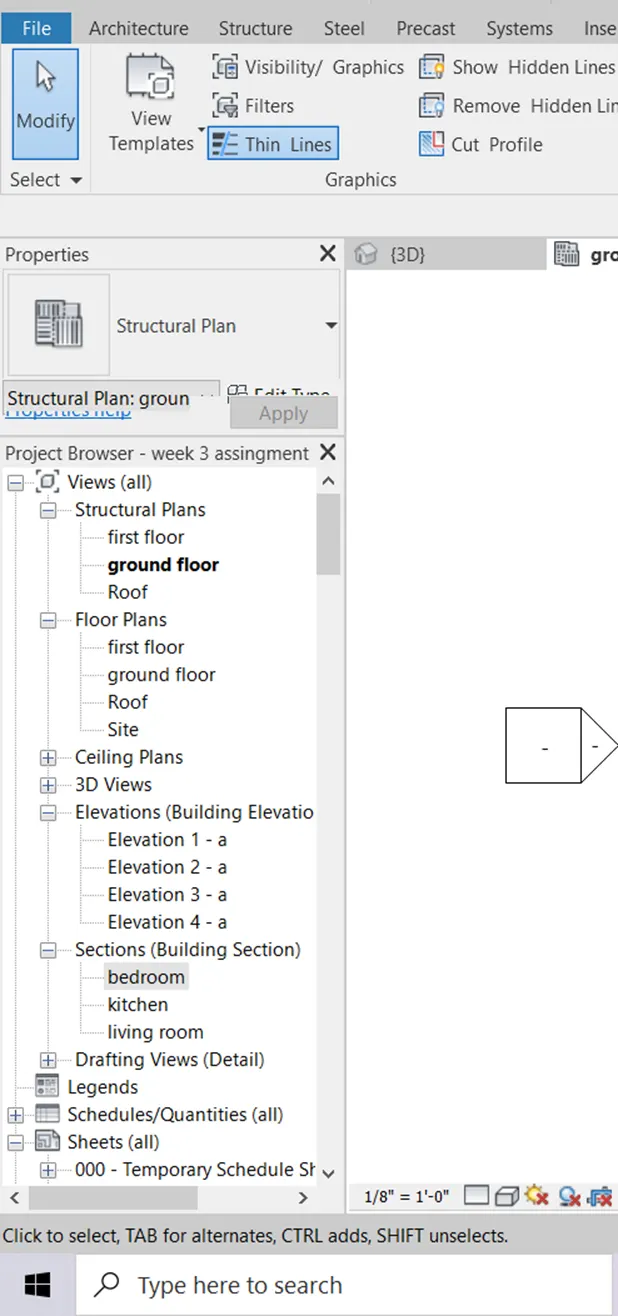
Aim – To Classify the views, Plan Views, Section Views, and Elevation views to either Design or Documentation category using Properties browser.
Procedure –
- Views are created in the properties browser.
- The views are created simultaneously as the changes are made in the project.
- In project browser the views are shown.
Result-
Aim – Using the sheet template to produce the multiple sheets in the revit file.
Procedure –
- Go in view tab and select the sheet option.
- If your required sheet is not there you can load them in the revit.
- If project information is set beforehand some of the title is already filled others can be filled by double clicking on them.
- Drag the view required in the sheet.
- Click on the view and scale the view appropriately.
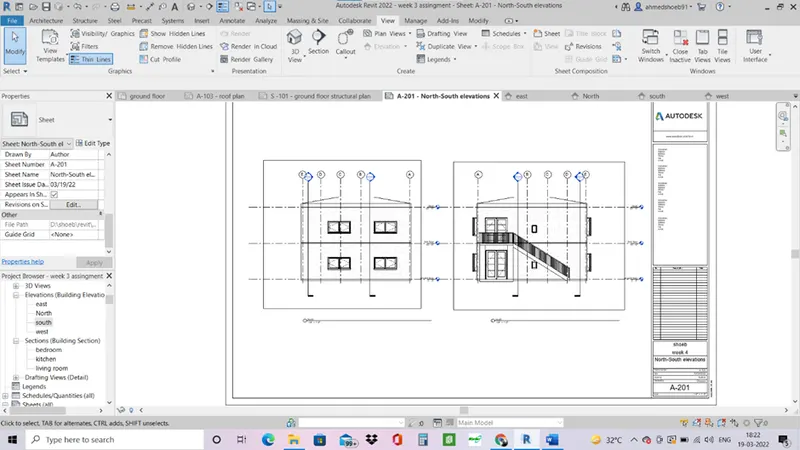
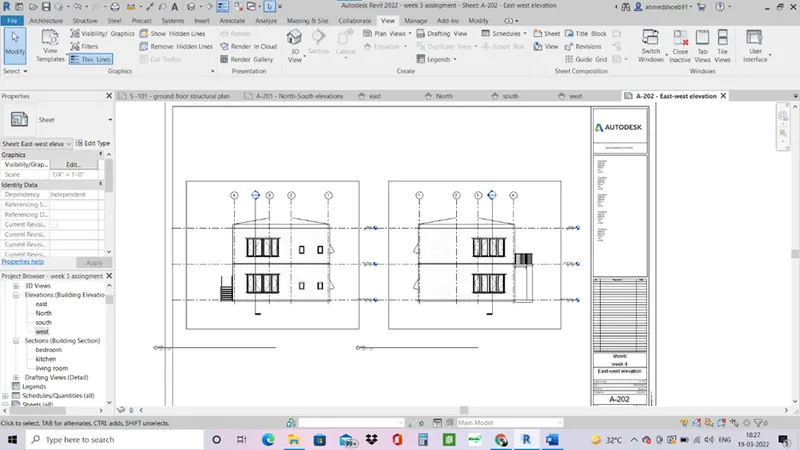
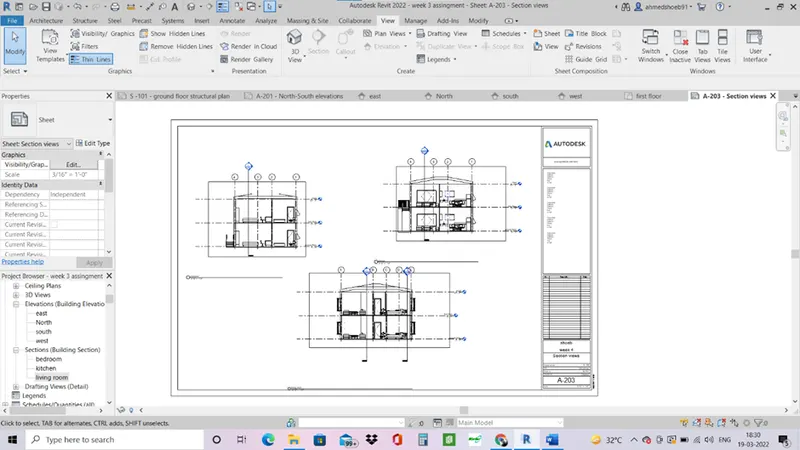
- Edit the template text as required For A101 for architectural, S for structural and 3d views sheets accordingly.
Result –
A-101
A 102
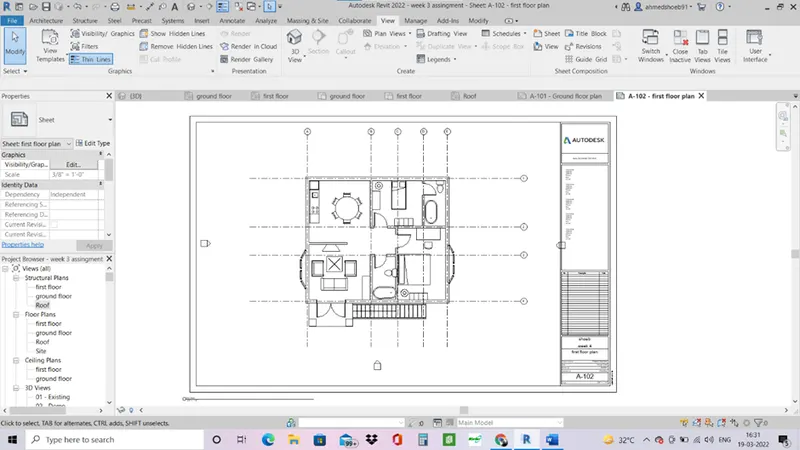
A 103
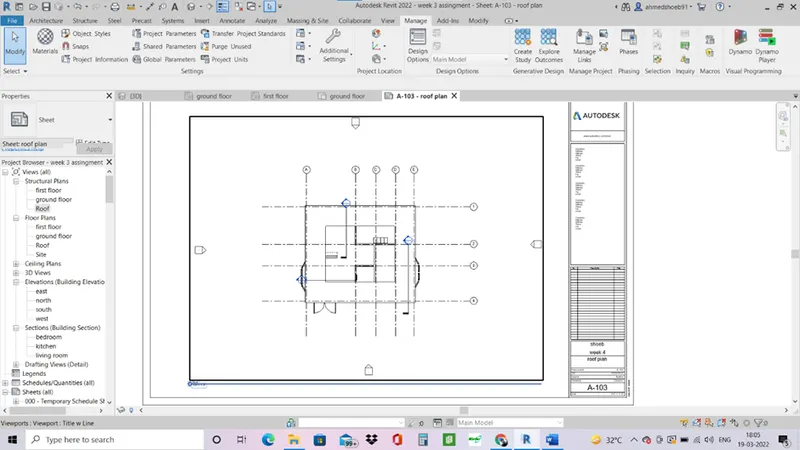
S-101
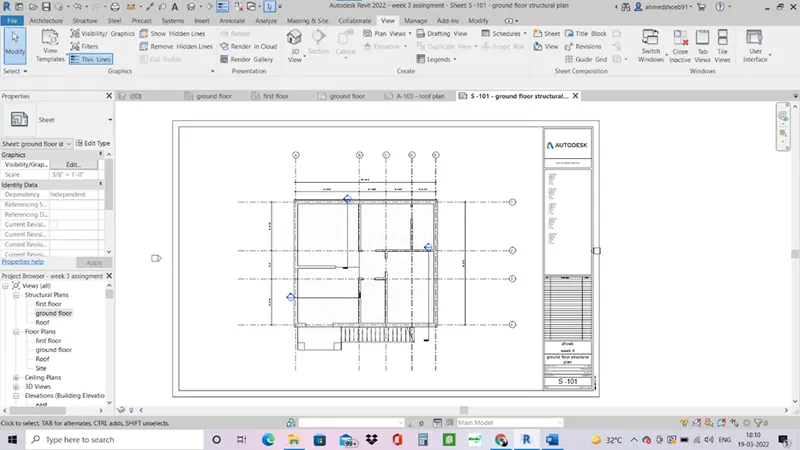
S-102
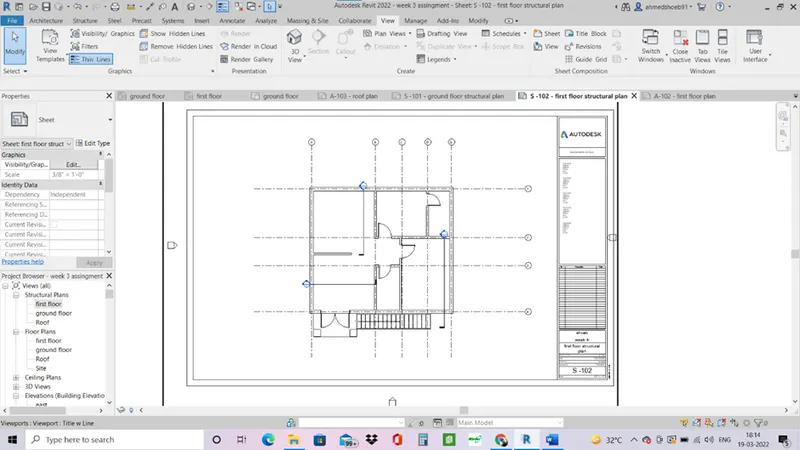
S 103
A 201
A 202
A 203
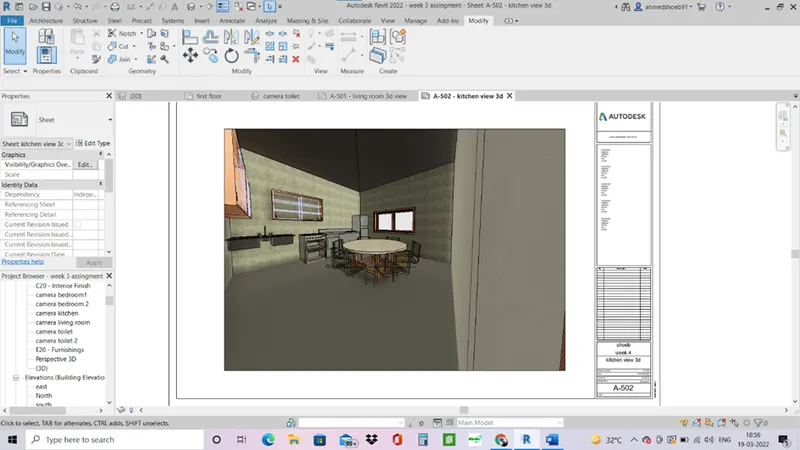
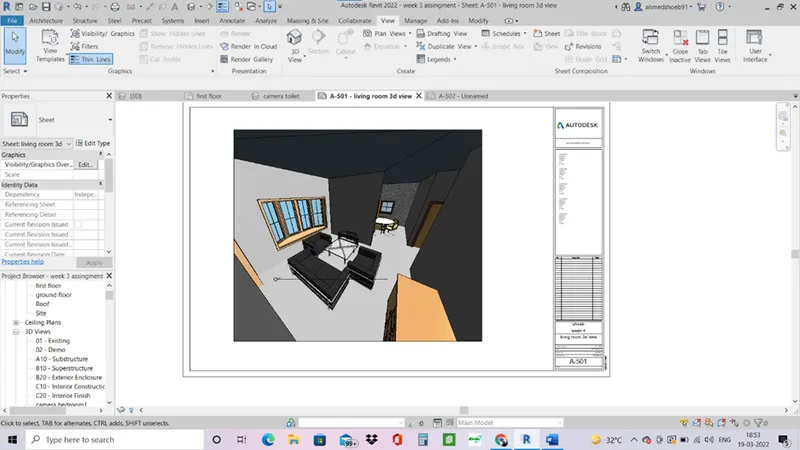
Aim – To create a camera-specific view or a 3D view in each room (living, dining, bedroom). Based on the views create a new set of sheets starting A-501 (you can add as many sheets after, 502, 503..n) to place the 3D view images.
Procedure –
- Go to view tab> 3d view> camera.
- Select camera and place the camera in rooms and place it accordingly.
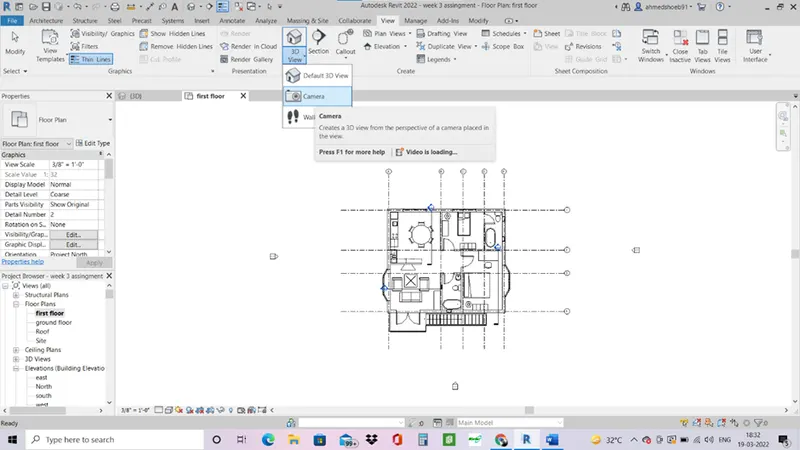
- Open the placed camera view and you can edit it using orbit wheel and navigation cube.
- Now place the camera in each room and edit the view accordingly.
- Now go in sheet and open a new sheet for 3d view.
- Drag the 3d views and place it in the sheet and edit the view accordingly.
- Name it A501 and A502 for 3d views.
Result
A501 living room
A502 kitchen