Wiring harness routing & packaging Rules Week 3 Challenge
Wiring harness routing & packaging Rules Week 3 Challenge
Q1. Download following cad data & define it as Electrical support using Electrical Part design Workbench. Define all the necessary properties.
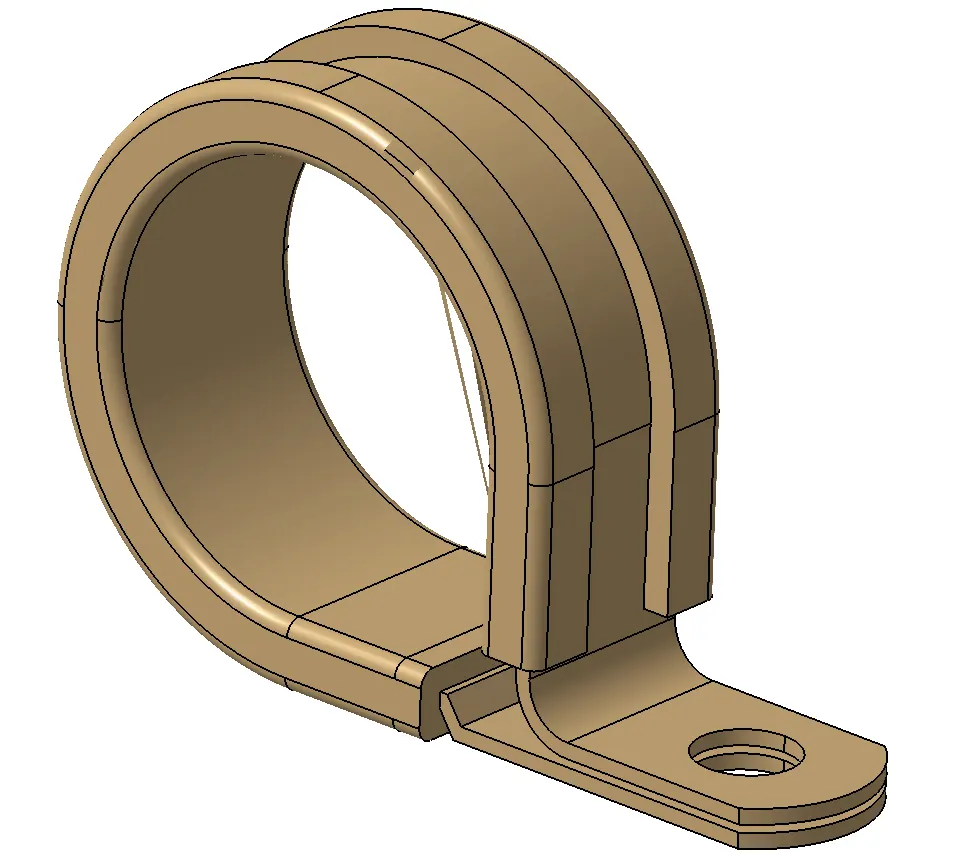
Ans. Got the clip [P-clamp]
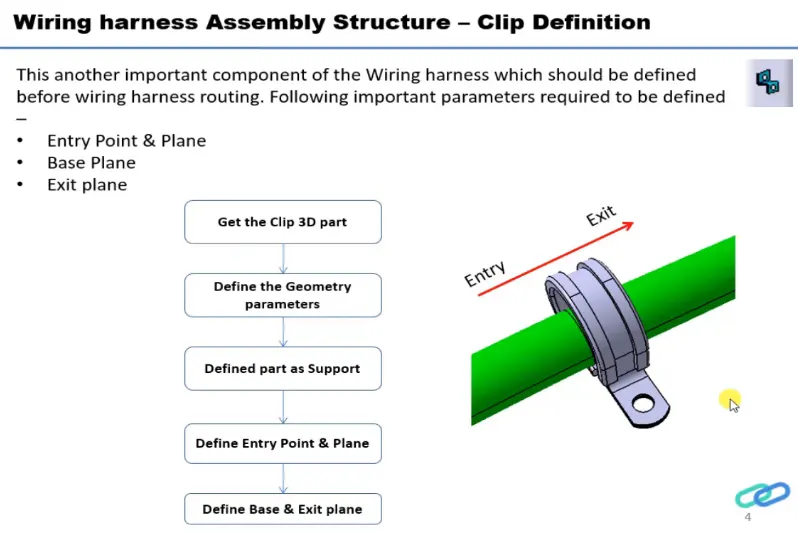
Define the geometry parameters:
- Create two points one as entry and another as exit point.
- create planes at two points and another at base.
- Switch to Electric part desgn
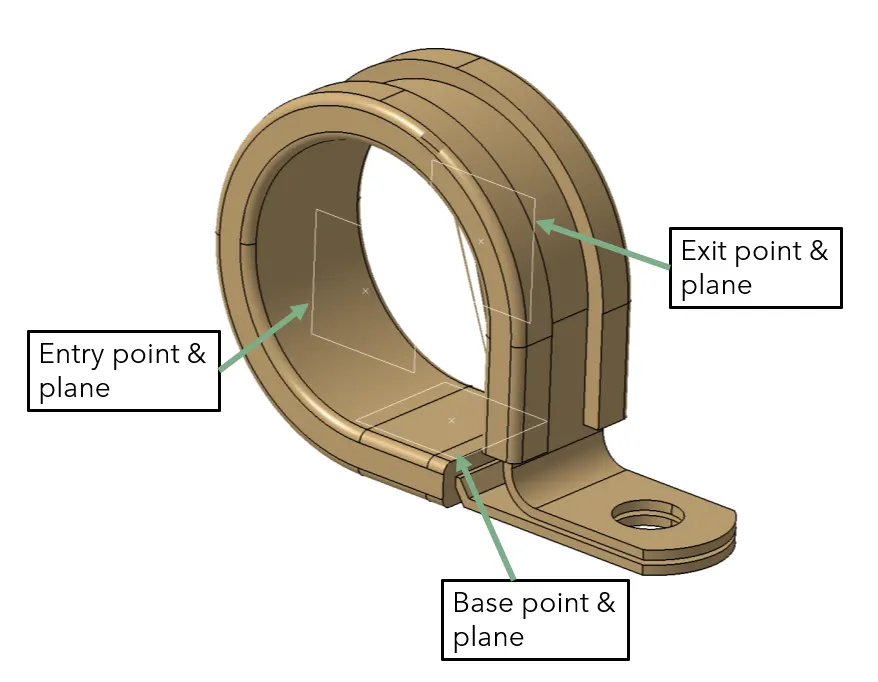
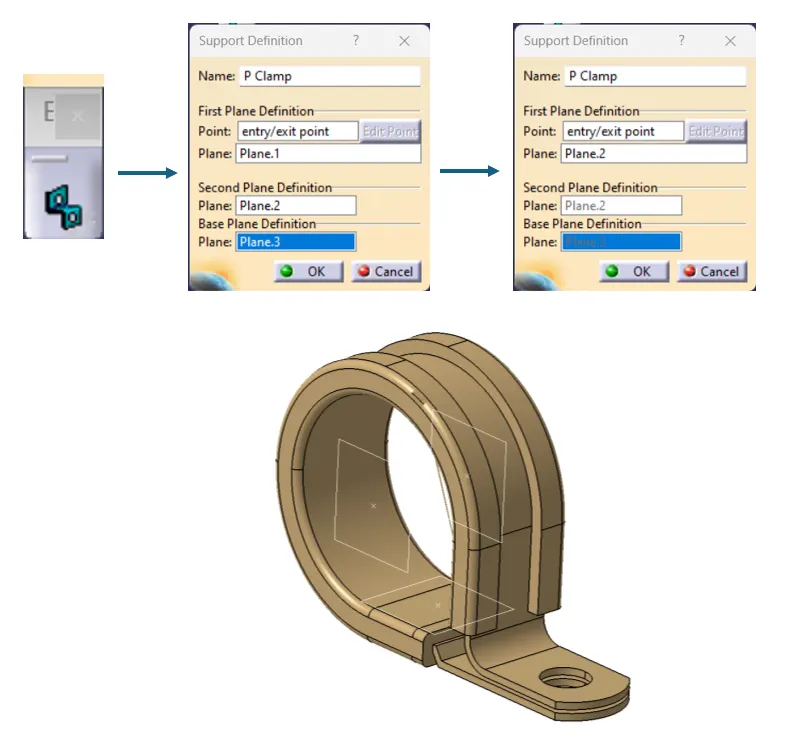
- Click on support defination - select part - select entry point - select entry plane, exit and base plane.
- Again Click on support defination - select part - select exit point - select exit plane and base plane as secondary plane is automatically taken.
Q2. Download following Back shell cad data & define it as Electrical back shell using Electrical Part design Workbench. Define all the necessary properties.
Ans. Tyco 1738312-1 [Backshell KIT]
Backshell Explanation:
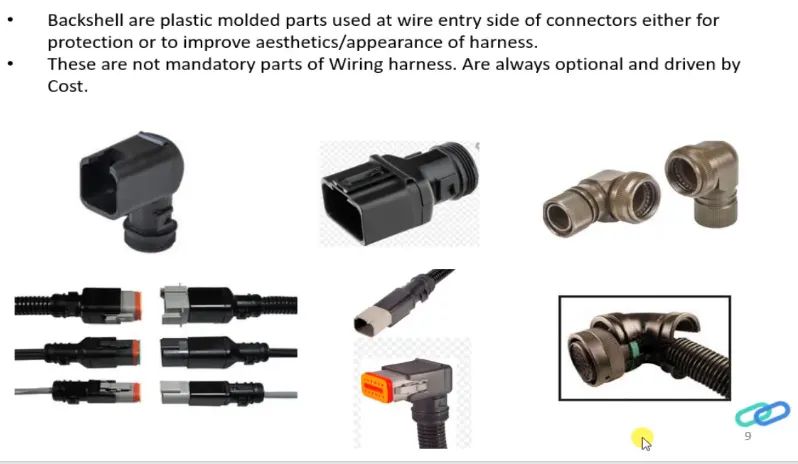
Defining the blackshell:
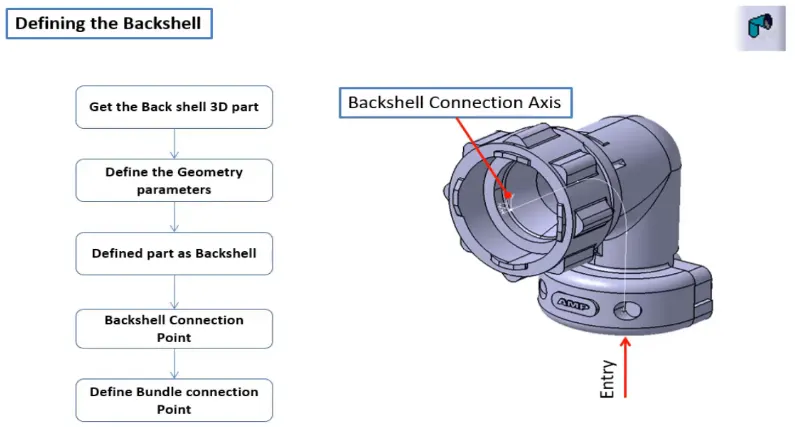
Steps to follow:
- Create Back shell entry point
- Create axis system for backshell entry
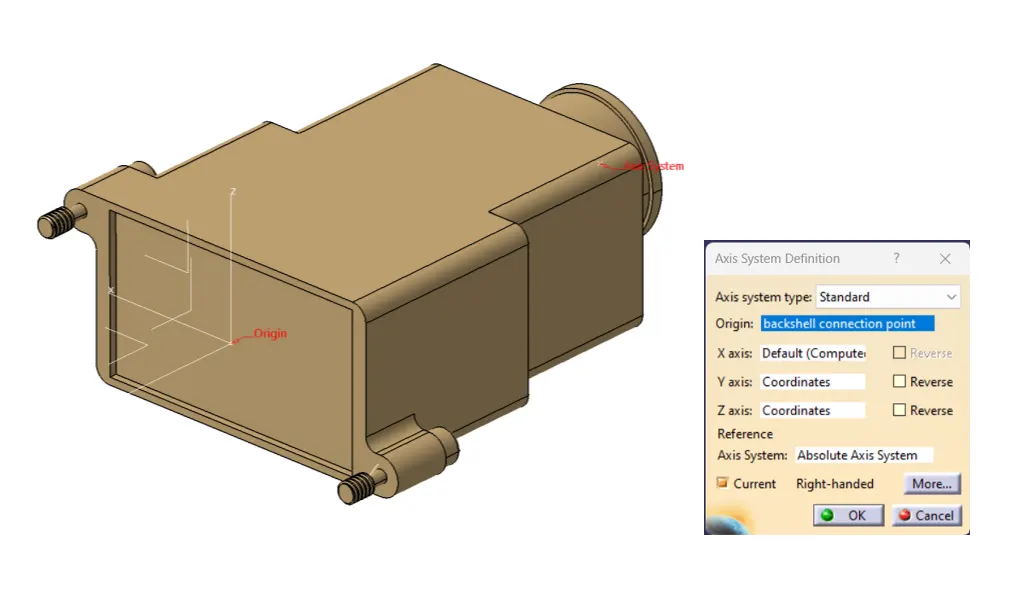
- Create bundle connection point
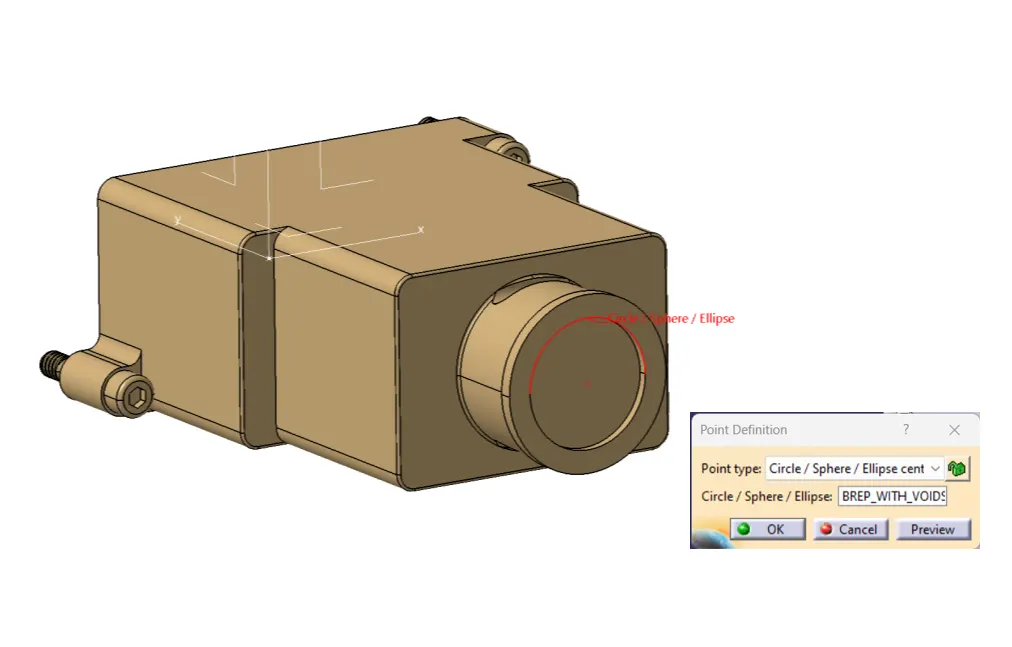
- Switch to electrical part design workbench
- Define part as a backshell
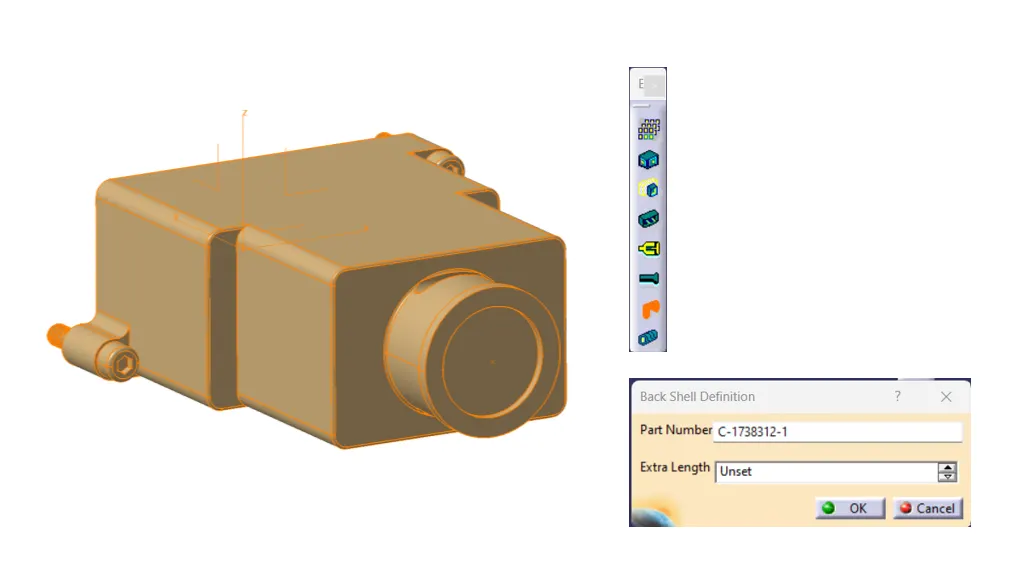
- Define backshell connection point
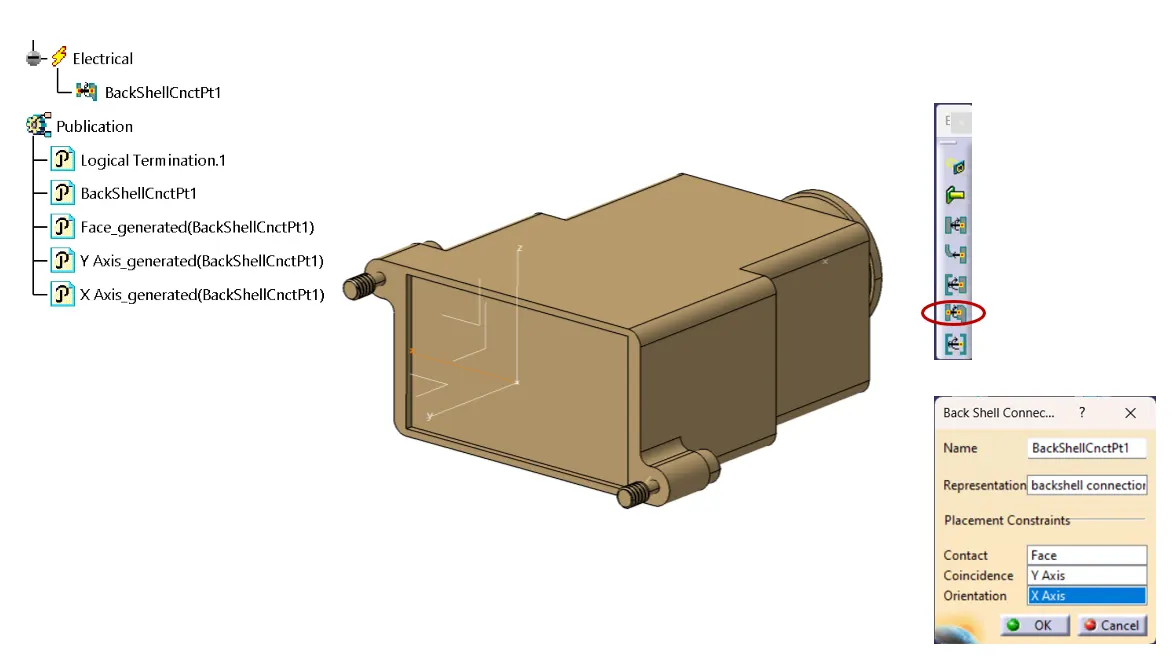
- Define bundle connection point
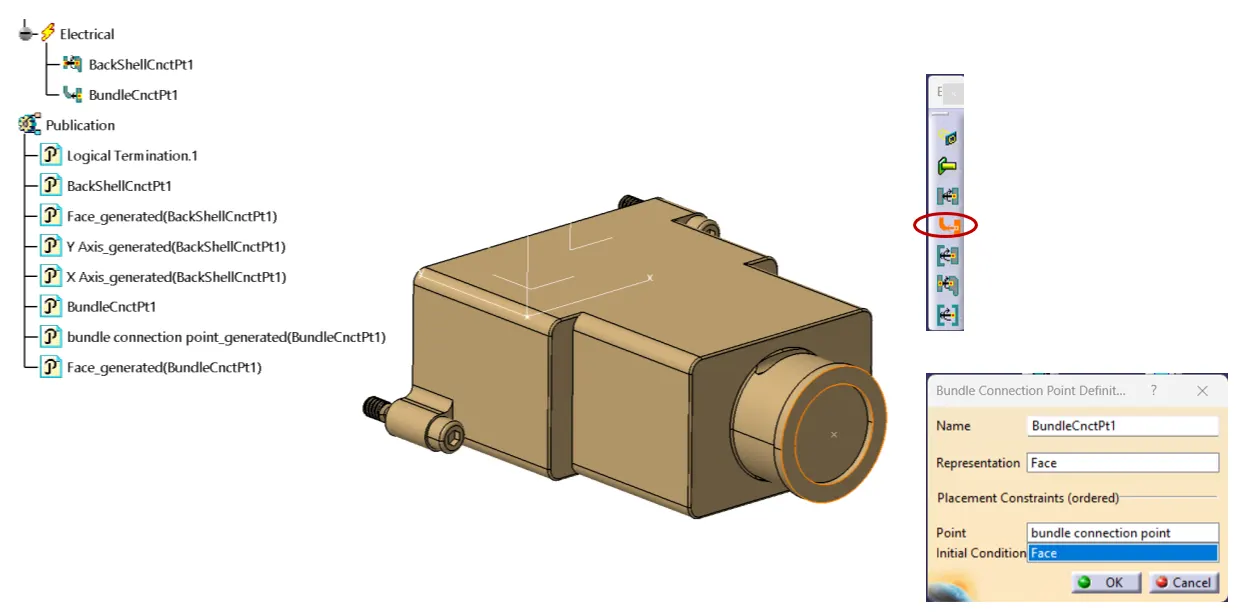
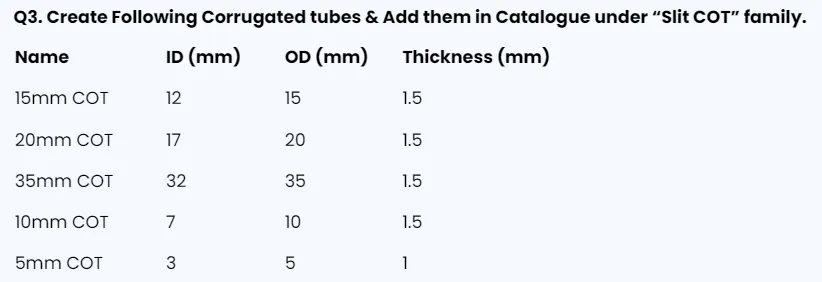
Steps to follow:
- Switch to electrical part design
- Select define protection part
- Click on part in spec tree
- input parameters & bend radius [1.5 x OD]
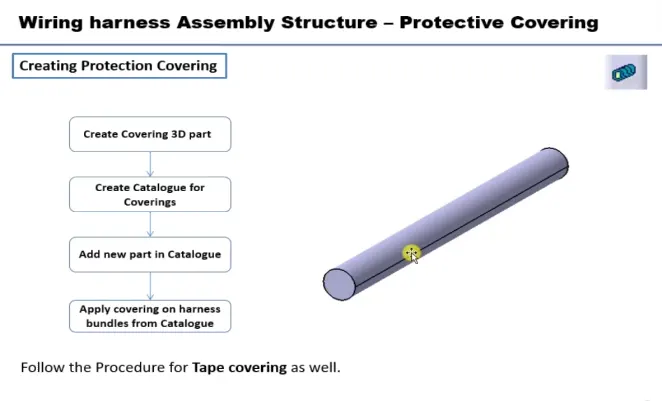
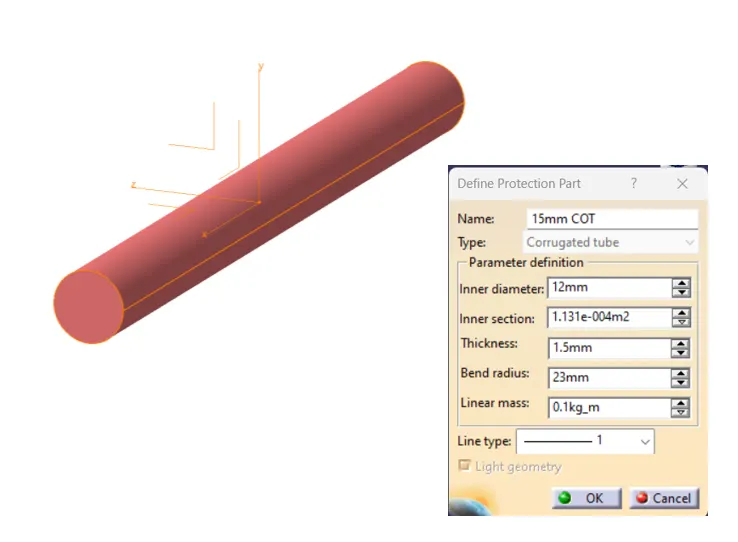
Catalogue Creation:
- Select new part
- Choose Catalogue doc
- Add family
- Give name
- Select Conduit as standard,Then save
- Open part to add catalogue
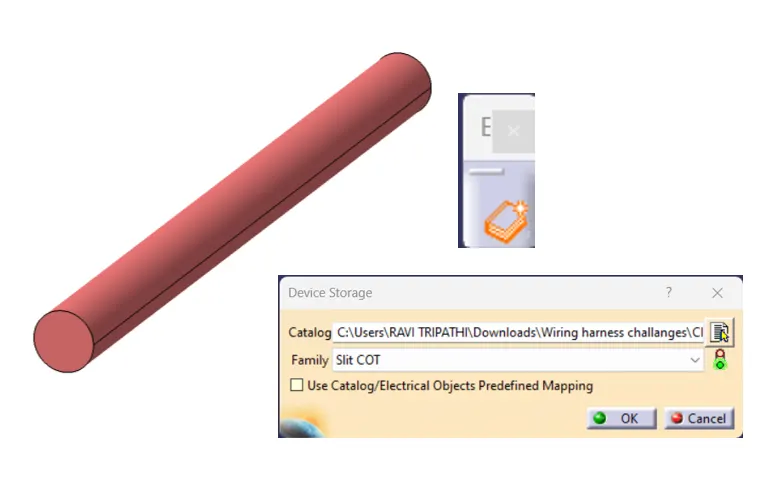
- select store Device tool
- select catalogue
- Go to family
- Put_"Slit COT", then ok