Wiring harness routing & packaging Rules Week 3 Challenge
P CLAMP:
DOWNLOAD AND UPLOADING:
- Download the required component as 3d model in suitable format form the open-source websites like te.com.
- Import the downloaded model into Catia.
CREATION OF GEOMENTRICAL DATA:
- Open part work bench.
- Create a new geometrical set for the electrical geometry data.
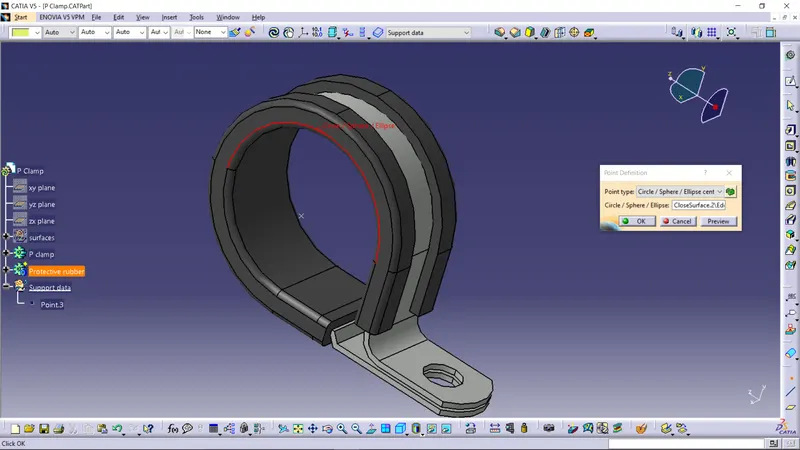
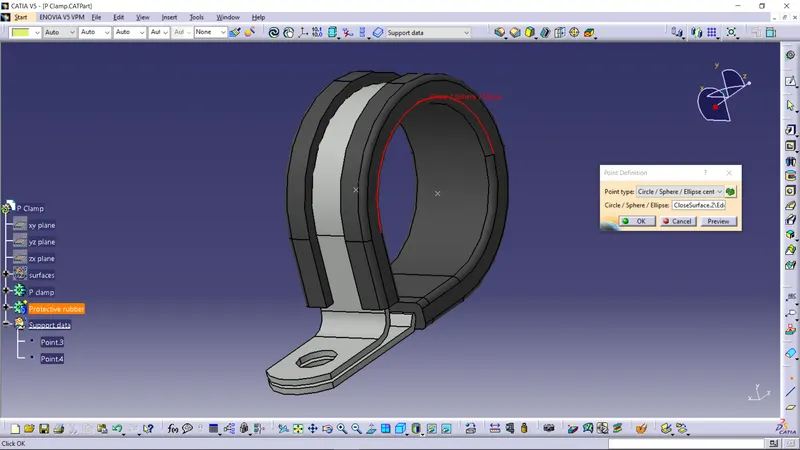
- Create an Entry point and a plane through which the bundles enter the clip.
- Create an Exit point and a plane through which the bundle exits out from the clip.
- Create a Base plane for inside the clip inner circle which act as base for the bundle running through it.
DEFINING COMPONENT AS SUPPORT:
- Open electrical part design workbench.
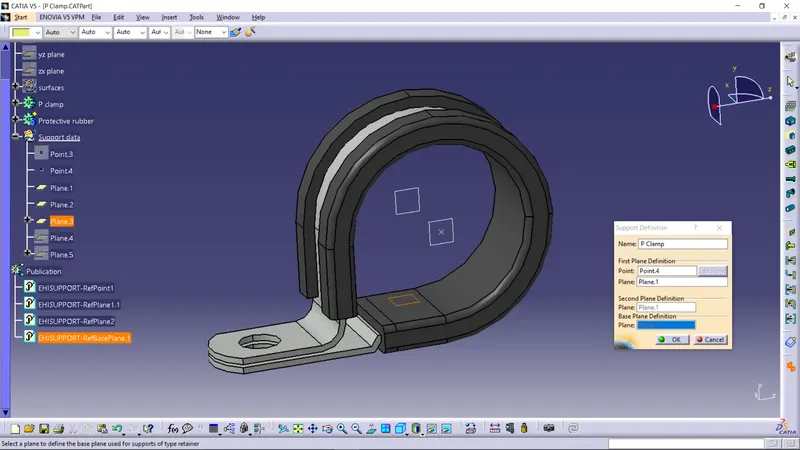
- Select define support tool form the toolbar and click on the component to define it an supporting or clamping part which opens up a support definition dialog box.
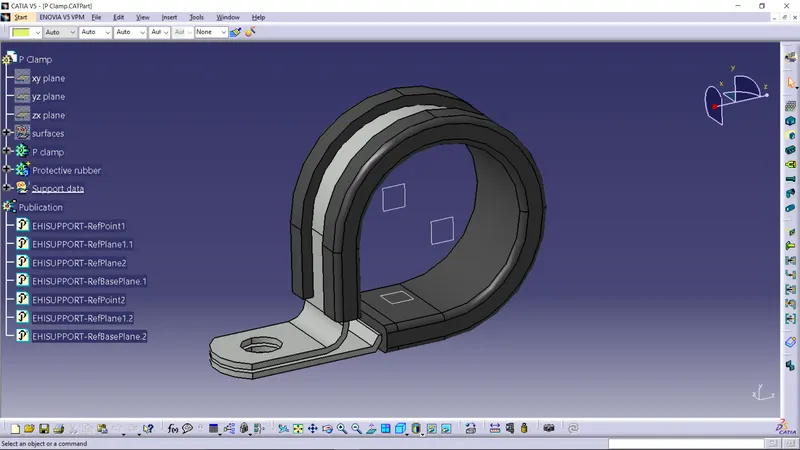
- Choose the entry point and plane and second plane and base plane and click OK. This will define them a support part with single side entry which is represented in the publication.
- As the bundle can enter the clamp from both side the component has to define again as support with another side plane as entry point and plane with same base. This will make the clamp to use them from both sides.
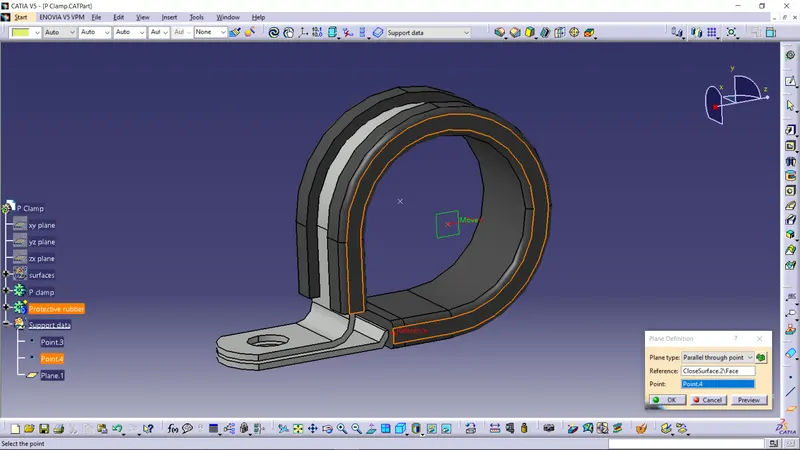
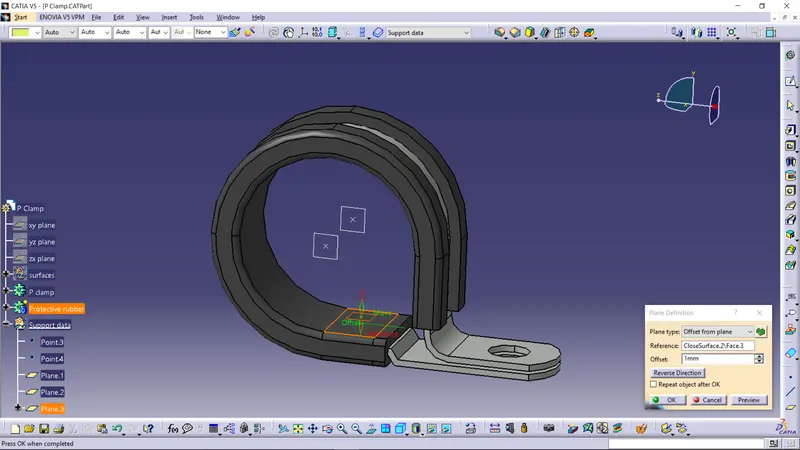
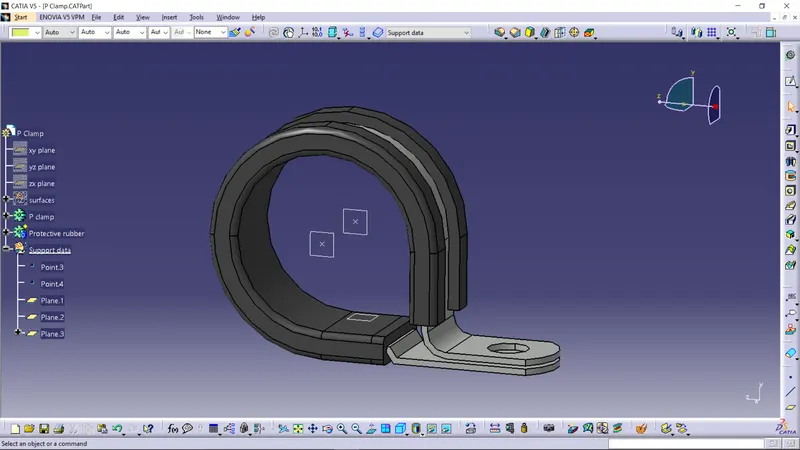
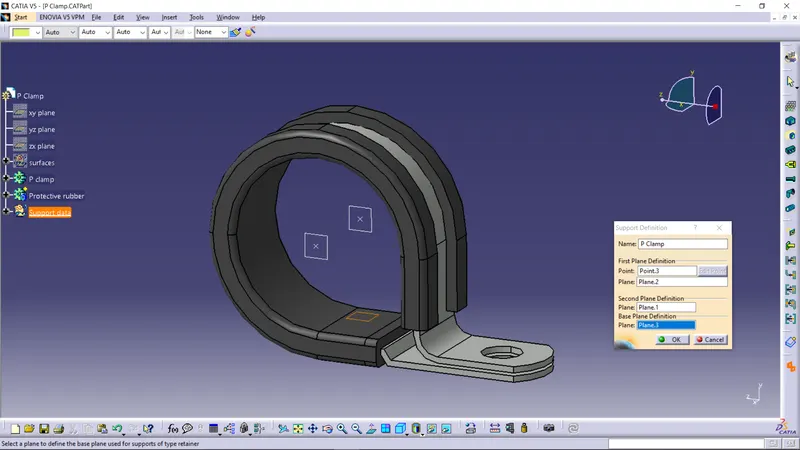
Tyco 1738312-1:
DOWNLOAD AND UPLOADING:
- Download the required component as 3d model in suitable format form the open-source websites like te.com.
- Import the downloaded model into Catia.
CREATION OF GEOMENTRICAL DATA:
- Open part work bench.
- Create a new geometrical set for the electrical geometry data.
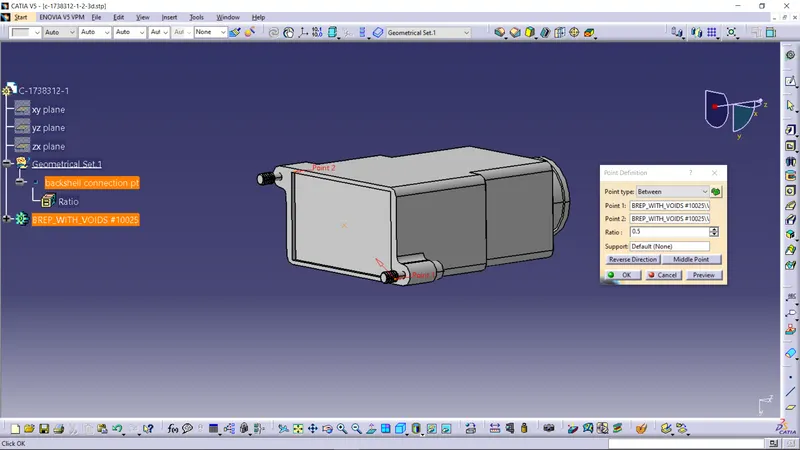
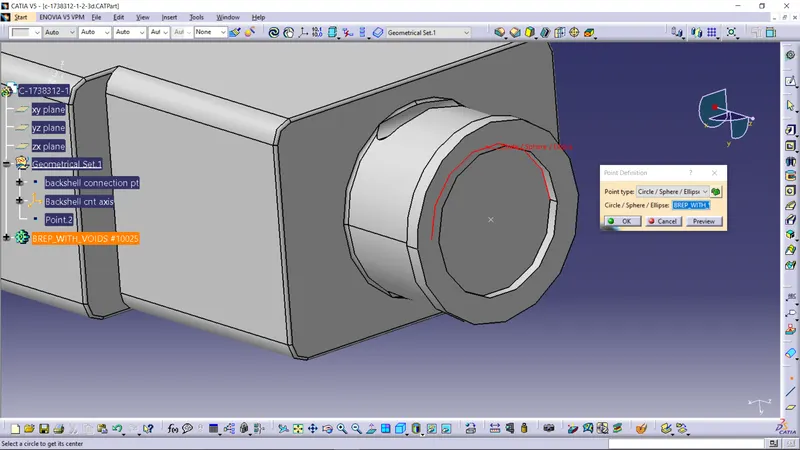
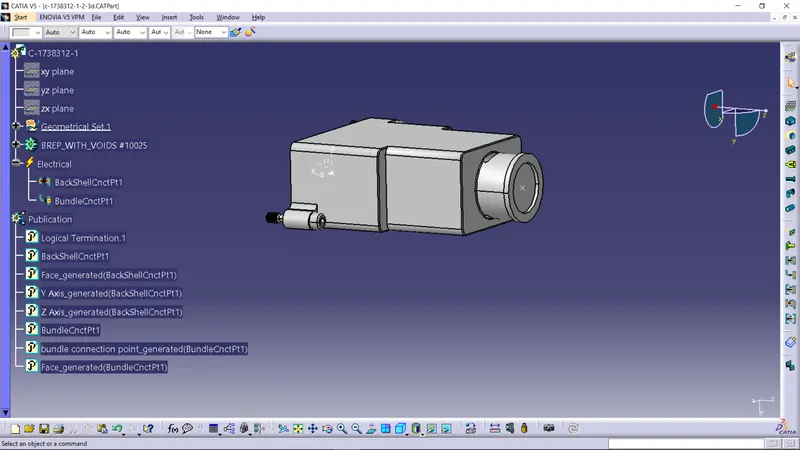
- Create a centre point on the matting face of backshell and the connector which is backshell connection point.
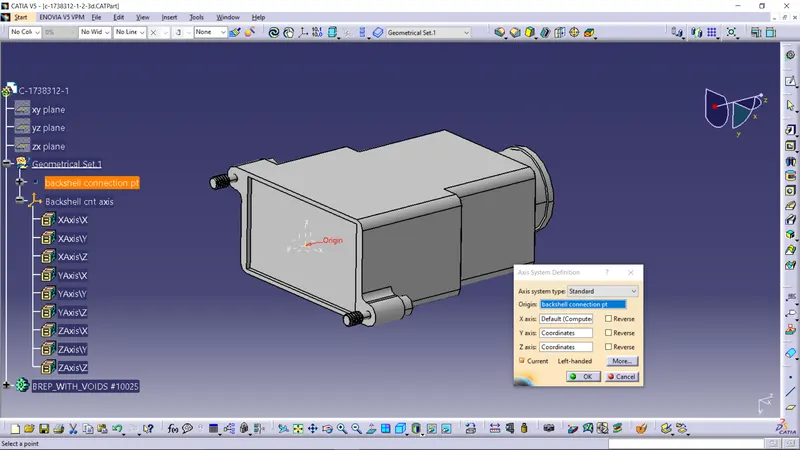
- Create an axis system on that point with y-axis directing the direction of attachment of connector and x and z axis for the orientation same as the connector and name it as backshell connection axis.
- Create a centre point on the bundle mating face which is bundle connection point.
DEFINING COMPONENT AS BACKSHELL:
- Open electrical part design workbench.
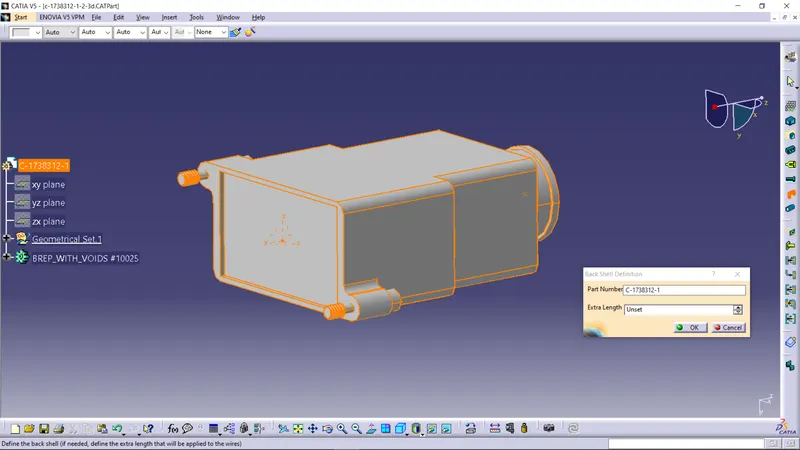
- Select the define backshell tool from the toolbar and click on the component which opens a backshell definition dialog box. Provide the appropriate part name and click OK.
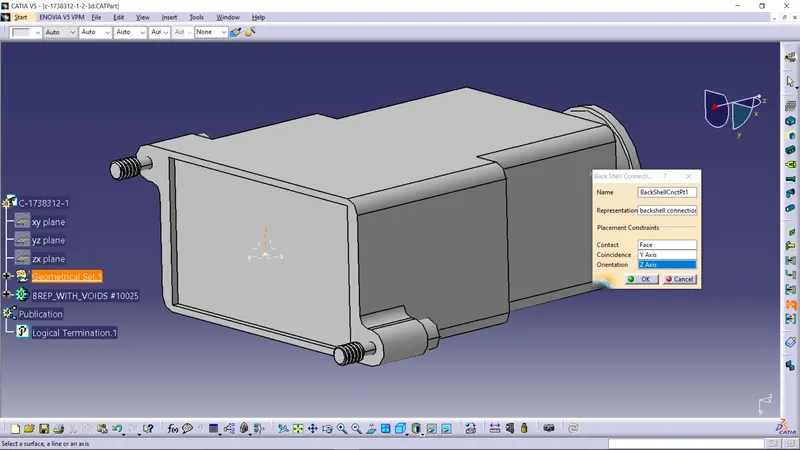
- Define backshell connection point: Select Define backshell connection point tool from toolbar and click on the component which opens a backshell connection point definition dialog box. Choose the backshell connection point as representation, contacting face as contact, y-axis as coincidence and x or z-axis as orientation. The orientation axis should choose as same axis for the connector. This will be represented in the Electrical branch and the publication branch of the tree.
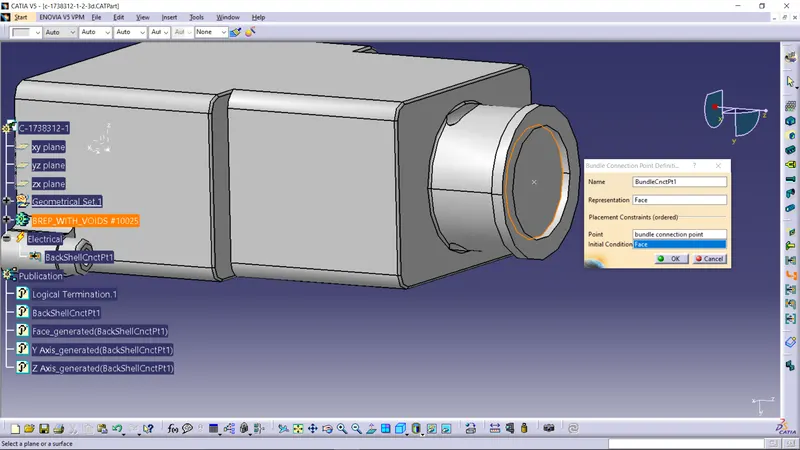
- Define Bundle definition point: Select define bundle connection point tool from toolbar and click on the component which opens a bundle connection point definition dialog box. Choose the bundle matting face as representation, bundle connection point as point, and same bundle matting face as initial condition and click OK. This will be represented in the Electrical branch and the publication branch of the tree.
CORRUGATED TUBE:
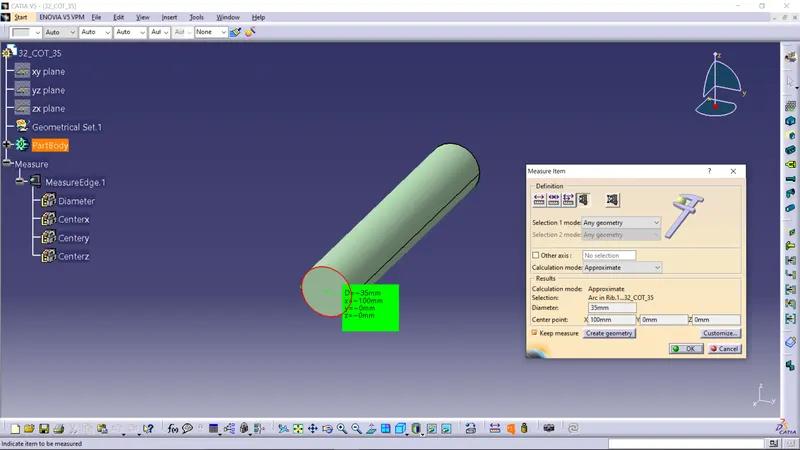
CREATION OF 3D PART:
- Open the electrical part work bench and create a new part file.
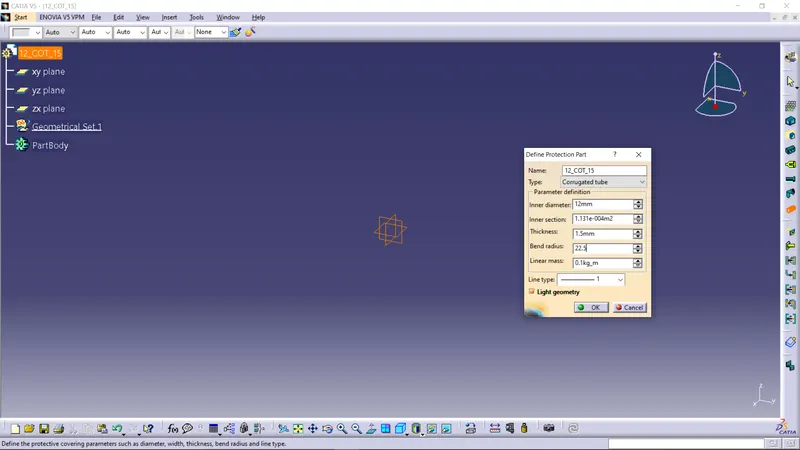
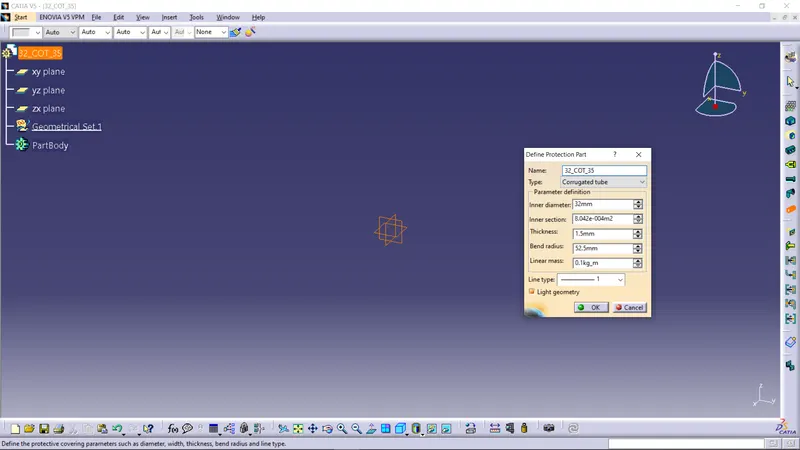
- Select the define protection part tool from the tool bar and click on the part body which opens a production part definition dialogue box.
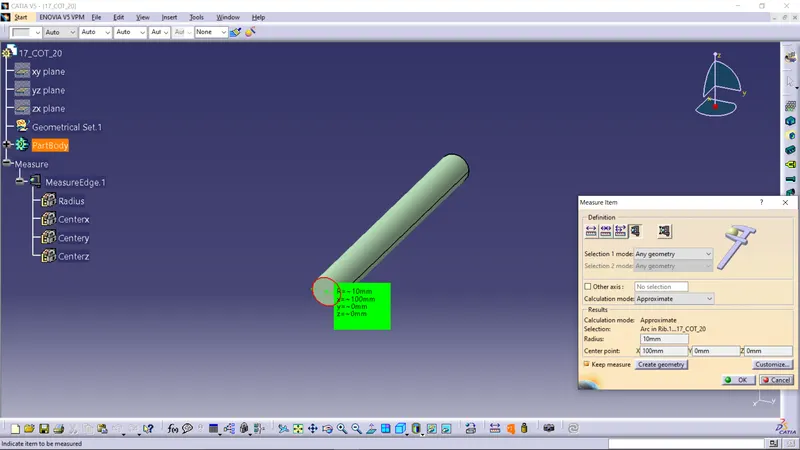
- Choose the type as corrugated tube and provide the required inner diameter and the thickness of the tube needed. Provide the bend radius as 1.5 times the outer diameter of the tube and click OK. The factor 1.5 is the experimented value for the corrugated tube. This will create a rib of defined dimension.
ADDING FILES TO CATALOGUE:
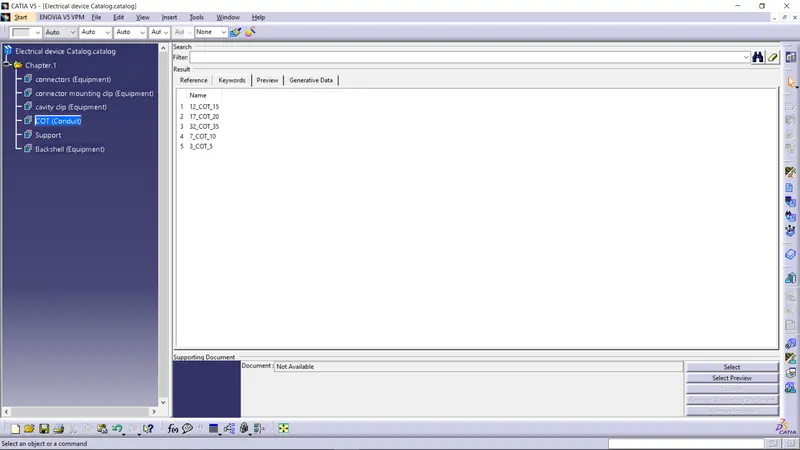
- Create a new catalogue file or create a new family in an existing catalogue. Provide a suitable name for the family and choose the type as conduit and save the catalogue.
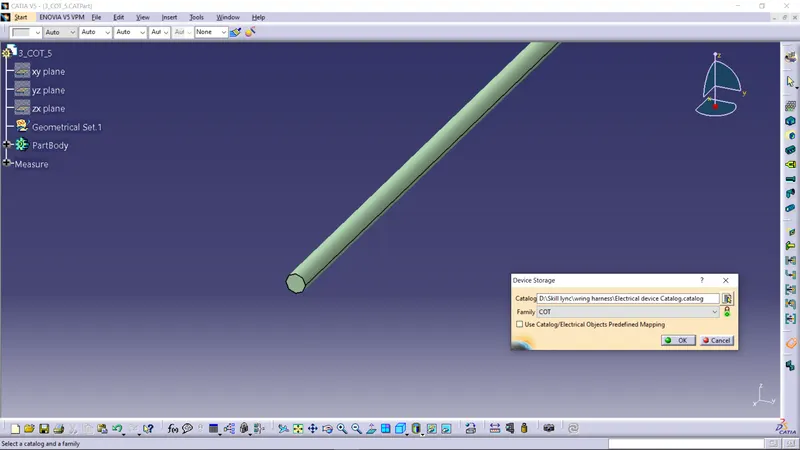
- Now open the corrugated tube file in the electrical part workbench and click on store device tool. Choose the catalogue file and choose the family that created and click OK.
- This will make the tube part added to the catalogue and make available for the future use.