Wiring harness routing & packaging Rules Week 3 Challenge
Q1. Download following cad data & define it as Electrical support using Electrical Part design Workbench. Define all the necessary properties.
P clamp :
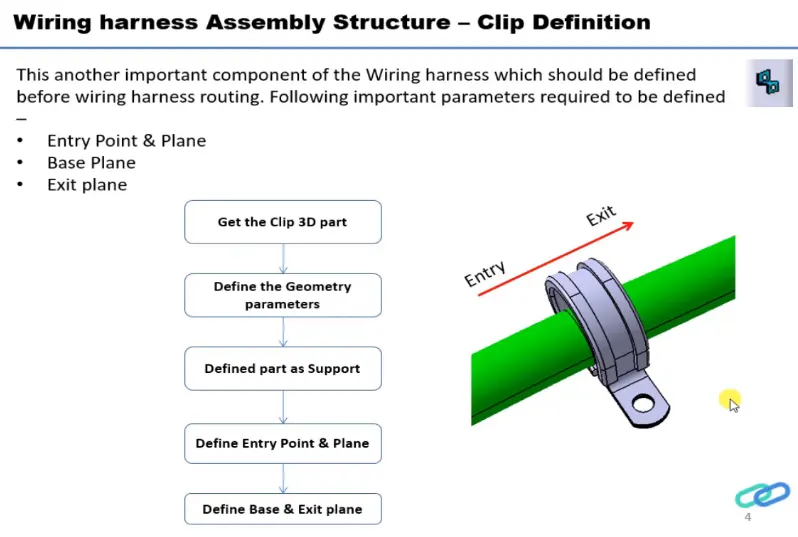
Steps to define P clamp as Electric Support:
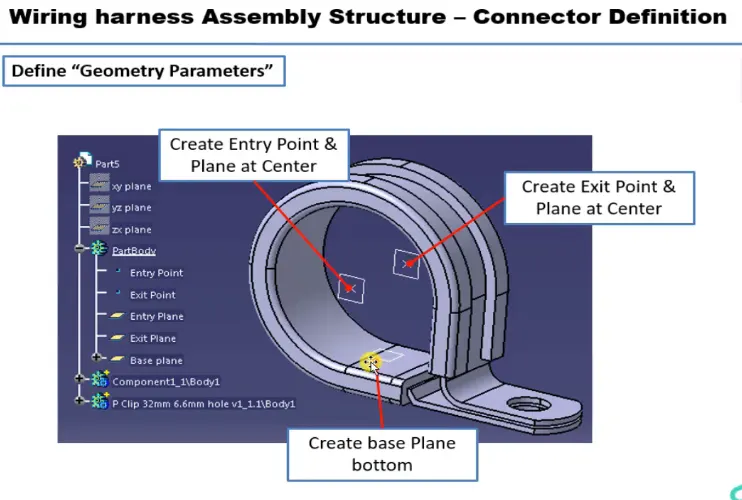
- Create one point on one side of P clamp as entry point and point on the other side as exit point.
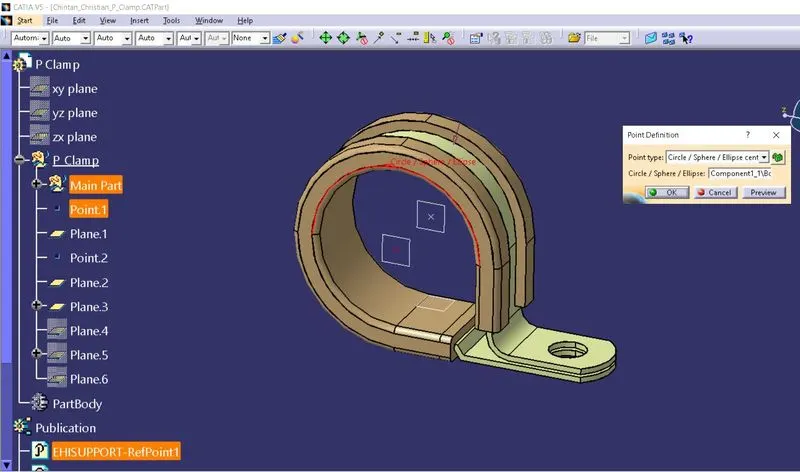
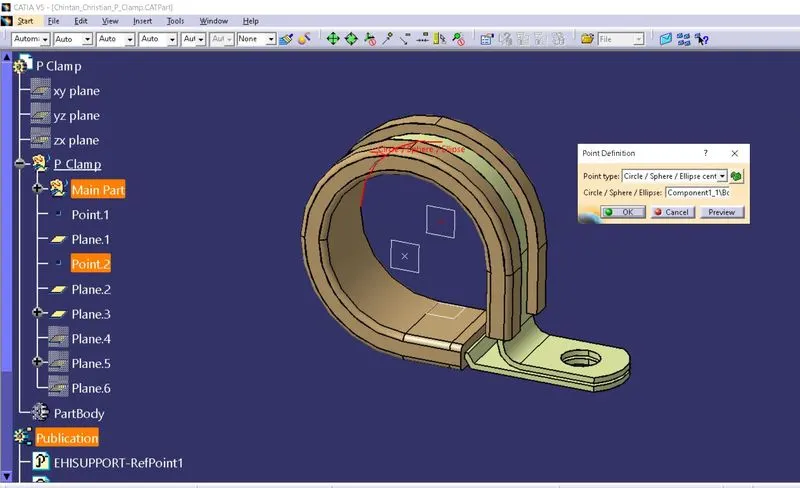
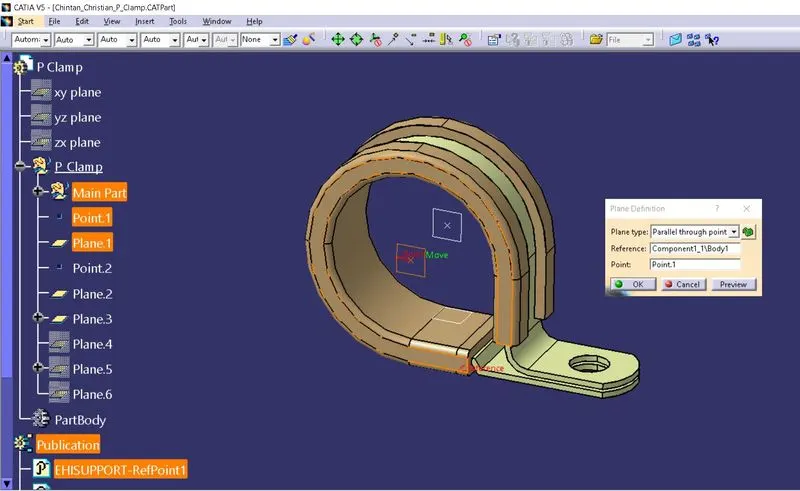
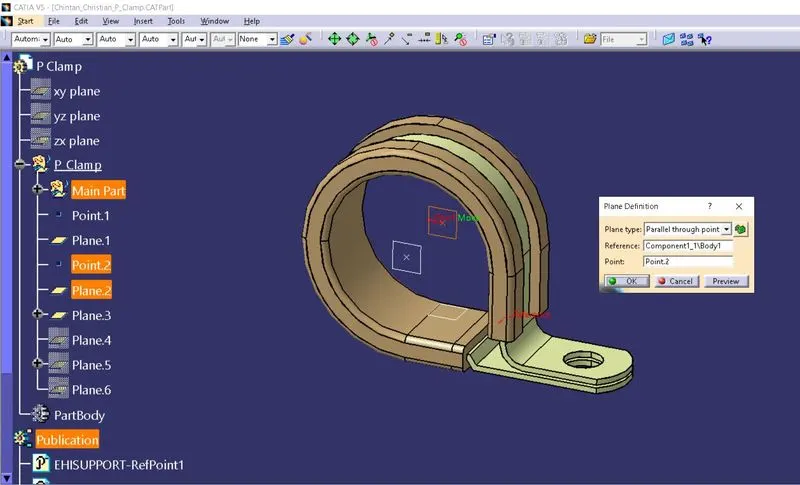
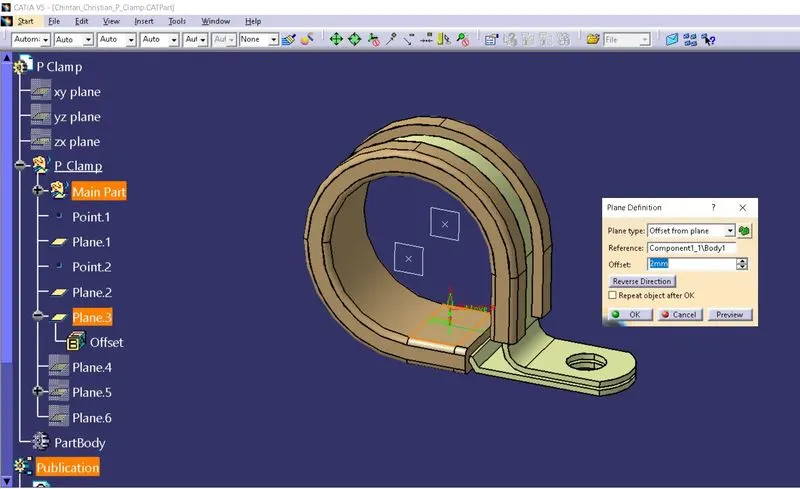
- Create two planes at these two points and third plane as 2 mm above from base of P clamp.
- Go to ‘Electric Part Design’ workbench.
- Click on ‘Define Support Part’ and select P clamp. Now, select one point as an entry point, the adjacent plane as an entry plane and the remaining planes as exit and base plane.
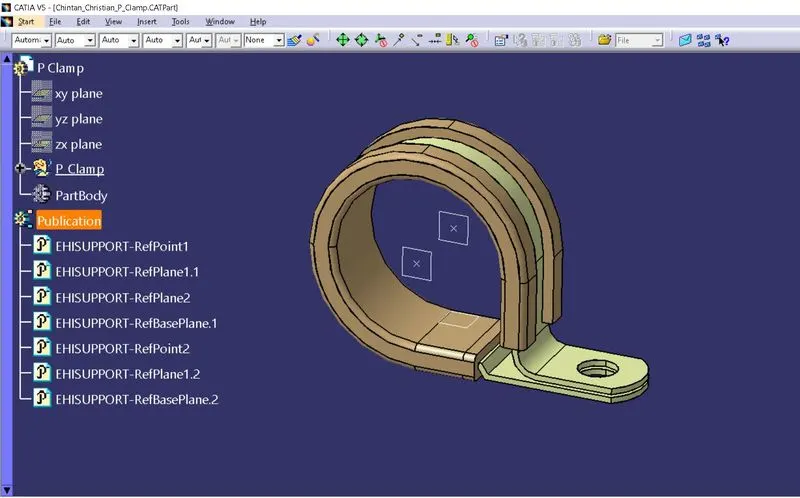
- Again Click on ‘Define Support Part’ and select P clamp. Here first use reset option for point selection by right click and select the exit point as the other entry point, select exit plane as the other entry plane and base plane. The previous entry plane will be automatically taken as exit plane.
Q2. Download following Back shell cad data & define it as Electrical back shell using Electrical Part design Workbench. Define all the necessary properties.
Tyco 1738312-1 : https://www.te.com/usa-en/product-1738312-1.html
Steps to define Back shell as Electric Back shell:
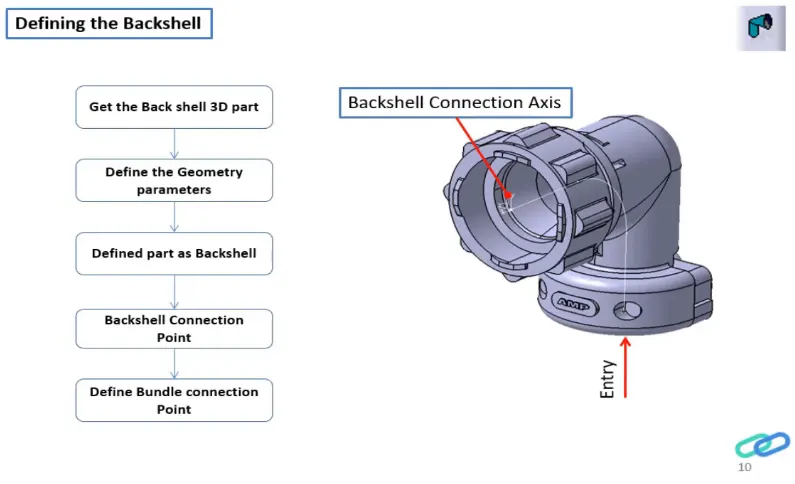
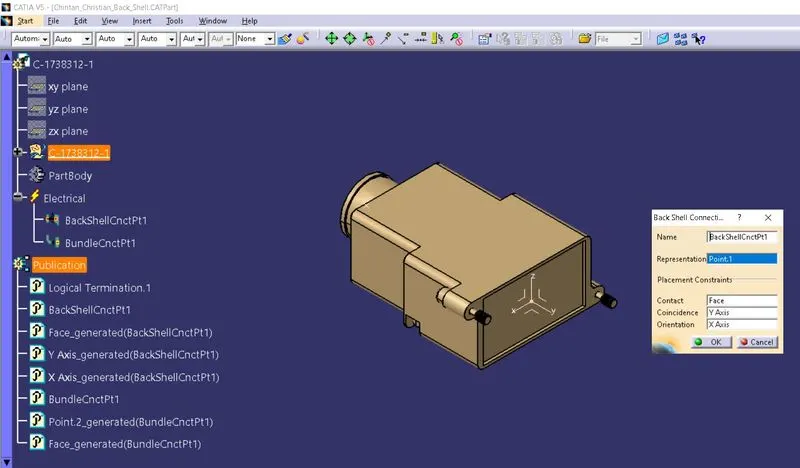
- Create a center point on surface of mating side of Back shell. Create an axis system on this point with Y axis normal to the surface.
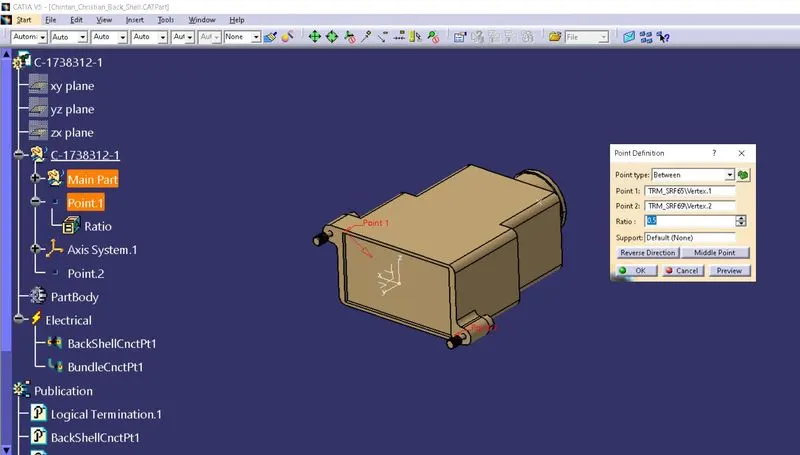
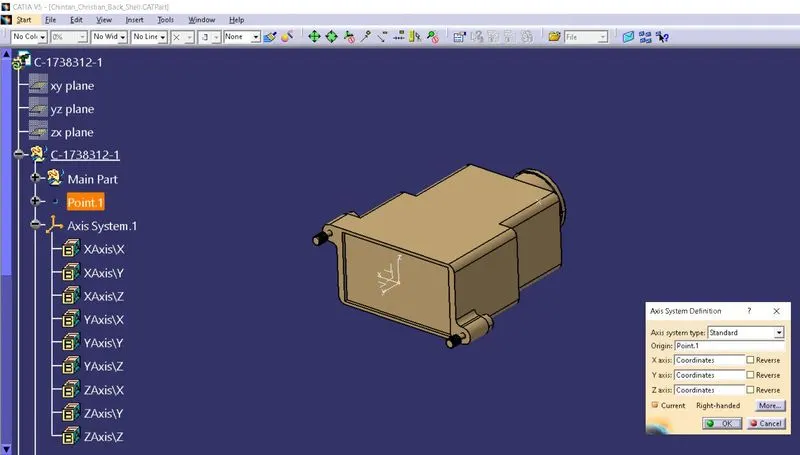
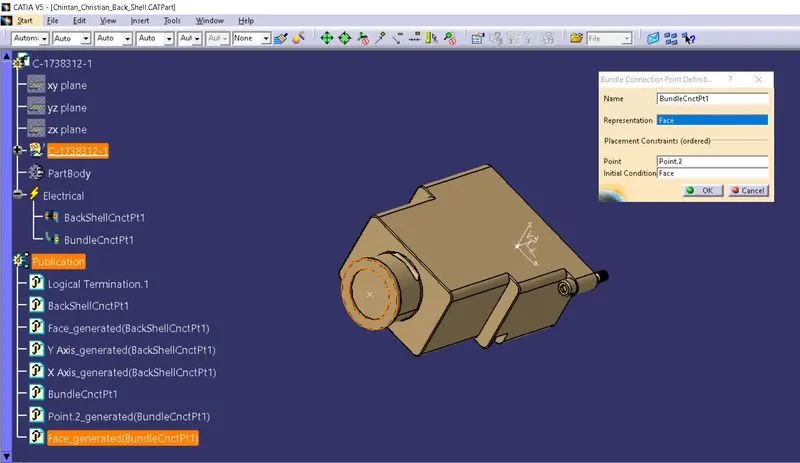
- Create another point on bundle entry side of back shell.
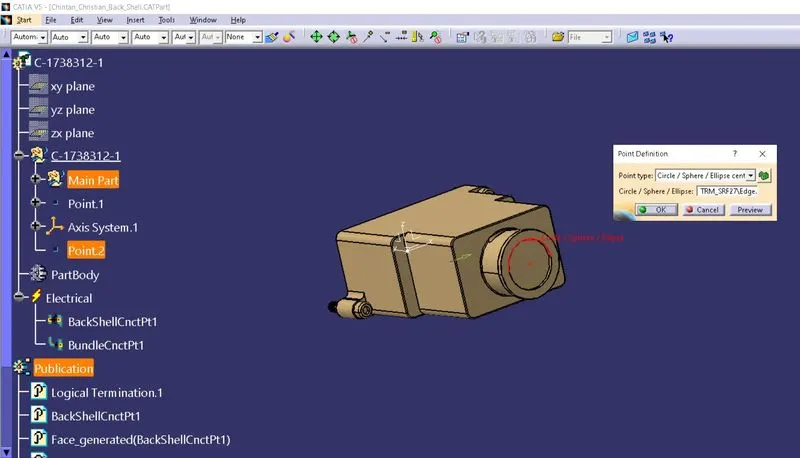
- Now go to ‘Electrical Part Design’ workbench.
- Define back shell as ‘Support Part’.
- Now define Back Shell Connection Point.
- And Define Bundle Connection Point.
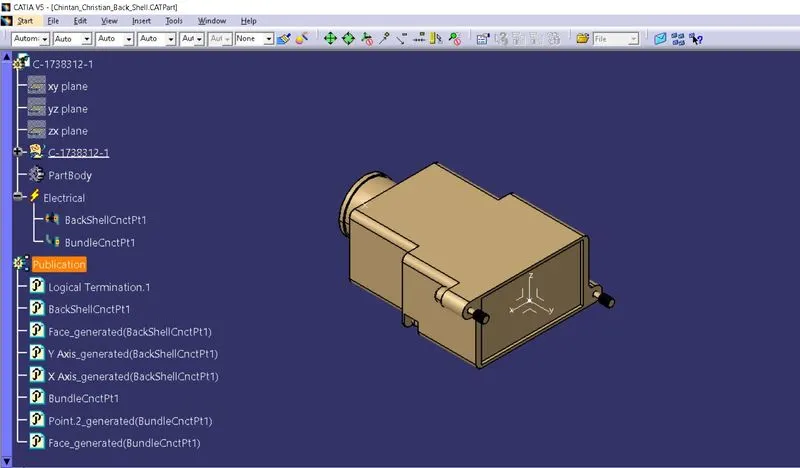
Q3. Create Following Corrugated tubes & Add them in Catalogue under "Slit COT" family.
|
Name |
ID (mm) |
OD (mm) |
Thickness (mm) |
|
15 mm COT |
12 |
15 |
1.5 |
|
20 mm COT |
17 |
20 |
1.5 |
|
35 mm COT |
32 |
35 |
1.5 |
|
10 mm COT |
7 |
10 |
1.5 |
|
5 mm COT |
3 |
5 |
1 |
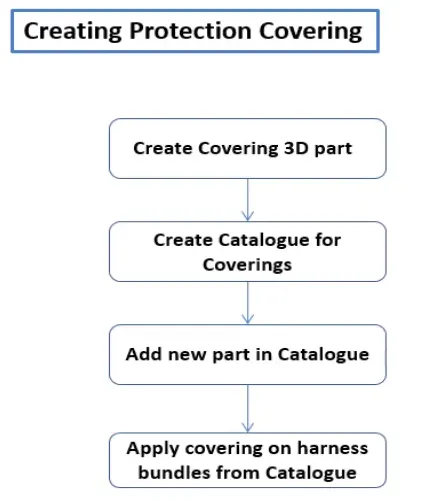
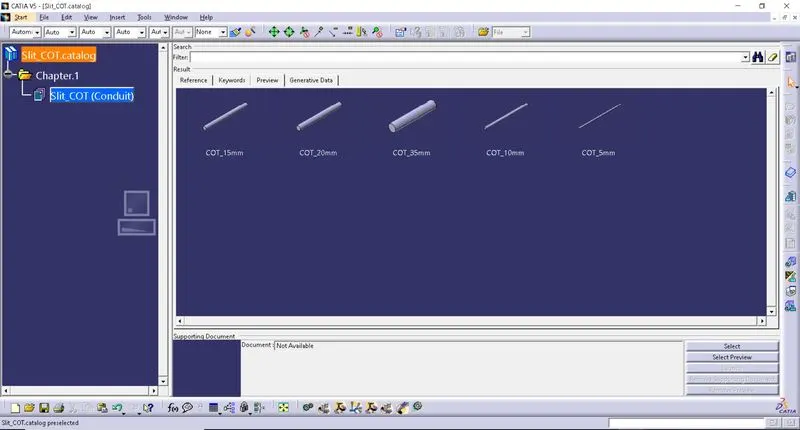
Creation of COT (or Corrugated) tubes and adding them into “Slit COT” catalogue :
- Go to ‘ELECTRICAL PART DESIGN’ workbench.
- Create COT tubes by using ‘Define Protection Part’ option.
- Click on part name in Feature tree and provide given parameters like Inner Diameter, Outer Diameter as well as Thickness according to above given table. Save all COT tubes.
- Now create a catalogue with family name as ‘Slit COT’. Add all created COT tubes in this catalogue by using ‘Device storage’ option.