Radar Mast & Final Assembly of Yacht
Sunseeker Predator Yacht : Designing , Assembling and Rendering
Objectives:-
- To learn about different surface design tools & how to use them.
- To know setup and proper usage of blueprints.
- To design parts of Sunseeker Yacht by using solid & surface features.
- To make an assembly of Yacht and render it using proper lights, camera and environment.
Introduction:-
As the name of yacht suggests, Sunseeker International is luxury yacht maker company based in UK. All yachts from this company are designed & manufactured at Poole, UK.
Sunseeker Yachts have been featured into movies as well as documentary.
Here for this report, we are going to focus on a particular model - Sunseeker Predator Yacht.
It contains different parts as given below:
- Propeller
- Radar
- Hull
- Garage door
- Front seat
- Middle seat
- Rear seat
- Superstructure
- Radar mast
For yacht design, number of surface as well as solid tools are used which will be explained further in report.
A blueprint file is also set up which is also explained further.
Solidworks 2020: This software is used for creating 3D solid as well as surface designs and assembly.
Photoview 360: It is used for rendering 3D models images in realistic environment.
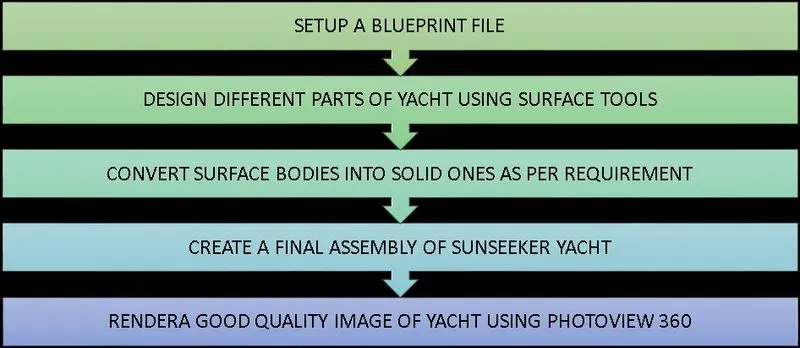
Design Approach:
Features used:-
Surfaces features:
- Lofted surface: To create surface with main lines and guide lines.
- Extrude surface: To convert sketch into 3D surface in given direction.
- Revolve Surface: To make a revolved surface around center axis.
- Filled surface: To generate a surface with number of sides.
- Swept surface: To create a surface with two different sketches.
- Surface offset: To generate a surface at a particular distance.
- Ruled surface: To create a linear surface with open / closed curves.
- Trimmed surface: To remove particular portion of given surface.
- Delete surface: To delete a selected surface.
- Thicken surface: To give a surface some thickness.
- Extend surface: To extend a surface in a given direction.
- Knit surface: To knit number of surfaces with required gap tolerance.
Solid features:
- Extrude: To create 3D solid body in required direction.
- Revolve: To generate solid body around an axis.
- Sweep: To make a solid body with two sketches.
- Reference Plane: To create a plane required for reference while designing.
- Projected Curve: To generate a 3D curve with help of two sketches.
- Split line Curve: To use line to split surface / body.
- Fillet: To make corner in smooth rounded edge given as radius in mm.
- Chamfer: To make a slanted edge with given dimensions.
- Extruded cut: To make cut in solid body in given direction.
- Revolved cut: To cut solid body around an axis.
- Mirror: To mirror bodies / surfaces around plane, surface or axis.
- Shell: To make a hollow portion in solid body.
- Helix spiral: To create spiral shaped solid bodies.
- Linear pattern: To generate copies of solid bodies in linear direction.
- Circular pattern: To make copies of solid bodies in circular direction.
- Sketch pattern: To create copies of solid bodies and placed them in a sketch direction.
Modelling of yacht:-
- Blueprint setup: Blueprint is an essential part of creating designs & assemblies as it contains different views and dimensions.
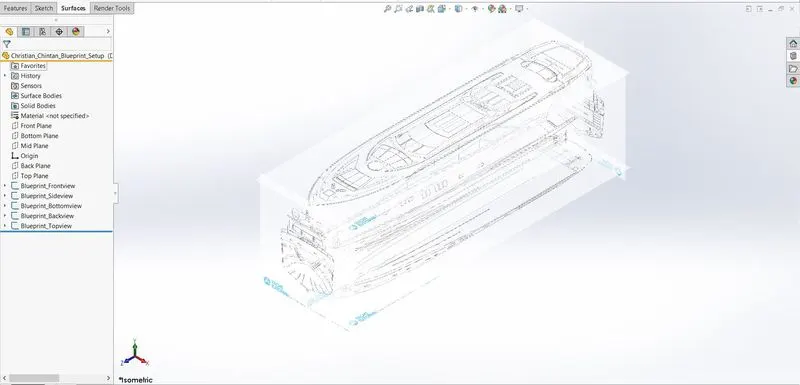
- Process: Here first blueprint setup is created in a new Solidworks part file with the help of different blueprint views. Two planes - back and top are created. Different views are constrained to respected planes. This blueprint setup file is further used in all parts’ design as well as final assembly.
- Features used: Sketch Picture
- Propeller: Propeller helps yacht to move forward or backward in water bodies such as lake, sea which is powered by engine of yacht.
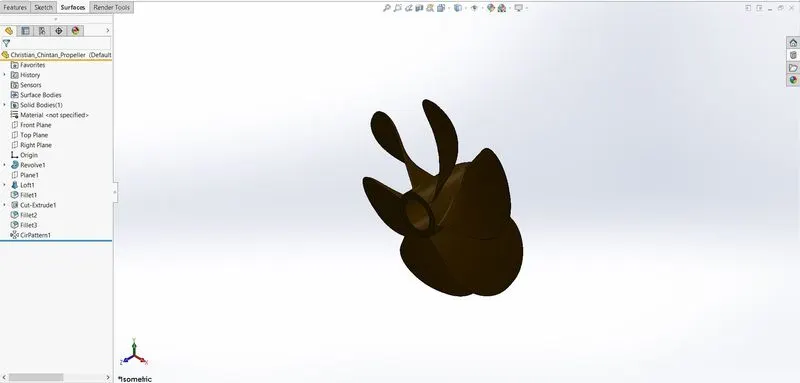
- Process: First center part of propeller is created with the help of revolve and cut extrude. Then a single curved blade is modelled on rotor part of propeller by using loft. Some fillets are also applied on propeller. At last, circular pattern is used on rotor to copy number of blades.
- Features used: Revolve, Loft, Plane, Fillet, Extrude cut, Circular pattern
- Relations given: Coincident, Vertical, Horizontal, Tangent, Perpendicular
- Colours applied: Custom Brown
- Radar: Radar is an important navigation device as it detects distance, direction and speed of any aircraft, ships or objects by sending out radio waves and receiving it back.
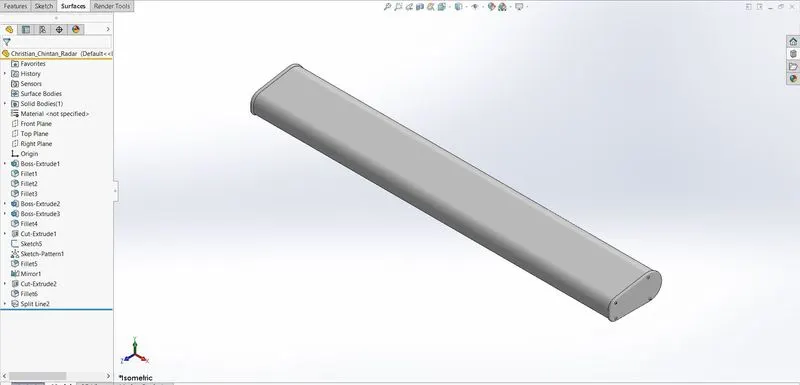
- Process: Here radar half portion is created. In this portion, half solid body is made according to blueprint. Then a full solid body is generated by using mirror. Here cut extrude & sketch pattern is used for 4 small bolt heads. Then split line is used and “Yacht Assembly” letters are cur extruded on this solid body of radar.
- Features used: Extrude, Fillet, Extrude cut, Split line, Mirror, Sketch pattern
- Relations given: Coincident, Vertical, Horizontal, Tangent, Perpendicular, Concentric
- Colours applied: White, Custom grey
- Hull: It is the main body of yacht. It contains bottom, side and deck surface. It must be watertight.
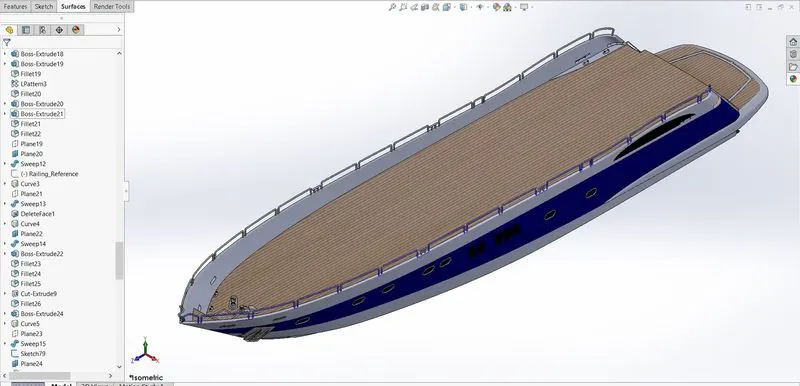
- Process: First blueprint setup file is saved as Hull. Then with the help of surface tools, half portion of hull is created. Windows and Doors are created with the help of extruded cut. All railings are made with sweep. In last step, mirror operation is performed to complete the whole body of hull. Decals are applied on the deck floor, hull nose, stairs and hatch.
- Features used: Projected curve, Reference plane, Lofted surface, Extrude surface, Extrude cut, Trim surface, Split line, Sweep, Mirror, Fillet, Chamfer, Linear pattern, Helix spiral, Revolve, Delete face, Surface knit, Shell, Filled Surface
- Relations given: Coincident, Vertical, Horizontal, Tangent, Perpendicular, Concentric, Parallel, Distance
- Colours applied: White, Black, Custom blue, Custom grey, Custom light grey, Custom brown
- Garage door: It is situated on back side of Hull. Garage door is used to close the garage.
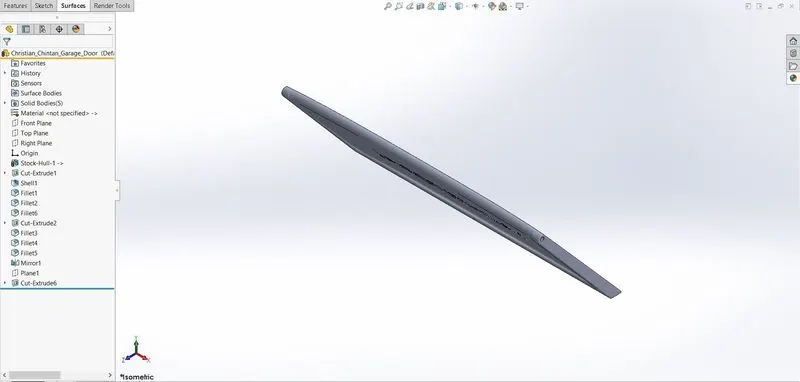
- Process: A hull part taken out from main body of Hull is imported here for garage door design. A portion is trimmed from this part according to blueprint. Then some shell and fillet is applied. After that, a hole is produced by extrude cut for attaching it to door hinges on Hull. A full body is produced with the help of using mirror. Then letters are cut extruded on door surface by using extrude cut again.
- Features used: Extrude cut, Mirror, Shell, Fillet, Plane
- Relations given: Coincident, Horizontal, Vertical
- Colours applied: White, Custom Blue
- Front seat: Front seat is situated in front of Jacuzzi on deck surface of hull.
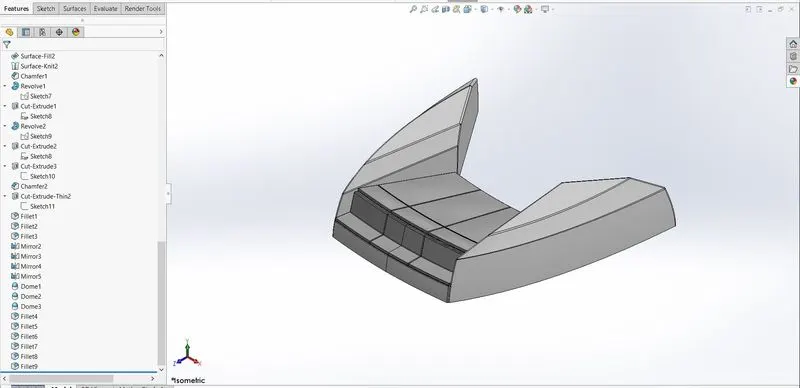
- Process: First surface from Hull is imported here. Then curved portion of seat is created with help of various surface tools. Some chamfer is applied. Then seat portion is made with revolve, cut extrude and fillet. Lastly, this half portion is mirrored and front sear is completed.
- Features used: Swept surface, Filled surface, Lofted surface, Trimmed surface, Knit surface, Extrude cut, Fillet, Chamfer, Revolve, Mirror
- Relations given: Coincident, Vertical, Horizontal, Tangent, Perpendicular, Parallel
- Colours applied: White, Custom Grey
- Middle seat: Middle seat is located above garage and on backside of superstructure. It contains 3 sided sofa and a rectangle table.
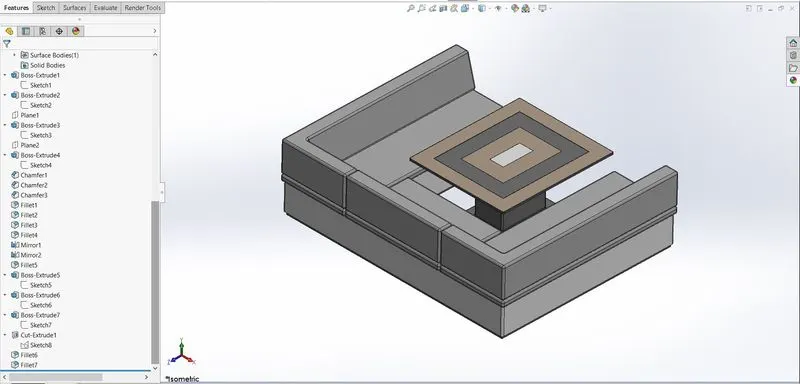
- Process: Surface from Hull is imported here. First, half portion is created by using extrude. Some fillet and chamfer is also applied. Then this portion is mirrored and thus 3 sided sofa is made. After that, a rectangle table is created with extrude, cut extrude and fillet.
- Features used: Extrude, Reference Plane, Extruded cut, Mirror, Chamfer, Fillet
- Relations given: Coincident, Vertical, Horizontal, Perpendicular, Parallel
- Colours applied: White, Grey, Light Grey, Custom Light Grey, Custom Brown
- Rear seat: Rear seat is located above garage and in front of Middle seat. This contains seat, side railings and flag post.
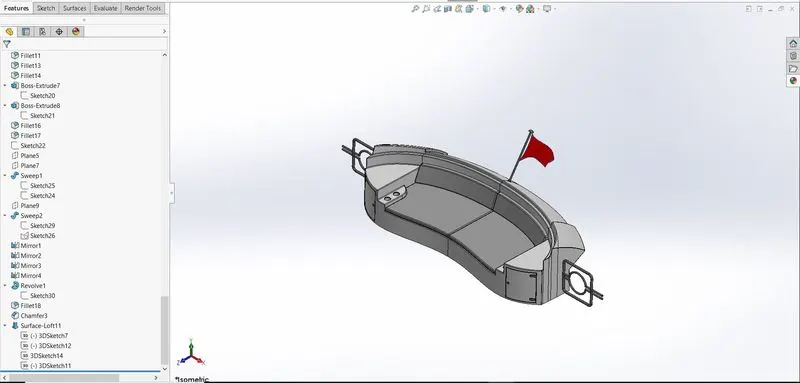
- Process: Surface from Hull is imported here. Then half portion of seat is created with the help of surface tools. Fillet and chamfer is applied as per requirement. Flag pole is made with revolve. After that one side railing is created with help of sweep. Lastly, mirror is used to complete rear seat. A small red flag is created by using lofted surface.
- Features used: Swept surface, Ruled surface, Offset surface, Trim surface, Knit surface, Reference Plane, Extruded surface, Lofted surface, Extrude, Extruded cut, Sweep, Revolve, Chamfer, Fillet, Mirror
- Relations given: Coincident, Vertical, Horizontal, Tangent, Perpendicular, Concentric, Parallel
- Colours applied: White, Red, Grey, Light Grey
- Superstructure: It is located on top of Hull. It contains Jacuzzi, Windows, Doors, Stairs.
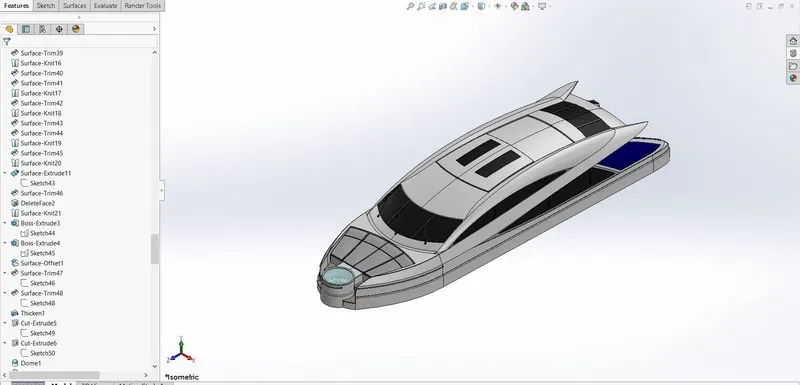
- Process: First surface from Hull is imported here. Then half portion of superstructure is created using various surface tools according to blueprint. Mirror is used for completing superstructure body. Windows and doors are created using extrude cut. Door handles are created using cut extrude. Wipers for windows are made using extrude and sweep. On the front side, Jacuzzi top surface is given transparency for water surface effect. Stairs on side of Jacuzzi are given decals. Required colours are also given to different parts of superstructure.
- Features used: Swept surface, Ruled surface, Offset surface, Trim surface, Knit surface, Reference Plane, Extruded surface, Lofted surface, Extrude, Extruded cut, Sweep, Revolve, Chamfer, Fillet, Delete face, Mirror, Dome, Split line
- Relations given: Coincident, Vertical, Horizontal, Tangent, Perpendicular, Concentric, Parallel, Distance
- Colours applied: White, Grey, Custom Dark Grey, Custom Light Grey, Custom Blue, Light Brown
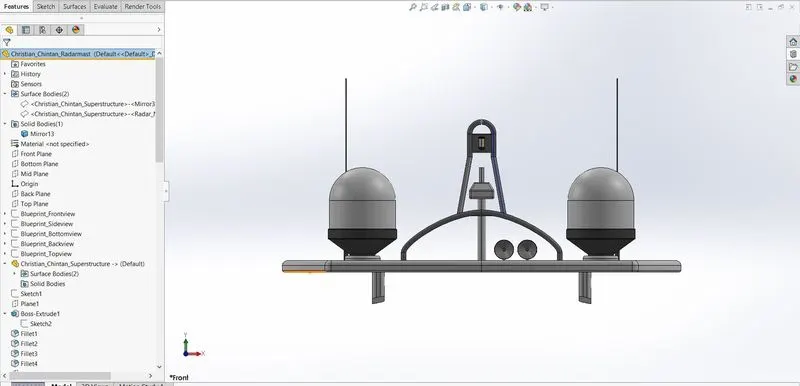
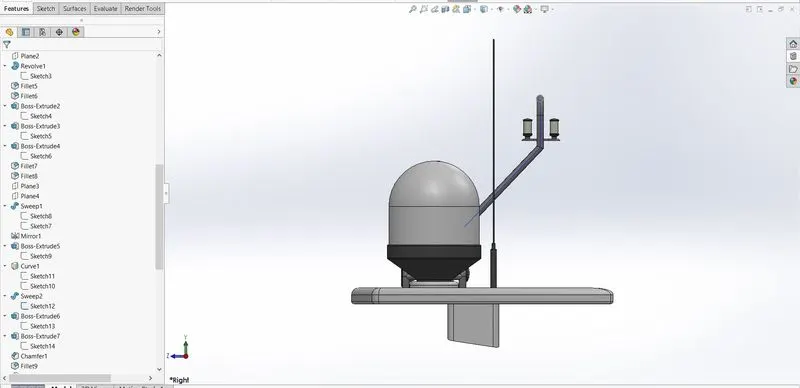
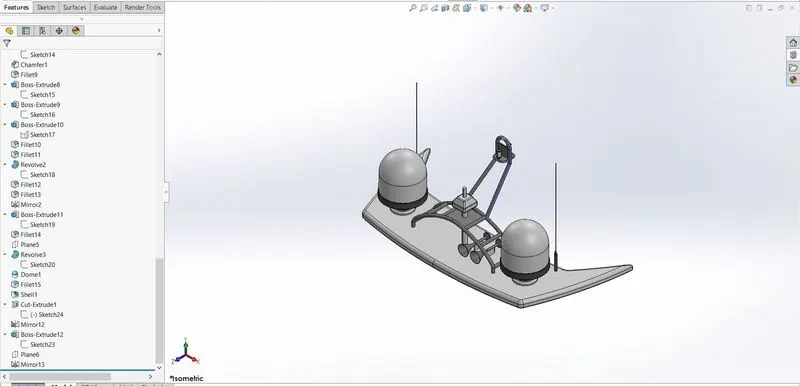
- Radar mast: It is used for attachment of radar. Radar mast is located on top side of superstructure as per blueprint.
- Process: First surface of Superstructure is imported. On that, a half portion of radar mast is made. It includes cylinder, antenna, half side of railing and pole for radar. After that whole radar mast is made by using mirror operation. In last, two horns are created with the help extrude, revolve, shell and fillet.
- Features used: Extrude, Revolve, Fillet, Reference Plane, Mirror, Sweep, Extrude cut, Projected curve
- Relations given: Coincident, Vertical, Horizontal, Perpendicular, Concentric, Parallel
- Colours applied: White, Custom Grey, Custom Light Grey, Custom Yellow
Assembly of Sunseeker Yacht:-
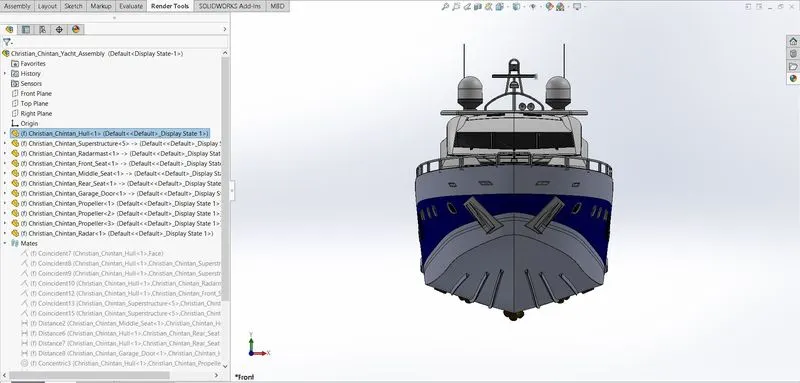
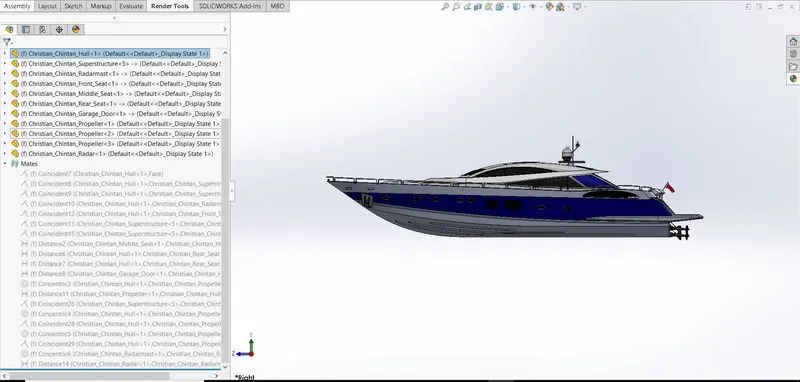
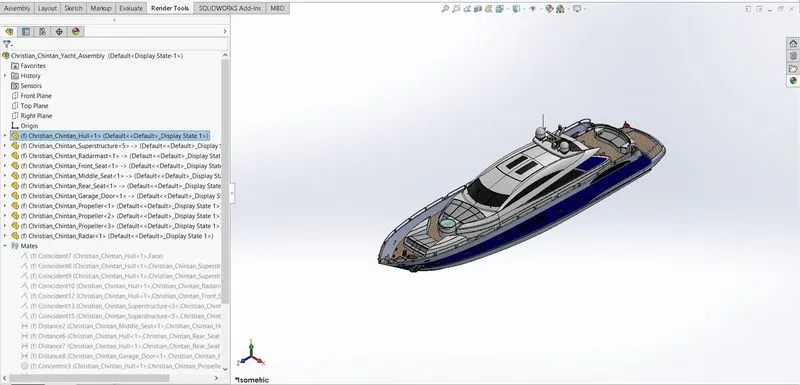
In the beginning of assembly, “Hull” is inserted first and fixed. Then I have inserted “Superstructure” & given it relation with Hull’s deck surface. Here Radar mast is fixed on top of superstructure. After that, Radar is attached to Radar mast.
Garage door and 3 propellers are also attached to different parts as per the blueprint.
Then Front, Middle & Rear seats are inserted and fixed to the positions according to blueprint.
Decals are applied to deck surface, staircases, garage space and other places as per required.
In this way, assembly of Sunseeker Yacht is completed.
Rendering of final image:-
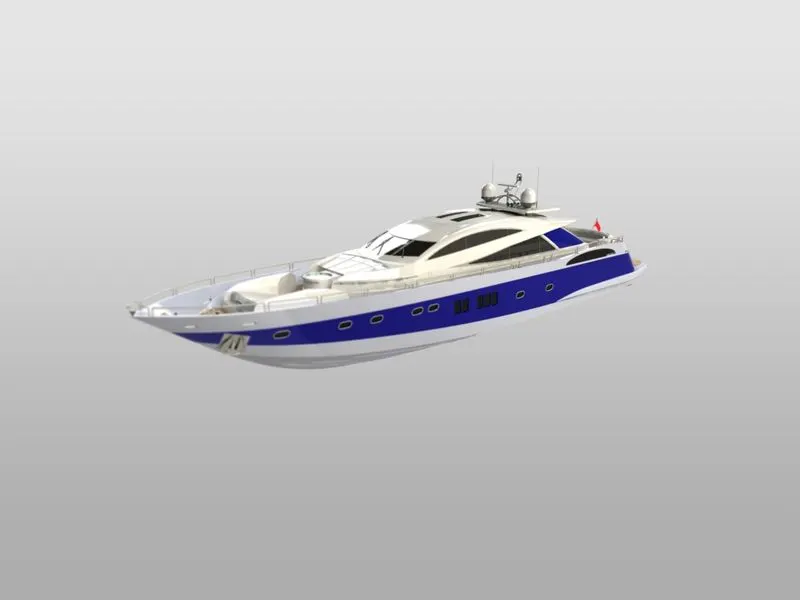
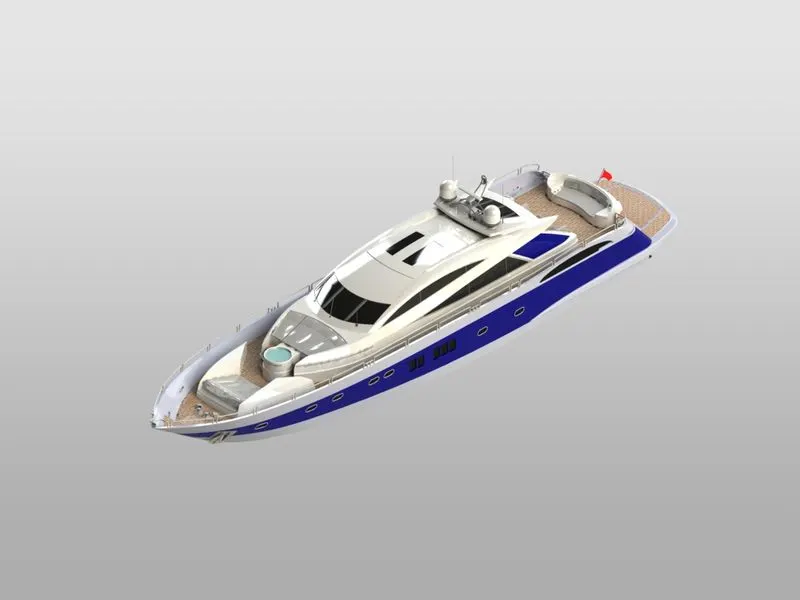
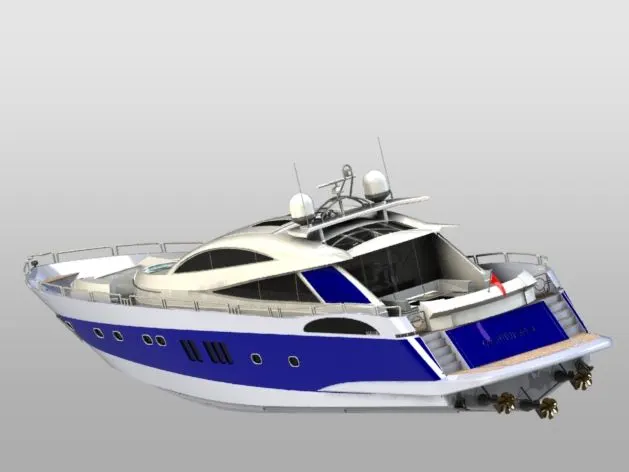
With the help of “Photoview 360” in Solidworks, the rendered image is prepared.
Using options, rendered image size is selected as 1280 X 720 (16:9) in JPEG format. For final render Maximum quality option is applied. Bloom and direct caustics is also applied. Preview window is used for looking at how model will look after render.
Rendering for different view is done using “Final Render”.
As a result, different views of Sunseeker Yacht with rendering are presented below.
Conclusion:-
I have learned a lot about usage of different surface tools in Solidworks while doing modelling and assembly of Sunseeker Yacht.