Wiring harness design in CATIA V5 - 3D modeling Week 7 Challenge
AIM:
To route the following harness layout in the Electrical workbench with in cinnectors and make sure to prodective coverings are applied on suitable position.(we already done on week 4 challenge so we use that and we include that report.)
To flatten the wiring harness and Draft the wiring harness in Drawing sheet after flatten.
REQURIED CAD MODEL:
Get the following CAD model from the te.com:
- DT06-4S
- DT06-6S
- DT06-2S
- DT06-08SA
- We already done in week 4 challenge.
CONNECTORS LAYOUT DESIGN:
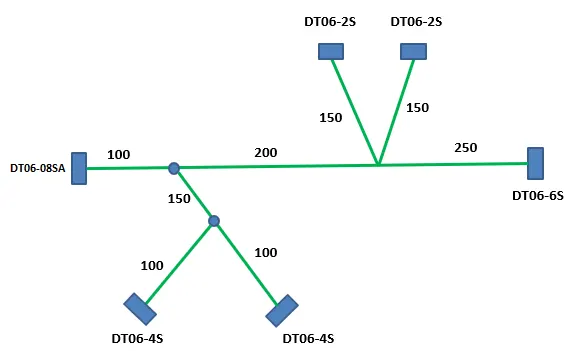
INTRODUCTION:
A wiring harness is an organized set of wires, terminals and connectors that run throughout the entire vehicle and transmit information and electric power, thereby playing a critical role in “connecting” a variety of components.
In the system to define the electric connector and clips by the catia v5 software and explain the process.
ELECTRICAL HARNESS FLATTENING:
Electrical Harness Flattening is a product which is intended to flatten 3D harnesses in order to create associated 2D drawings. Filtering functionalities for wires are also available if you have an Electrical Wire Routing license.
WIRING HARNESS ASSEMBLY:
After ready with the electrical connector parts move to the wiring harness.
Turn workbench to Wiring harness assembly select the Geometry bundle and select the parent file.
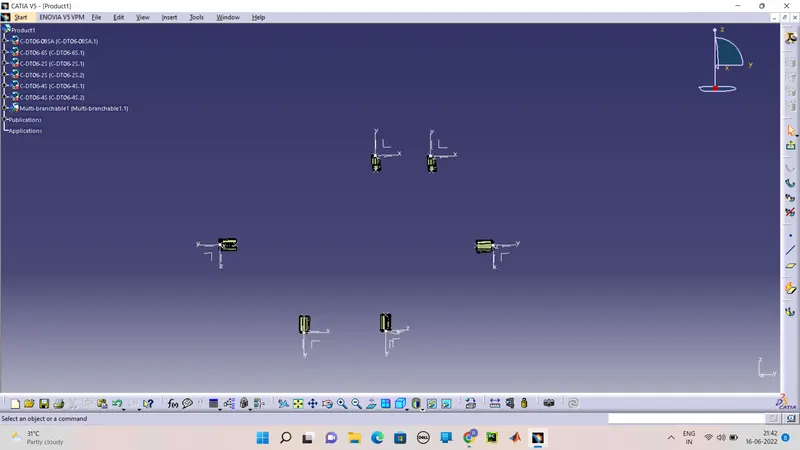
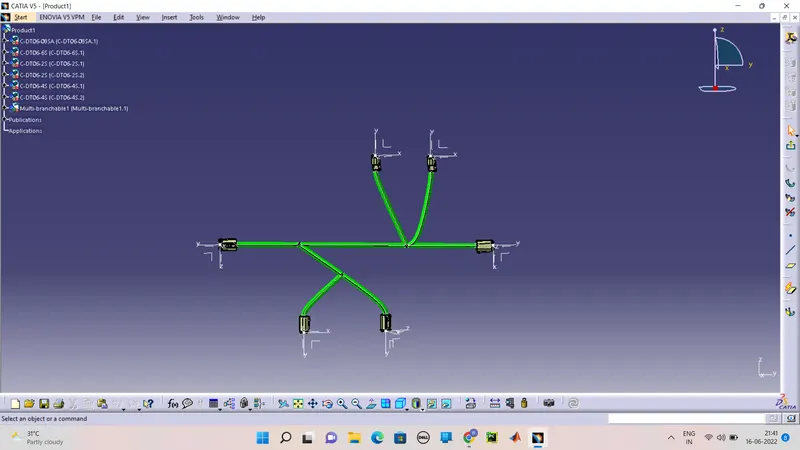
Define routing harness make the wire routings and select bundle connection points between the connectors.
Routing all wires shows the figure.
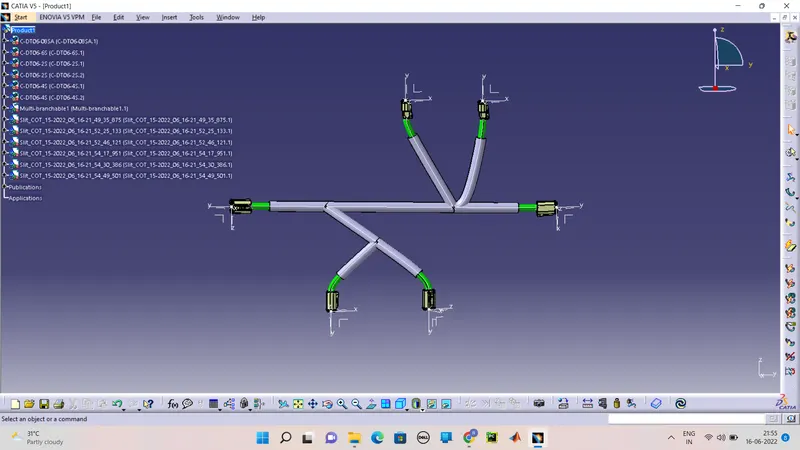
After routing the wire make the protective covering by the tool of protect cover.
Make the extremity of 30mm of all the conectors.
ELECTRICAL HARNESS FLATTENING PROCESS:
Load the week 4 product file along with open the new Electrcal Harness Flattening make it tile vertically. And lets now extract the to Eelctrical Harness Flattening workbench.
See the image for that process
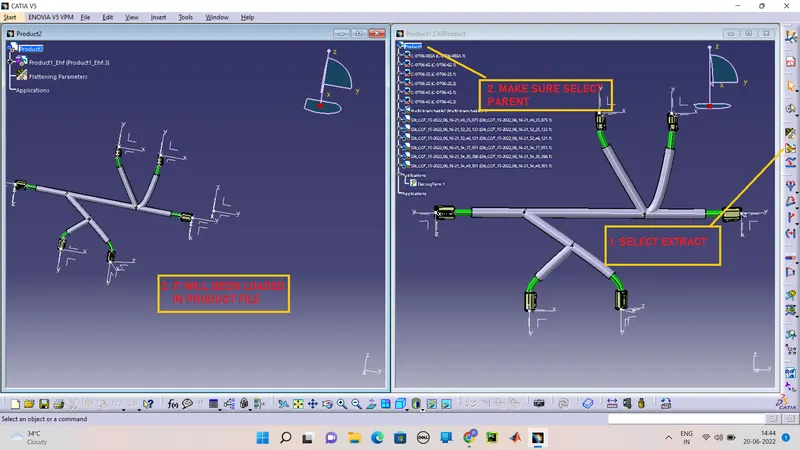
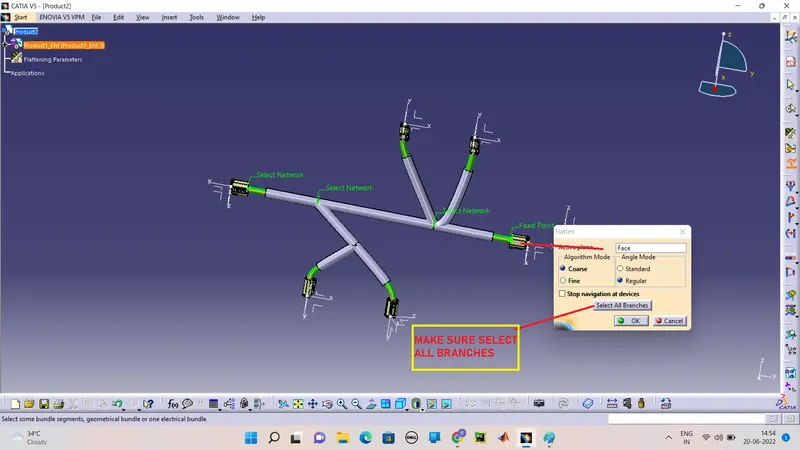
After extract the Flatten process is start choose the plane of view and make sure select all the bundles are selected. Shown the image.
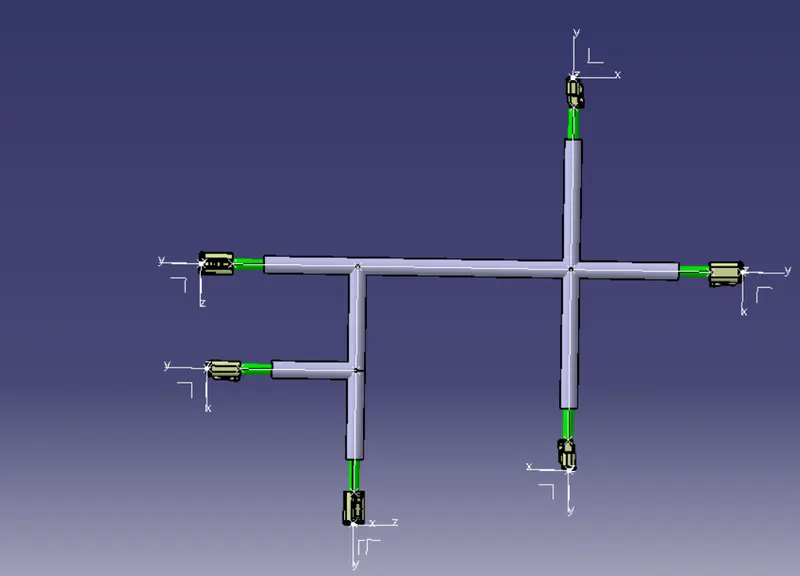
After click "OK" the Bundle Harness will turn to Flatten that it for 2d drawing.
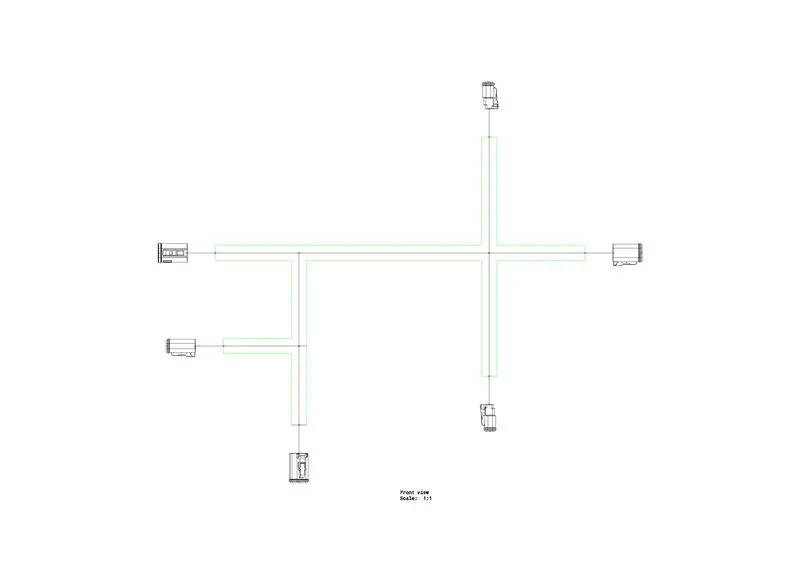
After Flatten we want in drawing sheet the electrical harnss bundle in 2d view open a new Drawing and click front view.
Select the plane in product Harness assembly.
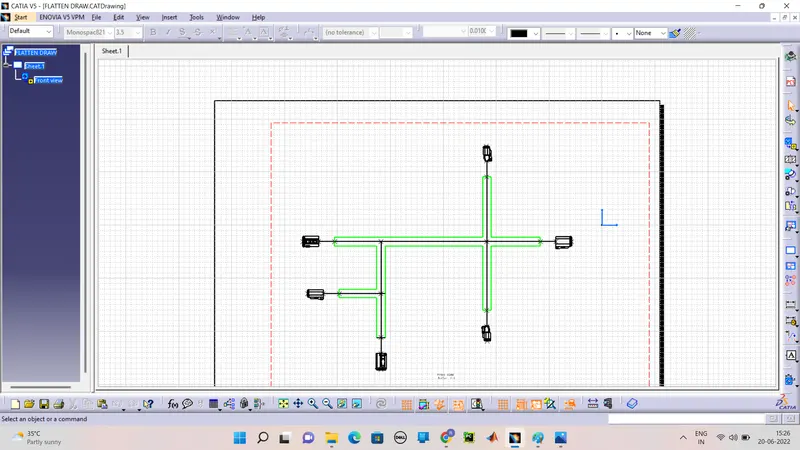
DRAFTING PRESENTATION:
NOTES:
If any change in the main product file it with update in flatten product by the Synchronize tool command make sure the product it save as well as.
Before Flatten ensure the product is Fully connected whether not.