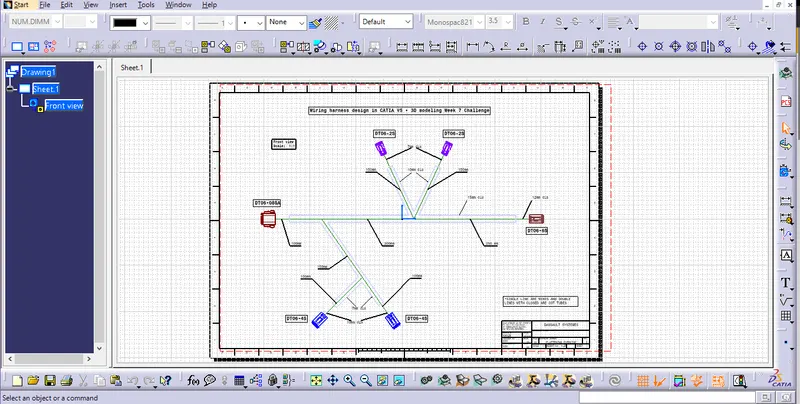
Wiring harness design in CATIA V5 - 3D modeling Week 7 Challenge
WIRING HARNESS DESIGN IN CATIA V5 - 3D MODELING WEEK 7 CHALLENGE
IN THIS REPORT:
- Defining the mechanical parts electrically in Electrical Part Design WB and preparing bundle in Electrical Harness Assembly WB, then flattening has to be done in the Flattening Workbech.
- Creating 2D drawing of the bundle with connector representation and diffrent colour coding for bundle with protective covering.
GIVEN DATA:
- To flatten the wire harness assembly completed in week 4 assignment and place the flattened view on a drawing sheet.
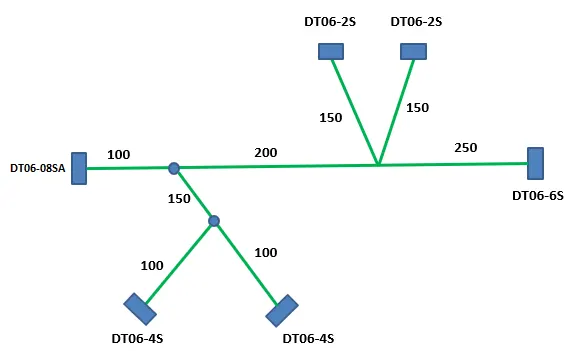
Defining the mechanical parts electrically in Electrical Part Design WB and preparing bundle in Electrical Harness Assembly WB, then flattening has to be done in the Flattening Workbech.
- Create a points and a axis system based on that requirement and rules in Part Design WB.
- Go to Electrical Part Design WB and define the products, now mechanical part convert into electrical part.
- Define the Product into Electrical Product, using the Geometrical Bundle command in Electrical Harness Assembly workbench.
- now, use Electrical Harness Assembly WB, Multi Branchable Document command in product and create a main Branch using Branch Definition and split the branch for sub branch using Add Branch Point then use Branch Definition for Sub Branch creation in Electrical Harness Installation WB. Main branches is 12mm dia and sub branches are 7mm dia.
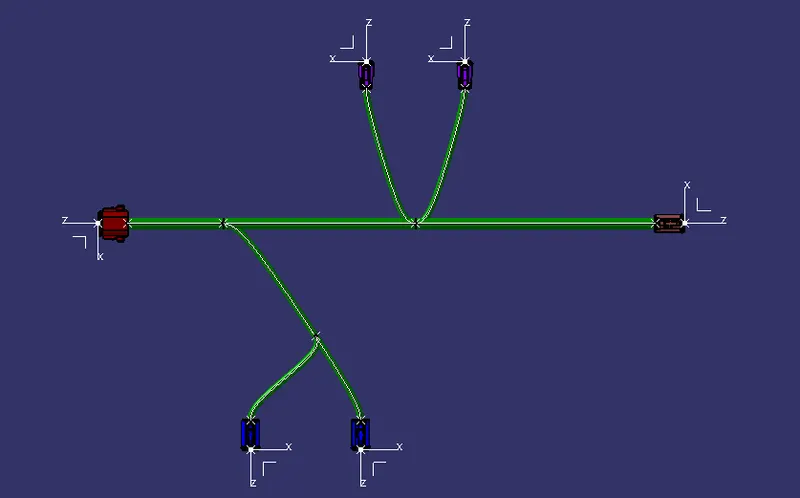
- In Electrical Part Design workbench, Create a corrugated tubes and tapes as required dimensions and save them into specific catalog. tapes are don"t have a specific dimension.
- Electrical Harness Assembly, now add covering, using Protective Covering command in Electrical Harness Assembly WB and select the branches then pick the COT Tubes from catalog. (end extremity at 30mm)
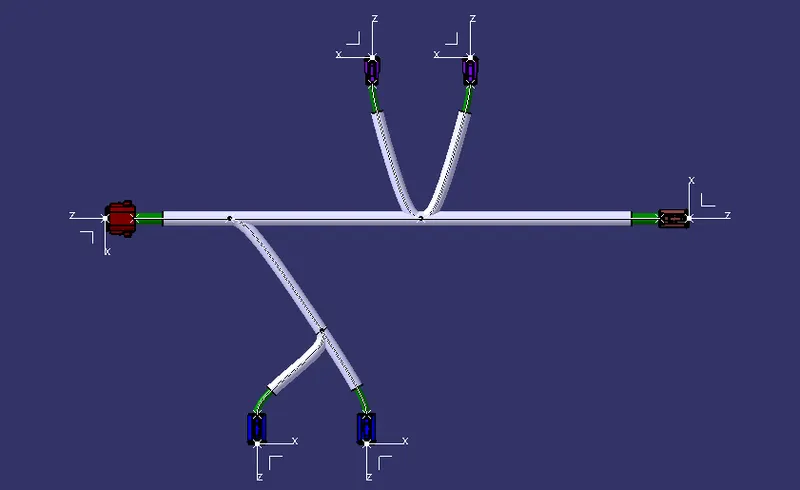
Step - 1:
- Create a product file and save it in the same location where the wire harness or routing assembly Product File is stored.
In Electrical Harness Flattening WB:
- Open the Electrical Harness Flattening WB then Define the Harness flattening parameters. like shown in following fig.,and rest of the parameters are don't need a edit, so default settings are enough for those.
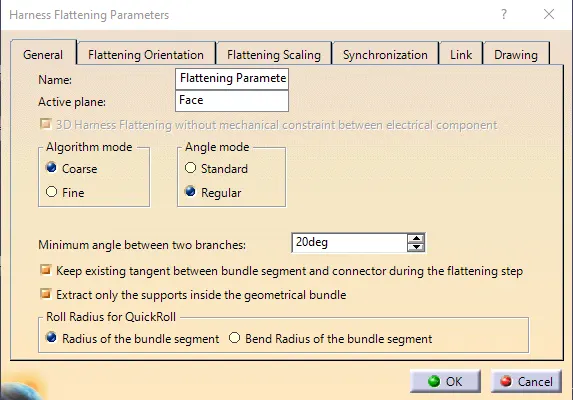
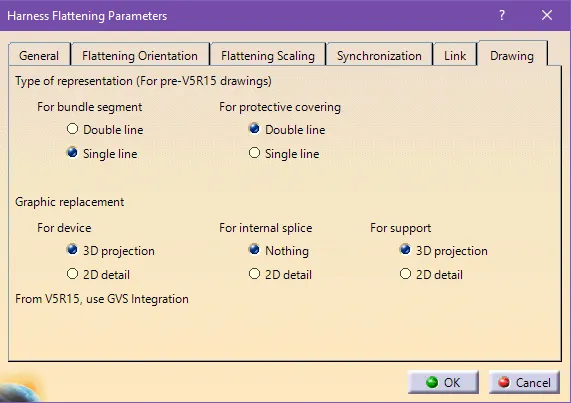
Step - 2:
- Select the Extract command for importing the product file into the Flattening WB.
- Then, the geometric bundle assembly productis modified into geometric bundle assembly Ehf product now save it as a Ehf product.
Step - 3:
- Select the Flatten option to flatten the wire harness assembly.
- Then select the active plane, then select any one branch and then select the 'select all branches'.
- If there is no discontinuity in the bundle segment then all the branches will be selected and by pressing 'ok' the wire harness assembly will be flattened.
Step - 4:
- Use Manipulator Toolbar commands, like Rotate and other commands to move the branches and bring them in proper orientation as per the given layout.
- If any need of modification in bundle segments and cot tubes do it in normal assembly product then save it, and now use the Synchronize command and update the modification in Ehf product.
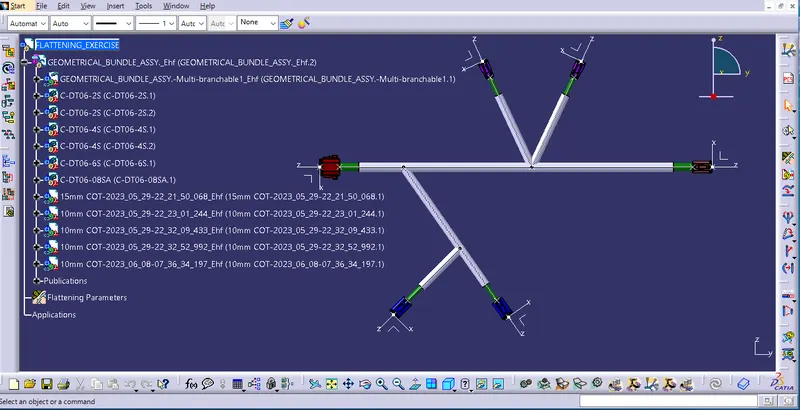
Creating 2D drawing of the bundle with connector representation and diffrent colour coding for bundle with protective covering:
- Create a new drawing file and save the file in the same location.
In Drafting WB:
- Insert the title block template and fill up the required details.
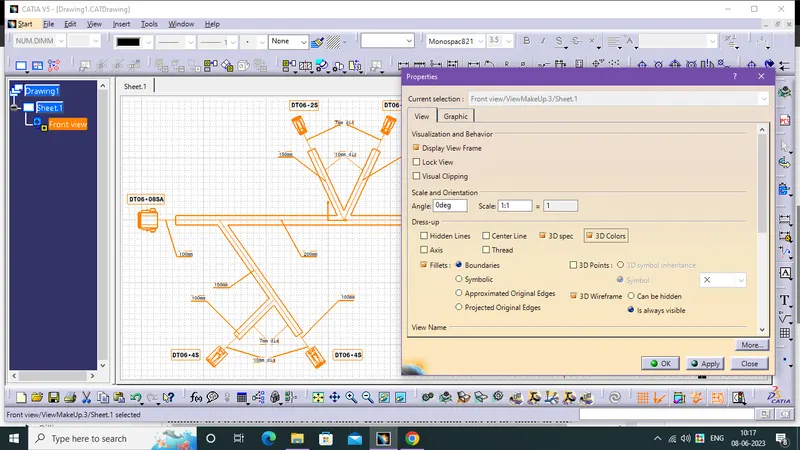
- Import the 3D assembly into 2D drawing sheet using front view command, Add the front view of the harness assembly by selecting any one of the flat faces of the connector and orient the view as per the requirement.
- Go to the properties of the view and select the '3D Wireframe' on and ' Is always visible' option in order to see properly the Wire bundle, connectors and the protection coverings.
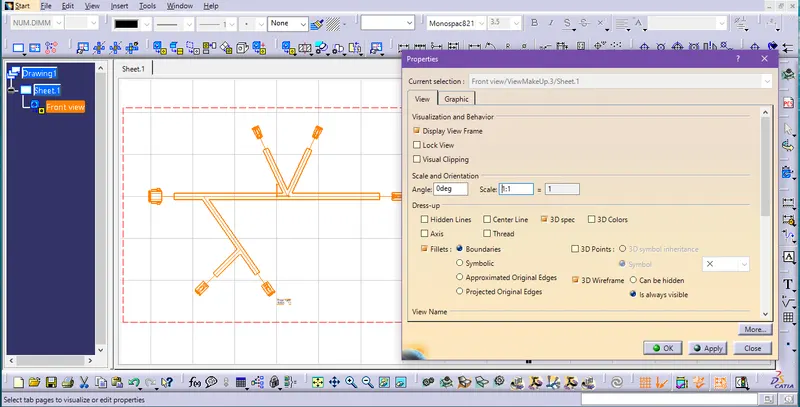
- mention the names, and dimensions. If need of colours due to differenciation between components then enable the 3D colors.
- now black colour diagram is convet into colour diagram, the colours are cary out from its 3D components colour.
- add a Title Block from Edit.