Wiring harness design in CATIA V5 - 3D modeling Week 4 Challenge
WIRING HARNESS DESIGN
CHALLENGE 3
Objective:
Define the all the mechanical connectors electrically and store it in the catalogue and prepare the bundle routing for the connectors and orient the bundle in proper direction. Add the protective coverings for the branches for some connectors.
Wiring Harness Assembly:
- <!-- [if !supportLists]-->· <!--[endif]-->Harness Context Assembly: This is the top level product file that contains the harness geometrical bundle/ assembly and the wire harness electrical bundle.
- <!-- [if !supportLists]-->· <!--[endif]-->Geometrical Bundle: This sub level product file is the wire harness product that contains all of the harness components i.e. clips, supports, connectors, splices, grommets, annotation and actual physical bundle segments and branches.
- <!-- [if !supportLists]-->· <!--[endif]-->Electrical Bundle: This sub level product file contains all of the electrical circuit information.
WIRING HARNESS ROUTING:
- <!-- [if !supportLists]-->· <!--[endif]-->Download the all connectors which is given.
- <!-- [if !supportLists]-->· <!--[endif]-->Define all the connectors electrically and give the bundle and connector connection point.
- <!-- [if !supportLists]-->· <!--[endif]-->Save all the connectors as a CAT.Part file.
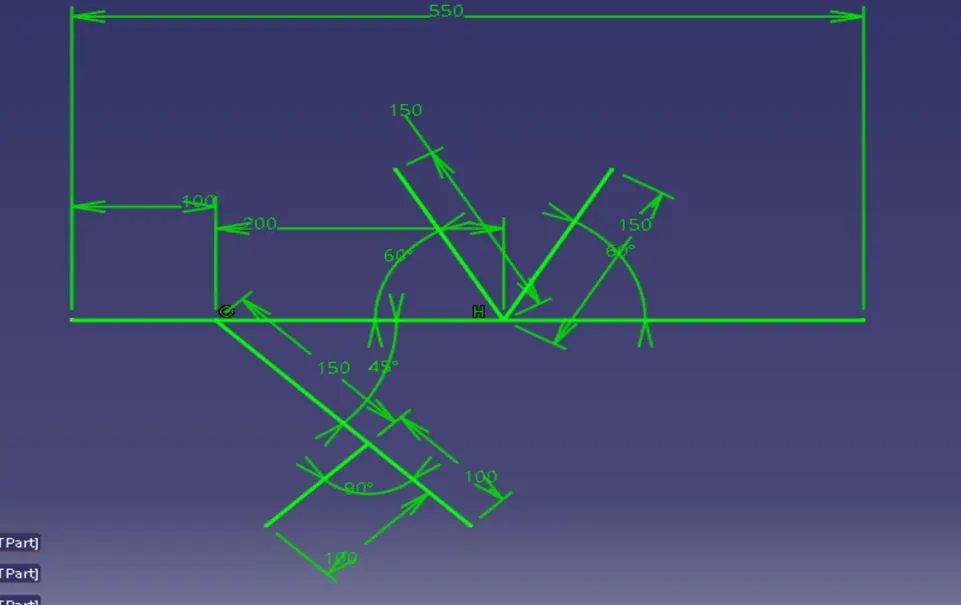
- <!-- [if !supportLists]-->· <!--[endif]-->Draw the route map sketch in a part file as per the given bundle connection and save it.
- <!-- [if !supportLists]-->· <!--[endif]-->Create a new product file in the wiring harness routing.
- <!-- [if !supportLists]-->· <!--[endif]-->Define it as a electrical segment.
- <!-- [if !supportLists]-->· <!--[endif]-->Add the connectors as per the routing by applying the manipulation or snap or translation commands.
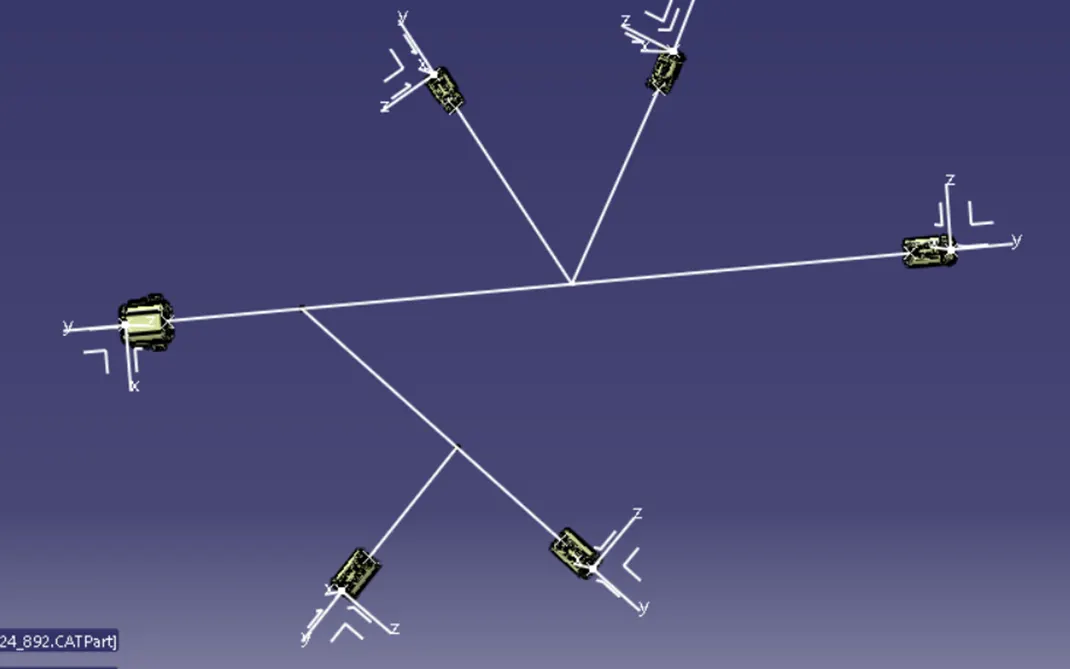
- <!-- [if !supportLists]-->· <!--[endif]-->Switch to the wiring harness assembly.
- <!-- [if !supportLists]-->· <!--[endif]-->Go to the multi – Branchable command and give the routing definition.
- <!-- [if !supportLists]-->· <!--[endif]-->Then add the branch points for applying the branch connection for all connectors in the bundle routing.
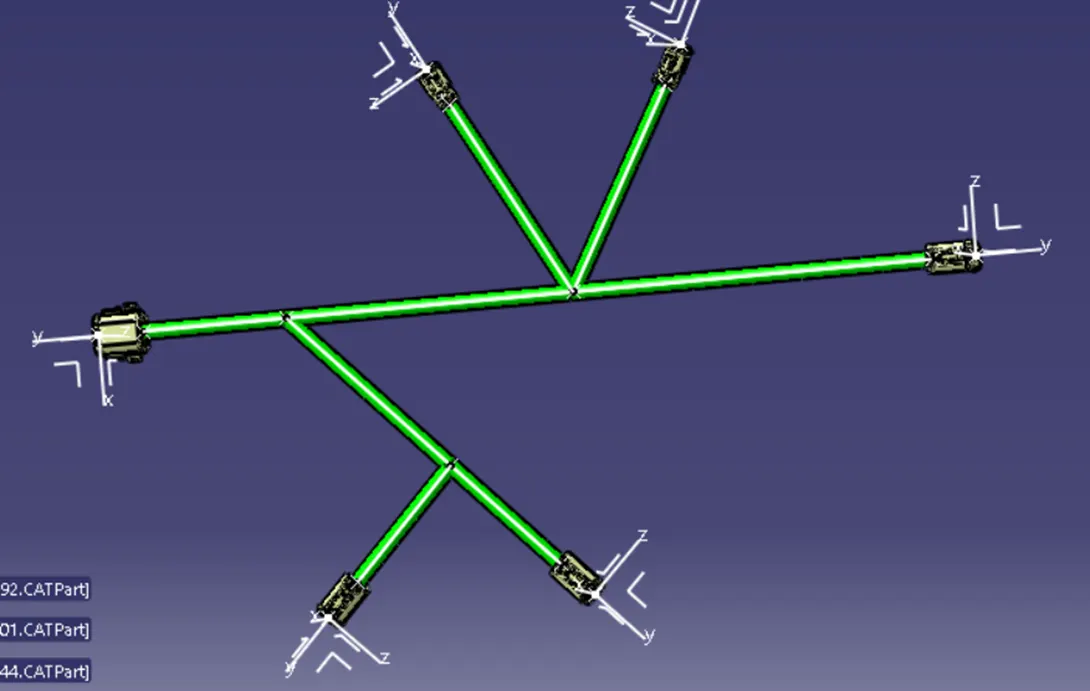
- <!-- [if !supportLists]-->· <!--[endif]-->Give complete bundle routing connection to the connectors.
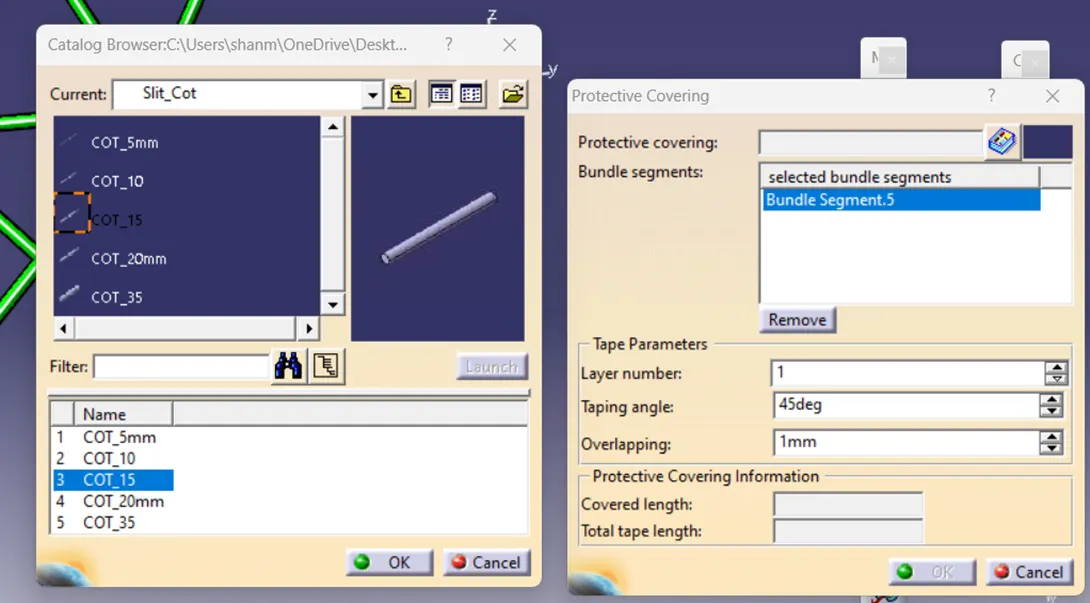
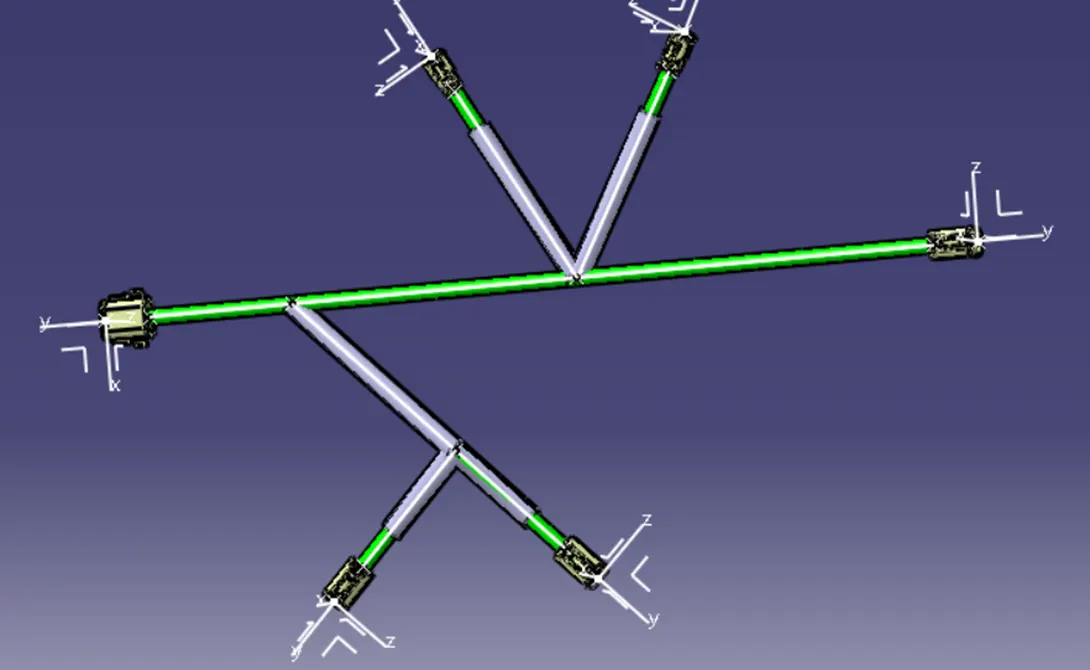
- <!-- [if !supportLists]-->· <!--[endif]-->Finally add the protective coverings to the branches for insulating purpose.
- <!-- [if !supportLists]-->· <!--[endif]-->By adding the protective coverings create the catalogue document and add all the corrugated tubes in it
- <!-- [if !supportLists]-->· <!--[endif]-->Go to the define protection command - select the branches – select catalogue file and family – add it to the branches.
- <!-- [if !supportLists]-->· <!--[endif]-->When define the protection one should follow, if the dia of the corrugated tube is less than the branch dia it won’t taken, some error window will pop – up.
- <!-- [if !supportLists]-->· <!--[endif]-->Add the protectives in every time the dia of the corrugated tube is greater the branch bundle.