Wiring harness design in CATIA V5 - 3D modeling Week 4 Challenge
Report on routing the harness layout in Electrical workbench by using the given connectors:
Aim: To route the harness in elecrtrical workbench by using the given layout and using the given connectors and adding the protective covering at the desired location.
Given Conncetors:
- DT06-4S
- DT06-6S
- DT06-2S
- DT06-08SA
Step 1: First download the CAD files of all given connectors from TE.com unzip them and open them in Catia V5 in part design.
- Define the bundle point and Connector connection point on the bundles and mating side of the connector and define the axis system for the connector connection point such the Y axis in Axis system should be direction of mating side, X axis should be towards the locking side of connector and Z axis poining towards left to right side of connector.
- Now open the part file in electrical part design and define the connector by using the same command and define the connector connection point and bundle point by using the command for the same available in the elecrical part design.
- This is the first step done before adding the connectors in the assembly.
- Now make the catalog for these connectors and add all the connectors on that catalog.
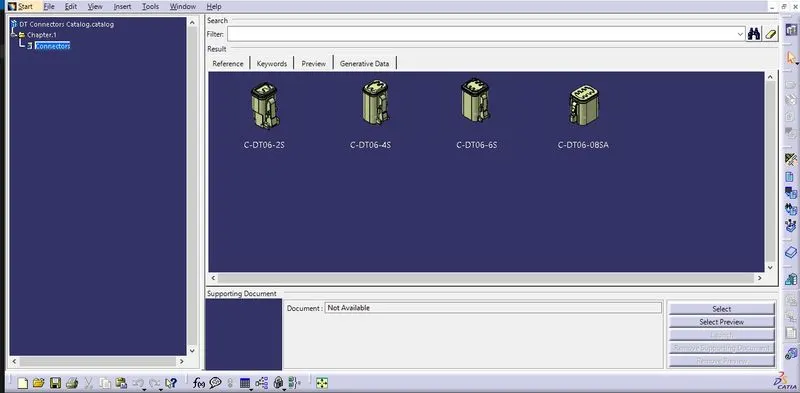
Step 2: Now create a new product file and name it "Assy Connectors wire harness" and create another product file name it as "Geometric Bundle" also add another product file naming it as Electric bundle circuit.
- open the geometric bundle file in Electric assembly then add all the connectors from the catalog on the geometric bundle product file one by one.
- Now sketch the layout in the part workbench as given for wire harness in the diagram and the point in the end as shown below :
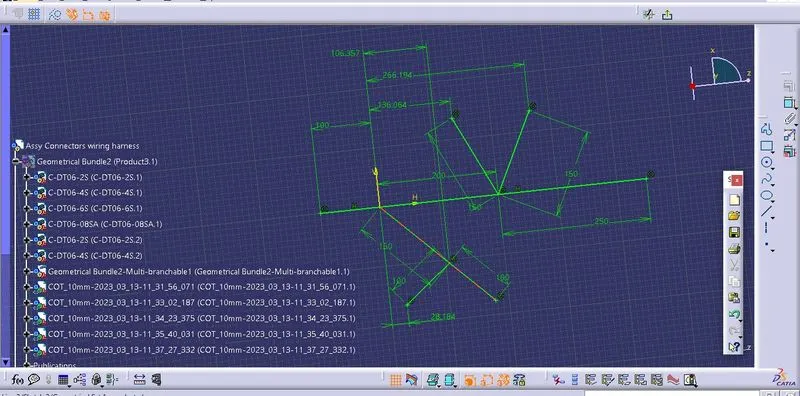
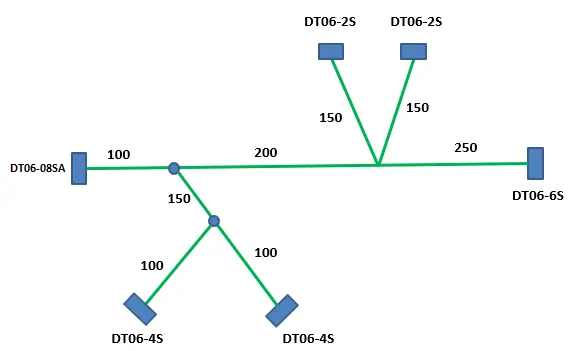
- Now place the respective connector at the end points by using the command such as manipulation, moving threough compass in the mechanical assembly workbench the position of connectors will as shown in given diagram :
- Now hide the sketch and in the next step we create the wire bundle.
Step 3: Now enter into the electric harness assembly and use multiple branchable document to make wire bundles accross the connectors.
- Join the connector DT06-08SA with DT06-6S as per given layout with 10 mm diameter bundle.
- Add branch point at the respective distance as given in the layout to make the harness branchess and give the dia of 5mm. to the bundles in branches.
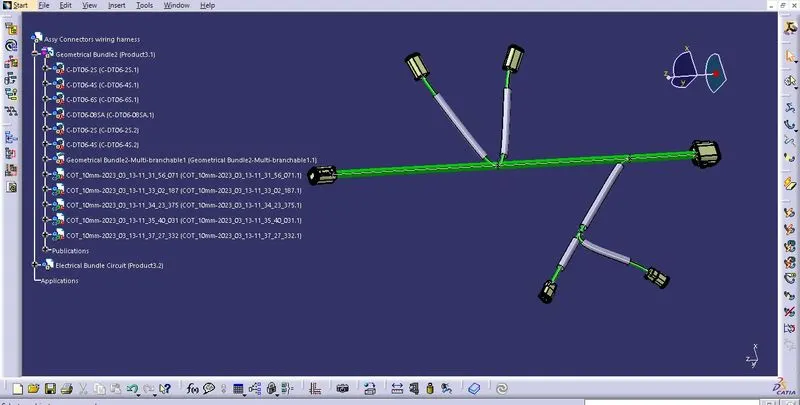
- So our wire harness design will look like this:
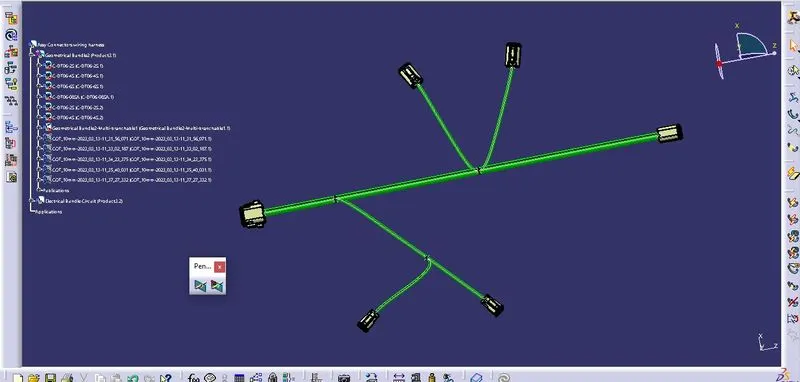
Step 4: Now add the protective covering on the branches that are connected to DT06-4S and DT06-2S by using the command add protective covering in electric assmebly workbench.
- We add protective covering by the catalog of corrugutted tubes from which we select the suitable tube with respective diameter to cover the bundle.
- We keep the end extremity of 30 mm from the end of connectors and extrimity of 20 mm at the joint in main branch also extrimity of 15 mm in the harness branch.
- so our final design will look like this: