Week 9 - Project - A pillar Design with Master Section
AIM:
To craete the Solid part from the given Class A surface and Follow the Master section for B Side Feature to creation.
OBJECTIVE:
Picture of the sketches with Sketch solving status’s geometry tab
Picture of the Detailed tree structure.
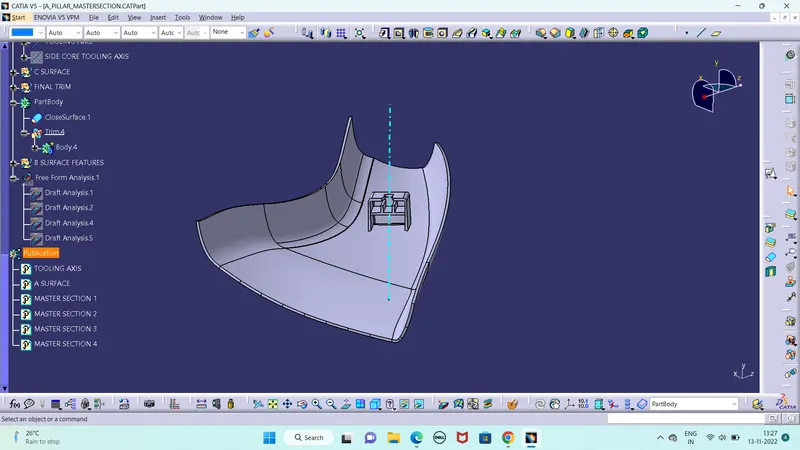
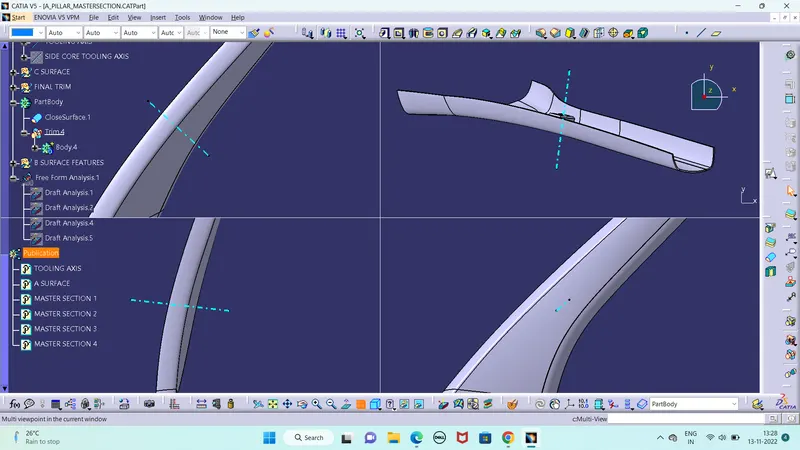
Picture of the 3D CAD
Create closed body
Create tooling axis and follow design rules.
Follow the Master section to create flange
Follow the master section for thickness and to create the Closed volume.
Follow master section to create Attachment features.
INTRODUCTION:
Master sections are the Guides for design requirements which decide the component packaging after technical (Styling, Concept or Class-A) surfaces. Concept development in BIW. Concept & Feasibility.
With draft analysis, you can verify draft angles, examine angle changes within a face, as well as locate parting lines, injection, and ejection surfaces in parts.
Drafts are defined on molded parts to make them easier to remove from molds. There are two ways of determining the objects to draft: either by explicitly selecting the object or by selecting the neutral element, which makes the application detect the appropriate faces to use.
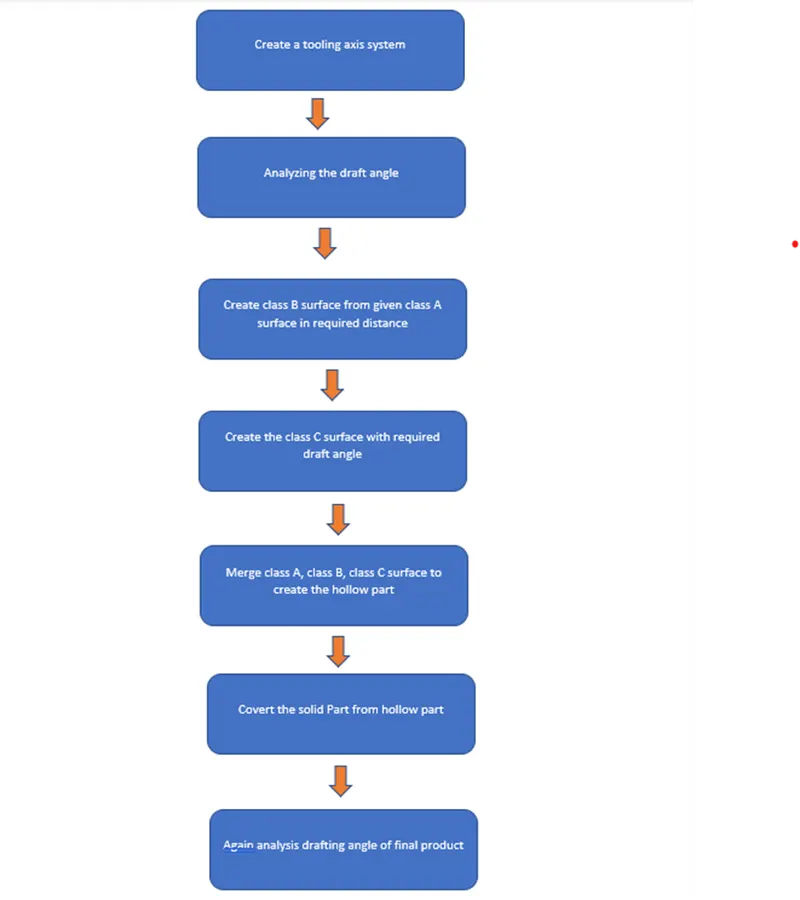
METHODOLOGY:
Part body:
TOOLS:
- Extract:
This comment is used to create the required surface again. Which means copy the surface again for next operations.
- Un trim:
This tool is used to un trim the surface which means create the full surface of previous surface from current surface.
- Trim:
This tool is used to cut and eliminate the unwanted surface.
- Extrapolated:
This tool is used to increase the length of surface or area with the help of different option.
- Offset:
It is used to create the same surface again in required distance.
- Edge Fillet:
It is used to create sharp edges to round edges.
- Boundary:
It is used to form the boundary lines on opened surface.
- Sweep:
It is used to create the surface in required length from the profile.
- Join:
It is used to join the separate surfaces and create the single surface.
- Close (Part command)
It is used to create the solid part from closed hollow part.
- Curve smooth:
It is used to change the smooth curve from tangency curve.
- Fill:
Fill some gaps portion with this comment
- Blend:
Two bounty lines used to fill the gaps by this comment.
14.Split:
It is used separate the surface with the help of another surface as cutting tool.
- Pad:
It is used to extrude to create 3D part from 2D sketch.
16.Thicken:
It is used to give thickness of the surface model. It is one of the part bench comments.
TOOLING AXIS CREATION:
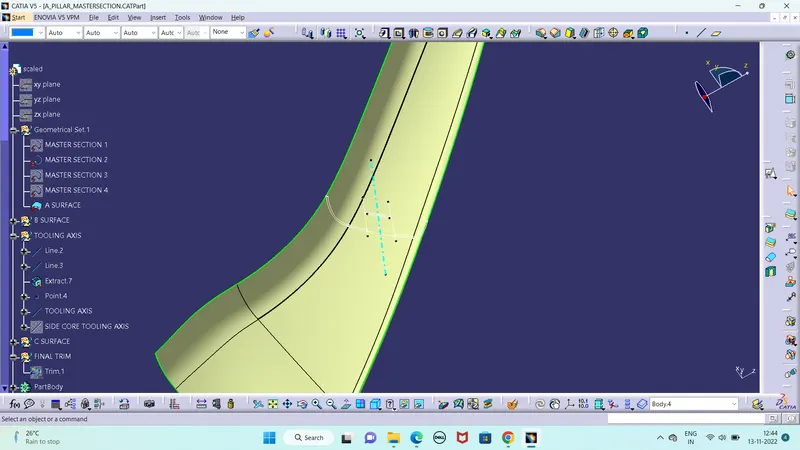
- First create the class A surface and manually analysis and fix the direction of tooling.
- In this part two hole on the surface. So, we can directly take its perpendicular as the tooling axis because its most suitable for tooling axis. Carefully watch and take this axis with the help of all types of views.
- First created the point on the surface and create new axis system.
- Then this intersect line is used to create the new lines on both wall lines. Then the both lines are used to create a bisecting line in tooling direction or it is zero degree drafting part, so we directly draw line through the line to form tooling axis.
- Change some appearance to this line like thickness, colour, dot lines. Finally, it is called tooling axis. It is published for frequent uses.
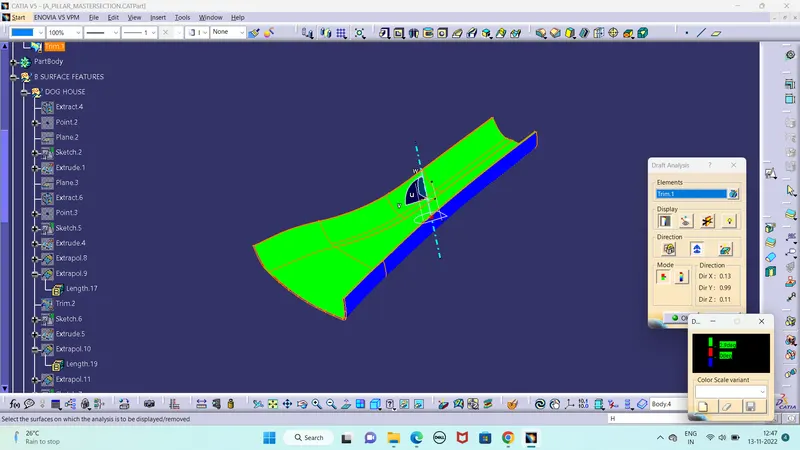
- Dog house is created by side core. So, we created separate tooling axis for dog house. Same method is used to create a tooling axis parapedicular to the main axis.
DRAFTING ANALYSIS:
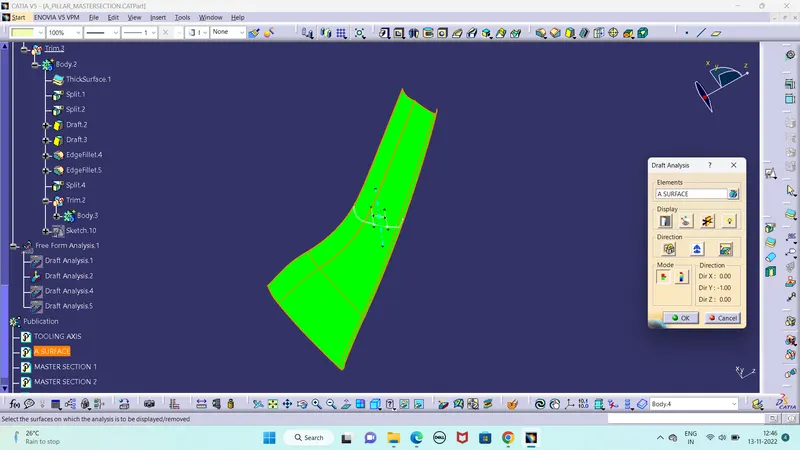
- Go to insert < analysis< feature draft analysis.
- Compass is fixed on the tooling axis.
- Then we click on the surface it showing different colour. This colour is used to analysis the drafting value of surface with the help of analysis table.
- It is zero-degree draft component. So, we no need to take drafting analysis. If we take it will show zero-degree draft angle.
CLASS A SURFACE :
FINAL PLASTIC COMPONENT :
B SURFACE :
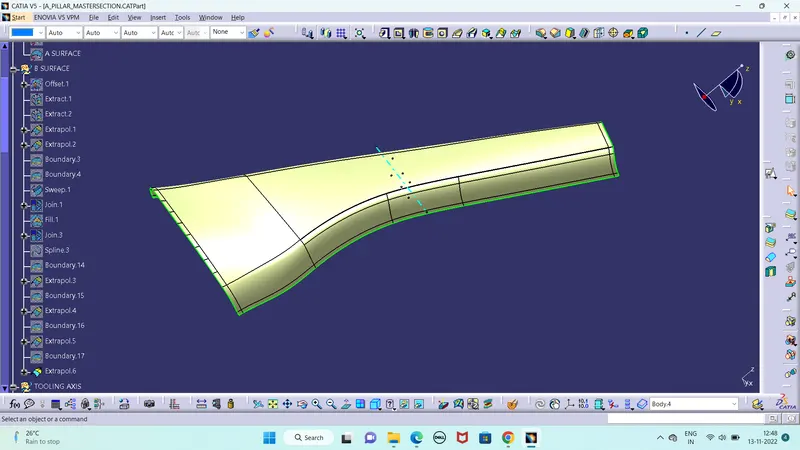
Based on Class A surface, now i am creating B surface. I did a offset of 2.5mm and i use the multi section surface to fill the gap. And i had joined the offset and multi section surface.
C SURFACE :
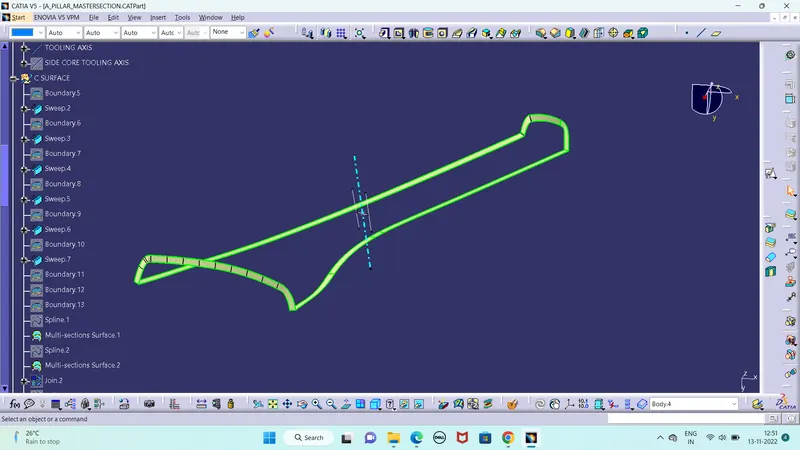
For creating C-Surface, now take the boundary line for class A surface.I had used the with in the surface,To click sweep command based on selected boundary and with reference surface with the outside angle of 90degree.
Final Surface:-
Using trim surface command to trim B & C surface and get the final surface.
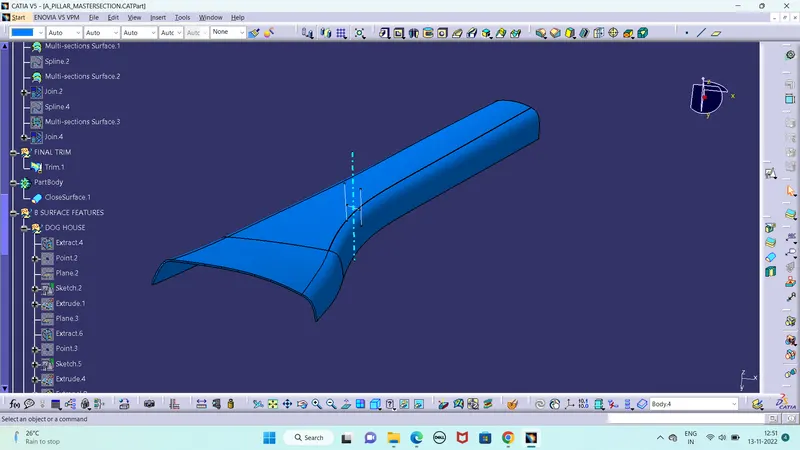
Part Body:-
By using close surface command, convert Solid Model from the final surface.
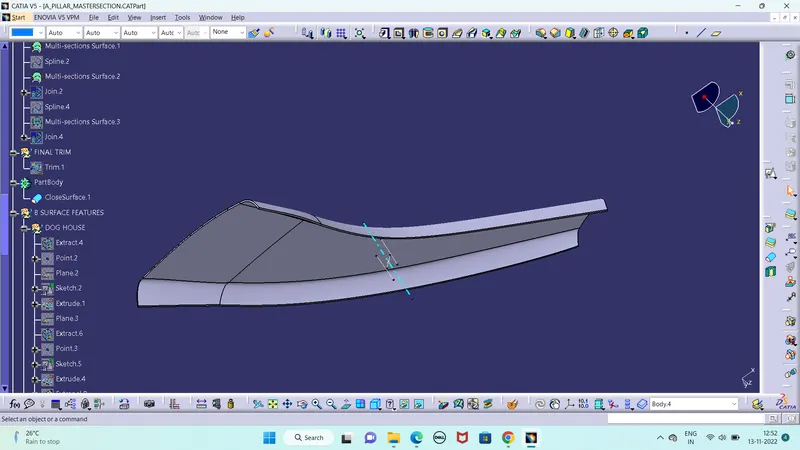
DOG HOUSE:
- First draw the rectangle with one side open
- Extrude required hight or given height 30mm.
- Offset used to close the top side
- Give thickness to the surface part 2.5mm.
- Give drafting to outside surface 1.5 degree.
- Give inside and outside fillets
- Then follow some dog house standard instruction like downside thickness and hight and some values.
- Offset the previous surface part 1mm and downside surface offset upside 4mm
- Trim and form down side part
- This part split from previous part body
- Give draft and fillet to the top wall of split portion. This draft is given for side core so we create separate tooling axis parapedicular to the main tooling axis and give draft for this direction.
- Finally, we have got dog house. Next, we will create the ribs on the dog house middle surface.
- So, we created middle part separately
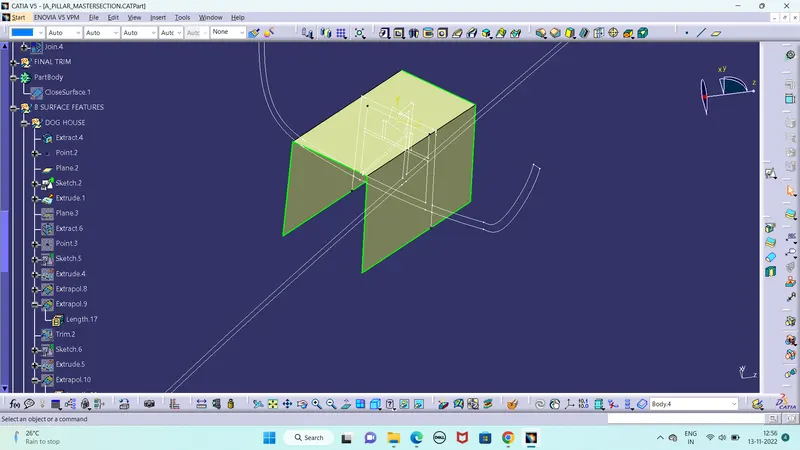
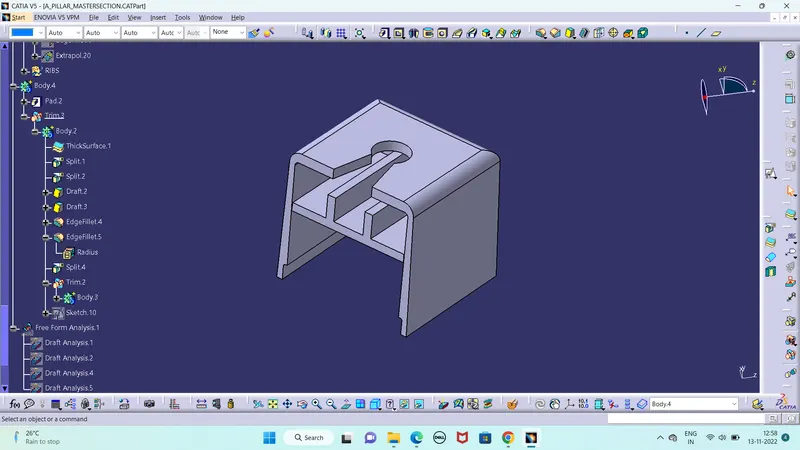
CLOSURE BODY AND DOG HOUSE JOIN:
- In this part there is hole like on the top of the dog house.
- First, created middle part is joined with dog house.
- The draw hole on the top wall and extrude the this extrude surface is used to split from the dog house. We finally got full engineering feature.
- The this dog house model is joined with the created pillar body by union trim operation.
- Finally, we have got full model with master section reference. Next we will do draft analysis
DRAFT ANALYSIS OF THE DOG HOUSE :
WITH SIDE CORE AXIS :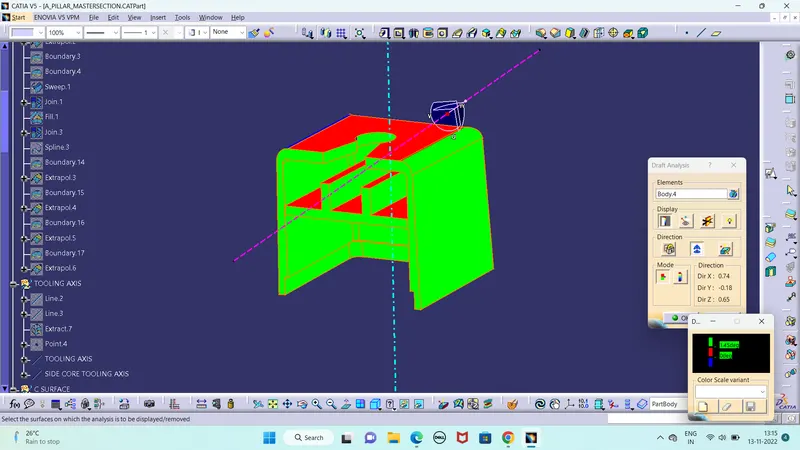
WITH MAIN TOOLING AXIS :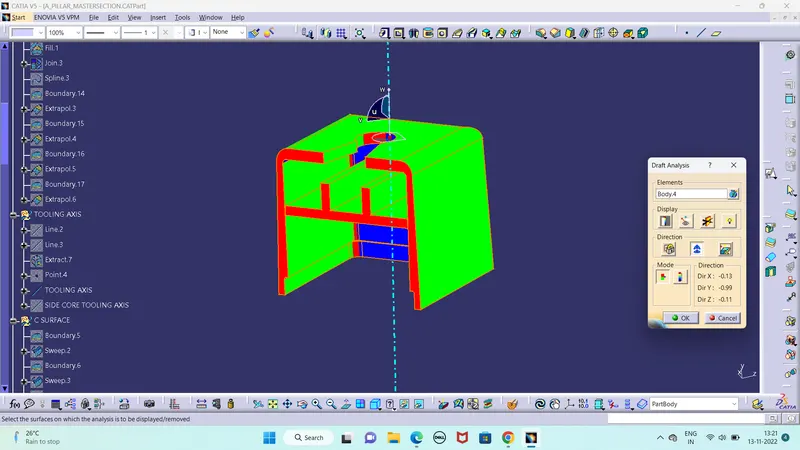
FINAL COMPONENT :