Week 9 - Project 1 - Door Trim Lower with Engineering Features
Objectives:
- Creation of Tooling axis with appropriate draft angle.
- Creation of other surfaces (eg, B and C surfaces) for creating a solid component.
- Perform draft analysis on Class A surface and solid model hence created.
DRAFT
The draft is the amount of taper for moulded or cast parts perpendicular to the parting, line. Draft angles are a design consideration that makes it much easier for a part to release cleanly from a mould. A draft angle is calculated asa degree measurement (or, less often, an inch or millimeter measurement) from the vertical axis of a mould, and it helps account for thermoplastic shrinkage, a practical reality of the injection moluding process for most materials.
Draft angles are generally a requirement of injection moulding design (through there are a select few soft materials, like nylon, that can get away with draft angles of zero). The draft should be part of the design for manufacture, and all stakeholders and contributors should be aware of its need at the outset of the design process. This includes the product designers, design engineer's etc and this aloows consideration for design requirements to be taken into account. Any draft is always better than no draft.
IMPORTANCE OF DRAFT
By accounting for thermoplastic shrinkage during the cooling process, draft angles significantly reduces friction between the finished, cooled part and the side of the mould, Not only does this create a much easier release process, but it also offers several other benefits, depending on the design of the part which is as follows:
- Reduces the chance of the damage to the part due to friction during the release.
- Reduces wear and tear and chances of damage to the mould.
- Ensures a uniform, smooth, unscratched finish when required.
- Ensures the integrity and uniformity of other surface finishes and textures.
- Reduces overall cooling time by lessening or eliminating the need for unconventional ejection setup's.
- Most, if not all, of these benefits, offer either direct or indirect overall production cost reduction.
Procedure for creation of Solid model:
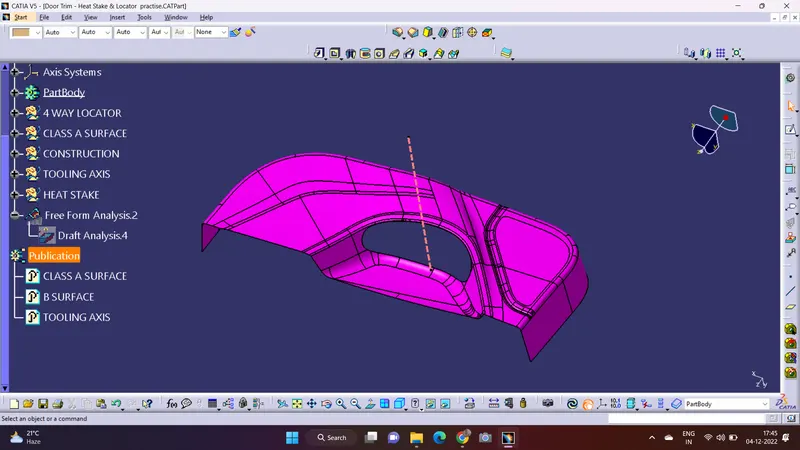
This image below shows the given class A surface for which a solid model is to be created.
TOOLING AXIS
It is defined as the direction in which the mould/core and cavity open. Selection of the tooling axis on the ease at which component can be easily ejected.
By analyzing the component the most easily ejectable direction is somewhere close to the Y direction, so in this case I think there is no nedd for using bisecting method for creating the tooling axis so for this component I simply extracted a surface from the class A surface and created a point on to that surface after that we just normally created a line using the point-direction method by doing all of this our tooling direction was created.
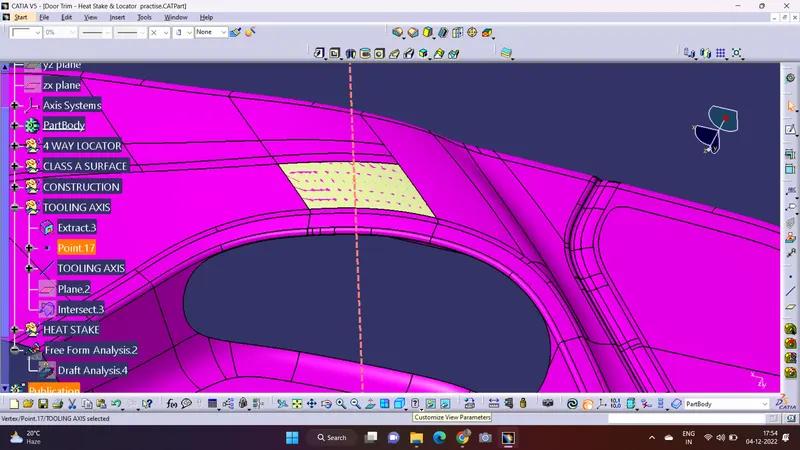
In this way of creating the tooling axis we just need to check that the component is clearing in the draft analysis if it does than we can go forward and created our solid body out it and if it doesn't clears in the draft analysis than we have to use the bisecting method for creating the tooling axis, we just have to keep that in mind.
DRAFT ANALYSIS OF ALL THE COMPONENTS
So at first we need to check the draft analysis of our Class A surface so we can determine the tooling axis we created for the Door trim is right. And we all know that the draft angle for the component should be 3 degrees, so we'll go ahead with that and check the draft analysis.
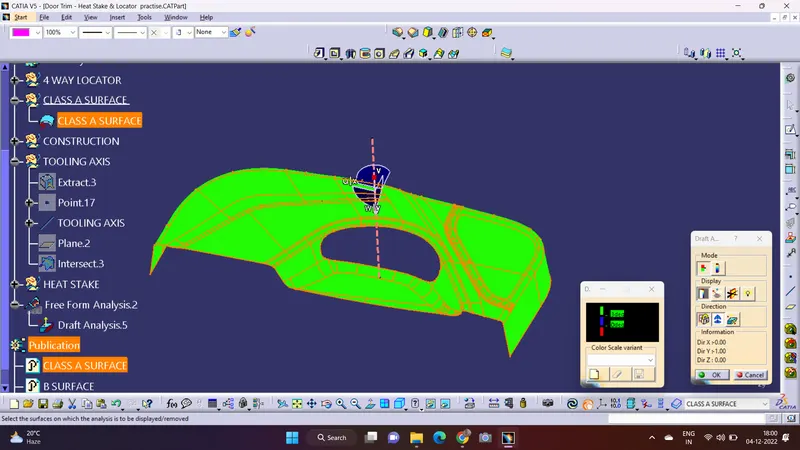
So as we can see in the above image that the Class A surface is clearing the 3 degree draft angle, and hence we can rest that the tooling axis we have created for it is perfect.
DRAFT ANALYSIS OF SOLID COMPONENT
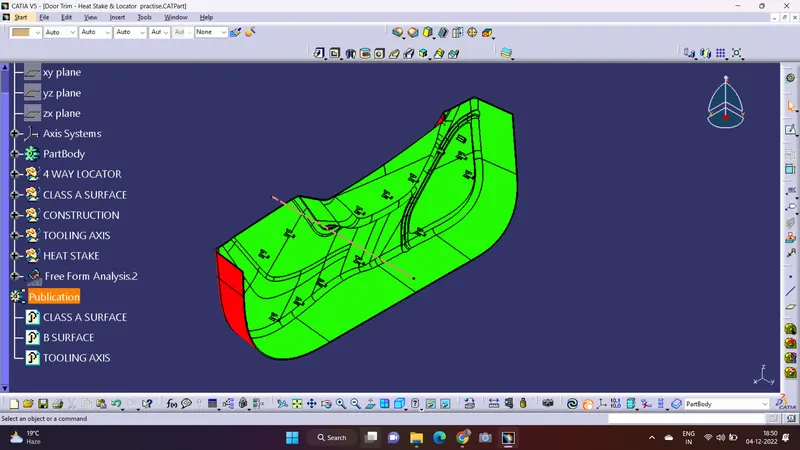
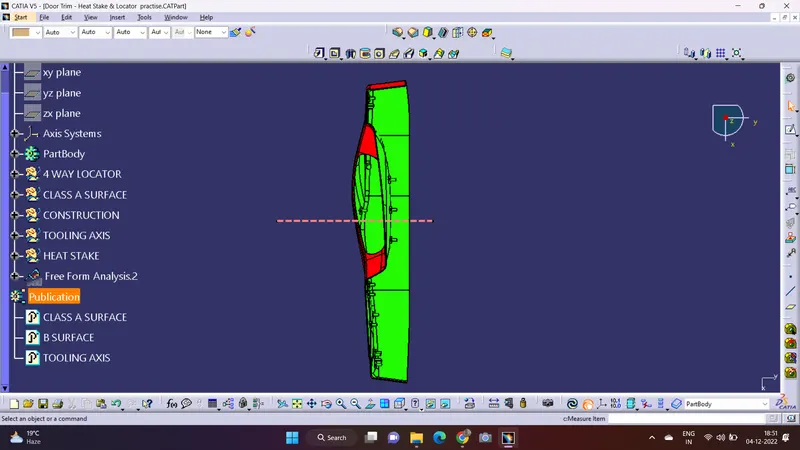
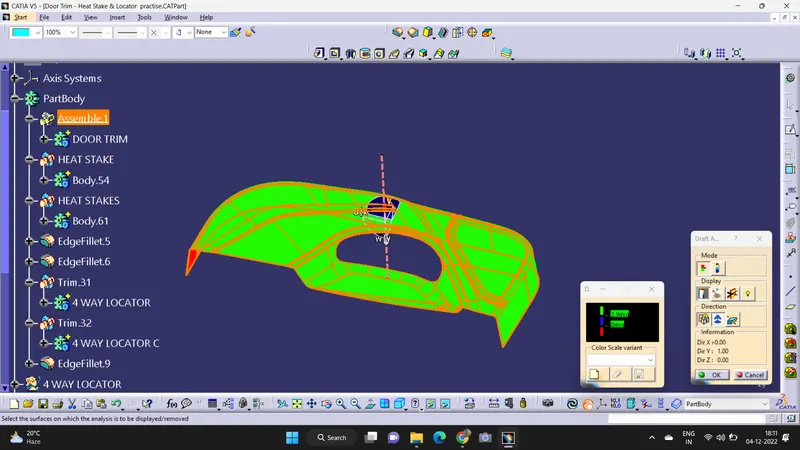
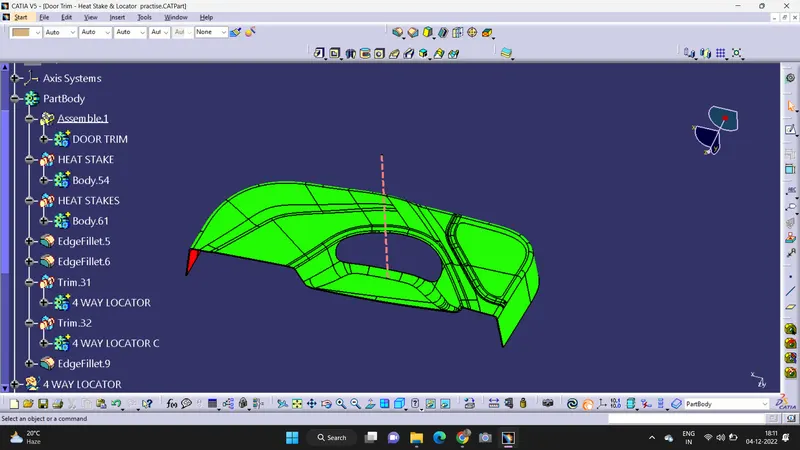
As we know minimum draft angle for the fcaes of the plastic component should be 3 degrees. So the value of 2.9 degree (considering tolerance) is provided in the draft analysis colour mode window inside the colour scale, the Green the green bar shows the draft angle of 2.9 degree or above 2.9 degrees. The blue bar shows below 2.9 degree draft angle. As shown in the image below all the faces and side faces of the component are green which the bottom faces are red. The line of demarcation between the green and red faces is the parting line which divides the core and cavity halves. The solid model has cleared the draft analysis successfully as shown in the image below.
DRAFT ANALYSIS FOR THE HEAT STAKES AND 4 WAY LOCATOR
In this case, for the heat stakes and the 4 way locator, the way we are gonna perform the draft analysis in all the same way we are gonna place the compass on the same tooling axis as before and it just for the B components ( heat stakes and 4 way locator all these features come in B surface component) the draft angle we are gonna use will be different that's it, else all the methods will be same,
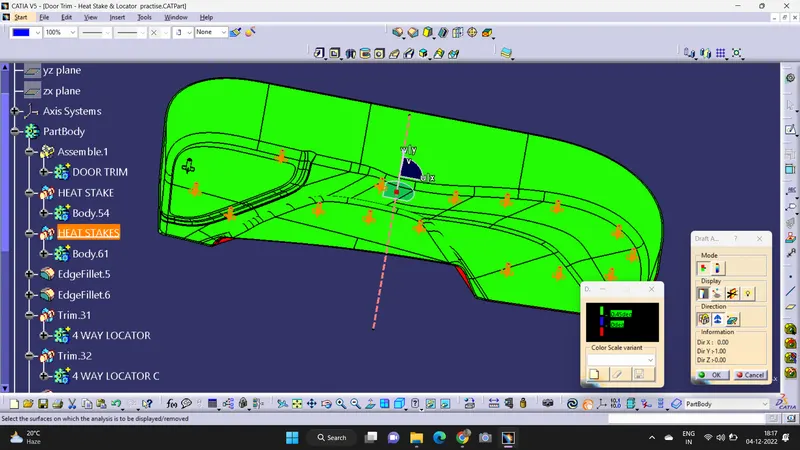
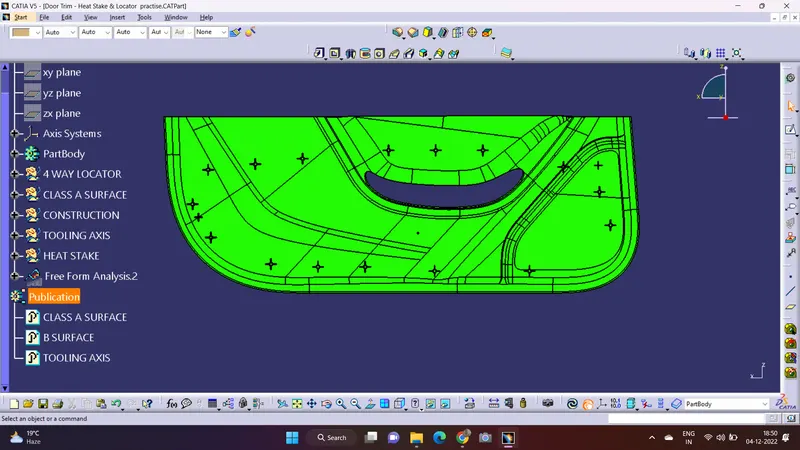
As we can see in the image above all the features are clearing the draft analysis and it's just that the draft angle for it is .5 degrees and we didn't used .5 degrees cause of the tolerance so we used the value as .45 degree.
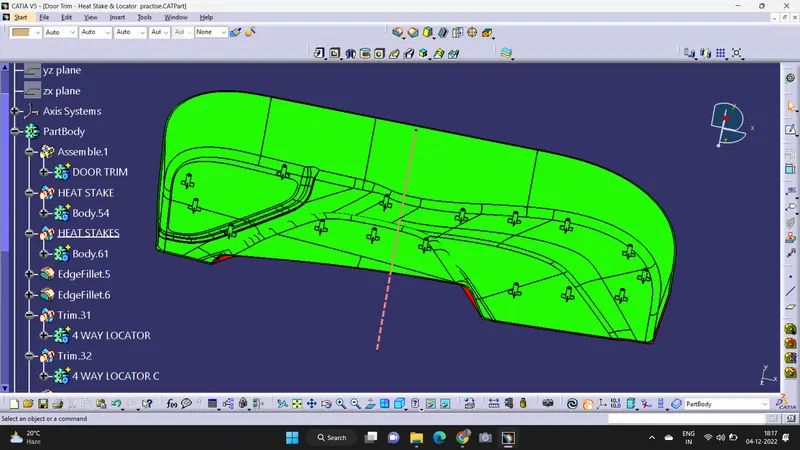
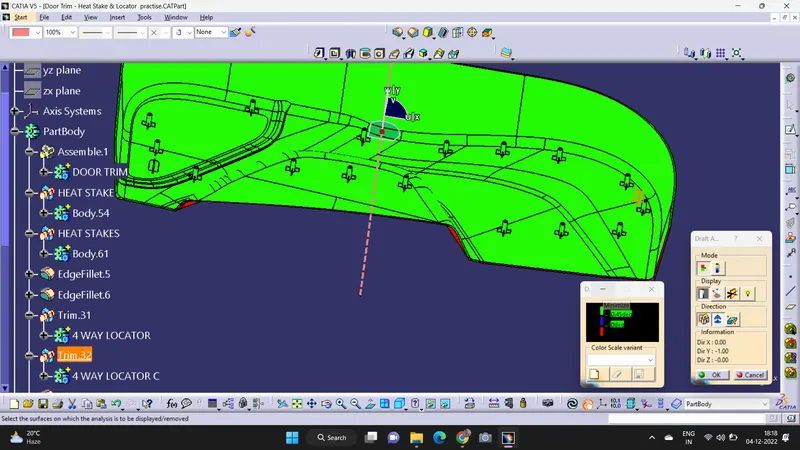
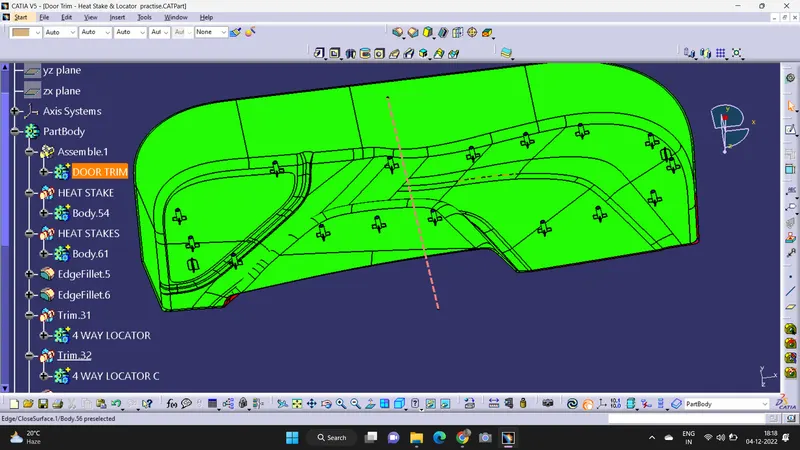
So as we can see at the images below all ofour heat stakes and 4 locator are clearing the tooling axis so the components are made perfectly fine.
CREATION OF HEAT STAKES AND 4 WAY LOCATORS
The locators resits all the other degrees of freedom expect the translation along the direction of tooling axis among Y-axis. For restricting that degree of freedom we will be using the heat stakes.
In heat staking, we use local heating and cooling to raise temperature of plastic components and allow plastic reforming to be carried out.
So for the heat stakes we're gonnal use the Inner diameter as 5mm and outer diameter as 7 mm (according to skill-lync rules) and as you can see in the below image
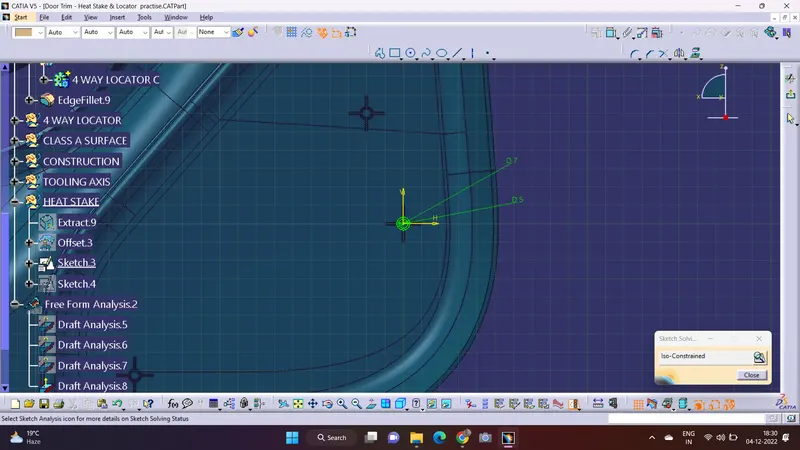
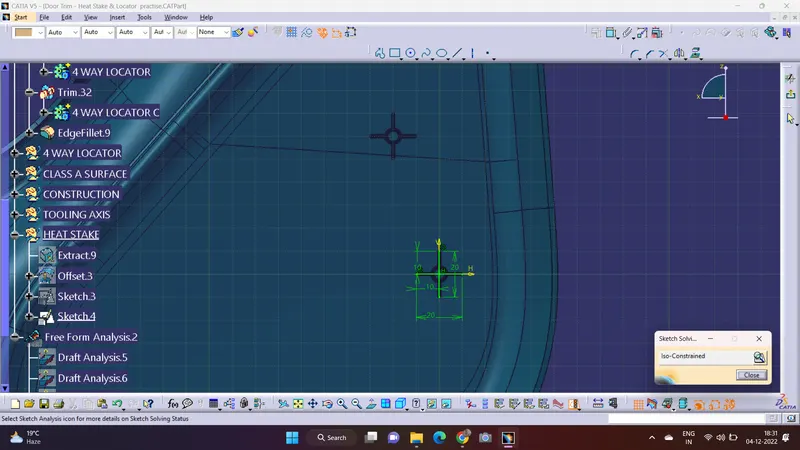
And now after creating the construction for heat stakes we're gonna PAD it and while padding the heat stakes we have to keep that in mind that for the direction of the padding should be in tooling direction so it can clear the draft analysis and as for height that we to take for the heat stakes will be also according to skill-lync rules
for height,
the RIB should be between 3 to 6mm,
and after that the thickness of the component that is goona come and sit on it so that will be 2.5mm
and after that we will have to add additional height of 12mm in it
so total of all this will be 20.5mm cause the RIB height I have assumed to be 6mm
(and all this rules were told to me in mentoring session)
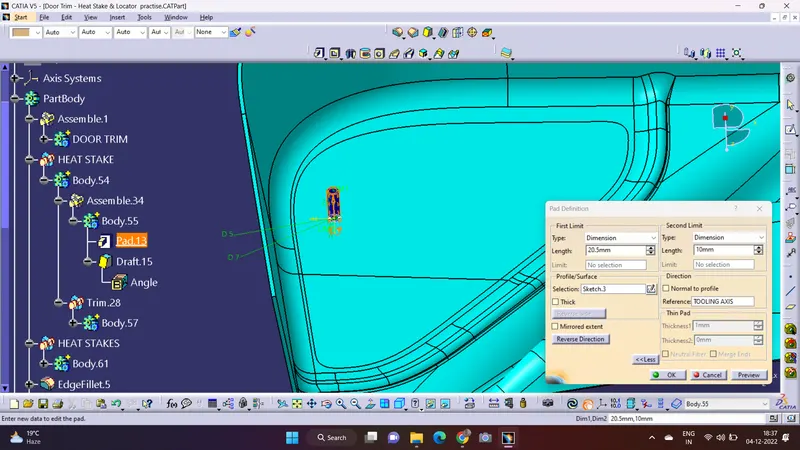
after that we're gonna give draft analysis to it of .5 degree
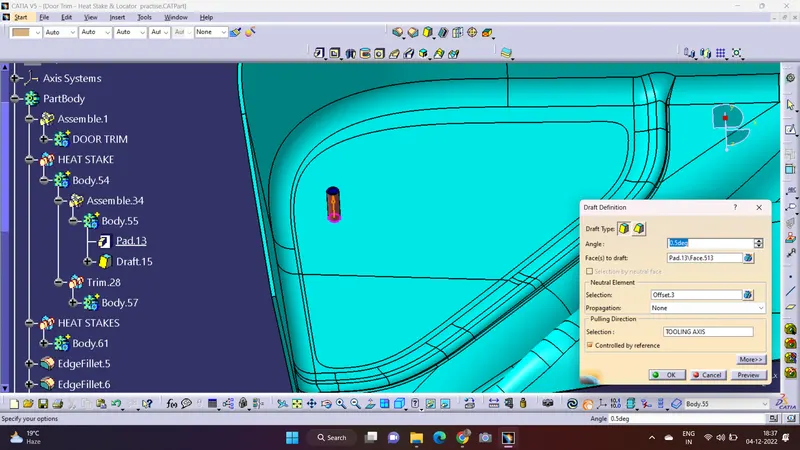
And now for the RIB I have taken the height to be 6mm and the padding direction as tooling axis
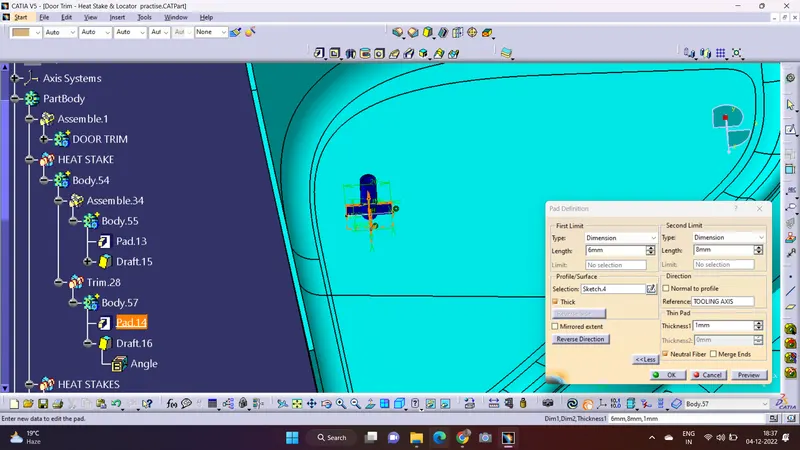
And for the RIB also the draft angle will be .5 degree
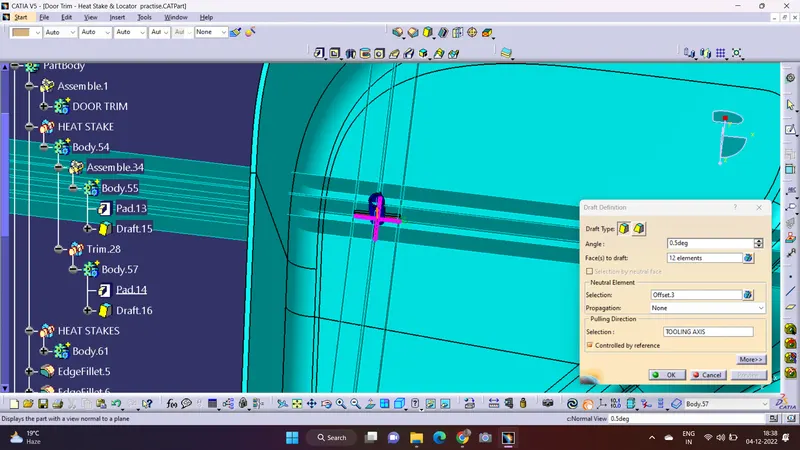
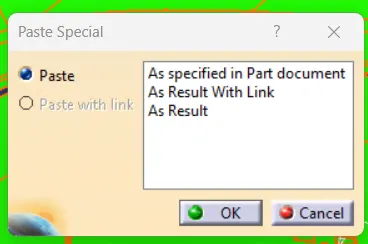
So in total we have to create 16 heat stakes in this Door trim we can't make all of them by the above instructions in exchange of that we can just simple copy the whole body and paste it as in special so we can have as much solid bodies as we want, as you can see in the image below,
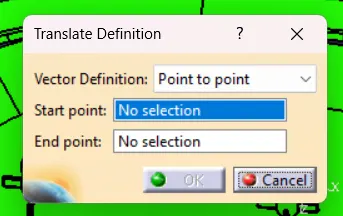
After that we just need to use the translation command to move the body to one point to another because we already have reference points, and in translation we just need to choose the definition as point to point, as shown in below image,
After that we just need to use the Boolean operation to create a single body out of it.
COMPLETE DESIGN IN VARIOUS ORIENTATION