Week 9-Creation of 1D Connectors Challenge
Objective:
To create different types of connectors and attach various parts of the given model satisfying given quality criteria.
Procedure:
1. The given model is checked for solids before proceeding with meshing.
2. Material and property created.
3. Assigned material and property to all the components.
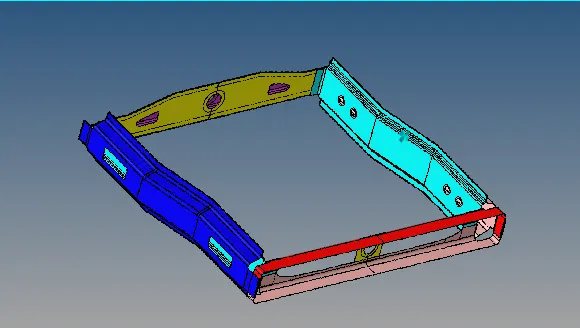
Procedure:
Right rail 2 & front truss 1 - Seam quad angled+capped L
1. The middle surfaces are meshed and proceeded for seam-quad weld (angled+capped+L).
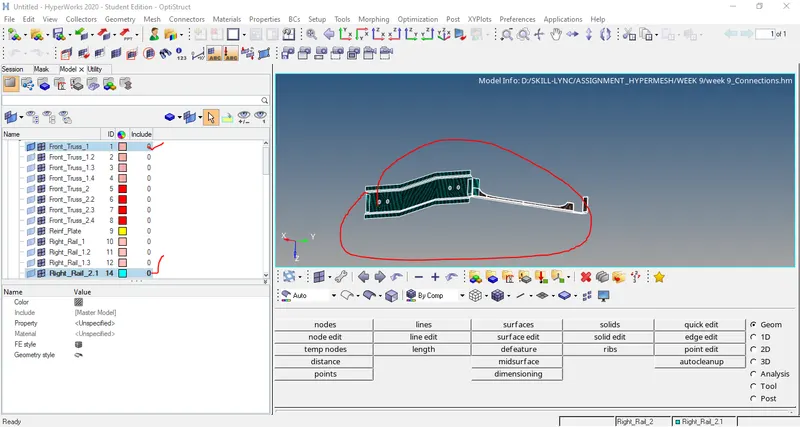
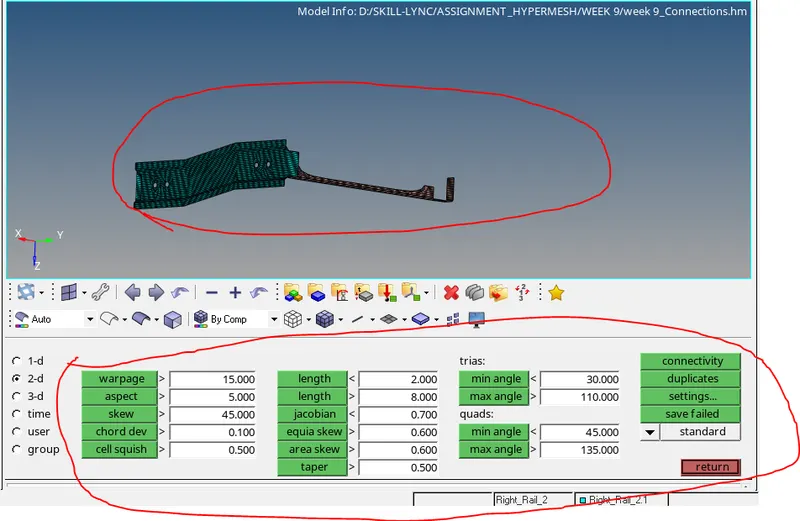
2. Once the mesh is created check for 2D element's quality and clear them.
3. Go to 2D-connectors-select seam.
4. Select the nodes required for weld, given the values as shown below.
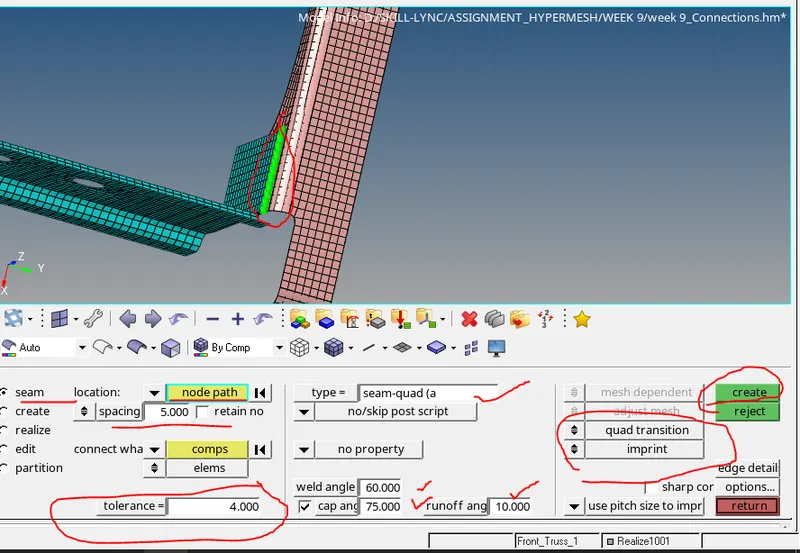
5. Tolerance is the space around the nodes for connecting.
6. Feed-in necessary weld angle, cap angle, and runoff angle as mentioned in the picture.
Left rail 2 & Front truss - Quad elements
1. Check for element failures in the front truss and newly mesh the left rail using auto mesh option.
2. Clear 2D mesh quality for the left rail.
3. Go to 2D - connectors - seam.
4. Specify values, select nodes, comps, select type as quads, and create.
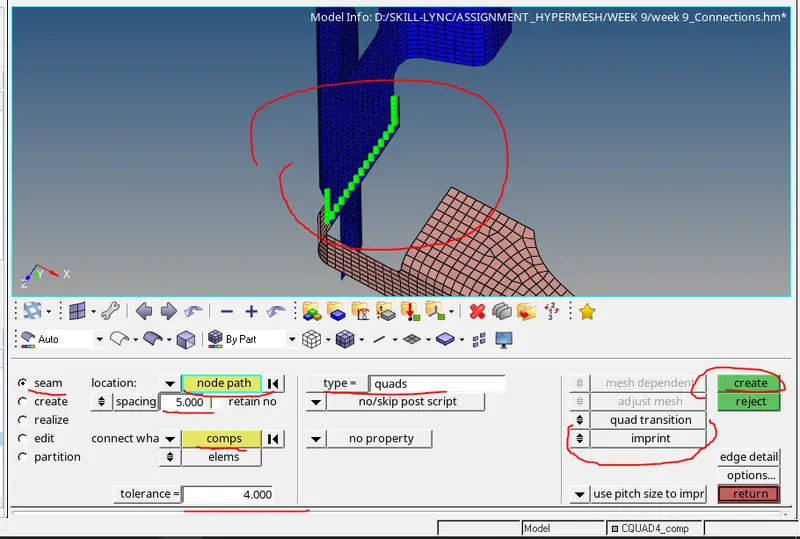
5. Check whether the connectors are realized.
6. If the mesh is altered or failed then remesh using the auto mesh option and clear the quality.
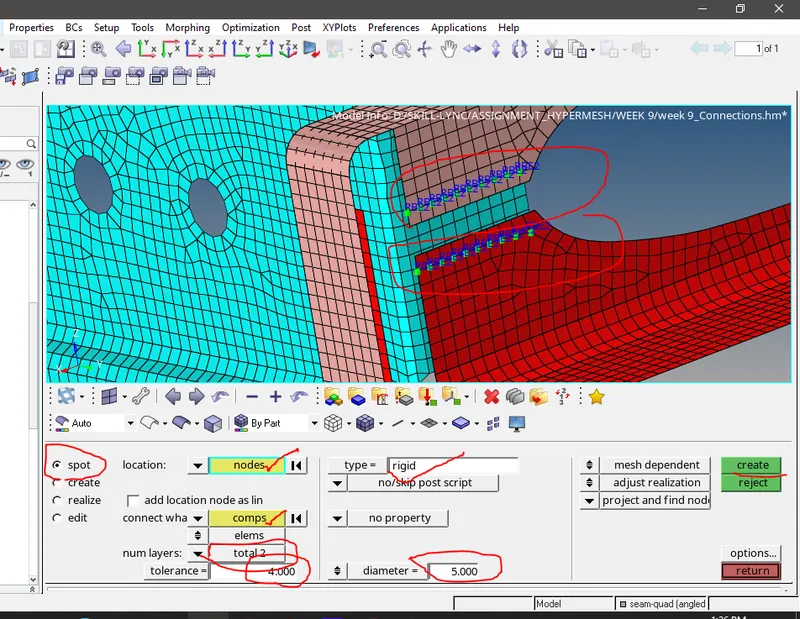
Front Truss 2, front truss 1 & Right rail - Spot weld with 2 layers & 5mm Dia
1. The front truss 2 is newly meshed using the auto mesh option and quality is cleared.
2. Go to 2D connectors, select seam.
3. Select the types as rigid.
4. Tolerance as 4, then adds with 2 layers and 5mm dia.
5. Click on create and spot weld is created.
Front truss 2, Front truss 1 & Left rail - Hexa adhesive
1. Already meshed components checked for any quality issues before proceeding for welding.
2. Go to 2D connectors - seam.
3. select the node path where the connectors have to be created.
4. Give the necessary details as per the below image.
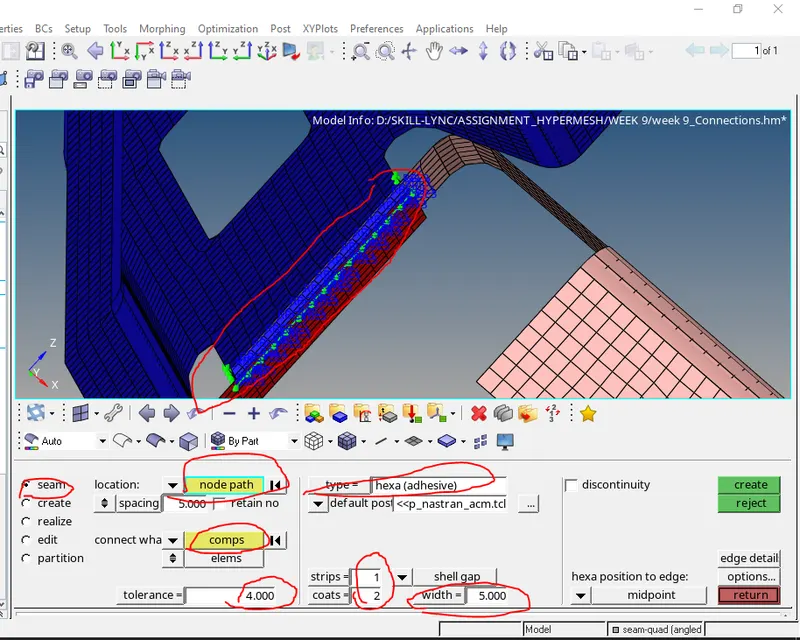
5. Hexa adhesive is created. check whether the connectors are realized.
Rear Truss 2, Rigid rail 2 - Bolt connector and Rear truss 2 & left rail 2 - Bolt Connector
1. Rear truss is meshed newly and cleared for quality.
2. Go to 2D connectors - bolt.
3. Give the necessary values as per the below image.
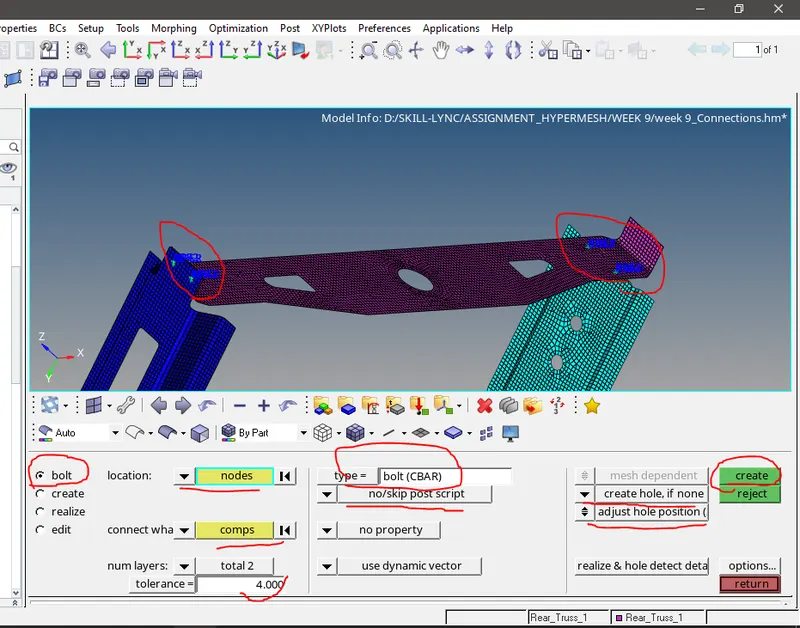
4. Choose bar type as CBAR.
5. And make sure created connection is realized.
Right Rail 1 & Right rail 2 - spot weld with rigid elements
1. Right rail 1 and right rail 2 are meshed and if meshed checked for quality criteria.
2. Go to 2D - connectors - select spot.
3. Select the nodes as per requirement and select type as rigid as per the below image.
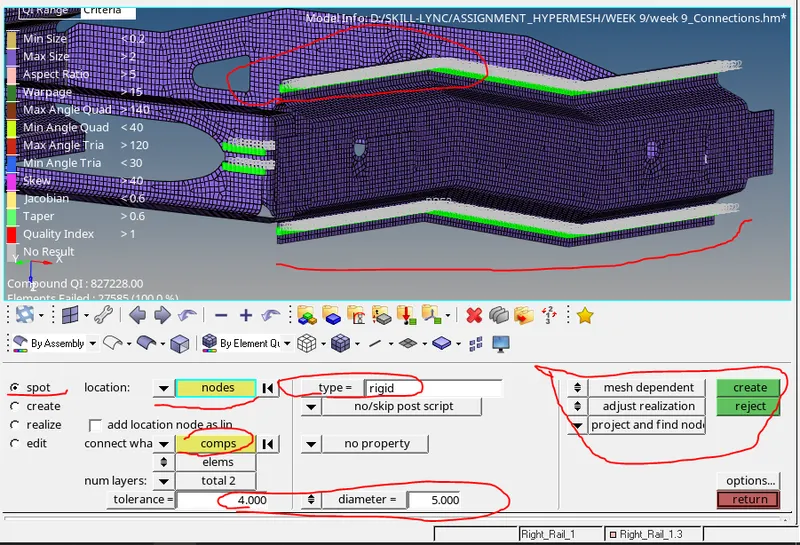
4. Check connectors are realized.
Left rail 1 & Left rail 2 - spot weld with spring elements
1. Mesh the left rail elements and check for quality is clear.
2. Go to 2D - connectors - spot.
3. Select the specific nodes and types as spring.
4. Give the necessary input as per the below image.
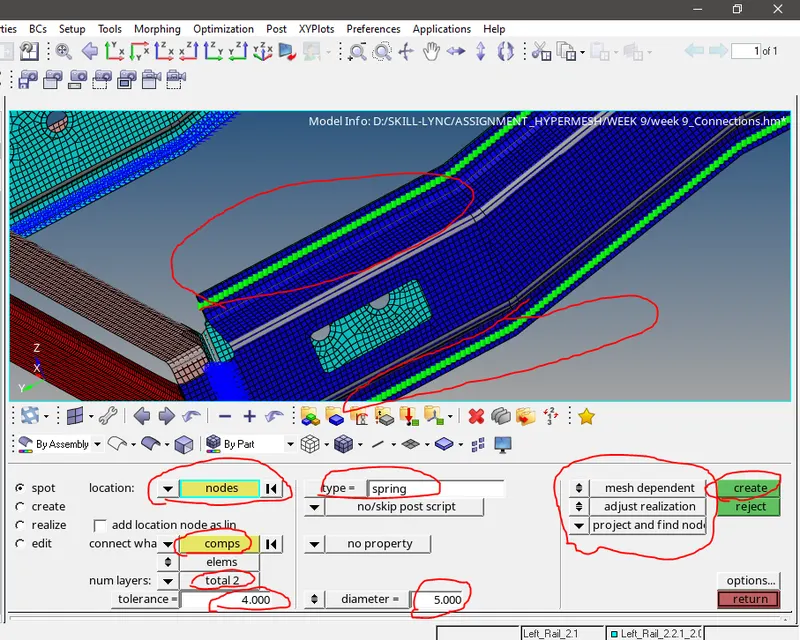
5. Check whether the element is realized.
Conclusion
The given components are meshed to the mid surface and attached using respective connectors as per the given input.