Week 9 - Attachment Feature Creation - Challenge 1
AIM
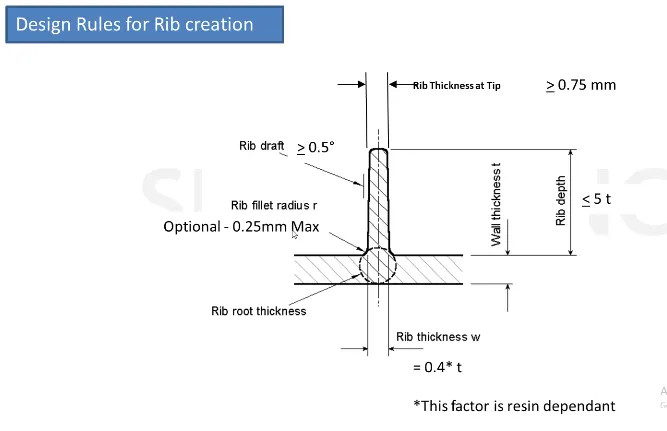
To Create a Ribs in Coin holder using the standards in below image
Procedure
- Open the Coin holder's CATPart.
- Create an Extract
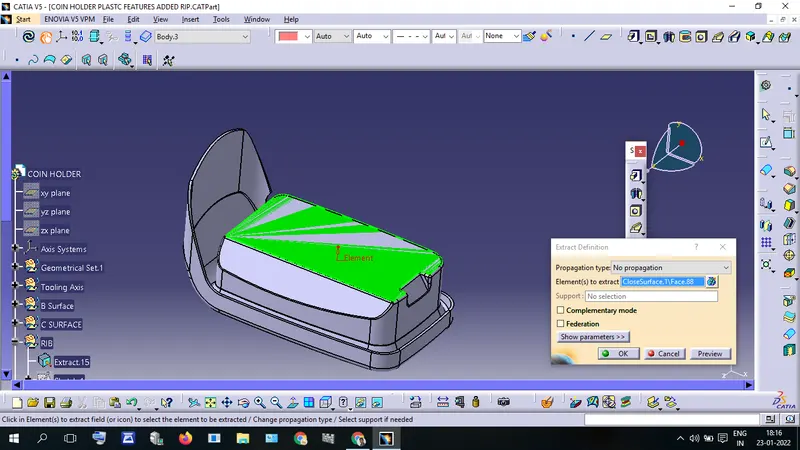
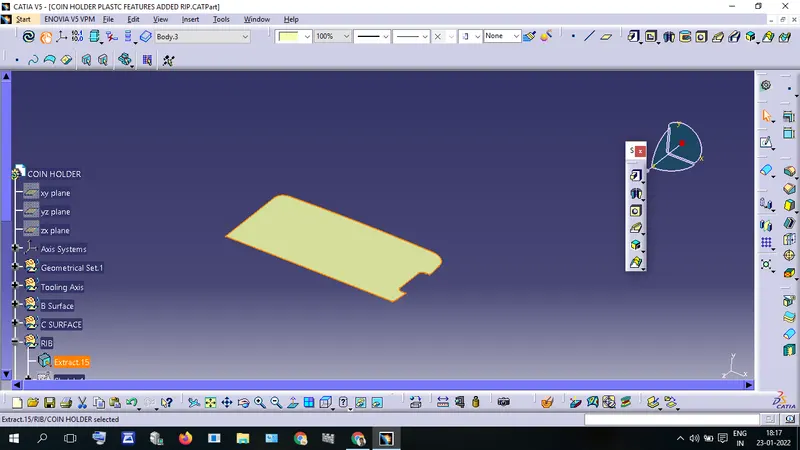
- Create a positioned sketch and draw a line with the proper dimension.
- Make Sure the sketch is "Iso-Constrained"
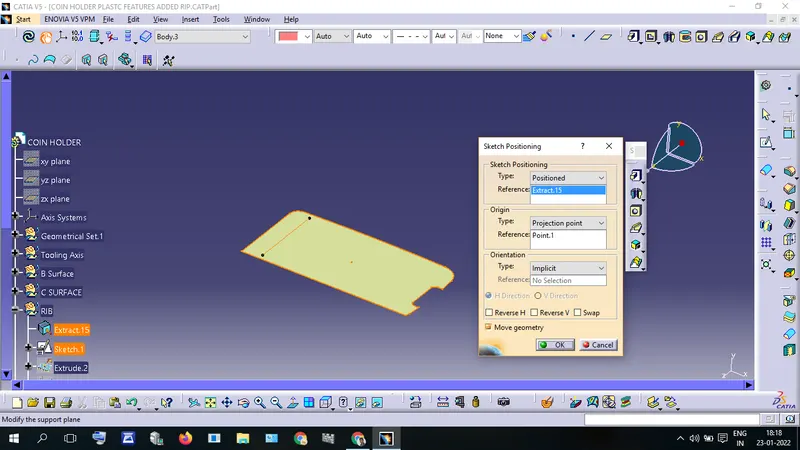
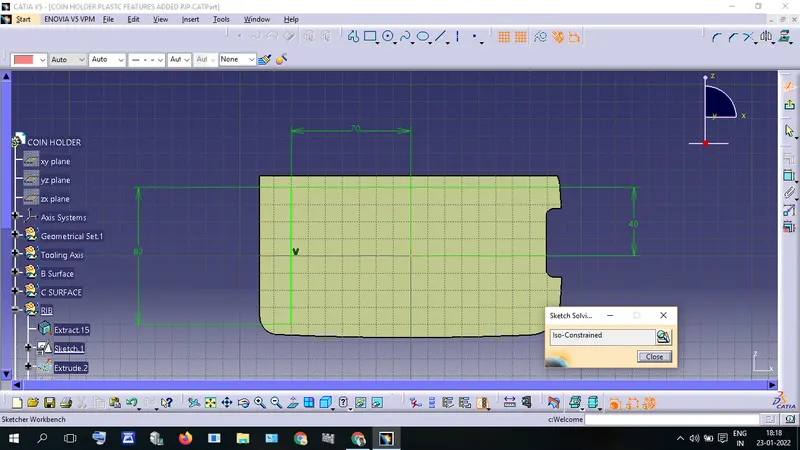
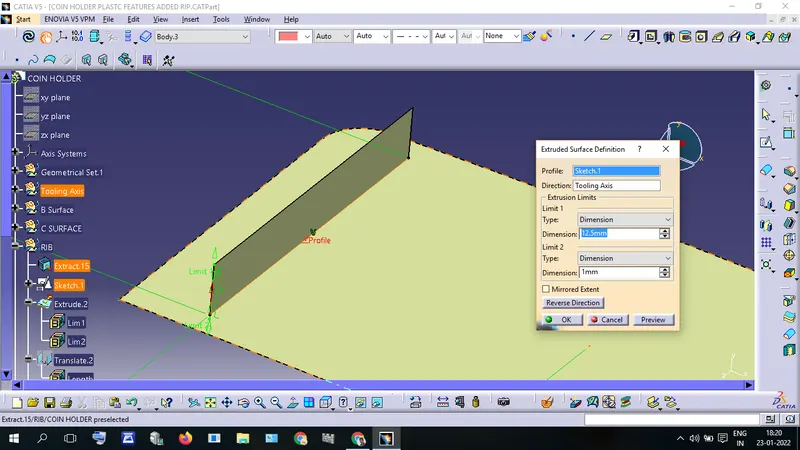
- Create an extruded Surface using the "Extrude" tool
- Dimension of Extruded surface should have a height of five-time multiplied by the thickness of the part.
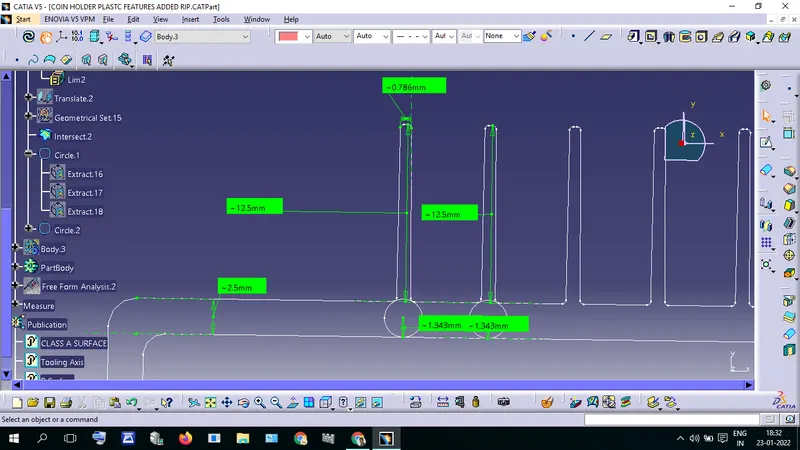
- the part thickness (t) = 2.5
- so the height of Rib = 5t
- = 5 x 2.5 = 12.5
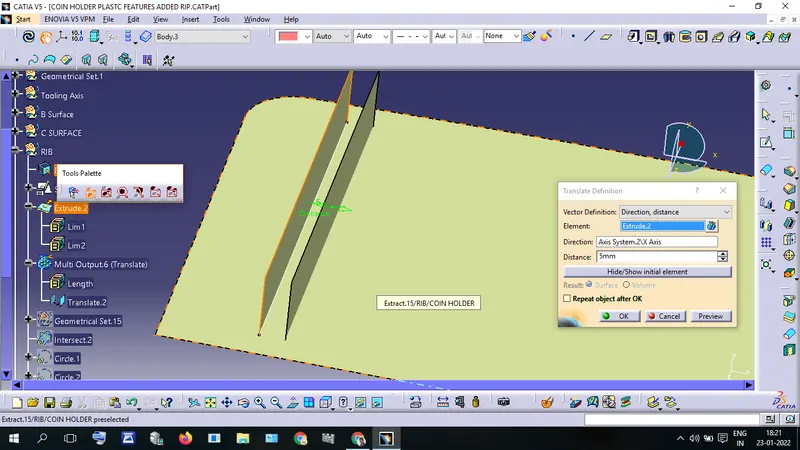
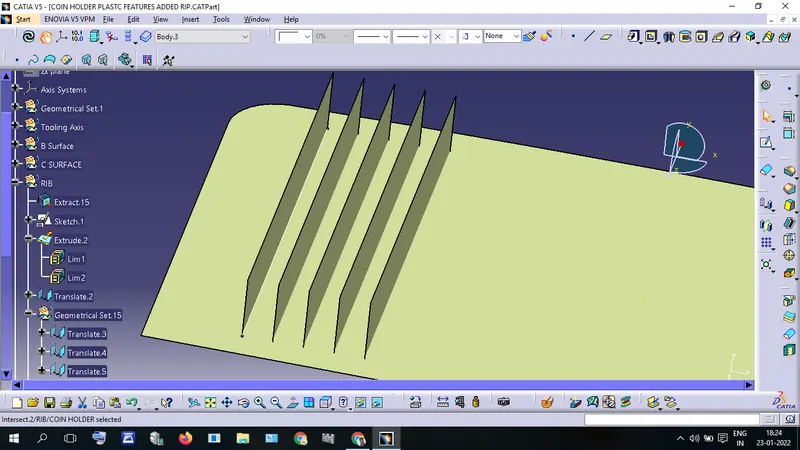
Use the "Translate" tool and create multiple ribs.
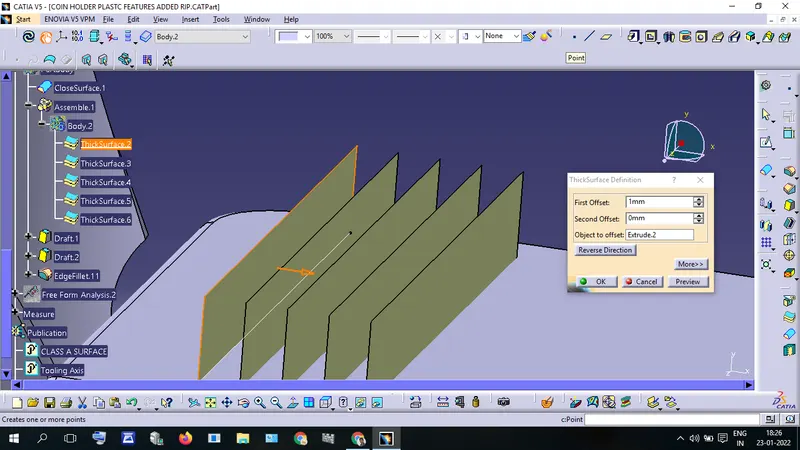
Open Tool Thick Surface in
"Surface-Based Features" -- "Thick Surface"
Give thickness to Surfaces
0.4x t = Thickness of Rib
if the part thickness is 2.4mm
the Thickness of rib is = 2.5 x 0.4 = 1mm
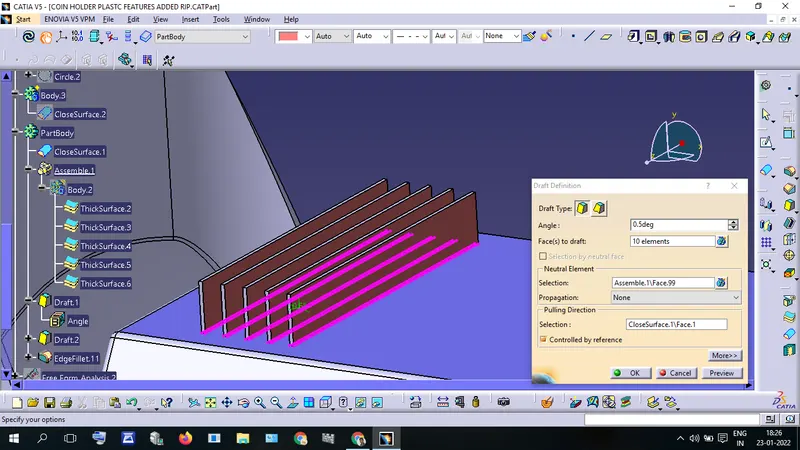
Draft Angle
The Minimum Draft Angle of rip is 0.5mm.
Rib Draft should be Greater than or Equal to 0.5mm
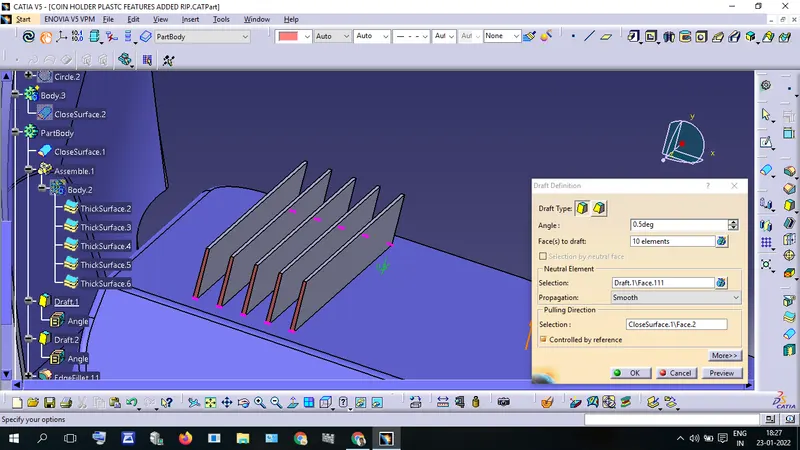
I gave a 0.5mm draft angle to the Ribs. If I choose more the 0.5 the Draft will reshape the Ribs Height.
Hence I gave a minimum Draft angle to each side of the Ribs.
Rib Fillet Radius
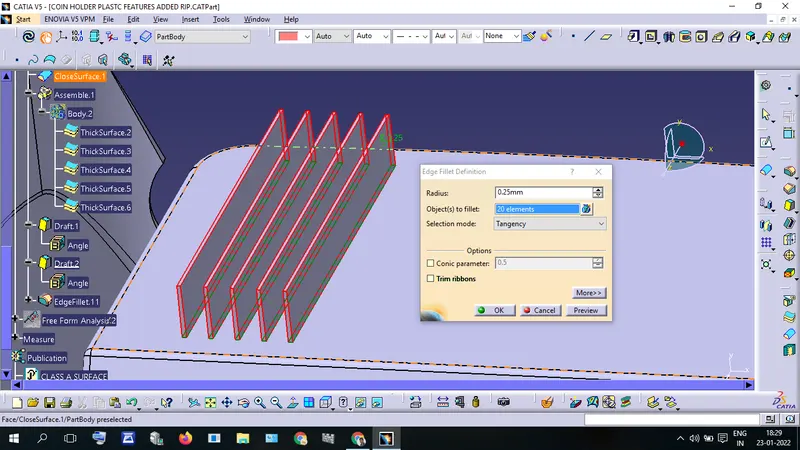
Rib fillet radius is the optional value we can either choose or not.
We desire to give fillet it should be a maximum of 0.25mm.
we can not give a fillet value of more than 0.25mm.
Go to Surface Work Bench
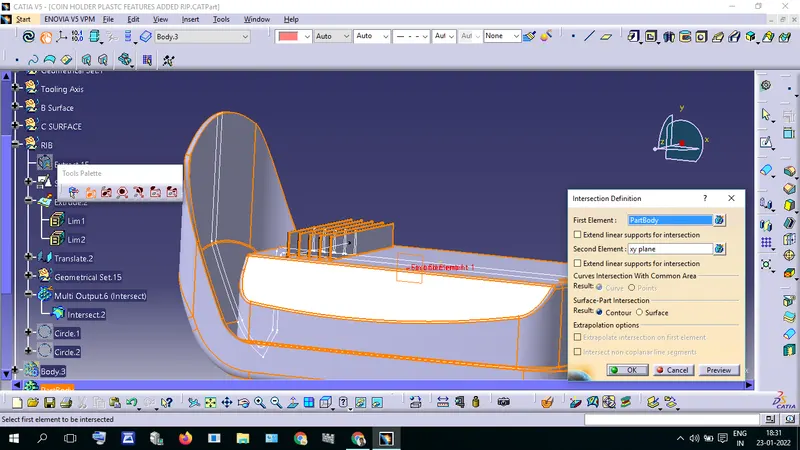
Use "InterSection Tool", Create an Intersection between Part and "xy Plane".
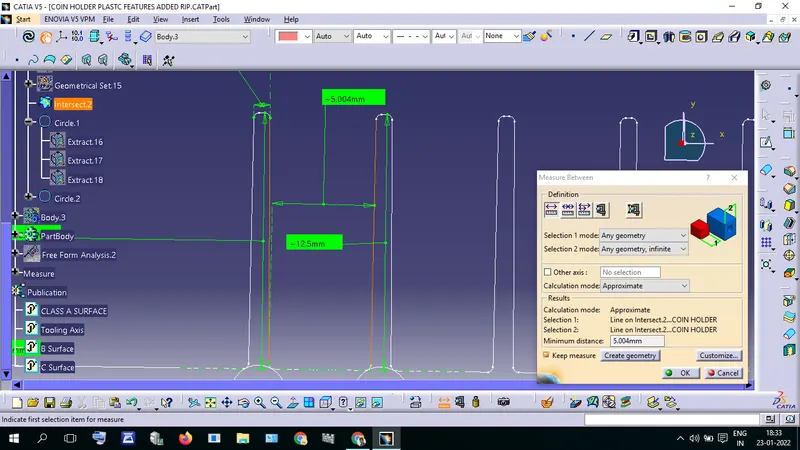
after creating the intersection measures the dimensions of ribs using the scale tool.
we can see detailed views and dimensions of the rib.
Draw a Circle between rib and Part using mentioned definition in the below image.
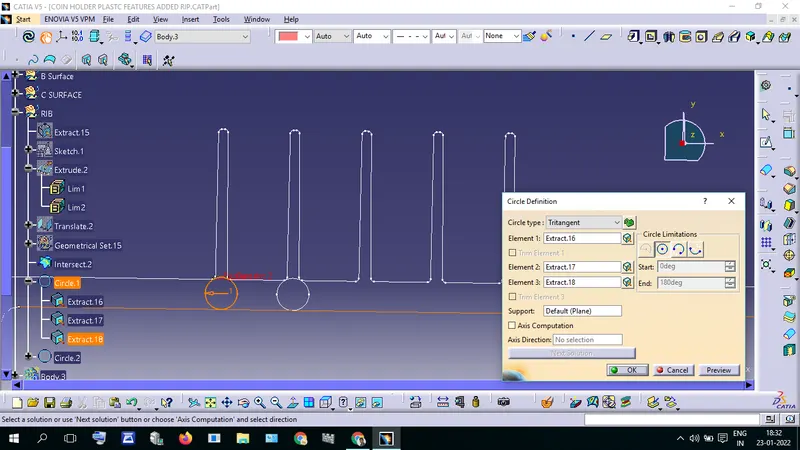
This circle Diameter should be less than 3.25mm.
3.25mm is the maximum value of 130% of the thickness of Part(2.5mm)
or
30% added in Part thickness = 2.5+(30%2.5)= 3.25
Below the image the circle diameter, We got 1.343x2 = 2.686mm
If the Circle Diameter is more than 3.25mm the rib will make "Short-Shot" Defect in the Part
DRAFT ANALYSIS
Procedure:
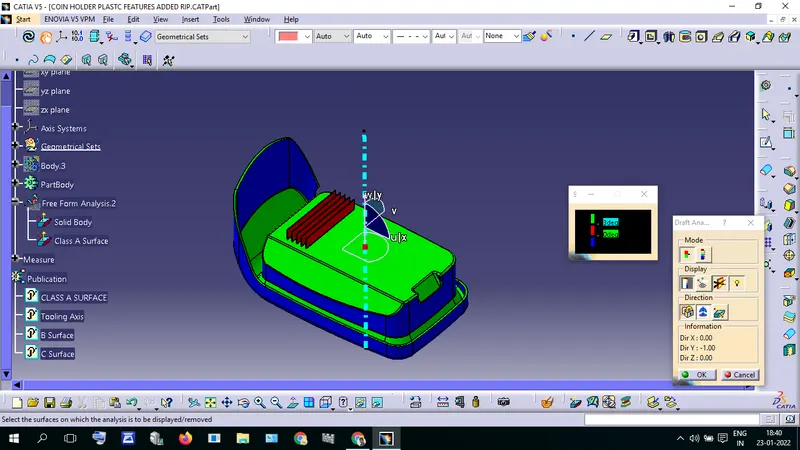
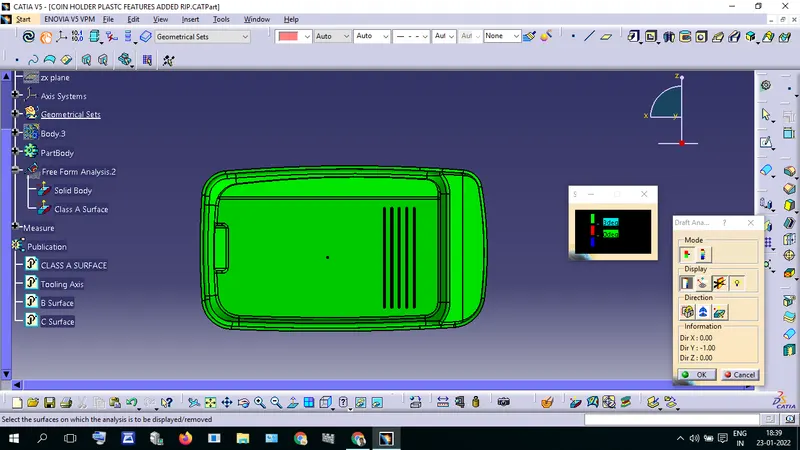
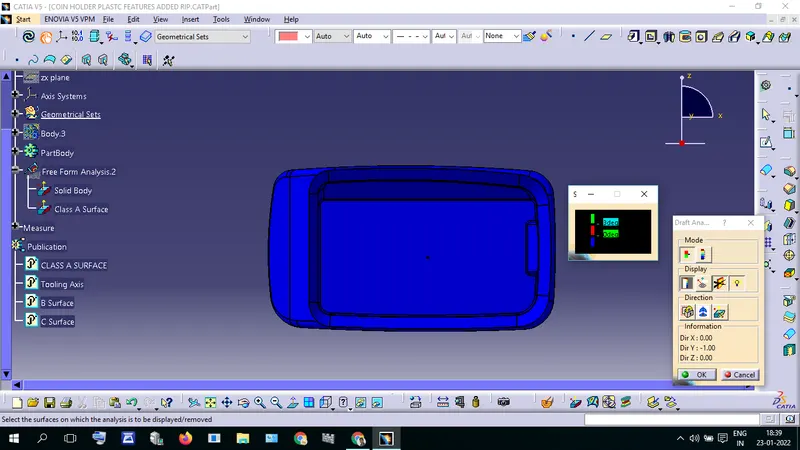
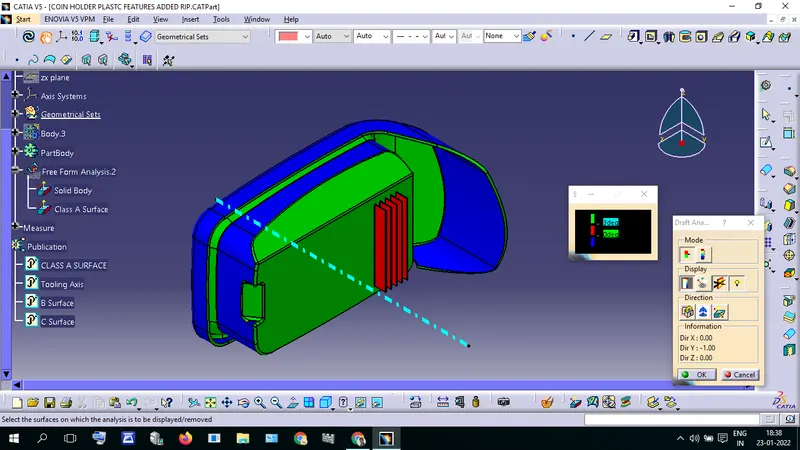
- Open Draft analysis toolbar Inset -- Analisis -- Feature Draft Analysis
- Place the compass in the center of the tooling axis and lock it. now click on the surface. now it shows the draft report
- The green color represents the draft angle more than 3 degrees
- blue color represents the draft angel draft angle 0 or below zero.
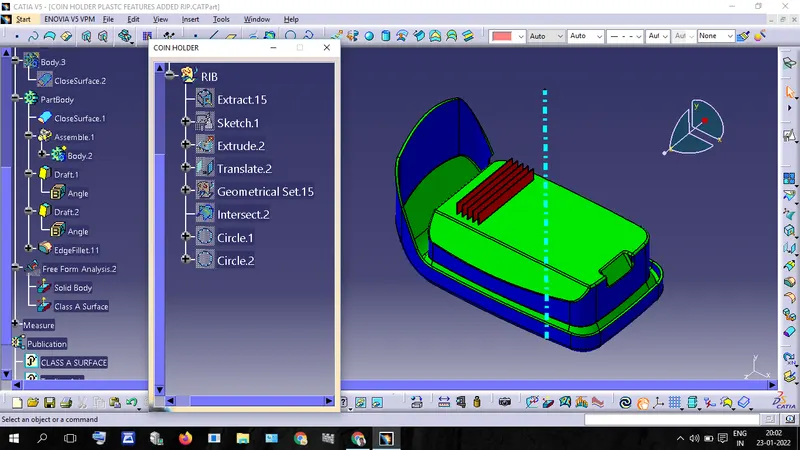
Result
The rib has been Created and the Draft angle has been analyzed.