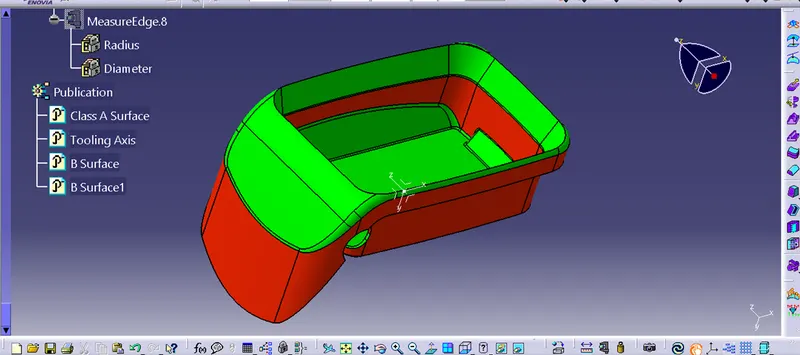
Week 8 - Challenge 4 - Coin Holder Design
COIN HOLDER
OBJECTIVE:
Creating a solid part body from class A surface, performing Draft analyais, creating tooling axis,and class B and C surfaces. Draft analysis on the part body.
Ther detailed Geometrical sets tree structure is given in the following image listed of operations performed on the surface.
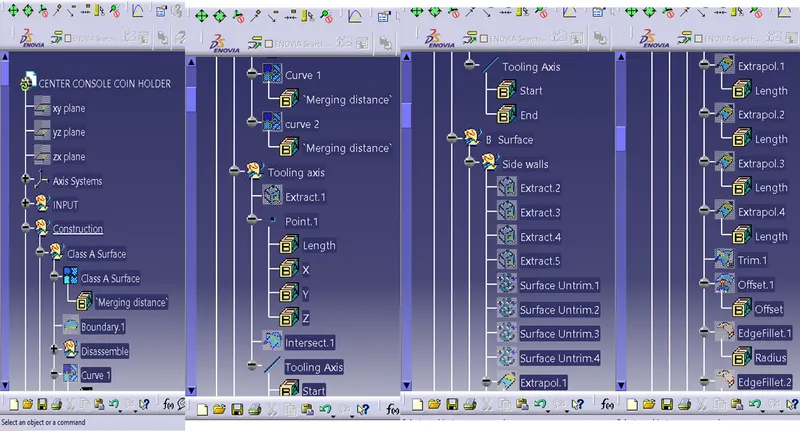
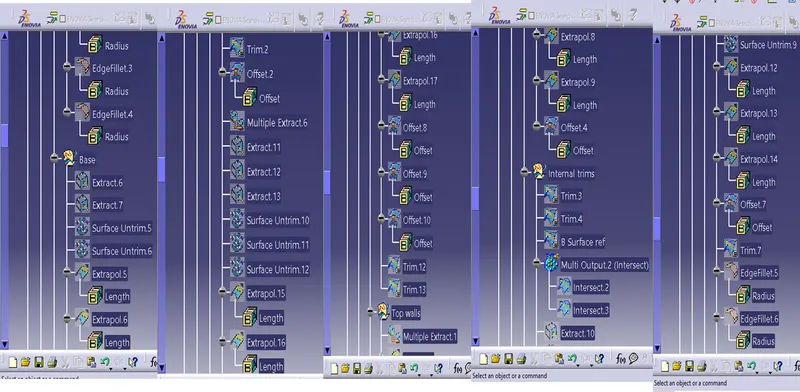
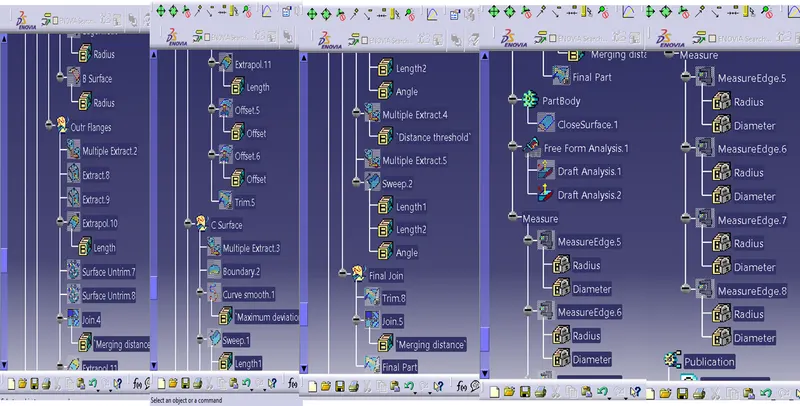
Step 1: Tooling axis Creation.
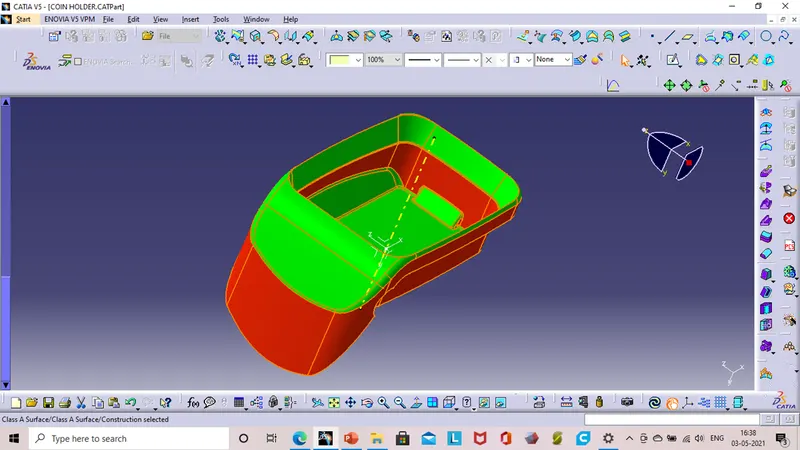
As this coin holder is having all the surfaces perpendicular a line wich is normal to the base surface will give us hte tooling axis.
First A base surace is extracted and a point is created on surface whare the Axis system is created.
And a line is created normal to that surface us our tooling axis.
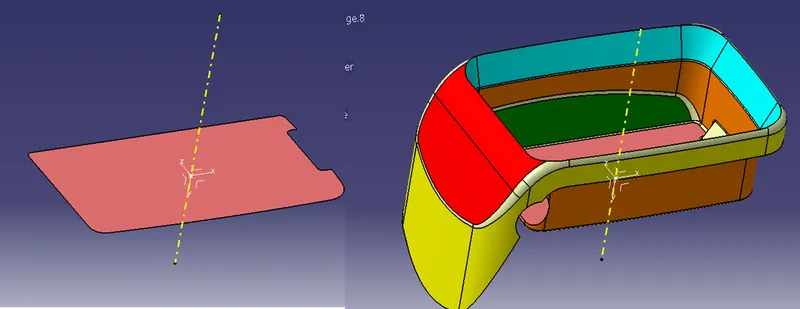
Step 2:Draft analysis on the Class A Surface
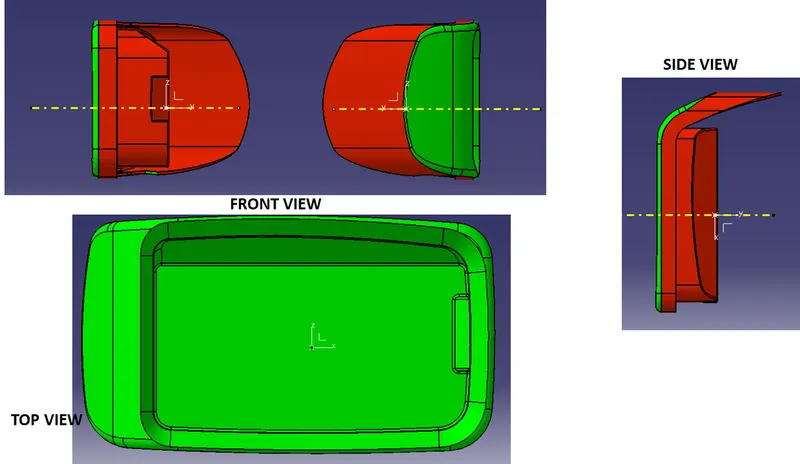
Along the created tooling axis we have performed Detiletd draft analysis, with colour combination.
Green - 3 and more degree draft angle
Blue - 0 to 3 Degreee draft angle
Red - Less than 0 degree draft angle
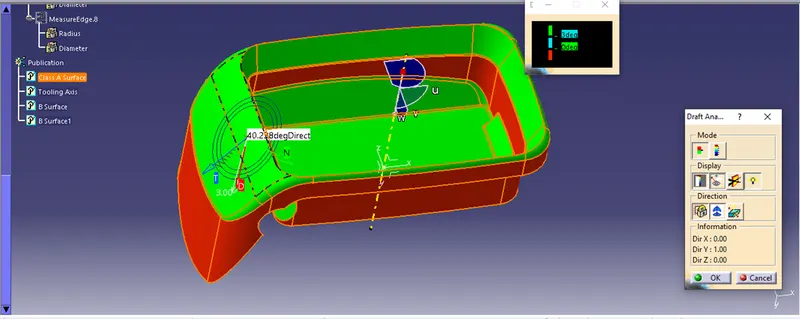
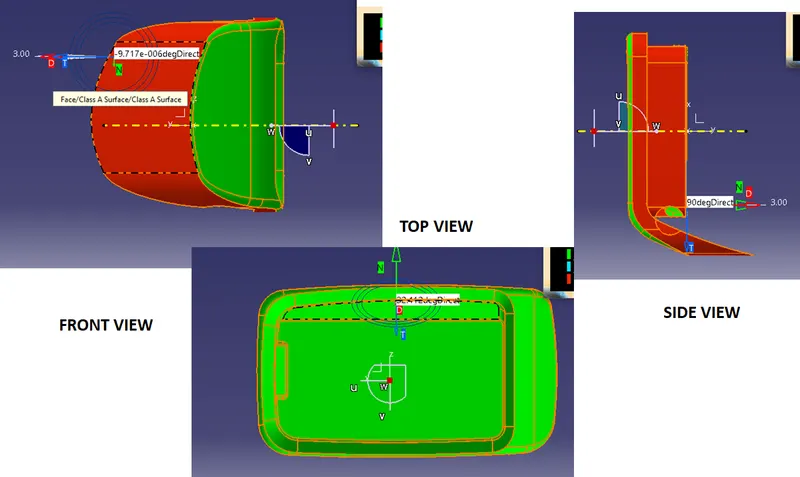
STEP 3 :Creation of B surface from class A surface
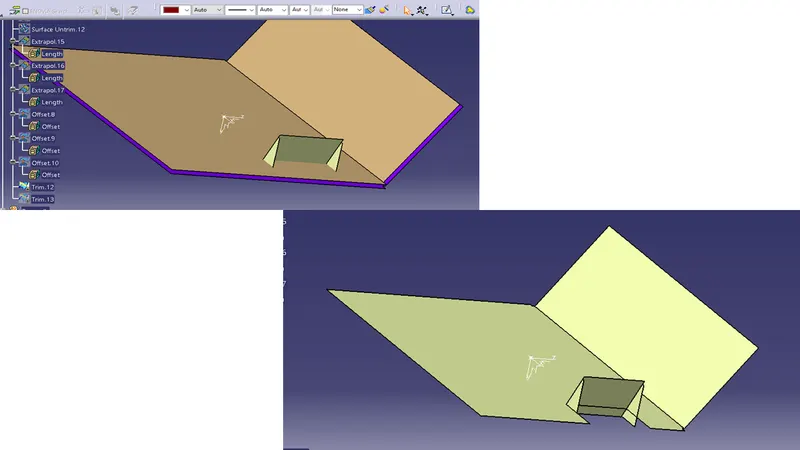
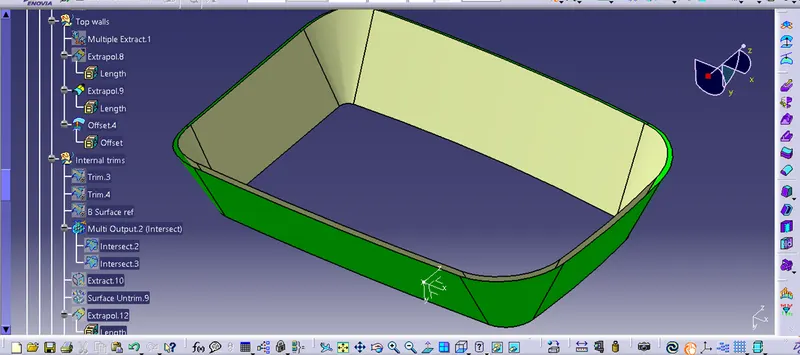
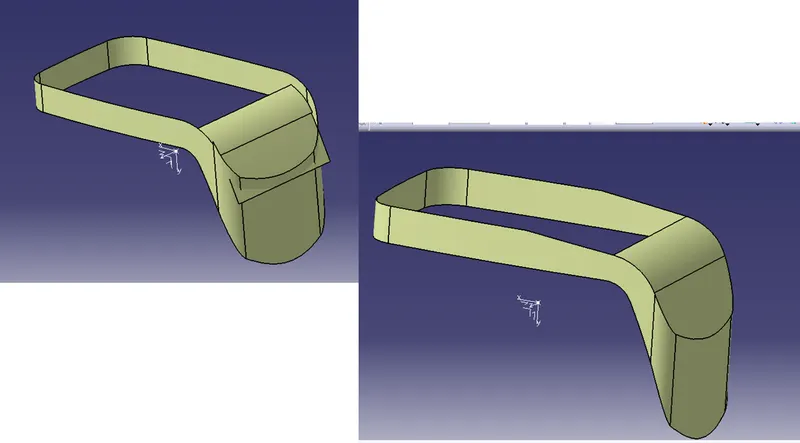
From the class A surface making the colplex geometry into small parts to and extracted them accordingle.
Next extrapolated them with approximate value
offset them with the part thickness of 2.5 mm
Trim them respectively.
This is process is carried out for all the surfaces.
SIDE WALLS
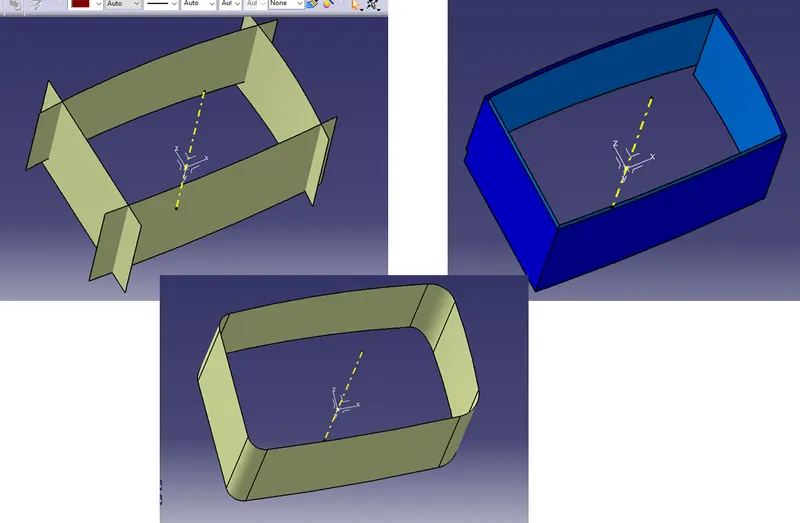
BASE
TOP WALLS:
OUTER FLANGES
After trimming all the individual Surfaces trim them to gether to get the final B suurface.
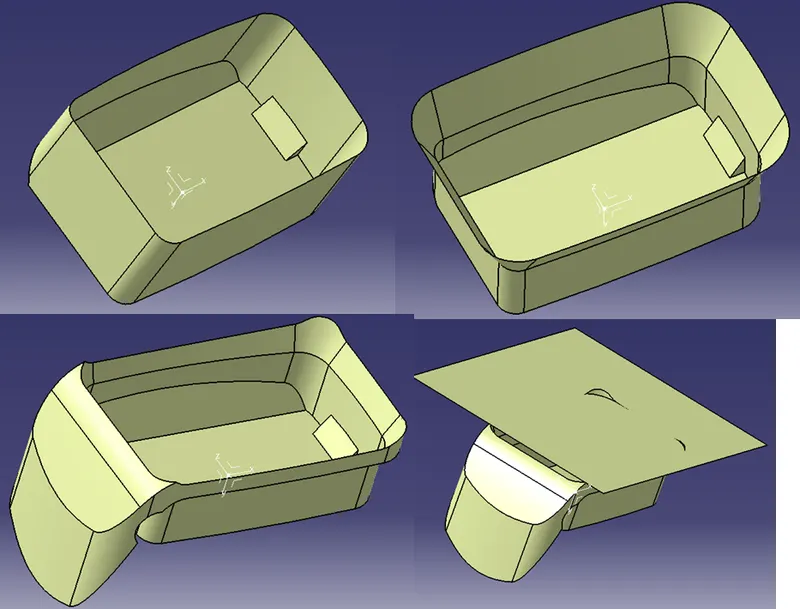
After all the fillet values given will get the final Class B surface.
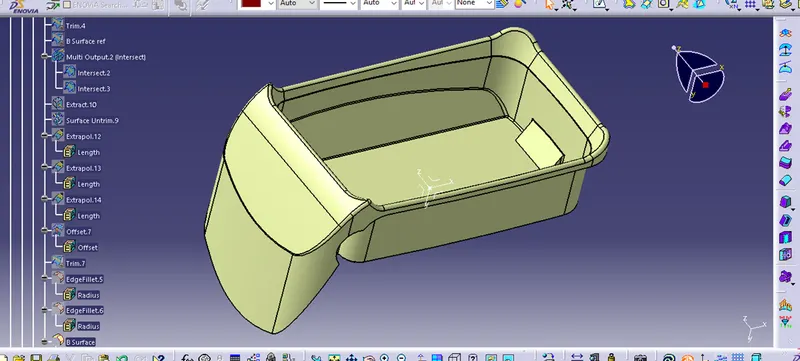
STEP 3 :Creation of C surface from class A surface
in this we have Followed a new method Sweep along the bundary with reference to surface.
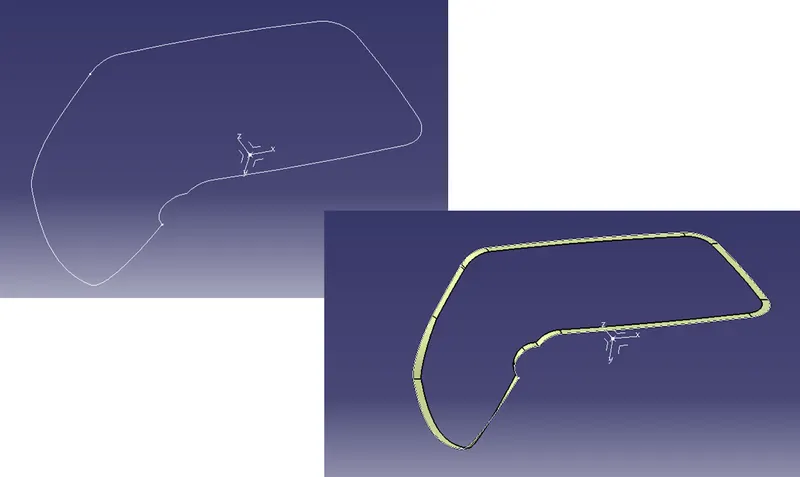
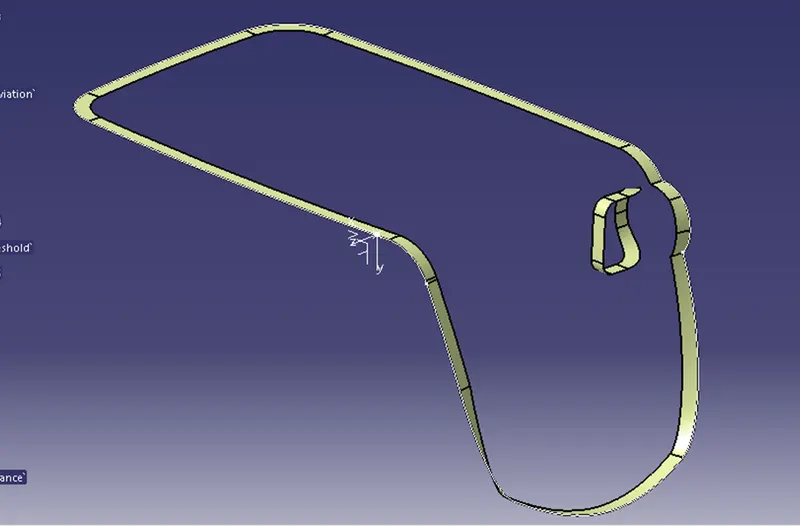
And the same operation is carried out with with the slot
STEP 4 : FINAL JOINING
First trimming operation is with Class C surface with B suraface, and final fillets values are given.
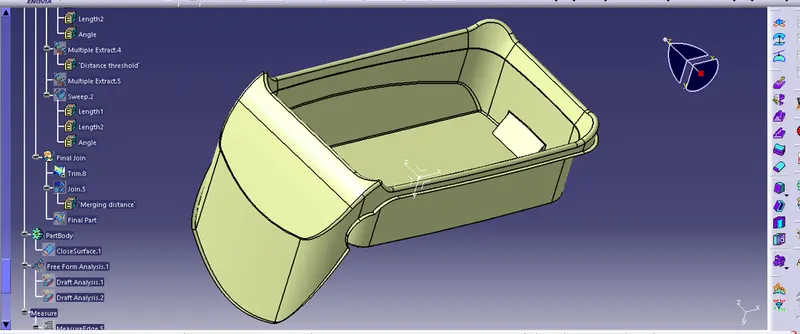 Then this will be joined to Class A surface
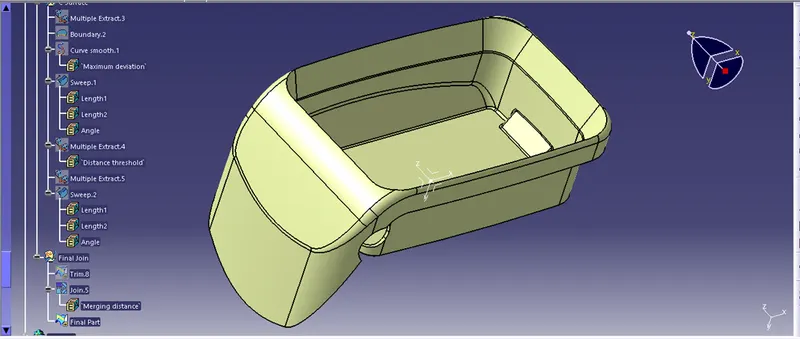
Form the Final body checking the boundary condirion
In part body making the surface into solid body.
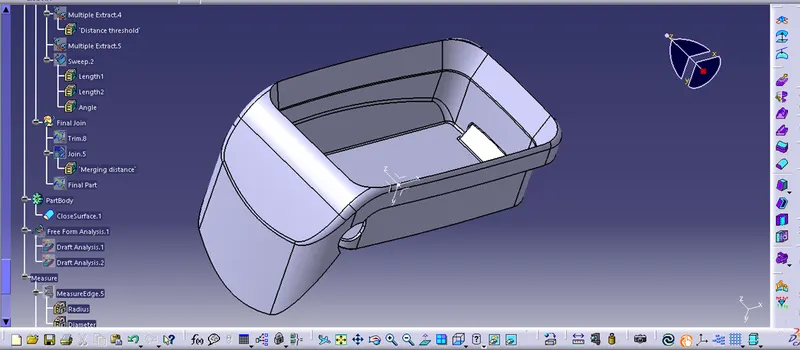
STEP 5 : DRAFT ANALYSIS ON THE PART BODY
A draft analysis carried out on the final part body along with the tooling axis.
STEP 6 : PUBLICATION
All the importent surfaces are published for easy acess.