Week 8 - Challenge 3 - Switch Bezel Design
SWITCH BEZEL:
OBJECTIVE :
From the given SWITCH BEZEL class A surface we are going to extrace Soid part body of 2.5 mm thickness and performing all the daft analysis on the solid part.
This Submission consists of following elements
1. Geometrical sets For the complete solid part creation
2. Draft analysis on the Class A Surface
3. Tooling axis creation
4. Creation of Class B surface from class A surface
5. Creation of Class C Surface
6. Final Joining and close body
7. Draft analysis on the Final solid part
8. Publication
1. Geometrical sets For the complete solid part creation
Following will expalin the complete tree structure with all the operation on the given surface.
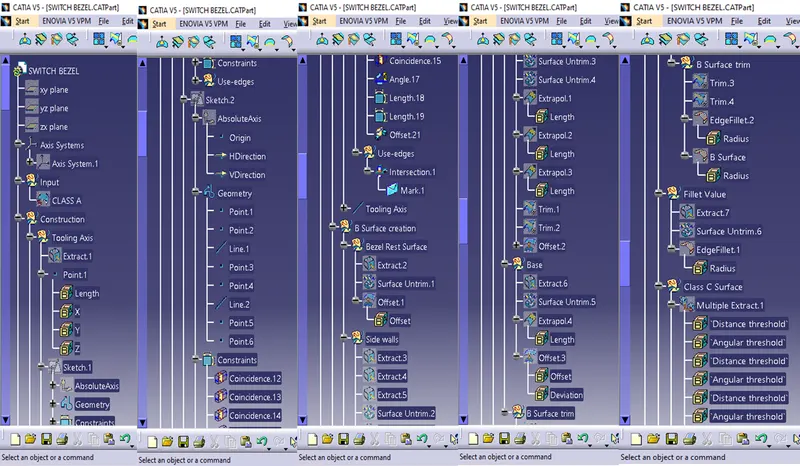
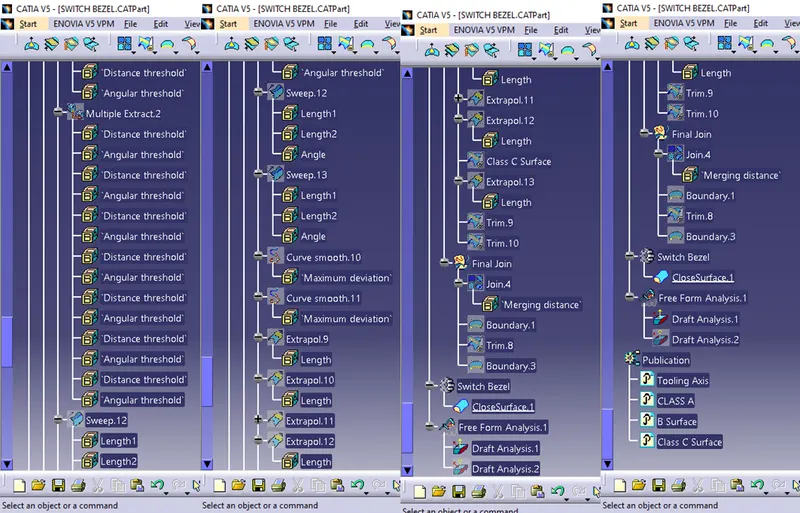
2. Draft analysis on the Class A Surface
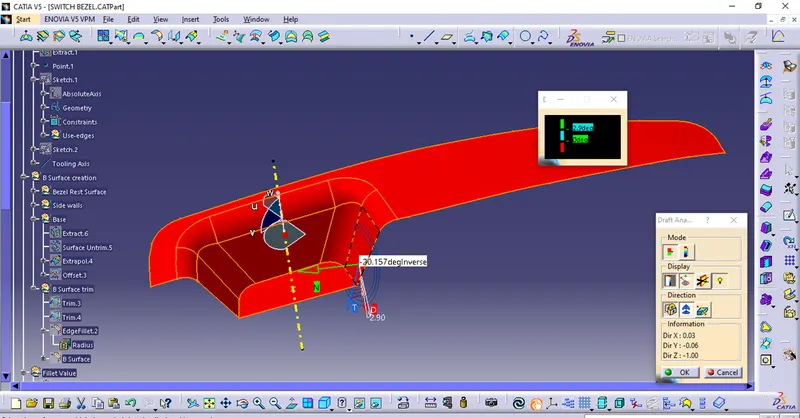
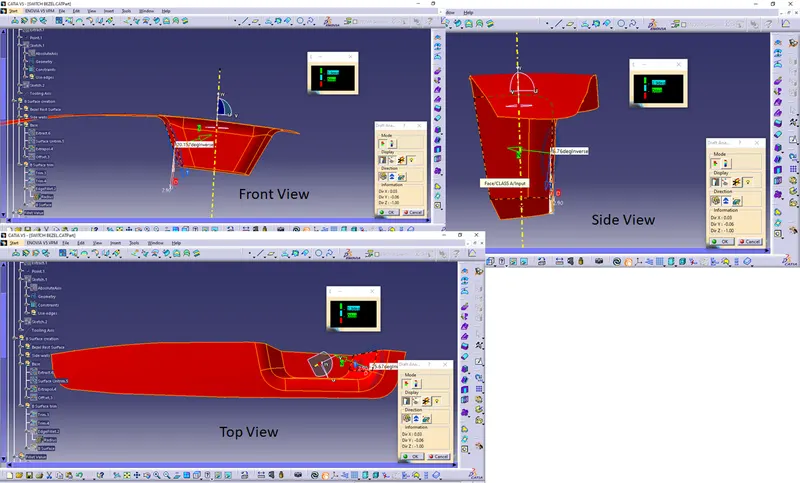
On selecting class A surface performed hte draft analysis along the tooling axis, we have got the following results.
Draft analysis in different orientations.
Iso matric View
Front,Side and Top views
3. Tooling axis creation
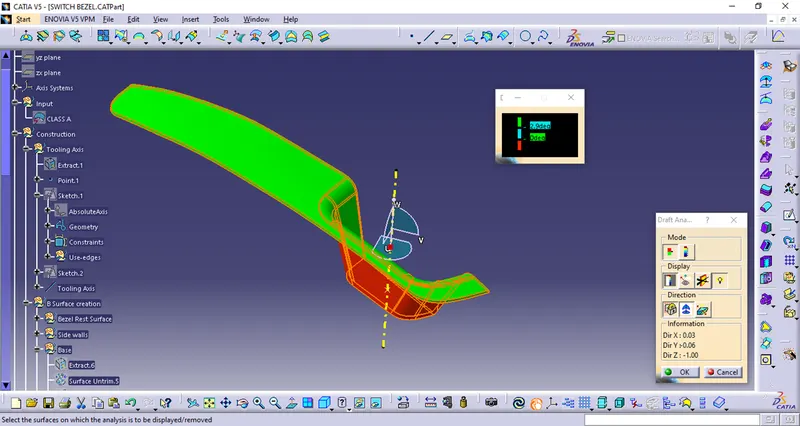
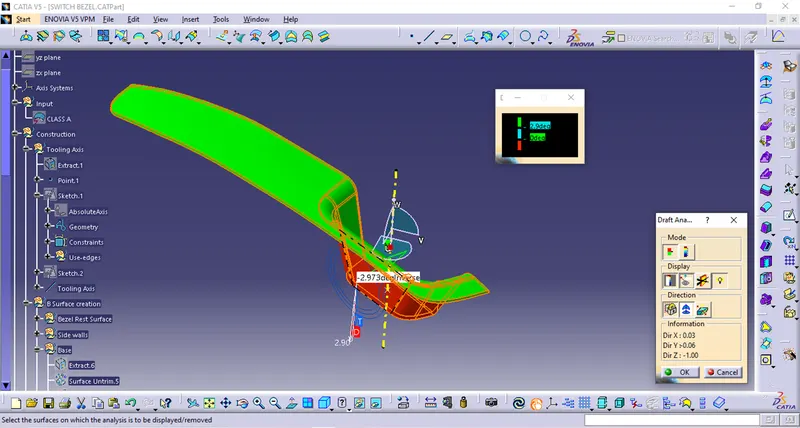
As we have 3 walls of the handle we have to perform the Bisection mehtod to get the tooling axis.
First a point is created in the base with Point - direction Command on the base surface which is extracted form class A surface.
Then by intersection method on the Y direction will create an bissecting line.
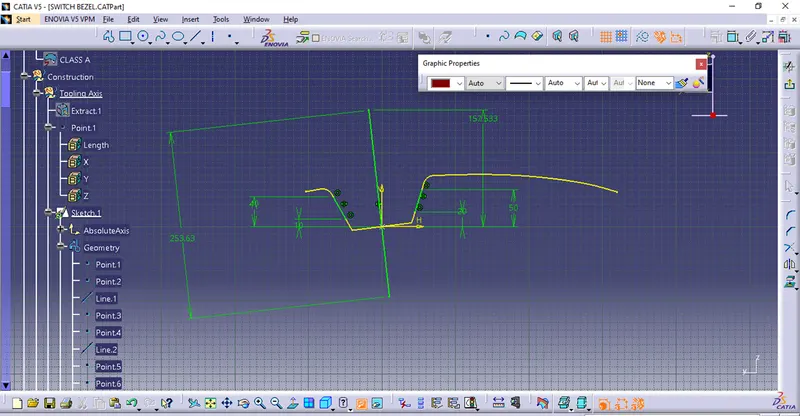
And the same is continued on the X direction also
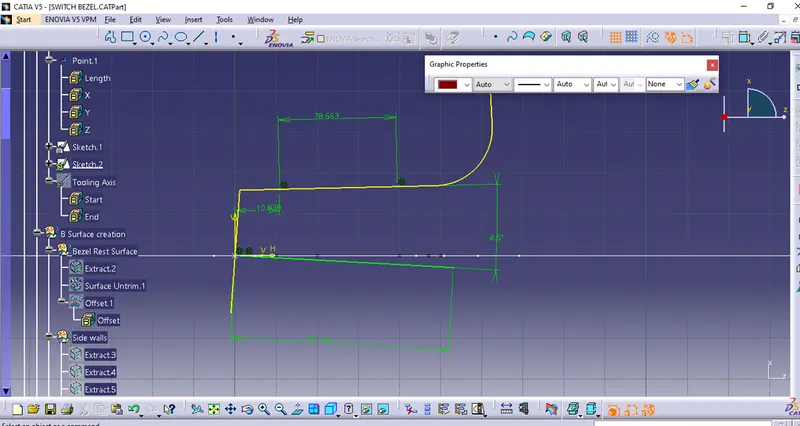
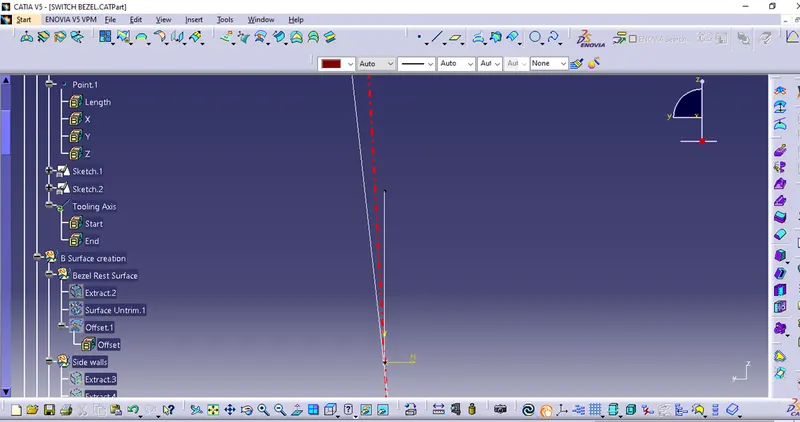
With these two lines with Bisecting method we have achieved the tooling axis.
4. Creation of Class B surface from class A surface
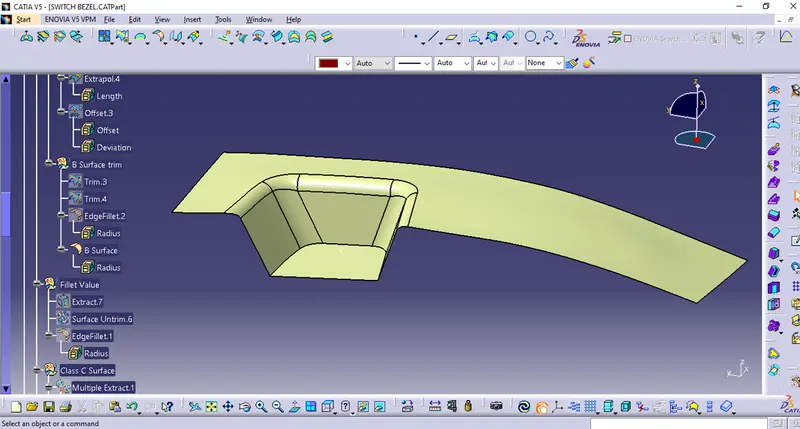
From the Class A surface step by step all the surfaces are extracted and them Untrimmed
and extrapolated with som diemtion
Them Offset each surface by 2.5 mm by hiding the parent plane
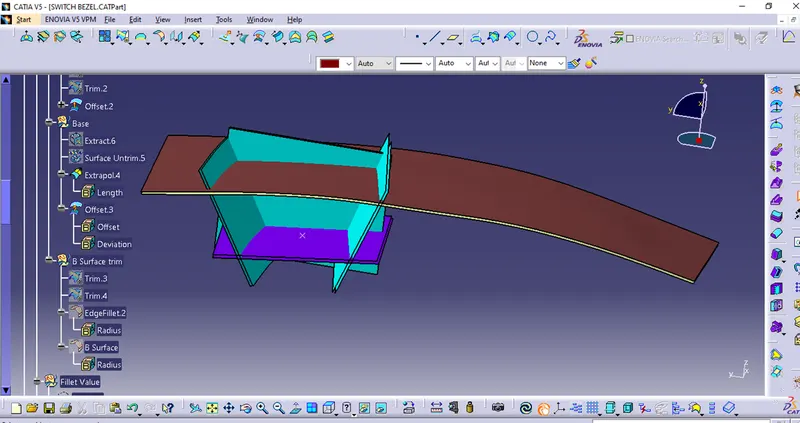
All the Offseted planes re trimmed to get an appropriate B surface
The for Side wall corners an fillet value od 17.5 is given and the top corners 11.5mm hadd given to get the Uniform wall thickness.
5. Creation of Class C Surface
Then next step to crate the C surface,from cllass surface extract the boundaries with Multiple extract command.
Then SWEEP the boundary with minimum Draft anfgle 3mm. as the surfact has lot of distrubing lines make the surface smooth with smooth command with the minimum value of 0.001mm.
Then by checking the boundaries if it satisfies with a single boundary ithe wise change the smoth curve value with maxium 0.003mm with all triels a class C is created along the tooling direction.
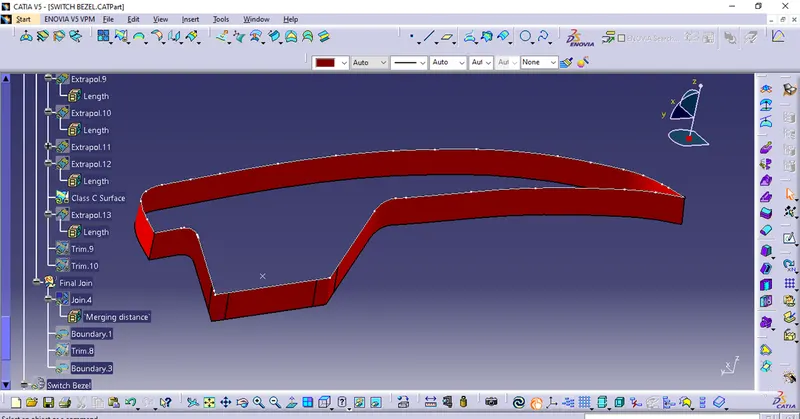
For this perticular case the object is not satisfing the boundary command with the maxixmum smooth curve vlue 0.003mm, so to avoid this we have extrapolated the class surface by a minimul value of 0.5 mm then replace this trimmed surface with the class surface then trimmed with class C surface.
Joining od Class C surface with Class A surface.
 6.Final Joining and Closed Body
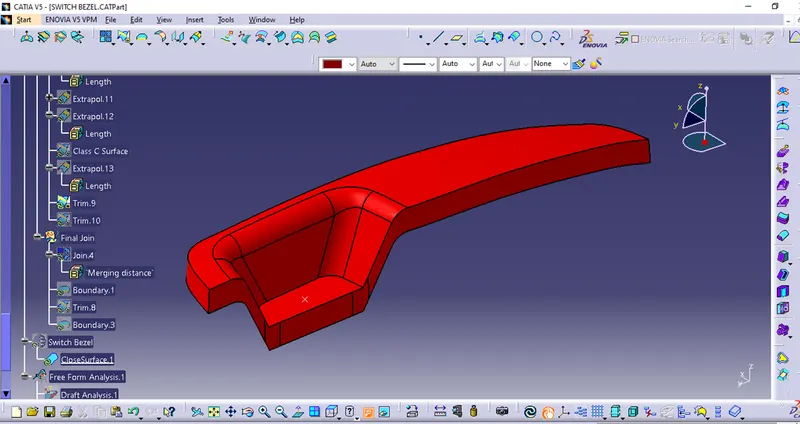
Now we have all the three surfaces A,B and C
We have alredy joined Class A and C surfaecs so by final trimming of these surfaces with B surface will give us the final Surface Body.
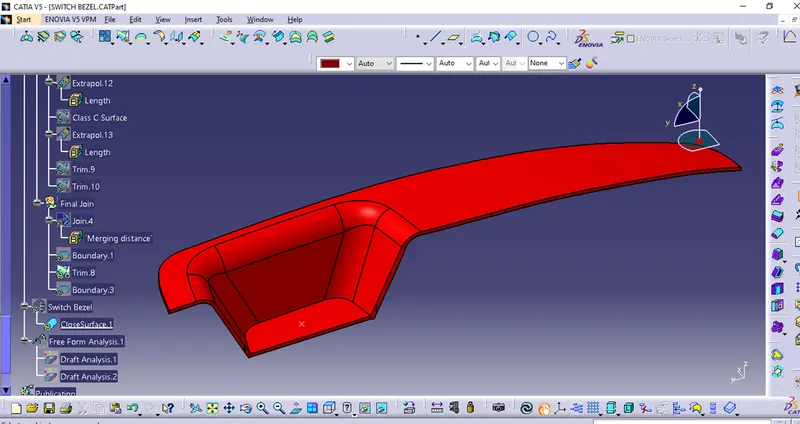
Then in the part workbench make the surface part to part body with thickning option.
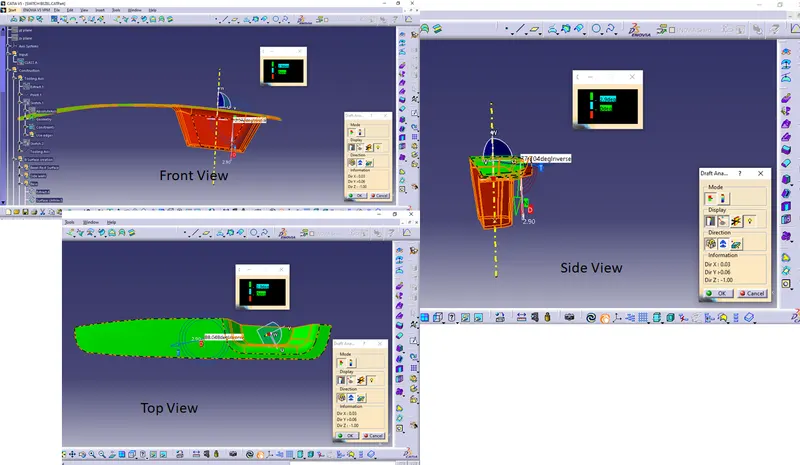
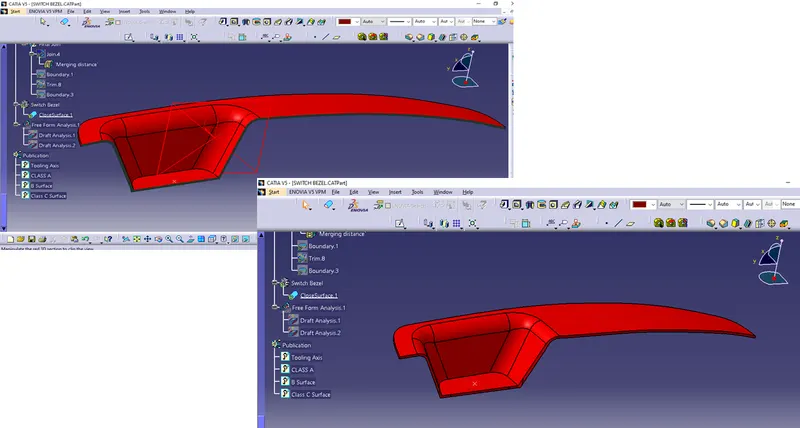 7.Draft analysis on the Final solid part
Draft analysis if prformed on the part body as same as the class A surface
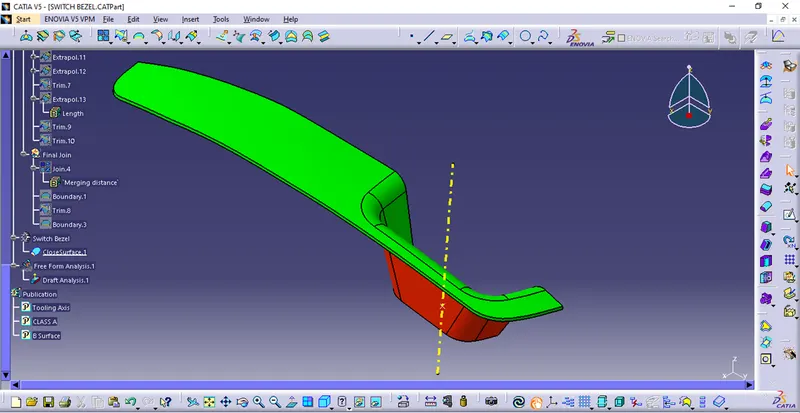
Draft angle is set to 2.9 and more is in green colour
0 degree in blue colour
less than 0 degree in red colour
and detailes colour structure is given on the images.
8.Publication
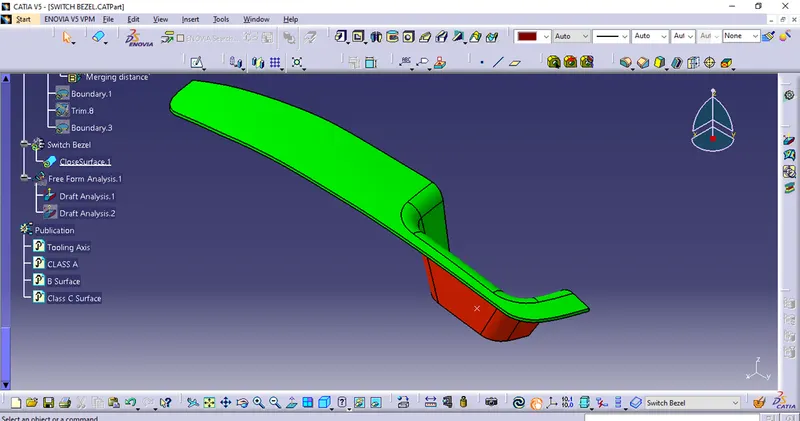
Publicatin is the part of the tree structure which higlights the importent objects.
In this part tooling axis,Class A surface,Class B surface and class C surface is published.
Conlusion:
In this perticular we have performed all the operations to create the final solid part body from the class A surface with 2.5 mm thickness and we have notied that with the smooth curve option the boundary command is not satisfing with on biundary on taking the maximum smooth curve value of 0.003mm, so to solve it we have exttapolated the class A surface by minimul value the trimmed. So we have cleared the error caused by bounday and created the solid part body as an output.