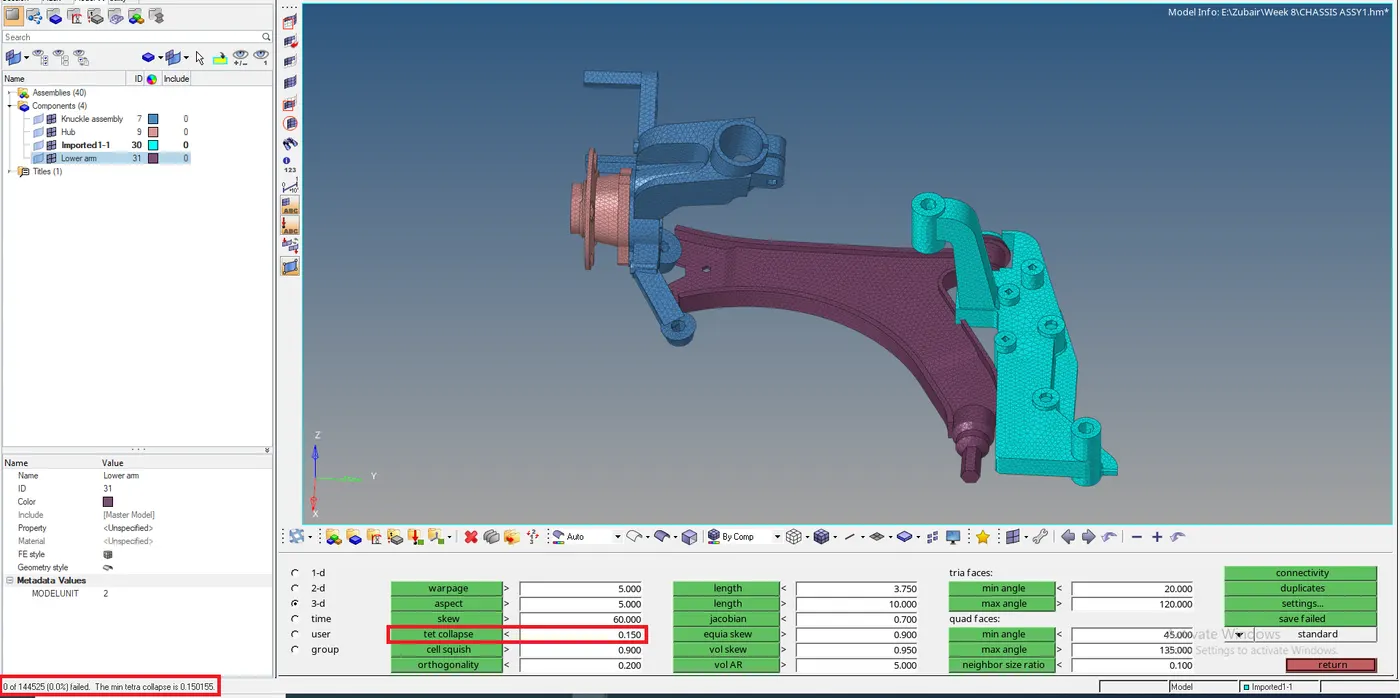
Preprocessing (3D Meshing) Hub housing, Crank housing and chassis assembly using tetra mesh in Hypermesh by Altair.
Objective: To perform a 3D mesh on three diffrent models with three different methods while focusing on resolving tet colapse.
- 2D to 3D
- Quick tetra
- Volume tetra
Procedure:
1. HOUSING
Step1: Import the .STEP geometry Housing file from import solver deck. (refer figure 1)
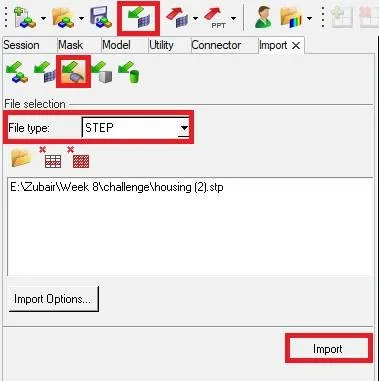
Figure 1.
Step 2: Switch to BY 2D TOPO from GEOMETRY COLOR MODE, that is in Visualization Tab. As shown below in (refer figure 2)
Figure 2 .
Step 3: Since on the first model Housing we will be doing 2D to 3D meshing so wee need to delete the solids. from Topo view it is evident that the inner model has solids so we will delete solids. (refer figure 3)
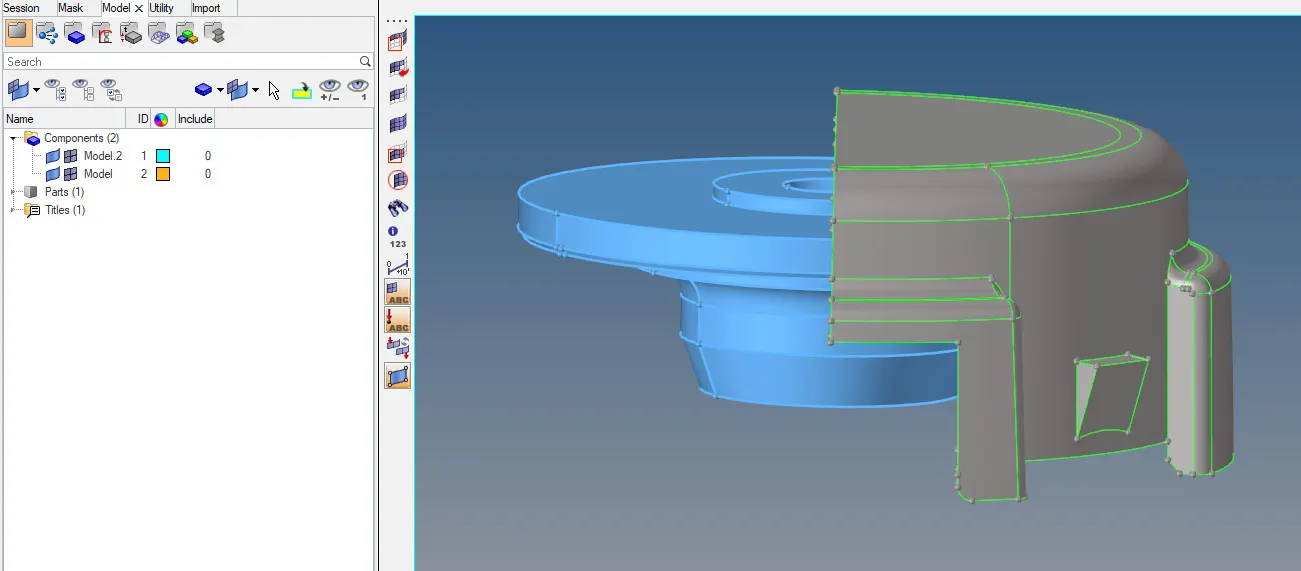
Figure 3 .
Step 4: Cleanup Geometry. clean geometry for both inner and outer component.
Step 5:From criteria setting put in the value of minimum length max length and target value.
Step 6: Go to auto mesh ( shortcut: f12) and first mesh on outer component by hiding the inner component.
- Select surface> displayed
- Give element size as 5mm
- Give mesh type as tria and select MESH. (refer figure 4)
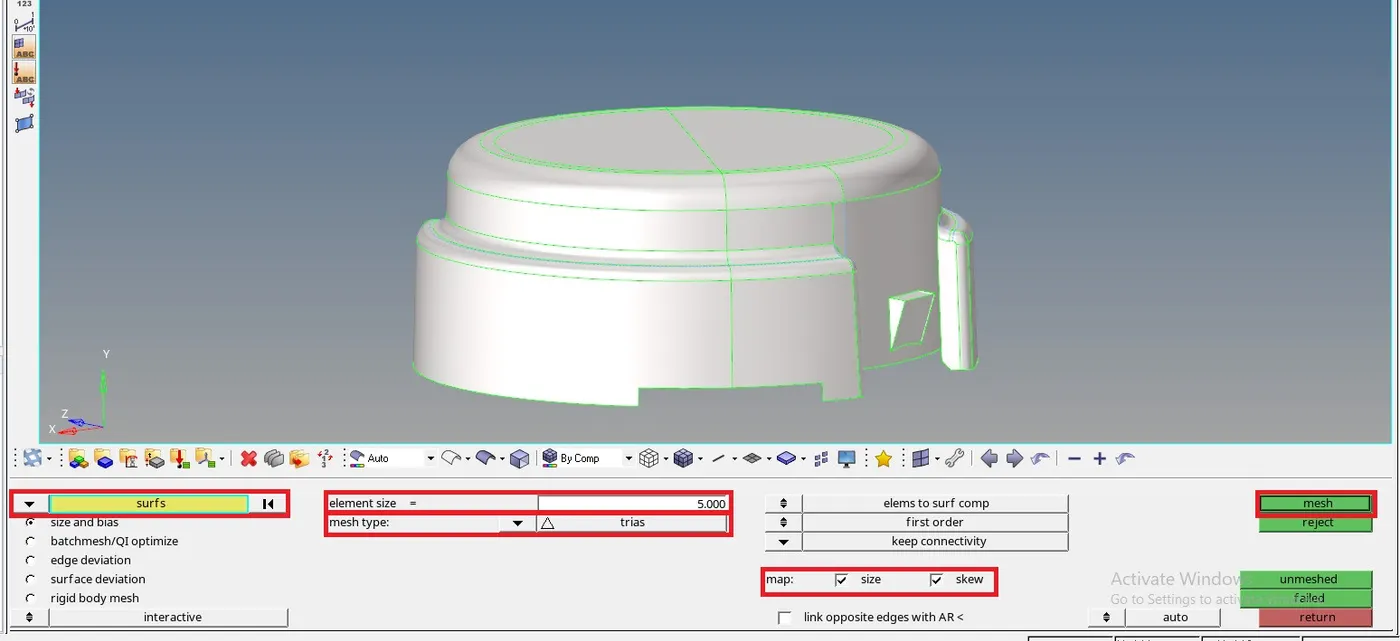
Figure 4 .
Step 7: After 2D tria mesh look for quality and resolve for minimum and maximum length.
Step 8 : Go to 3D> Tetramesh
- Select first option TETRA MESH
- From Fixed trias/quads to tetra > elements> displayed.
- Select MESH. (refer figure 5)

Figure 5 .
Step 9: After 3D tetra mesh go to TOOLS>CHECK ELEMS (shortcut: f10) >3D check tet colapse. (I had 127 tetra elements failing for tet colapse.) (refer figure 6)
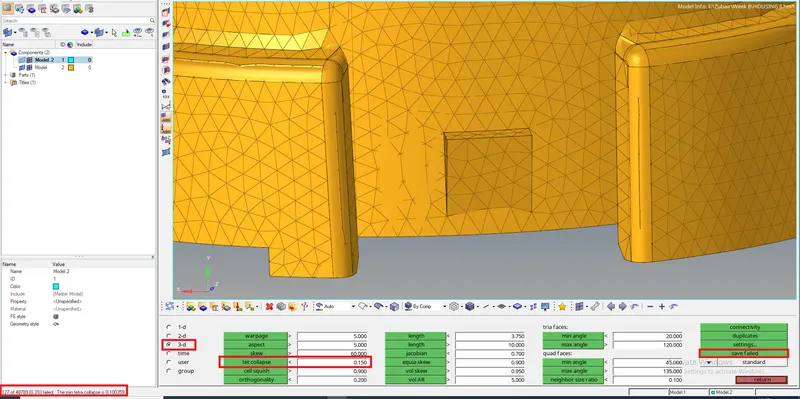
Figure 6 .
Step10: Since it will take too much time to resolve 127 tet colapse so remeshing will help reduce these failing elements. to remesh go to 3D> TETRAMESH> Tetramesh parameter
- Tick in the checkbox fill voids, fix midnodes, smoothing.
- Give tet colapse value 0.15 (given for this challenge) (refer figure 7)

Figure 7 .
Step 11: After giving parameters go to Tetra remesh.
- In 3D elements select elements by config
- In config select Tetra4 as we have tetra with 4 nodes.
- Select the select entities.
- In 2D baffle elements select by config
- In config select tria3 as we have tria with 3 nodes
- Window select the elements and REMESH. (refer figure 8 a and 8 b)
Figure 8 .

Figure 8 (b) .
Step 12: Go to TOOLS>CHECK ELEMS (shortcut: f10) and check fot tet colapse again. This time it is zero. similirly mesh 2D to 3D for INNER HOUSING as well.(refer figure 9)
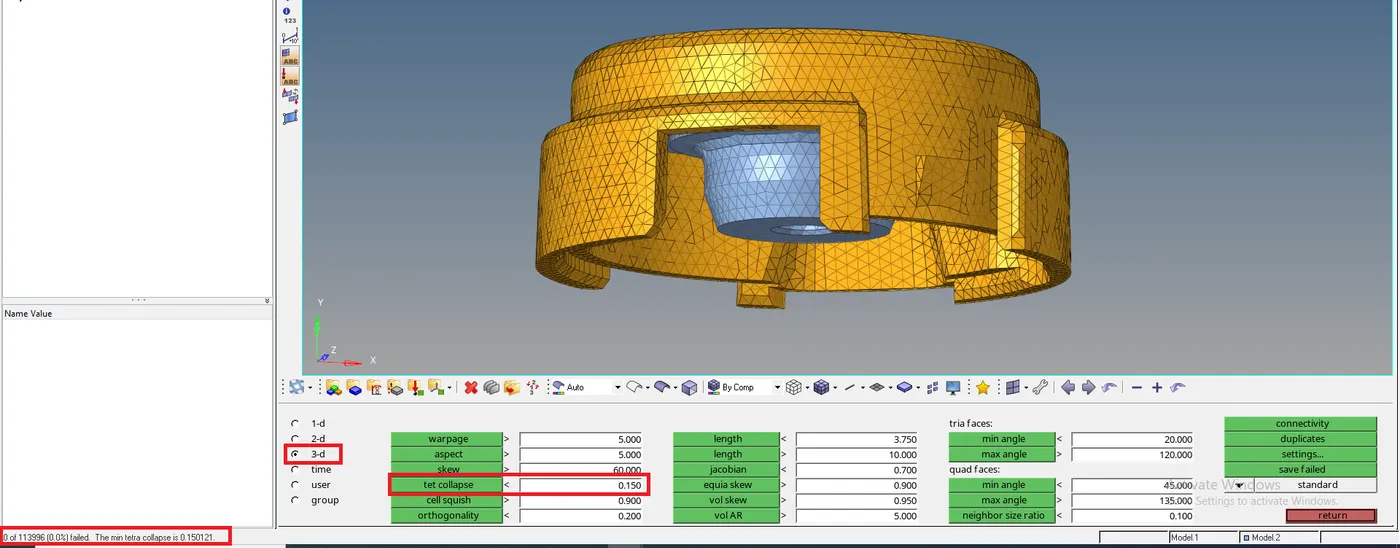
Figure 9 .
2. CRANK HOUSING
Step 13: Import the .hm file model from import solver deck. (refer figure 10)
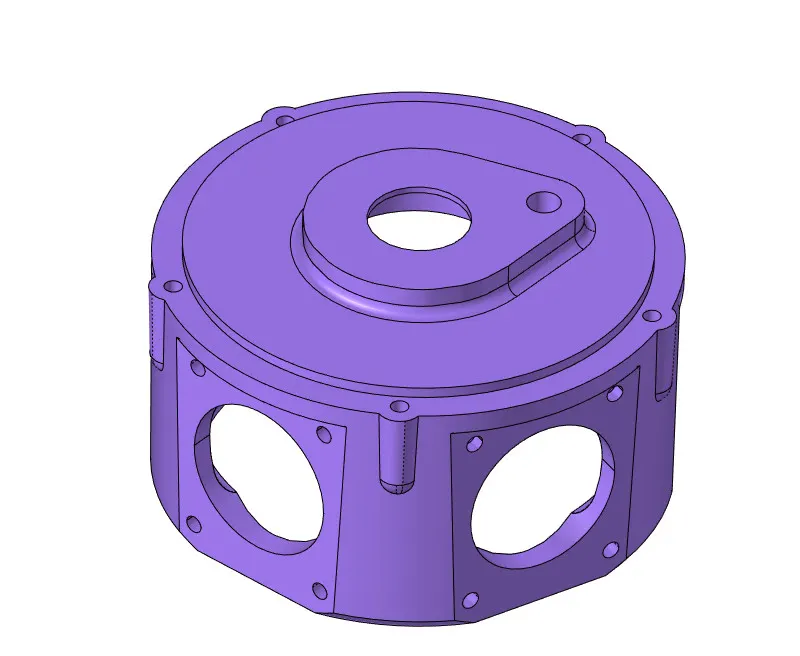
Figure 10 .
Step 14: Clean the geometry if needed.
Step 15: Go to View > Browsers > Hypermesh > Utility (refer figure 11)
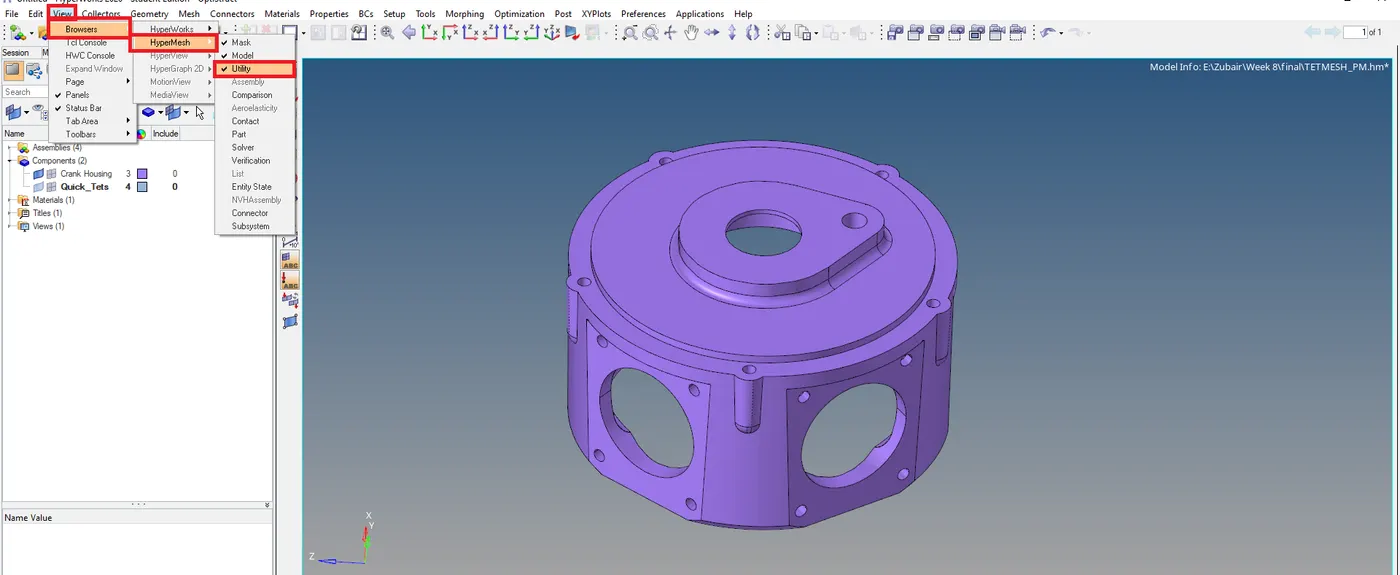
Figure 11 .
Step 16: From the menue prompt select Geom/Mesh and select Quick TetraMesh. (refer figure 12)
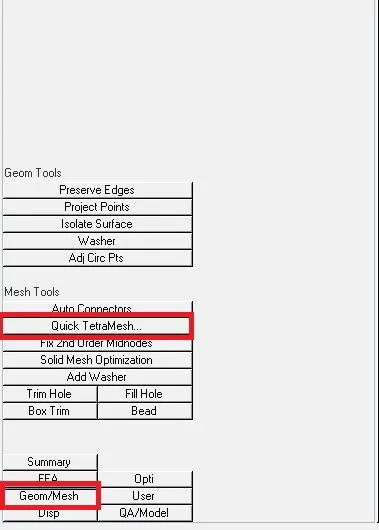
Figure 12 .
Step 17: We know minimum element size, mesh size
- Select mesh type as Trias only
- Fom volume complist select components. On clicking components a window will prompt at bottom. (refer figure 13)
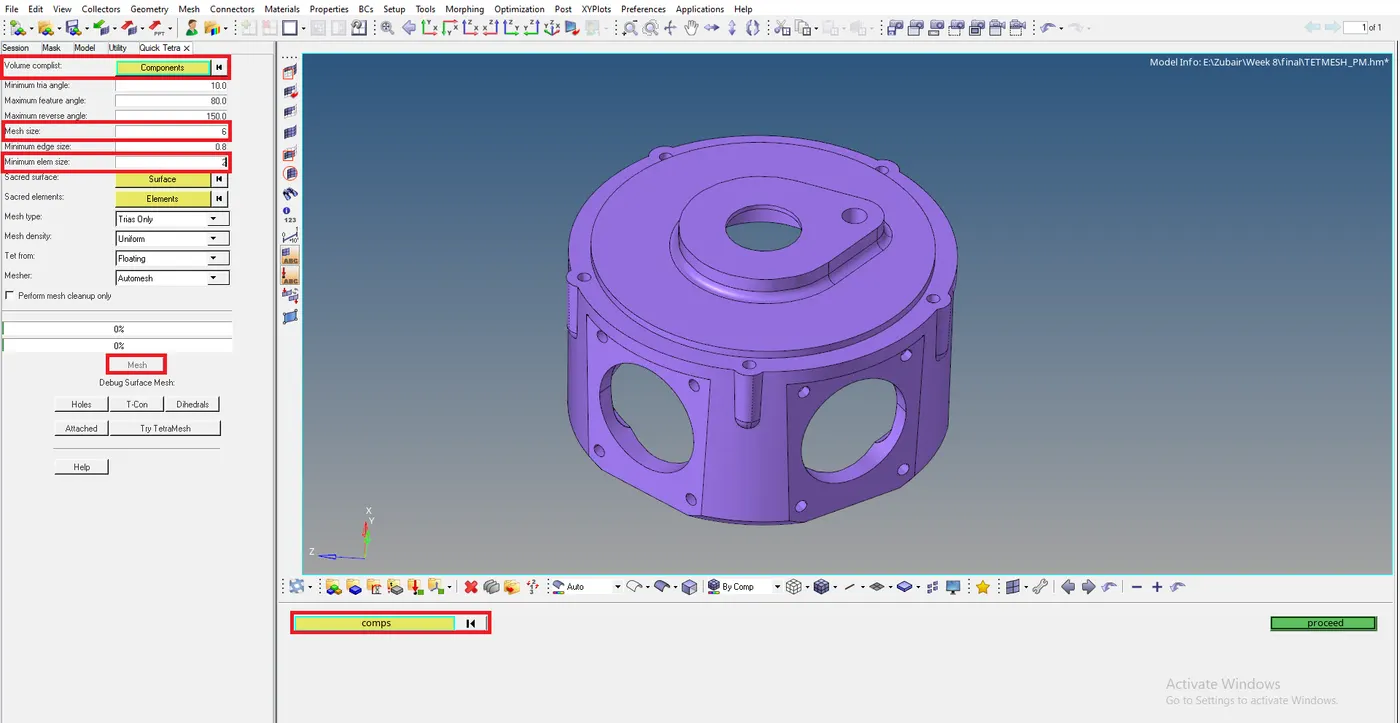
Figure 13 .
Step 18:
- Select comps. select Crank Housing checkbox and click on select.
- After selecting comps give mesh and wait till it meshes. (refer figure 14)

Figure 14 .
step 19: After meshing go to TOOLS>CHECK ELEMS (shortcut: f10) and check fot tet colapse. I had zero tet colapse.(refer figure 15)
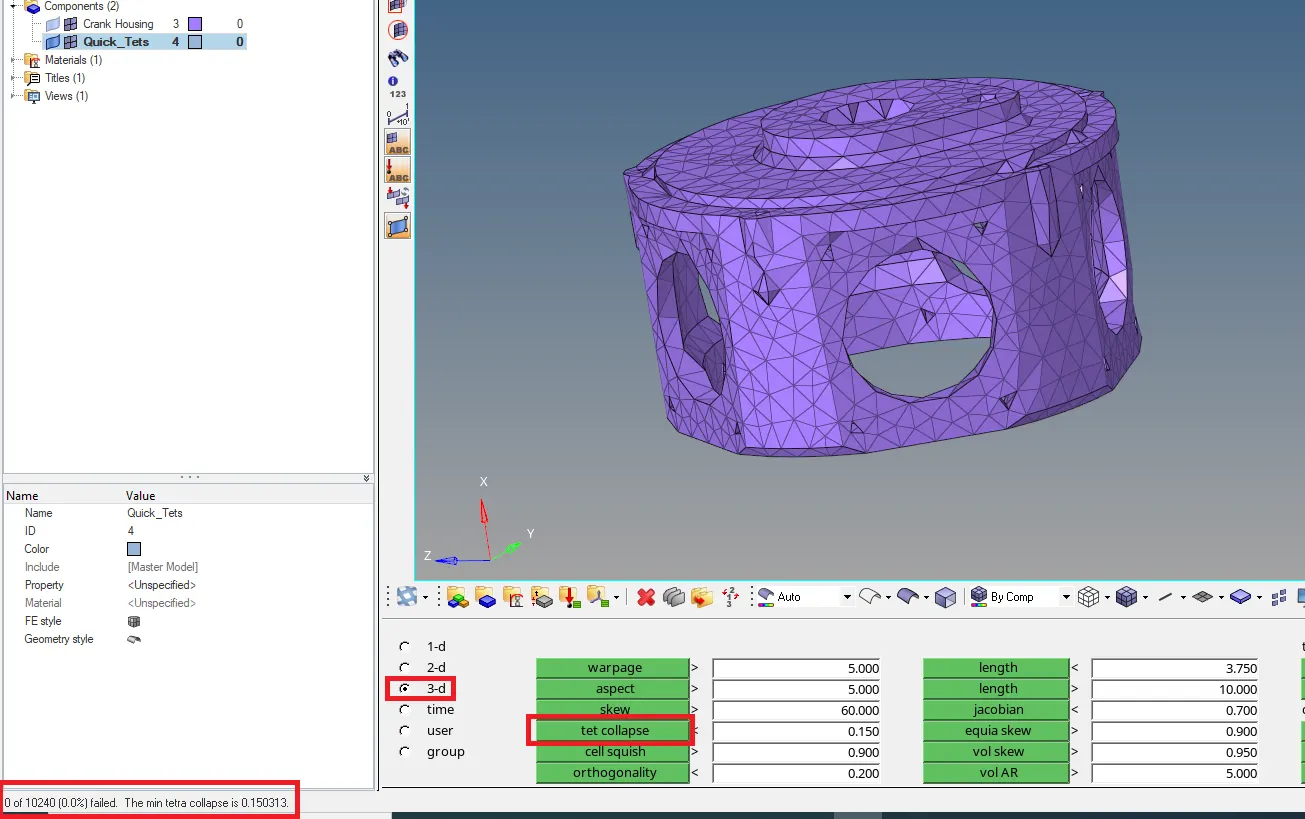
Figure 15 .
3. Chassis_assembly
step 20: Import the .igs file model from import solver deck. (refer figure 16)
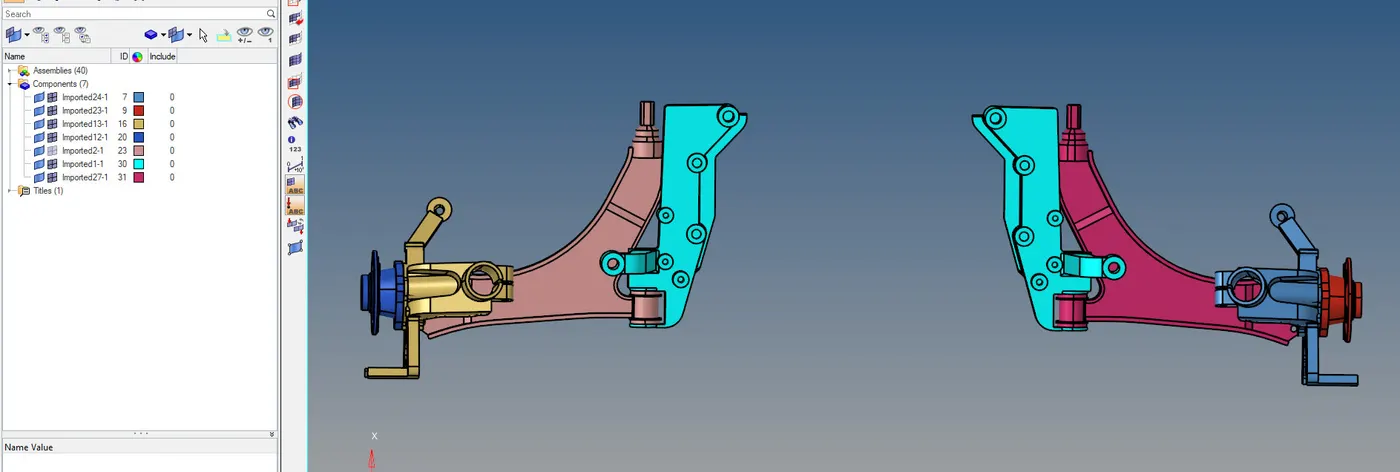
Figure 16 .
Step 21: Delete half of the symmetric components just by delete option (shortcut: f2). delete solids from window selection and then delete surface from window selection.
Step 22: From delete option select comps >preview empty
you will see number of empty components at left corner of screen. select delete entity. (refer figure 17)
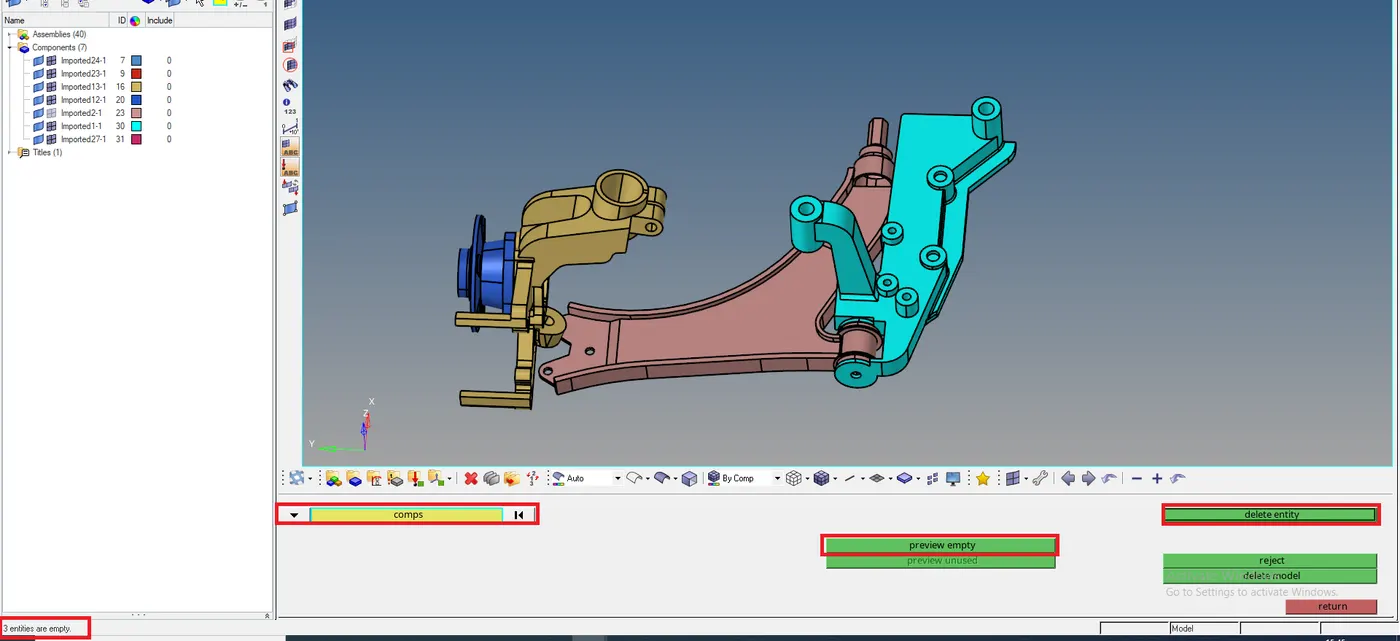
Figure 17 .
Step 23: Since we have 4 components left that are Hub, Kunckle,Lower arm and body assembly. starting with Hub cleaning geometry and since we have teeth which can cause many elements fail so we need to delete teeths.
Step 24: First delete solids from hub and then delete teeths surface. after deleting teeths there is surface left open and to fill or create surface, just extend the surface and create.
mask the surfaces so it gets easy to work on. Go to Geom>Surface edit (shortcut f12) and select the Extend option
from max extension switch it to extend over edges. select the lines to extend over and select surface to extend. (refer figure 18)
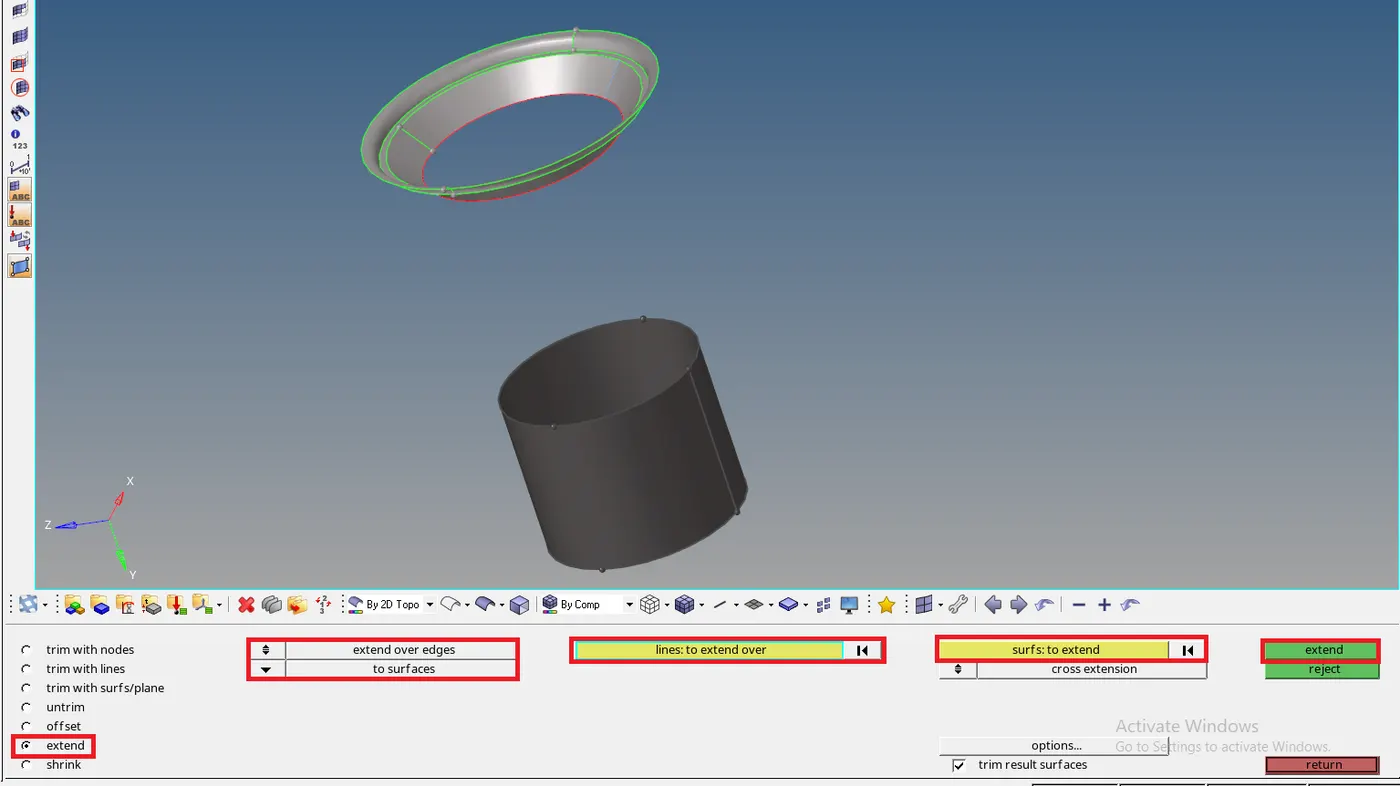
Figure 18 .
Step 25 : After geometry clean up perform a 2d mesh and then 3D mesh as we did in 1st Housing component.
Step 26 : Isolate the Knuckle model and clean up the geometry.
Step 27: Go to 3D> TETRAMESH> Volume tetra and select the solids
- Tick in the checkbox Use curvature & use proximity.
- In 2D type select trias
- In 3D type select Tetras
- Give minimum elem size as 2
- Give element size as 6 and select MESH. (refer figure 19)

Figure 19 .
Step 28: After meshing go to TOOLS>CHECK ELEMS (shortcut: f10) and check fot tet colapse. I had few tet colapse and resolved them manually.
Step 29: Do same procedure for the rest of other two components.
Conclusion: 2D to 3D tetra mesh is preffered if proper mesh with qualty is needed as it allows to have good 2d mesh and creates 3d from 2d and allows to remesh 3D elements with 2D baffle elements. Quick tetra is used when a corse mesh needed in short time
Learning outcomes:
-All the three types of meshing based on quality and time given.
- Resolving Tet colapse.
- Remeshing large number of tet colapse instead resolving them individually.
Final image: