Week 6-Meshing of Hood Challenge
AIM: To mesh the hood( or bonnet) component with the mentioned quality criteria, and to seperately extract midsurface and mesh the hood components such as latch, hinge, outer panel and inner panel.
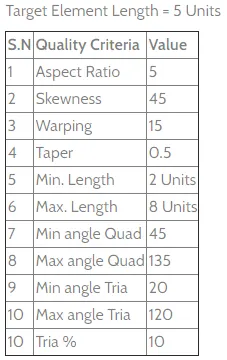
Target element length: It is the size of the element with which the meshing is precisely done on any component.
Aspect ratio: It is the ratio of maximum element edge length to the minimum element edge length.
Skewness: It occurs when the quad element when deforms or shrinks to lesser angles. The ideal value is 0 but less than 45degree is acceptable.
Warping: Warp angle is the angle between two planes of quad elements along the diagonal. Therefore the maximum angle allowed between the two possibilities is called warp angle. The ideal value is 0 but less than 10 is acceptable. The warp is not applicable for tria element.
Min. length: It is preset value and it is useful to avoid any zero length element. It is very important in crash analysis.
Max. length: It is preset value and above which the element fails in quality index. Thus every element formed will be between min and max element length.
Also, the min and max angle for quad and tria element is given and with that the elements have to be created with in the limits.
PROCEDURE:
- using the import option, import the model by giving the file type as STEP and place the model from downloads file HOOD.stp and click the import option to import the model to the working area.
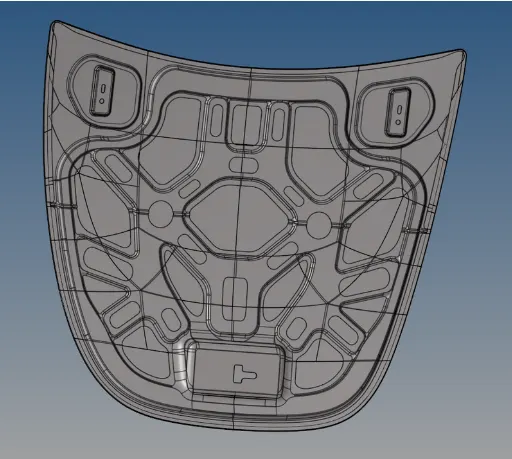
- The model consists of various parts such as latch, hinge, outer panel and inner panel. Save every part with seperate names and proceed with latch part.
- before starting, delete the solid surface for the entire model.
- delete the unwanted points using add/remove tool.
- unwanted lines already projected can be deleted using toggle edge tool, thus the mesh flow can be corrected and new mesh lines can be projected using split surf tool.
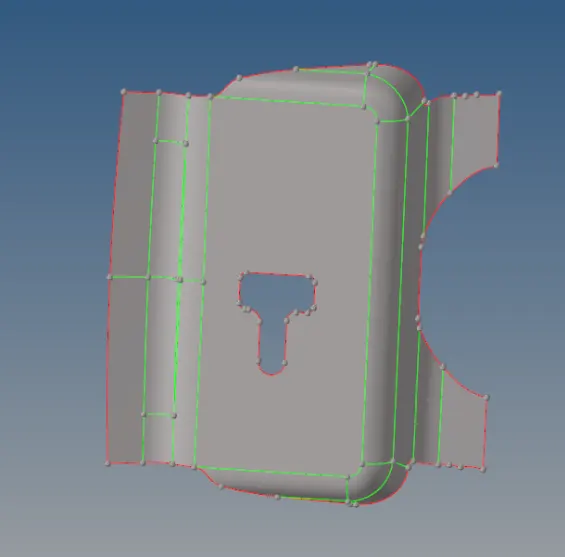
- then go for hinge part of the hood and mesh for only one part and another part can be meshed using reflect option.
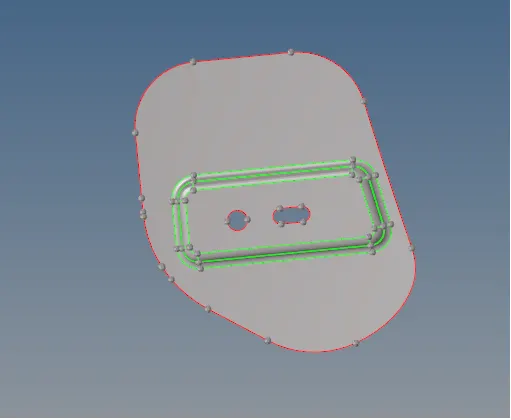
- then outer panel of the hood is taken and is cleaned by toggling unwanted lines and creating new lines with nodes.
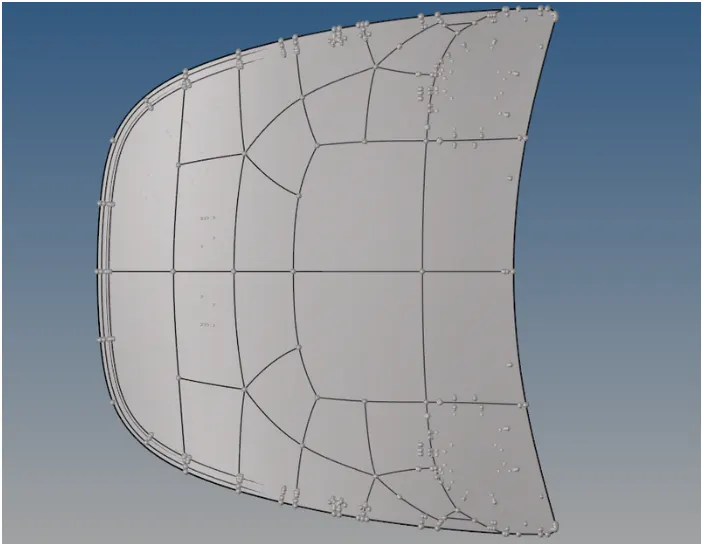
- then take half side of the outer panel of hood by using mask option from tool. Just select the surfaces which have to be masked and work with half side of the outer panel and later it can be done by using reflect option.
- for this, toggle the fillet edge lines and connect it directly to the mid lines. Here there will be two midlines on the entire outer panel, just make it one. Intersect all the other lines with single connecting path.
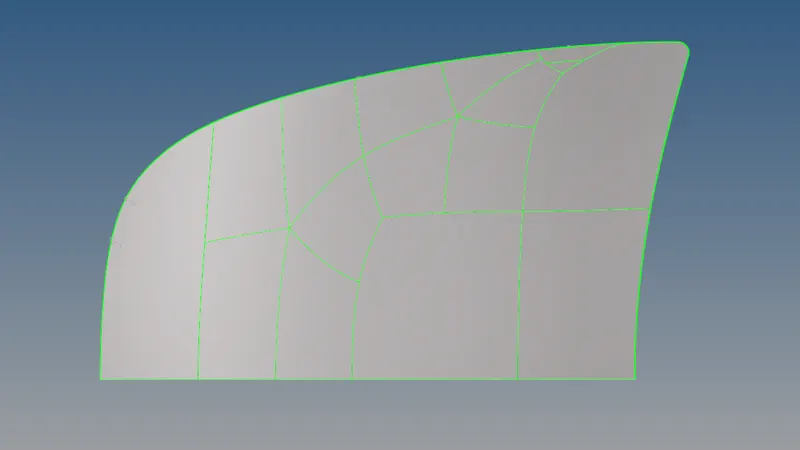
- toggle unwanted lines and generate new lines as if it does not create much tria elements when meshed.
Extracting midsurface
- before starting with, extract midsurface for every part by, Geom>mid surface and select the extraction option as skin offset. Here we using the skin offset in the extraction option because the skin offset will give a better mid surface in the region of fillet.
- Thus by this way midsurface is extracted for every parts before working.
geometry cleanup is one of the important work to be done before starting to meshing a new part or component.
- taking unwanted lines using toggle option in the geometric area for the part provides good mesh flow region and generate new lines using split surf option, thus it makes the part look easier to mesh and flow will also be good in that case.
- All the parts thus made perfect with geometry cleanup for good surface lineup and to maintain good quality criteria.
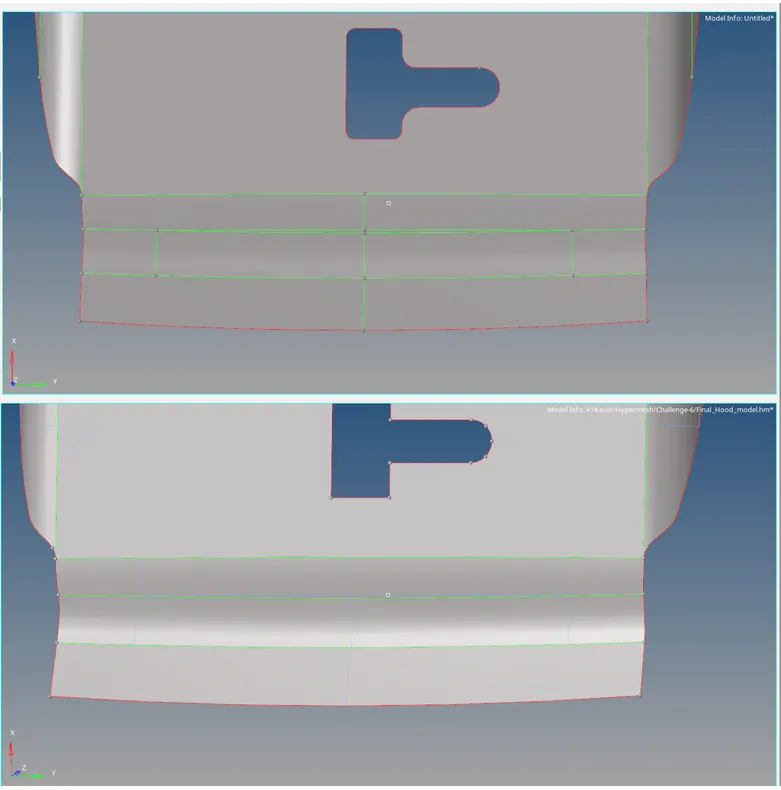
- thus like this, toogling option is used to clean up the part better and also for every parts in the component.
setting quality criteria
- By selecting the preference >file criteria setting> and enter the quality criteria values that are given by an instructor. The quality criteria values are shown below,
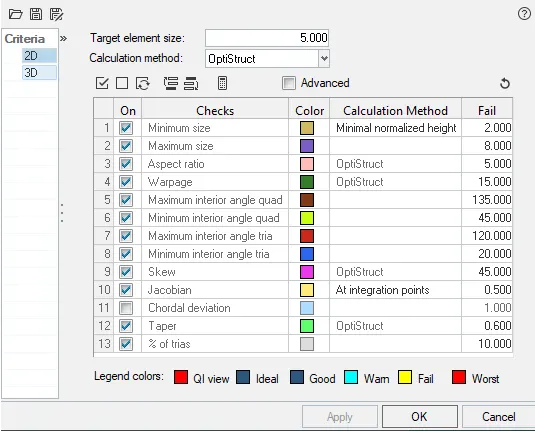
- thus, the values given by the instructor is set to the hood model and meshing can be proceed.
- when any of the quality criteria fails for the componenet it indicates for every criterias.
Meshing process
- Meshing is an integral part of the engineering simulation process where complex geometries are divided into simple elements that can be used as discrete local approximations of the larger domain. The mesh influences the accuracy, convergence, and speed of the simulation. Furthermore, since meshing typically consumes a significant portion of the time it takes to get simulation results, the better and more automated the meshing tools, the faster and more accurate the solution.
- To create the mesh for an individual component by selecting 2D>automesh>enter element size as 5mm and select the surface to create mesh on that mid surface of the component. The trais will be eliminated by clean up tools in the quality index. The tools are place node, smooth, drag trias, node optimizes, element optimize, split quad element, and combine tria element, etc. These options is used to remove, drag, combine the trais, and also used to clear the quality criteria.
- with geom>quickedit we use many tools here for cleanup of parts and areas of the component, the uses are to, toggle a line and to create a line, split any surface using node to node and node to line, replace point, add or remove point, deleting surface.
- with 2D, we use meshing tool, quality index mostly.
- from the meshing tool, we can set element size and select the type of mesh we need like keep it in mixed and meshing can be done for any parts by clicking on the surface option.
- we can even remesh on any meshed region again and again for better mesh flow in the selected region by using elements option before meshing.
- thus with this various tools the meshing can be properly done with respect to the given quality criteria.
- thus the flow should be uni directional for the trias created.
- trias should not be opposite to each other and connected with each other.
The resultant components are as follows:
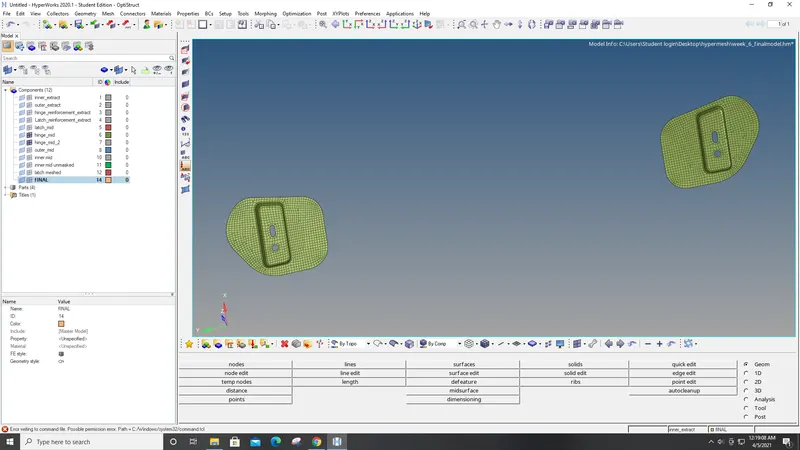
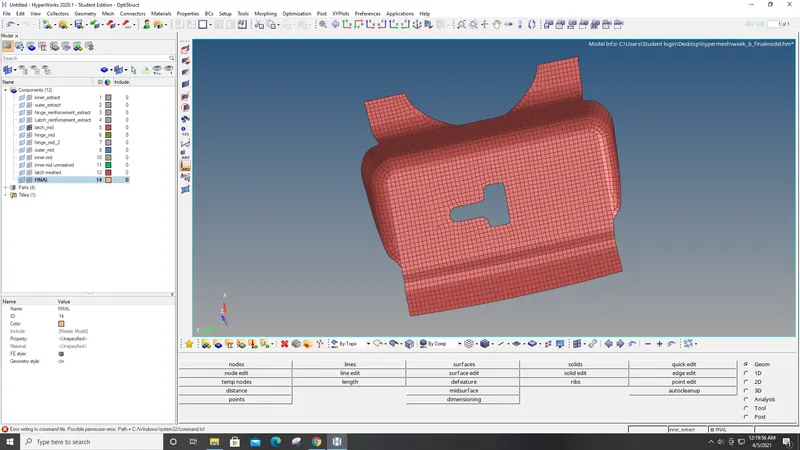
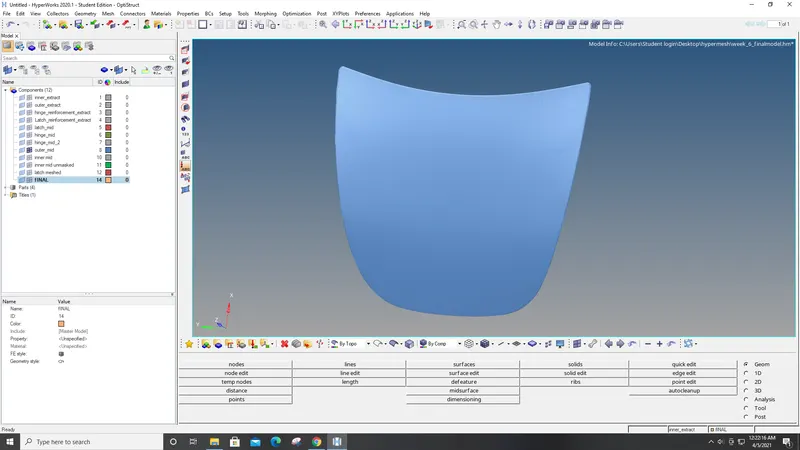
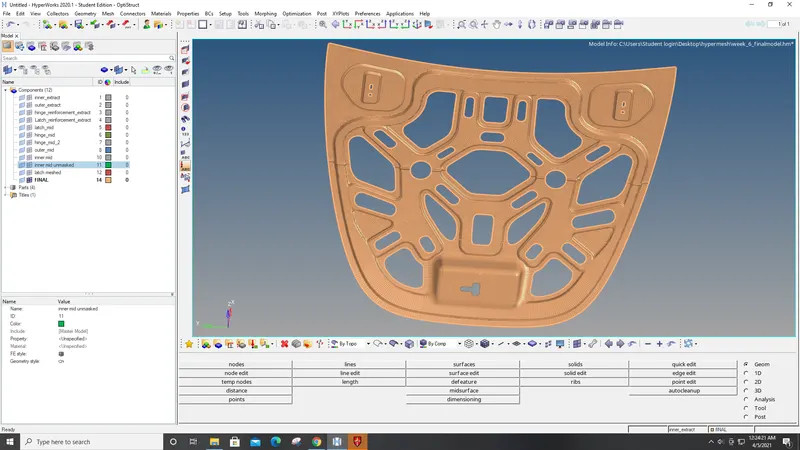
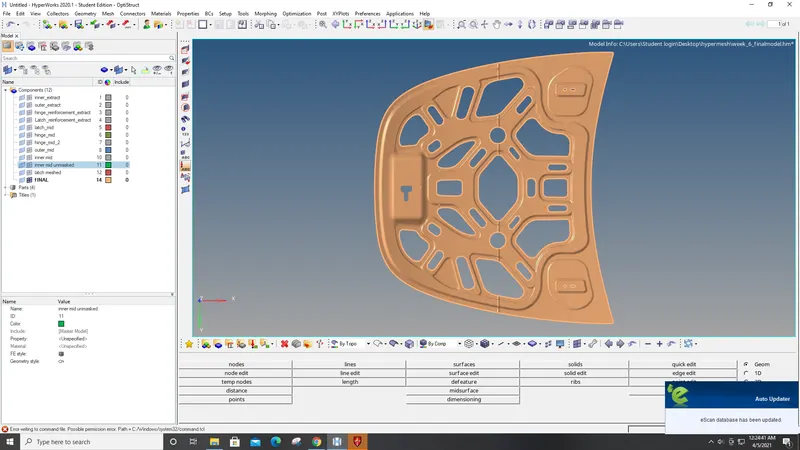
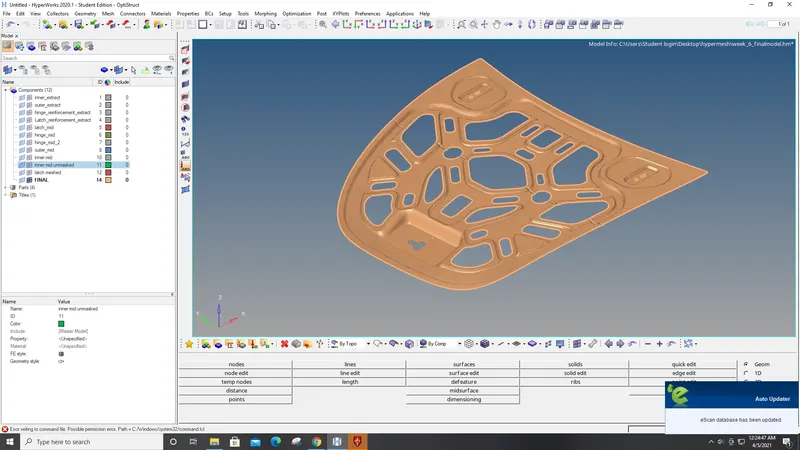
- thus by this the midsurface is extracted for the given component after geometry cleanup and meshing is done part by part for every component.