Week 6-Meshing of Hood Challenge
Meshing of the hood of the car using Hypermesh
INTRODUCTION
Making lightweight components and enhancing other efficiency parameters is the automotive industry's biggest concern. The design and development of a new hood assembly for increased hood assembly stiffness is the main emphasis of this effort. A car's hood is a significant part of the front section and serves a variety of functions. The outer panel, inner panel, latch system, and hinge system are the main four components of the hood assembly. The style department's exterior panel skin surface has a proper aesthetic appearance, gaps, and falseness. The outside hood panel complies with aerodynamic standards. The key functional component of the hood design is the inner hood. It is the most difficult and heavy component of the hood assembly. The inside of the hood was created throughout the vehicle's development to accommodate normal load cases. All cars, trucks, and other vehicles depend on their hood latch system. This system connects the hood assembly to the vehicle body. When the hood is opened and closed, the hinges also support and hold it. To ensure that the hood does not come into contact with other parts, they conducted a kinematics analysis.
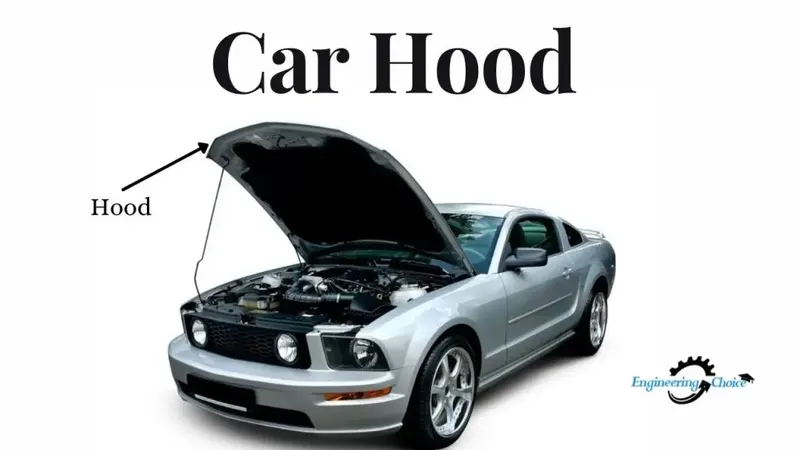
Figure-1 Detailed picture of the hood of the car
OBJECTIVES
For this assignment,
Follow the below-mentioned quality criteria, mesh the component given below and assign thickness:
Target Element Length = 5 Units
|
S.N |
Quality Criteria |
Value |
|
1 |
Aspect Ratio |
5 |
|
2 |
Skewness |
45 |
|
3 |
Warping |
15 |
|
4 |
Taper |
0.5 |
|
5 |
Min. Length |
2 Units |
|
6 |
Max. Length |
8 Units |
|
7 |
Min angle Quad |
45 |
|
8 |
Max angle Quad |
135 |
|
9 |
Min angle Tria |
20 |
|
10 |
Max angle Tria |
120 |
|
10 |
Tria % |
10 |
PROCEDURE
- The parent geometry is being imported by the import model option and changed into topo mode to get an assessment of the various parameters constituted in it. Since we found solids in green color which is unnecessary as we are dealing with 2D mesh with the component of uniform thickness. So we delete it and proceed with manual geometric clean-up.
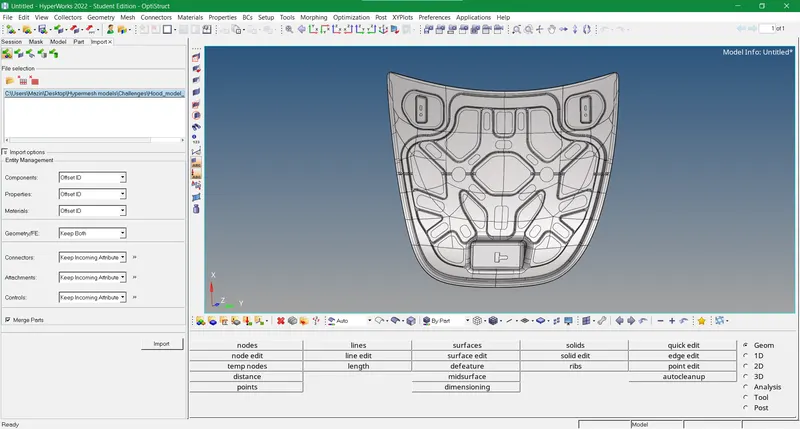
Figure-2 Import parent geometry in the hypermesh
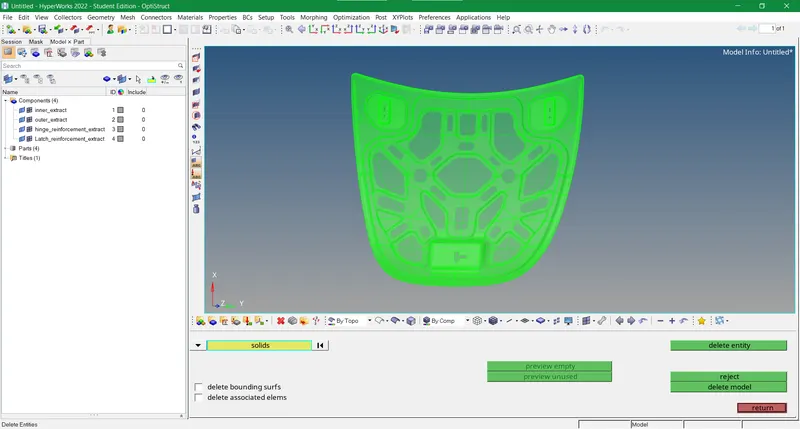
Figure-3 Solids are deleted on the geometry as they are not needed here
- There were minimal deformations in geometry so we initiated the auto mid-surface extraction for all 4 parts of the hood assembly. The thickness is uniform so we developed the mid surface for each model in separate components with ease.
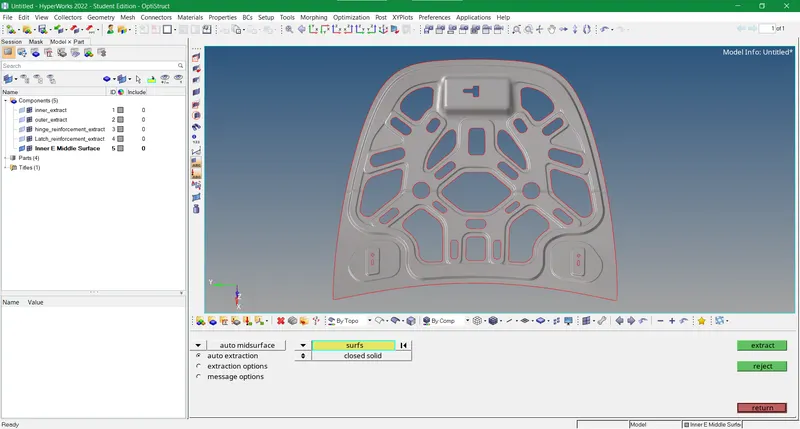
Figure-4 Mid surface generated for Inner extract
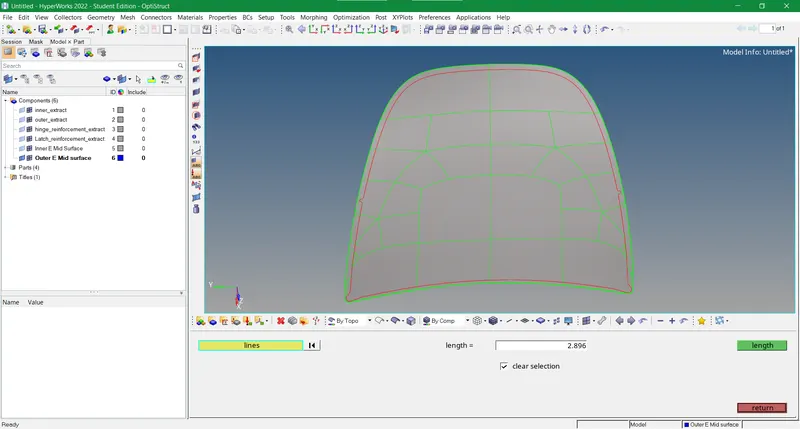
Figure-5 Mid-surface generated for outer extract
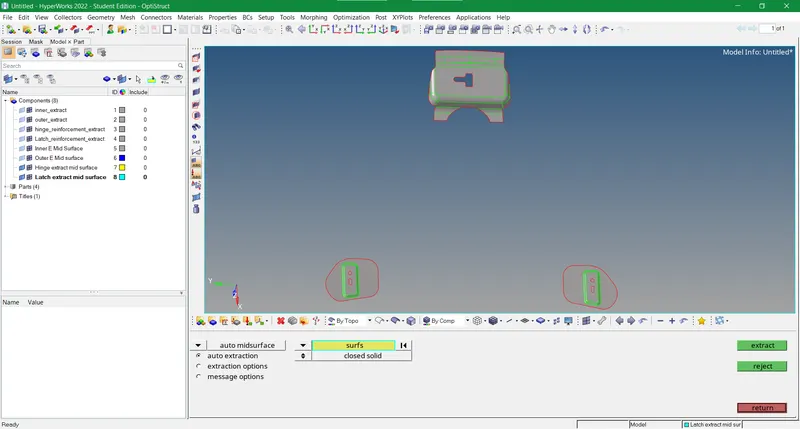
Figure-6 Mid-surface generated for the latch and hinge reinforcement
- We inputted the parameters file values and criteria file values as per the prescribed data for the whole geometry.
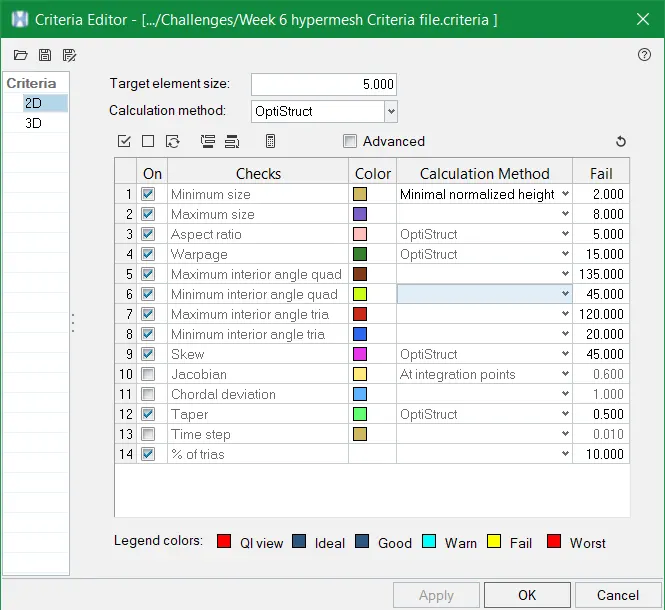
Figure-7 Quality criteria values registered in criteria file
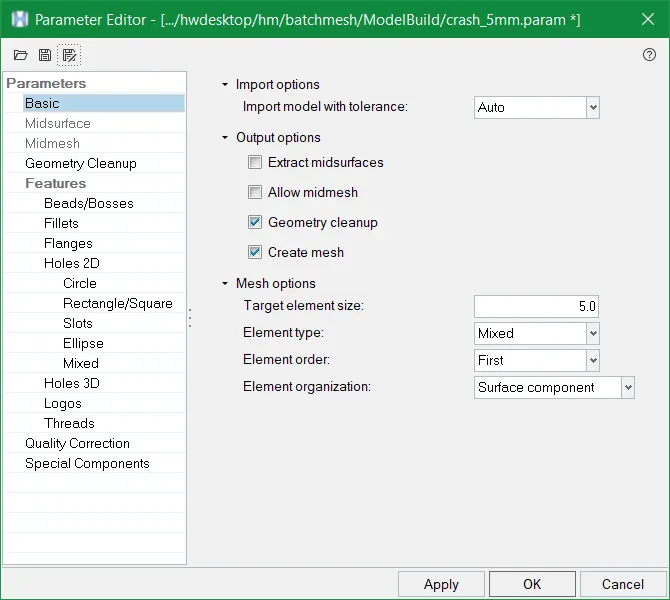
Figure-8 Values added in the parameter file
- We proceed with meshing the mid surfaces of the hinge and latch extracts and then move to the inner extract as shown below in the figures. For the inner extract, we need to defeature most of the areas as they fail for minimum length criteria and other parameters.
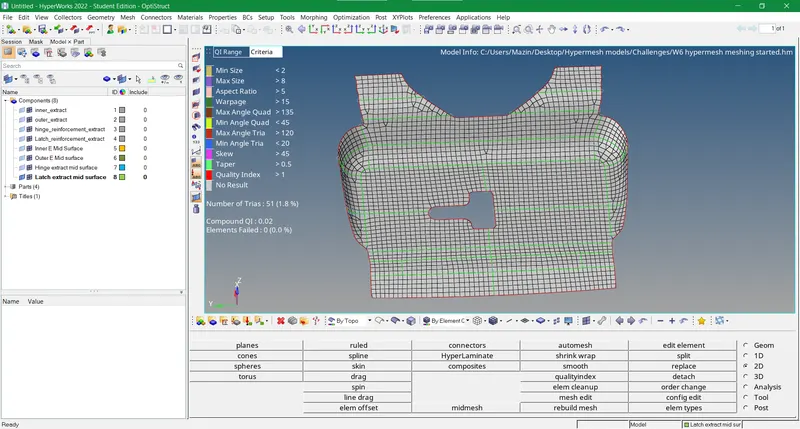
Figure-9 Latch reinforcement meshed
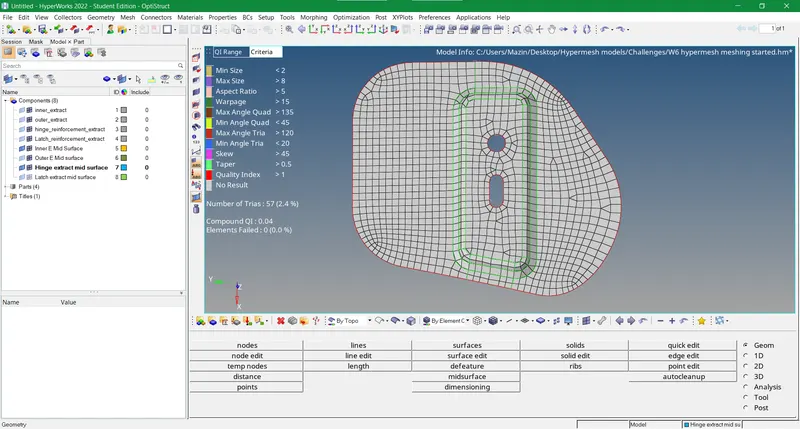
Figure-10 Hinge reinforcement meshed
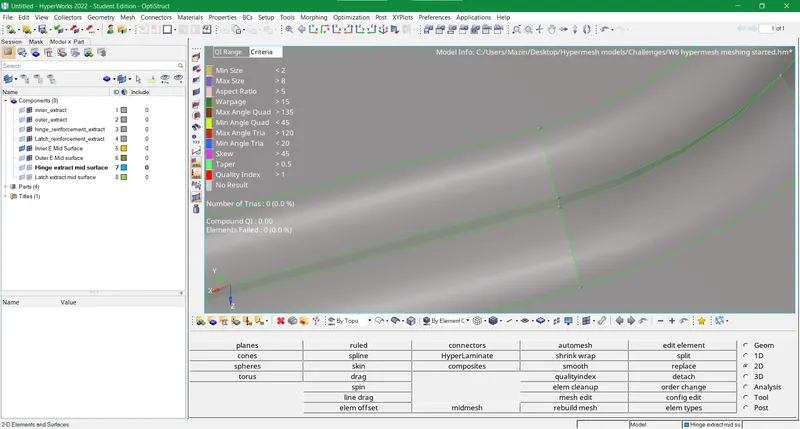
Figure-11 An area on inner extract prior to defeaturing
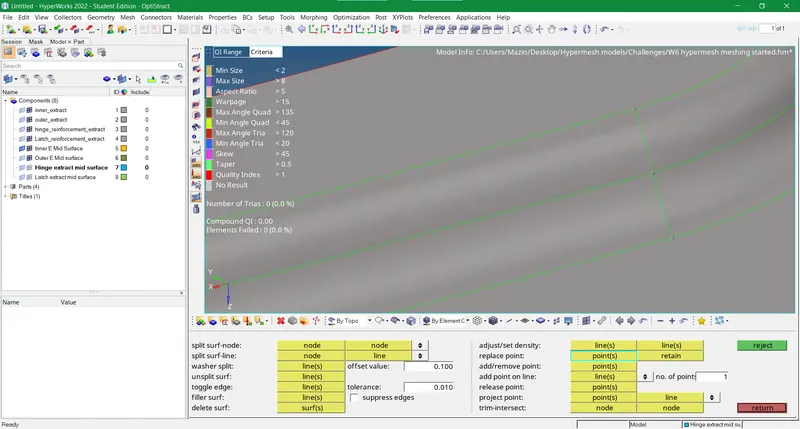
Figure 12 Post defeaturing the same area
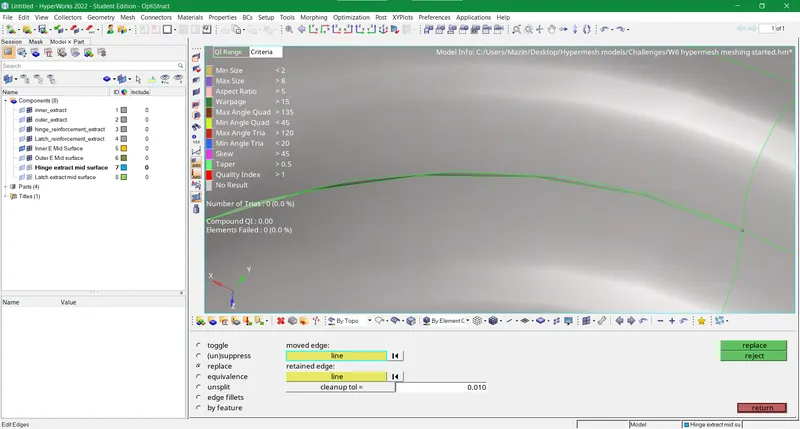
Figure-13 Another area on inner extract before defeaturing
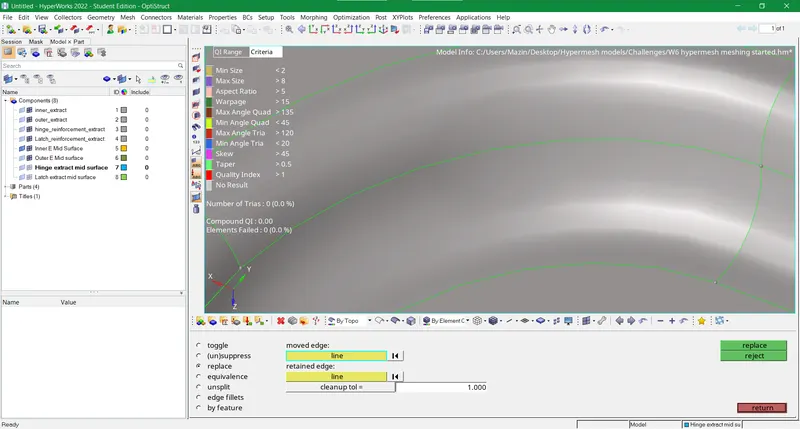
Figure-14 Same area post defeaturing
- Nevertheless, after defeaturing the inner extract we achieved a finer mesh flow at various intricate areas like veins and converging fillets of the inner extract. Without further ado, we pursue the reflect option for the half symmetrical inner extract in the tool panel of the tools bar. Apparently, we joined both symmetrical parts of inner extract either by toggle edge in quick edit sub-panel of Geom panel or Edges>Equivalence with tolerance as 1 in the Tool panel. We meshed the asymmetrical latch seat of the inner extract lastly and joined it likewise.
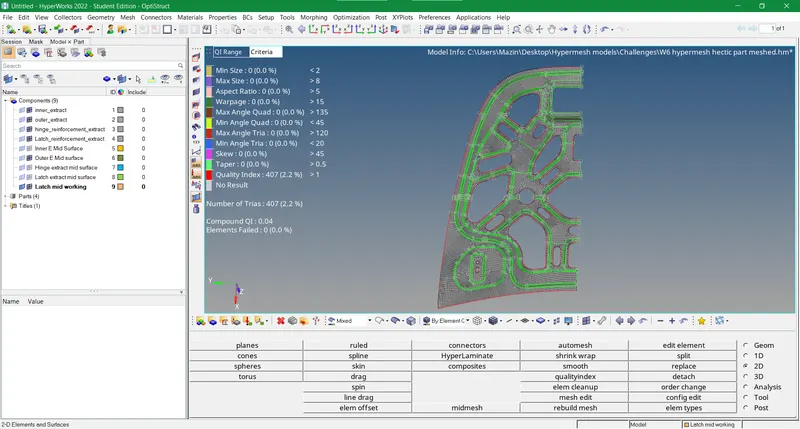
Figure-15 Inner extract meshed
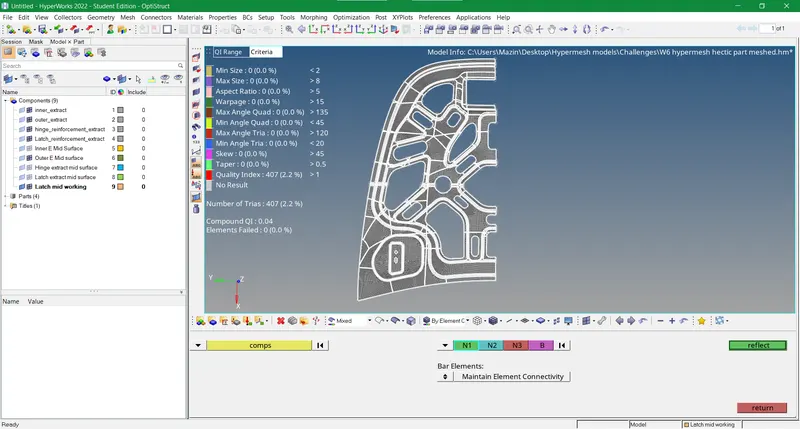
Figure 16 Reflecting the symmetrical part of an inner extract
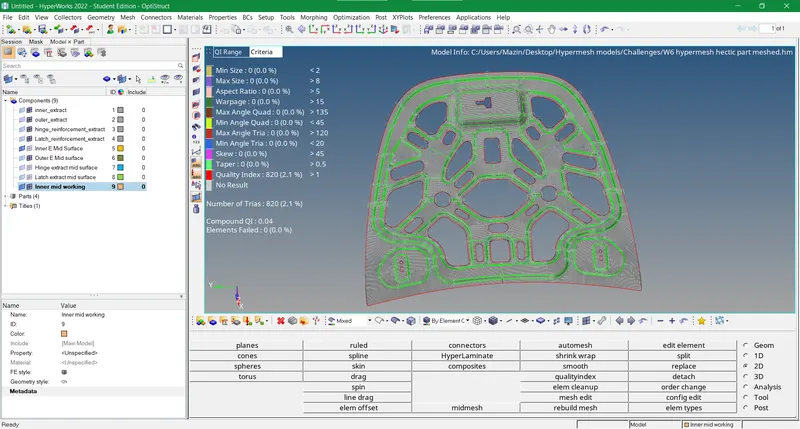
Figure-17 Inner extract after using reflect command and with its asymmetrical part meshed
- Henceforth we ended the pre=processing by advancing for meshing of outer extract, but we came across some issues in geometry regarding quality criteria. So we started with the defeaturing of outer extract mid by process known as hemming. In this process, we toggle the unnecessary shaded areas to avoid minimum length quality error on the fillets. Once the whole manual geometrical clean-up is done we progress with the meshing of the whole outer extract. Finally assigning the thickness by creating 2 property cards for hinge latch and inner-outer extracts.
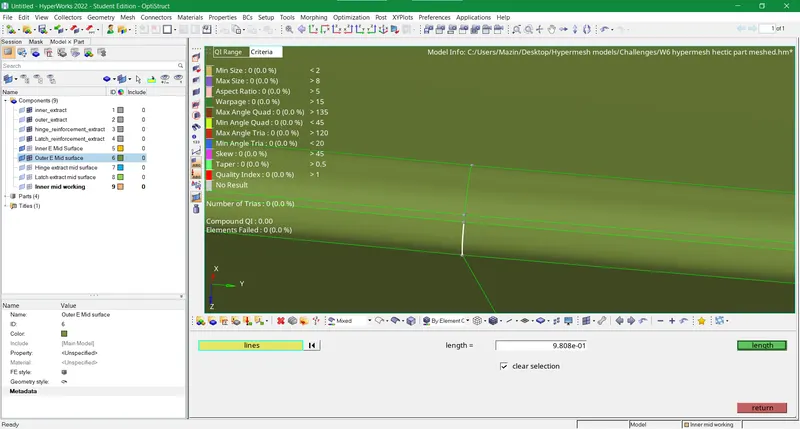
Figure- 18 The extreme edges of the outer extract are failing for minimum length criteria so defeaturing comes to action
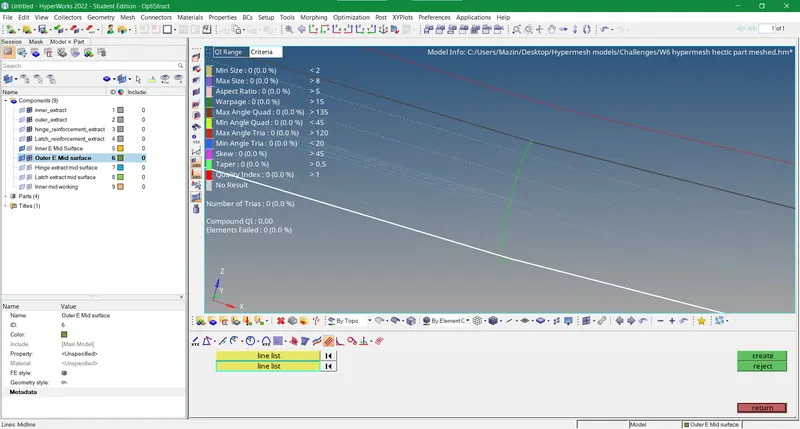
Figure-19 Mid-line formation or overall hemming done to avert minimum length error
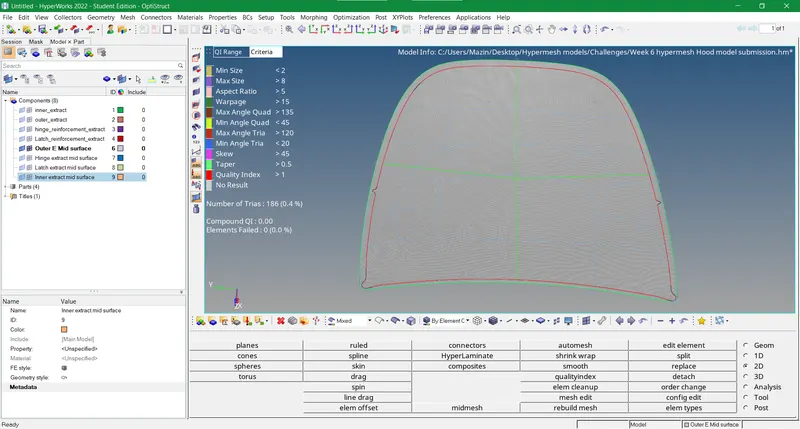
Figure-20 Outer extract meshed
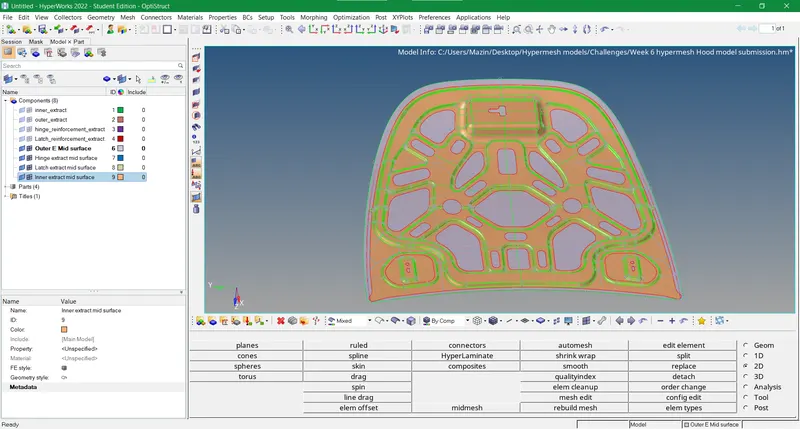
Figure- 21 Final image of the hood model developed
RESULTS
- This assignment gave a good evaluation of meshing and extracting mid-surface on a sheet metal component using hyper mesh.
- Many defeaturing techniques are being learned while progressing with meshing in this component.
- The model is processed using proper quality criteria parameters that give a good insight into our performance while pre-processing using hyper mesh.
- The thickness assignment for all entities shows a detailed presentation of the model in a 3D layout.