Week 6 - Creating connection for Rear door
AIM: For the given Rear door FE model, Create and Apply different PIDs for different components. Perform suitable connections.
PROCEDURE:
Step 1: Import the given rear door FE Model.
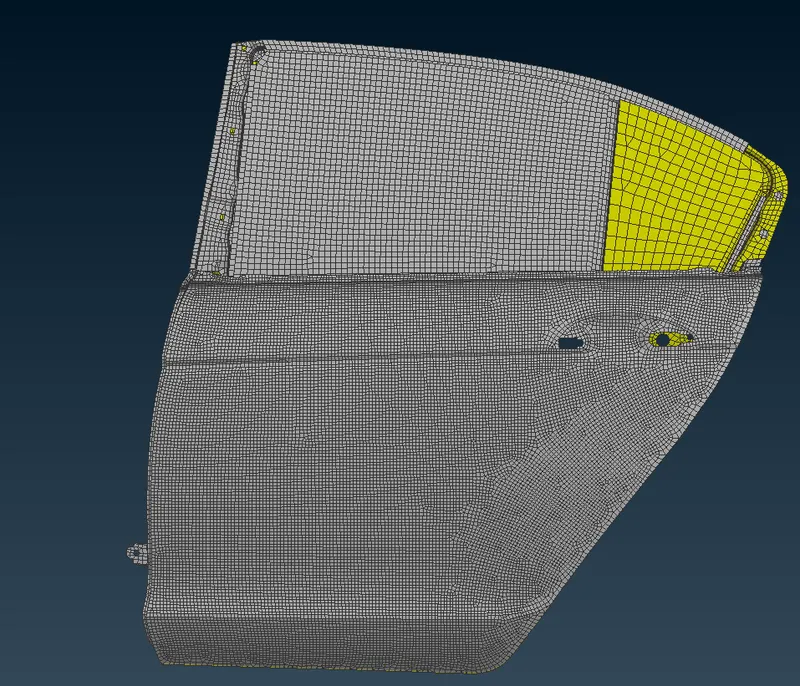
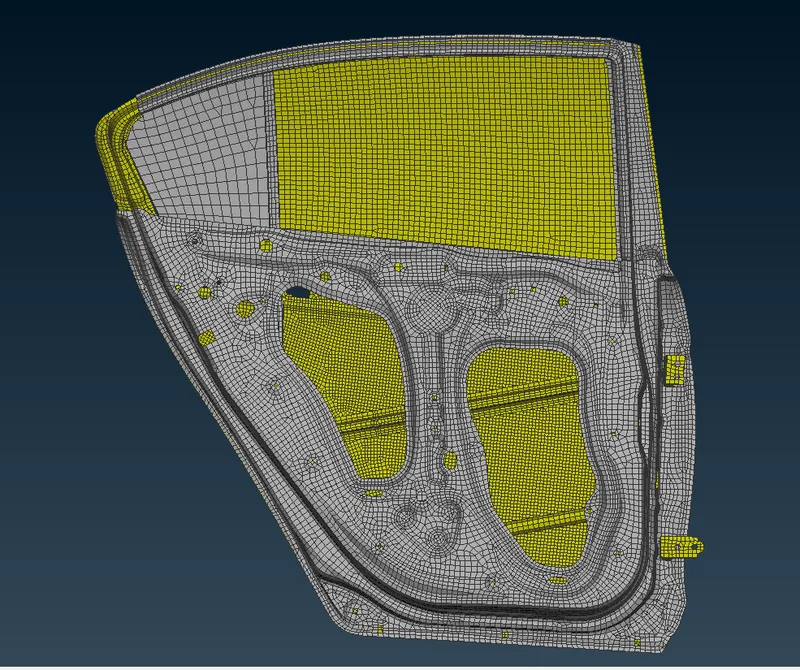
Step 2: Create different properties for different components.
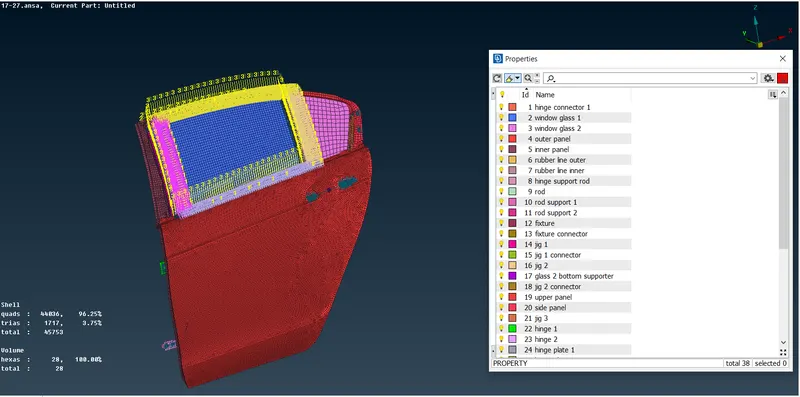
Step 3: Bolt connections at hinge by RBE2 many node and RBE2 two node from NASTRAN deck.
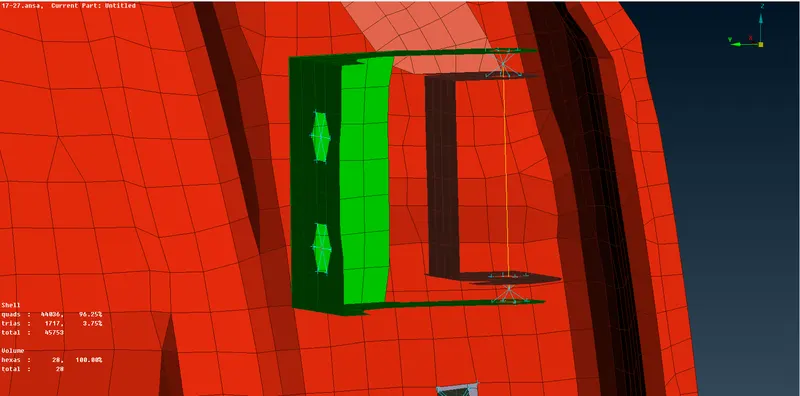
NASTRAN deck >>> Elements >>> RBE2 >>> many node.
By using many node RBE2, create a cluster nodes at top and bottom between hinge and connector plate.
Select the nodes on polygon as slave nodes, master node is automatically created, create a group for the RBE2's that are created by selecting part as "ask always".
NASTRAN deck >>> Elements >>> RBE2 >>> two nodes.
by using two node RBE2 create a connection b/w 2 nodes of RBE2 cluster master nodes.
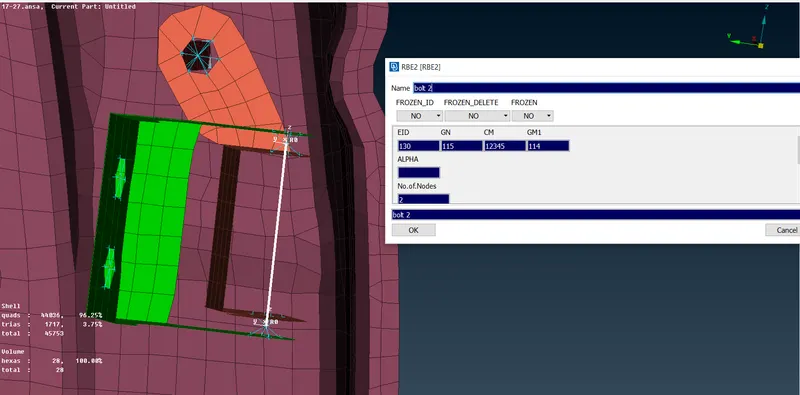
Here Degree of Freedom has to be defined for two node RBE2.
According to the global co-ordinate system, z direction rotational motion is not constrained as door should open and close by rotaional motion along the xy-plane i.e., z-axis.
So, in the above figure CM: 12345 is given to constrain the translational motion in x,y,z; rotational motion in x,y.
Step 4: Spot weld connections are used where 2 parts are parallel and overlapping.
Topo deck >>> points >>> at COG
On the overlapping face (any part), select the mesh cons to which COG has to be defined.
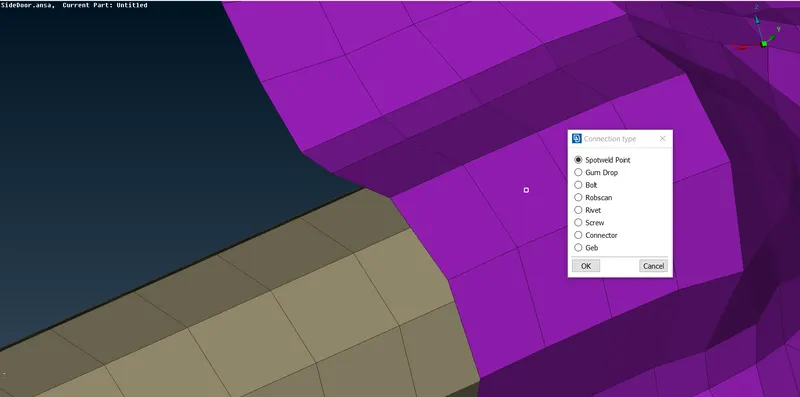
Assembly >>> convert >>> 3D points >>> Spotweld point.
Assembly >>> connection manager.
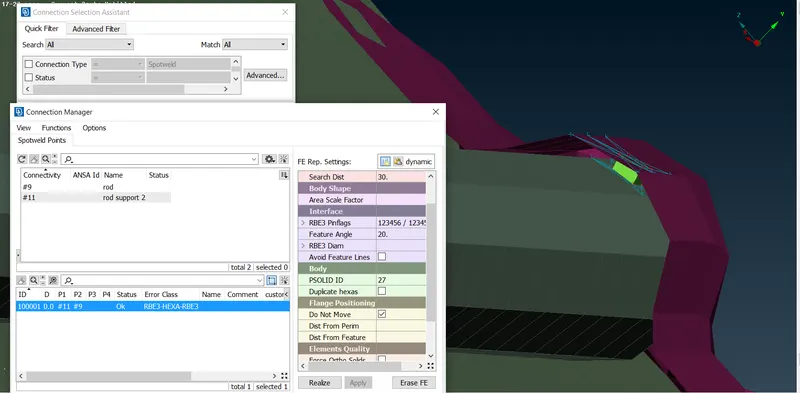
Select P1 and P2 i.e., parts that are to be spot welded >>> Give search distance(user defined distance b/w two connected parts) >>> Make sure that all Degree of Freedoms are constrained i.e., RBE3 Pinflags >>> Create a PID for the weld by using ( SHIFT + ? ) @ PSOLID ID >>> APPLY >>> REALIZE.
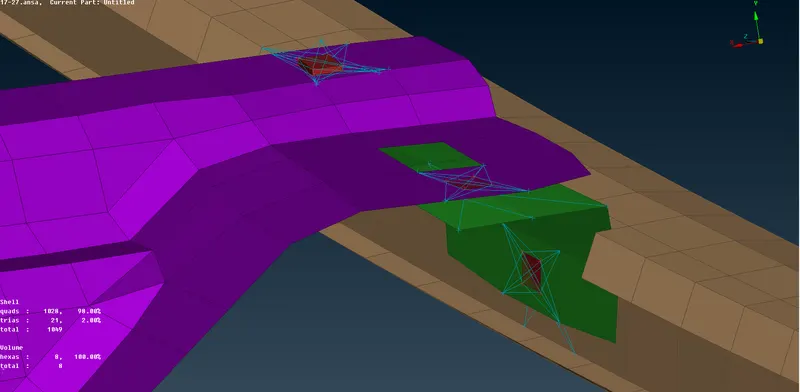
STEP 5: RBE 2 connections at outer panel.
NASTRAN deck >>> Elements >>> RBE2 >>> many node.
Select the nodes on polygon as slave nodes.
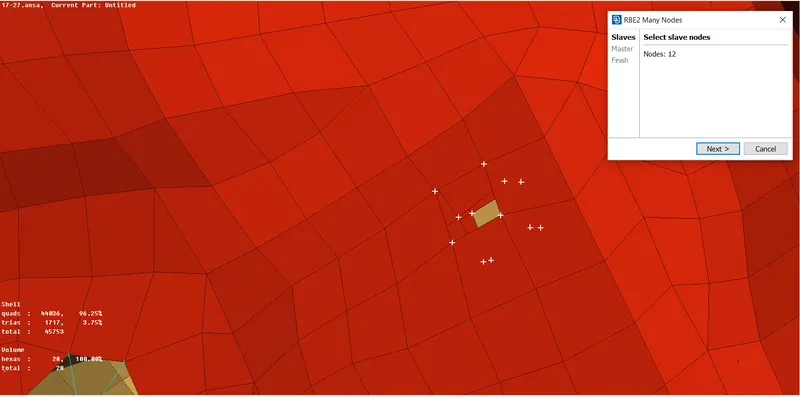
Master node is automatically created.
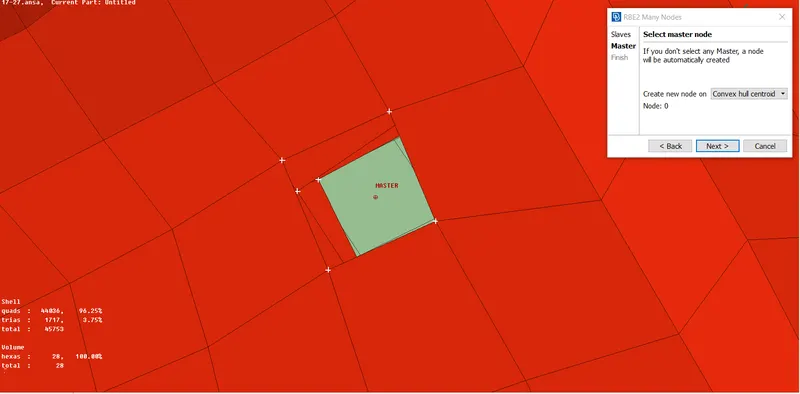
Create a group for the RBE2's that are created by selecting part as "ask always".
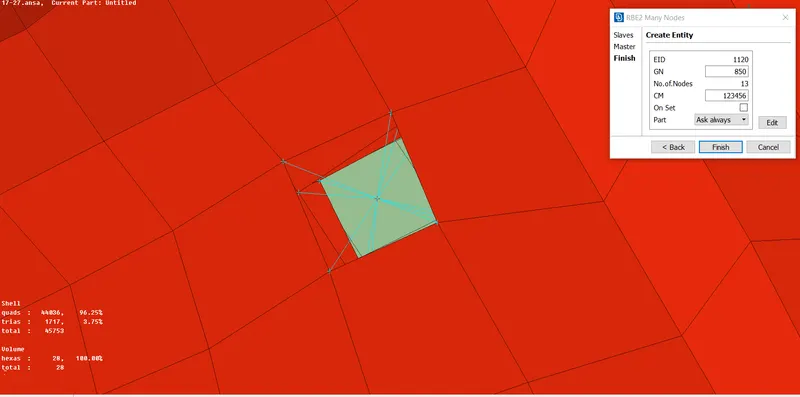
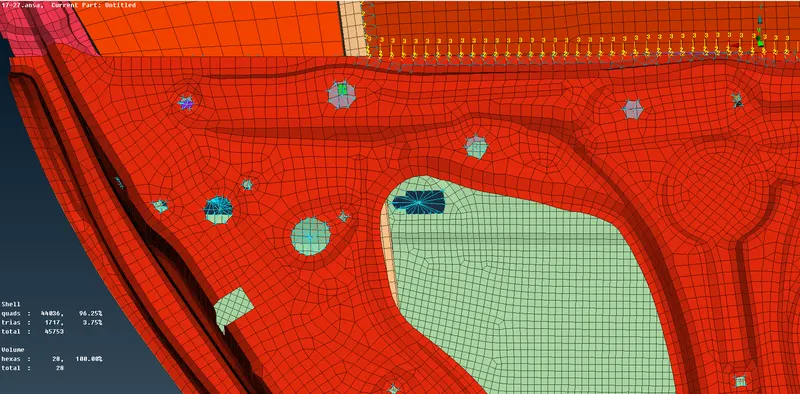
By using same approach create all the necessary RBE2 connections.
STEP 6: Door Handle
Create RBE 2 many nodes on either sides of the handle.
Create RBE 2 many nodes b/w the master nodes of above created RBE 2 elements.
NASTRAN deck >>> Elements >>> CON MI (concentrated mass) >>> Select the master node of the RBE 2 element created from 2 master nodes from either side of the handle >>> provide the value of the concentrated mass(I have taken the mass as 0.0001 tonns).
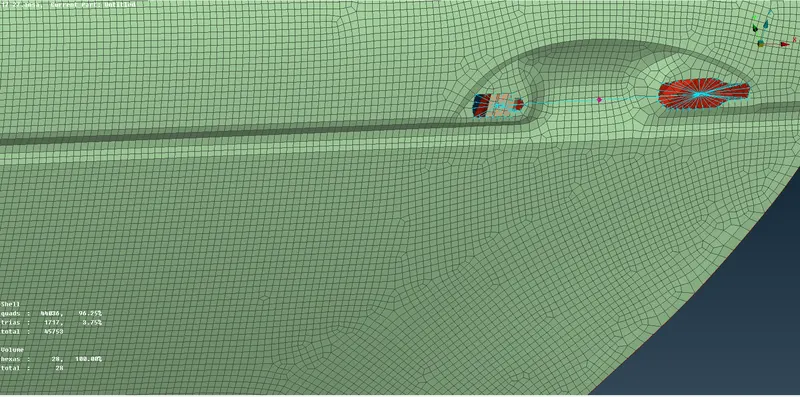
Step 7: Connection of Glass to the guide way.
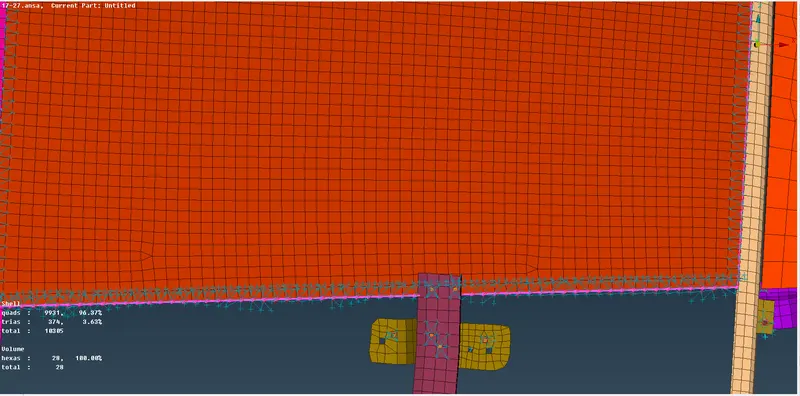
The guide way is extended until the two faces overlap each others so that a spot weld can be created.
Mesh deck >>> Grids > MV FREE.
Select the nodes on outer perimeter of guide way.
Select the co-ordinates to which the extention is to happen and drag the mouse untill needed.
Create the spot weld b/w guide-way and the glass.( Guide-way guides the movement of the glass up & down).
Step 8: CBUSH elements
Create curve on the periphery of the glass.
Mesh deck >>> Perimeter >>> FEAT2CURVE.
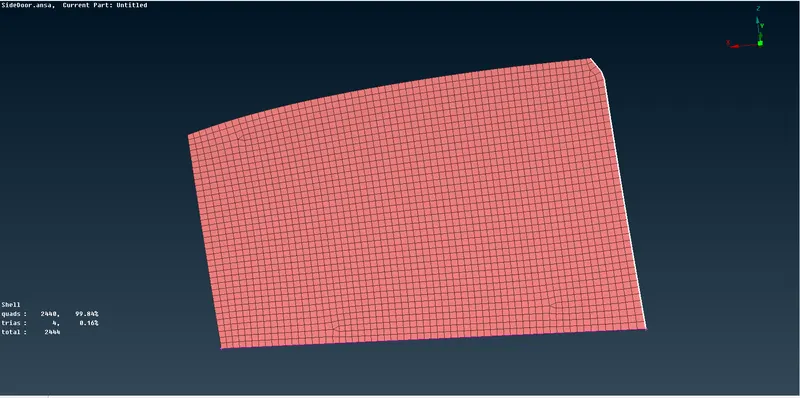
Convert the curve to spot line:
Assembly >>> Transform >>> curves >>> spot line.
Assembly >>> Connection manager >>> select the spot line.
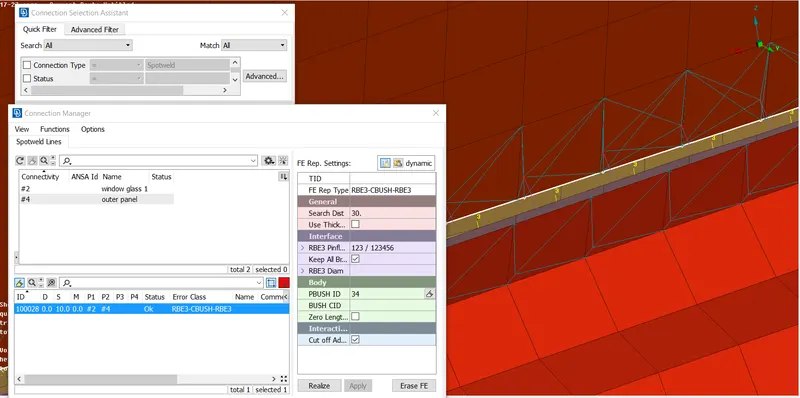
Selecting the parts (right click on P1 >>> F1 on dialogue box >>> select the PID) >>> FE Rep Type: RBE3-CBUSH-RBE3 >>> Search Distance >>> Keep all branches should be enabled >>> create a pid (SHIFT + ?) >>> Apply >>> Realize.
element CBUSH is a structural scalar element connecting two noncoincident grid points, or two coincident grid points, or one grid point with an associated PBUSH entry.
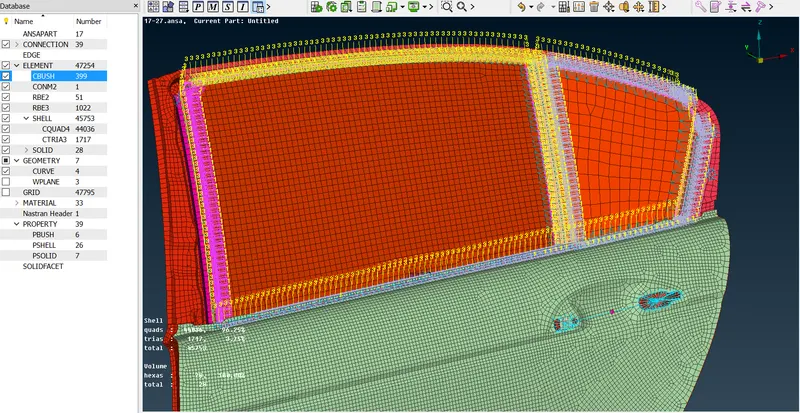
CBUSH Elements are created on outer part of the door b/w the side glass and the outer panel and on bottom side b/w side glass and inner panel.
If the CBUSH elements on inner parts can't be created using the same curve, Offset the curve (user defined distance, generally to the middle of two parts) and repeat the above procedure.
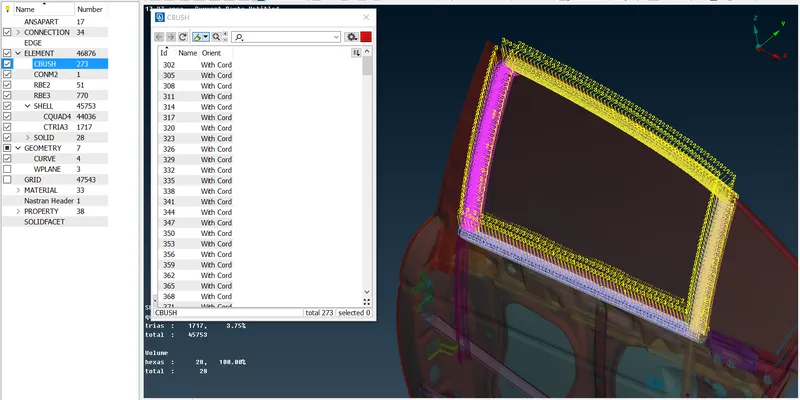
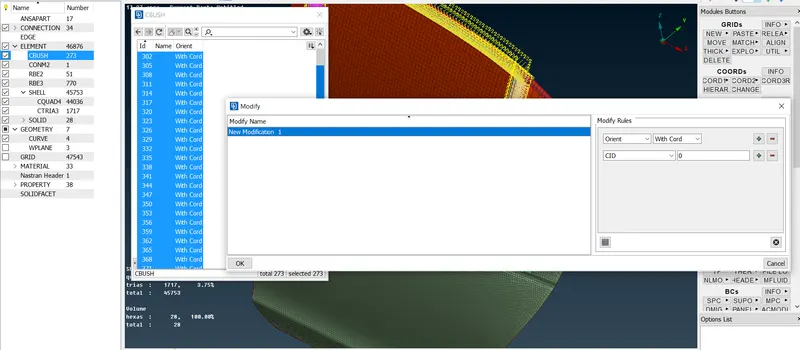
The created CBUSH elements are to be alligned:
F12 >>> Elements >>> CBUSH >>> show columns >>> activate orient >>> select all CBUSH's at one shot >>> right click >>> Modify >>> create new modification ID >>> Orient >> With cord >>> CID >>> 0 w.r.t global co-ordinate system >>> OK.
ALL CBUSH ELEMENTS
LEARNING OUTCOMES:
I have learnt how to do spot weld, bolt connections, connections using RBE2 many node and two node, connections using CBUSH elements.
I have learnt how to constrain the motion in the connections.
I have learnt how to apply concentrated mass.
I have learnt how to assign values and create PID fo the connections.
Conclusion:
For the given Rear door FE model, Different PIDs for different components are created. Suitable connections are made using NASTRAN deck and ASSEMBLY tools.