Week 6 - Creating connection for Rear door
AIM
For the given Rear door FE model, Creating and Apply different PIDs for different components. By using the same technique and
the elements as shown in the video,and Performing the suitable connections.
INTRODUCTION
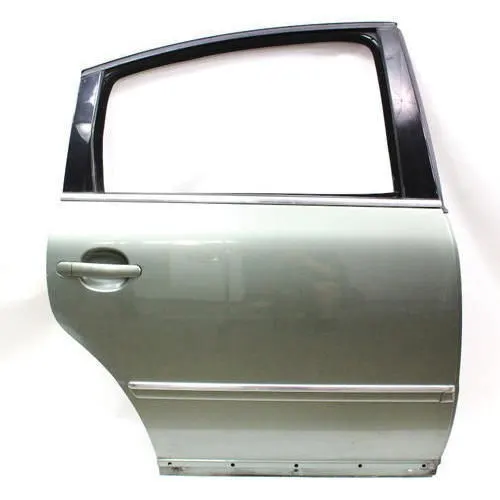
A car door is a type of door opening, typically hinged on its front edge, but sometimes attached by other mechanisms such as tracks,
for entering and exiting a vehicle. Doors most often integrate side windows for visibility from inside the car and can be locked to secure
the vehicle.
Car doors may be manually operated or with power assist supplied by the vehicle. Powered doors or power doors may be found on
mini van, buses,luxury vehicles or modified cars.
PROCEDURE
- Open the model from the file in ANSA and kindly looking for major errors and mismatchings in the model .
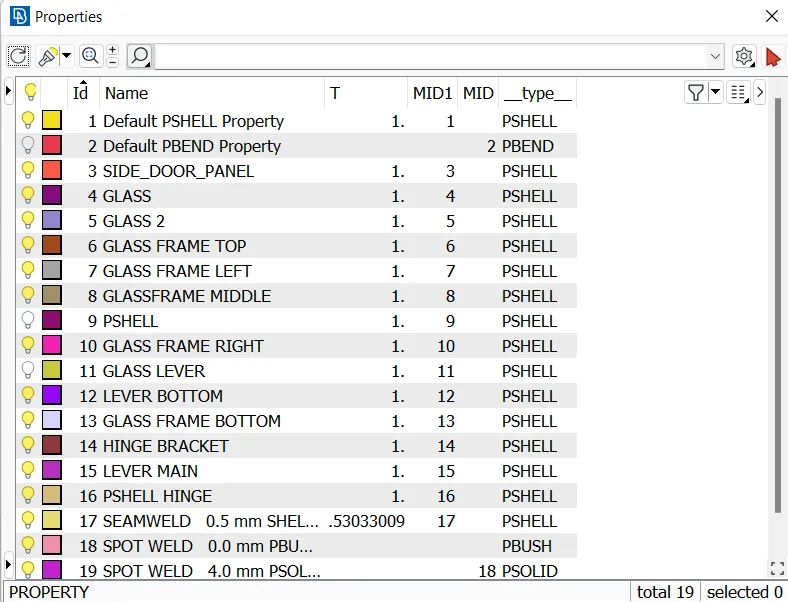
- Set different PID for all the components in the model and name / save it respectivly .
- Looking and analysing for the all the connections for the model properly .
- Connecting the bolted holes with NASTRAN/ELEMENTS/RBE2/many nodes or 2 nodes .
- Connecting the unmapped portion of the hinges to the surface by means of seamline .
- Limiting the degree of freedom of the hinge to 1 2 3 4 5 .
- Connecting the lever/rail to the surface by using a seamline connection by means of OVERLAPPED SHELL TYPE .
- Connecting the main glass of the door by introducing spot line with RBE3-C BUSH-RBE3 .
- Connecting the secondary glass of the door by using the same procedure .
- SPOT WELDS are carried out in the door lever by means of RBE3-HEXA-RBE3 .
- All other connections are checked and performed by using the same procedures .
LEARNING OUTCOMES
For setting PIDS , SELECT THE COMPONENT/SET PID in faces/selecting P shell/enter/saving .
For making curves ,
Topo/Curves/Cons2curves/selecting/enter .
For converting curves in to seamline/spotline/adhesive ..etc ,
Convert / curves /selecting thr curve / select the character of the curve to be converted /enter .
For Creating a weld spot ,
define/manuel/PID / multiples parts / select the parts to be welded / enter .
For having many node connection ,
NASTRAN/ELEMENTS/RBE2/many nodes
For connecting two nodes ,
NASTRAN/ELEMENTS/RBE2/ 2 nodes
For connecting a seamline ,
Connection manager /connection type = seamline/select seam line/select the P1 & P2 / GIVE search dist/OVERLAPE SHELL/REALISE
For connecting a spot line ,
Connection manager /connection type = spot line/select spot line/select the P1 & P2 / GIVE search dist/spacing/RBE3-CBUSH-RBE3/REALISE
For connecting a spot weld ,
Connection manager /connection type = spot weld/select spot weld/select the P1 & P2 / GIVE search dist/RBE3-HEXA-RBE3/REALISE