Week 6- Challenge
Week 6: 2D Meshing of Sheet Metal
Agenda of Week 6:
- To understand the concept of 2D meshing on sheet metal.
- Familiarizing 2D, Tools, & Geometry options.
- To understand the quality and correction of meshing.
Content in Week 6:
1. Manual Cleanup of geometry.
2. Meshing the cleaned up geometry.
3. Checking for quality and correcting until it passes the quality criteria.
Task:
To create 2D meshing for the given hood. With passing all quality criteria.
Brief:
The solver will consider the meshing part instead of the surface and models. The 2D meshing will reduce the higher-order problem to solve it easier. Converting the 3D model into 2D will also make the solver to solve it in less time span with good accuracy. Importing the given model in Hypermesh. (Import Geometry).
In the hood, 4 components:
1. Hinges (2)
2. Latch
3. Outer Panel
4. Inner Panel
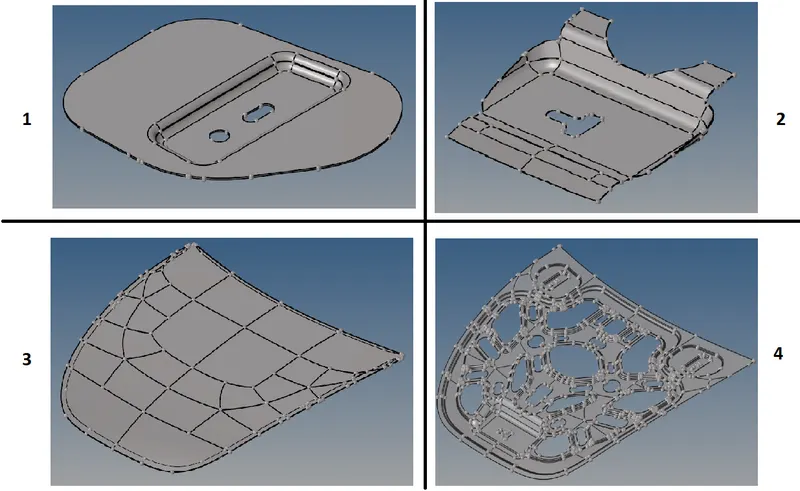
First, let's get into the Hinges component
1. Hinges:
First step is to extract the midsurface from the 3D model. By Geometry => Midsurface => auto extraction => Click middle mouse button / extract.
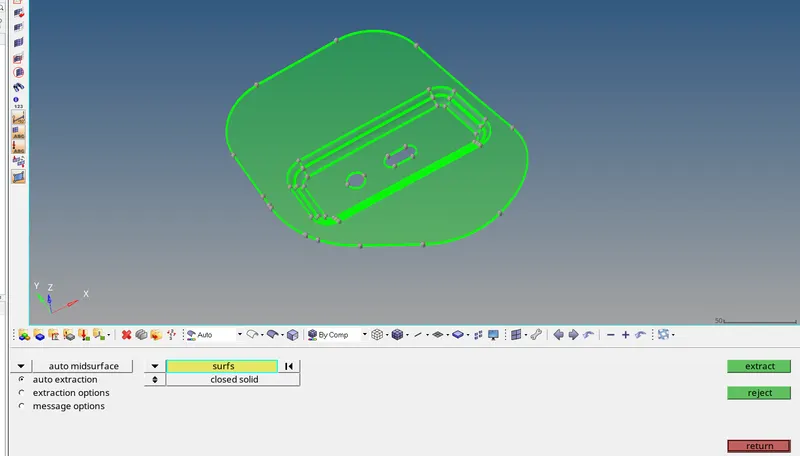
After extracting the mid surface, manual cleanup is preferred instead of auto cleanup. Because manual cleanup will be easy to control the mesh flow. For manual cleanup, can be done using the below tool.
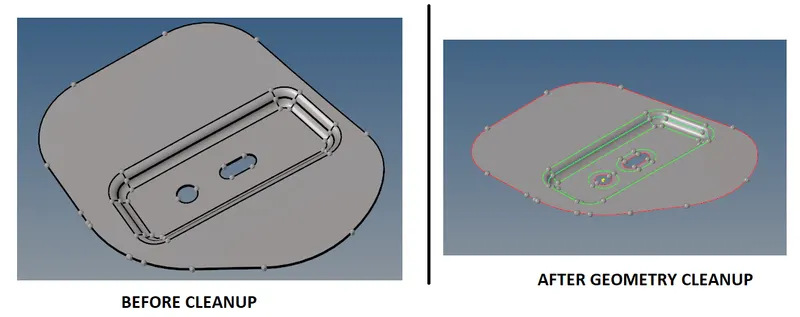
Geom => quick edit => [Split surf node / Split surf line /...] or shortcut key for quick edit - F11. Splitting the surface by drawing lines will be easier while performing mesh operation. There is no procedure for splitting the surface, it's about mesh capturing on that surface. The good quality mesh will result in proper accuracy in results.
Edges can be toggled using Toggle from quick edit
For holes, one can use Washer split which will we be easier to mesh the hole and prevent that from forming trias.
For meshing 2D => automesh or Press F10
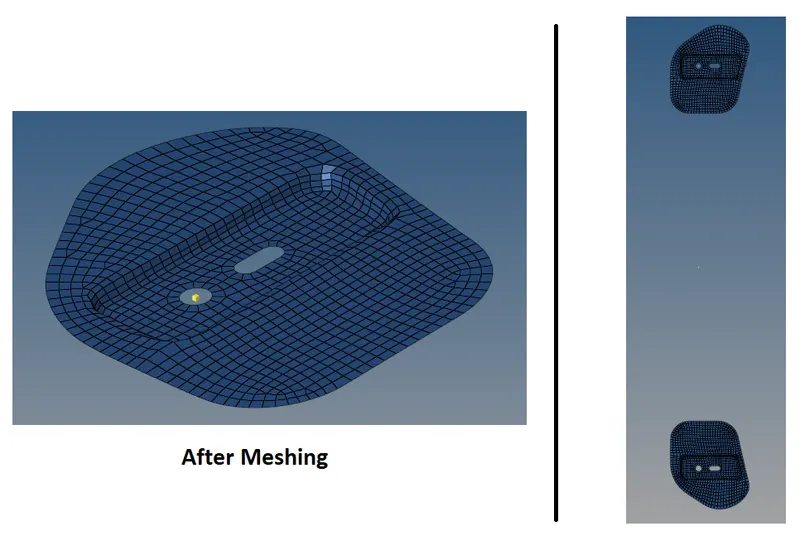
During Meshing, one needs to check for the quality criteria given in the profile
This quality criteria file should be invoked in the hypermesh by Preference => Criteria File Settings => Enter the value => Apply.
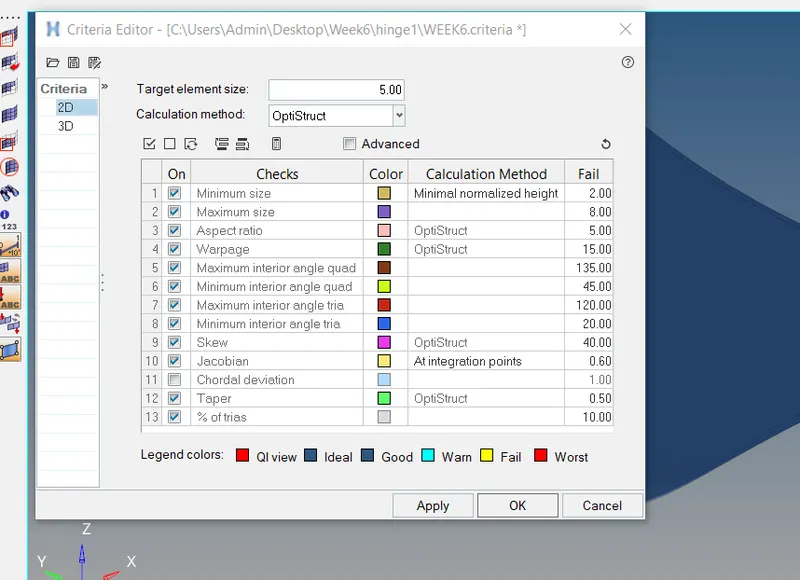
To check the quality criteria Press F10 or Tools => Check elements - This option leads to check each and every parameter
2D => qualityindex
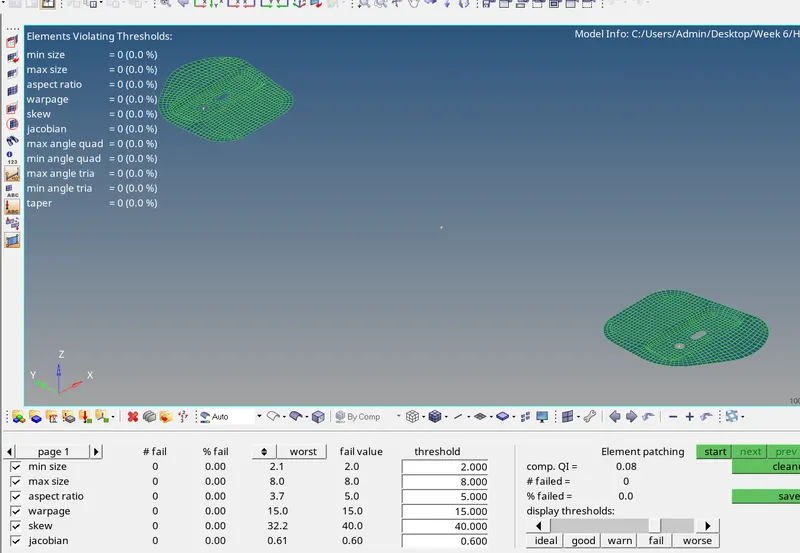
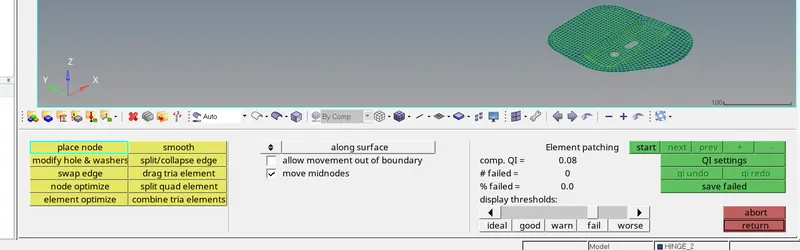
2D => quality index => cleanup tools.
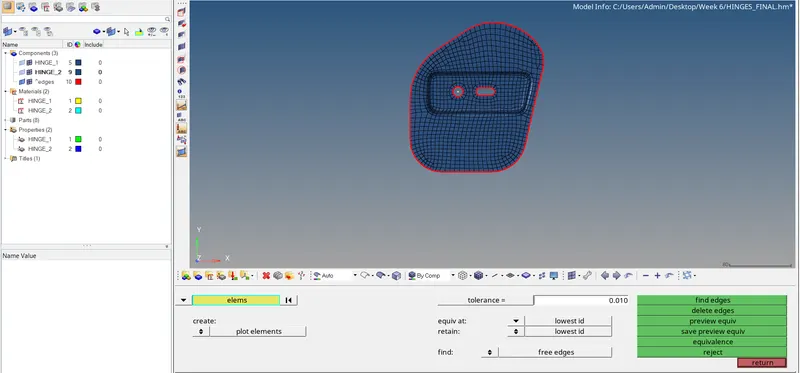
To check for connectivity. which means to ensure elements connected with each other properly or not. Tools => edges => elements select all elements then click on find elements. The Red contour indicates free edges.
It should be checked mostly in edges and fillet areas if any elements not connected in the middle. Select the particular elements and given tolerance as 0.1 and shouldn't be above 0.5 in range. Then click on preview edges and click on equivalence. Click 2D
After meshing, quality checking, smoothing (Press shift + F12 or 2D => smooth),
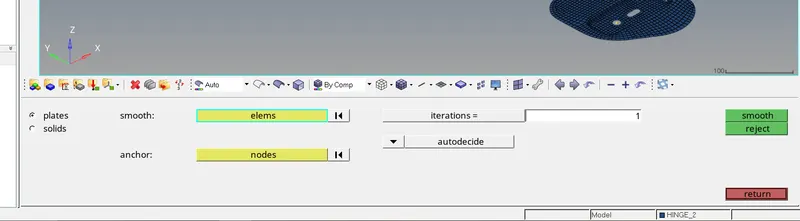
and connectivity was done.
Hence the component is symmetrically placed in the hood, one can use the reflect option for mirroring the elements to symmetrically placed hinge on another side of the hood. This option will lead us to create meshing another time on the same component
Tool => Reflect => "Ensure for current component" => elements (select all the elements in one side of hood) => select axis and centre nodes on centre of the hood.
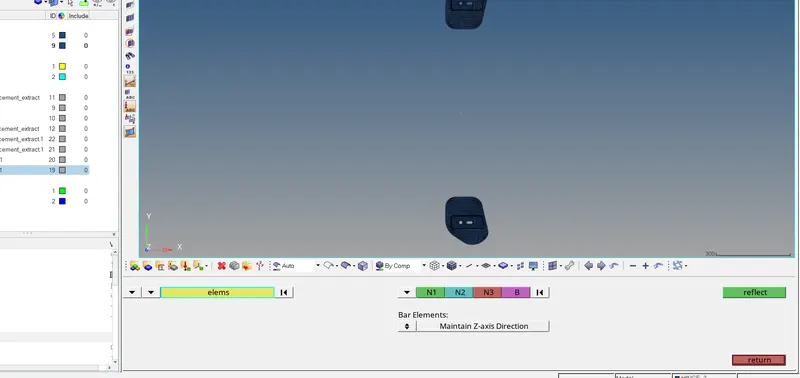
Ensure for the thickness using Geom => dimensioning. Then assign property and material for the mid-surface created above.
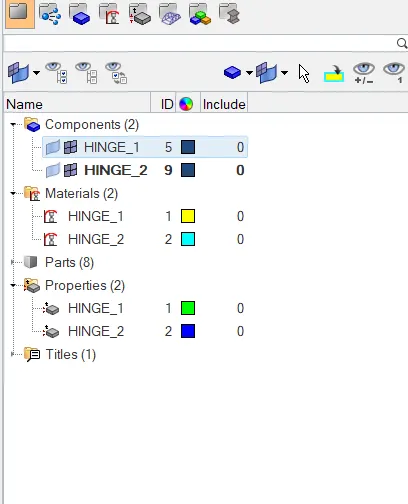
Hinge part meshing successfully completed.
The summary for the above 2D meshing is simple.
i) Extracting the 3D model to 2D - mid surface.
ii) Manual cleanup. [This will make the easier to mesh, so this stage is more important for splitting the geometry properly for meshing].
iii) Meshing the geometrically cleaned mid-surface.
iv) Checking for quality criteria.
v) Few After meshing tools, which can help us to meet the quality criteria.
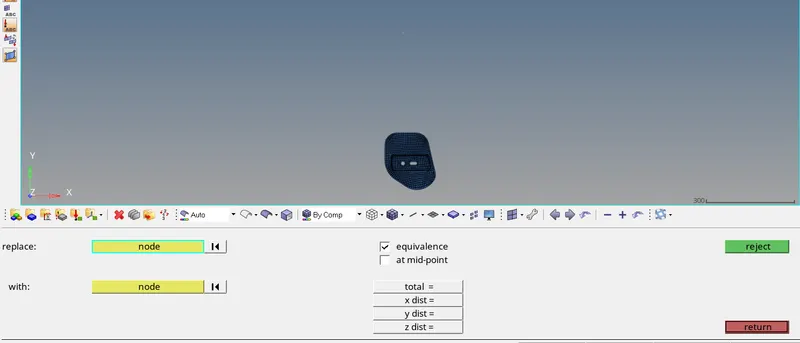
- Replace node click on 2D => replace [this option, is used to correct the nodes where it is not corrected properly]
- Edit elements Click on edit element => create / combine / split
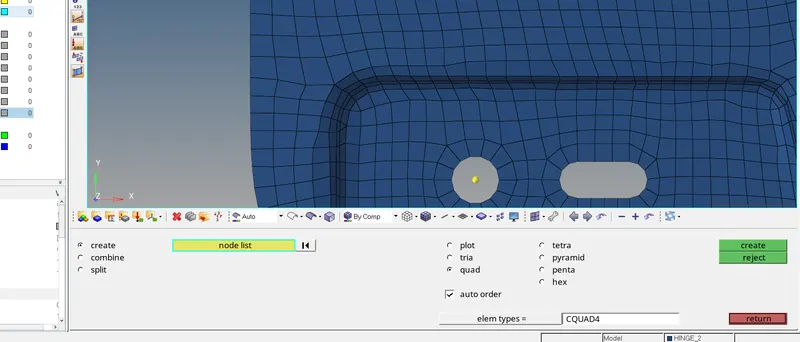
This option, which is used to create, combine, or split elements.
vi) Ensure for connectivity/equivalence.
vii) Smoothing operation has to be done.
viii) Assign materials and property to the mid-surface.
ix) Save the model.
2. Latch component
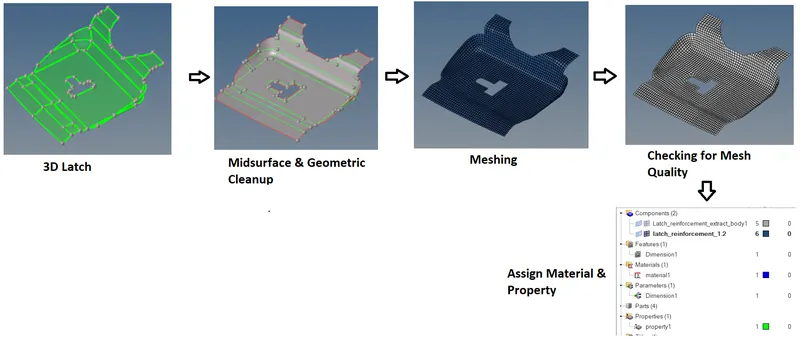
The procedure is same for the above latch component as mentioned in hinges, the only thing that differs is geometry cleanup and splitting up the surface.
3. Outer Panel:
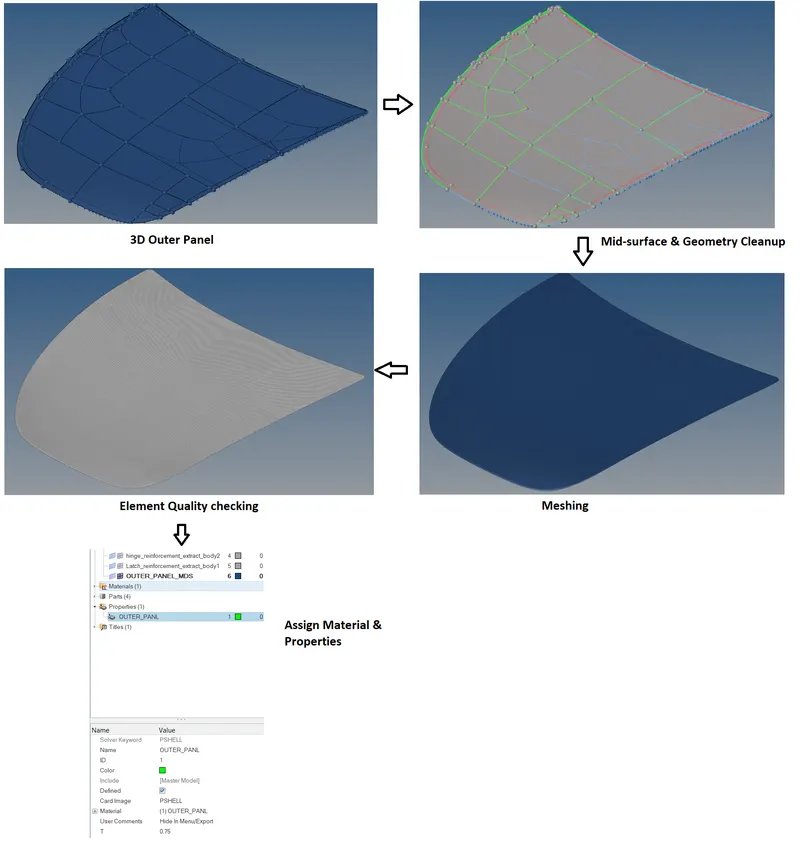
Special Case in Outer panel: The Hemming Portion.
Here one needs to use the "Midline" tool to split the hemming portion to mesh.
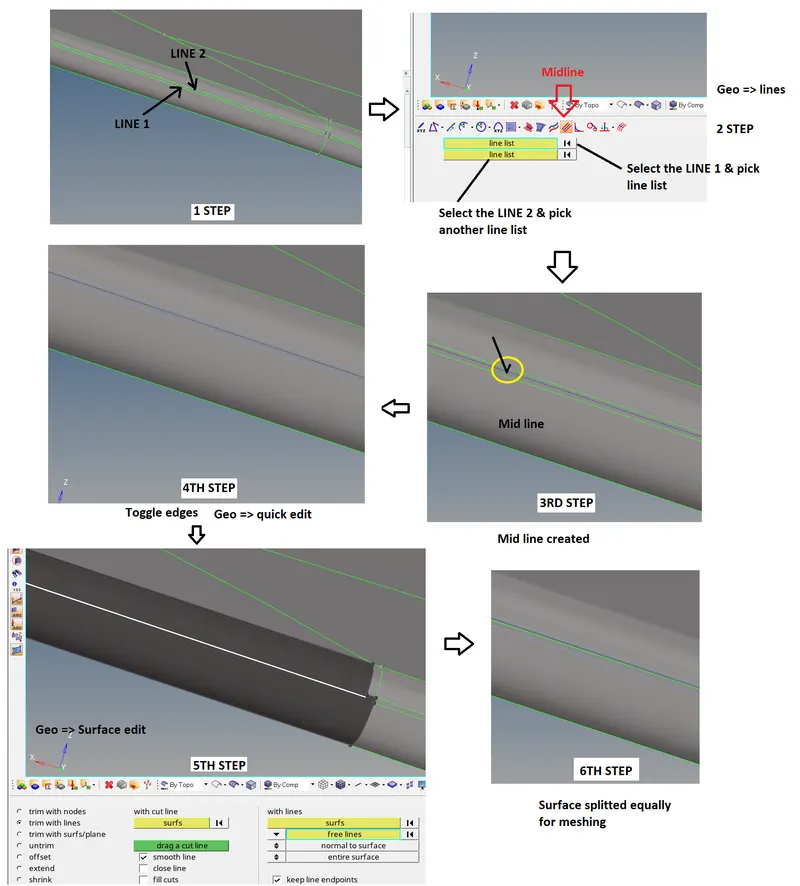
4. Inner Panel:
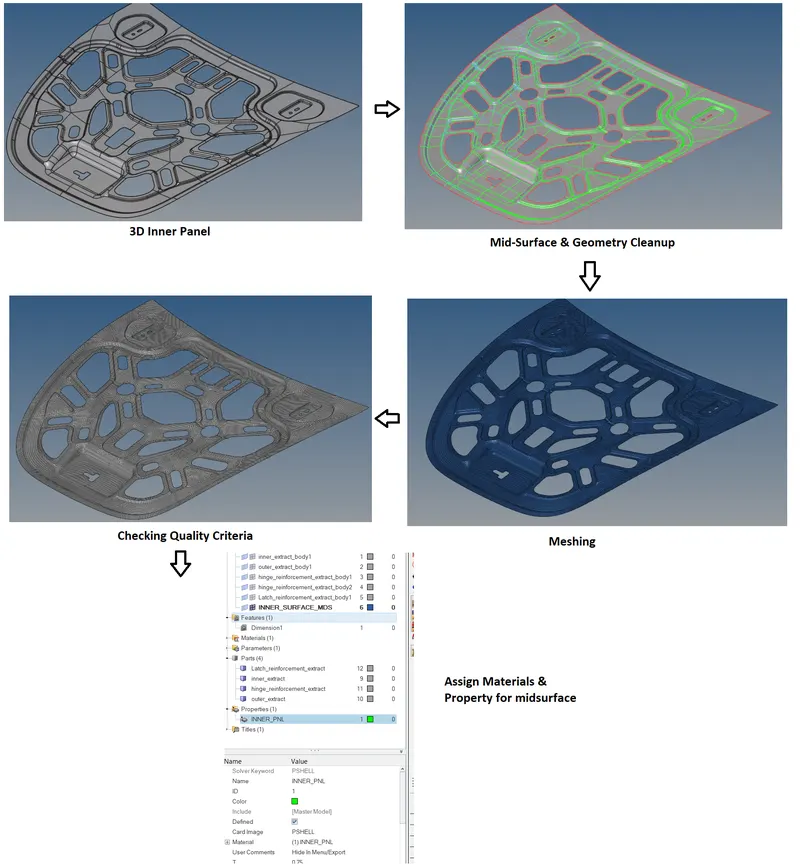
The most important thing in all the models is connectivity/equivalence checking should be done. In the inner panel fillet areas, where the elements will not connect properly. Therefore, proper split up and connectivity checking should be done alongside while meshing
Conclusion:
The given model is completed 2D meshing and checked with the quality criteria provided above in the task.