Week 5 Challenge : Surface wrap on Automotive Assembly
Week 5 Challenge:
Surface wrap on Automotive Assembly
Aim:
Our aim is to rectify all the necessary error in the given design, merge the automotive engine parts together and perform surface wrap.
Objective:
The main objective of this detailed report is mentioned below: -
- To clear geometrical error and clean the external geometry.
- To merge the engine, transmission and gear box.
- To perform surface wrap on engine.
Body of content:
In this report we discuss the main process of geometry cleaning, merging of components and surface wrap of automotive engine in which the main part are engine, transmission and gear box. The work carried out during this process is done in ANSA V23.
1. Geometry cleaning operation for engine, transmission and gearbox.
Before performing the surface wrap, we deleted all the unwanted parts of engine as shown in below figure.
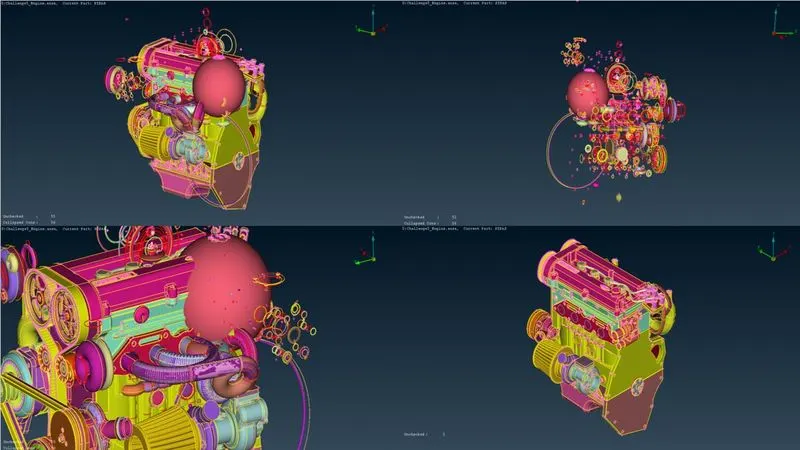
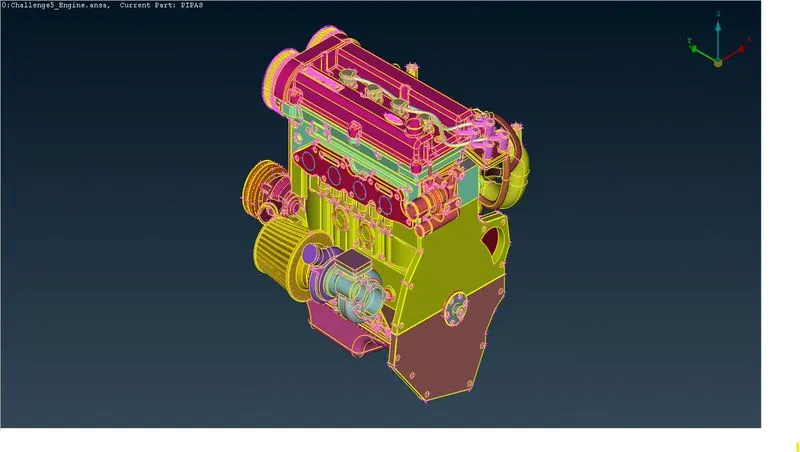
In above figure of engine, we have deleted the unnecessary pipes and components the final figure is shown below.
Now going for the next geometrical error that is of transmission first we cleared all the external geometrical error of its as shown in below figure.
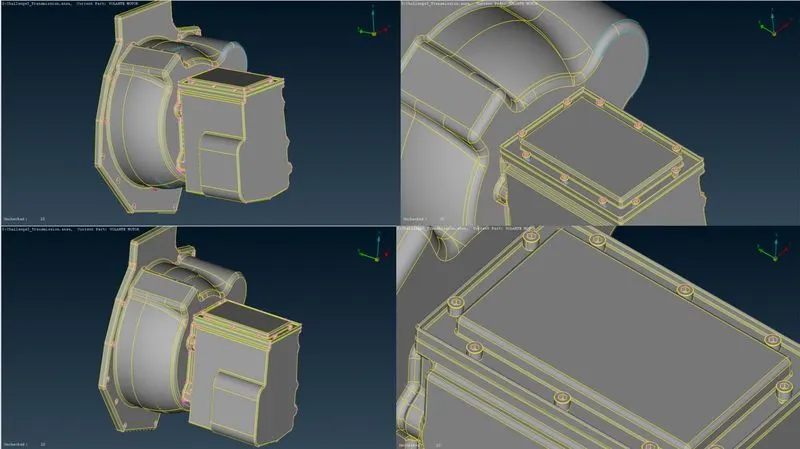
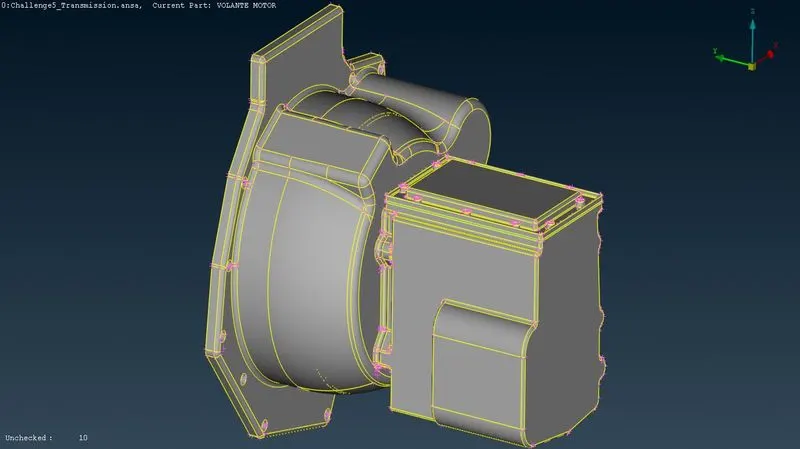
After clearing all the external geometrical error, our final transmission model looks like below figure.
Now, going for next geometry of gear box we rectify all the crossed white cons error as sown in below figure.
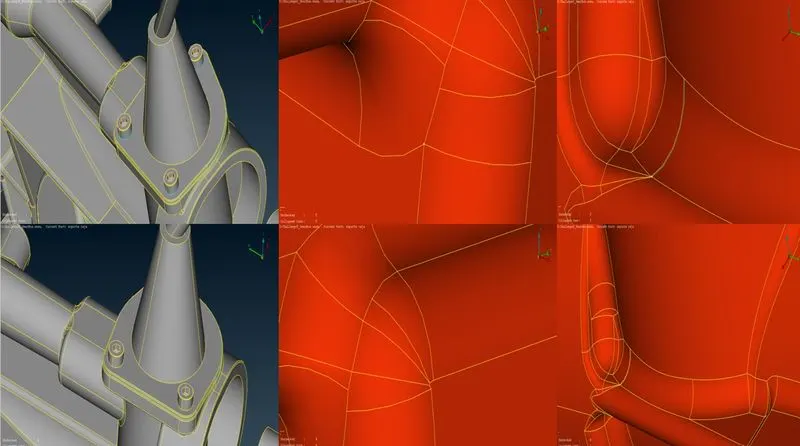
The final design of gear box is shown in below figure.
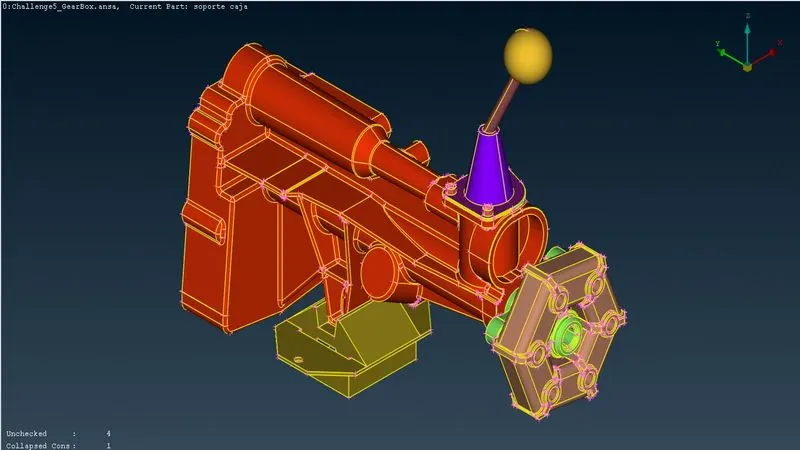
2. Merging of engine, transmission and gear box.
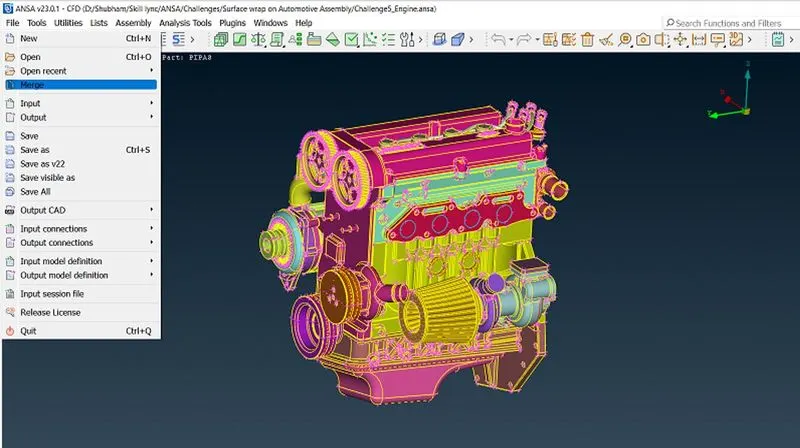
Now for assembly of automotive engine we first open the engine geometry and then go with an option of merge in file. A shown in below figure.
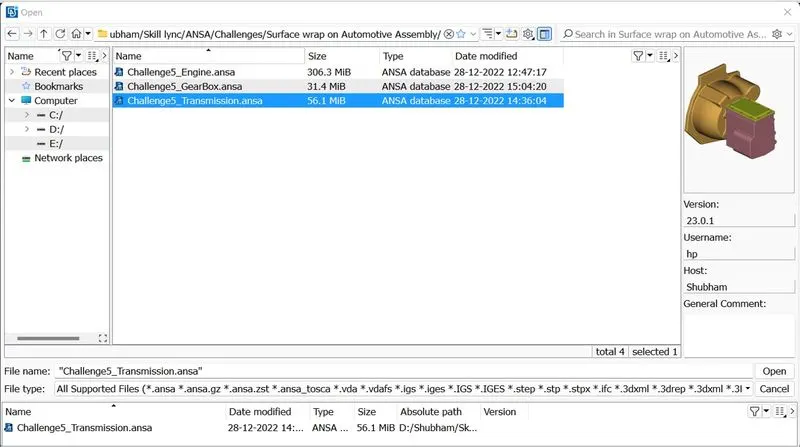
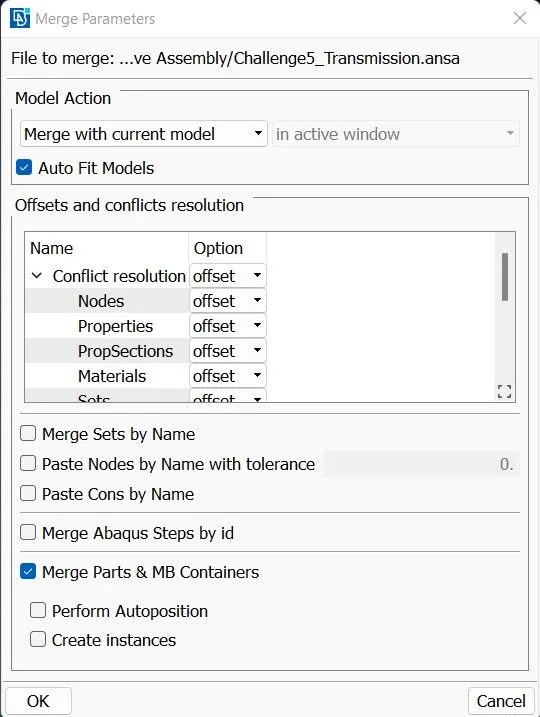
As shown in below figure select the transmission file and open it, then the dialogue box open for offset and merge action, simple click ok and the transmission is merge with the engine.
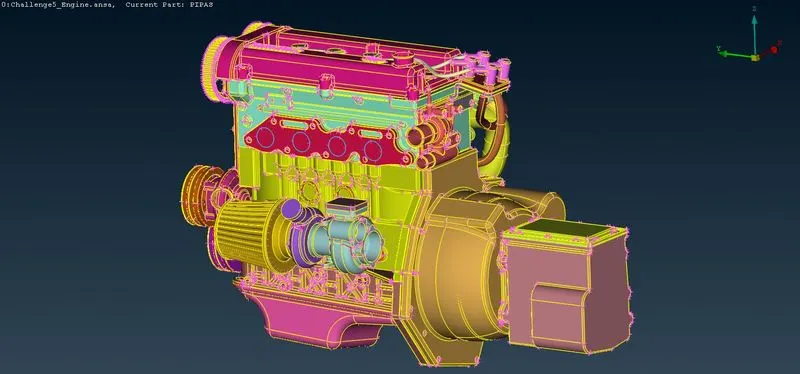
The final model of transmission and engine assembly is shown in below figure.
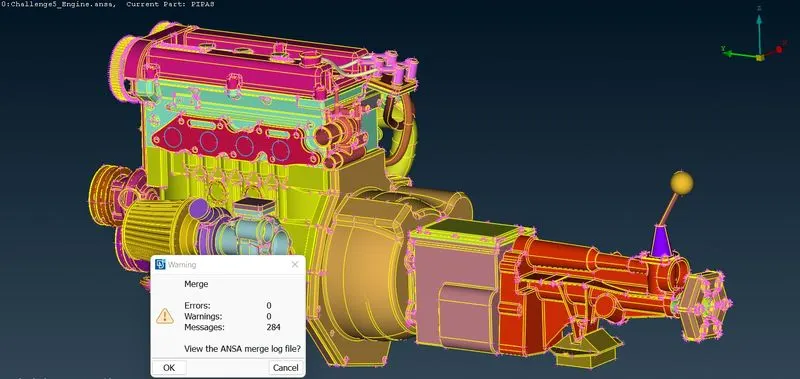
Now applying the same process for gear box and merge it with the other component of automotive engine, also make sure that durning the merging process the dialogue box doesn't show any type of error, as shown in below figure.
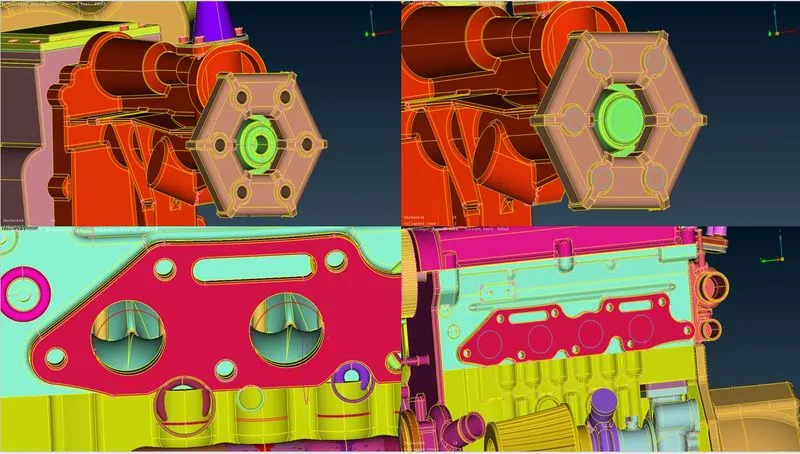
Now next step is to fill the holes of automotive engine as shown in figure.
Now we have deleted unnecessary PIDs as shown in below figure with help of compress.
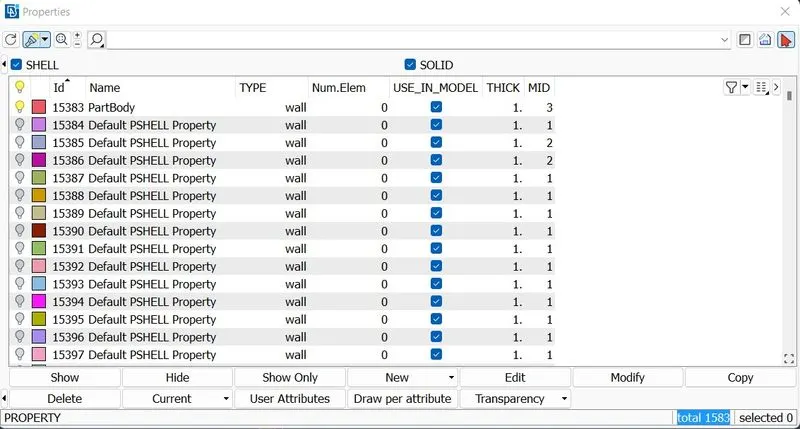
As shown in above figure there is 1583 PIDs after compressing the PIDs the remaining PIDS are 70, as shown in below figure.
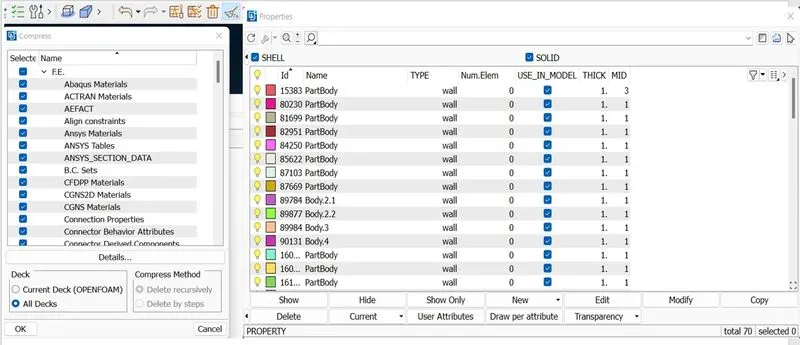
3. Surface wrap of automotive engine.
Now after completing all the process, we go for surface wrap as shown in below figure go to mesh and search for surface wrap, in surface meshing domain there is a column name element in their find out for wrap and go with constant length. As shown in below figure.
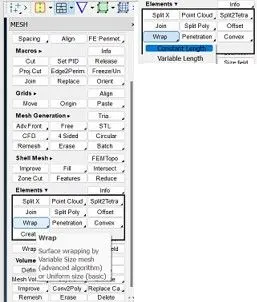
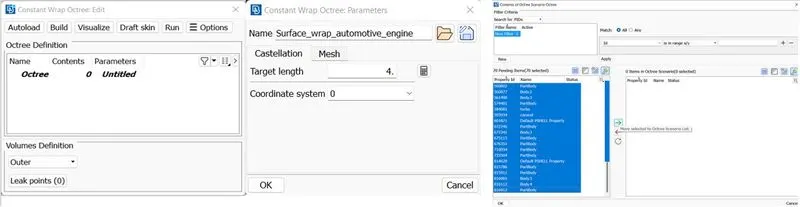
There is this box open for constant wrap octree click on it, as shown in below figure.
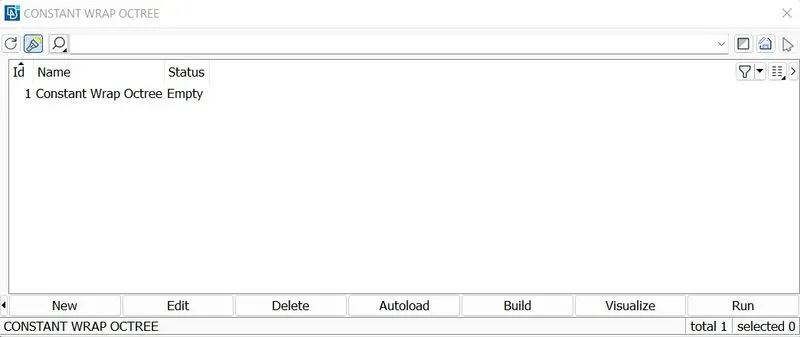
As shown in below figure of wrap provide the name and target length of mesh after that assign all the PIDs and click on the run.
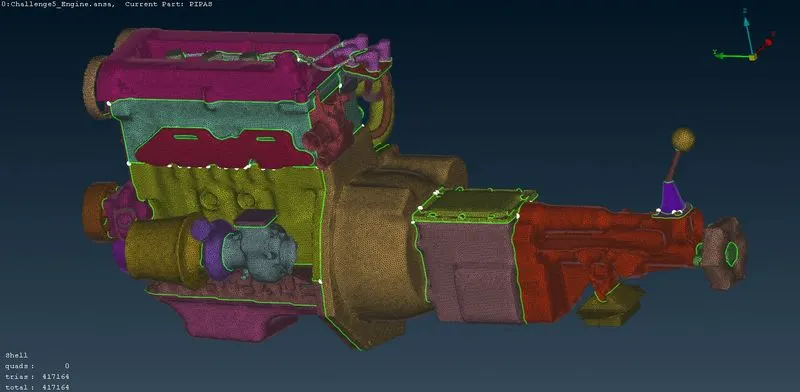
The final image of surface wrap automotive engine is shown below figure.
Conclusion:
1. In this report we discuss now to perform surface wrap and how to merge more than one geometry.
2. The number of elements produce by using surface wrap is around 417164, which are all trias elements.
3. Surface wrap is an easy method for complex geometry but the result is not accurate compare to mesh.
Below is the google link of surface wrap of automotive engine.
https://drive.google.com/file/d/1ytNiY-sXM4x-zUI2tsHJFU3hCBizyEjn/view?usp=share_link