Week 5 Challenge : Surface wrap on Automotive Assembly
AIM/OBJECTIVE:
- For the given models, check for geometrical errors and delete surfaces which are unwanted for Surface Wrap.
- After clearing geometry, Merge all 3 models and perform surface wrap.
GIVEN:
a. Challenge5_Engine.ansa file to be downloaded
b. Challenge5_GearBox.ansa file to be downloaded
c. Challenge5_Transmission.ansa file to be downloaded
d. Target length for Wrap = 5mm
PROCEDURE FOLLOWED WILL BE:
- Geometry Clean Up of each part
- Merge
- Surface Wrap
BASIC STEPS TO BE FOLLOWED WHILE STARTING THE ANSA
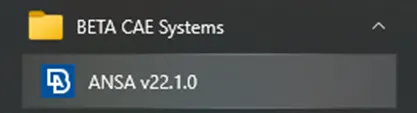
Click on the ANSA v22.1.0 in the Start Menu to open the ANSA software.
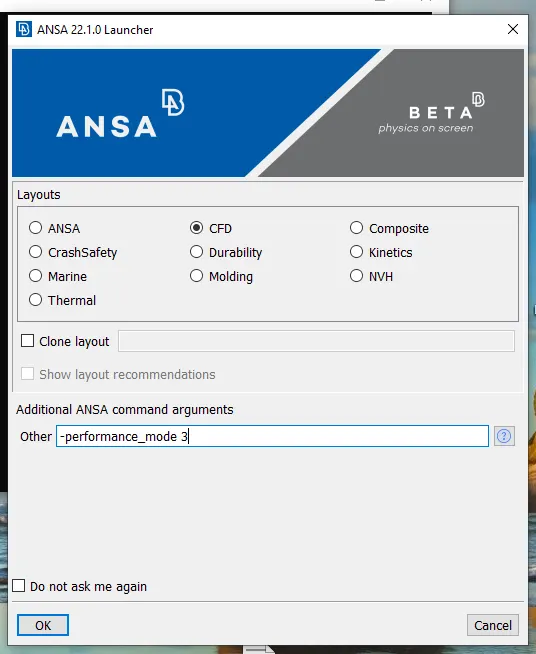
After clicking the ANSA v22.1.0 the above window pops up. In the above poped up window, select the CFD in Layouts.
In additional ANSA command arguments change the other to -performance_mode 3
Always remember not to click/tick on Dont ask me again. Finally click the OK button.
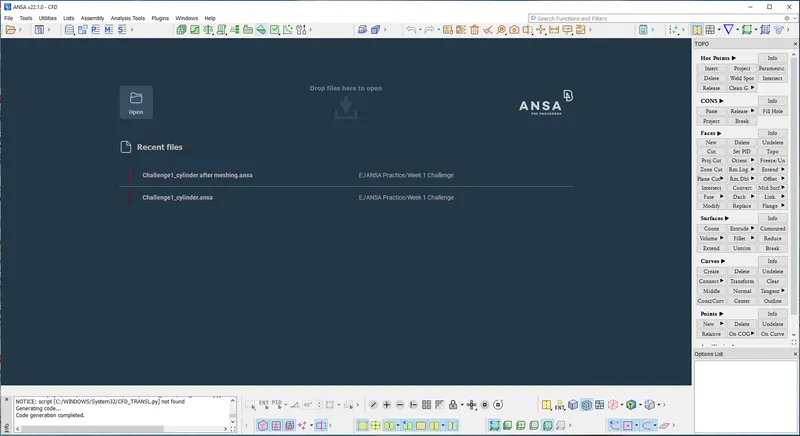
After opening the above window, right click on the top tab with icons and select the show labels and click apply to all
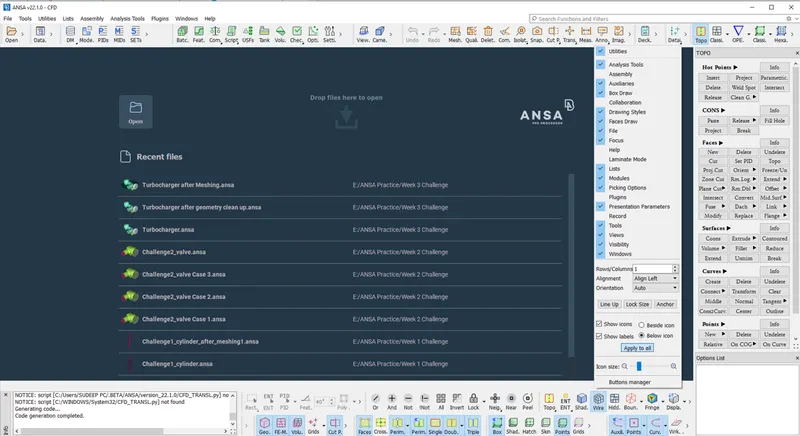
Open the downloaded Challenge5_Engine.ansa file as shown below
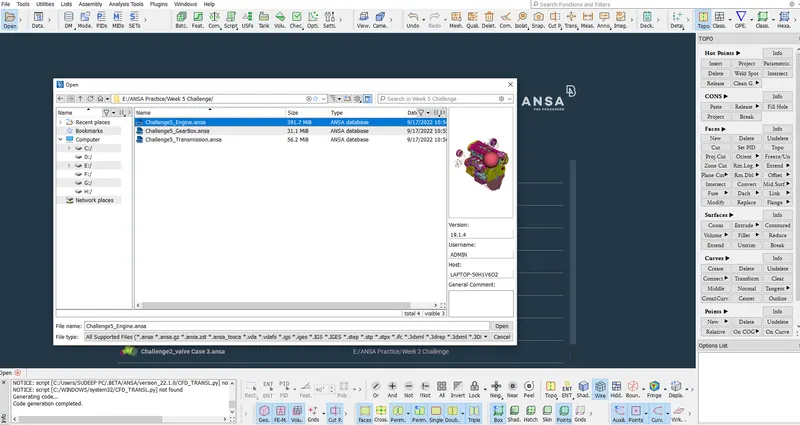
Click on the open.
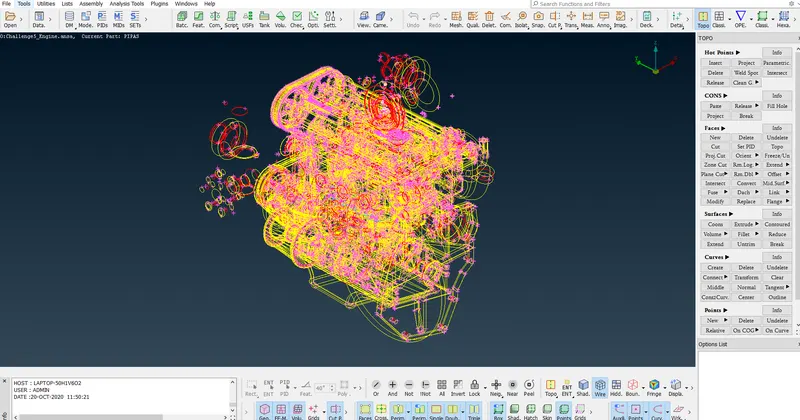
Wireframe view of the model after opening.
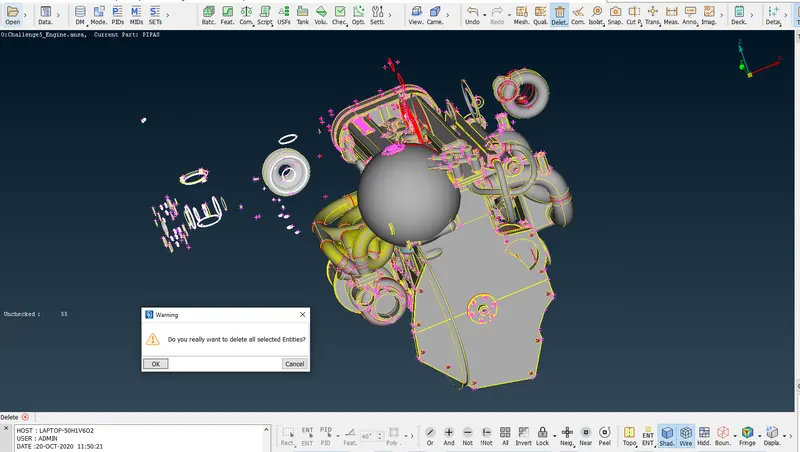
After opening the model we see unnecessary or not required surfaces. So we start deleting them one by one.
The selected surface in the above image is not required and is deleted using universal delete.
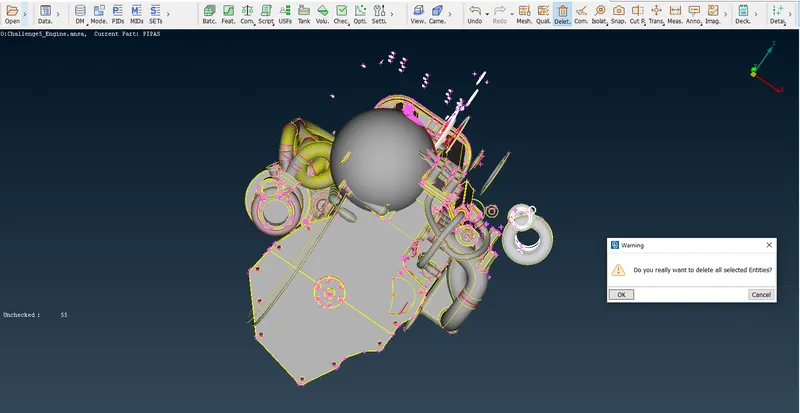
The selected surface in the above image is not required and is deleted using universal delete.
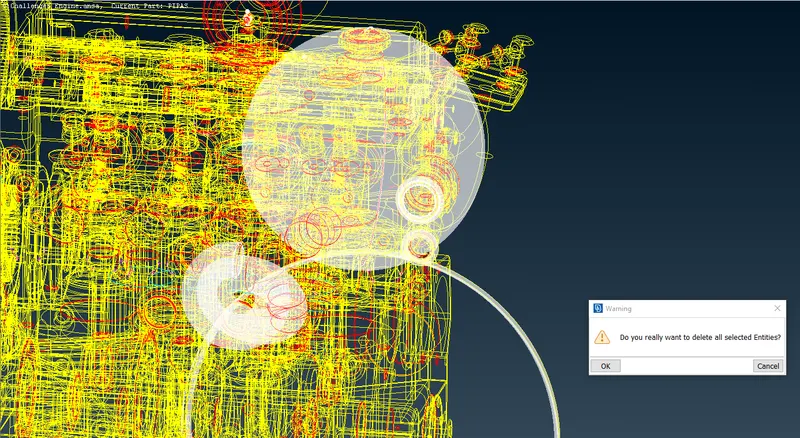
The selected surface in the above image is not required and is deleted using universal delete.
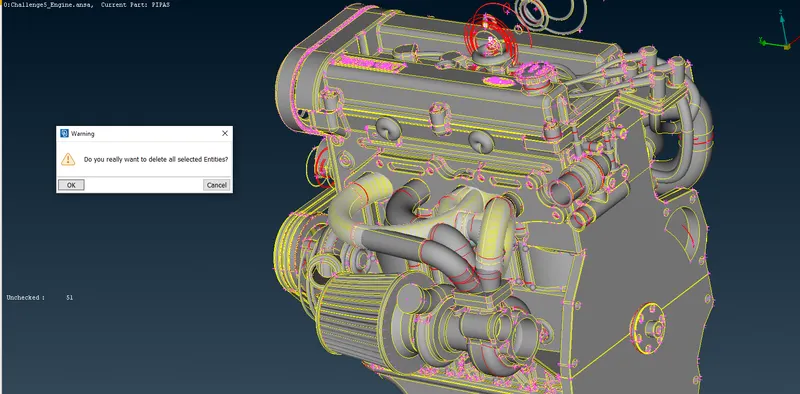
The selected surface in the above image is not required and is deleted using universal delete.
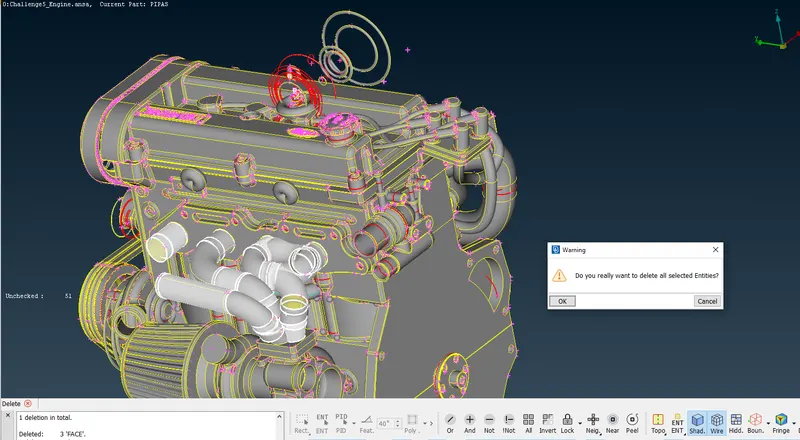
The selected surface in the above image is not required and is deleted using universal delete.
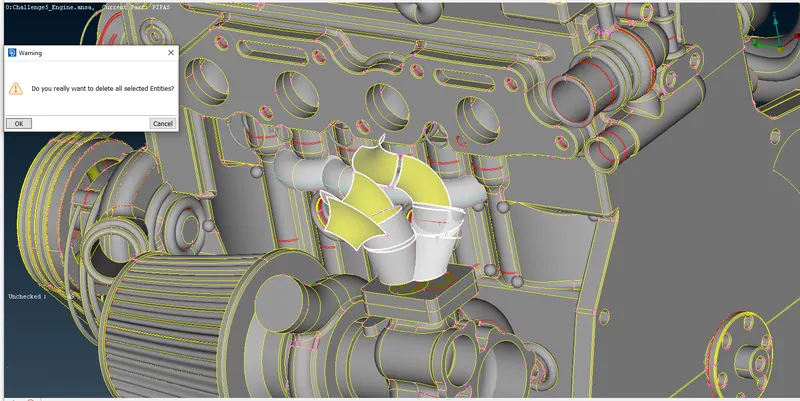
The selected surface in the above image is not required and is deleted using universal delete.
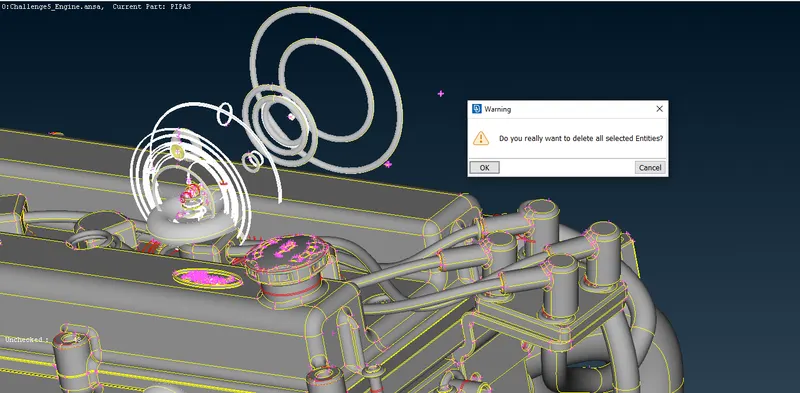
The selected surface in the above image is not required and is deleted using universal delete.
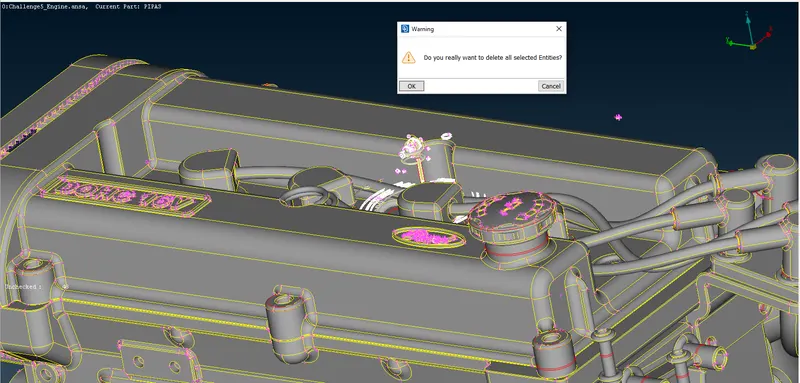
The selected surface in the above image is not required and is deleted using universal delete.
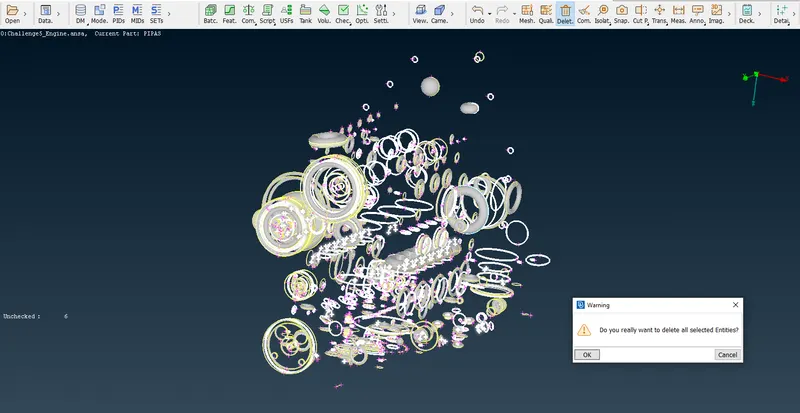
Now using Not and PID region I have isolated the unwanted surfaces which are shown in the above image.
The selected surface in the above image is not required and is deleted using universal delete.
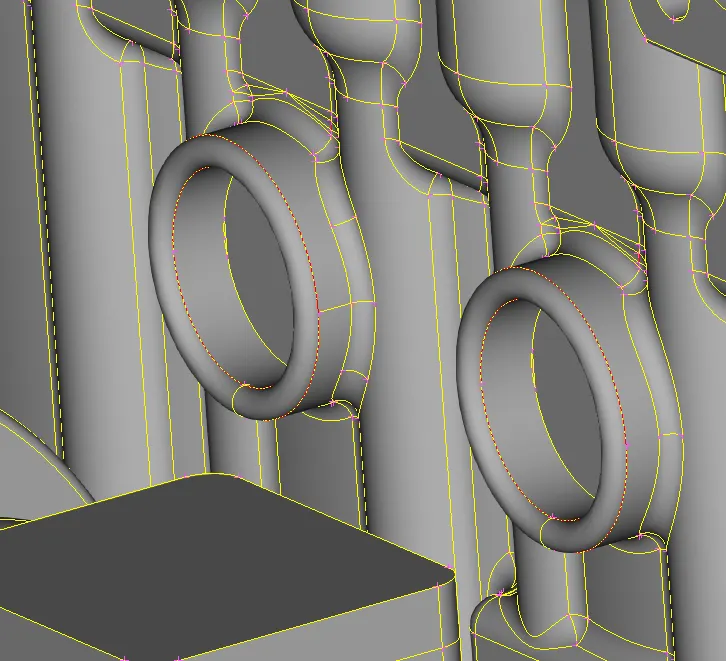
Red cons are present as shown in the above image.
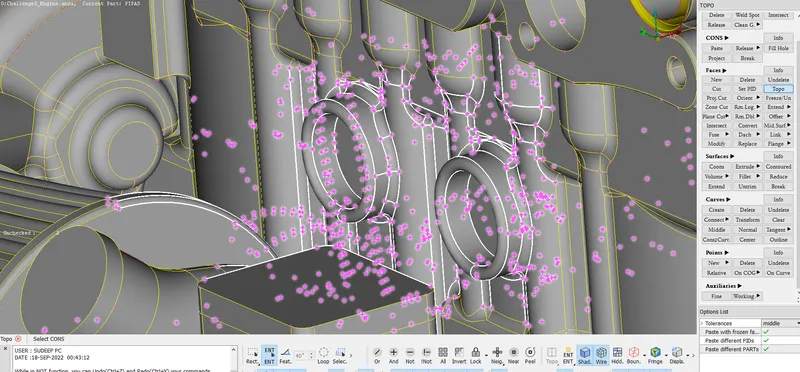
A TOPO is used for the selected portion as shown in the above image.
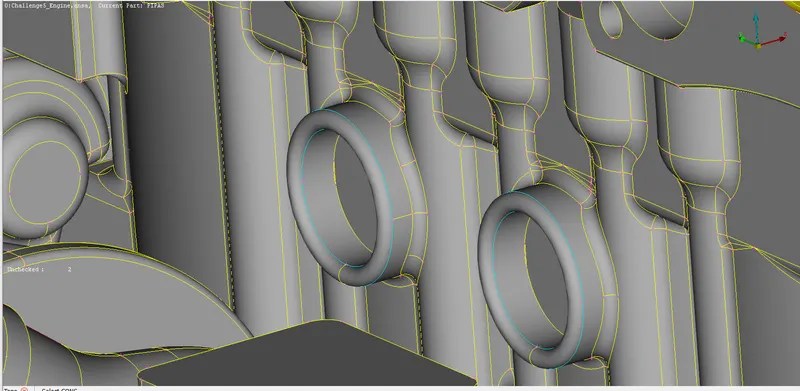
Red cons are converted to blue / triple cons.
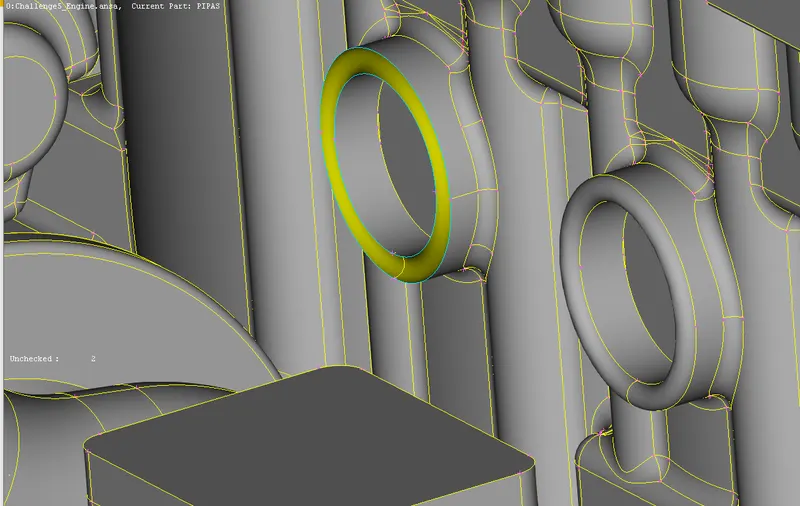
Using Not option we highlight the underlying unwanted surface. Using universal delete we delete the unwanted surfaces and the triple cons are resolved.
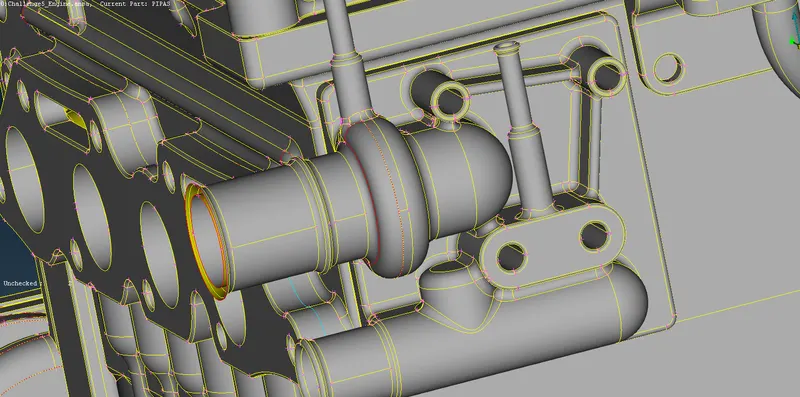
Red cons are present as shown in the above image.
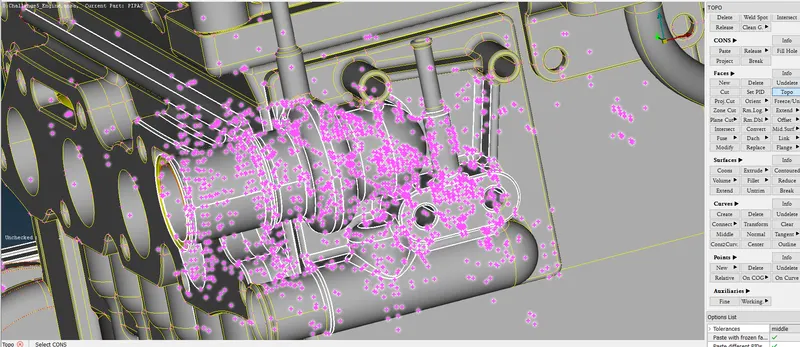
A TOPO is used for the selected portion as shown in the above image.
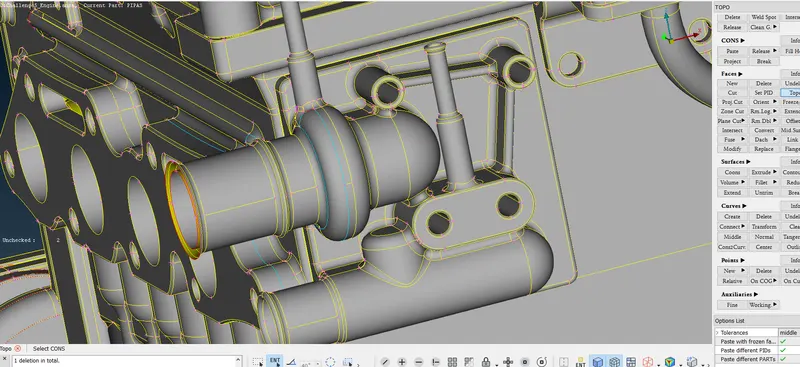
Red cons are converted to blue / triple cons.
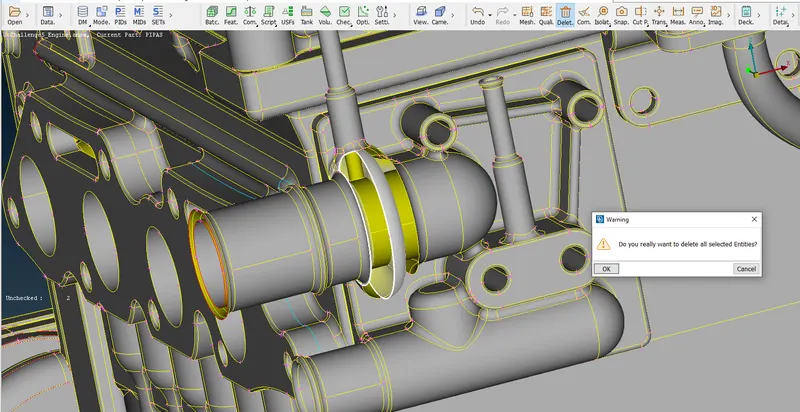
Using Not option we highlight the underlying unwanted surface. Using universal delete we delete the unwanted surfaces and the triple cons are resolved.
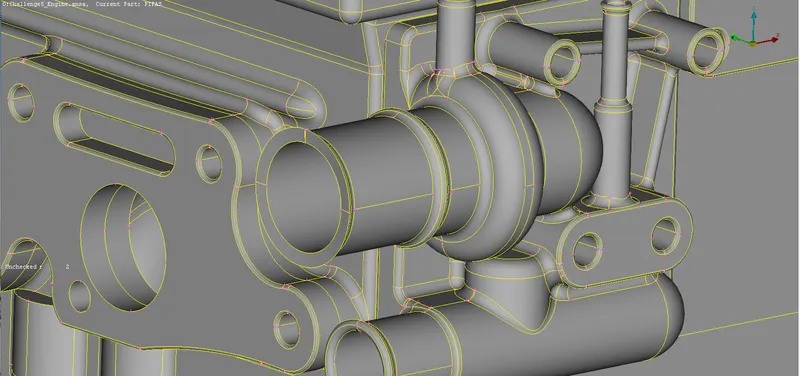
We create the new face and the red cons are resolved.
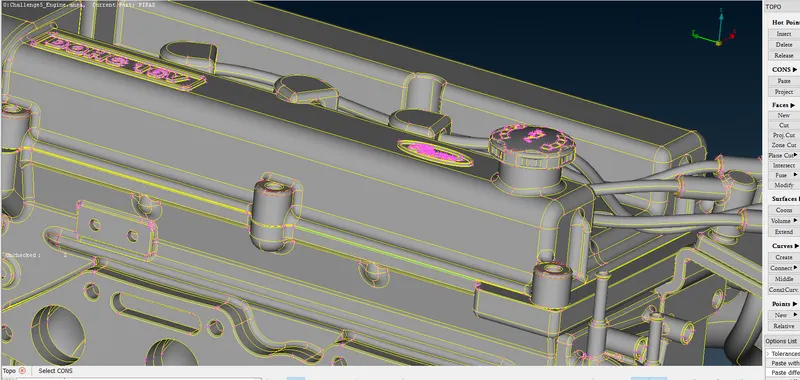
Red cons are present as shown in the above image.
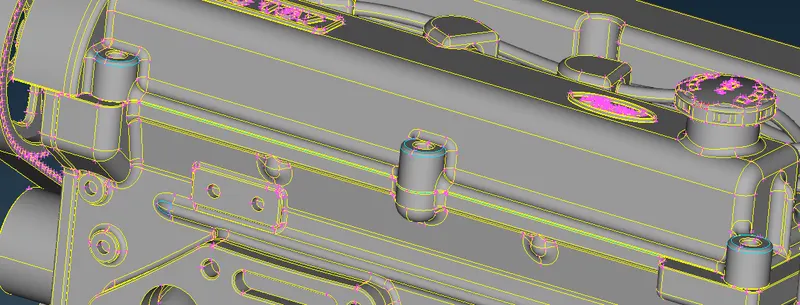
A TOPO is applied and the red cons are converted to blue / triple cons as shown in the above image.
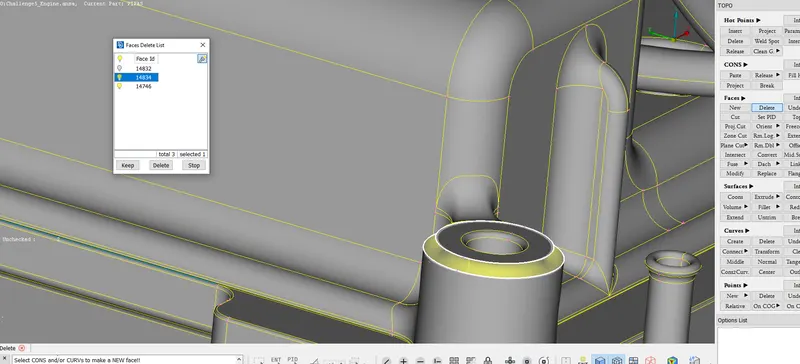
Using Not option we highlight the underlying unwanted surface. Using Delete under Faces in TOPO we delete the unwanted surfaces and the triple cons are resolved.
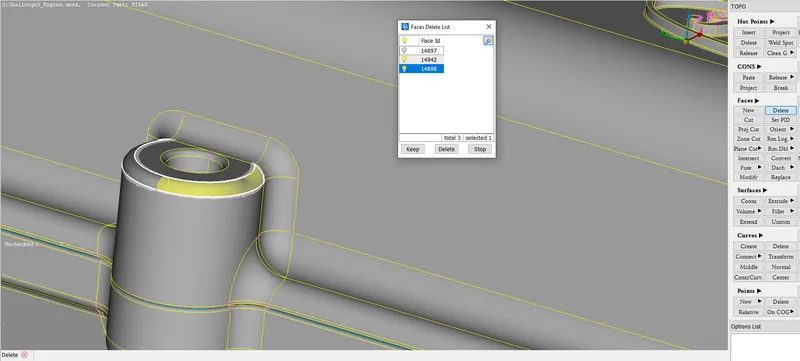
Using Not option we highlight the underlying unwanted surface. Using Delete under Faces in TOPO we delete the unwanted surfaces and the triple cons are resolved.
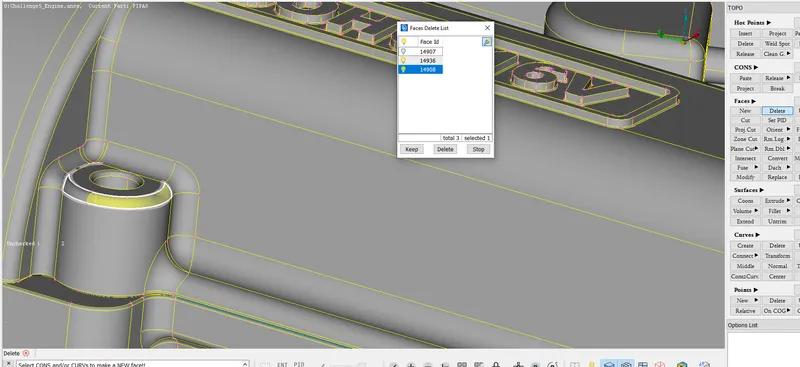
Using Not option we highlight the underlying unwanted surface. Using Delete under Faces in TOPO we delete the unwanted surfaces and the triple cons are resolved.
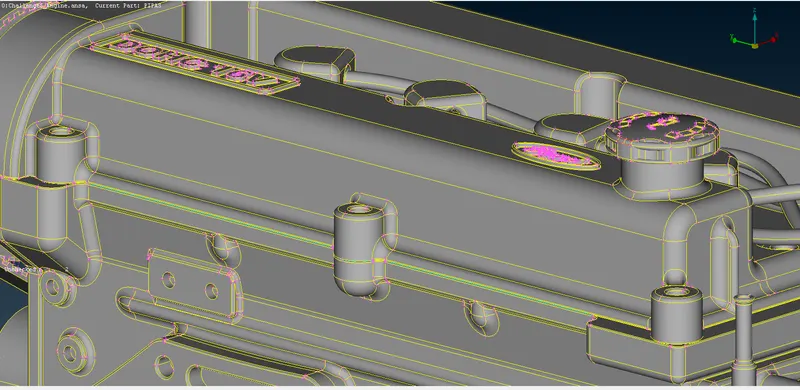
Triple cons are resolved.
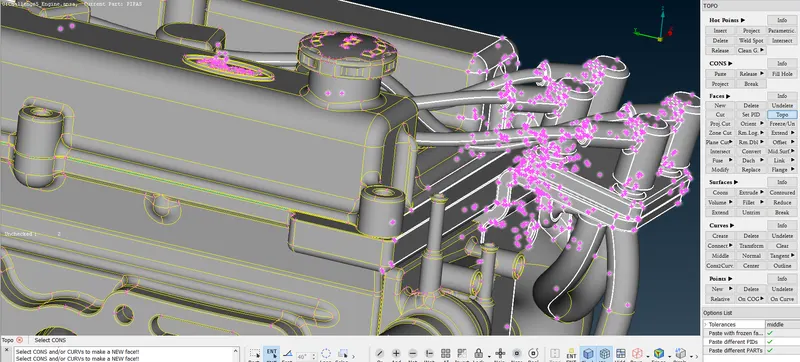
Red Cons are present in the selected region, a TOPO is used for the selected portion as shown in the above image.
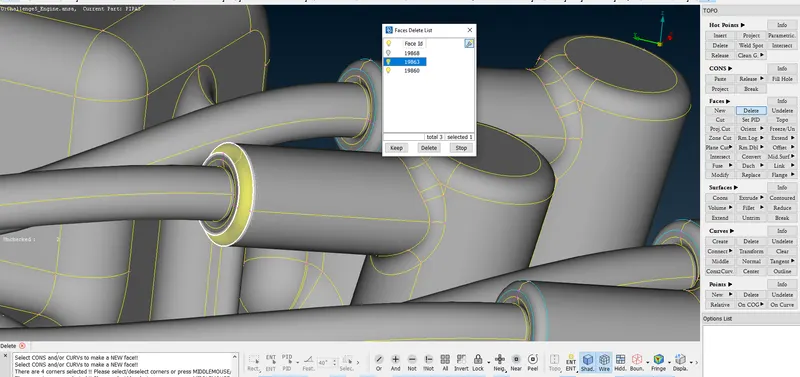
Red cons were turned to blue cons after TOPO. Using Not option we highlight the underlying unwanted surface. Using Delete under Faces in TOPO we delete the unwanted surfaces and the triple cons are resolved.
The repetitive procedure is applied to the blue cons present in the above image.
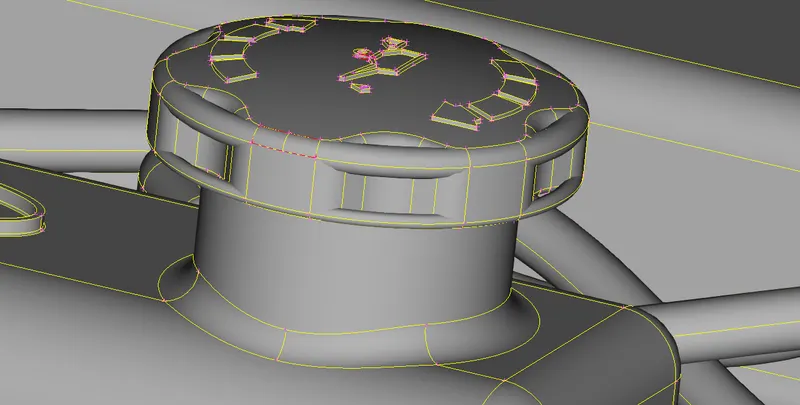
Red cons is present in the above image.
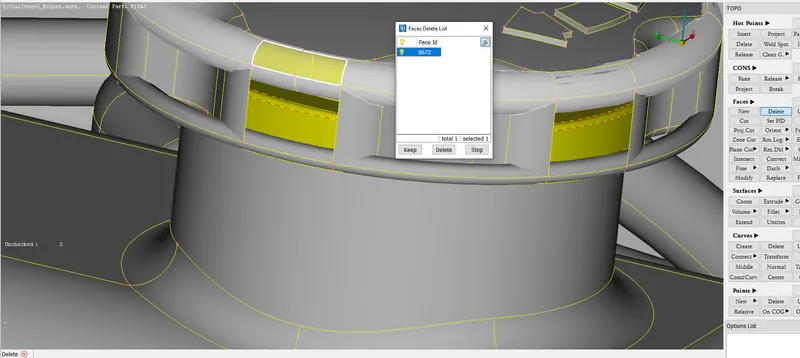
The selected surface is deleted using the Delete under Faces in TOPO.
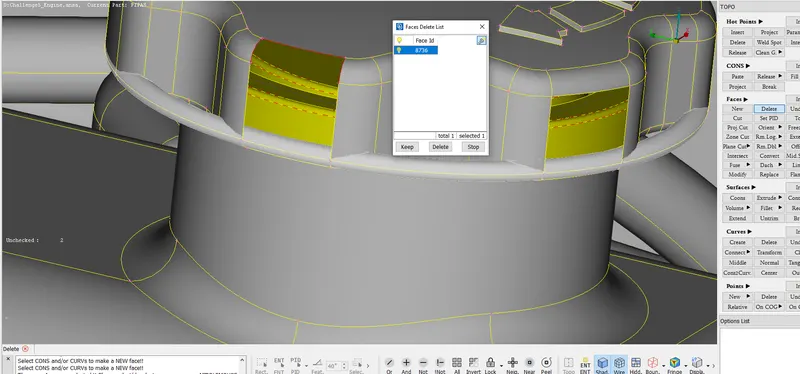
The selected surface is deleted using the Delete under Faces in TOPO. A New Face is created using New under Faces in TOPO and Red cons are resolved.
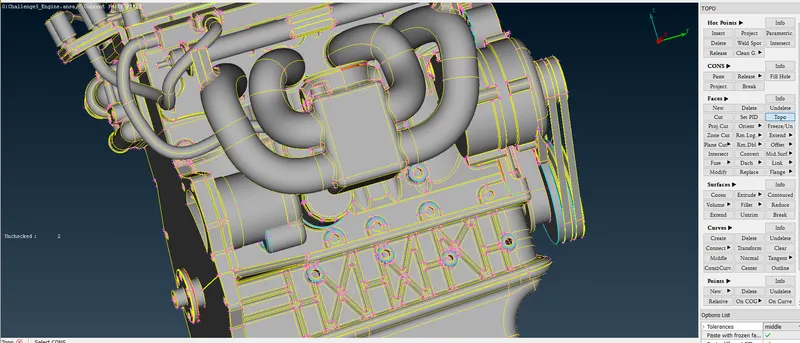
Using TOPO at the bottom portion of the engine in the above image, red cons gets converted to blue cons.
Using Not option we highlight the underlying unwanted surface. Using Delete under Faces in TOPO we delete the unwanted surfaces and the triple cons are resolved.
The repetitive procedure is applied to the blue cons present in the above image.
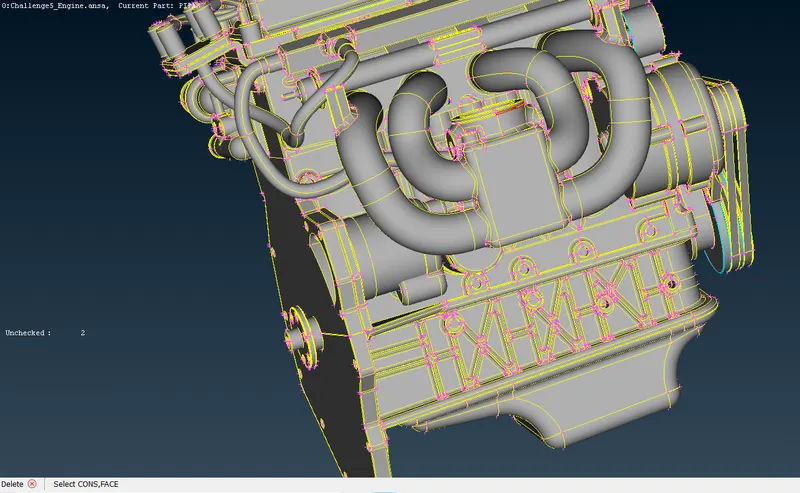
Blue / triple cons in the above image is resolved.
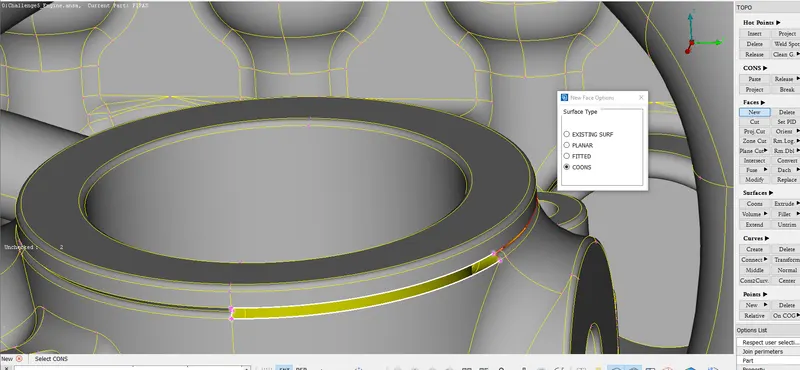
Red cons were present in the selected portion of the above image. Red con was present as there was no surface present.
The hot points are created on the curves and new faces were made using New under Faces in TOPO.
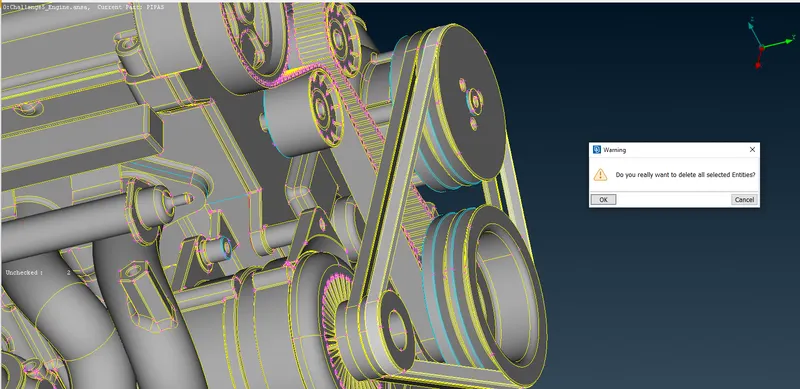
The belt is selected using PID region and it is deleted using universal delete as they are not required for Surface Wrap.
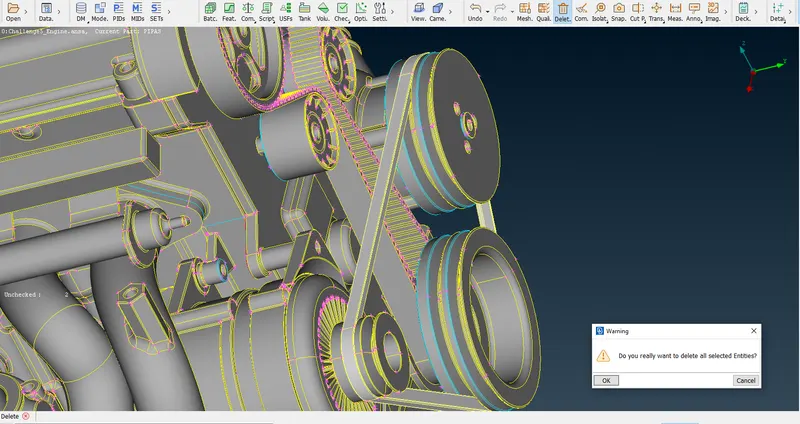
The belt is selected using PID region and it is deleted using universal delete as they are not required for Surface Wrap.
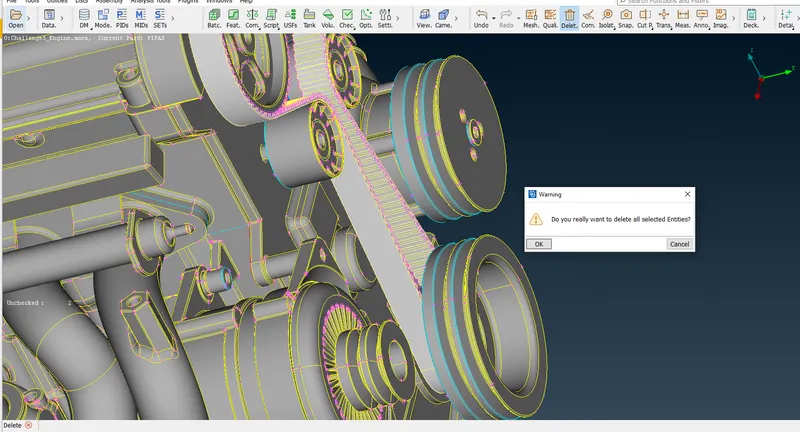
The toothed belt is selected using PID region and it is deleted using universal delete as they are not required for Surface Wrap.
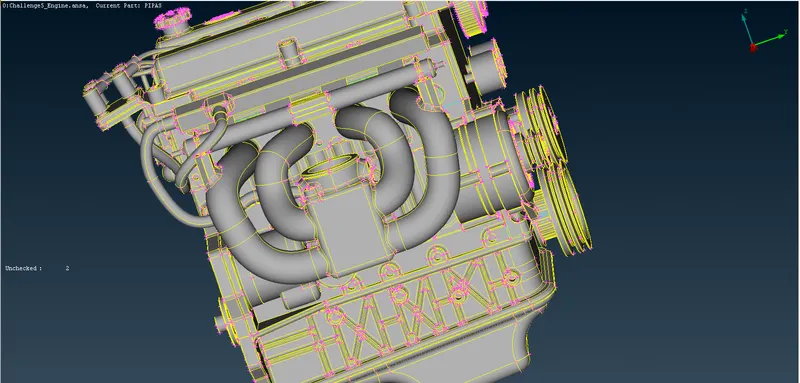
Blue cons present on the pulley and idler were resolved. The following procedure has been adopted.
Using Not option we highlight the underlying unwanted surface. Using Delete under Faces in TOPO we delete the unwanted surfaces and the triple cons are resolved.
The repetitive procedure is applied to the blue cons present in the pulley and idler seen in the above image.
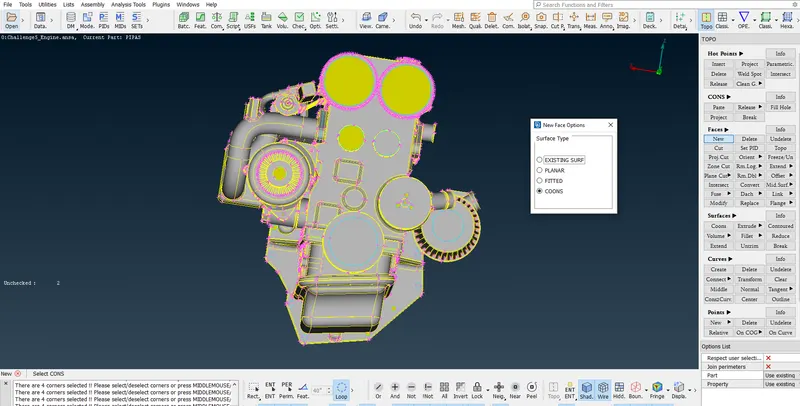
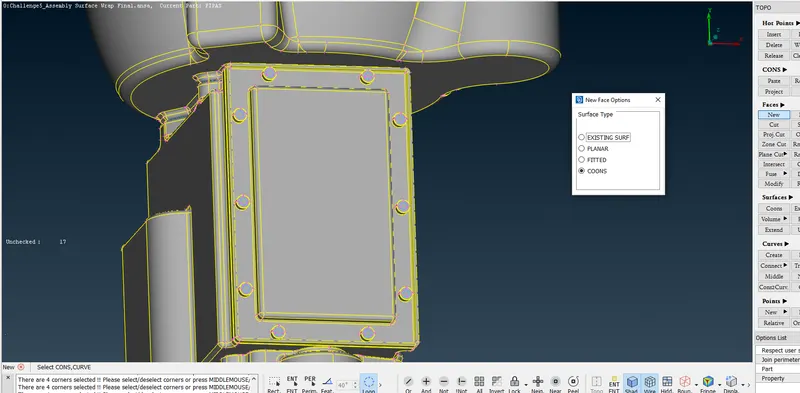
We create faces using COONS in newly poped window New face Options on clicking New under Faces in TOPO for the opening present in the above image. This is done to create water tight faces.
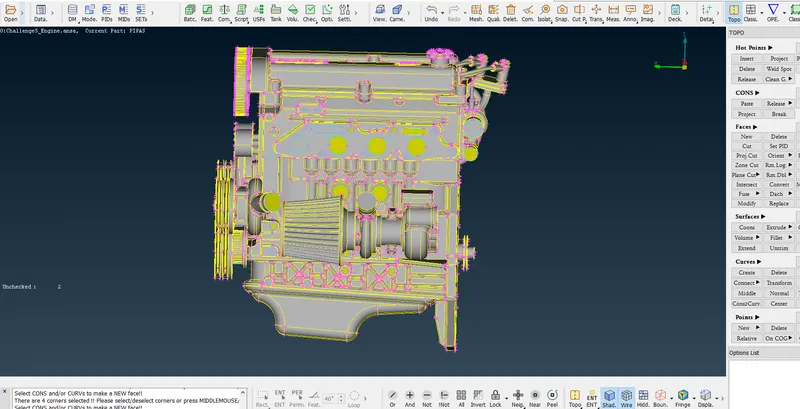
We create faces using COONS in newly poped window New face Options on clicking New under Faces in TOPO for the opening present in the above image.
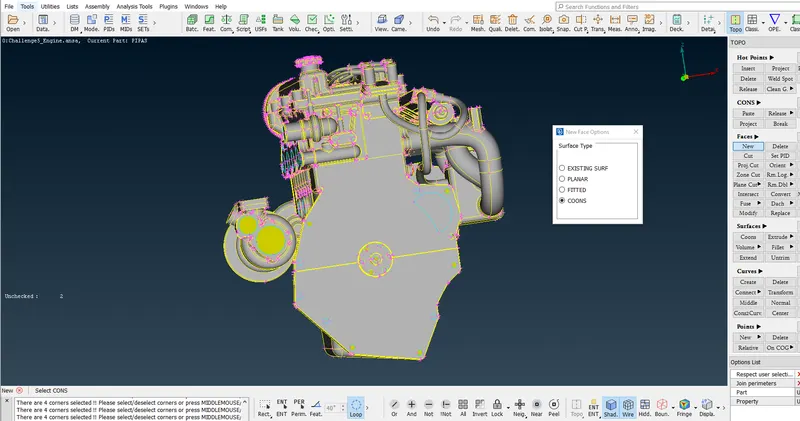
We create faces using COONS in newly poped window New face Options on clicking New under Faces in TOPO for the opening present in the above image.
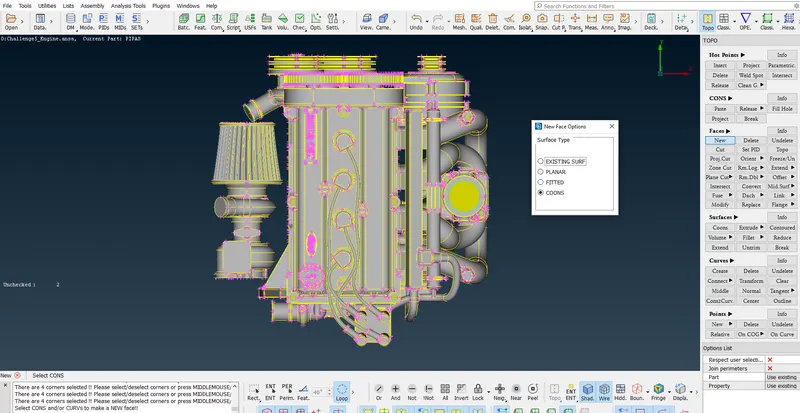
We create faces using COONS in newly poped window New face Options on clicking New under Faces in TOPO for the opening present in the above image.
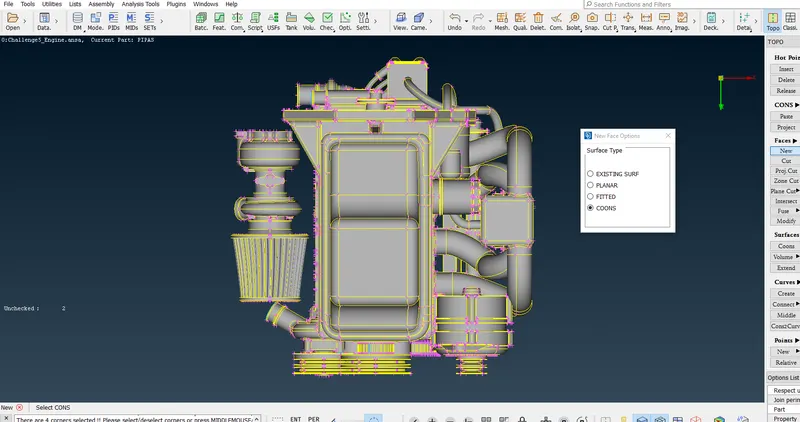
We create faces using COONS in newly poped window New face Options on clicking New under Faces in TOPO for the opening present in the above image.
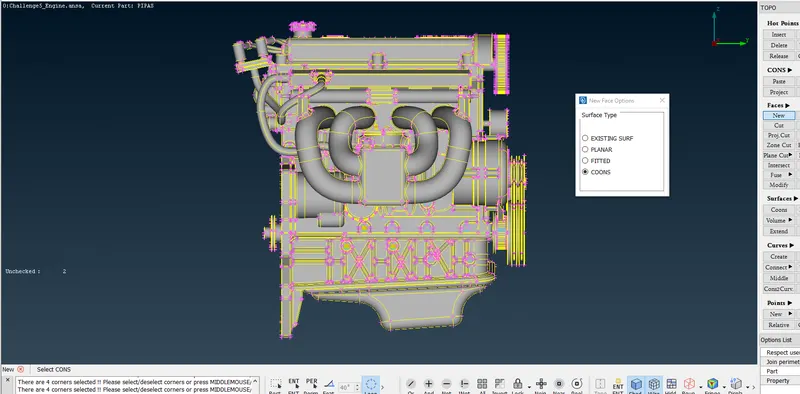
We create faces using COONS in newly poped window New face Options on clicking New under Faces in TOPO for the opening present in the above image.
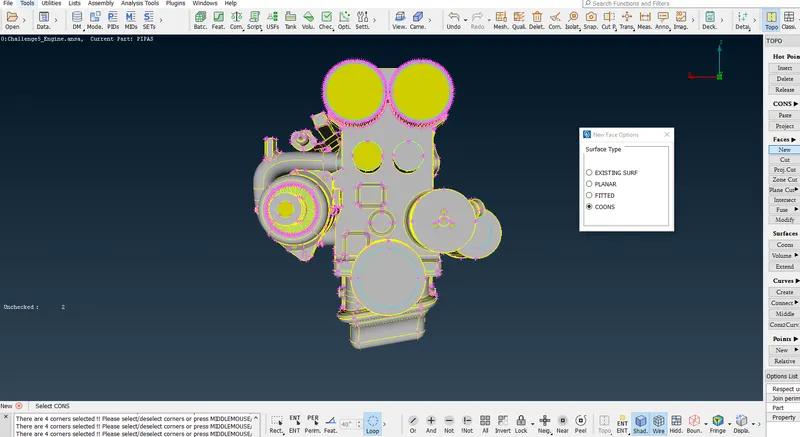
We create faces using COONS in newly poped window New face Options on clicking New under Faces in TOPO for the opening present in the alternator prsent in the above image.
After closing all the opening present in the Engine we save the geometry as Challenge5_Engine after geometry clean up.ansa
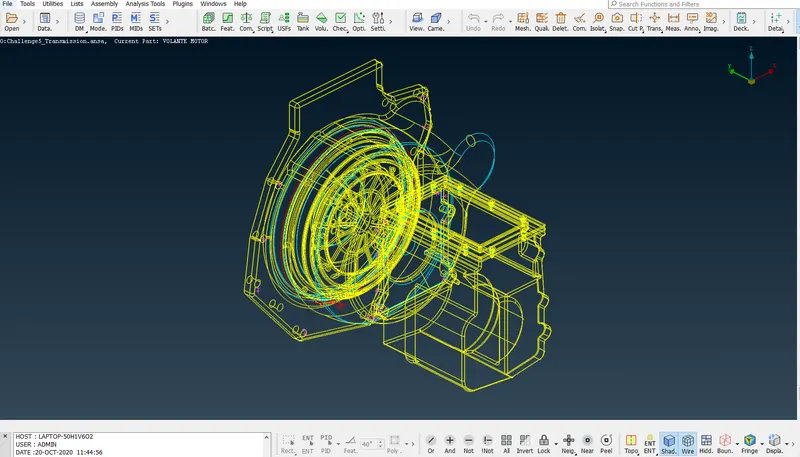
The downloaded file Challenge5_Transmission.ansa is opened by clicking on it where it has been downloaded and saved.
Wireframe view of the transmission is seen after opening the file. We see the red cons and blue cons present in the file.
An attempt will be to resolve the undesired red cons and blue cons.
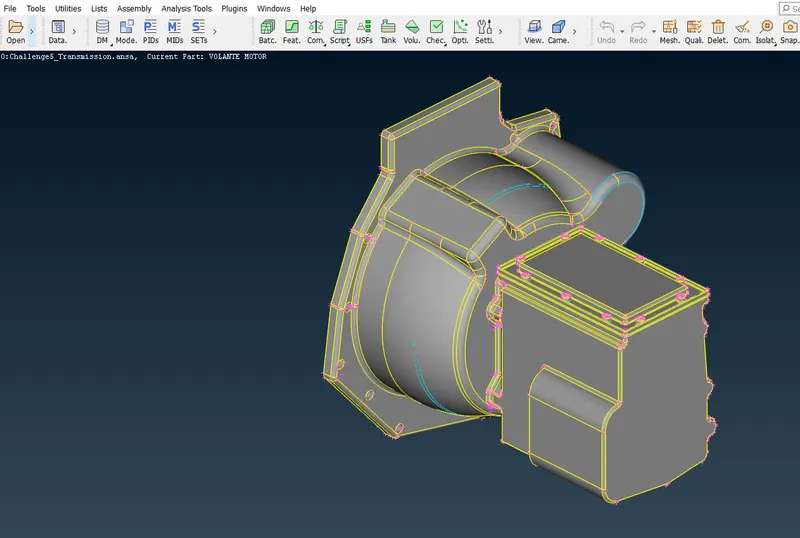
Shading mode is turned on. TOPO is applied on the entire geometry and the triple cons are seen which I attempt to resolve.
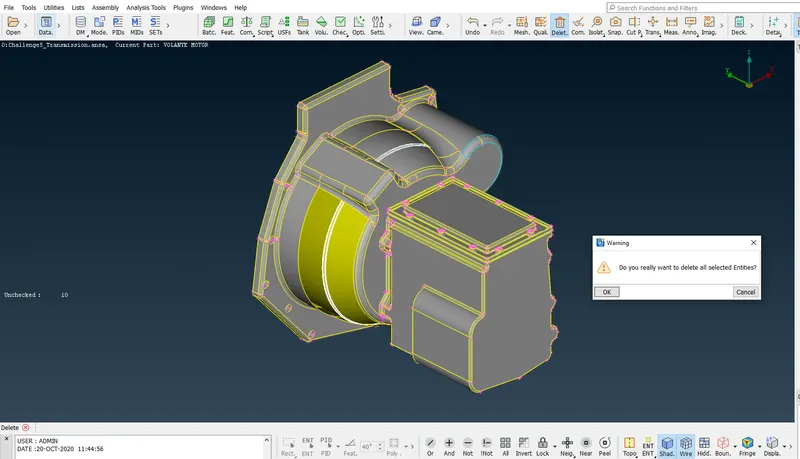
I isolate the undesired face by using Not option as shown in the above image and then using universal deleted the selected surface in the above image is deleted.
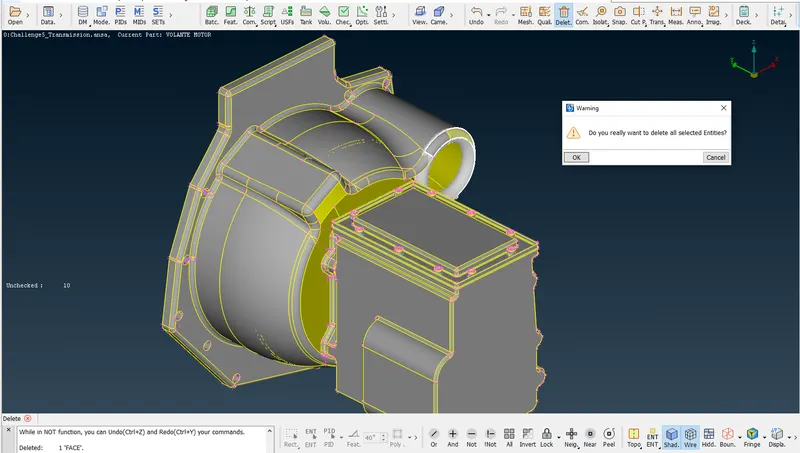
I isolate the undesired face by using Not option as shown in the above image and then using universal deleted the selected surface in the above image is deleted.
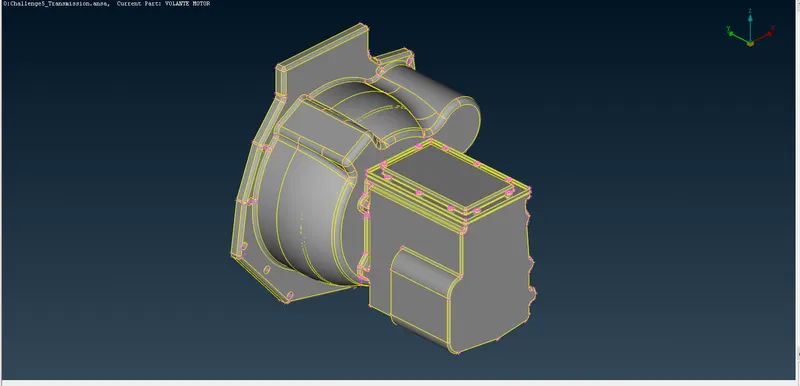
The undesired curves present in the geometry are deleted using Delete under Curves in TOPO. Now we see the blue cons present in the fasteners at Top plate in the above image.
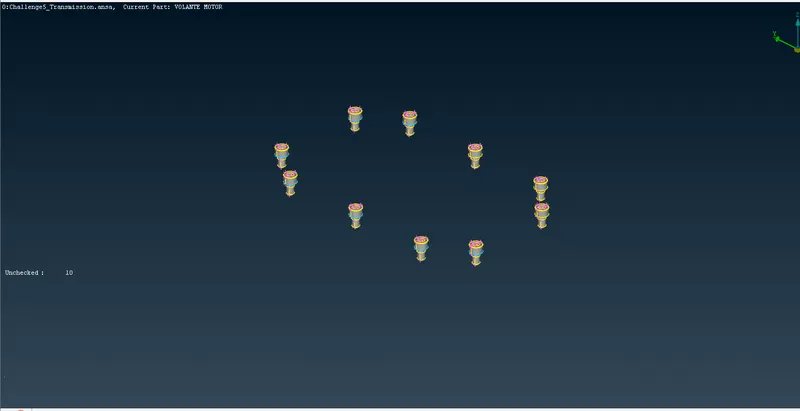
Using !Not option we isolate the fasterners where blue cons are present.
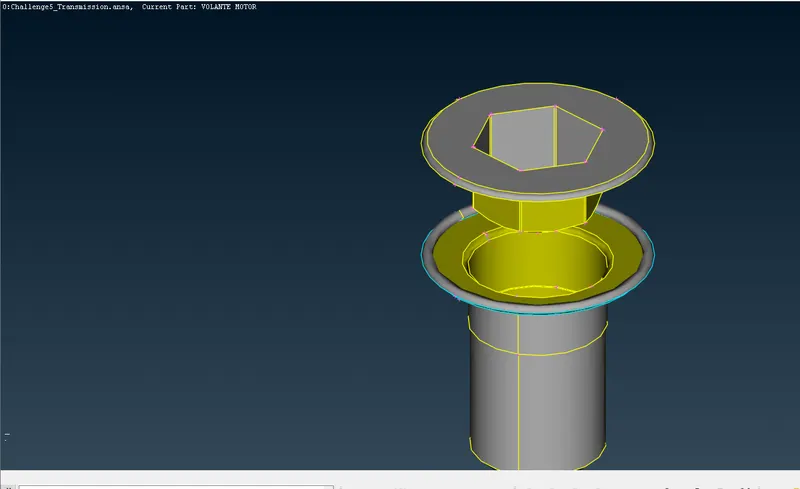
The seleted face is isolate using Not option, after isolating a ring is seen causing the blue cons.
The above procedure is repeated for all the fasteners.
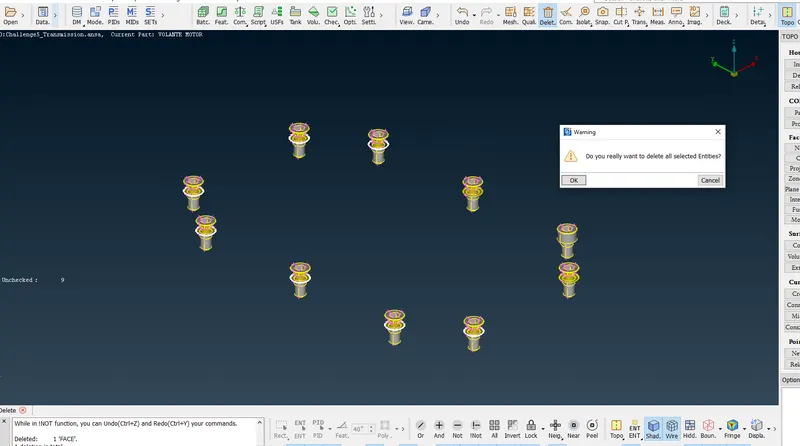
Using universal delete the rings are selected as highlighted in the above image and are deleted using universal delete.
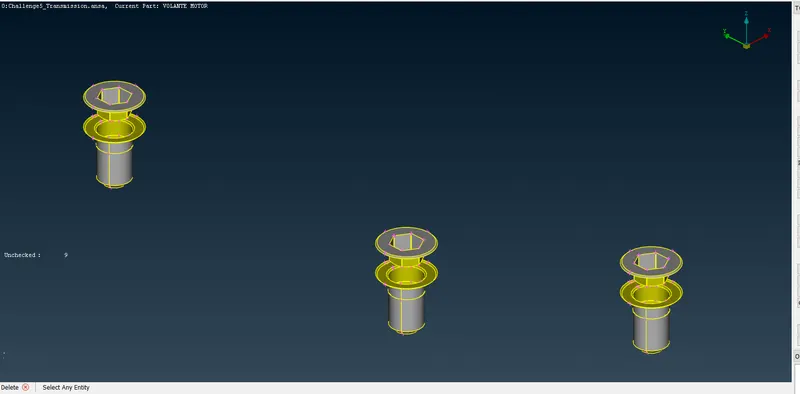
The fasteners after deleteting the undesired surface. Triple cons in the fasteners are resolved.
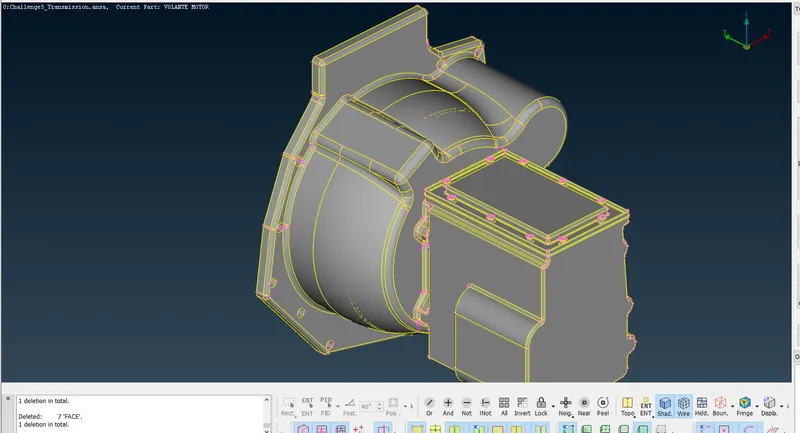
All the undesired blue cons are resolved as ahown in the view of the above image.
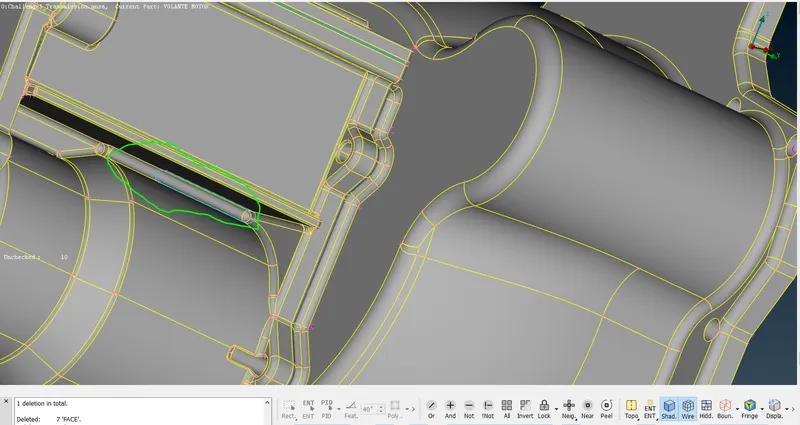
After careful observation of the transmission geometry file one blue con is traced as encircled in green.
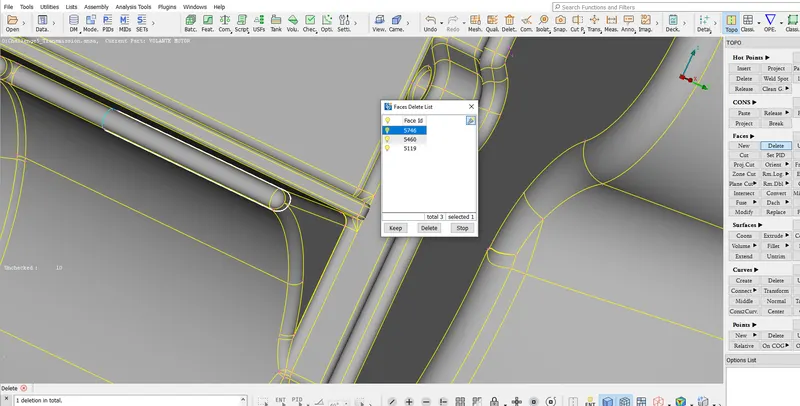
The selected undesired surface causing the triple con is deleted using Delete under Faces in TOPO.
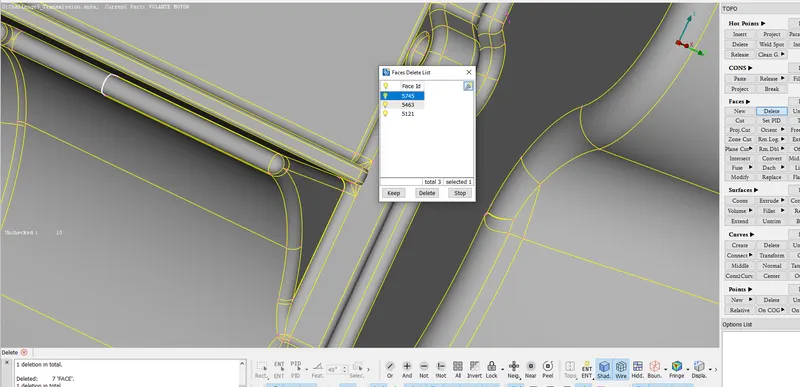
The selected undesired face causing the triple con is deleted using Delete under Faces in TOPO.
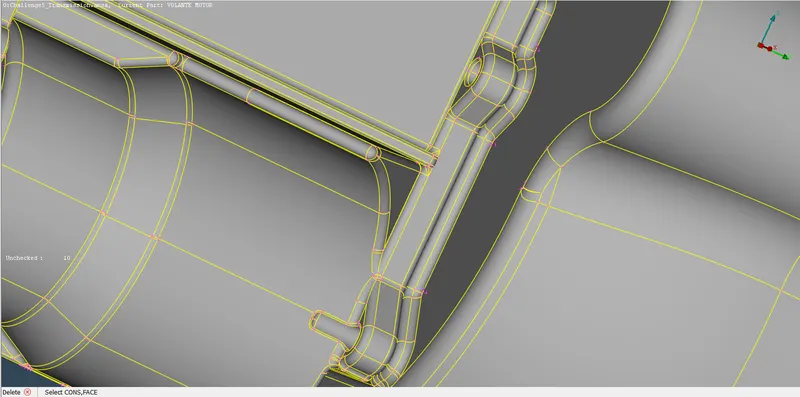
Hence the triple / blue con is resolved as seen in the above image.
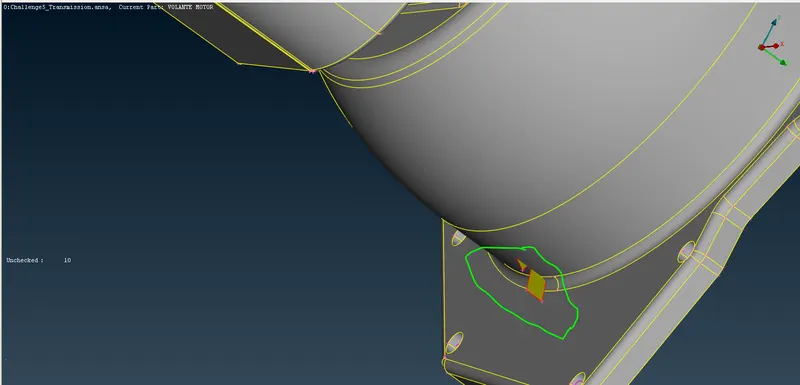
During observation the undesired surface are spotted.
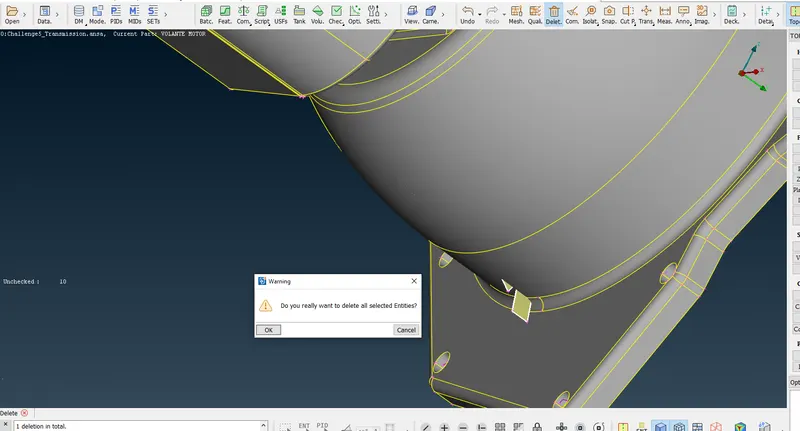
The selected undesired surfaces are deleted using universal delete.
After clearing we save the geometry as Challenge5_Transmission after geometry clean up.ansa
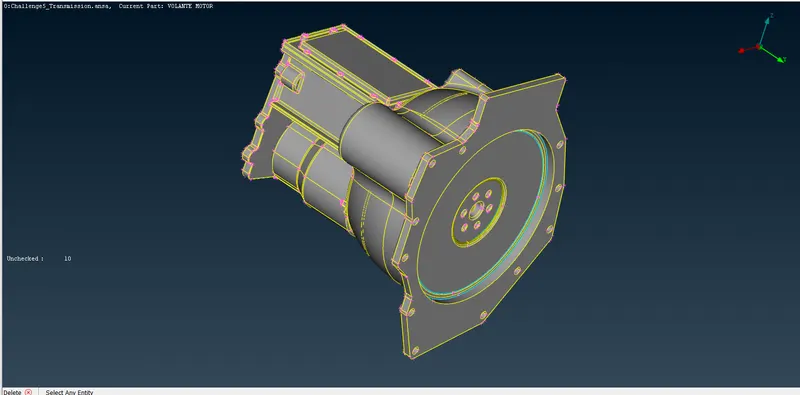
The openings are not closed now as this part has to be merged with the engine.
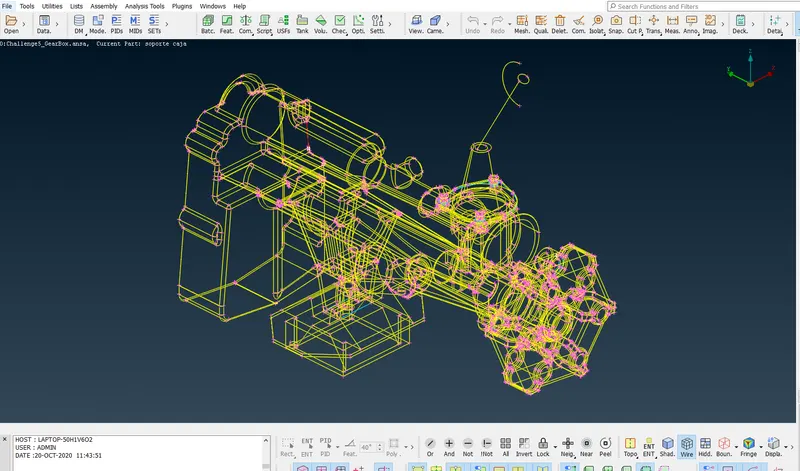
The downloaded file Challenge5_Gearbox.ansa is opened by clicking on it where it has been downloaded and saved.
Wireframe view of the transmission is seen after opening the file. We see the red cons and blue cons present in the file.
An attempt will be to resolve the undesired red cons and blue cons.
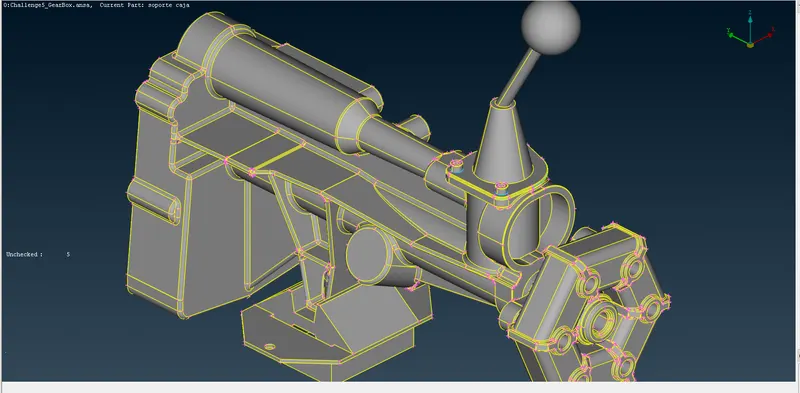
First the attempt would be to resolve the blue cons present in the fasteners at the base of the knob present in the above image.
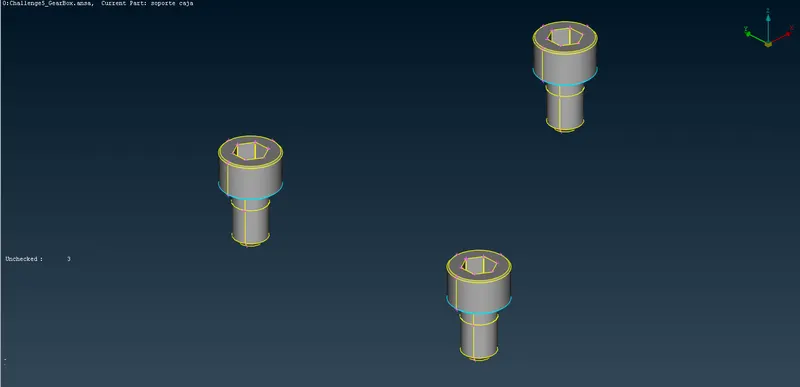
Using !Not we isolate the fasteners as shown int the above image.
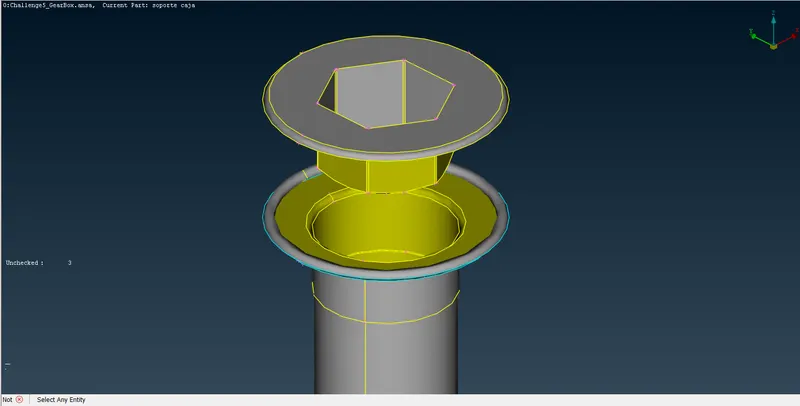
The seleted face is isolate using Not option, after isolating a ring is seen causing the blue cons.
The above procedure is repeated for all the fasteners.
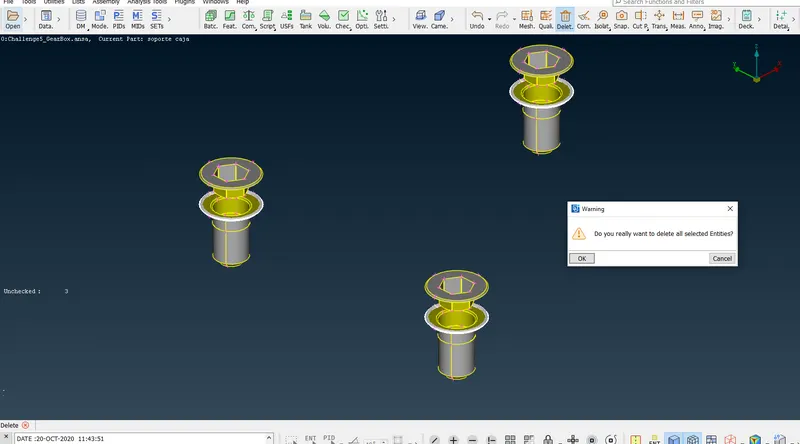
Using universal delete the rings are selected as highlighted in the above image and are deleted using universal delete.
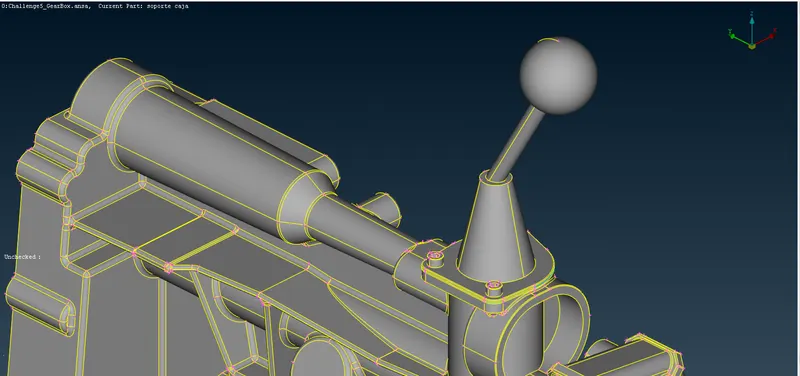
Triple cons in the fasteners are resolved.
After clearing we save the geometry as Challenge5_Gearbox after geometry clean up.ansa
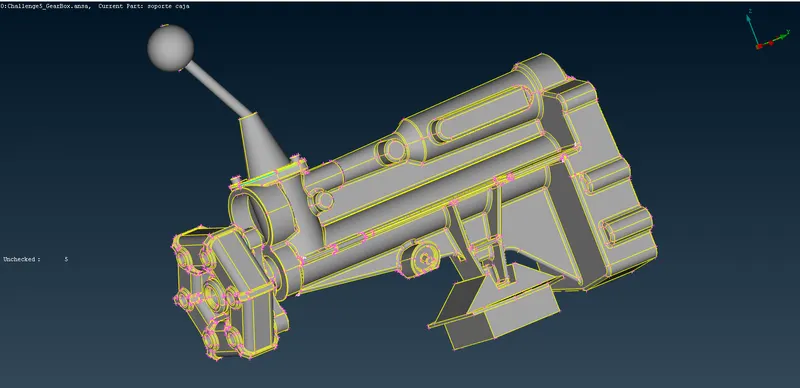
The openings are not closed now as this part has to be merged with the transmission.
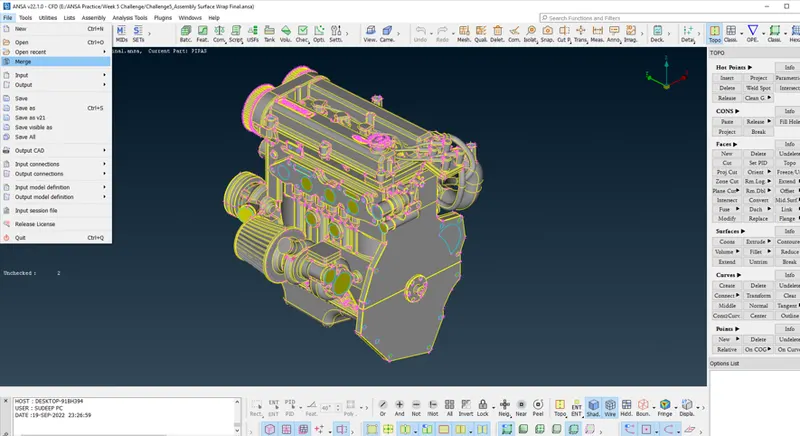
The file named Challenge5_Engine after geometry clean up.ansa is opened. After opening it is saved as Challenge5_Assembly Surface Wrap Final.ansa
After that we click on the File, a Tab is dragged down and we select the Merge option in that Tab as shown in the above image.
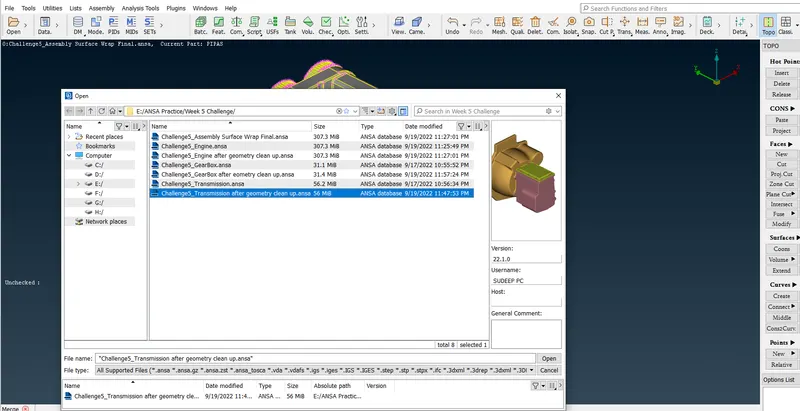
A new window Pops up with the current library where our files are saved. The file named Transmission after geometry clean up.ansa is clicked and opened.
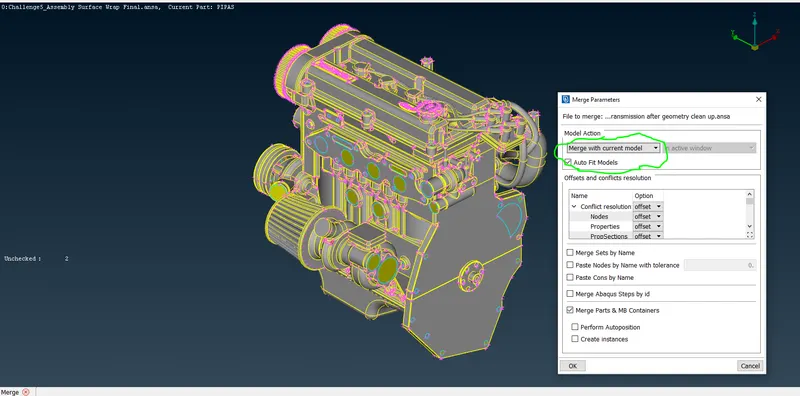
A new window pops up named Merge Parameters in that we select Merge with current model under Model Action and click the check box Auto Fit Models as highlighted green encircled in the above image and then click OK.
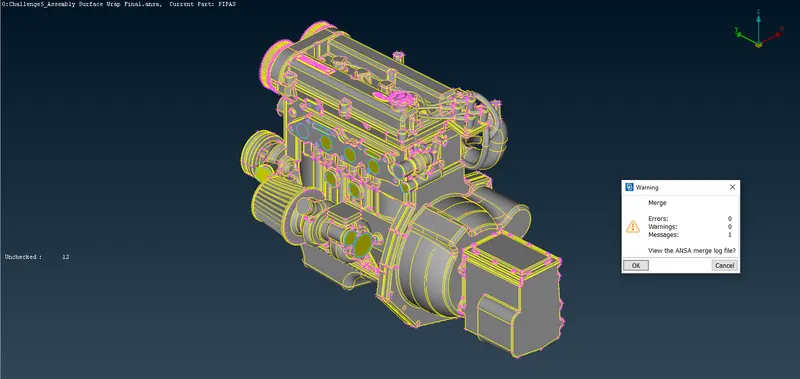
No errors were found and we click on the Cancel
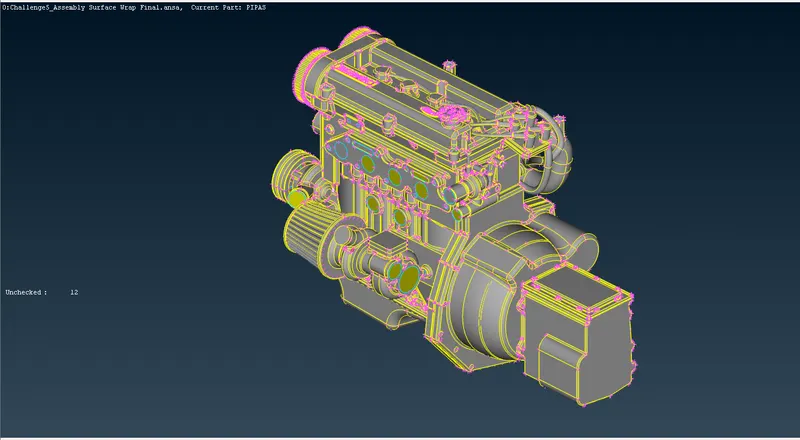
Engine is merged with Transmission successfully.
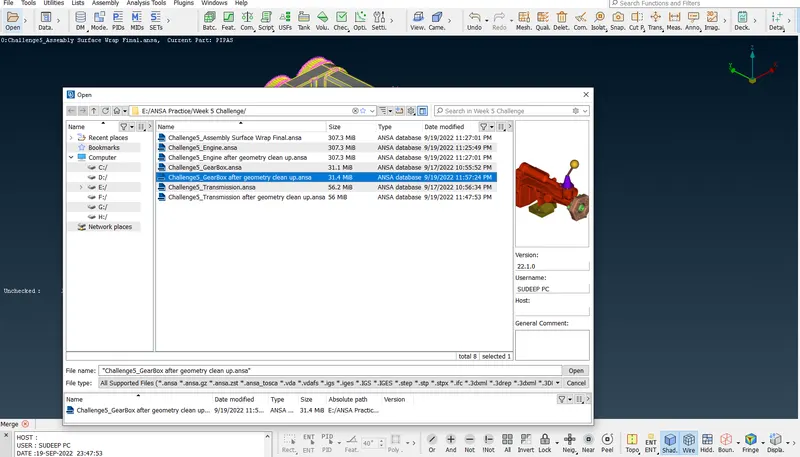
Again we follow the same procedure of merging for the Gearbox.
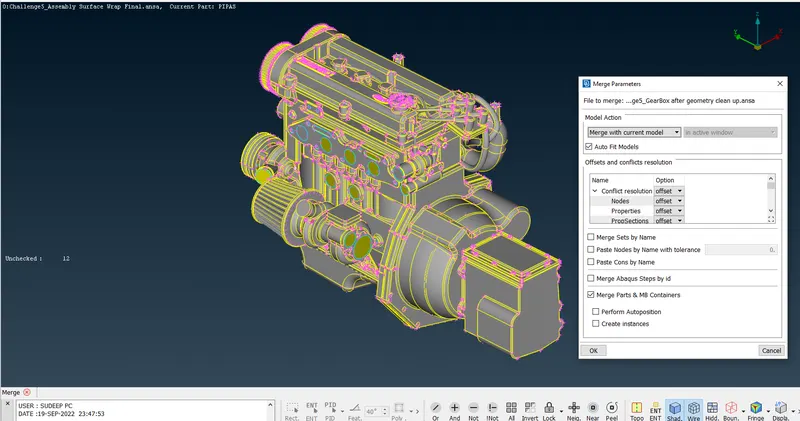
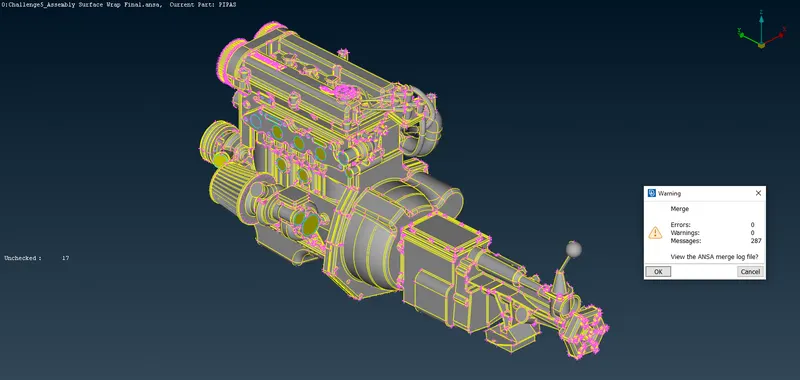
No errors were found and we click on the Cancel.
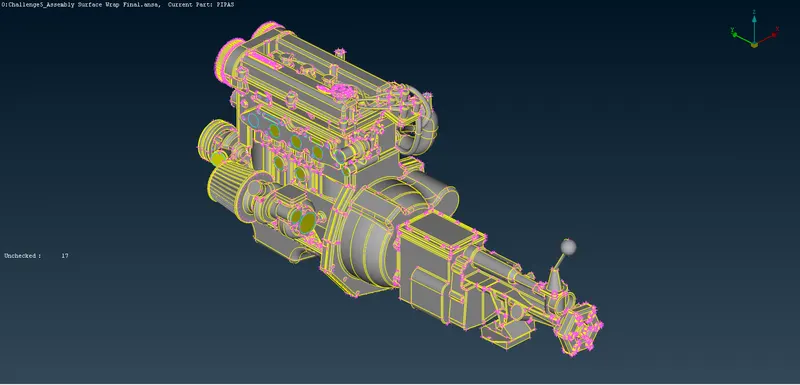
Engine is merged with transmission and transmission is merged with gearbox successfully.
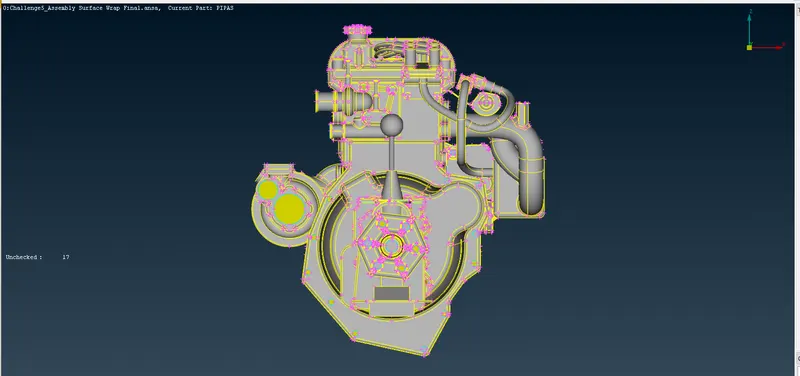
Now we start filling the holes on the surface to create a water tight mesh.
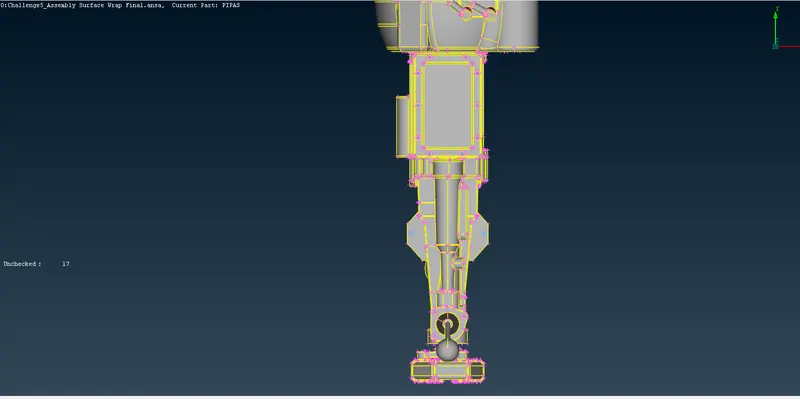
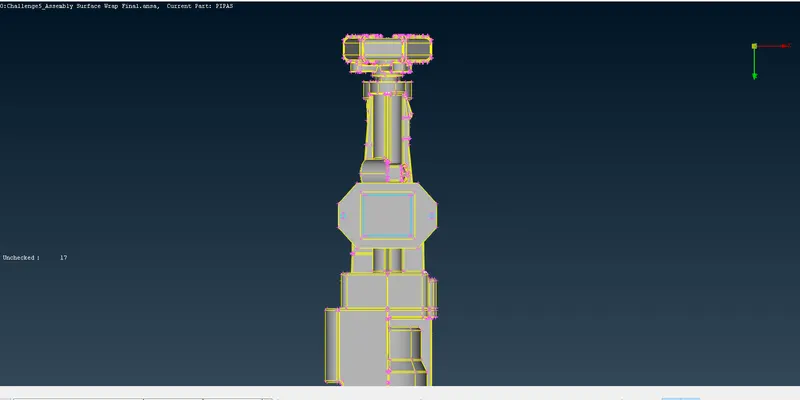
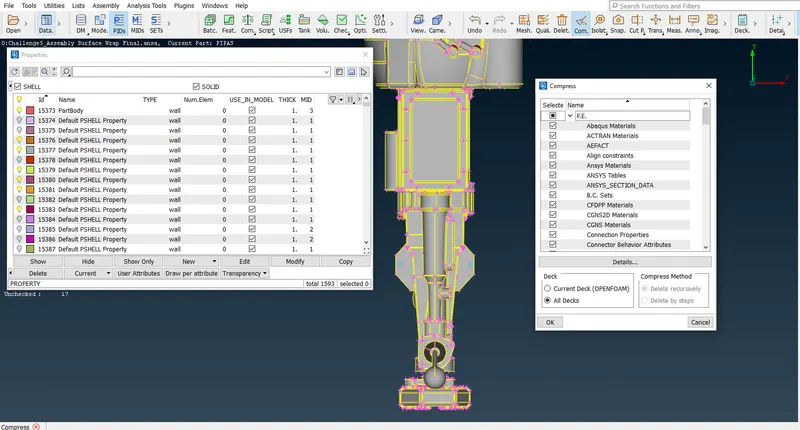
Compress option is used to remove the unassigned PIDs.
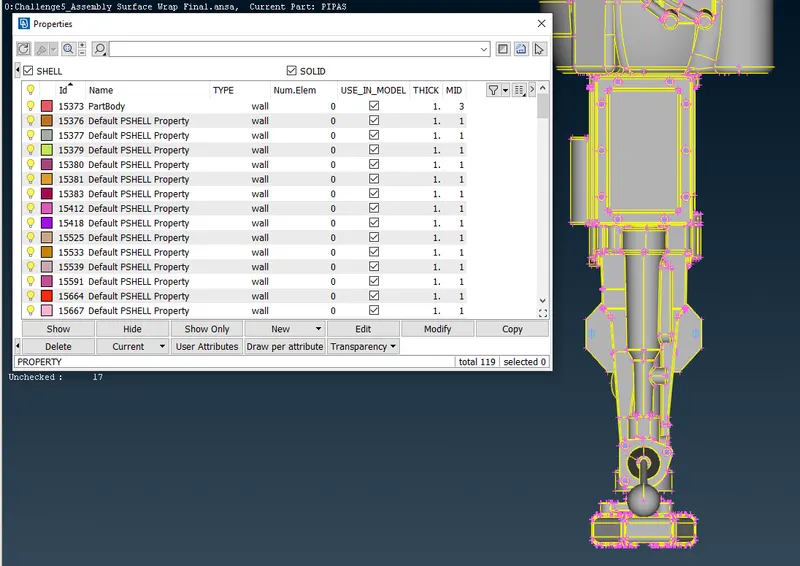
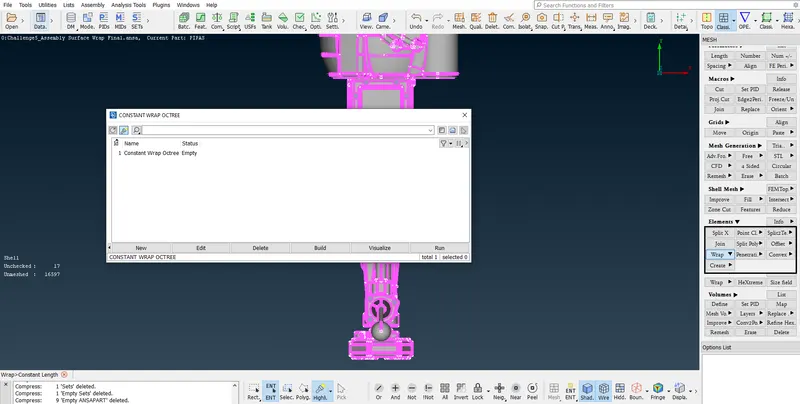
Click on Wrap under Element in MESH a new window pops up named CONSTANT WRAP OCTREE as shown in the above image.
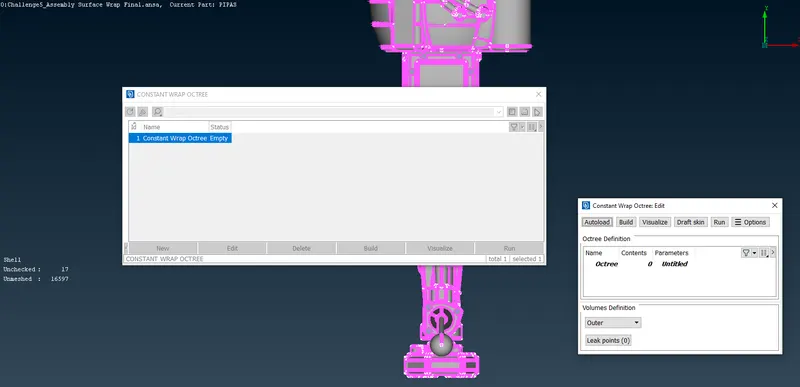
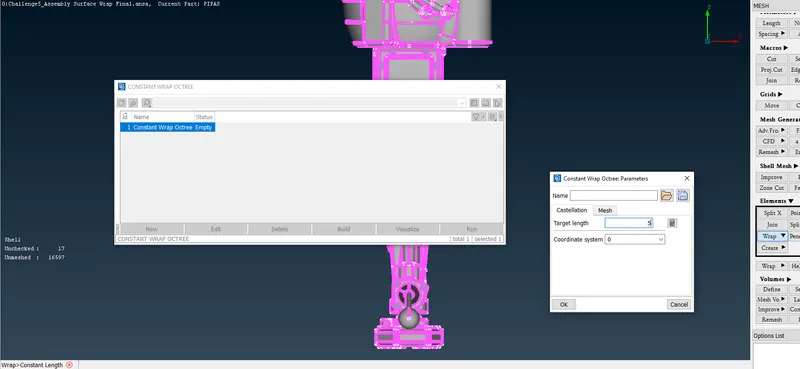
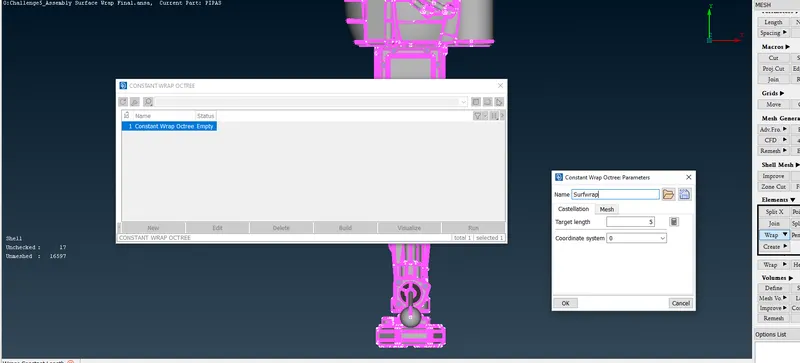
Here we give the Name as Surfwrap and Target length as 5mm.
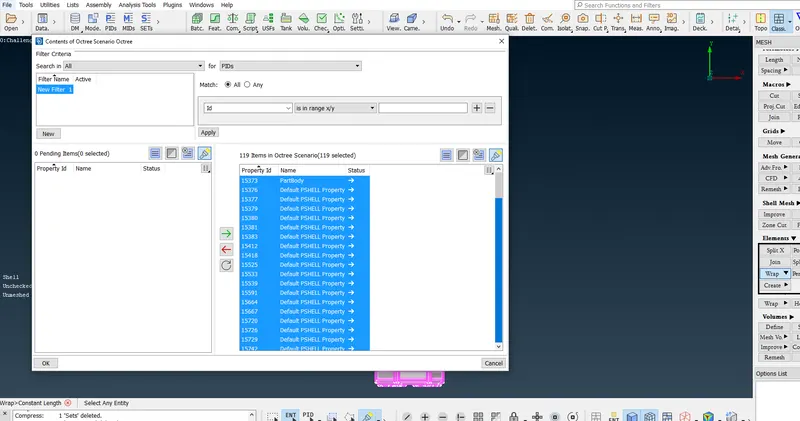
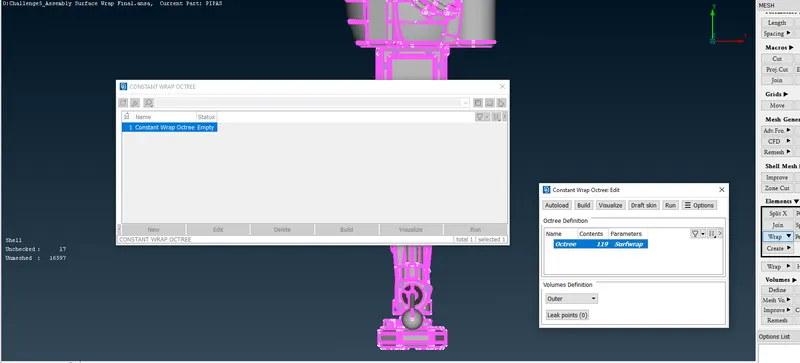
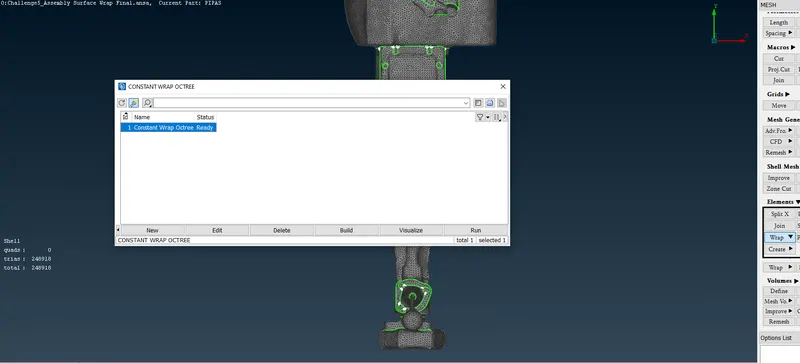
Click on the Run in CONSTANT WRAP OCTREE window.
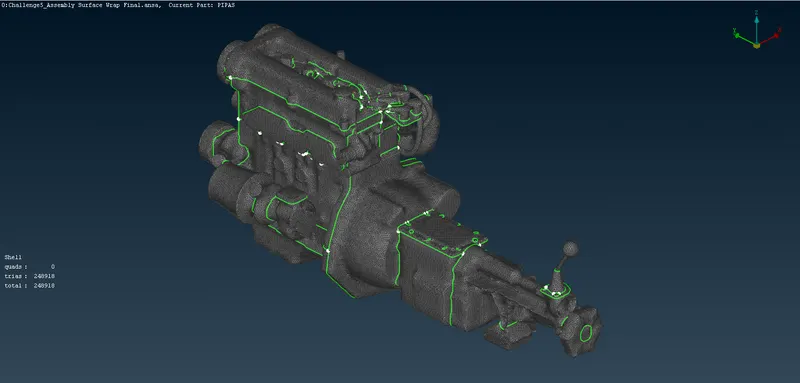
Surface Wrap is done.
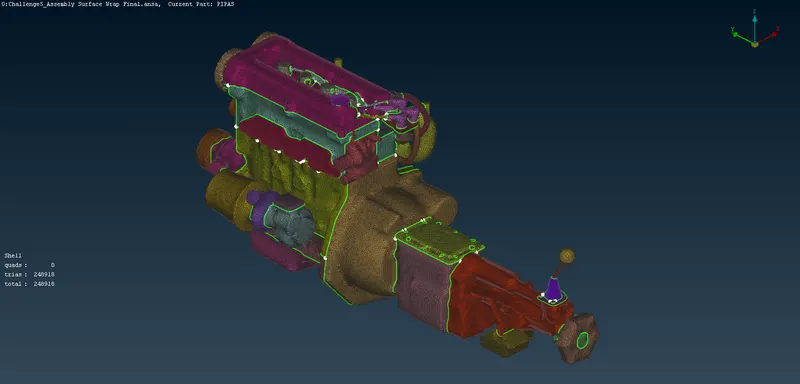
Surface Wrap in PID mode.
OUTPUTS
To view Challenge5_Engine after geometry clean up.ansa file click below link
https://drive.google.com/file/d/1_7-T-IesiPjG3KfY3shBC9G5KiOe86IB/view?usp=sharing
To view Challenge5_Transmission after geometry clean up.ansa file click below link
https://drive.google.com/file/d/1_fxJAhUkV2cHao3LtT94jXBPf6gfydas/view?usp=sharing
To view Challenge5_GearBox after geometry clean up.ansa file click below link
https://drive.google.com/file/d/1QEVVYTFxHp_pK3TpGo-Wb33awqdpdrqv/view?usp=sharing
To view Challenge5_Assembly Surface Wrap Final.ansa file click below link
https://drive.google.com/file/d/1ddcJQsuwpGLTeGl6O8ui0zEsCdPcHCtn/view?usp=sharing
CONCLUSION
For the given models, deleted the unwanted surface and geometry clean up is done.
All the three models are merged.
Surface Wrap on Automotive Assembly is done.