Week 5 Challenge
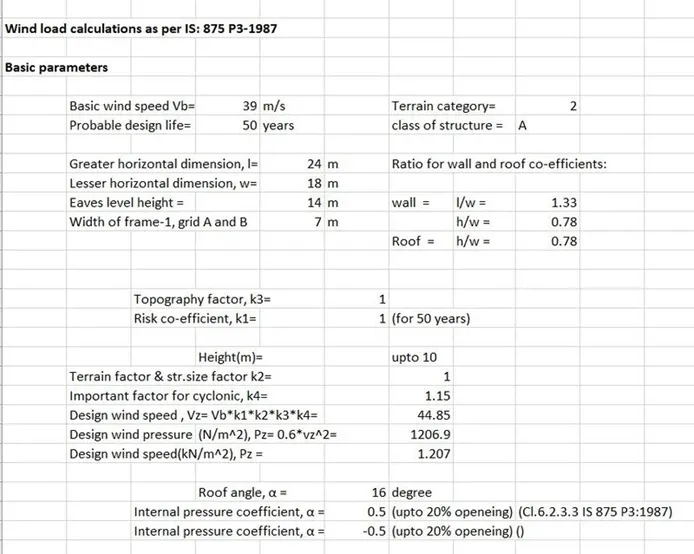
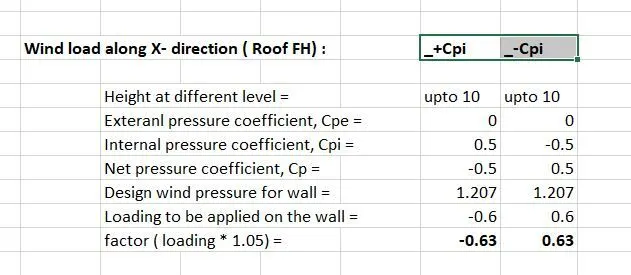
1.Generate manual wind loading in the design report based IS code as per the following input
- Basic wind speed = 39m/s
- Terrain category 2
AIM : To generate manual wind loading in the design report based IS code as per the input.
TOOLS REQUIRED : MS Excel, IS code, Calculator, Dimeniosns from TSD model.
PROCEDURE :
1. First type all the format for calculations in excel.
2. Then enter the values as per the input and dimensions of the model created previously in TSD.
3. Refer to IS code as per the calculation requirement.( Wind speed is to be taken as 39m/s.)
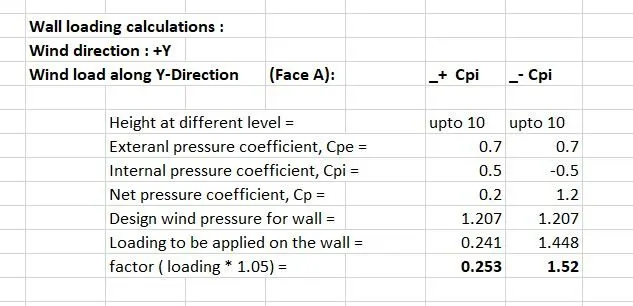
4. And then finally calculations are to be done as per the format and find external, internal and net pressure coefficients , design wind pressure for wall, loading to be applied on walls laterally.
RESULT :The manual wind loading calculations are calculated as per the input.
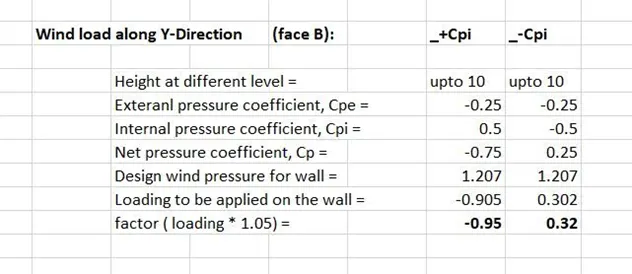
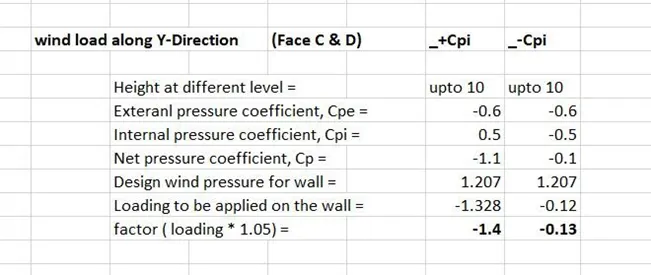
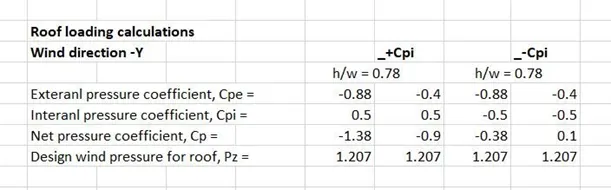
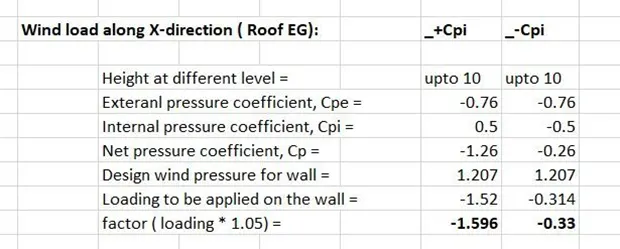
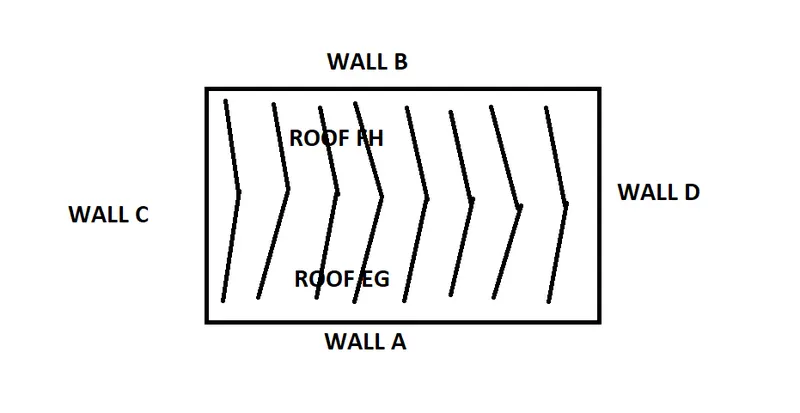
IN THE MODEL THE WALLS AND ROOF NAMES ARE :
2.Based on the above calculation apply the loadings on the model
AIM : To apply the calculated loadings on model.
TOOLS REQUIRED : Open, Loads, Loadcases, Loading dropdown, Area load, Properties tab.
PROCEDURE :
1. Open the model for which wind load is applied in TSD.
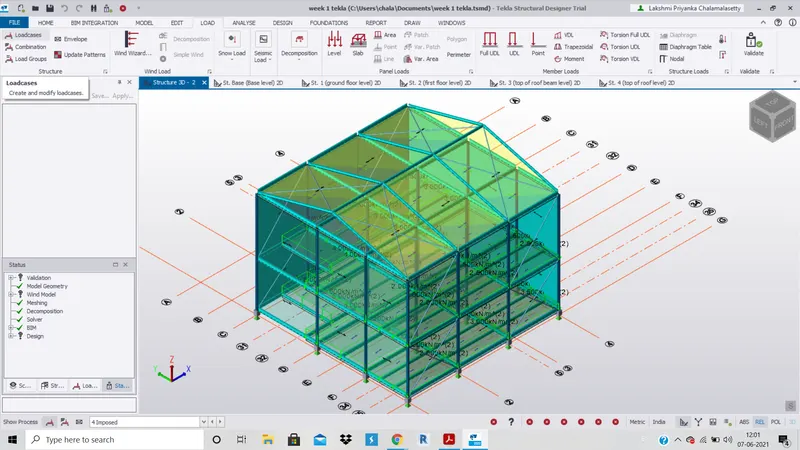
2. Click on load in the menubar and select loadcases in the load dialogue box.
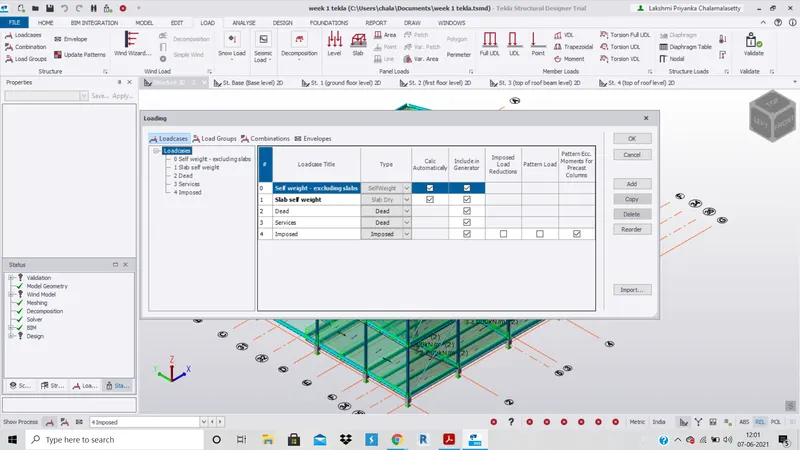
3. Click on add in the loadcases and change the name of loadcase as Wind+Y+Cpi and select type as WIND.
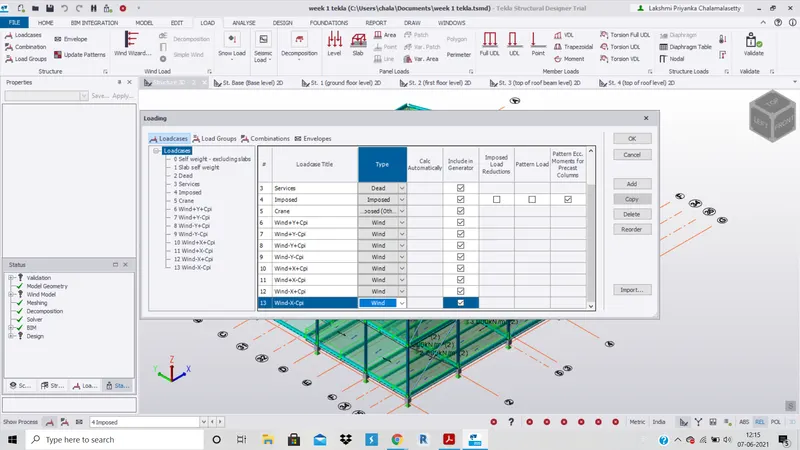
4.Similarly create 7 other loadcases named as Wind+Y-Cpi, Wind-Y+Cpi, Wind-Y-Cpi, Wind+X+Cpi, Wind+X-Cpi, Wind-X+Cpi, Wind-X-Cpi.
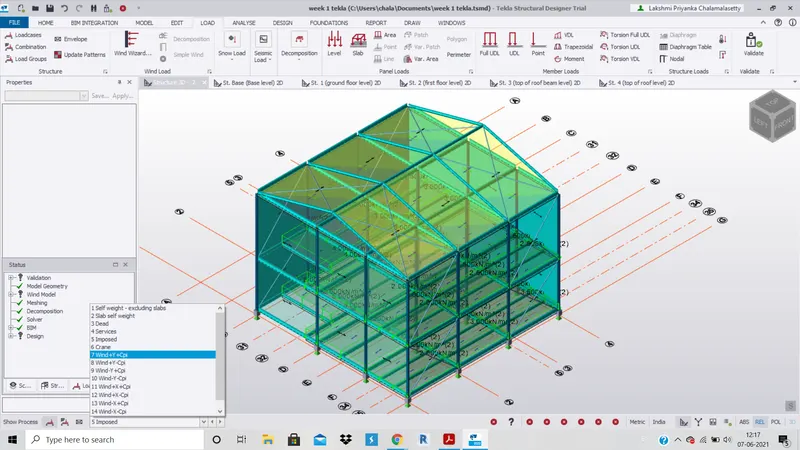
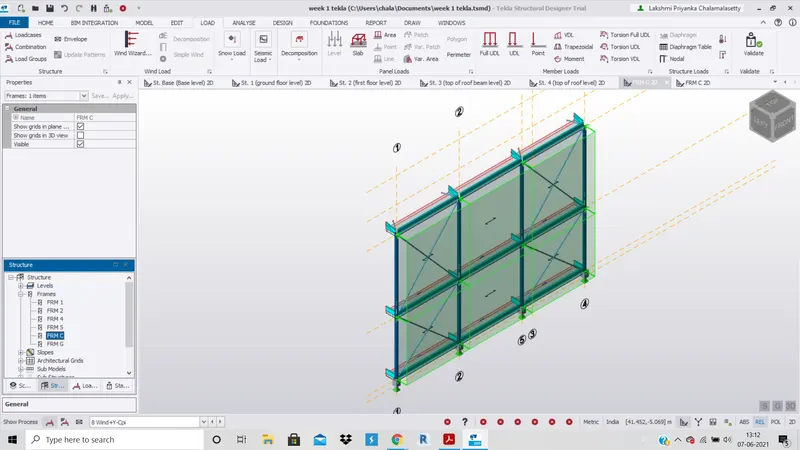
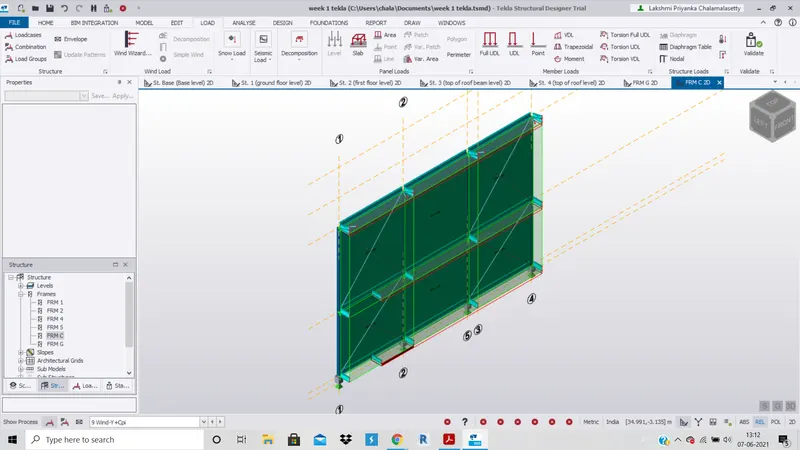
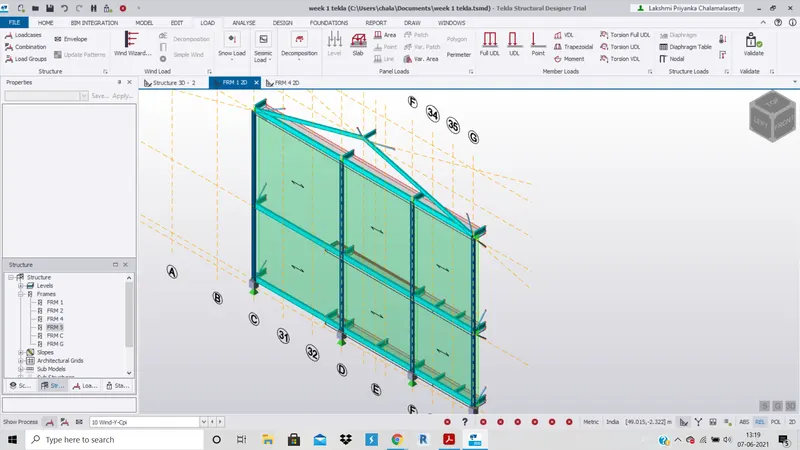
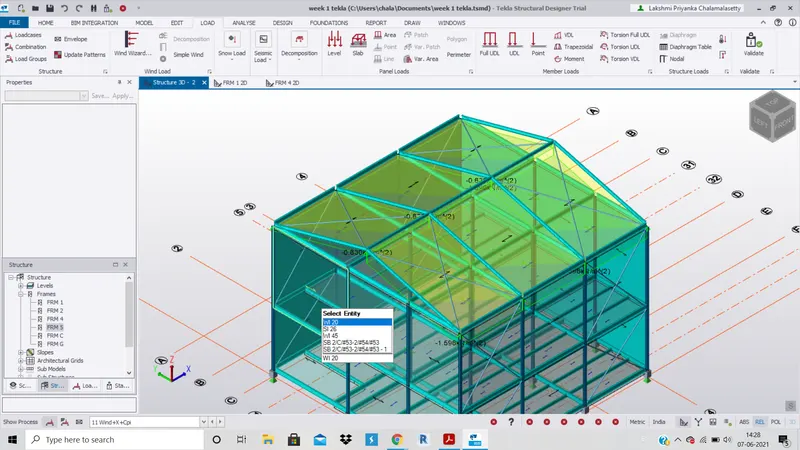
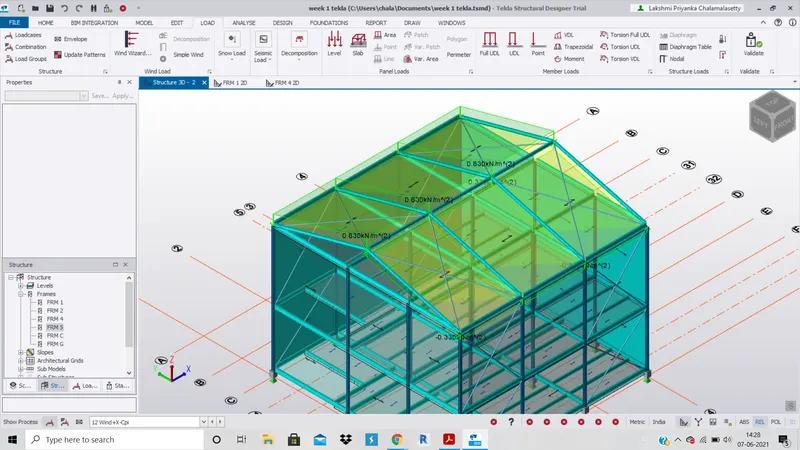
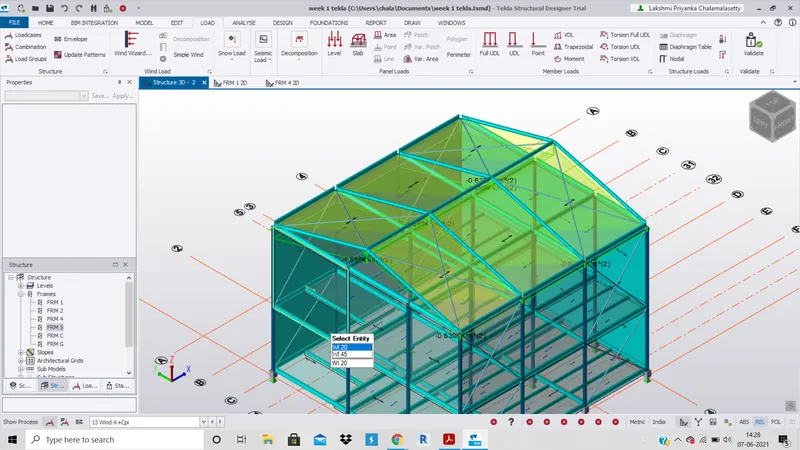
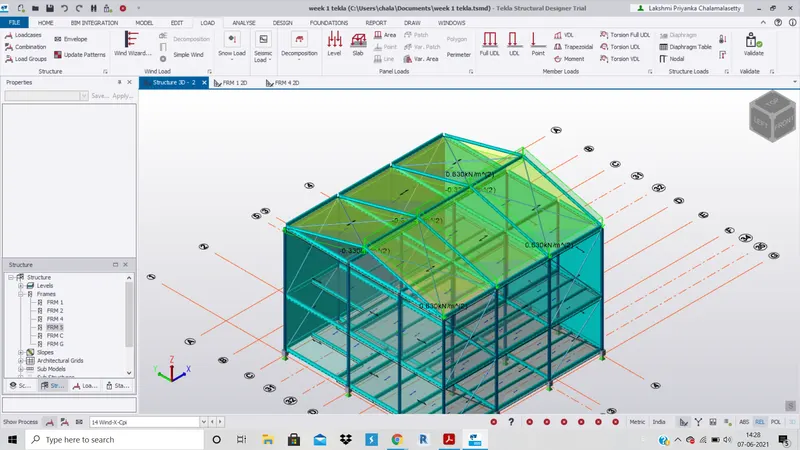
5. Now, open a frame C , click on the required loadcase in the dropdown at the bottom end left side and click on area load in load menu tab and input the values as per the table and apply on the panels in Wall frames.
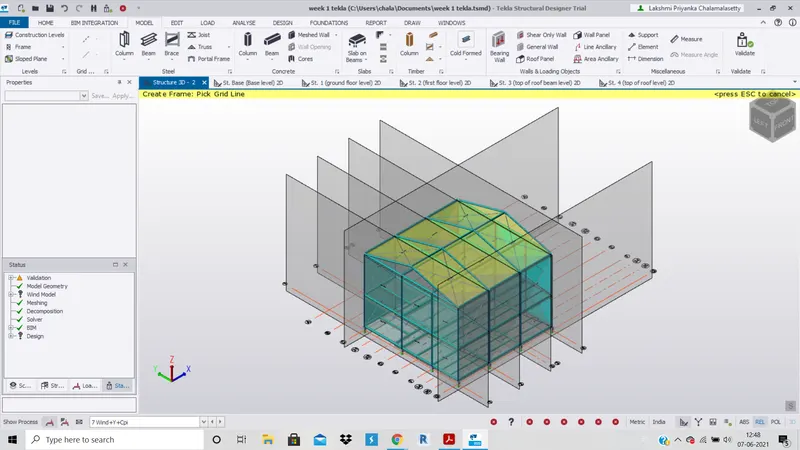
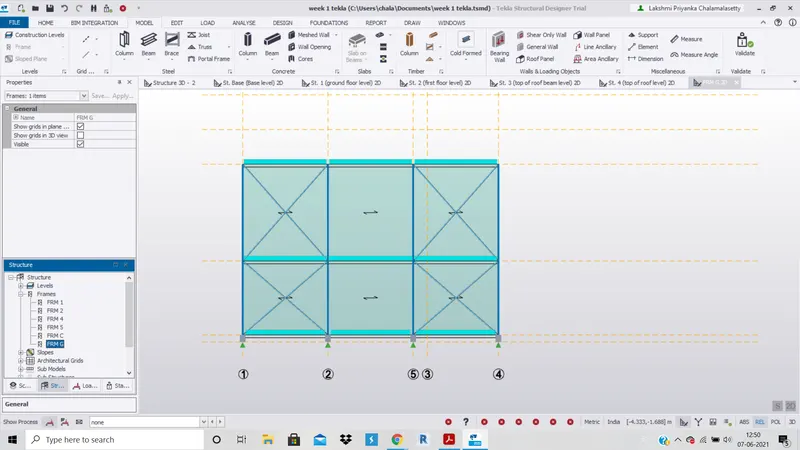
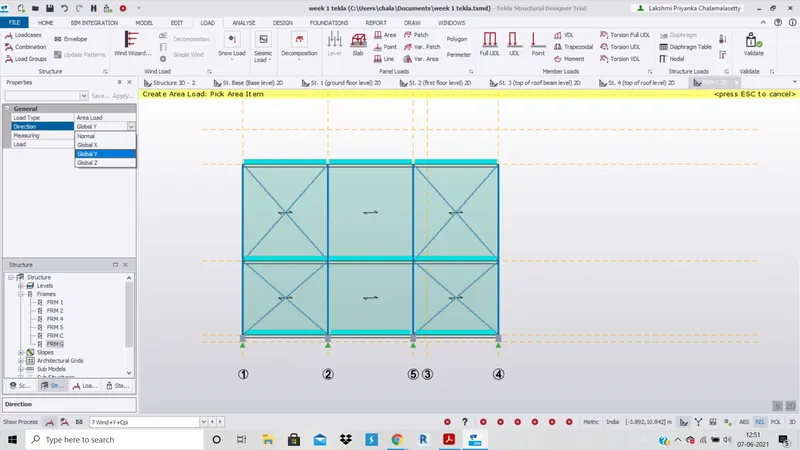
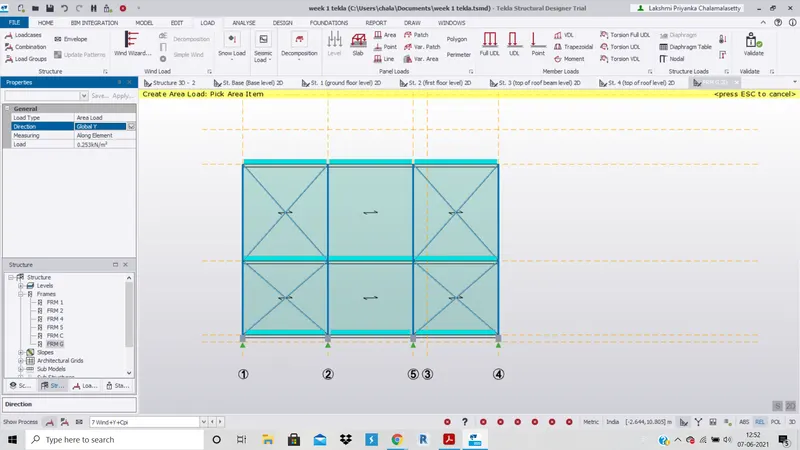
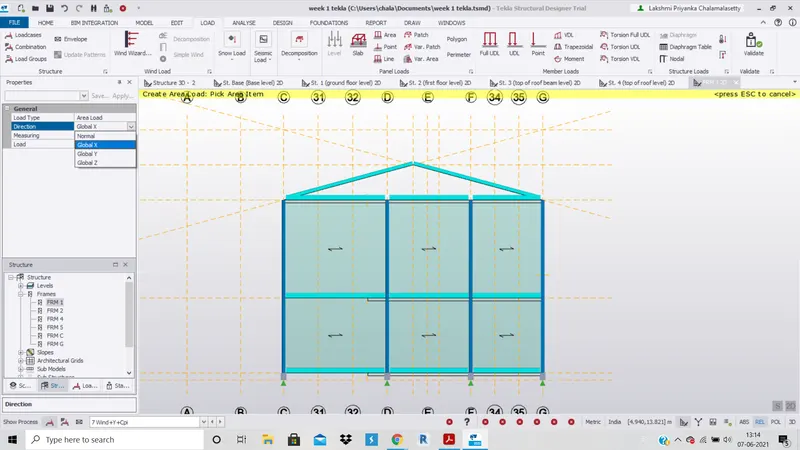
6. Set the direction as Global Y for Walls A and B , direction as Global X for walls C and D
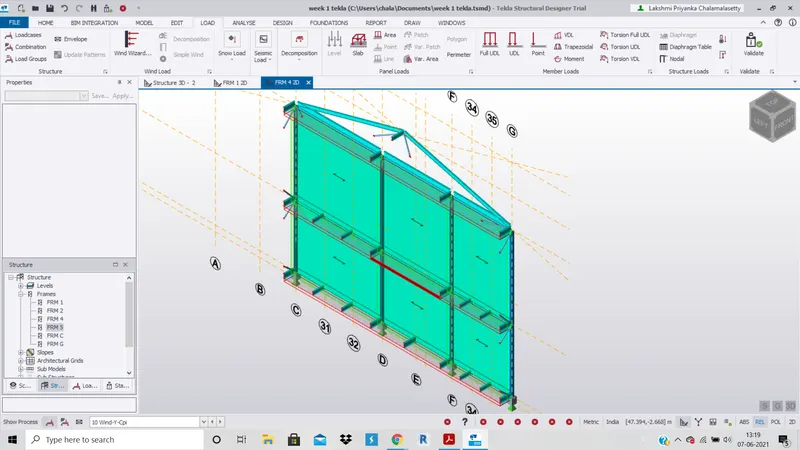
7. Apply wind loads on roof panels and set the direction as Global Z and apply loads as per the calculations.
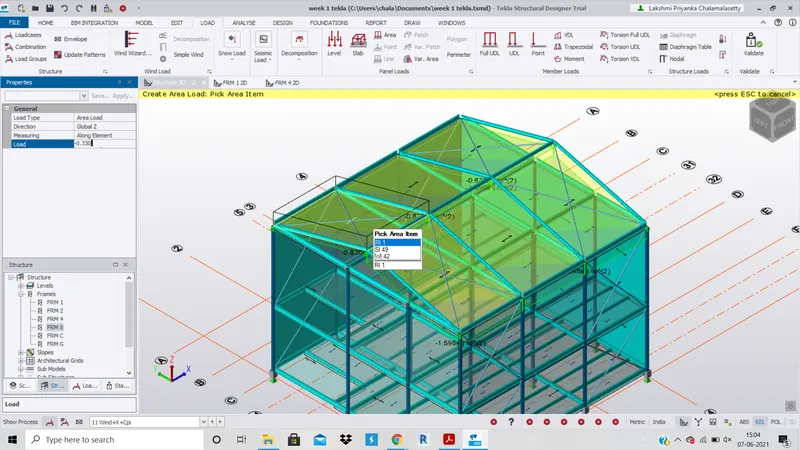
RESULT : The loads are applied as per the calculations.
LOADS ON WALL A :
LOADS ON WALL B :
LOADS ON WALL C :
LOADS ON WALL D :
LOADS ON ROOF :
a) Wind+ X+ Cpi
b) wind + X - Cpi
c) wind-x+Cpi
d) Wind - X-Cpi
3.On a separate model generate wind loading using wind wizard
AIM : To generate wind loading using wind wizard on a seperate model.
TOOLS USED : New , Construction levels, Grids, Parallel(quick), Manage property sets, Beams, Columns, Slabs, Frames ,wall panel, roof panel, Copy, Wind Wizard.
PROCEDURE :
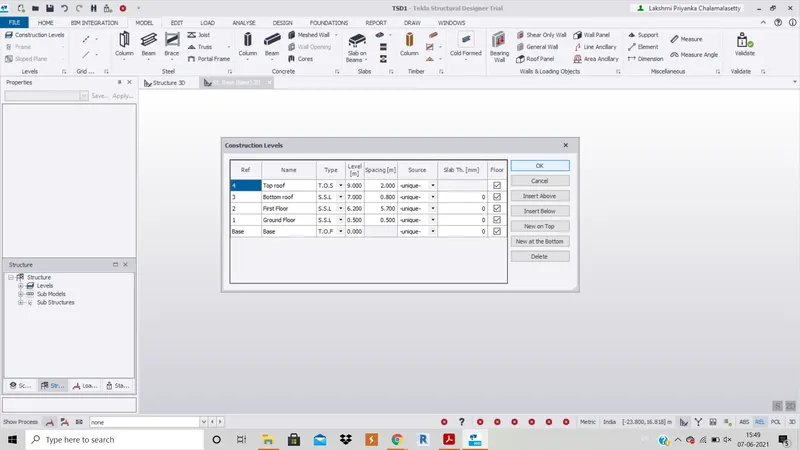
1. In a new file, click on construction levels in model tab and click on Insert above and name the levels and enetr the required spacing between the levels and click ok.
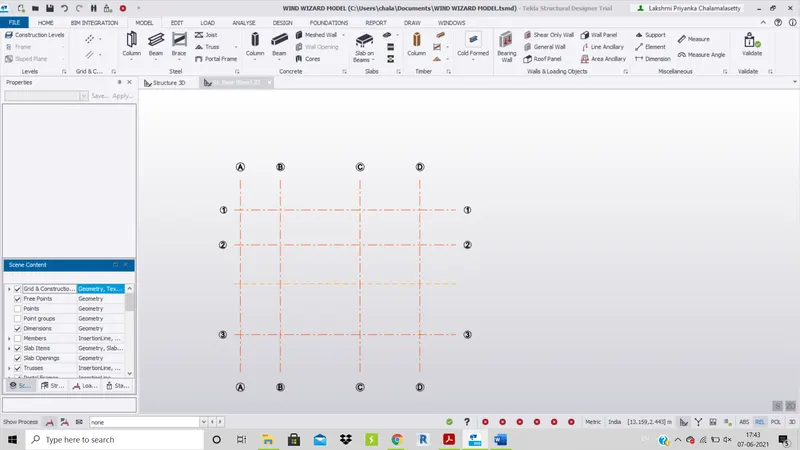
2. Click on Grids in Model tab and create grid by dragging cursor and at required offsets using parallel(quick) option.
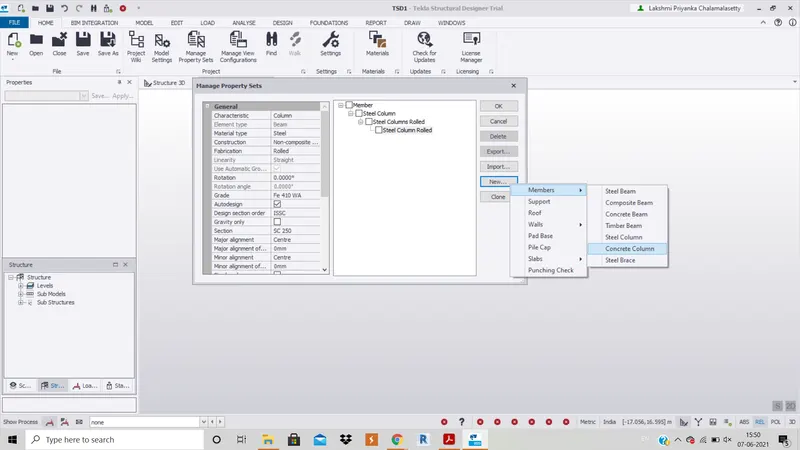
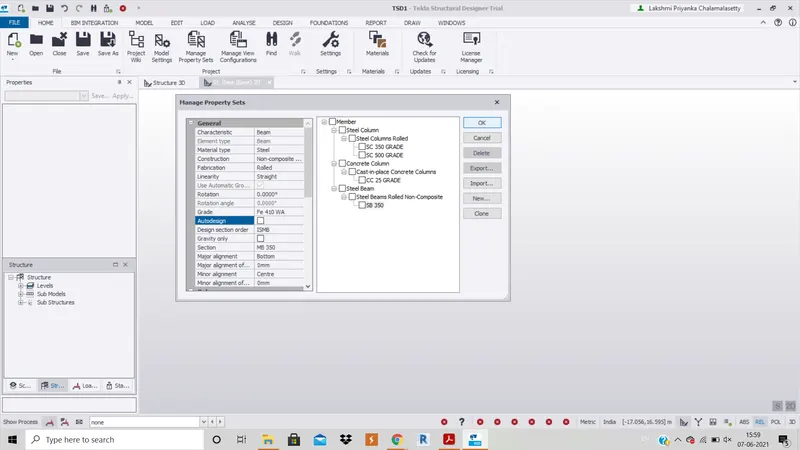
3. Click on Mamage property sets in Home tab and create steel columns, concrete columns, steel beams with a requiredgrade and ISMB type and off the autodesign option. Set the supports as fixed and pinned for columns. Set the top constraint for beams as Bottom.
4. Now, click on beams and select concrete beams and place them in base level with top constraint as ground floor level.
Similarly, select the concrete columns and set constraints as from ground floor level to bottom of roof level and press escape.
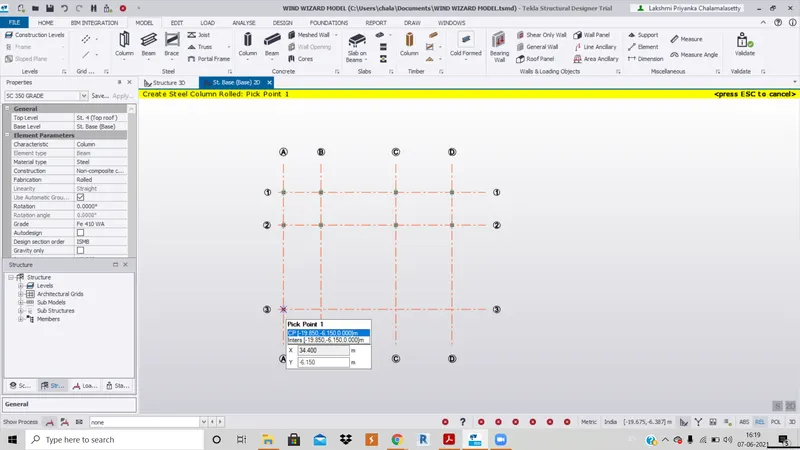
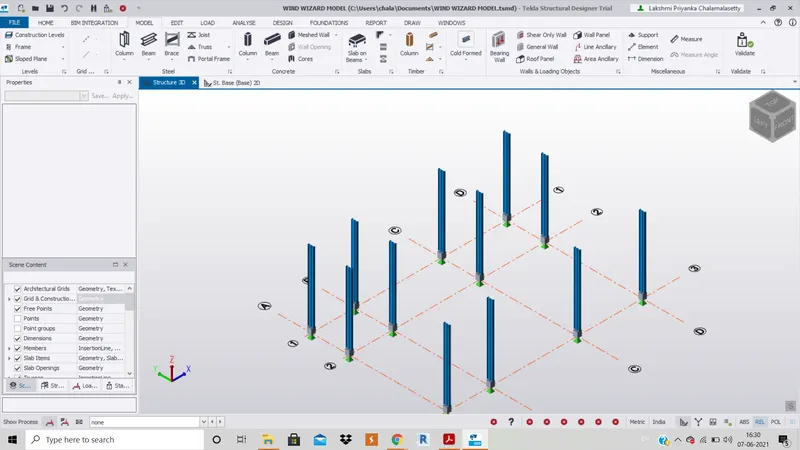
5. Now click on beams in model tab and create beams between the columns ant bottom of roof , ground floor level.
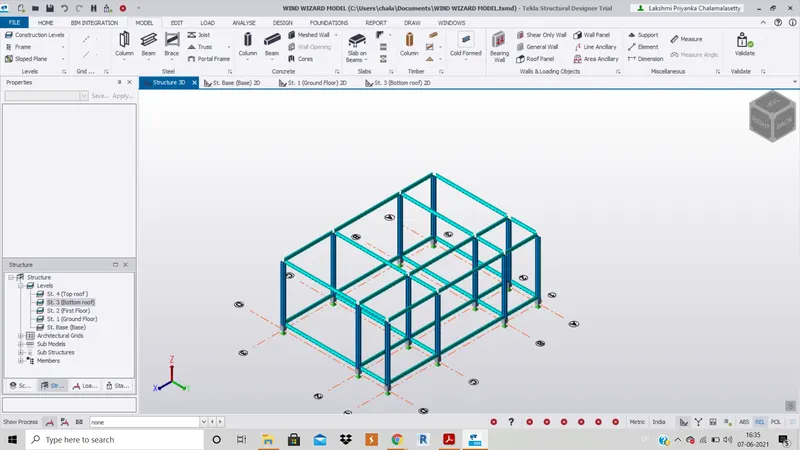
6. Click on Frame tool in model tab and create frames for outer walls.
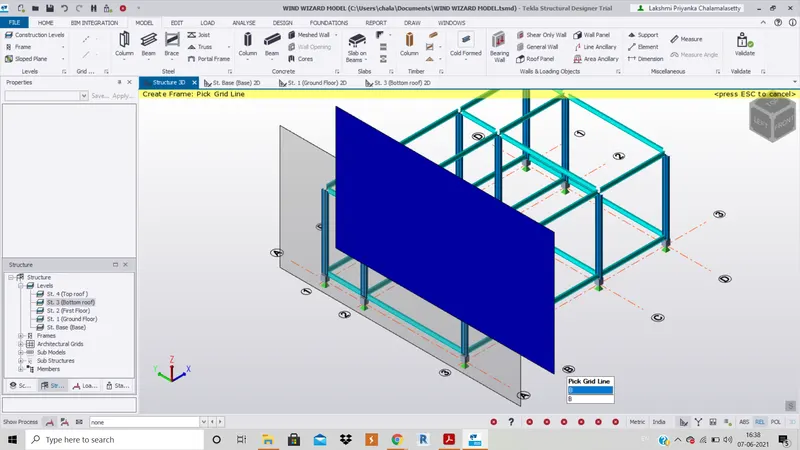
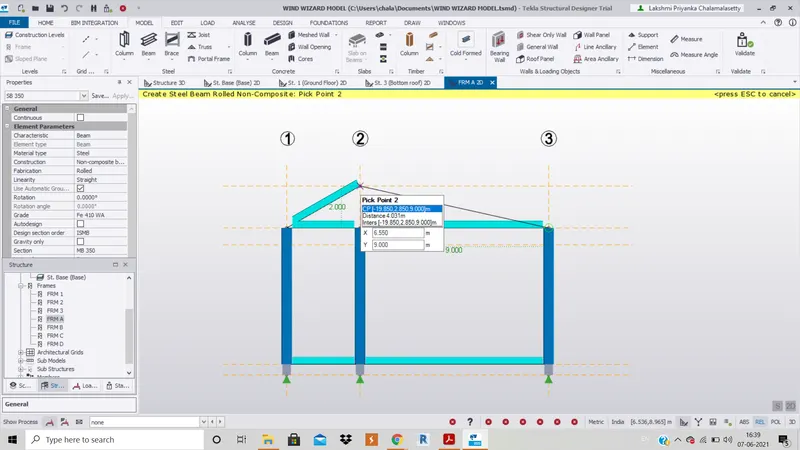
7. Open frame A and create rafter roof by using the beams.
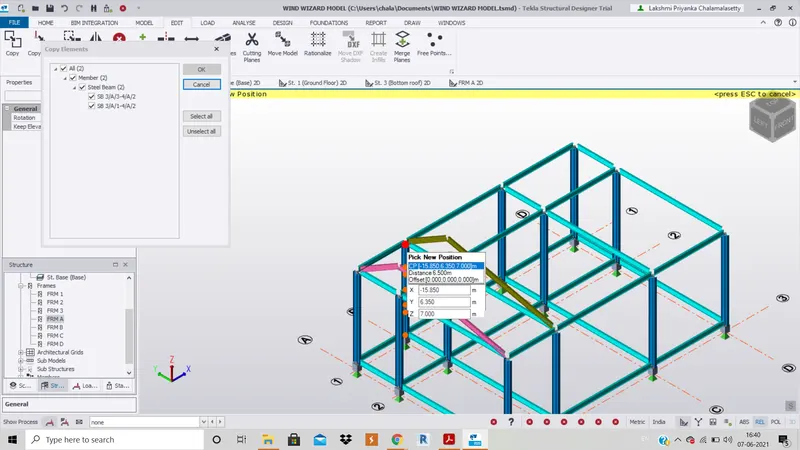
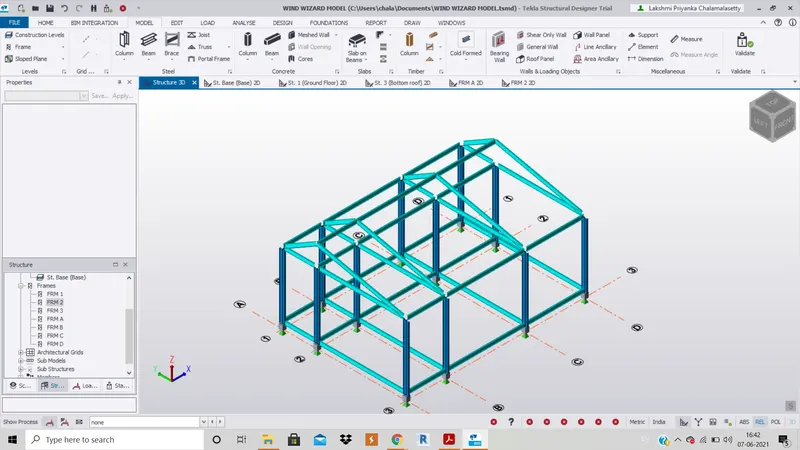
8. Click on copy in Edit tab and select the rafter and copy to all the beams.
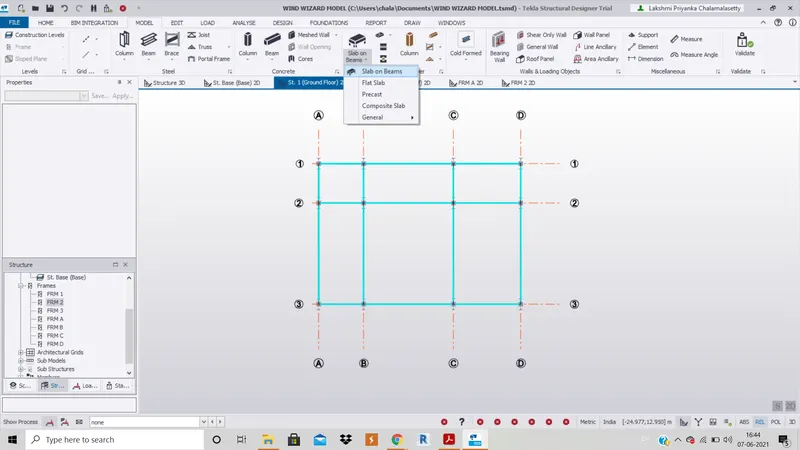
9. Click on Slab on Beams option and create two way and one way slabs as per requirement.
10. Click on wall panels and roof panels and create panles for all walls and roof respectively.
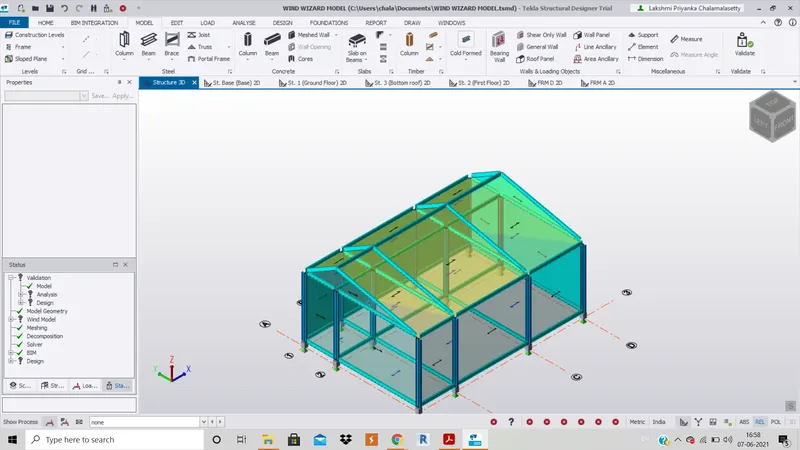
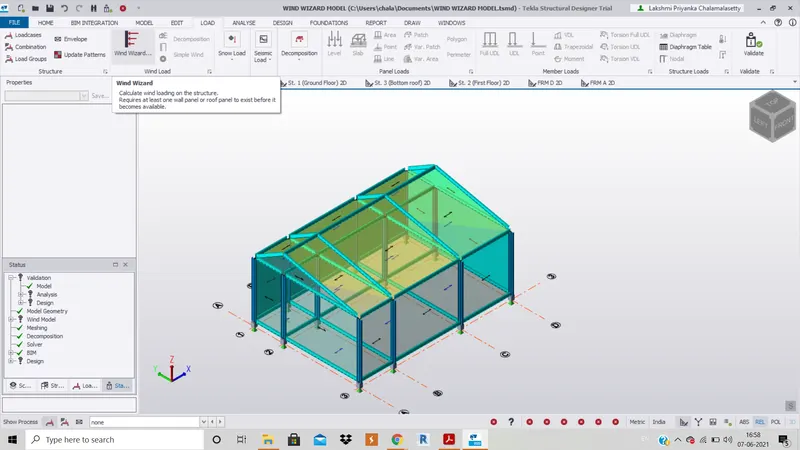
11. Click on Wind Wizard tool in the Load tab.
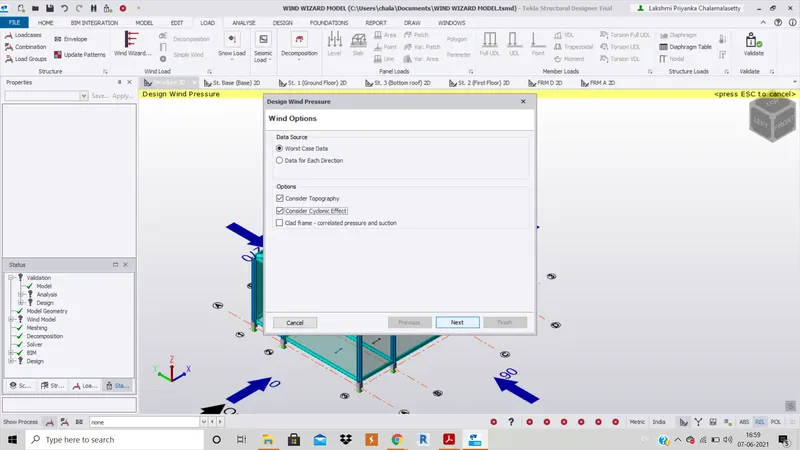
12. In the dialogue box that appears, Click tick on Consider Cyclonic Effect option and click on next.
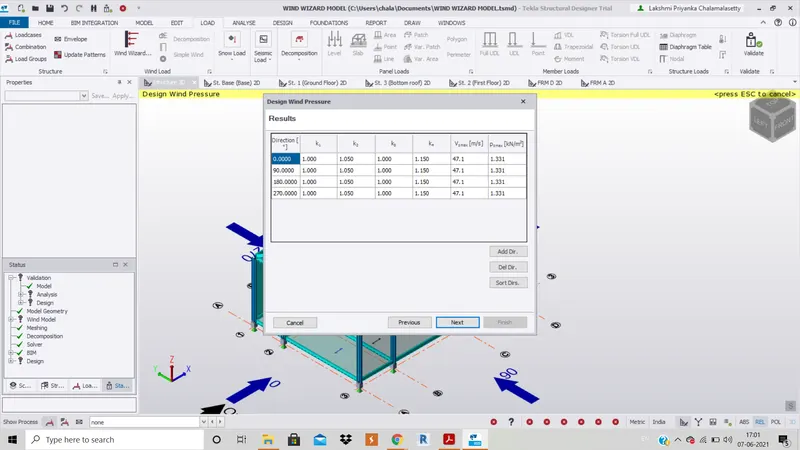
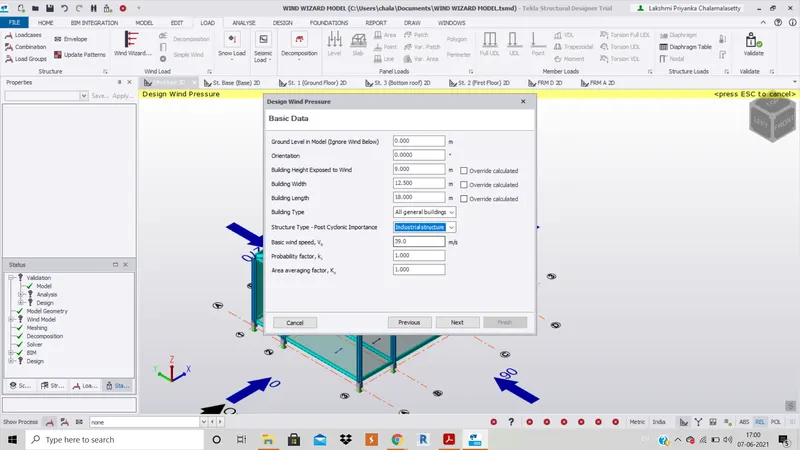
13. Select the structure type as per the requirements( here I've choosen industrial type) , WIND SPEED IS TAKEN TO BE 39.0m/s and click next.
14. Enter a distance to fetch, for example 10m and Click next
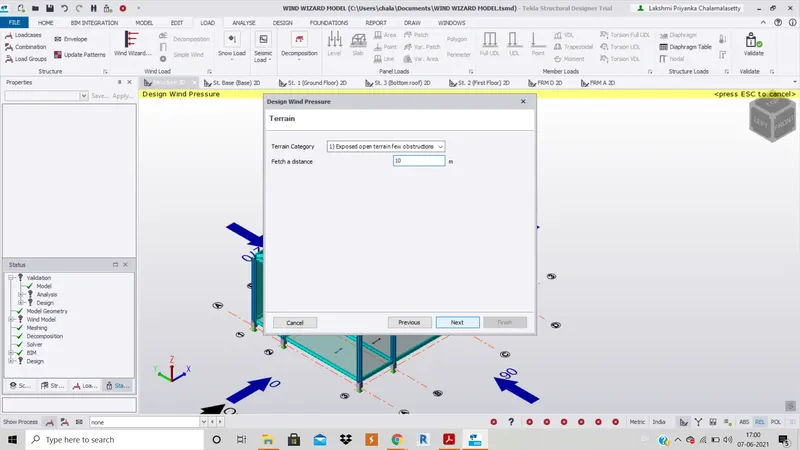
15. Click on dropdown and change topography if required. here i have not changed topography. Click next.
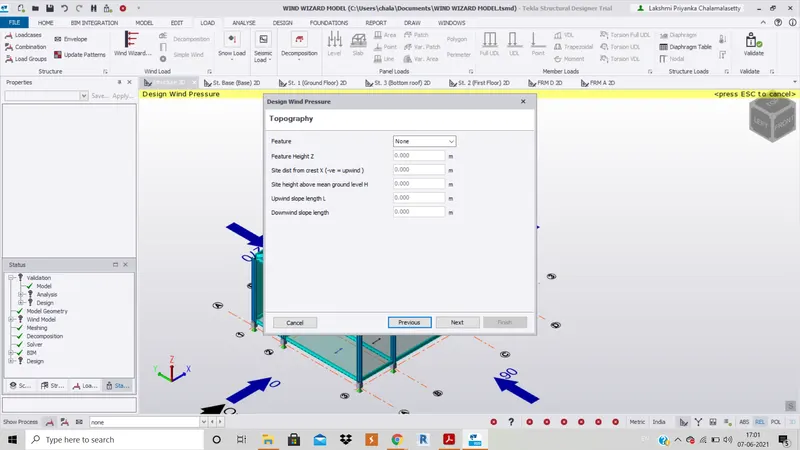
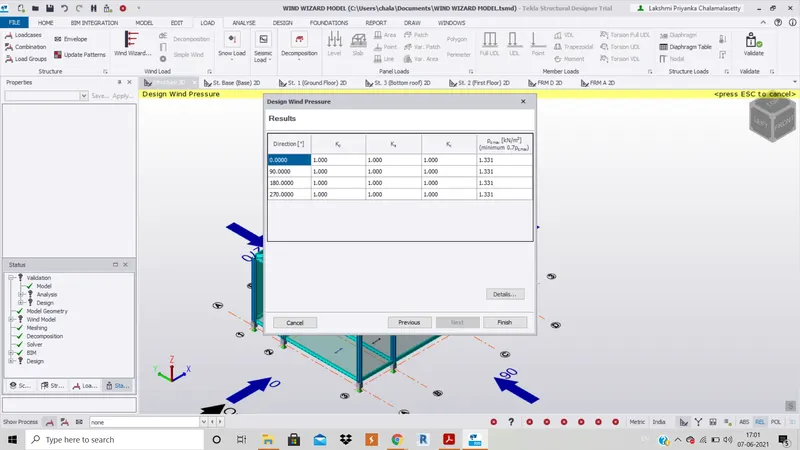
16. The results will be displayed, click finish if viewing results is done.
RESULTS :