Week 4- Meshing of Backdoor Challenge
OBJECTIVES
- To generate mid surface and mesh the given backdoor sheet metal component and assure good mesh flow and adherence of mesh to the required quality criteria.
- Make a proper geometric cleanup on the surfaces if there are any damaged surfaces.
- To extract a proper mid surface from the parent components manually.
- Maintain a Proper mesh flow with less tria concentration.
- To achieve exact quality criteria as given in the question.
- Mesh the component properly with clean-up tools to get proper mesh flow.
PROCEDURE
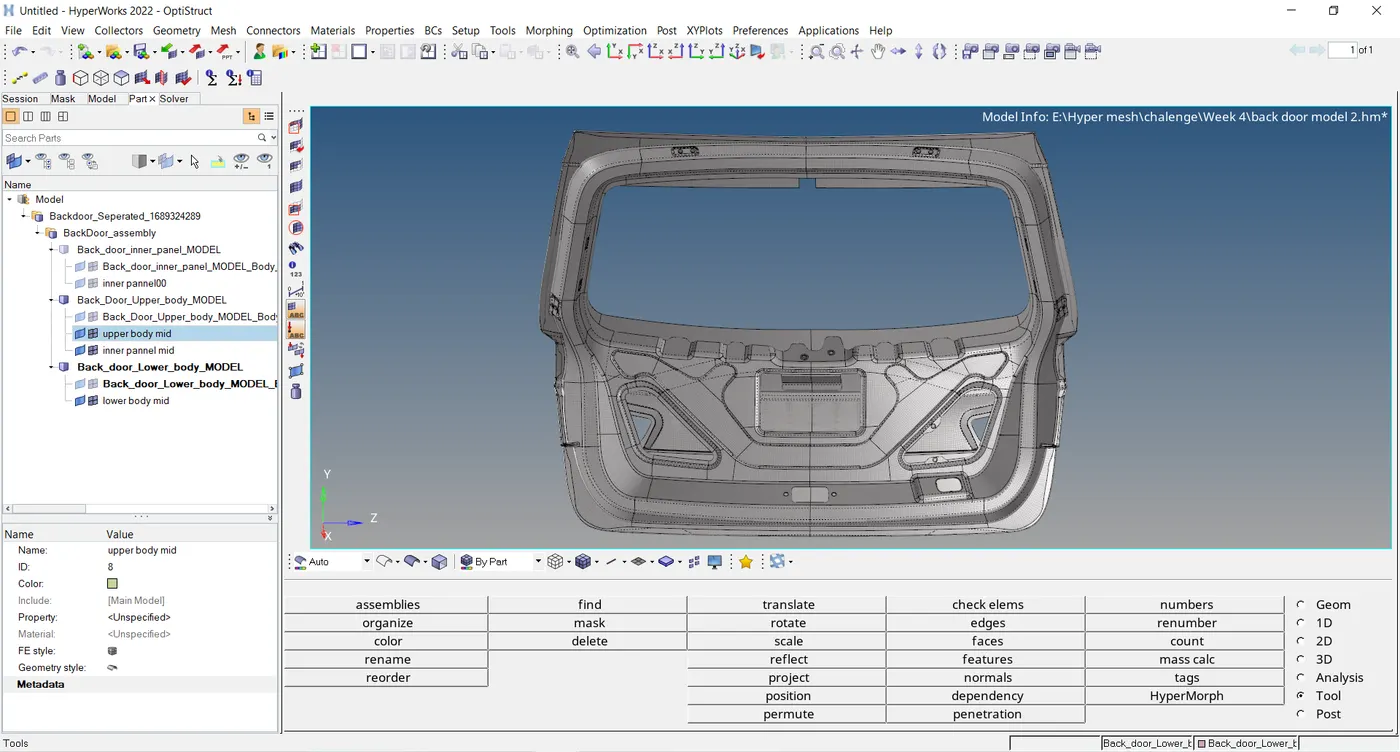
- The given component is shown in the below image.
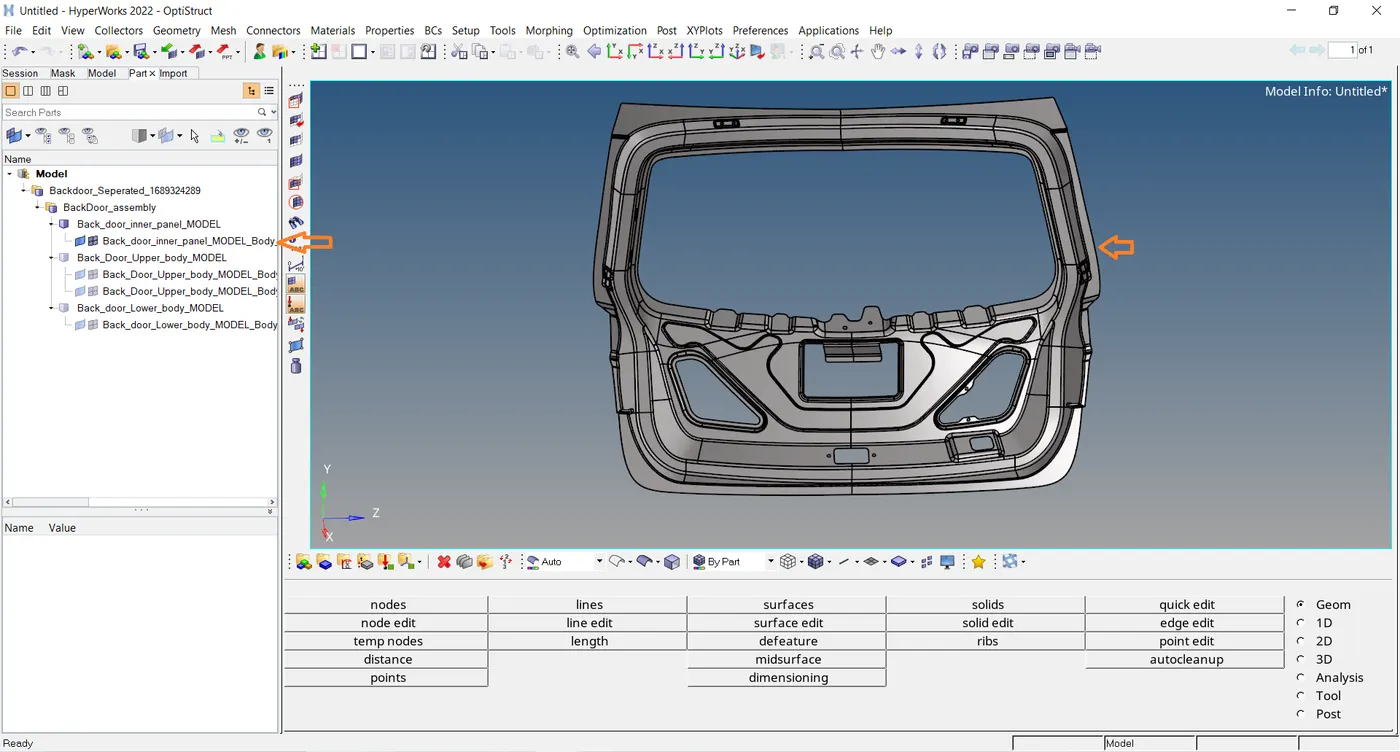
- Inner body.
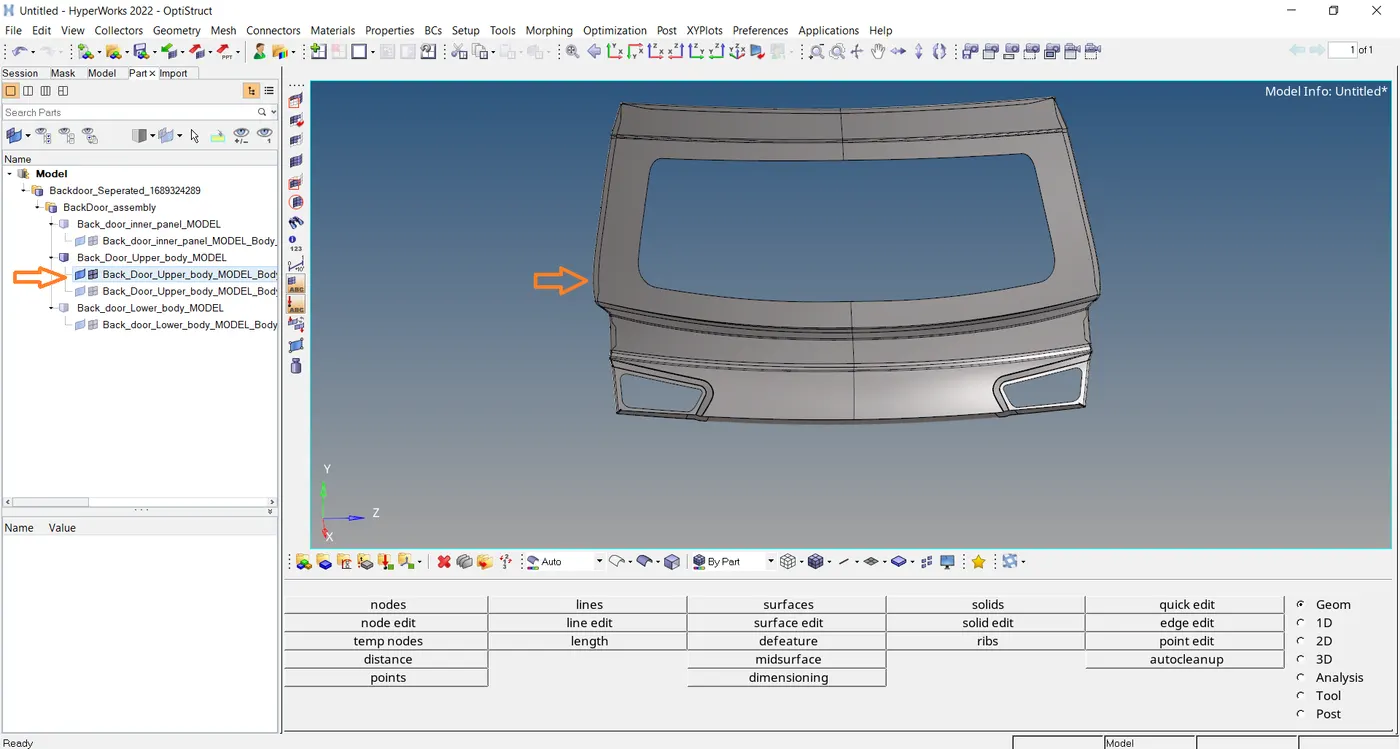
- upper body.
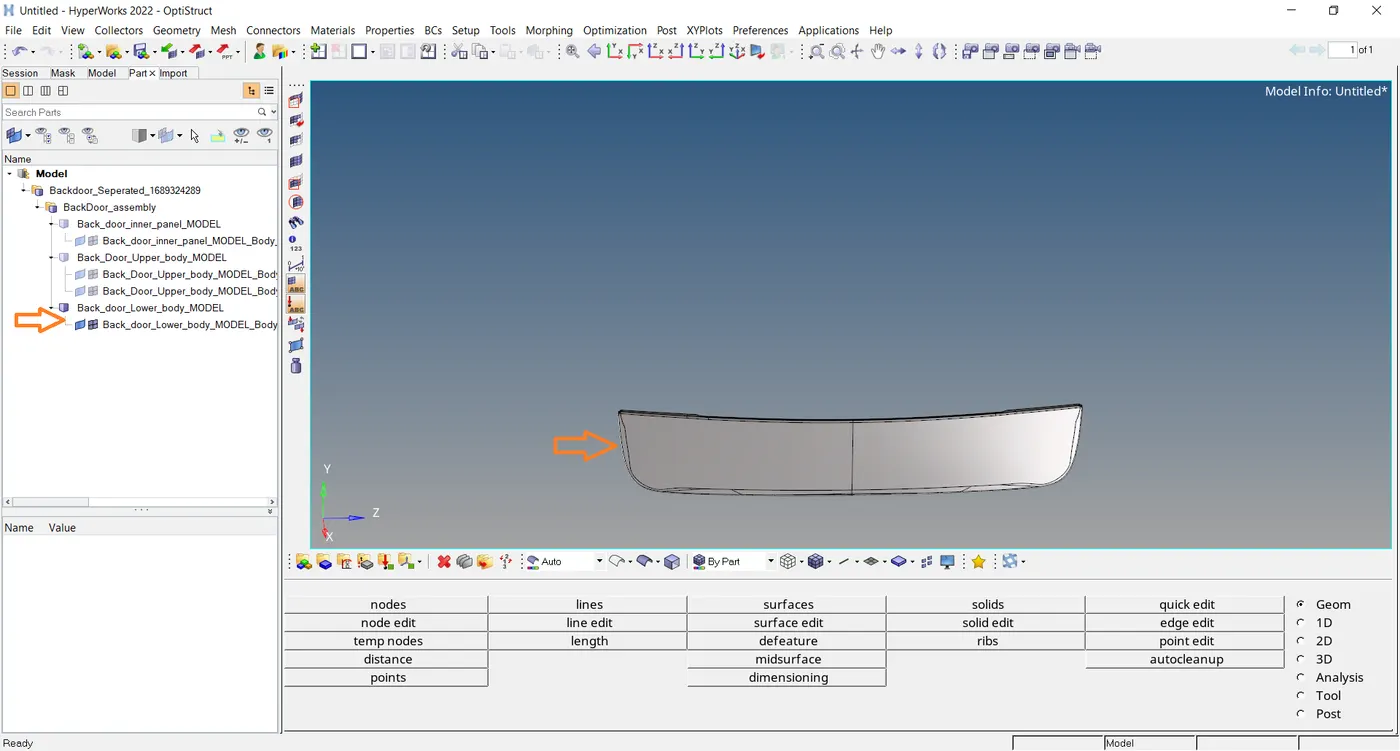
- Lower body.
- Now, Before working on the model. We have to check the geometry if there are any errors like.
- Damaged Geometry, Free edges in unnecessary areas, Unnecessary points on the lines, Unnecessary Connections, and connectivity errors.
- Before extracting the mid surface, Delete the solids and then extract the mid surface cause we are not going to mesh on the solid Model.
- We are going to mesh on the surface.
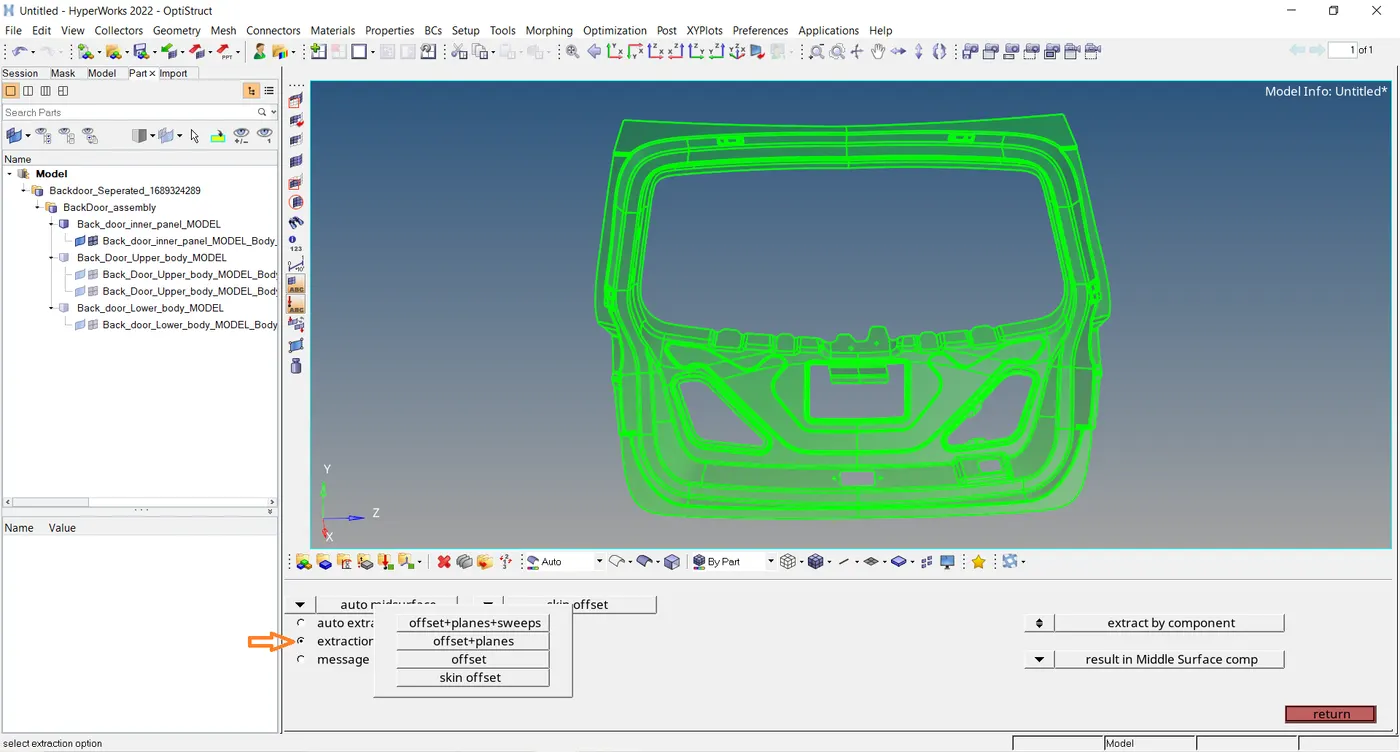
- In Geometry->">>Mid Surface->">>Auto Mid Surface.
- Extraction Options->">>Use Skin Offset. This option will be able to capture the features properly.
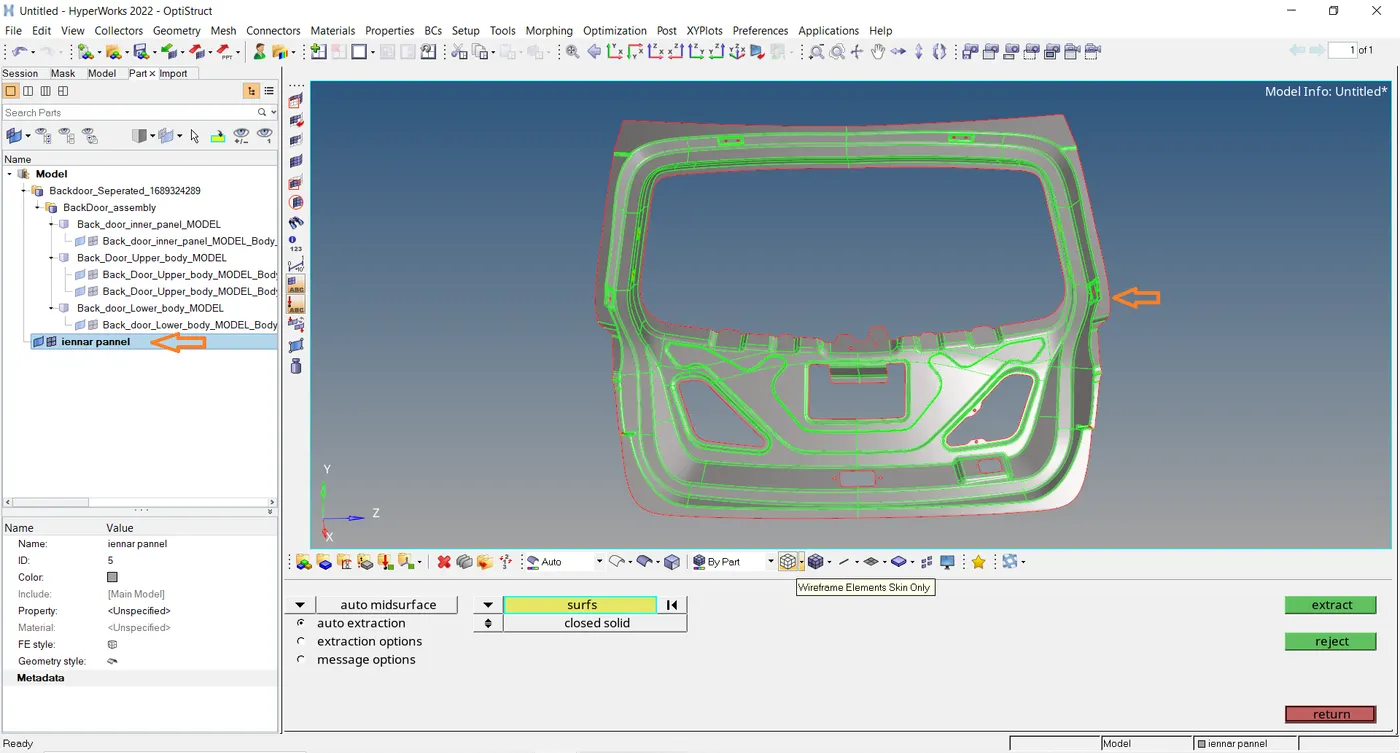
- After giving Rename to the Mid-Surface Extraction as shown in the image.
- The same procedure for the remaining two upper body and Back doors.
- Now, Using The tool Toggle-Right click on the line to hide.
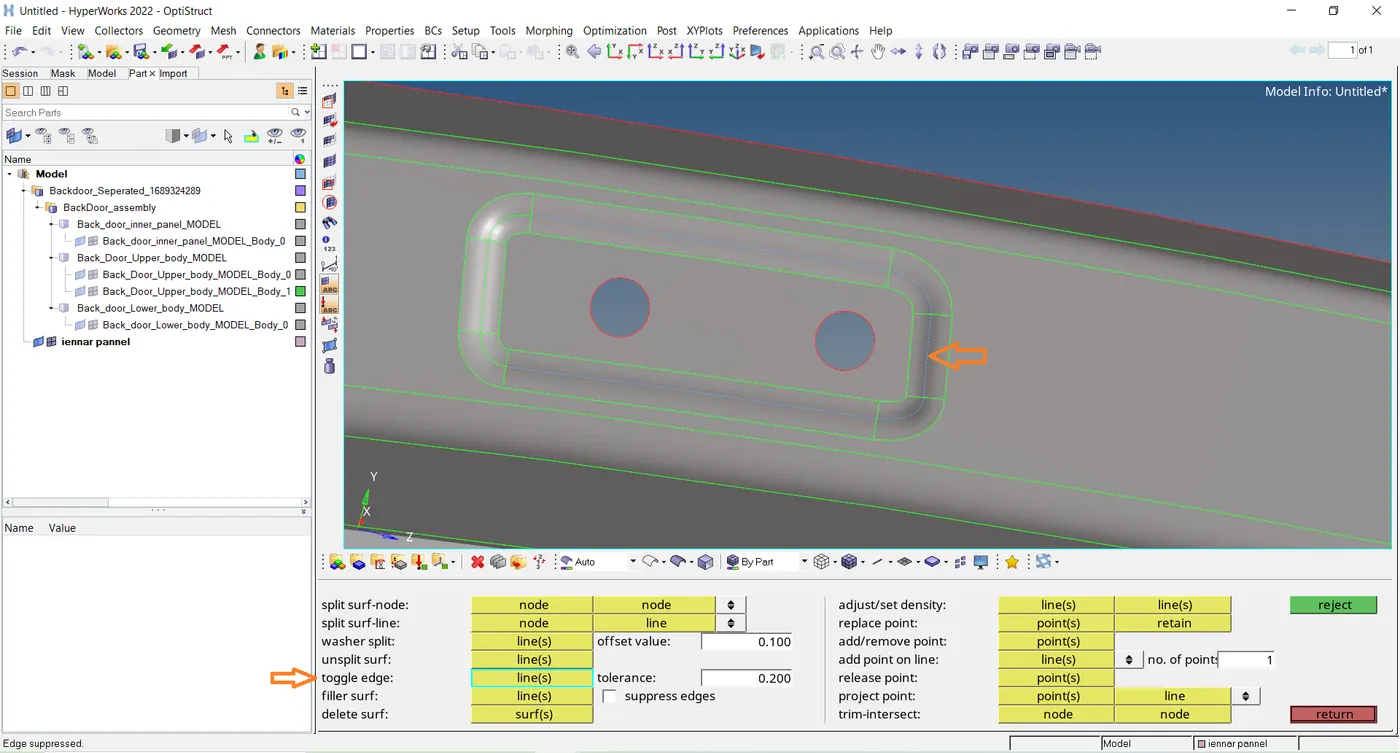
- We have to toggle all the split lines that are less than the minimum length.
- We have to go Midline option- Geom - lines - middle line.
- We have to select two fillet edges on the hemming portion and then create a midline.
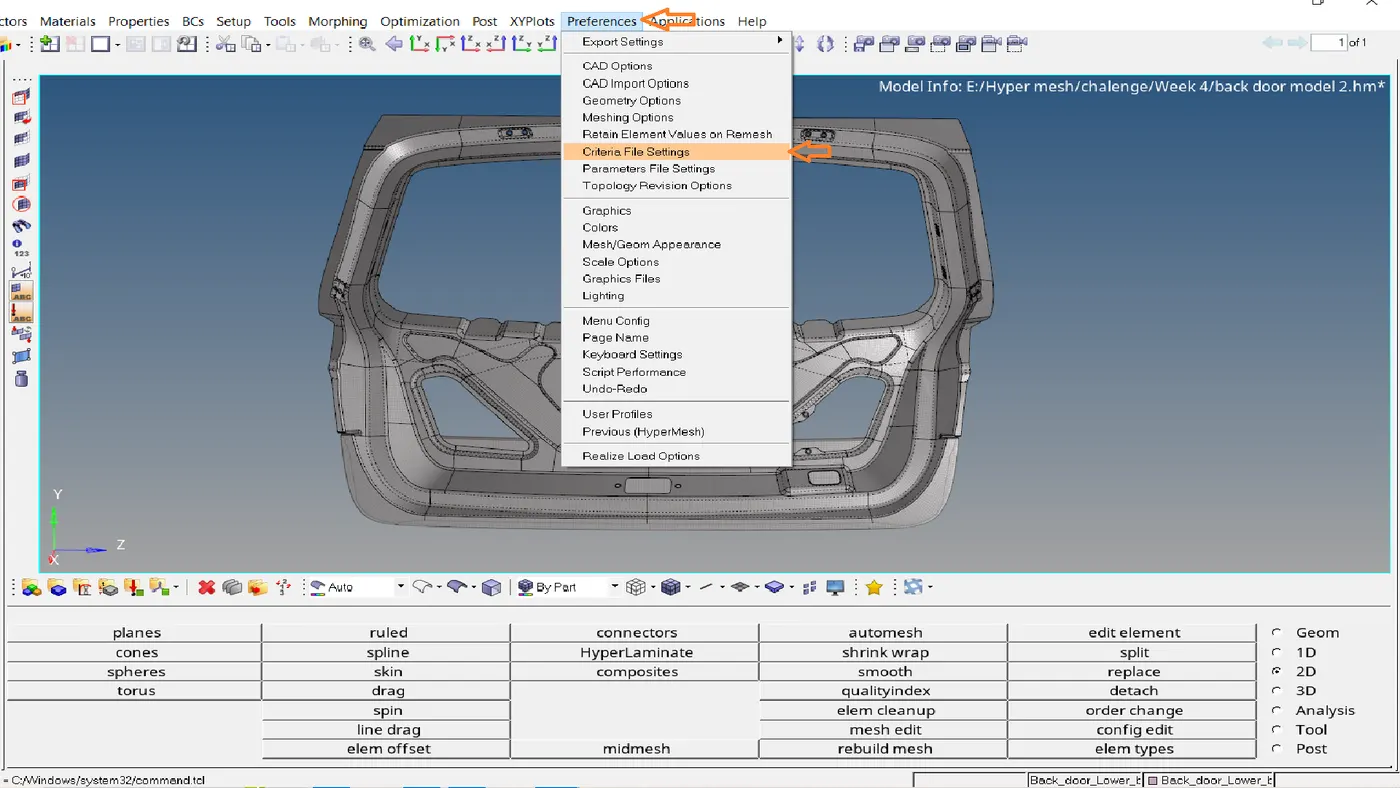
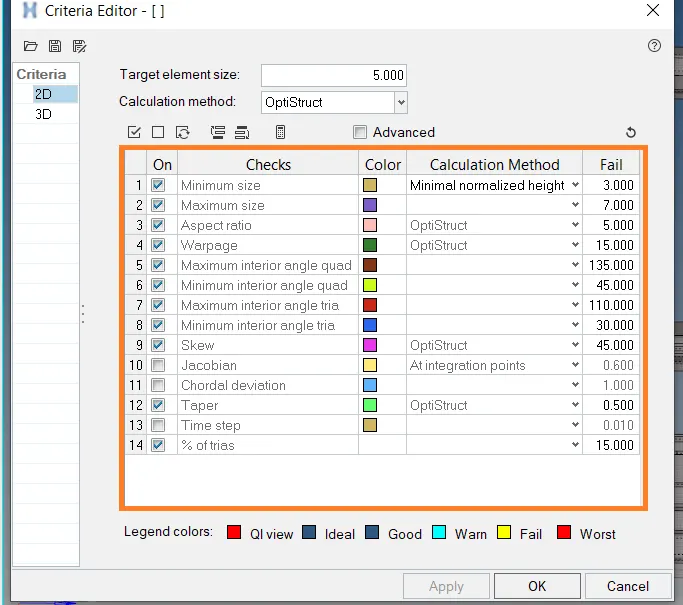
- Toolbar - preferences - criteria file settings - checks for the element criteria - Enter values - apply - ok.
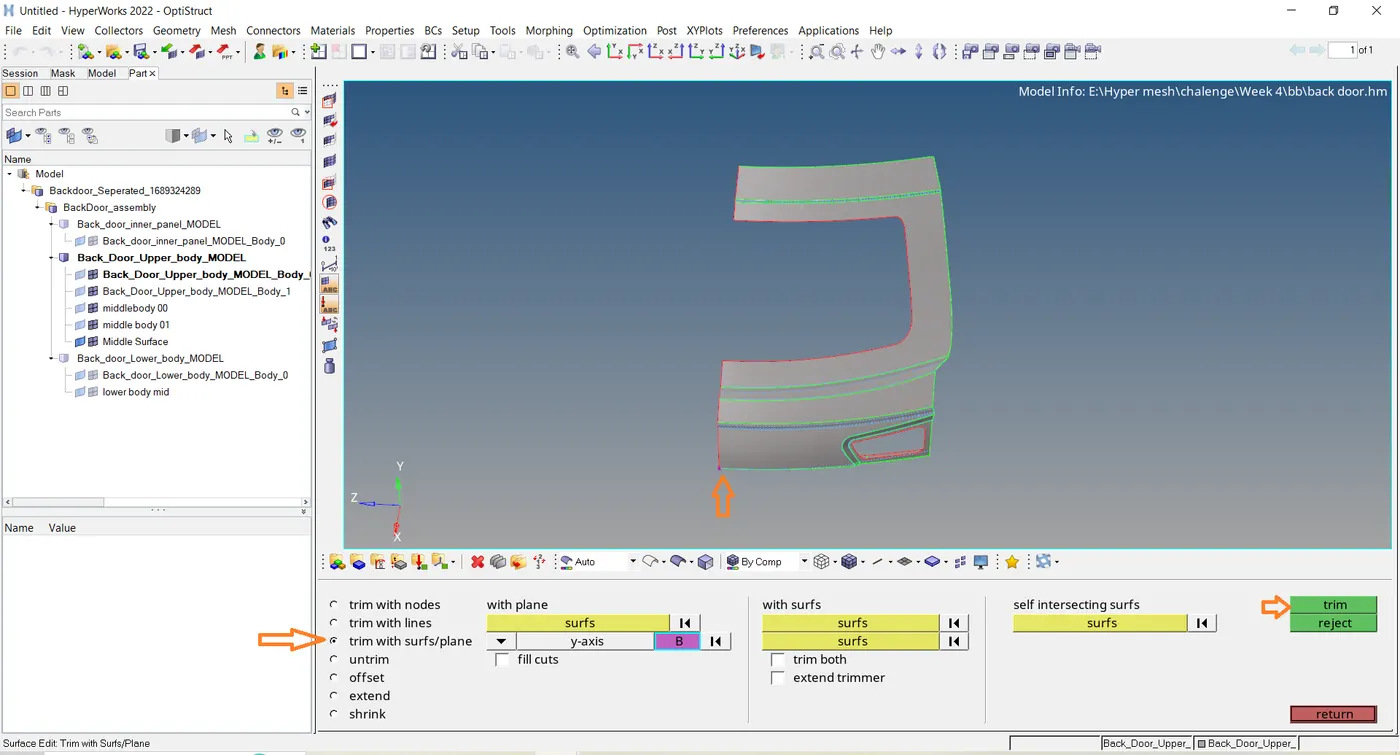
- Now, the upper body panel is trimmed into two halves because of similar to both sides.
- Go to Geom - Surface edit - trim with surfs/plain - with plain - basepoint B - Y axis.
- After that delete one half of the component.
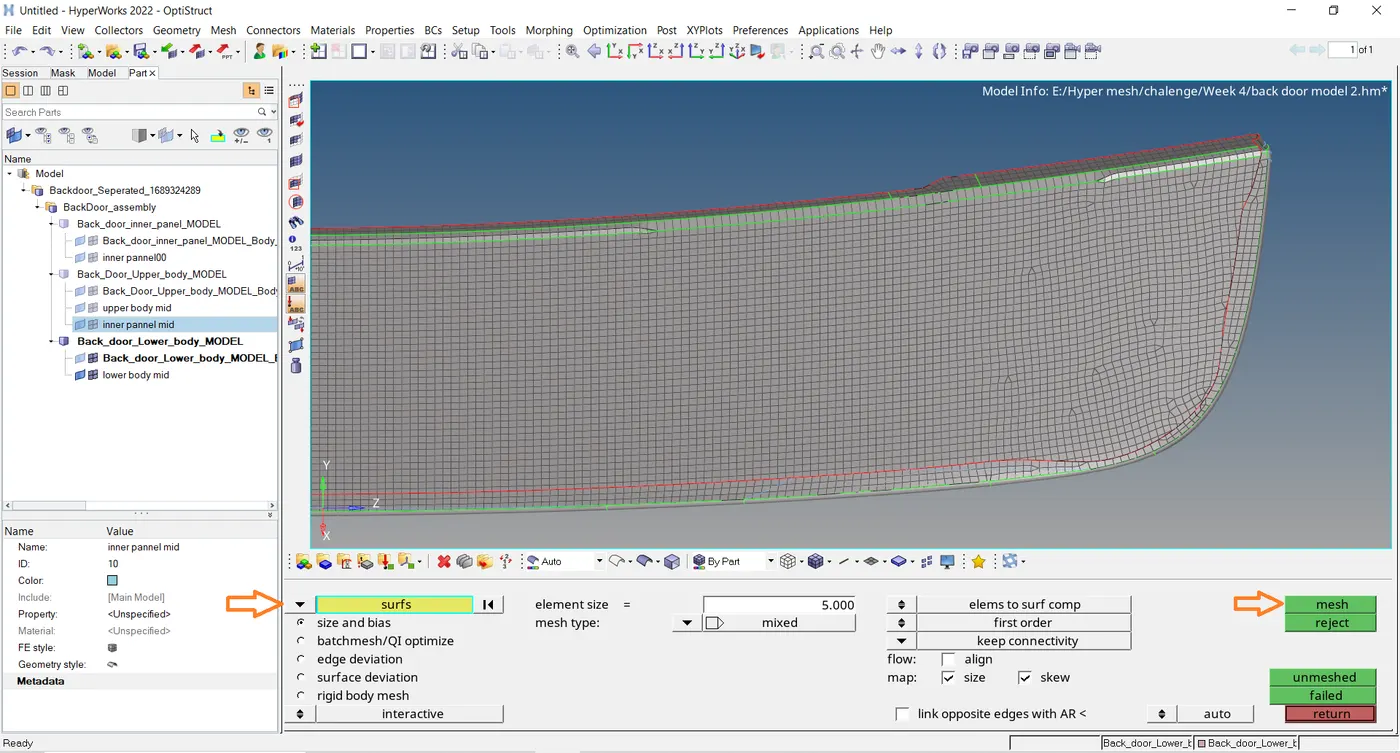
- Then mesh the given three components upper, inner body, and back body.
- By mesh tool go to 2D - Automesh - surface - Mesh.
- Avoid a higher number of trials.
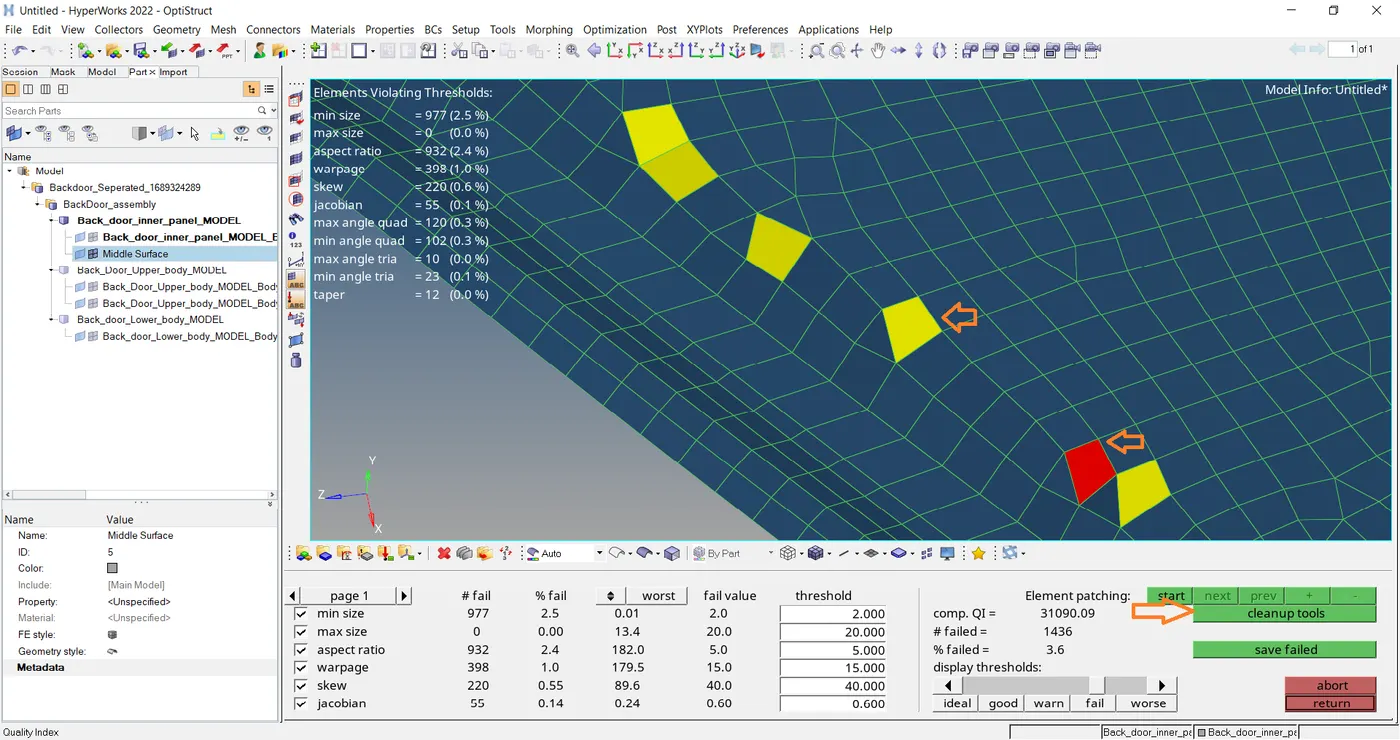
- The above Image shows some failer elements by the given criteria.
- The F12 shortcut is used to access the auto mesh option. Meshing is done for the hood part by part and elements are checked for quality then and there.
- TOOLS - CHECK ELEMS is used to check the failure of mesh elements for various preset quality criteria such as warpage, min. length, max. length, max angle, min angle, and many more.
- Failed elements can be isolated for correction using the SAVE-FAILED option in the check elements window.
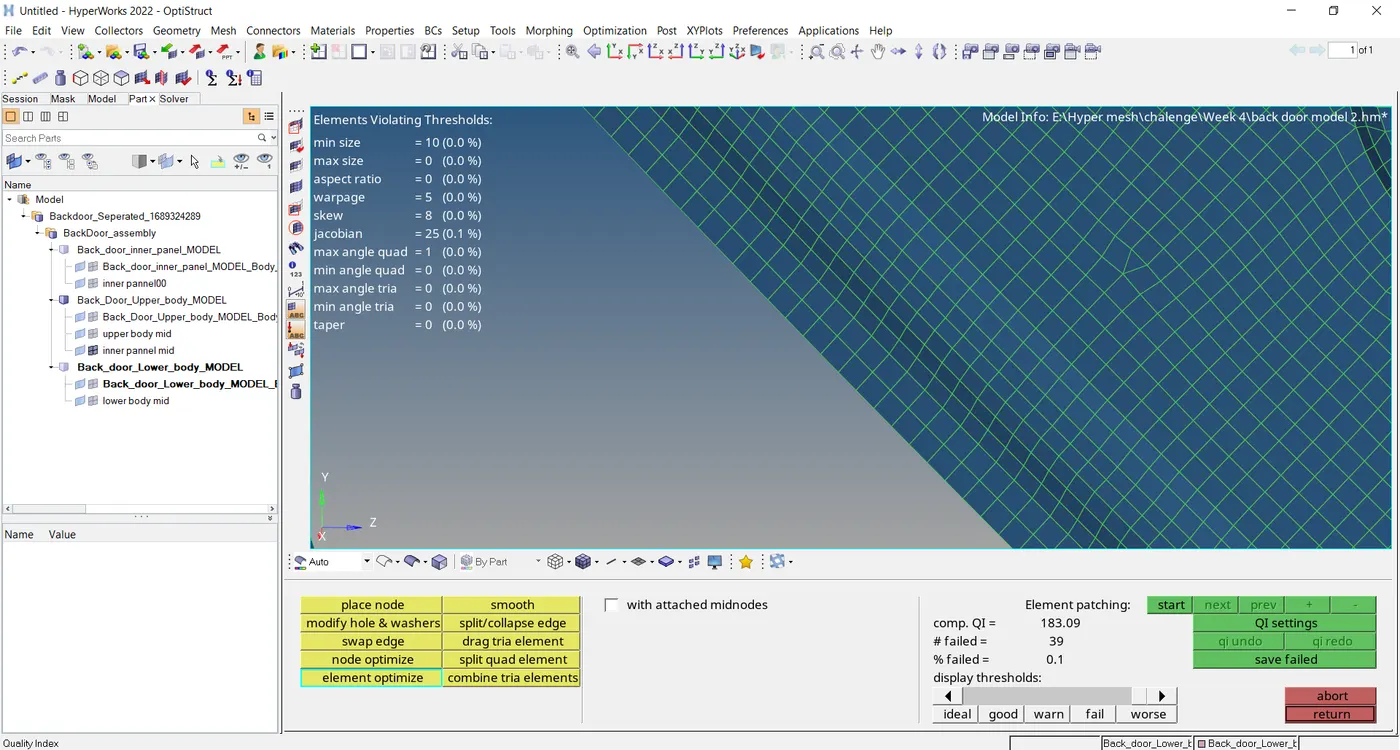
- There are many methods for correcting mesh elements both for size correction and orientation and placement sake.
- 2D - QUALITY INDEX has many correction features such as a place node using which we can move the node of an element and see if the failure is corrected.
- Smooth is used to refine the mesh. ELEMENT OPTIMIZE is a useful tool to optimize failed elements automatically correct them and adjust them to not fail.
- Similarly, there are many more such options such as split/collapse, swap edge, and more.
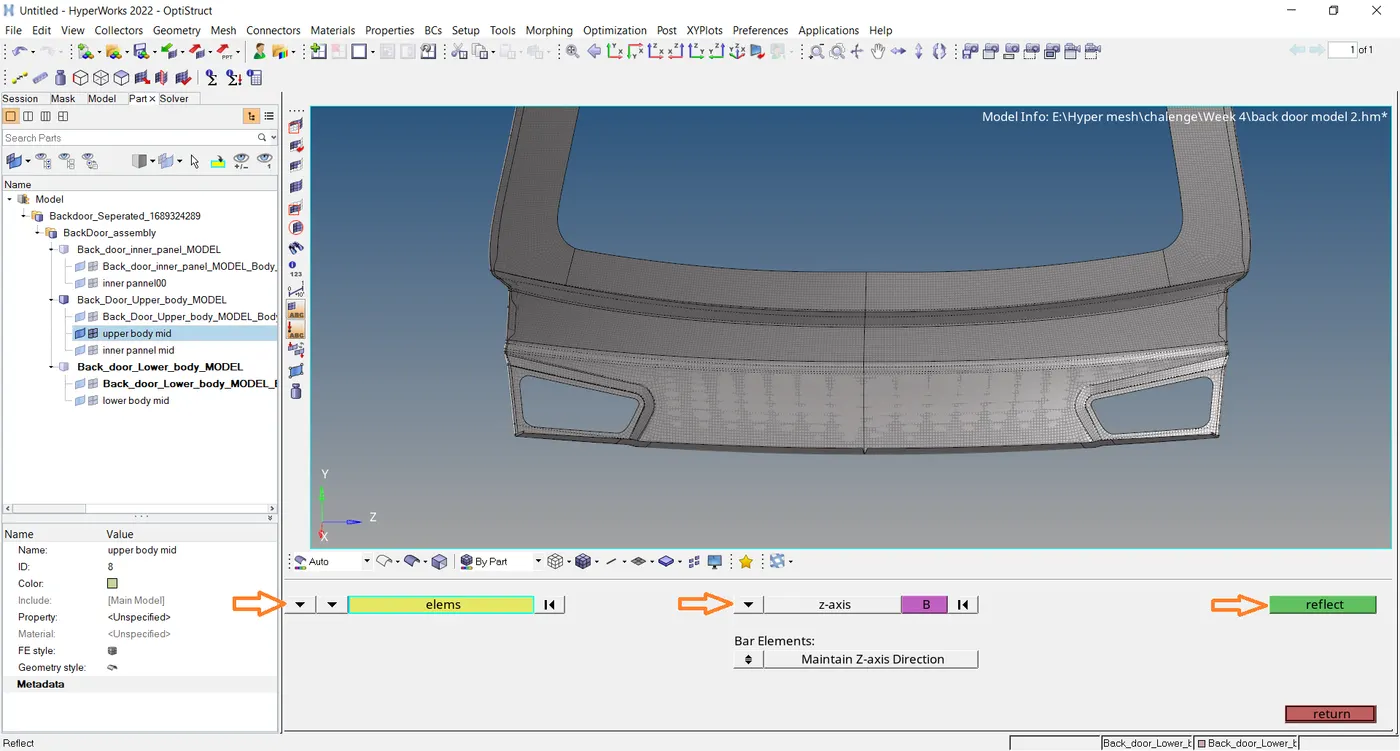
- The most useful tool for meshing axis-symmetric components is the REFLECT option in TOOLS.
- After meshing the left half of the hood and correcting them to avoid failure and refining the mesh, we can just reflect the acquired mesh along the central line vector to duplicate and paste the mesh on the right half also.
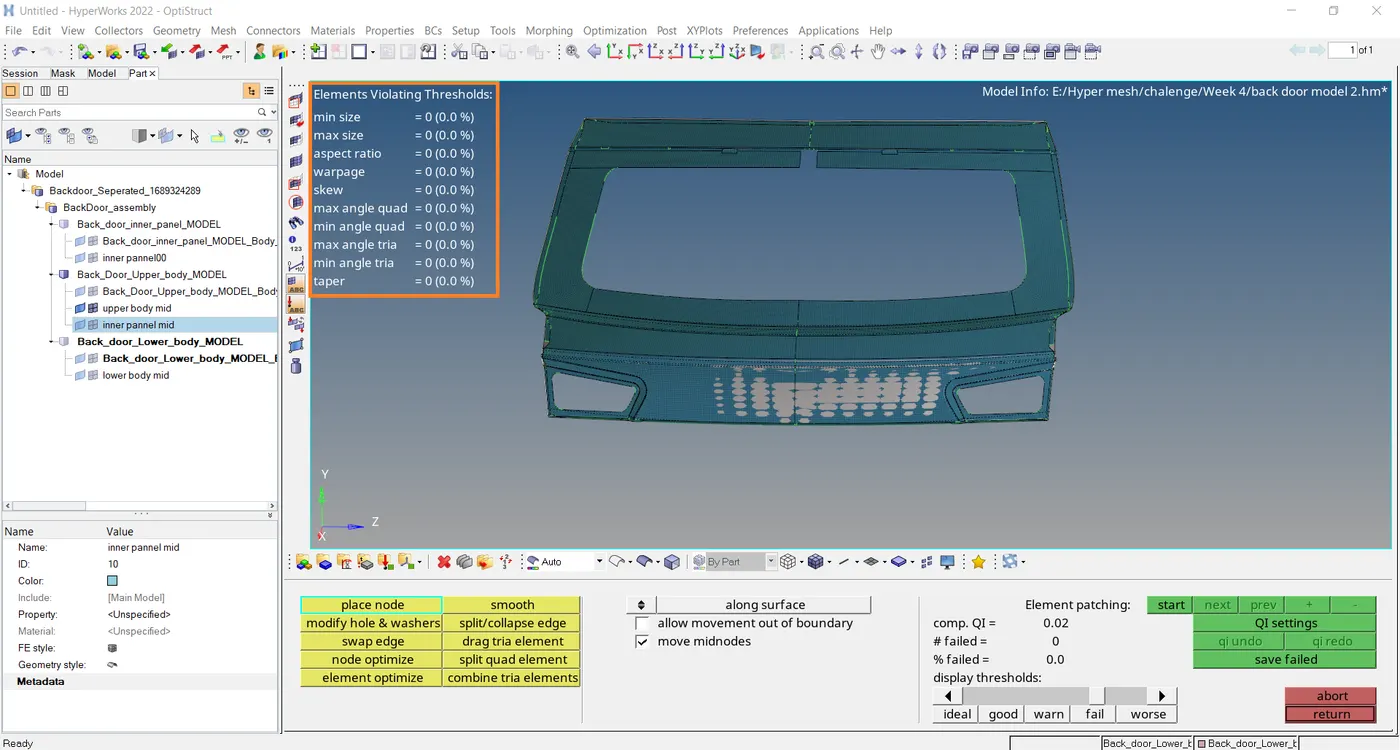
- Final upper body panel.
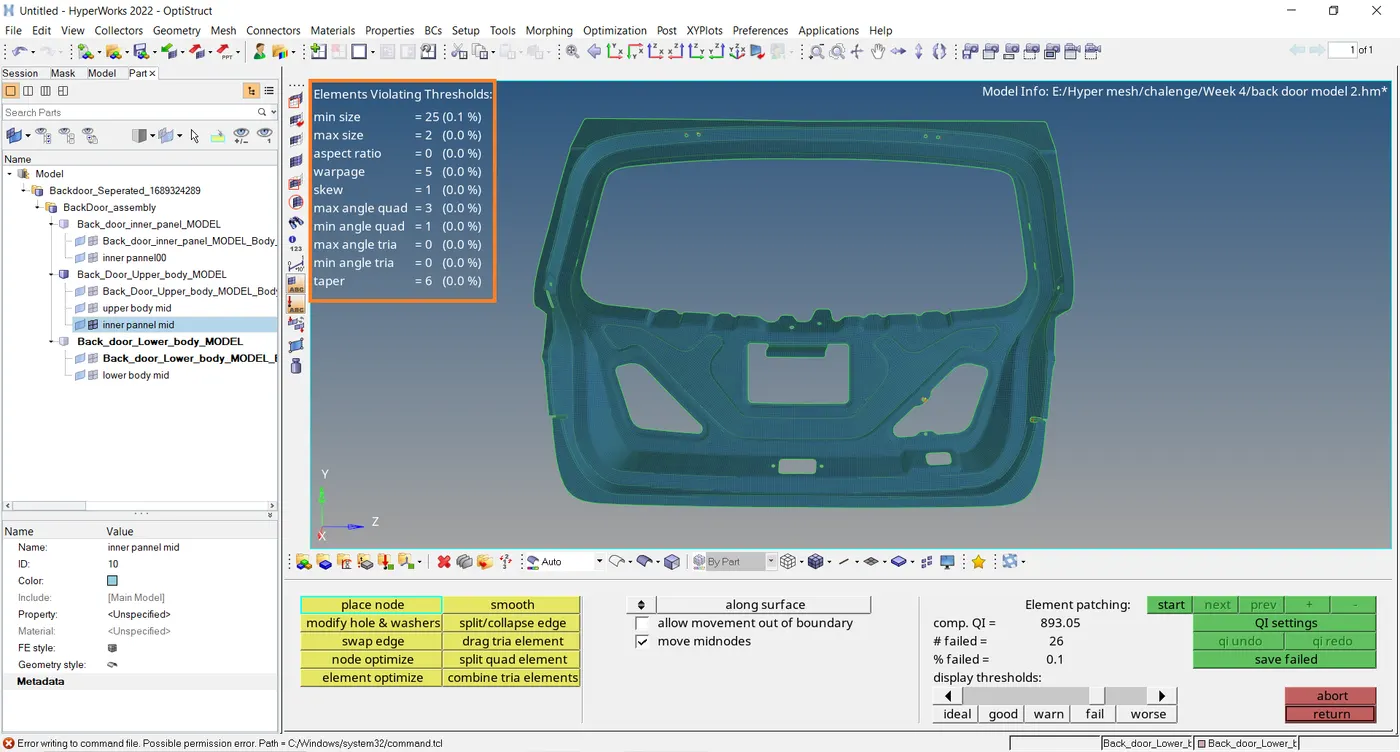
- Final inner body panel.
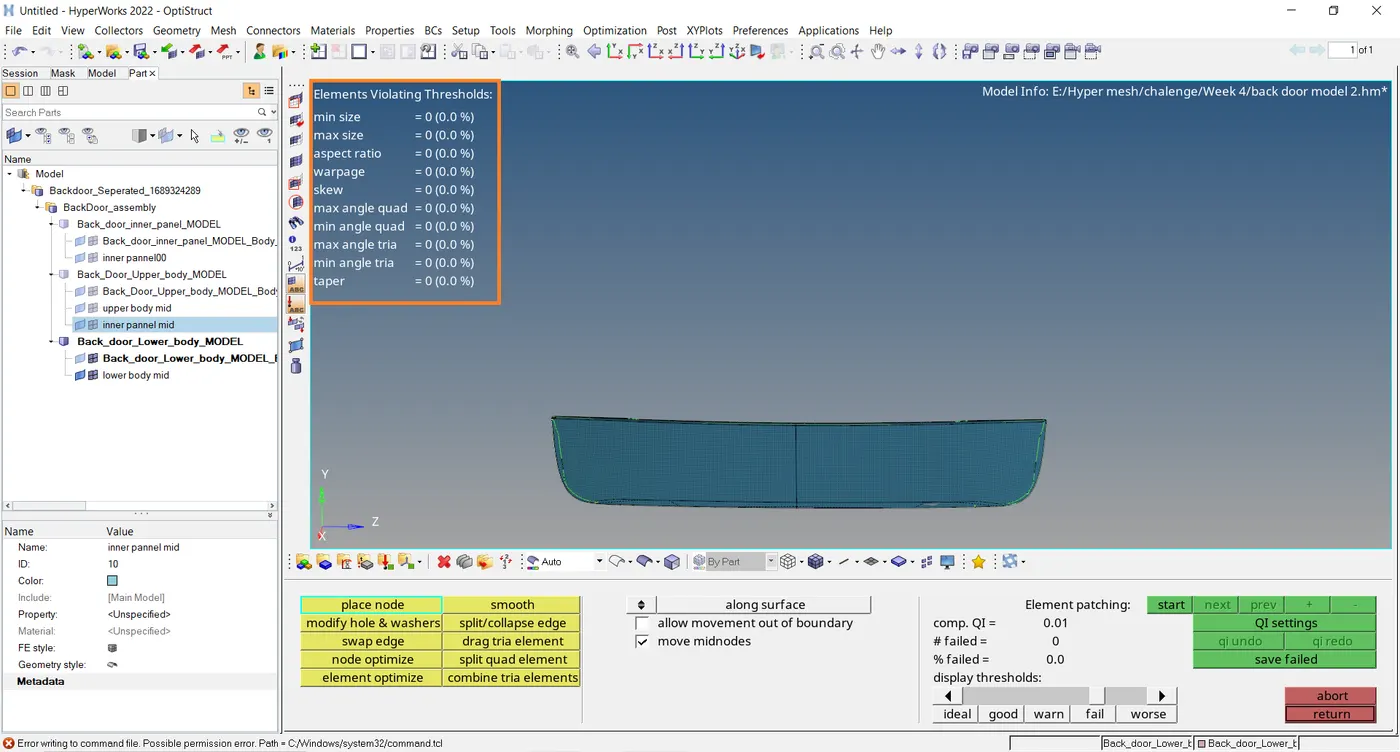
- Final Back door panel.
RESULT
- Hence the mid surface for every individual component has been extracted manually and every component has been meshed with proper good mesh flow and attained the quality criteria as per given.
- Every tries condition has been followed in this model and completed successfully.
Conclusion And Learning Outcome
- Proper feature capturing, avoid tries as much as possible.
- Attain quality criteria and do manual cleanup.
- Check for the duplicates, nodes, normals, and tria percentage.
Final
LINK
https://drive.google.com/file/d/1Q25lMSMCn8wamzw__LHHxVXC2Nc9JLmp/view?usp=sharing