Week - 4
- Implement control logic of a “washing machine” using Stateflow as per given sequence:
- If the power supply is available, the system gets activated
- If the Water supply is not available, stop the process & indicate through LED
- Soaking time should be 200s followed by Washing time of 100s.
- Then rinsing happens for next 20s & dryer runs for 50s
After all the processes have completed turn on the finished LED
ANS:
What is a fully-automatic washing machine?
A fully-automatic machine does what the name says – they come with several programs and washing modes that will work at the push of a button. The machine does everything automatically, so once you’ve picked your program there is no need to do anything else, just turn it on. When compared to semi-automatic washing machine, the fully-automatic washing machine price is going to be in a higher range, usually from RS 9,000/- to 80,000/-, sometimes even more. But the benefits merit the cost, since they not only make the washing process so much easier, but they also come with a built-in heating system, which controls the hot washing cycle. Another benefit with the fully-automatic washing machine is that it also delivers a more thorough clean than a semi-automatic washing machine.
Step By Step Process For Fully Automatic Washing Machine
Below we have come with the steps provided one by one in a clean and better understandable format. Try to follow and implement the same for enhancing the best wash at the end of the operation.
- In the first step, we must and should add dirty or stubborn clothes into the respective drum of one particular machine.
- If the person uses a front-load fully-automatic washing machine, strictly follow the rules provided in the given manual. And then add the required amount of detergent powder to the suitable/ special drawer. If not mentioned, place the powder directly into the drum.
- Do not forget to take detergent powder as per the dosage.
- Pick the option among settings you like to go with and click on start operation without stepping back.
- Based on the type of clothes you place, it is important to select one particular option available in the form of settings.
EXPLAINATION AS PER CHALLENGE:
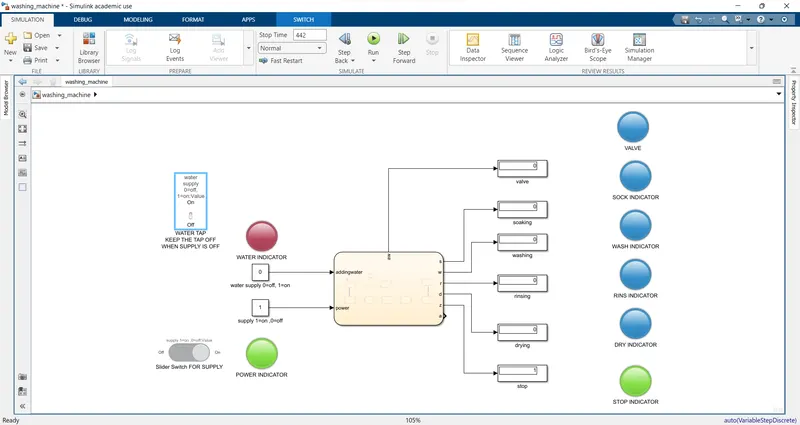
- Using simulink we are creating a blocks that creates our control logic
- Using chart block we are creating the flow blocks as follows:
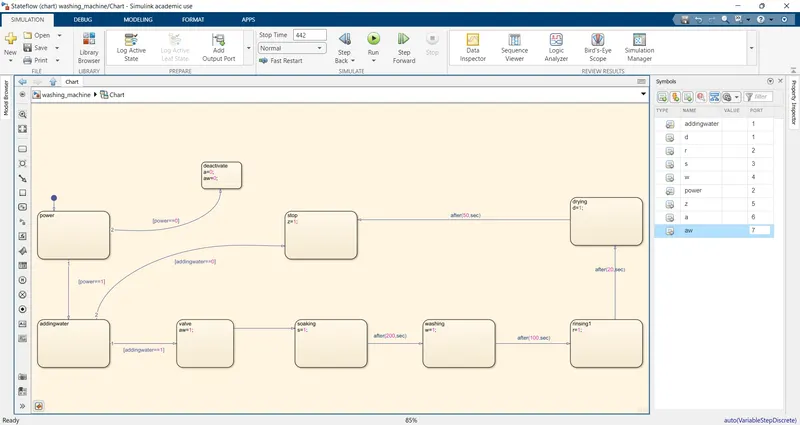
- Using state power block is stated if the supply is on further process is moved else it is deactivated
- Further water is added to machine as per input,if ON water enters system if OFF it does not.
- We have added the 'valve' state which is activated if Power-Supply is ON and supplies water to machine if the tap is on Else it dose not allow the water to enter machine.
- The first process is soaking and after its completion at 200 seconds the sock indicator is turned 'green'.
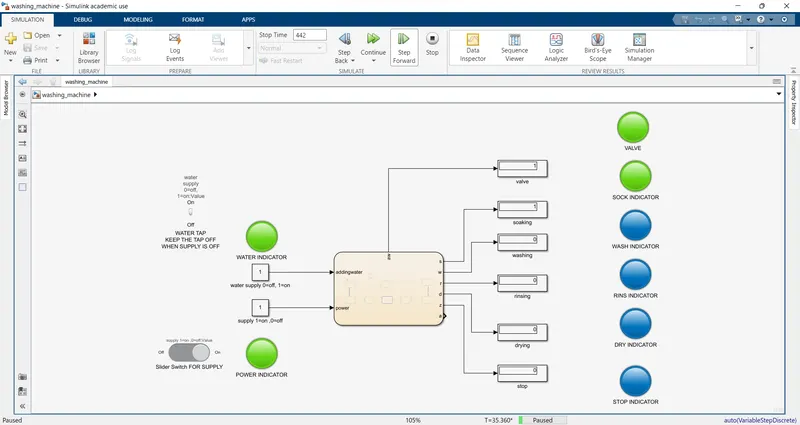
- The next process wash is completed after 100secs,and the wash indicator is turned 'Green'.
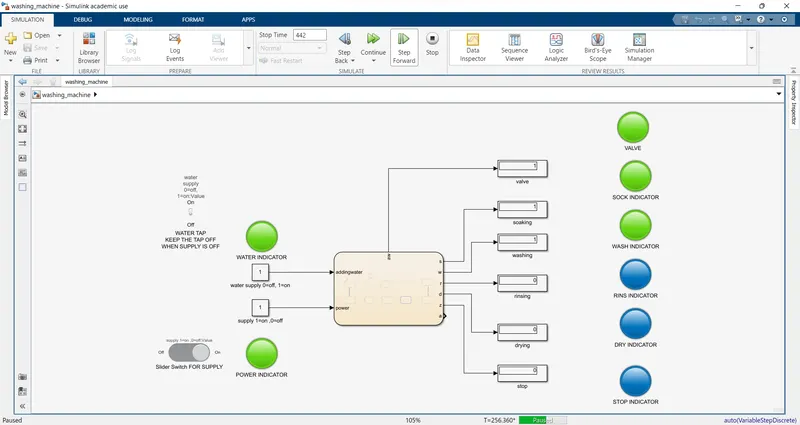
- The rinsing process is completed after 20sec,and the 'RINS INDICATOR' is turned 'GREEN'.
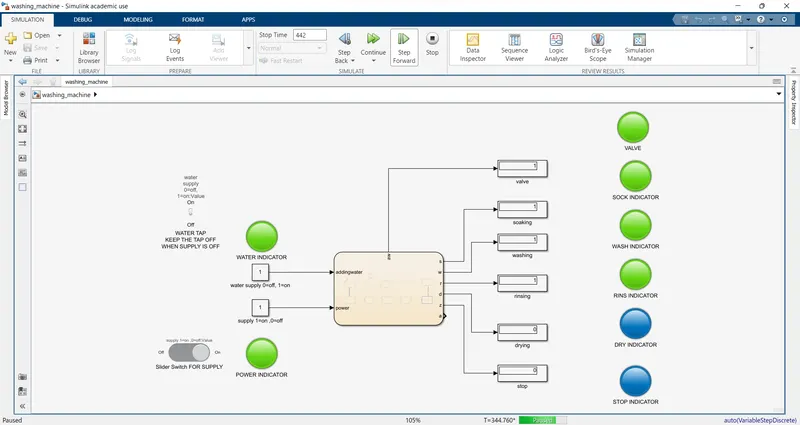
- Later,Drying is processed and after 50sec the 'DRY INDICATOR' is turned "GREEN".
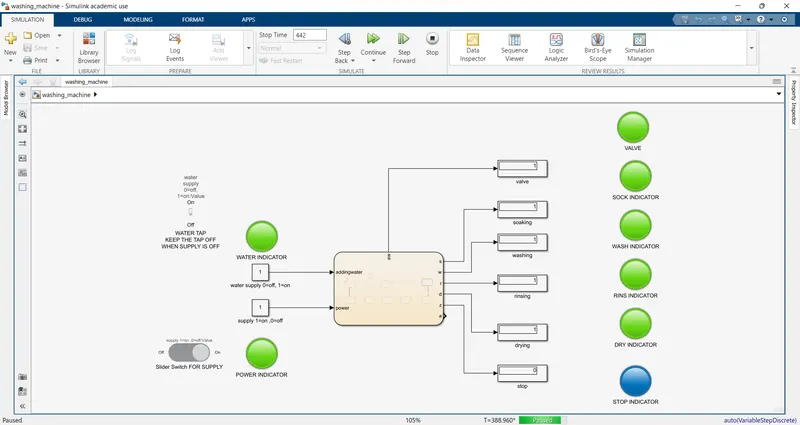
- Finally,after process completion 'STOP INDICATOR' and all other lamps are turned 'Green' .
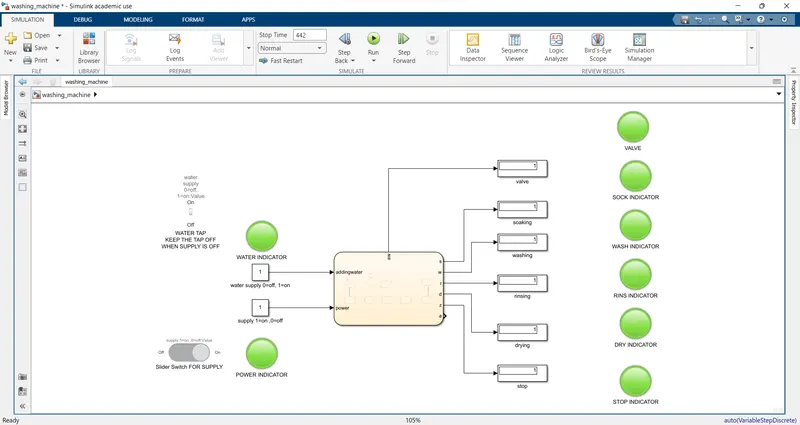
IF the power supply is available, the system gets activated ,ELSE ALL ARE DEACTIVATED AND ALL PROCESS LAMPS ARE TURNED BLUE :(HERE EVEN IF THE SUPPLY IS ON THE VALVE IS TURNED OFF AND IS INDICATED BY BLUE COLOR IN THE 'VALVE LAMP')
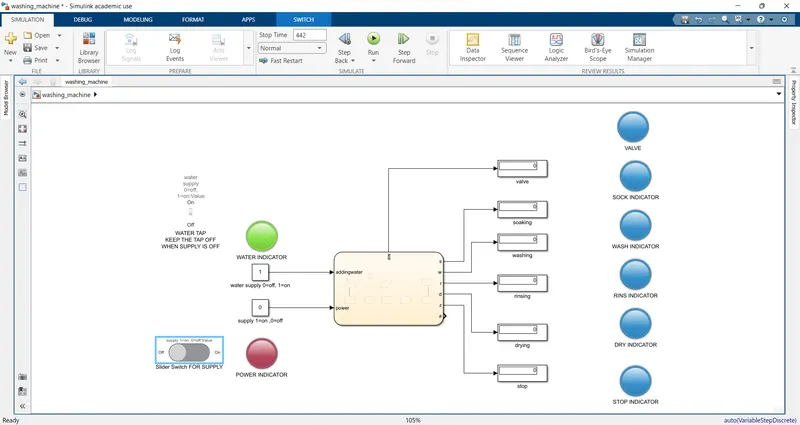
IF THE TAP WATER IS OFF THEN STOP INDICATOR IS TURNED GREEN WITHOUT GOING THROUGH ALL PROCESS:
2. Make a Simulink chart for the “Gear shift” logic as per below conditions:
Speed Range(kmph) Gear
0 to 15 1
16 to 25 2
26 to 40 3
41 to 60 4
Above 61 5
Give speed input while the simulation is running & display the gear number.
What is Auto Gear Shift Technology?
AGS technology is a futuristic two-pedal technology that enhances the ease of driving. It comes with dual driving modes that allow switching between the manual and automatic transmission option effortlessly. AGS technology offers synchronised control over the engine, clutch, and shifting operation. This translates to smoother gear changes and strong fuel efficiency which is at par with the manual versions.
How does Auto Gear Shift work?
AGS is equipped with an intelligent shift control actuator, which is an electric-hydraulic actuator that performs the clutch and shift operations automatically. The AGS technology is designed with a creep function as well that makes driving easier in traffic congestion. With this, you just have to release your foot off the brake and the car starts moving at slower speeds.
Along with this, it also comes with a kick-down function that makes driving easier on the highways. It automatically lowers the gear to deliver better acceleration while driving on the highway, freeing you from the hassle of changing gears manually. Cars equipped with the AGS technology have better fuel efficiency as well and require lesser maintenance.
Benefits of Auto Gear Shift Technology
Now that you know about this automatic transmission – how it works and so on, here are the key benefits that make AGS technology so preferred in India:
1. It offers drivers superior ease and comfort of driving. The absence of the clutch pedal and no manual shifting operation make the drives effortless.
2. This automatic transmission is tuned according to Indian driving conditions which ensures consistent performance across terrains.
3. Fuel efficiency is a factor that every car owner looks for and cars with AGS technology delivers the best-in-class mileage that amps up the driving performance.
The most well-balanced type of automatic transmission, AGS is making driving easier like never before.
BLOCK OF GEAR SYSTEM:
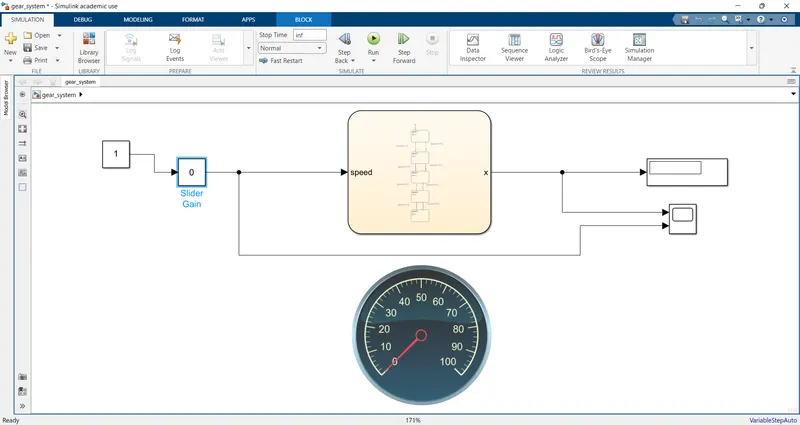
CHART :
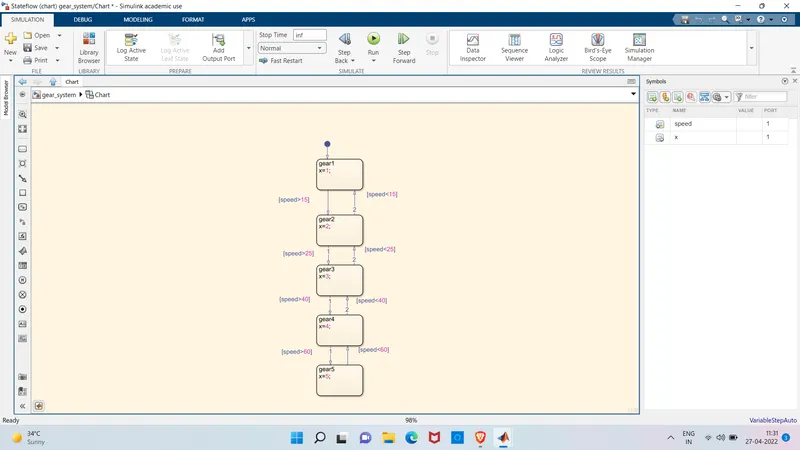
Explaination:
- Using the CHART command in simulink first we have arranged the state variables and have provided the input - output as'speed' and 'x' as per requirement.
- The gear needs to be shifted automatically so we have connected each state variables as followed.
- Using the 'slider gain'command we will be varing the speed of the system and it will be connected to input of the chart.
- The slider gain is also connected to the constant as it multiplies with it.
- The output of the chart is connected to the 'Display' command which shows the active gear during the process simulation.
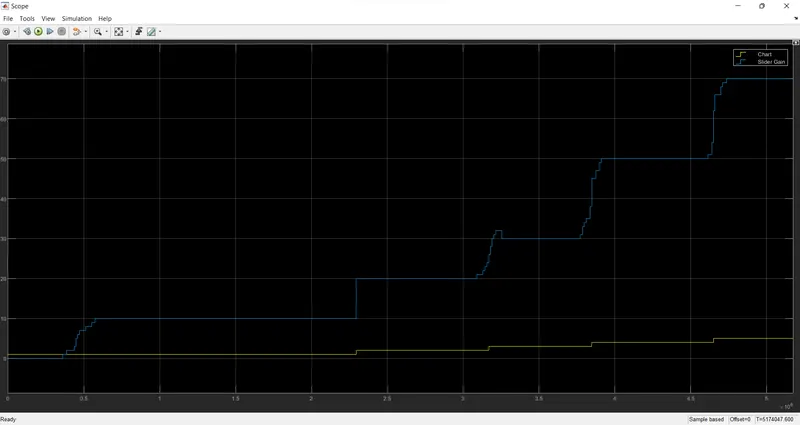
- The output is also connected to 'scope' command as it plots gear shift and speed variation with respect to time.
- To have a glance look on speed variation we have connected a 'Speed Gauge'.
1.Speed Range(kmph) = 0 to 15 Gear =1
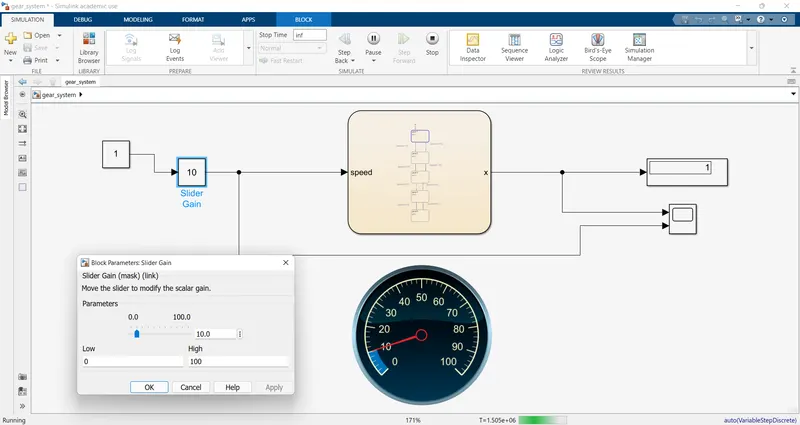
2.Speed Range(kmph) = 16 to 25 Gear =2
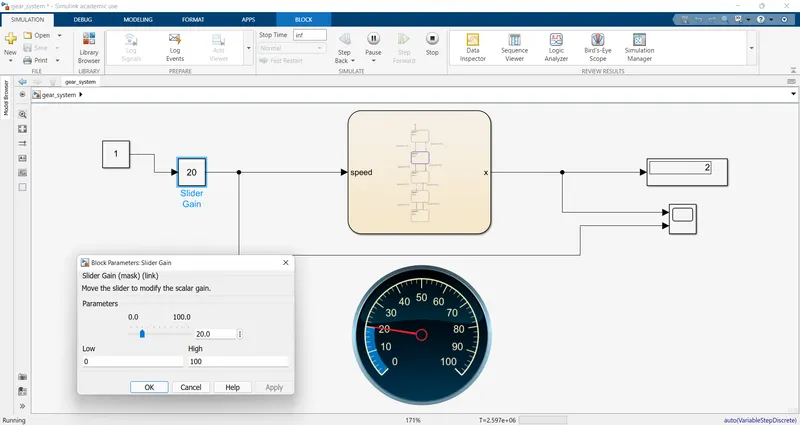
3.Speed Range(kmph) = 26 to 40 Gear =3
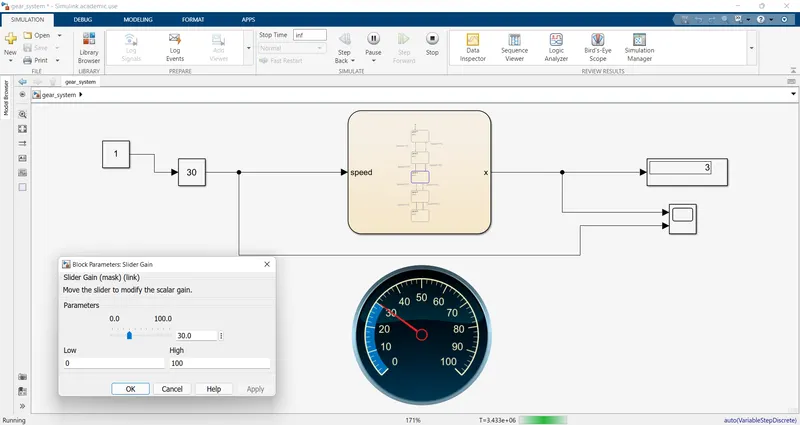
4.Speed Range(kmph) =41 to 60 Gear =4
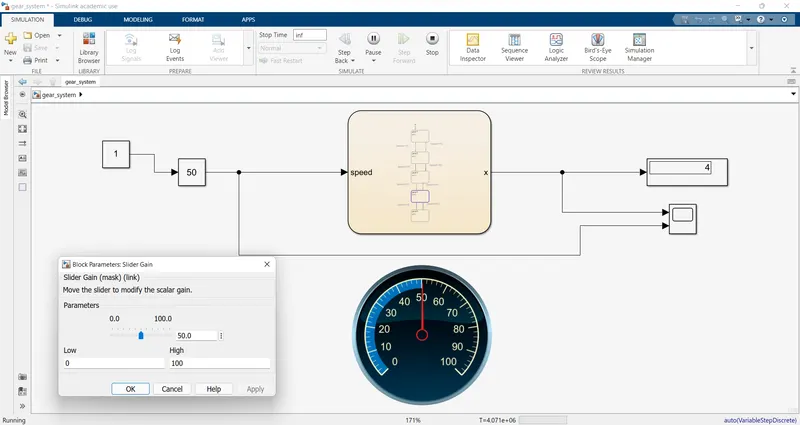
5.Speed Range(kmph) = Above 61 Gear =5
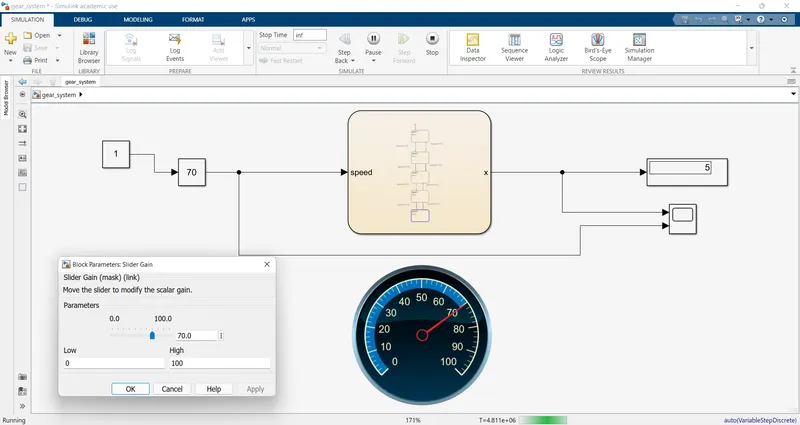
PLOT: