Week - 4 - 2D meshing for Plastic components
2D-Meshing of Plastic Bottle Cap
1. Aim: For the given Plastic bottle cap, after checking the geometrical errors, take the mid surface and mesh the mid surface with the given element Quality criteria.
2. Procedure:
To do the mesh below procedure is followed
- Checking CAD topology
- Mid surfacing
- Defeaturing
- Shell mesh
- Element Check and Improve mesh quality
1. Checking CAD topology:
In this step, we check CAD geometry. This includes, all surfaces being stitched properly, checking any triple cons available, and checking any broken surfaces are present. These geometrical checks are automatically done and solved by ANSA by the geometry checks option in the Tools tab. ANSA can fix some errors, but some issues would be solved manually. Most errors can be detected by ANSA, but you have to ensure manually all the surfaces are good. If you found any triple cons, and ANSA can’t solve the problem, release the cons and do the TOPO operation manually. If you found any broken surfaces, use the delete option in the faces menu. And create a new face in the TOPO module.
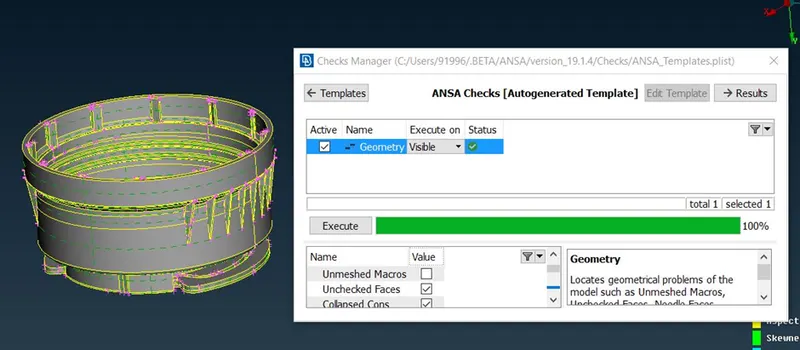
Fig 1: Geometry checks of Plastic Cap
2. Mid surfacing:
When the geometry checks are done go for mid surfacing. There are two ways to obtain the mid surface. One is the Auto mid option and another one is manual mid. For Auto mid, an object should be closed volume. Auto mid assigns thickness automatically when creating mid. Sometimes auto mid option failed to generate mid surface, in that case, we go for manual mid. I tried to do the auto mid, casting option(for plastics and casted components) (Topo >Faces> Mid surfacing> Casting), but ANSA had quit the program and was unable to do the mesh by auto mid option. So, I went for the manual mid option.(Topo > Faces > offset or middle)
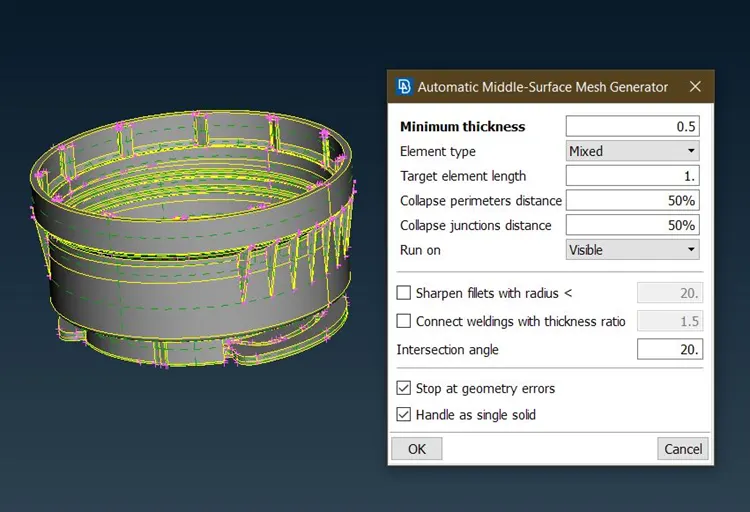
Fig 2: Error in creating mid by Auto Mid option
When we are going for mid, check the thickness of the part at different places and confirm the thickness is uniform. If we are going for manual mid, assign PID and assign thickness to every mid surface.
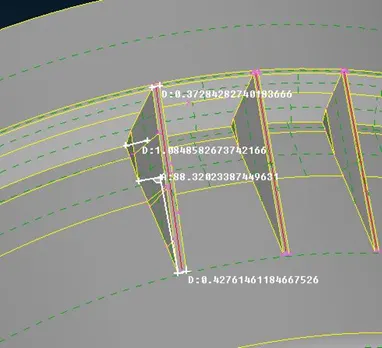
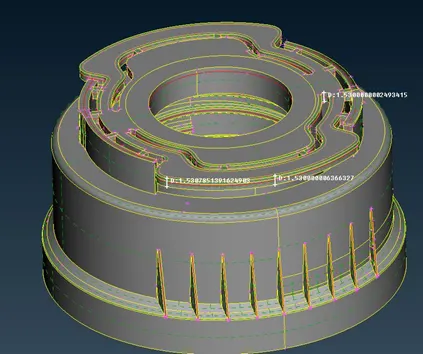
Fig 3: Checking the thickness of component at different locations of the part
For handling and visualization of the given cap, I have divided the cap into two portions upper and bottom, and saved them in the lock views. Most uniform thick surfaces are done by faces offset option after that PIDs and thickness should be assigned.
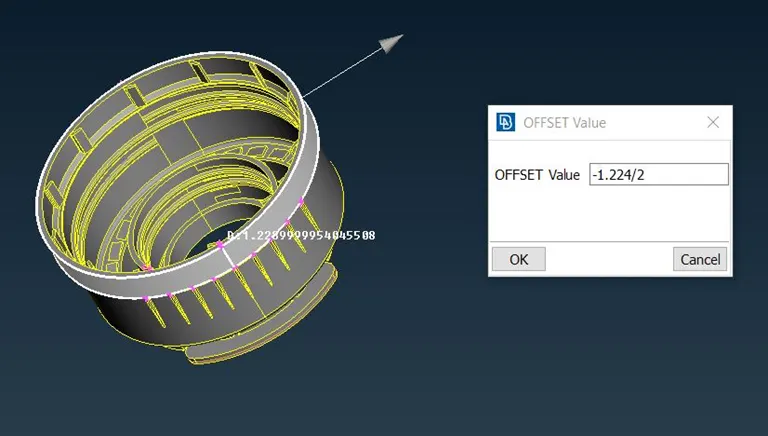
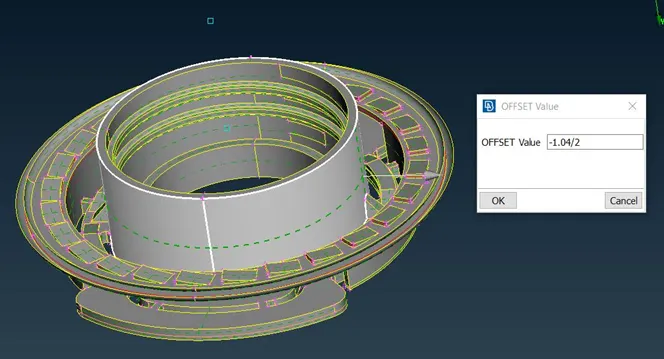
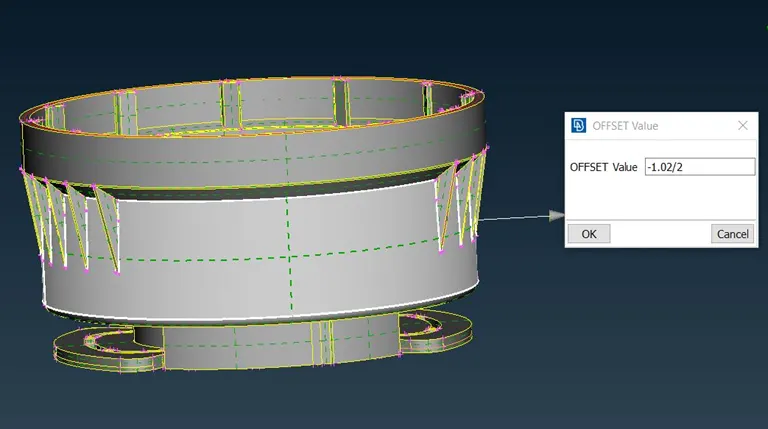
Fig 4: Offsetting face for taking mid of uniform thick surfaces
For taking mid for threading surfaces, it is impossible to capture the trapezoidal geometry, so we are compromising to capture that surface by rectangular geometry.
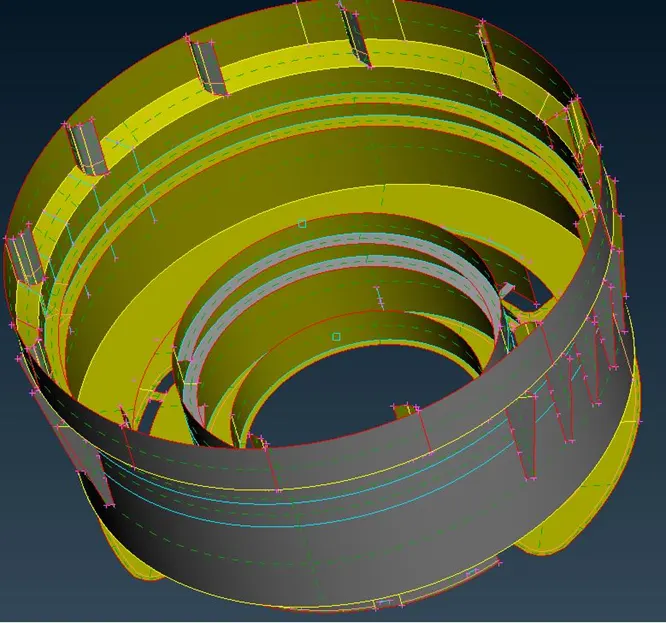
Fig 5: Taking mid surface for trapezoidal thread
For taking mid for tapered surfaces, we have to use the curve middle option. (Topo>curves > middle). We have to create the mid surface by faces new by using mid curves of the geometry. To capture the tapered surfaces like stiffeners, ribs, we have to split the surface and for each split surface, we have to give average thickness so as to capture the geometry finely. I have given thickness to the tapered ribs as the base thickness of the tapered surface as it is important in giving strength to the part. When we give thickness as average, sometimes we get the average thickness is lower than the bottom base thickness which is crucial in giving strength to the component, I have given the base maximum thickness of the rib geometry. You can also compare the thickness of the mid surface and parent geometry by using the option draw shell as solid. And ensure the mid surfaces are connected to the base geometries as per parent geometry. I have split the inner rib into two surfaces and assigned two different thicknesses to capture the geometry.
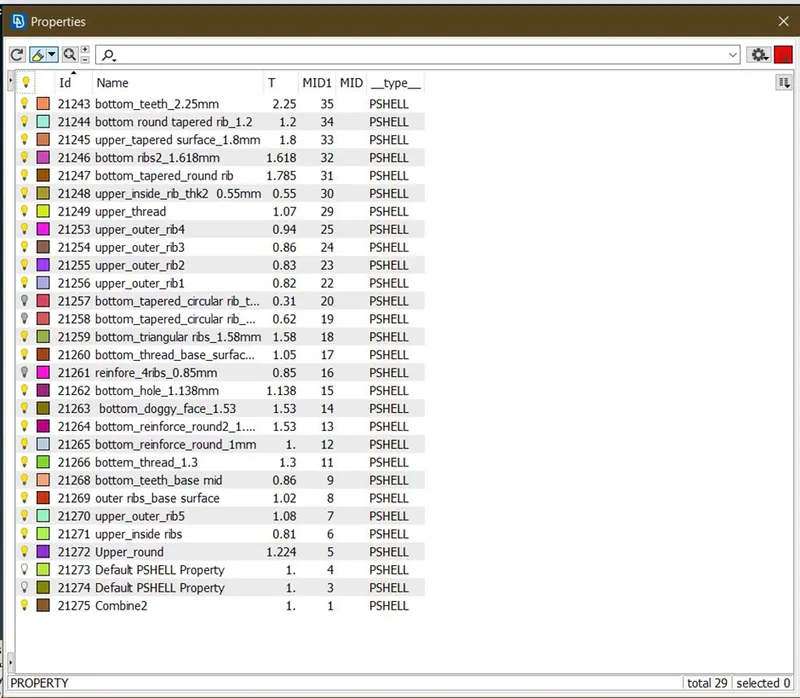
Fig 6: Thicknesses of different surfaces
There are some geometries like ribs having the same shape and thickness. For that kind of geometry, take mid for one and do transform or symmetry or rotate after doing mesh for one. So that you can avoid again meshing of same shape and also save time.
3. Defeaturing:
If the distance between the cons is less than the minimum element length criteria, we can go for defeaturing. Because those elements formed at those cons are failed for minimum length criteria.
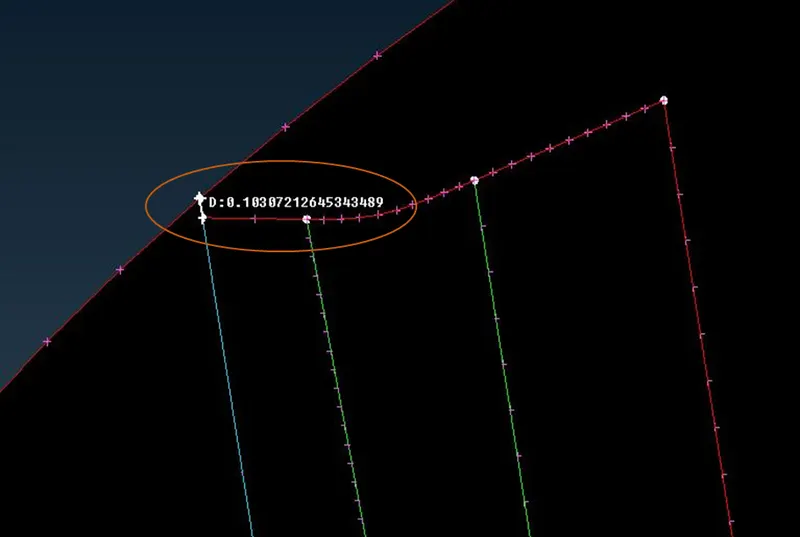
Fig 7: Less distance from inner upper rib to the top face
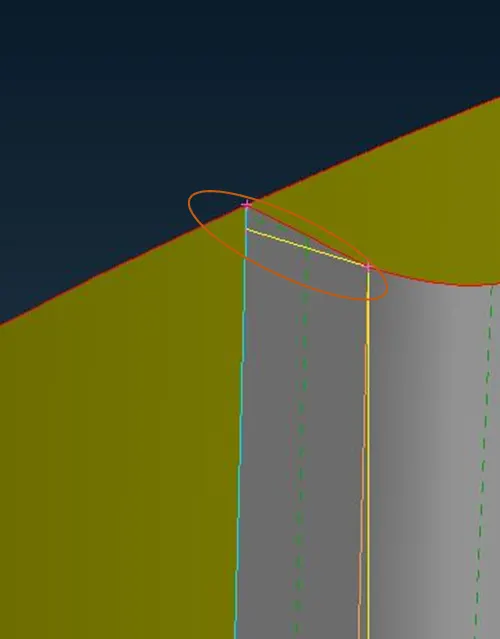
Fig 8: Defeaturing inner rib
You can see the distance between the cons is 0.1, in fig.7, orange oval. At this location, elements formed are failed for minimum length criteria. So, I joined this smaller distance by taking a new face between the rib and the top surface
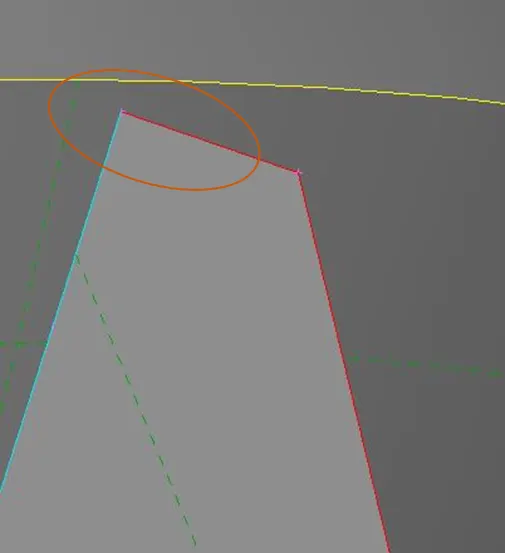
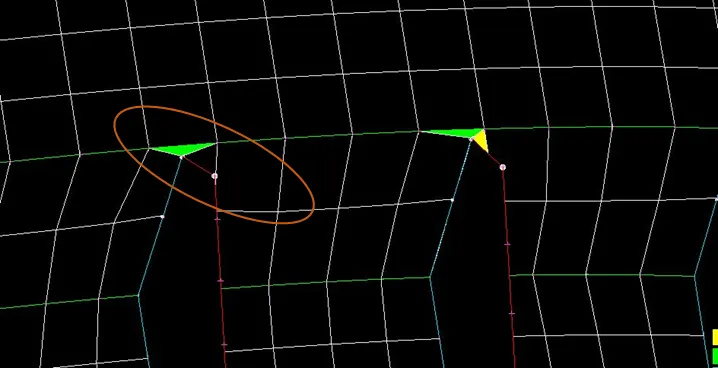
Fig 9: Elements formed are failing at outer rib region due to less distance
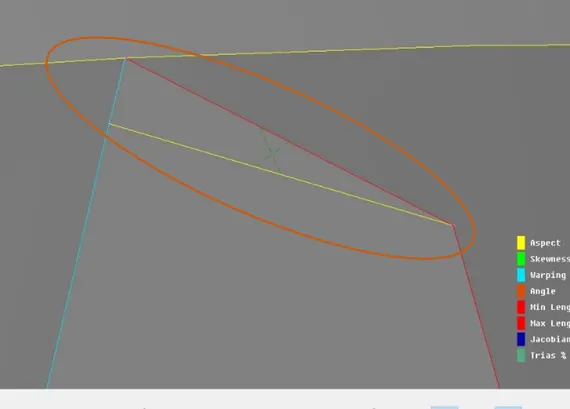
Fig 10: Defeaturing Outer rib by connecting to the upper con
4. Shell Mesh:
Before doing mesh, we have to give the quality criteria and mesh parameters. We can give the quality criteria by function key F11. Or you can give quality criteria and mesh parameters in utilities Tab.
|
S.No |
Quality Criteria |
Value |
|
1 |
Target/Average length |
1 |
|
2 |
Minimum Length |
0.5 |
|
3 |
Maximum Length |
3 |
|
4 |
Aspect |
3 |
|
5 |
Warpage |
15 |
|
6 |
Skewness |
45 |
|
7 |
Jacobian |
0.7 |
|
8 |
Minimum Quad Angle |
45 |
|
9 |
Maximum Quad Angle |
135 |
|
10 |
Minimum Tria Angle |
30 |
|
11 |
Maximum Tria Angle |
120 |
|
10 |
Tria Percentage |
15 |
|
S.No |
Mesh Parameters |
Value |
|
1 |
Average length of element |
1 |
|
2 |
Minimum length of element |
0.5 |
|
3 |
Maximum length of element |
3 |
And in the mesh module, in the perimeter tab, give perimeter and macro length according to the quality criteria. Here I have given the average shell element length is 1. This will adjust the nodes on the perimeter and macro area according to the value given. We can use the join command in the macros tab, to join surfaces or to remove unwanted cons.
I meshed the component with options Best(meshing), Reconstruct (for better mesh), Smooth (To refine the given mesh), split (To move trias front), Paste(to move the trias backward) in the mesh module. For Inner ribs I have used rotate option.
For outer ribs, I have used the symmetry option. If the component is symmetrical about working planes to select the plane refer to fig 11.
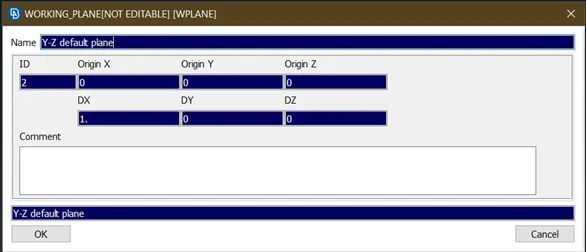
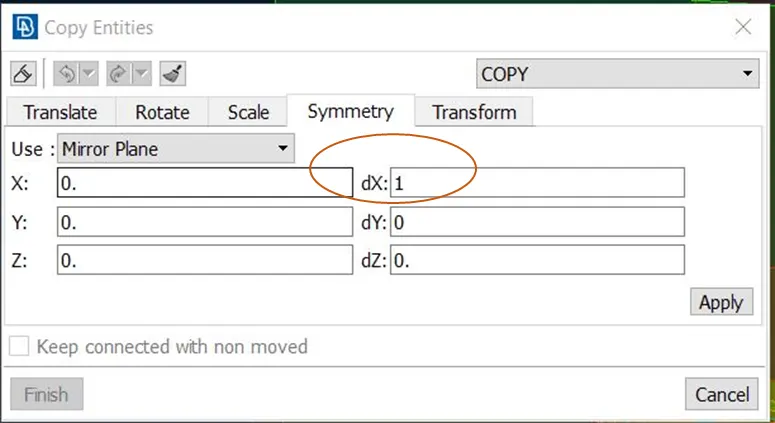
Fig 11: Doing symmetry operation for outer ribs, selecting mirror plane(YZ-Plane)
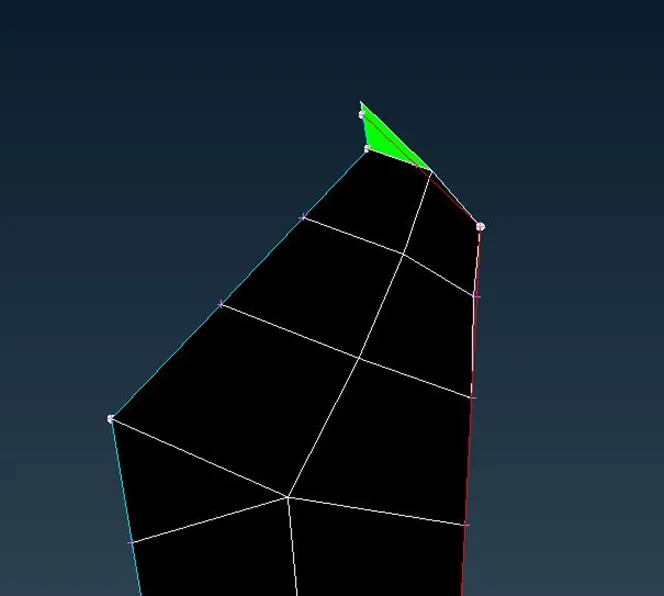
Fig 12: Element formed at the edge of the outer rib is failing for skewness due to sharp edge
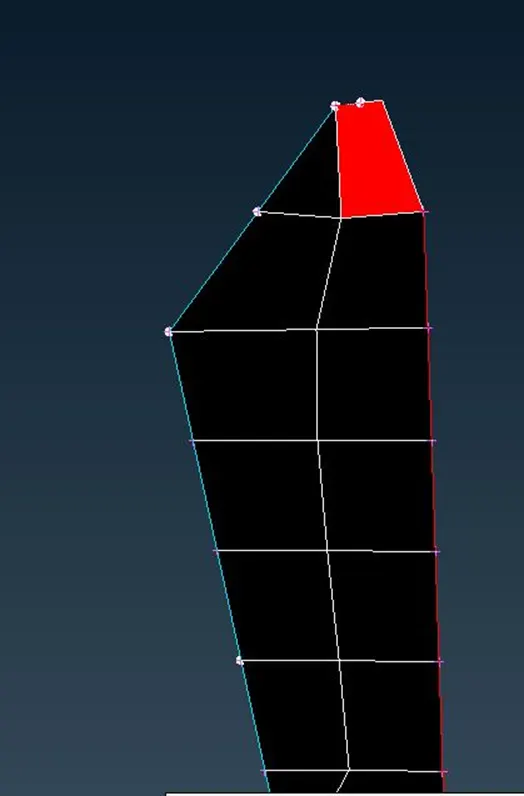
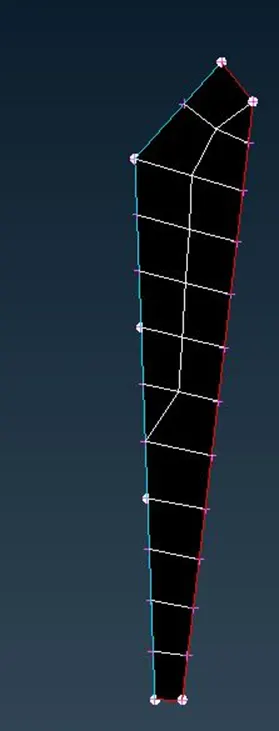
Fig 13: Defeaturing the outer rib by removing the sharp edge
5. Element check:
The element quality criteria which we are given will check the mesh whatever we are doing. ANSA will show whichever element is failing our given quality criteria. There are no off elements formed and no rotating quads are available. And tria percentage also very less.
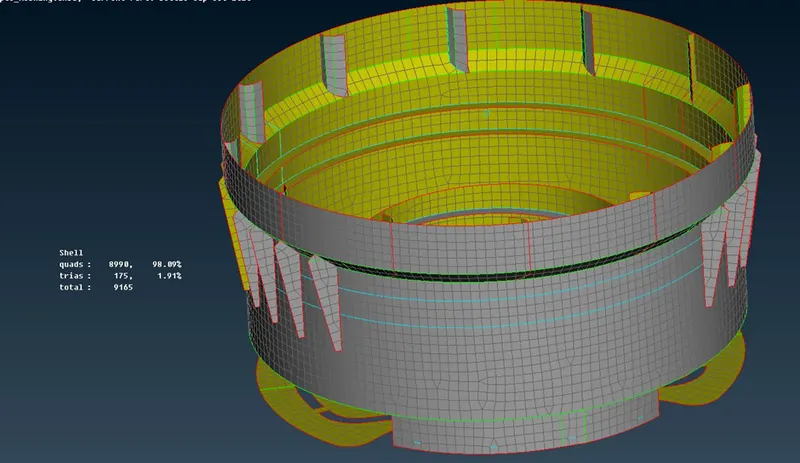
Fig 14: After completing meshing
3. Learning outcomes:
- I have learned how to use symmetry and rotate in the transform option.
- Taking mid for tapered surfaces using curve middle option.
- When we are taking thickness for tapered surfaces, go for max base thickness.
- You can also split the surface into more than one and give the average thickness for tapered surfaces to capture the tapered geometry.
- Take proper mid for geometry which is symmetrical about both planes like rectangular ribs according to the parent geometry and base surface.
- For symmetrical geometries which are attached to the base surface, try to use transform options. By this, we can save time and also remove more triple cons.
4. Conclusion:
Obtained mid surface and shell mesh for the given Plastic Cap. The total no. of elements obtained are 9165. So, these number of elements will try to capture the entire geometry of plastic cap.
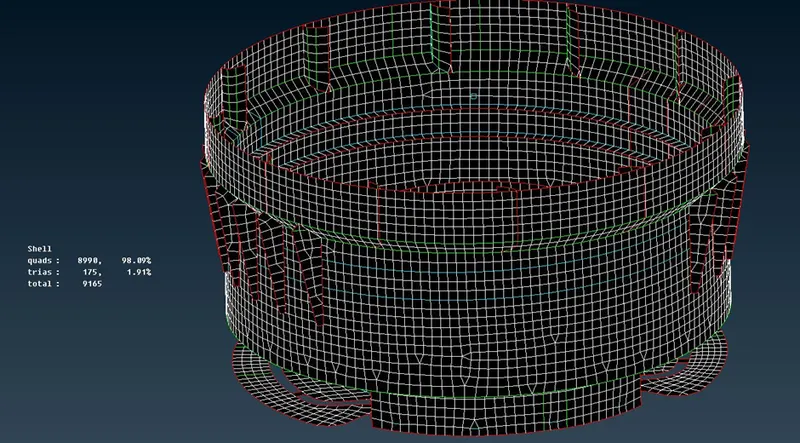
Fig 15: After finishing of meshing
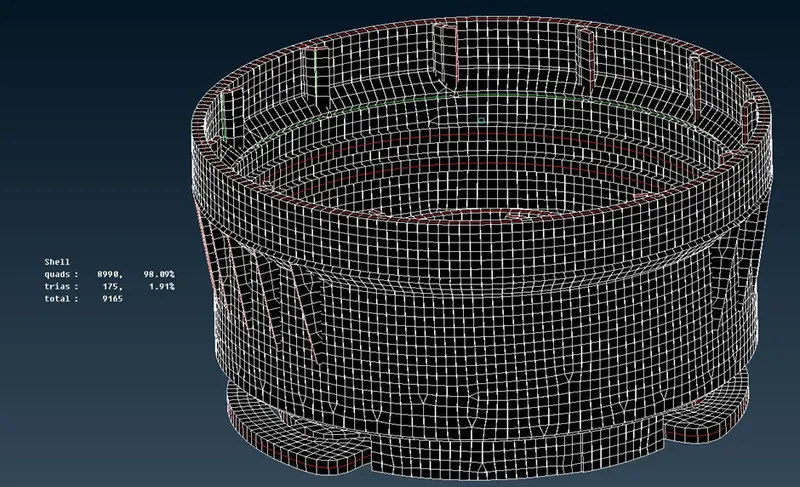
Fig 16: After finishing meshing (Draw shell as solid)
Total Elements: 9165
Quad elements: 8990
Trias: 175
Tria %: 1.91%