Week 4-1D Element Creation Challenge
Object- 1D element creation of given part.
Introduction-
1D element-
1D modelling approaches are used for modelling line-type members such as columns / piers, beams or piles. Representation of the line is self defined by the user via a section and all geometric properties of the member (width, height, etc.). 1D elements are commonly used to represent line members and can provide accurate bending behaviour of a member. 1D element meshing is the division of the member into multiple segments, this does not affect the overall result but more segments allows smoother and better visualization of the results. The analysis results for members modelled using 1D elements are usually given in terms of shear force and bending moment about the two main axes of the members as well as axial force and torsional moment about the axis that connects both ends of the member.
RBE2s -
RBE2 elements are commonly used to connect parts, apply fixed boundary conditions, and other places where a rigid connection is appropriate. RBE2s enforce rigid body behavior for the nodes and degrees of freedom of which they are comprised.
RBE3s-
RBE3 elements are commonly used to connect parts, attach nonstructural concentrated masses, apply loads and boundary conditions, and in other places where a distributed connection is needed. In contrast to RBE2s and contrary to the name, RBE3s do not behave as rigid bodies. An RBE3 creates a flexible connection between the constituent nodes and degrees of freedom where the displacement of the center node is equated to the weighted average of the displacement of the other nodes. This context may be used to quickly create and modify RBE3s directly when the use of Connectors technology is not necessary/desired.
Rod, Bar and Beam-
Actually Rod is a member which is Circular In cross section. But Bar can be of any cross section like rectangular bar, square bar, I- section bas etc. But a Beam Can be of any cross section either circular or any other. The main difference between Bar/Rod & Beam is in the basis of loading conditions. A rod and Bar are subjected to Axial load only, this can be either tensile or compressive but not torsion or bending. And a Beam can be subjected to any type of load, tension compression, torsion and bending, shear etc.
Procedure-
- First of all we import the IGS model to .hm model,
- then we create the midsurface by midsurface command (Geom>midsurface),
- then we create the washer of hole for better result by washer command (Geom>quick edit>washer),
- then we create the material steel and and give thickness 2mm and 2.5mm after it we assign it with midsurface,
- then we create the automesh 5 unit,
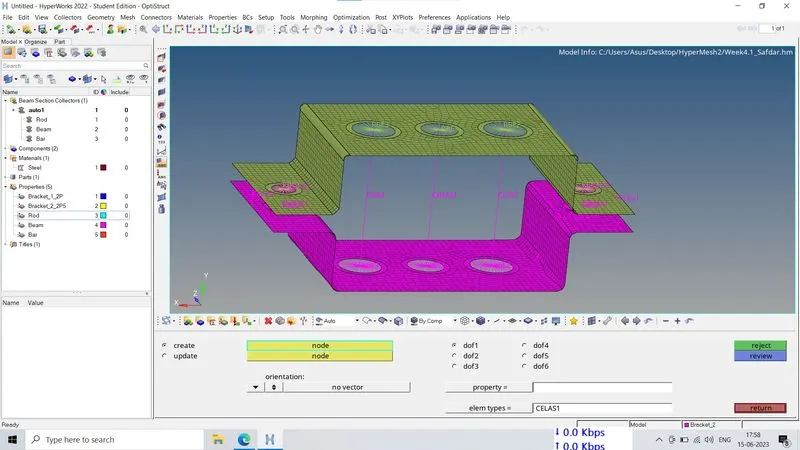
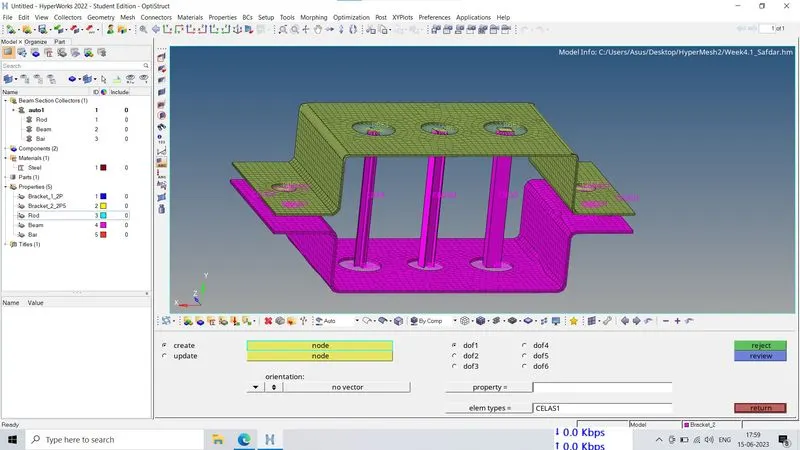
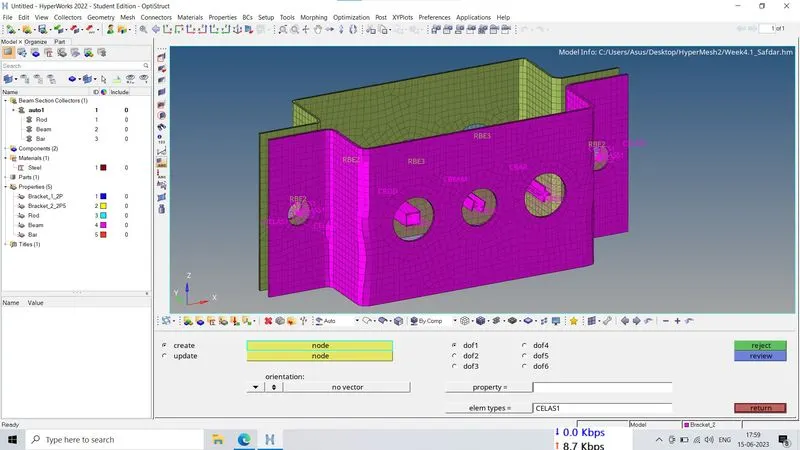
- then we create rbe2 link with given dof constrained at a, d and e place by rigids command (1D>rigids),
- then we create rbe3 link with given constrained at b and c place by rbe3 command (1D>rbe3),
- then we give mass of magnitude 10 with element type CMASS1 at d and e place by masses command (1D>masses),
- then we create rod link with CWELD element type at a point by rod command (1D>rods),
- then we create beam link with CBEAM element type at b point by bar command (1D>bars),
- then we create bar link with CBAR element type at c point by bar command (1D>bars),
- then we create hyperbeam of box type, I type and cross(+) type according to given dimension by hyperbeam command (1D>hyperbeam>standard section)
- after it we create property with the name of rod, beam and bar, and select appropriate card image like PROD for rod, PBEAM for beam and PBAR for bar,
- then we assign the property with appropriate cross-section like rod property to box crossection, beam to I and bar to + cross-setion,
- after it we update the every rod, bar and beam with appropriate property,
- then we create the spring element at f point with element type CLEAS1.
Conclusion:
In this challenge we learnt that how to create midsurface, how create material and property, how to create bar, rod and beam and how to assign matterial and property with part etc.