Week 4-1D Element Creation Challenge
Mesh the Given component with the Size of 5 Units. Create 1D elements on the following component with given cross-section and DOF
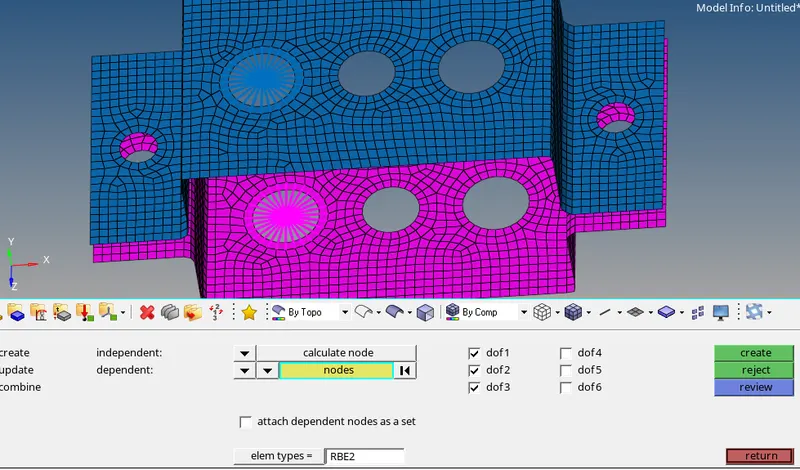
a. Rod element:- Translational DOF should be Constrained with RBE2 link
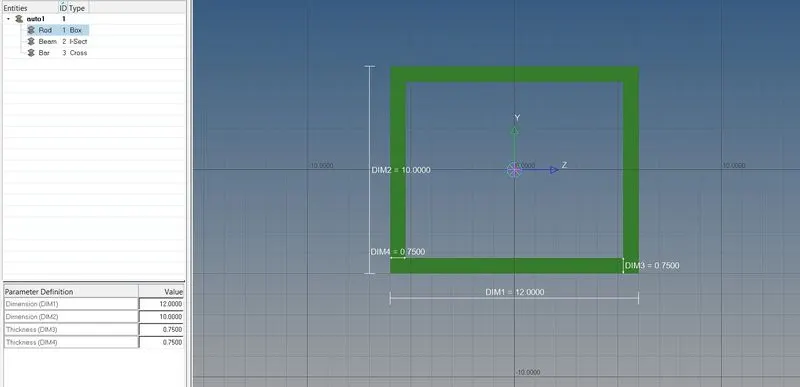
Cross-Section: BOX- Dimension a= 12 mm
dimension b=10 mm
Thickness t= 0.75 mm
b. Beam element:- All DOF should be constrained with RBE3 link
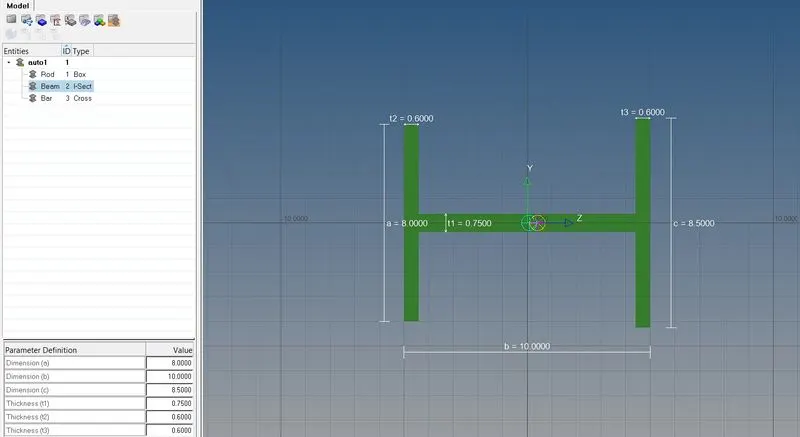
Cross-Section: I Section- Dimension a= 8 mm
Dimension b= 10 mm
Dimension c= 8.5 mm
Thickness t1= 0.75 mm
Thickness t2= .6 mm
Thickness t3= .6 mm
c. Bar element:- Constrain only x and y DOFs With RBE3 link
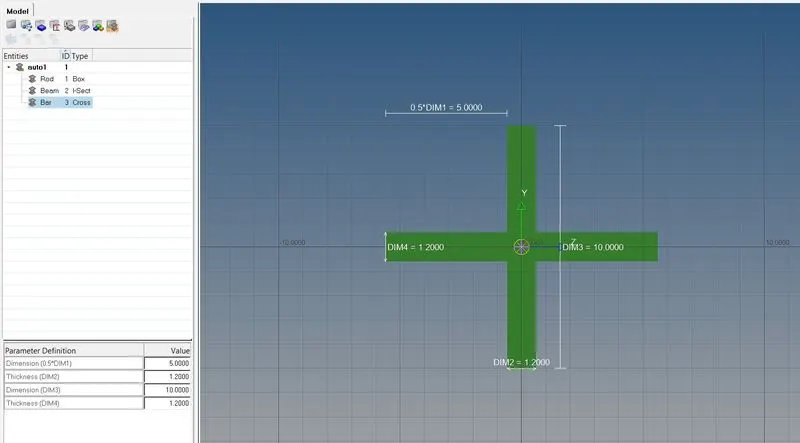
Cross-section: X section- Dimension DIM1= 5 mm
Thickness DIM2= 1.2 mm
Dimension DIM3= 10 mm
Thickness DIM4= 1.2mm
d. & e. Apply the mass of magnitude 10 with the RBE2 link
f. Join the two components with Spring elements
PROCEDURE:
1.Importing the geometry-
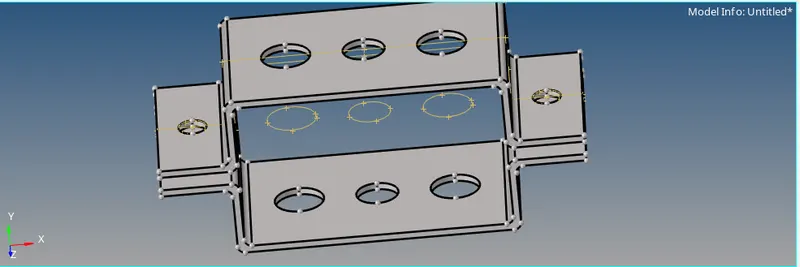
- Import the geometry into the workspace and delete the wireframe.
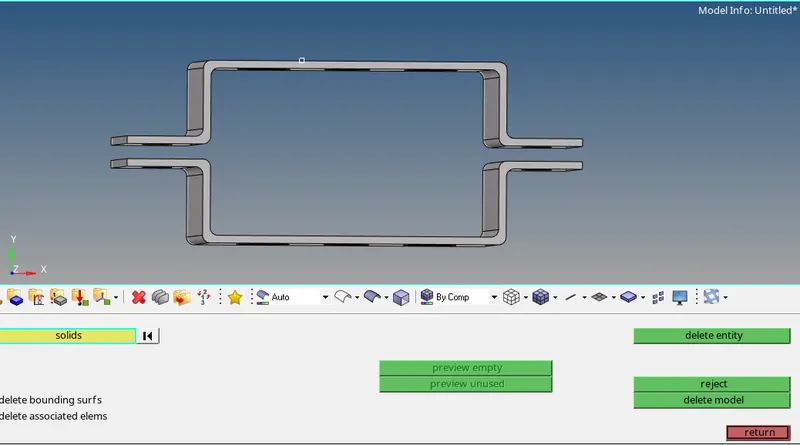
Delete the Solid Element.
delete all solid element of geometry as we not required for the 2D meshing by using delete tool as shown in below image.
2.Creating the mid surface for the given component-
- Select the component and create a mid surface for the top component (bracket 1) by making it current selection.
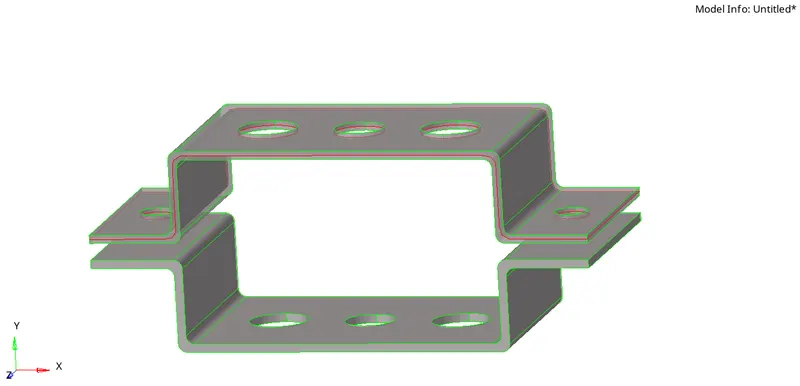
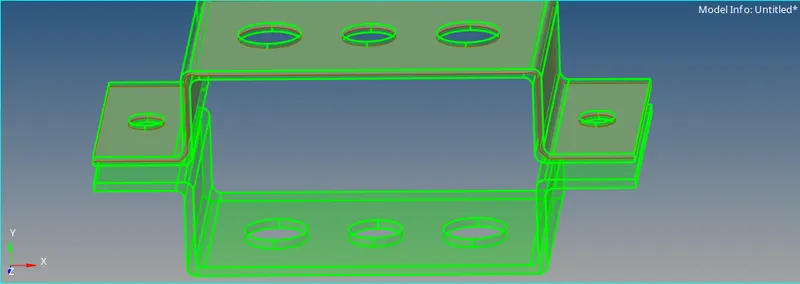
BRACKET 1
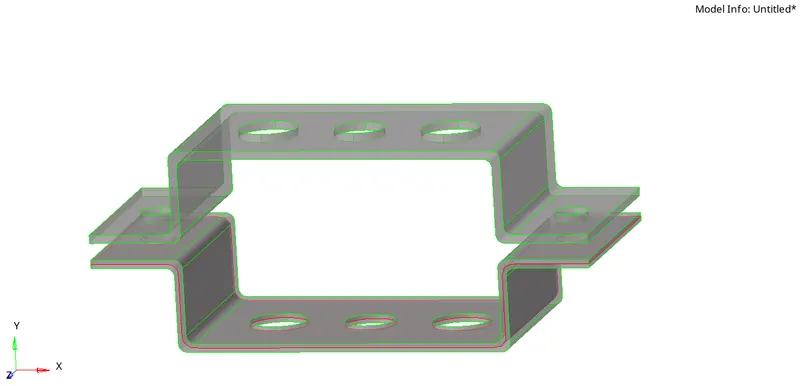
BRACKET 2
- Select the component and create a mid surface for the bottom component (bracket 2) by making its current selection
3. Meshing the component-
- To mesh the given component, we need to create washer splits near the hole region for a smooth mesh. Washer split offset we selected is 5mm.
- Washer split taken as per shown in below image.
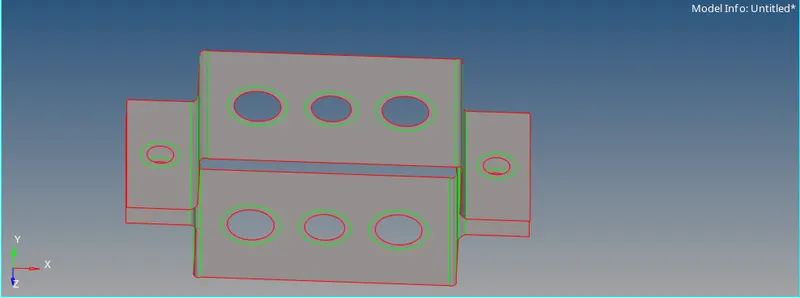
- now create the mesh for 5 unit and mesh quality not required as of now.
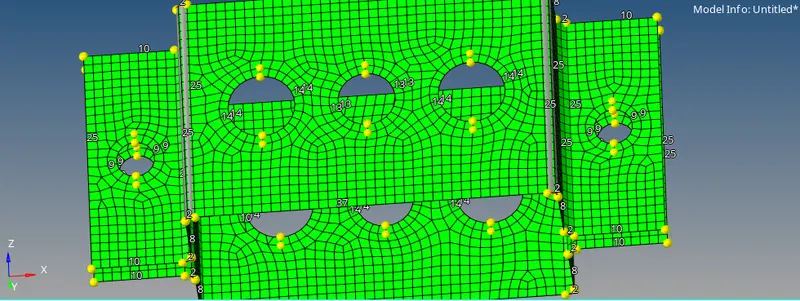
- Generate the mesh with element size as 5mm with mixed element type.
4.Create Material -
- We select steel as the material for this component.
5.Creating the properties-
- We created the properties for the respective component also creating rod, beam bar& mass properties with assigning the Card ID and material.
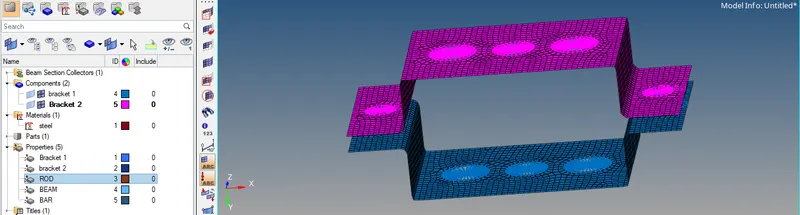
6. Create the 1D Elements- FOR THE RESPECTIVE HOLES
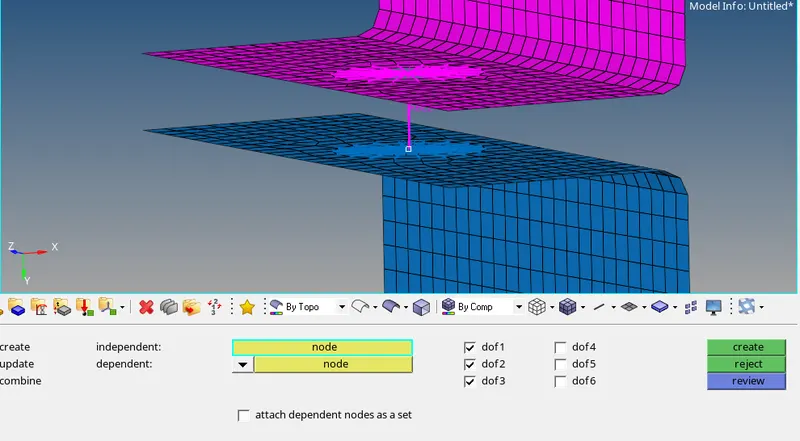
- Create the RBE2 and RBE3 at the respective holes with the given DOF.
- A -RBE2 LINK (Translational DOF)
B- RBE3 LINK (All DOF)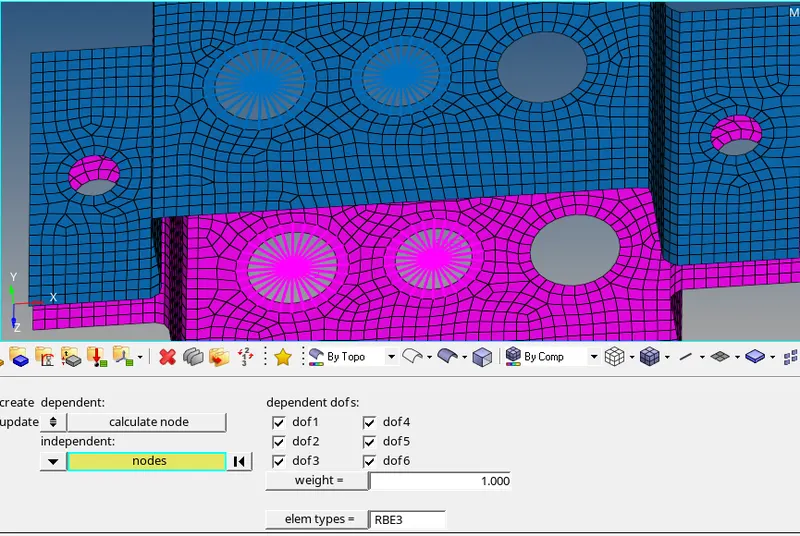
C- RBE3 LINK (X nd Y DOF)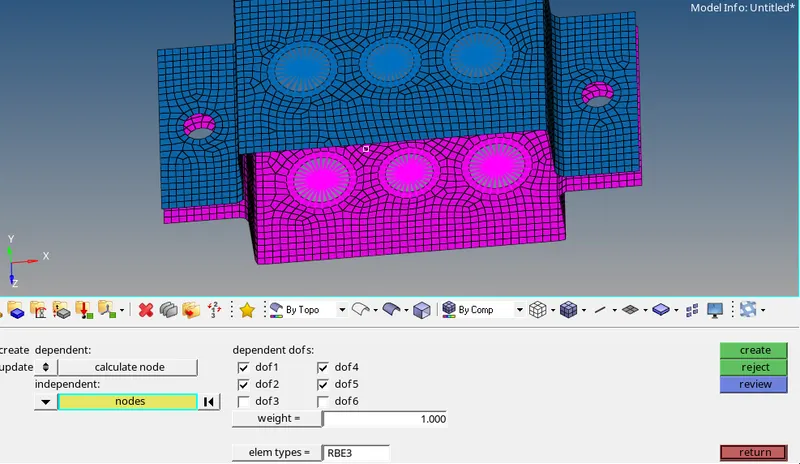
D- RBE2 LINK (MASS )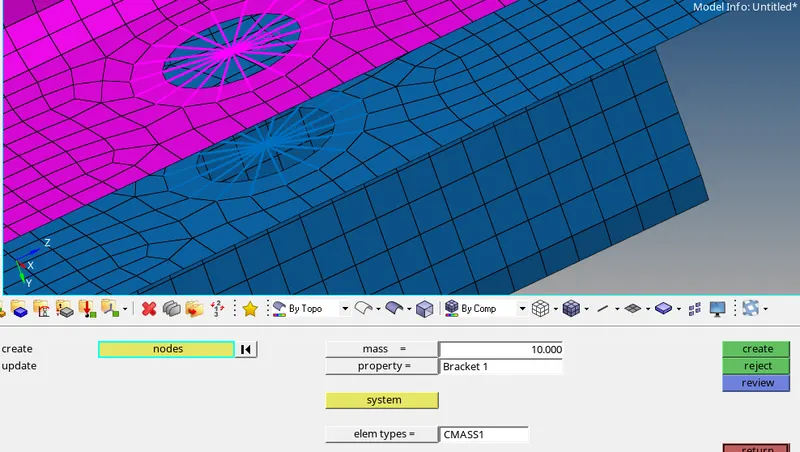
ROD 1D: BOX- section
To create the 1D element, we need to go the hyper beam tool and select the respective cross-section for creating the 1D element and give the assigned dimension to the geometry as mentioned in the specification.
BEAM 1D: I -section
BAR 1D: X- section
CREATE PROPERTY
Create properties for all element of ROD, BEAM AND BAR element and assign material and card image respectively.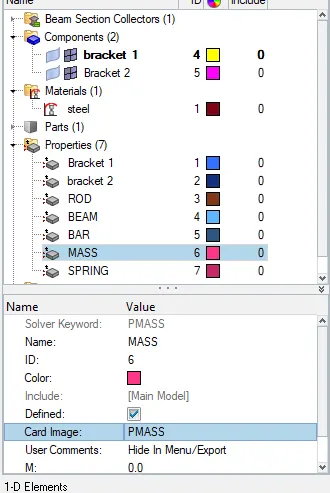
7. Create the 1D element on the rigid -
- Creating the rod, bar and beam 1D elements at the respective node points.
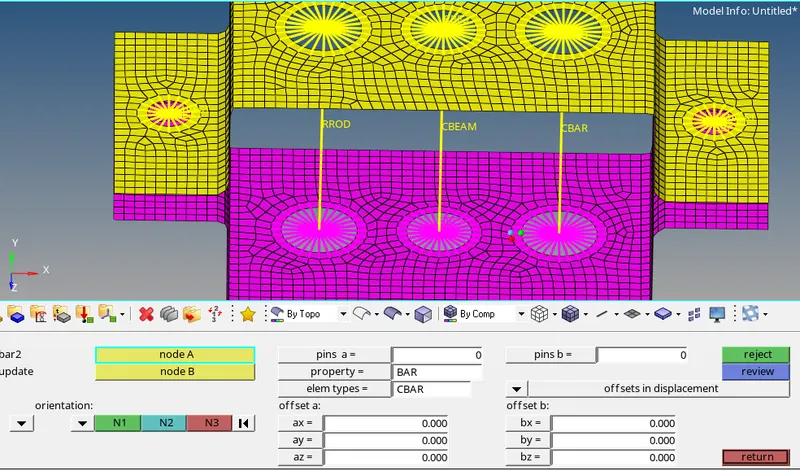
BAR - select Bar tool from 2D panel and select node respectively. property bar and element type should be CBAR.
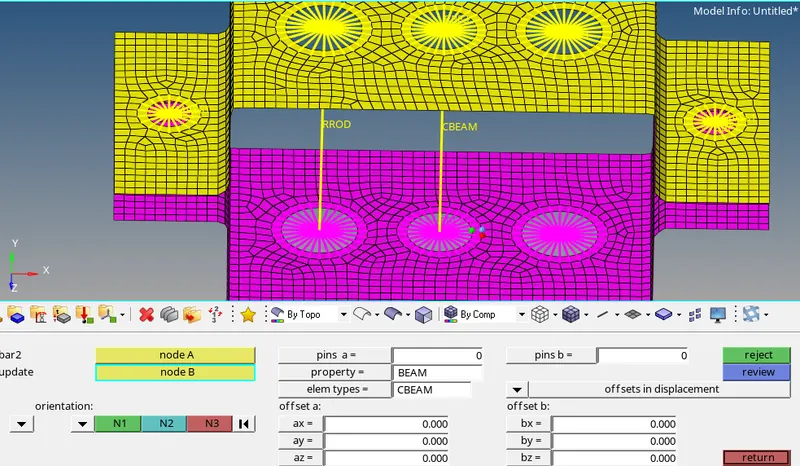
BEAM
- select Bar tool from 2D panel and select node respectively to create rigit element. property BEAM and element type should be CBEAM.
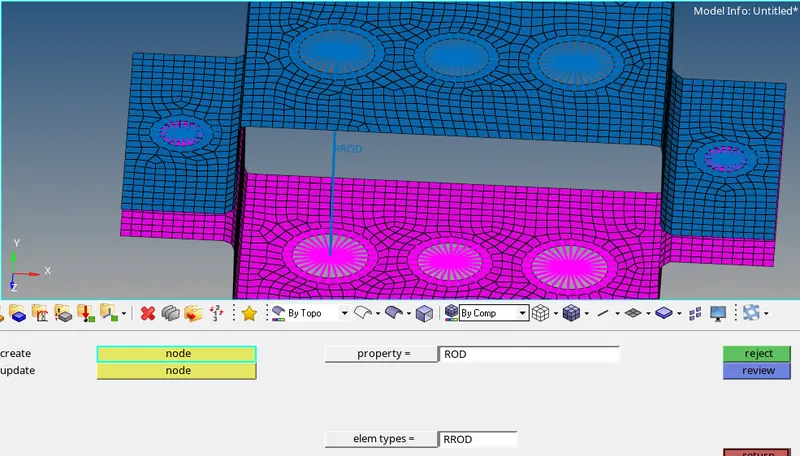
ROD
- select Bar tool from 2D panel and select node respectively to create rigit element. property ROD and element type should be CROD.
SPRING ELEMENT
Select spring from mail tool panel and select node one by one of bracket 1 and bracket 2 to create spring element.
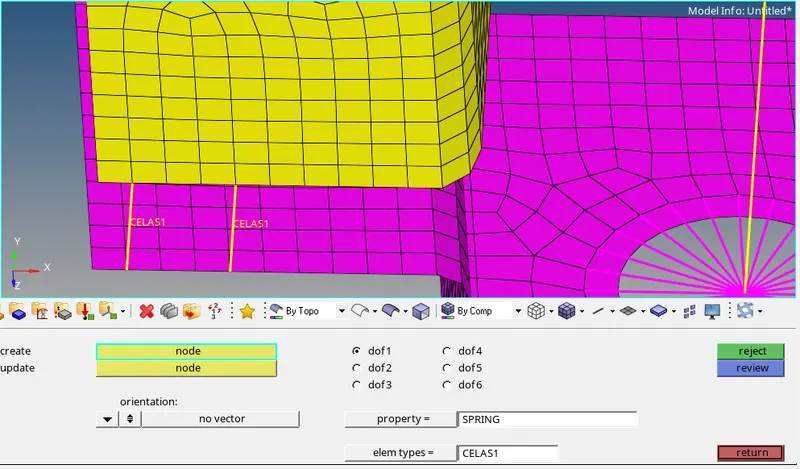
- Update the 1D element with respect to their property.
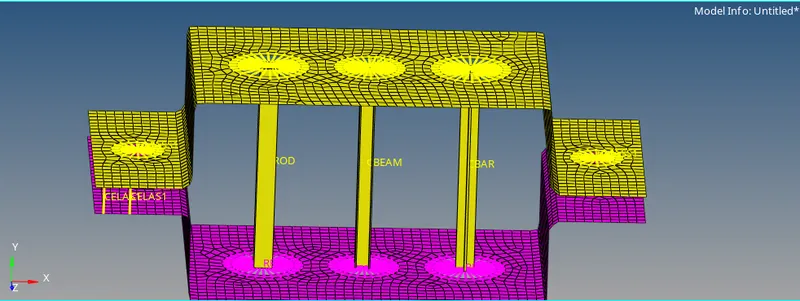
MASS ELEMENT
- Create the mass at node between 2 brackets.
final model
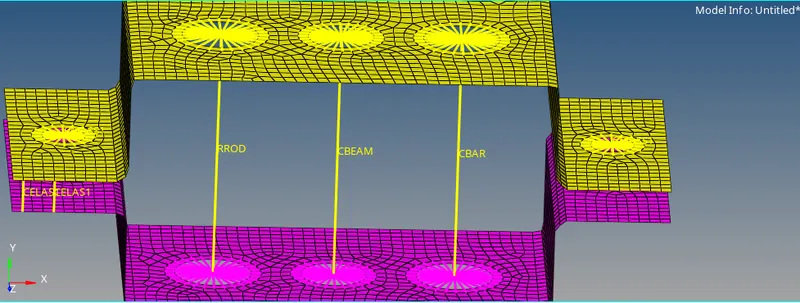
2-D element detailed representation:
Learning Outcomes :
- Understanding the use of 1D elements
- Deploying the suitable 1D elements on the respective places
- Assigning the cross-section and property to that
- Solid representation of 1D element.
-
Conclusion:
- Extracted the mid-surface for the given component and Created a Mesh on the mid-surface
- Deployed suitable 1D Element ( RBE2, RBE3, ROD, BAR, BEAM , MASS, SPRING etc ) to the respective places.
- Assigned Cross-section and property to the 1D elements
- Created Solid representations of 1D Element.