Week 3 Challenge
Question No 1:-Answer
Aim - Create beam properties for First floor and model the beams.
Procedure:-
Step1:Click on Home Tab.
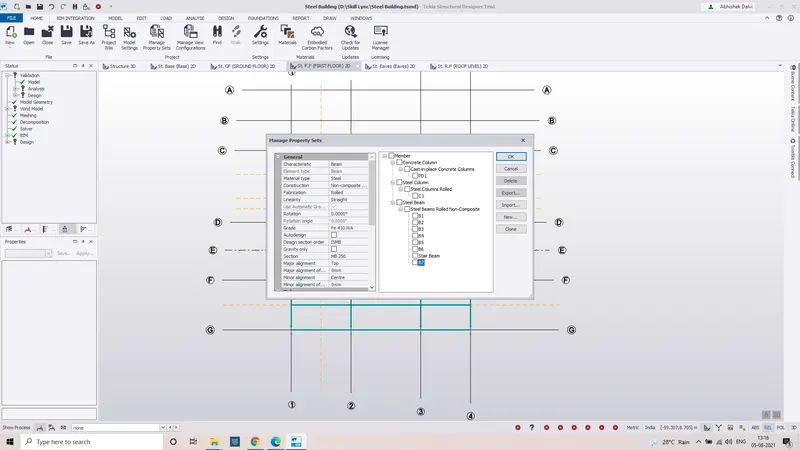
Step2: Click on Manage Property Sets to Create property of primary and secondary Beams.
Step3:Click On New tab and then click on Member option.
Step4:Select Steel Beam through member option
Step5:Rename Steel Rolled section beam as B4
Step6:Select Suitbable property like Sectio,Size,Releasing points.
Step7:Click on Model Tab.
Step8:Click On Steel beam through steel section from ribbon Window.
Step9:To create Primary Steel Beams on Grid line Select proper Property wihich is created and select it through Property window tab.
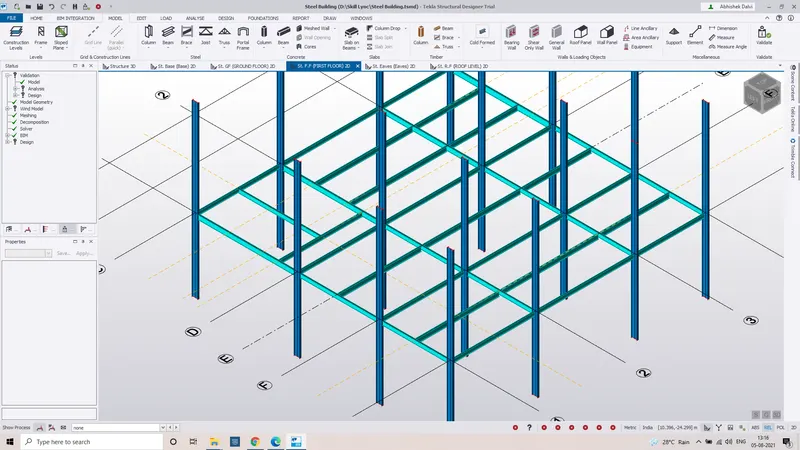
Step10:Select the starting and end point and distance on the plan to create Primary steel Beams.
Step11: Similarly to Create Secondary Beams For staircase and intermediate Beams on plan Follow steps till step 6 as above.
Step12:Select COnstruction line through Model tab and Mark suitable distance in which secondary beam should be placed.
Step13:Select Property for secondary beam and at Suitable distance drag beam from point to another like wise secondary beams are created in Model for First Floor.
- Properties for Beams:
- Modeling Beams On First Floor.
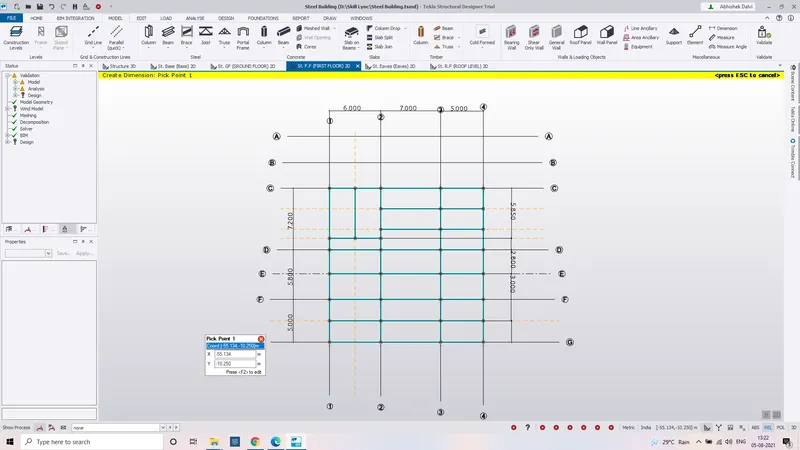
- 2D View of First Floor Beams With Dimensions:
- Question No 2: Answer
Aim:Create rafter beam on second floor as roof and moment frame action in one direction and add bracings at locations as per the design intent
Procedure:
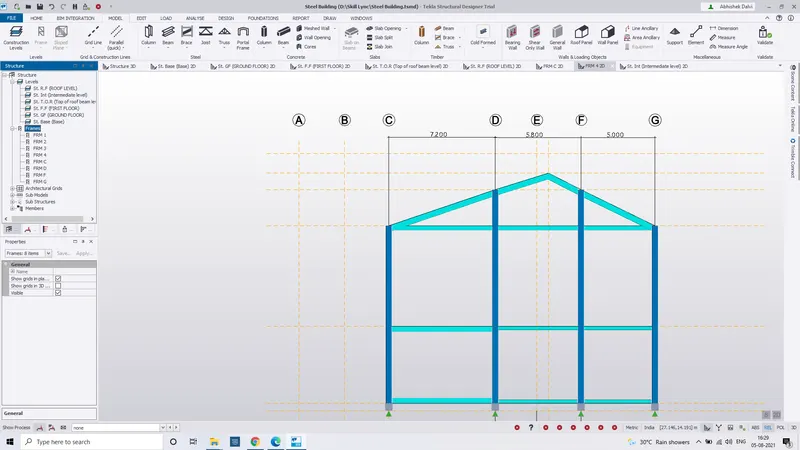
Creating Frame in One direction on the GIrd line and modeling
Step1: Click on Model Tab
Step 2: Click On 3d Option which is on right side bottom and select it
Step 3: After viewing the model in 3d jst click on Frame Option Just beside Construction level tab.
Step 4: After Selecting Frame option jst Select where you have to create the frame moment for Particular Grid i.e C-C,1-1.
Step 5:Then Through Project workspace window select frame option Frame 1,Frame 2 etc and we can the Frame in particular Grid Direction.
Note : Frames can only be created in 3D mode.
Frame Moment In One Direction:
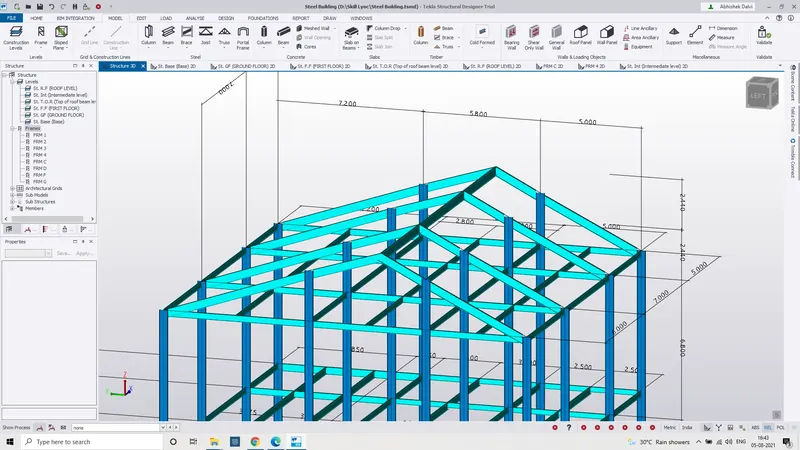
- Creating Rafters on Second floor as roof:-
Step 1:After creating first floor primary and secondary beams select Top of floor beam level in Project work space window which is above the first floor.
Step 2: Click on Home and then Manage property sets.
Step 3: Select new and then Member option.
Step 4:Select Top floor Level through Project work space window.
Step5: Create Beams on that by creating properties and also Selecting proper position on column.
Step 6: Go to Manage property sets Select new option and then select member steel beam and rename it as Rafter .
Step 7: Select quite heavy size through section tab.
Step8: Open Frame Tab select one Frame in which elevation dimensions are shown.
Step 9: Create Construction line and then select model option
Step10: Select Steel beam and then select Rafter through property window.
Step 11: Create proper Rafter in One frame By select the column end and extend it until the Construction line point wher the rafter should be rest and view it in structure 3d Mode.
Step 12:Finally Copy rafters and add is similar to othr members.
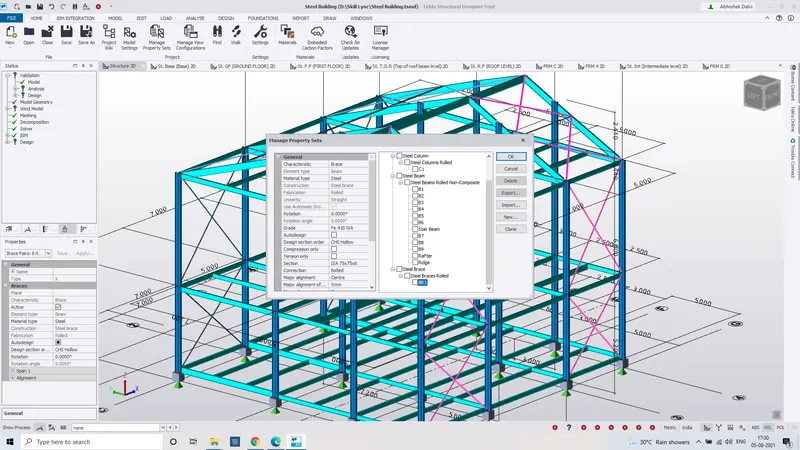
- Adding Bracing to the MOdel:
Step1:Click on Home Tab.
Step2: Click on Manage Property Sets to Create property of Bracing member.
Step3:Click On New tab and then click on Member option.
Step4:Select Steel Brace through member option
Step5:Rename Steel Rolled section Brace as BR1
Step6:Select proper section like equal angles 75*75*8 wihich is suitable for design.
Step7:go To model option and click on brace
Step8:select property through Property window Br1
Step9:Select proper frame for proper visual while designing and assign brace at starting columns.
Step10:Divide the area in two half and draw single brace at that mid starting point and end point.
Step11: select X Brace and then drag on all four ends so the bracing is completed so on Complete the bracing on Top Roof and Frame C-C side and G-G side as shown in image.
- Bracing Drawn On Top and sides.
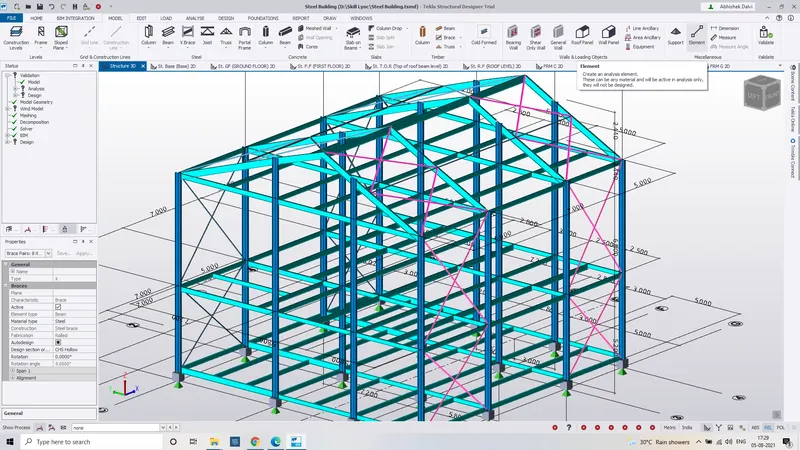 .
.
- Property For Bracing.