Week 3 - 2D meshing for Sheet metal
ABSTRACT:
The main objective of this challenge is, given car's hood is meshed in ANSA and checked for the quality parametres assigned to it. The geometry is captured perfectly to deliver a good mesh and that will give more accurate results during the analysis part.
2D SHELL MESH:
The 2D Mesh module is used to construct two-dimensional finite element meshes. The mesh consists of nodes that are grouped together to form elements.
In 2D meshing there are some element types involved to decide what type of analysis to be done on the model, they are
Tria element:
This cell shape consists of 3 sides and is one of the simplest types of mesh. A triangular surface mesh is always quick and easy to create. It is most common in unstructured grids.
Quadrilateral/Quad element:
This cell shape is a basic 4 sided one. It is most common in structured grids. Quadrilateral elements are usually excluded from being or becoming concave.
INPUT MODEL:
The given input model is car's hood. There are four steps to acheive the quality mesh in the model, they are
Cleaning the geometry,
Extracting the midsurface,
Meshing,
Quality checking,
Assigning thickness.
Cleaning the geometry:
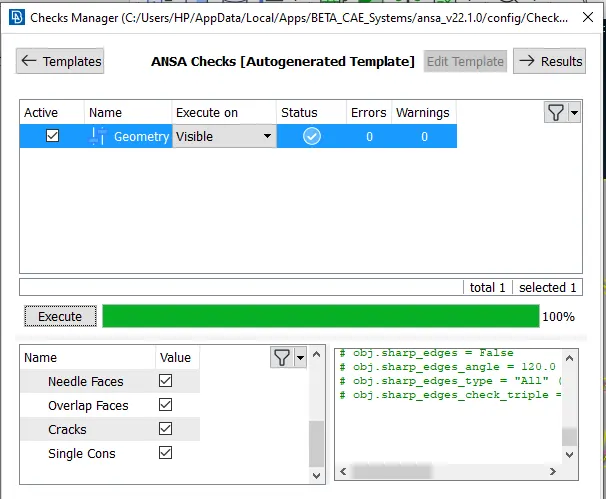
The geometry is cerified with the option called checks manager. It is in the
menu bar--->tools--->checks--->geometry.
.
The checks manager used to say all the errors in the model and listed it in the window according to the list input clenup parametres we given.
|
S.No |
Quality Criteria |
Value |
|
1 |
Target/Average length |
5 |
|
2 |
Minimum Length |
2 |
|
3 |
Maximum Length |
7 |
|
4 |
Aspect |
3 |
|
5 |
Warpage |
15 |
|
6 |
Skewness |
45 |
|
7 |
Jacobian |
0.7 |
|
8 |
Minimum Quad Angle |
45 |
|
9 |
Maximum Quad Angle |
135 |
|
10 |
Minimum Tria Angle |
30 |
|
11 |
Maximum Tria Angle |
120 |
|
10 |
Tria Percentage |
15 |
Assign length for perimeters and macros
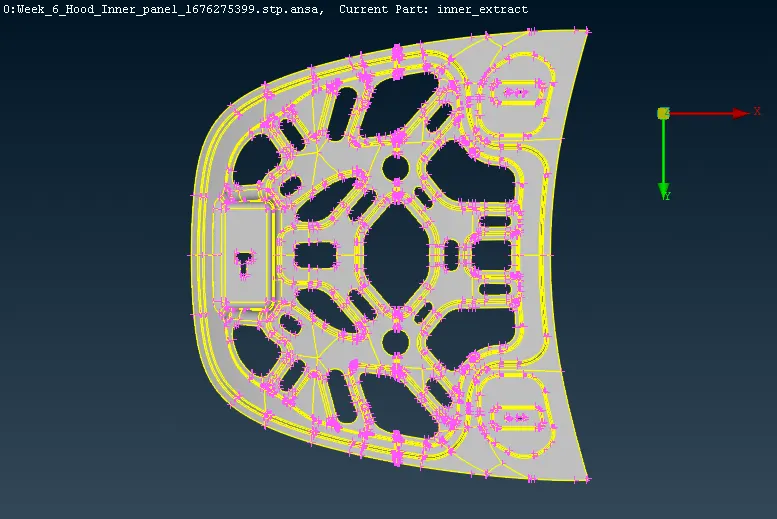
- At first the component didn't get a proper resolution, so that assign the length of perimeters and macros as target length 5mm. (mesh-perimeters-length).this help us to see a fine resolution of the components and also get a proper mesh flow.
Geometry check
- After this check the geometry for cleanup. In ansa we have a automatic option to check geometry and cleanup (checks-geometry). after selecting this, select the default option like single cons, triple cons, crack faces. after this select the execute tab and select the highlighted mistakes and fix all by one click.
- Now assign property id for the given components by select ctrl+p for property database (property in database tab-new-PSHELL), after that type the name, assign thickness by using measure tool, assign material card. after assign property, apply for the componentsfor given thickness using inot,or,not,lock view tool.
Manual mid surface
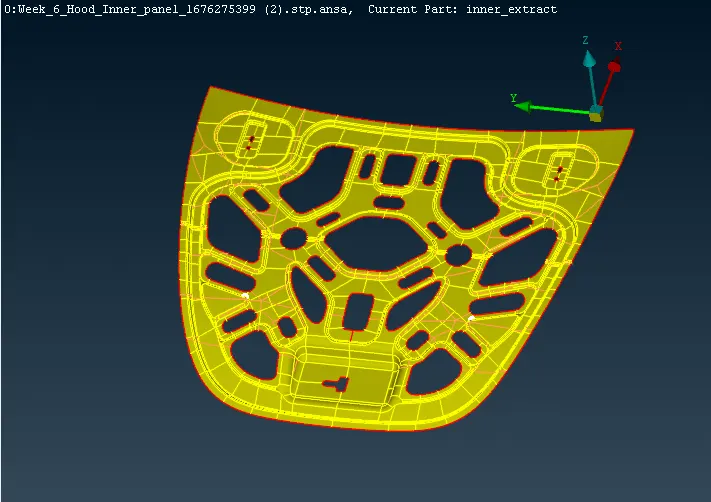
- Extract the midsurface for the components using auto and manual midsurface tool. For auto midsurface (topo-faces-midsurface), for manual midsurface ( topo-faces-offset)
Mesh parameters quality criteria
- Now get into mesh module to mesh the parts, at first assign the mesh parameters and quality criteria as given above (target length - 5), select the mesh parameters tab (utilities-mesh parameters & quality parameters).
symmetrical component
- Now prepare the components for meshing by give a proper surface cut to get a proper mesh flow and easy way to mesh (mesh or topo-faces-cut).
- Start meshing, use best mesh option to get a good mesh. In ansa there have many meshing algorithms, try it to get a proper mesh flow (mesh-mesh generation-best).
- Here we go for edit in meshing by using many tools like reconstruct, split, join,swap, paste to remove the opposite trias, back to back trias and rotational quads in the mesh. Use these tool to remove the unnecessary trias mentioned in trias management rule and rotational quads.
split tool swap tool
reconstruct tool
Paste option
- Reconstruct- use to remesh the selected elements.
- split- to split the elements and use to move forward the elements.
- swap- use to swap between two elements and to move the element up and down.
- paste - use to paste the two elements by nodes and move the elements to backward.
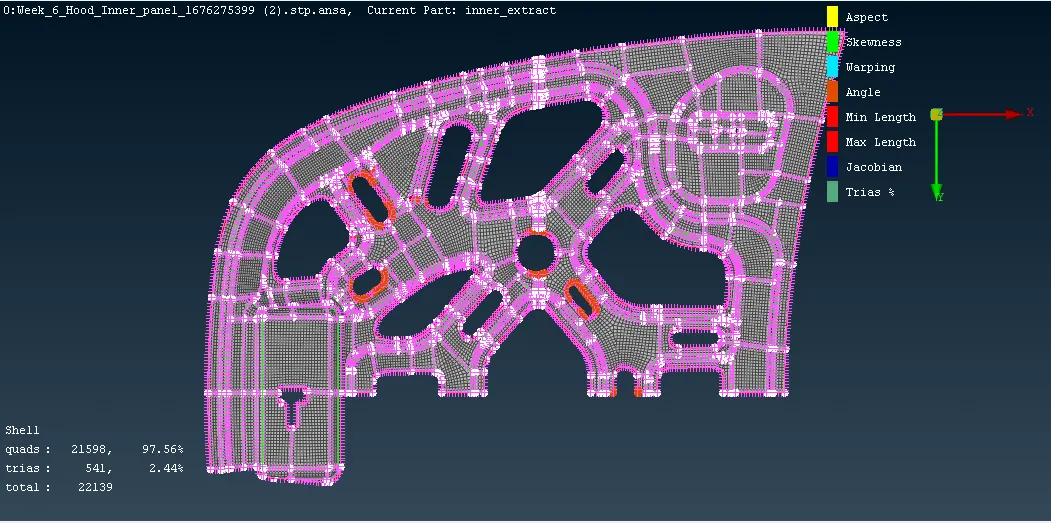
- Once mesh the surfaces go to hidden mode to check the quality criteria to get a proper mesh as per the quality.
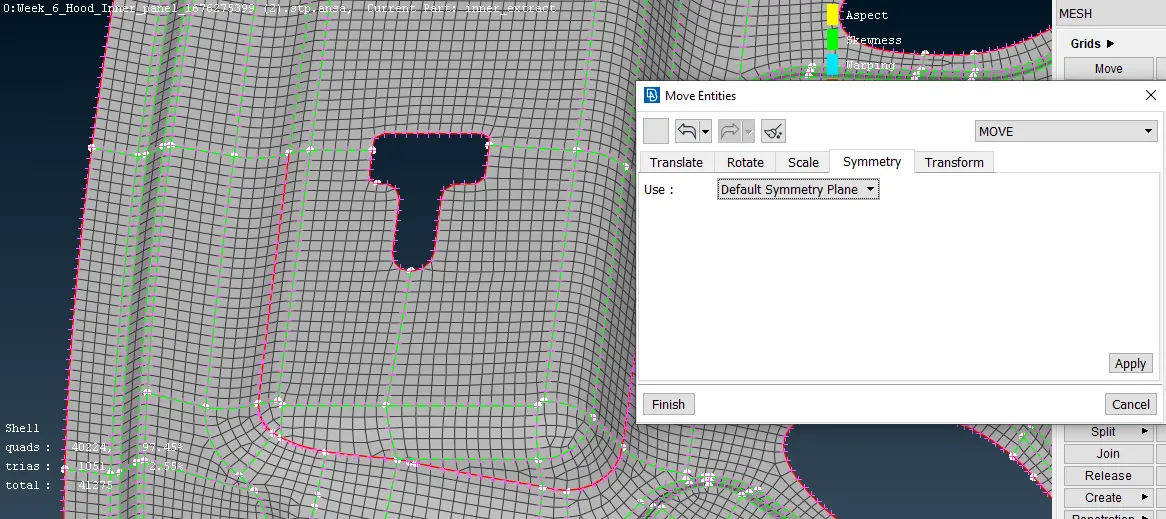
working of Symmetry tool
- In symmetry components , we can mesh one side of the symmetrical part and then we can do mirror or copy by using tool (transform-copy-symmetry)
- for proper symmetrical mirror componant use sutaible option (Default symmetry plane, mirror, 2 point , etc.)
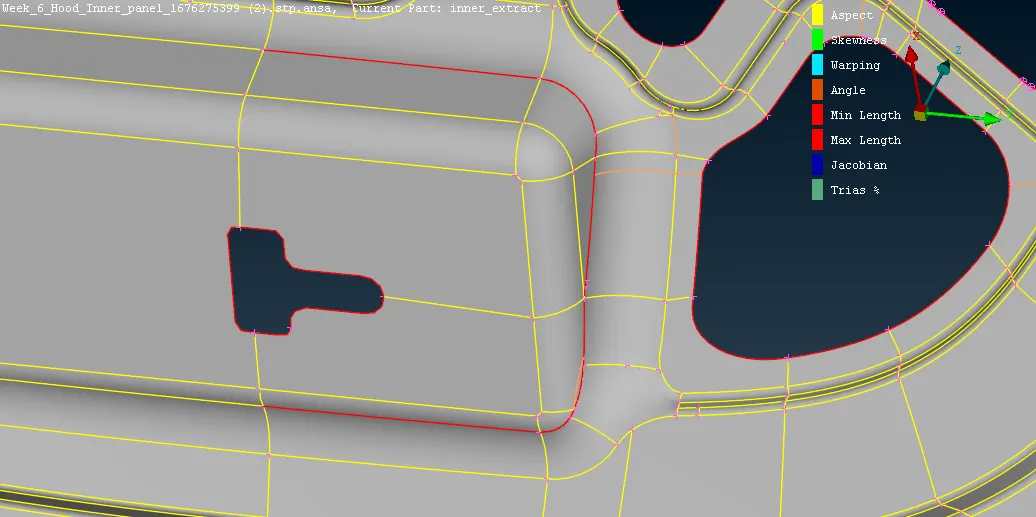
- After transform the symmetrical part, the part are automatically connected the elements in case any element didn't connect each other. use topo tool (topo-faces-topo).
- in the bellow image after transform the symmetrical part there are some red corn, Do topo to eliminate the such single corns..
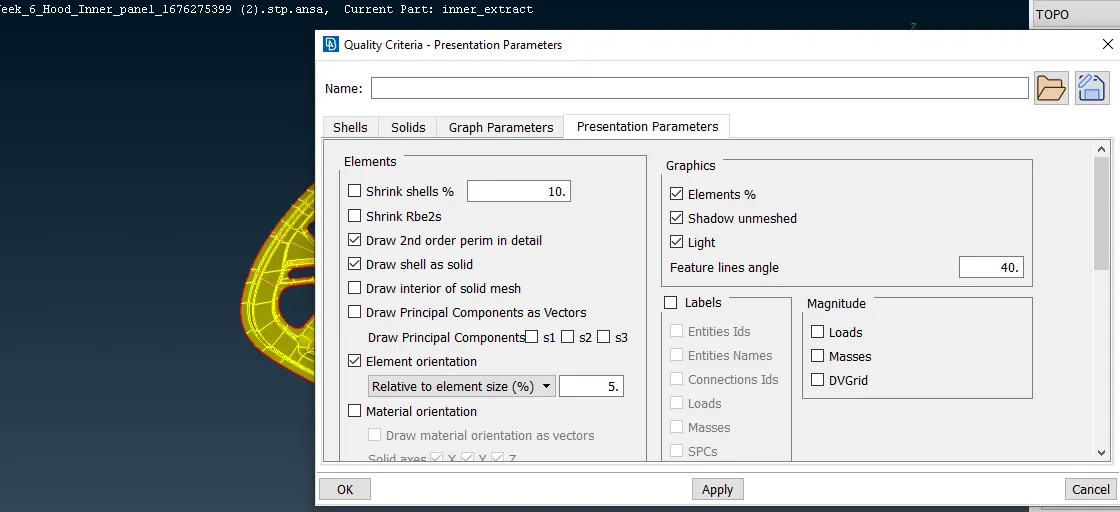
- To check the shell elements to solid as mention thickness in property id (utilities-quality criteria-presentation parameters-draw shell as solid).
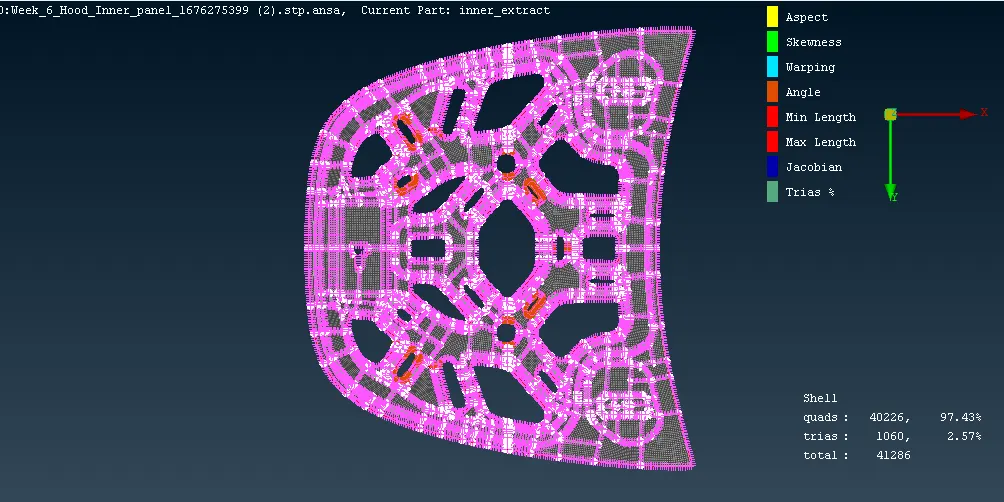
SOLID SHELL MESH
- Finally check the quality criteria as given above and check the proper mesh follow in all parts.
Learning outcomes:
- Now got a ideas for how to do geometry cleanup and take a manual & auto midsurface for sheet metal components.
- Understand how to do mesh and get proper mesh flow and use the tools had different meshing algorithms and more dressup tools for edit the meshing.
Conclusion:
The hood components were meshed as per the quality criteria and got a proper mesh flow and assigned proper thickness for the components.
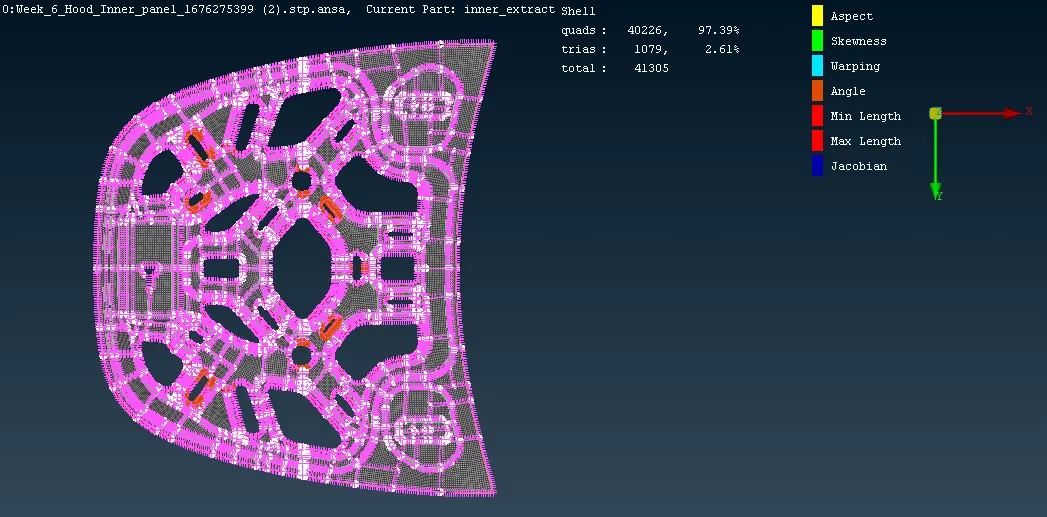
The allowable percentage of tria elements in the model is about 15% and the tria elements present in our model is about 2.61% which is acceptable.
Note: i am not able to attached the Ansa file due required File size should be < 20>