Week 2 Challenge : Surface meshing on a Pressure valve
For the given model, check for the geometrical errors and perform Topology cleanup accordingly. Set three different target lengths as three different cases and mesh the model.
- Target length = 1mm, 3 mm and 5 mm (i.e. 3 cases)
- Element type = Tria ( for all target length)
Aim: Surface meshing on a Pressure valve
Case 1 : Target length 5 mm
Case 2 : Target length 3 mm
Case 3 : Target length 1 mm
There is a some steps to do meshing in this challenge.
Step 1 : Analyse or Refine the geometry
Step 2 : Surface Meshing
Step 3 : Volumetric meshing
First i will go for geometry analysis and refine and rectify the errors in geometry.
Step 1 : Analyse or Refine the geometry
First of all we will rectify this cons by using Fill Hole algo in topo module Faces.
Select fill hole then select the cons in entity mode and do middle click.
TOPO MODULE > FACES > FILL HOLE > SELECT CONS > MIDDLE CLICK.
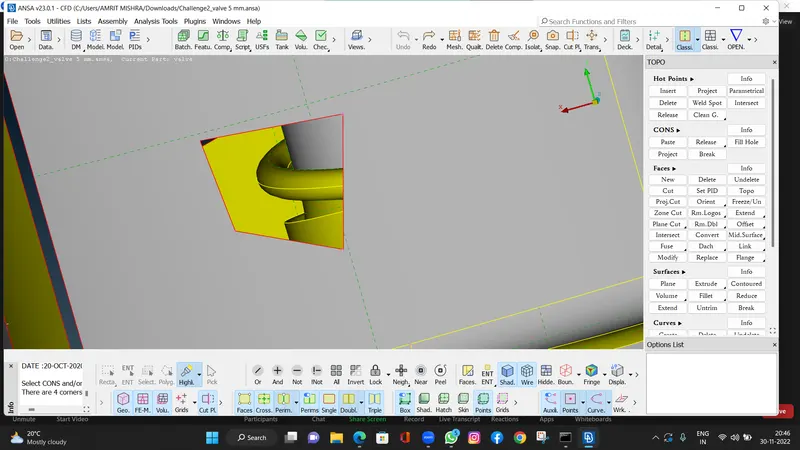
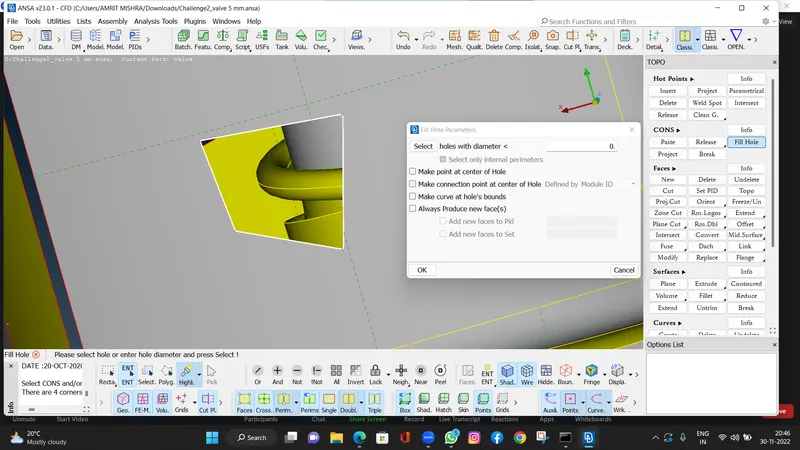
- In this geometry error cons will rectify by using Fill Hole algo in topo module Faces.
Select fill hole then select the cons in entity mode and do middle click.
TOPO MODULE > FACES > FILL HOLE > SELECT CONS > MIDDLE CLICK.
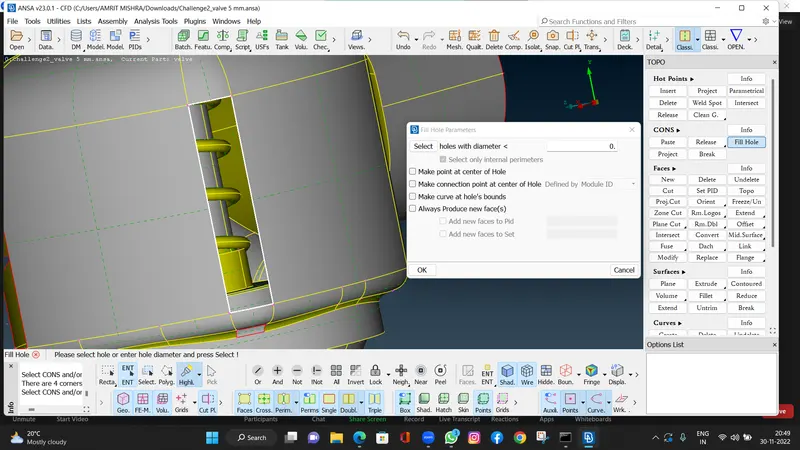
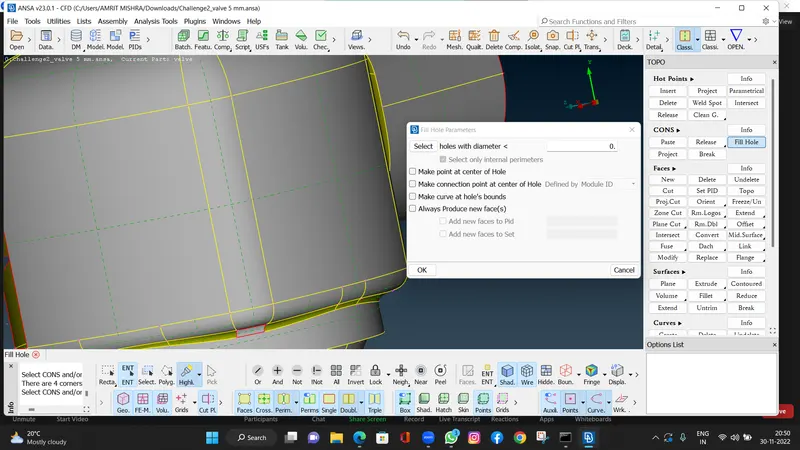
- In this geometry error cons will rectify same as above by using Fill Hole algo in topo module Faces.
Select fill hole then select the cons in entity mode and do middle click.
TOPO MODULE > FACES > FILL HOLE > SELECT CONS > MIDDLE CLICK.
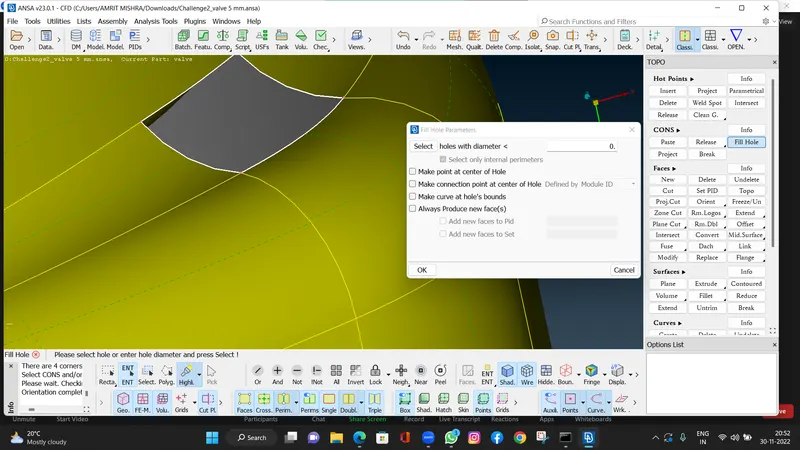
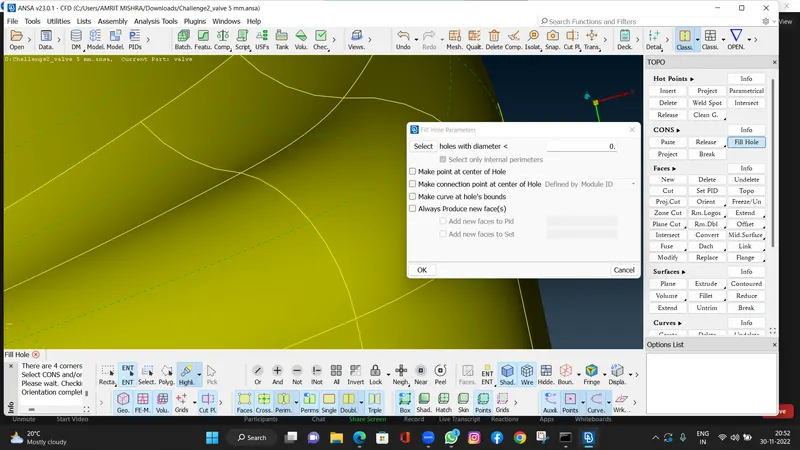
- In this geometry error cons will rectify same as above by using Fill Hole algo in topo module Faces.
Select fill hole then select the cons in entity mode and do middle click.
TOPO MODULE > FACES > FILL HOLE > SELECT CONS > MIDDLE CLICK.
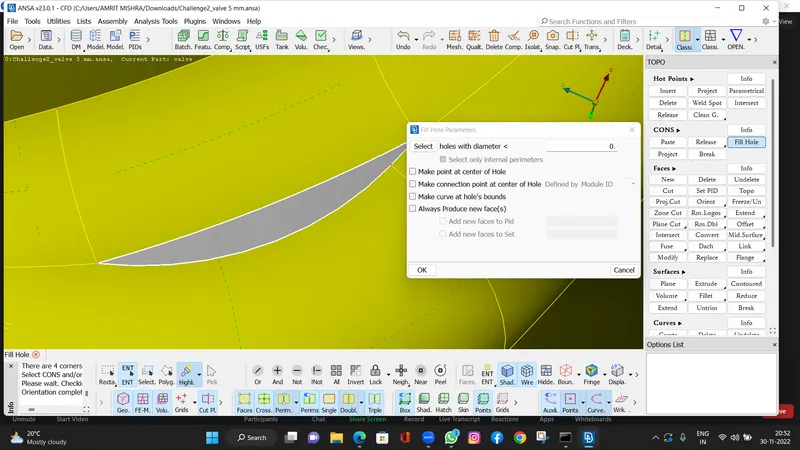
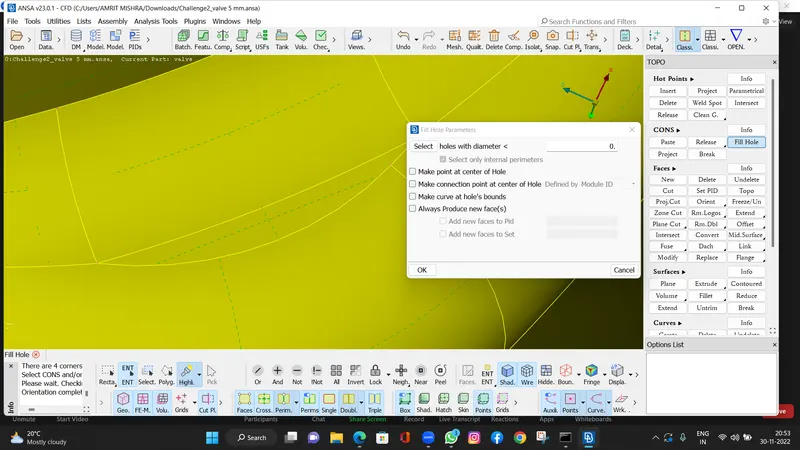
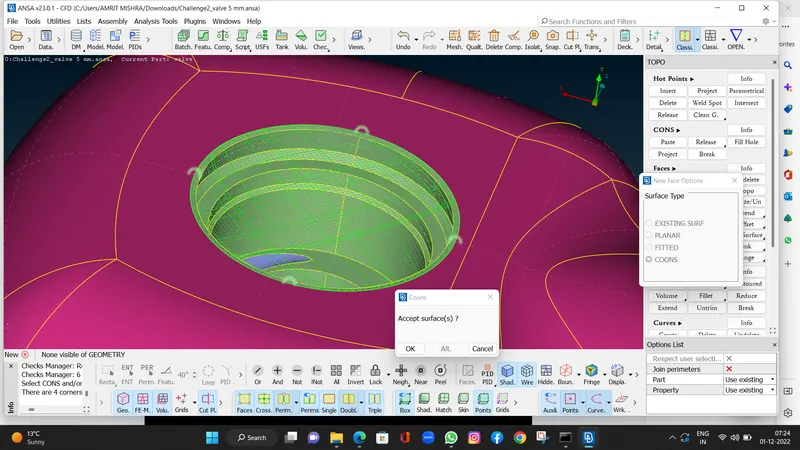
- In this geometry error cons will rectify by using NEW in topo module Faces.
Select New then select the Coons in entity or loop mode and do middle click.command will ask for accept surfaces, click ok.
TOPO MODULE > FACES > NEW > SURFACETYPE (COONS) > SELECT CONS > MIDDLE CLICK > OK
This will do for all near triangular shape geometrical error like showing in images.
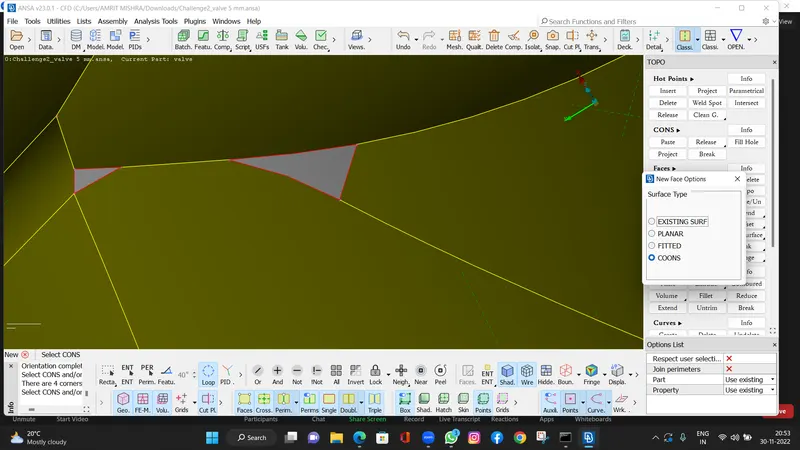
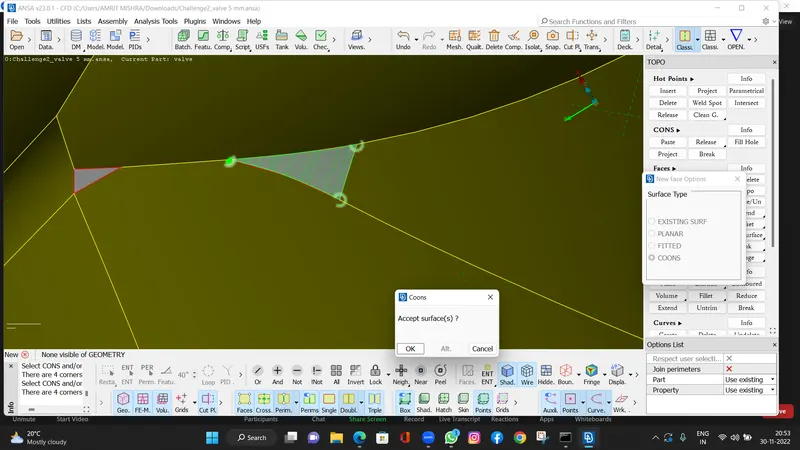
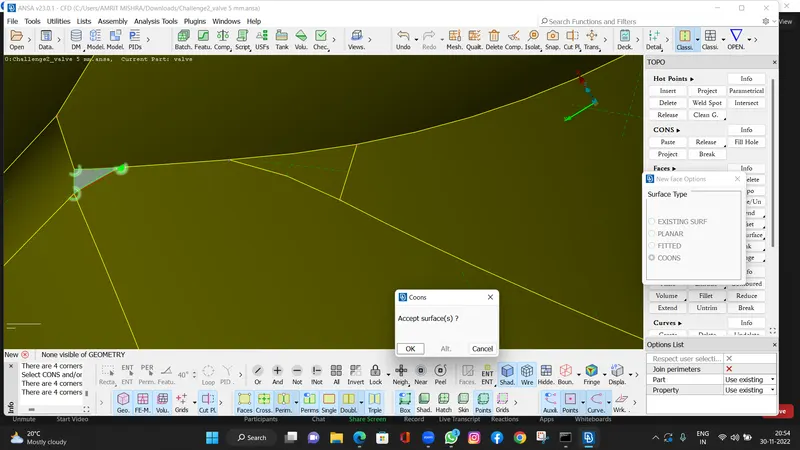
- In this geometry error cons will rectify by using NEW in topo module Faces.
- But in this i will go with two part first i will go with Coons for rectangle and then Fill hole command for triangle shape cons .
- first command Coons and then select the four cons of rectangle and middle click then ok.
- Now i will go for traingle shape cons by using fill hole and rectify the error.
TOPO MODULE > FACES > NEW > SURFACETYPE (COONS) > SELECT CONS > MIDDLE CLICK > OK (this is for first part)
TOPO MODULE > FACES > FILL HOLE > SELECT CONS > MIDDLE CLICK. (this is for second one )
As showing in images.
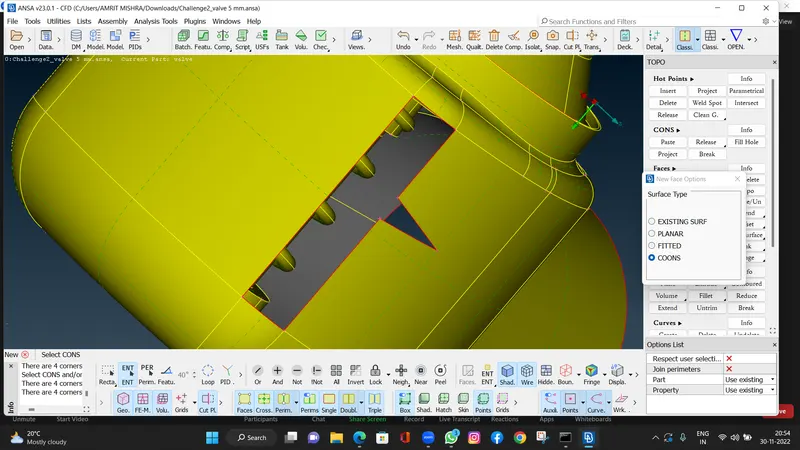
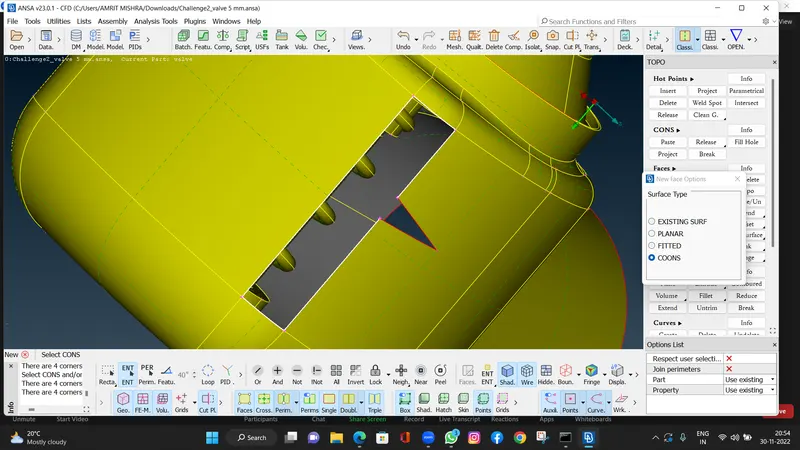
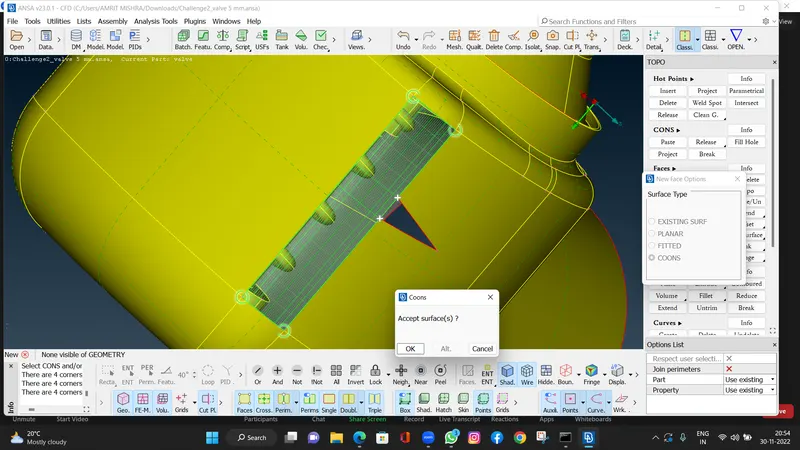
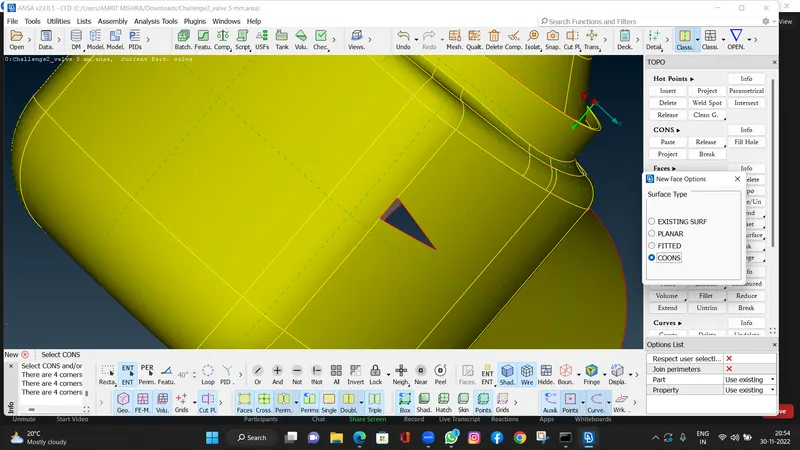
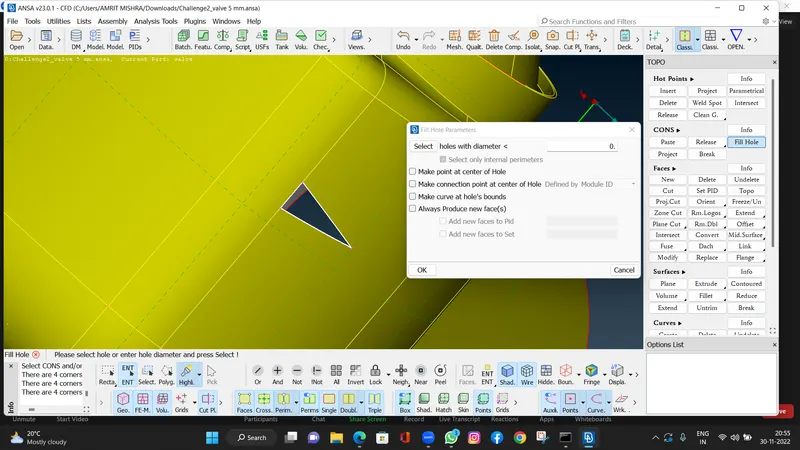
- In this geometry error cons will rectify by using NEW in topo module Faces.
Select New then select the Coons in entity or loop mode and do middle click.command will ask for accept surfaces, click ok.
TOPO MODULE > FACES > NEW > SURFACETYPE (COONS) > SELECT CONS > MIDDLE CLICK > OK
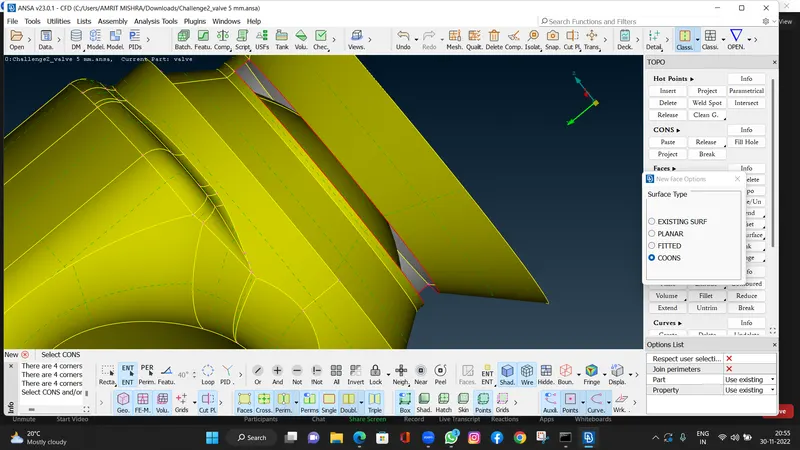
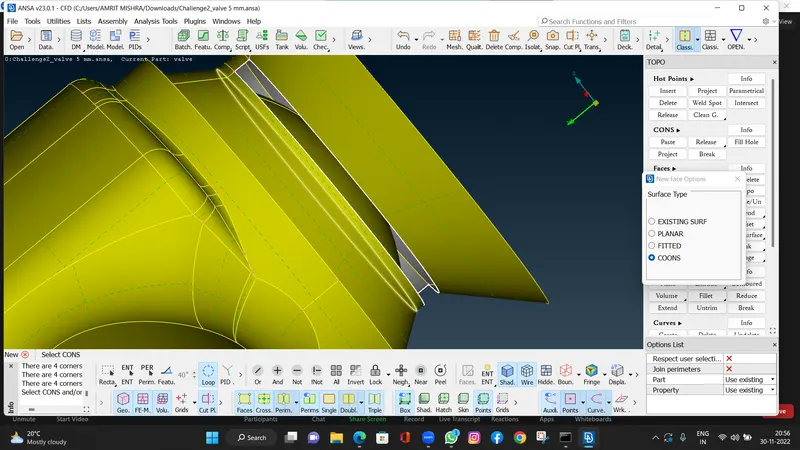
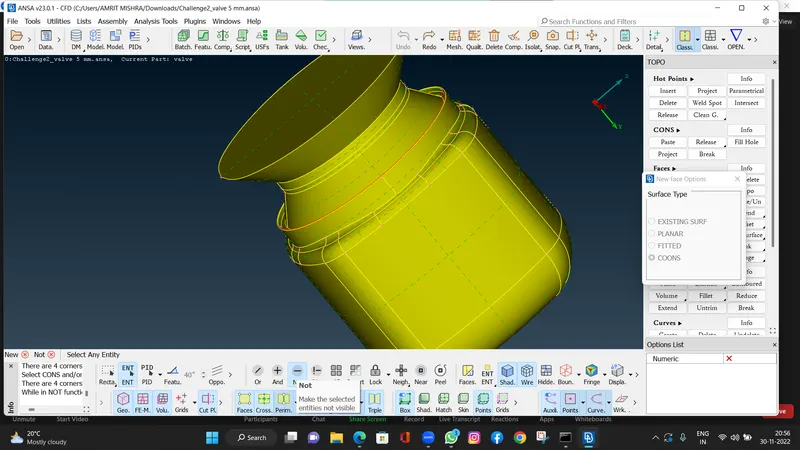
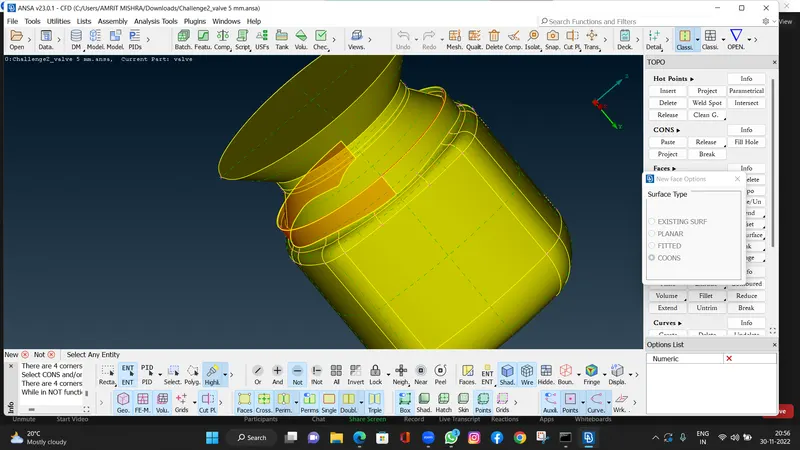
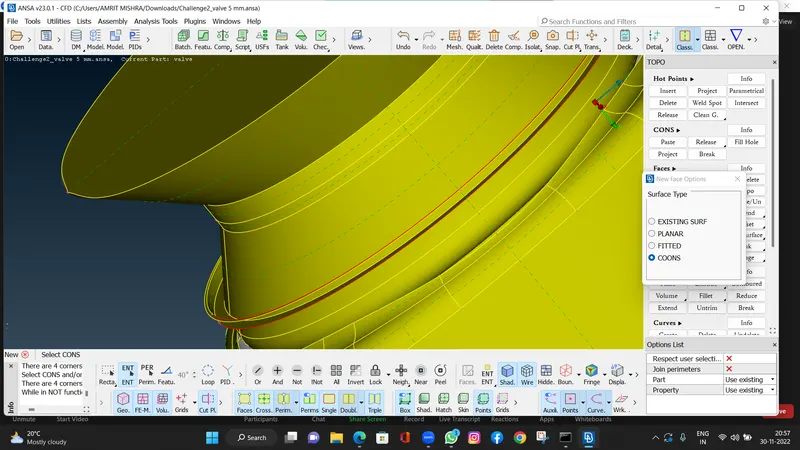
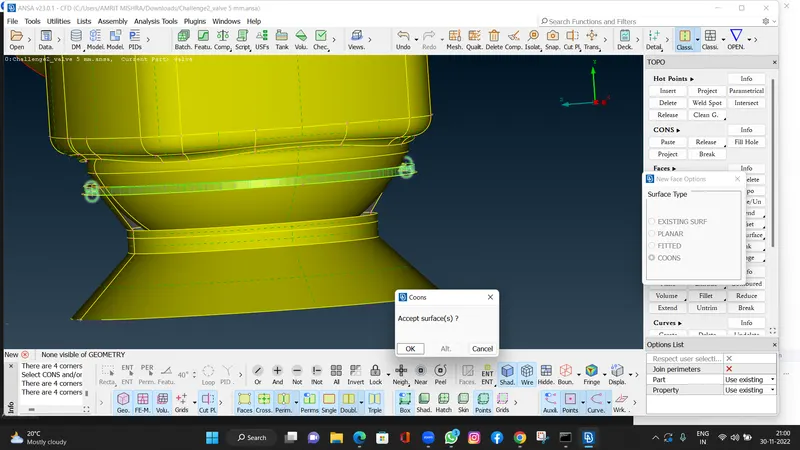
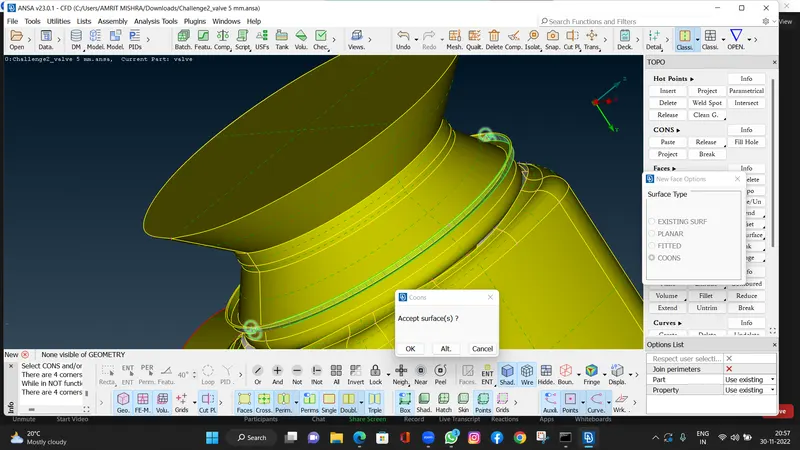
- In this geometry error cons will rectify by using NEW in topo module Faces.
Select New then select the PLANER in entity or loop mode and do middle click.command will ask for accept surfaces, click ok.
TOPO MODULE > FACES > NEW > SURFACETYPE (PLANER) > SELECT CONS > MIDDLE CLICK > OK
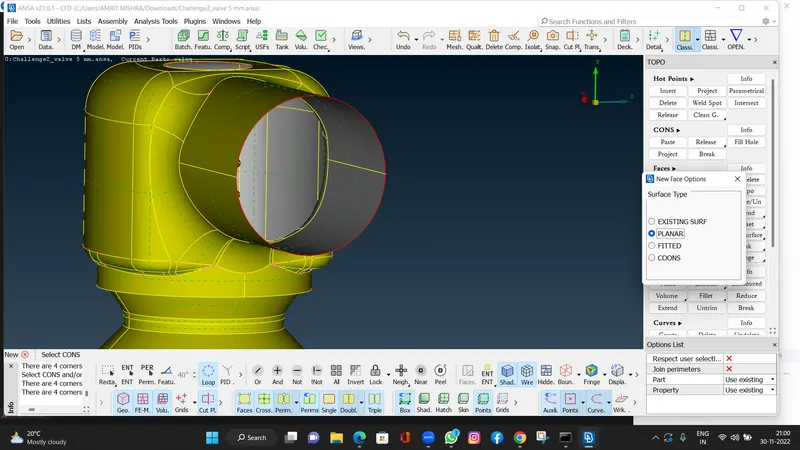
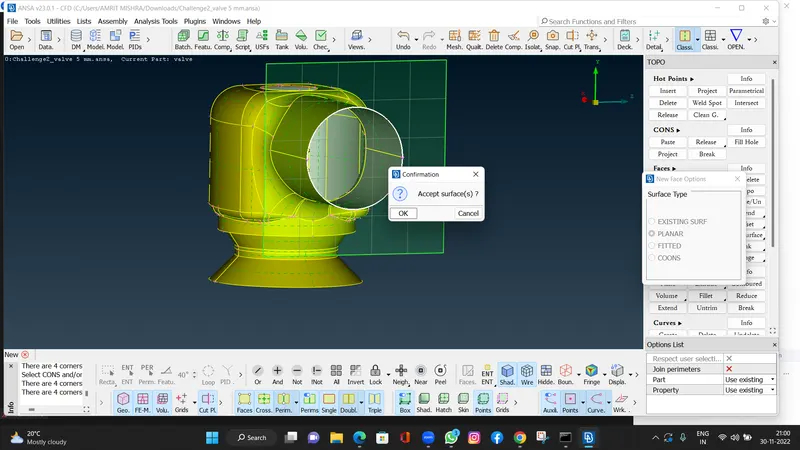
- In this geometry error cons will rectify by using NEW in topo module Faces.
- Select New then select the Coons in entity mode
- In this error i will do in two parts first i will rectify half circle surface and then go for another half.
TOPO MODULE > FACES > NEW > SURFACETYPE (COONS) > SELECT CONS > MIDDLE CLICK > OK
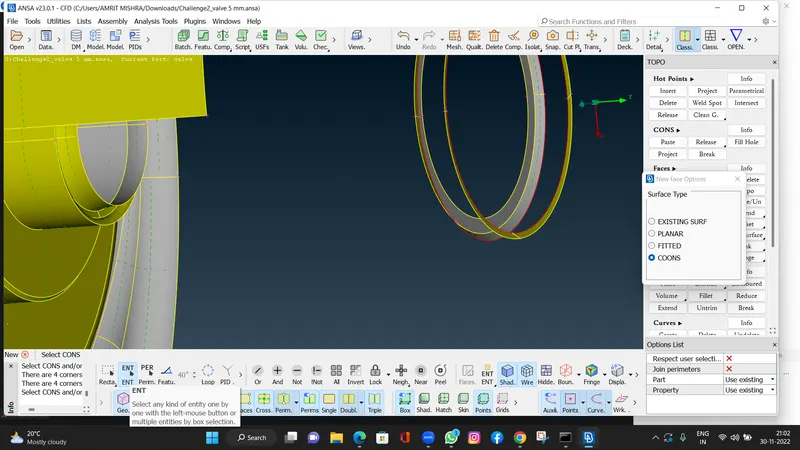
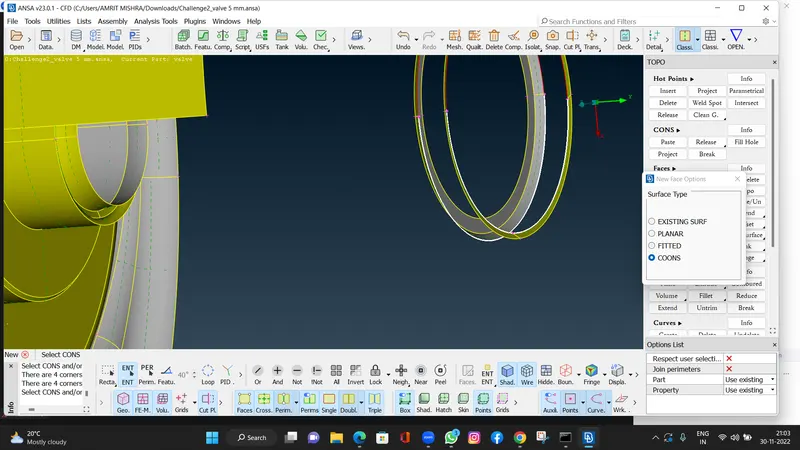
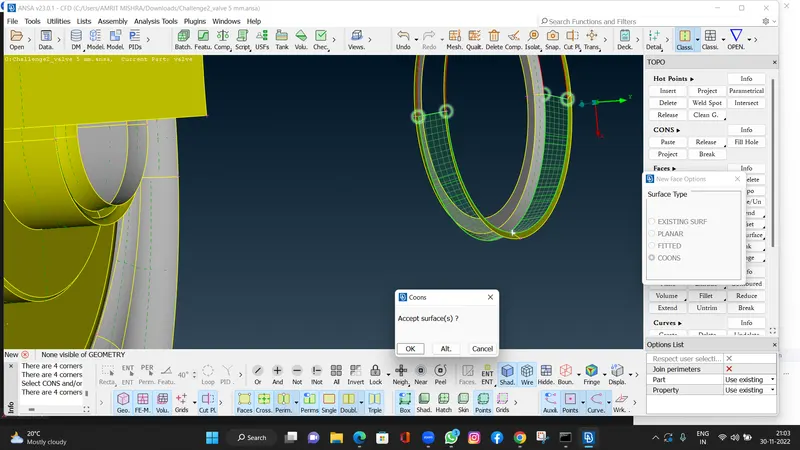
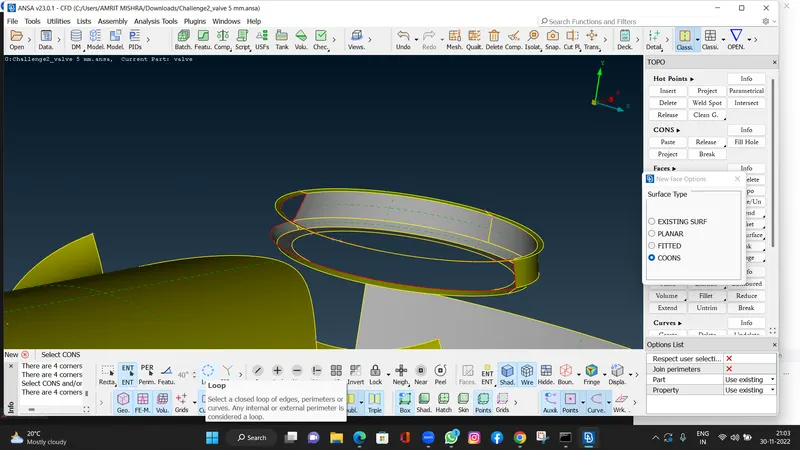
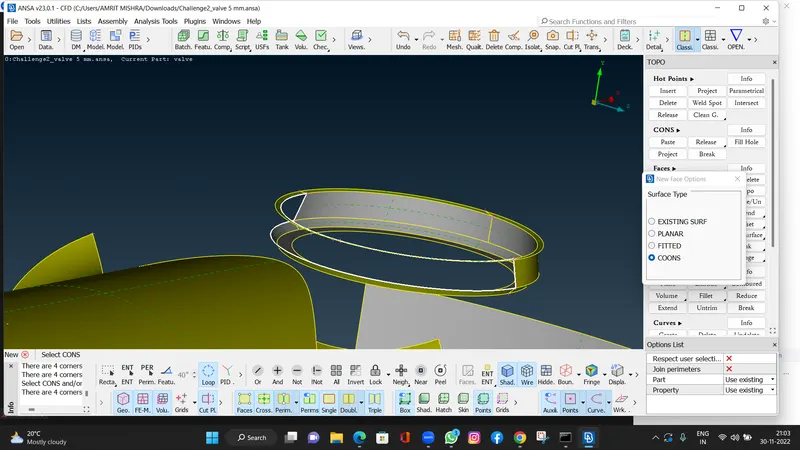
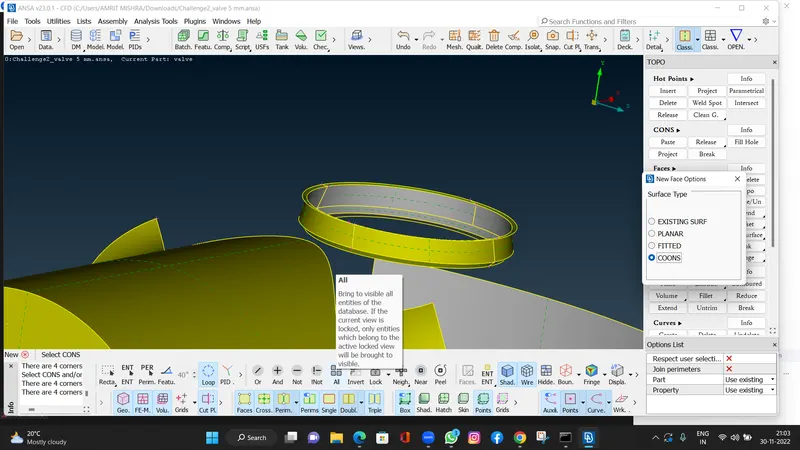
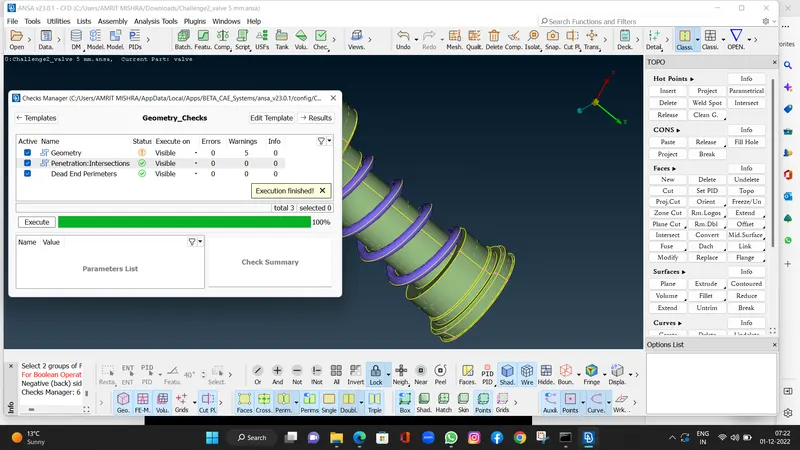
- Now i completed all visual errors, for double check i will go for geometry check that will shows the all tyes of cons error.
CHECKS > GEOMETRY > GEOMETRY CHECKS > EXECUTE > DOUBLE CLICK ON GEOMETRY.
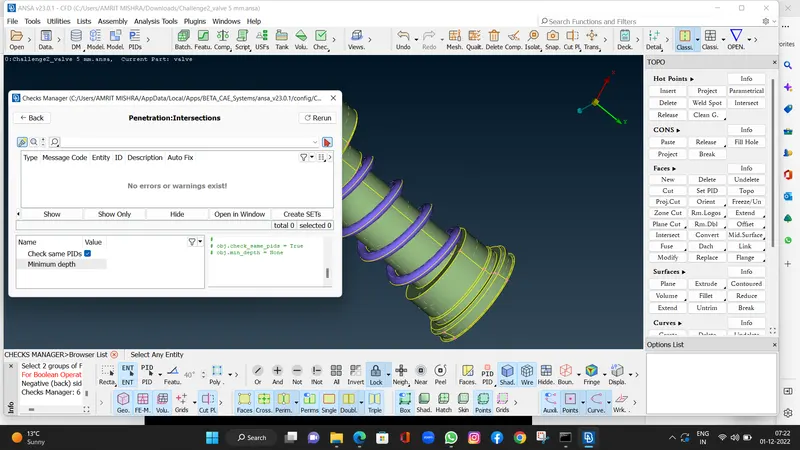
There is not any geometrical error found , only Penetration:Intersection error is showing.
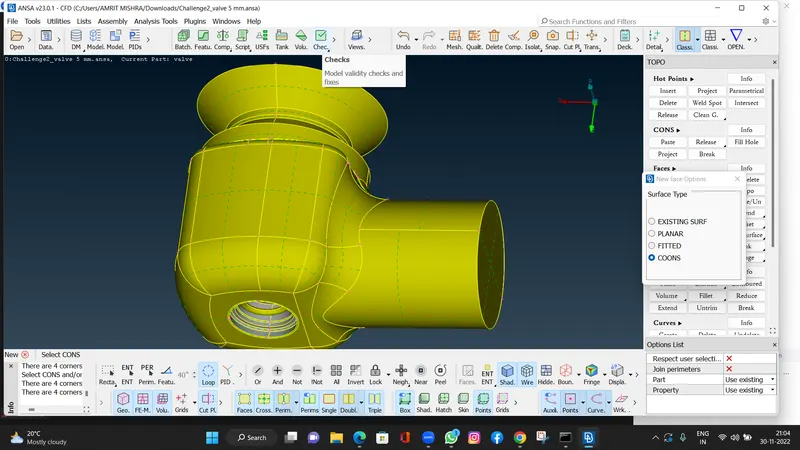
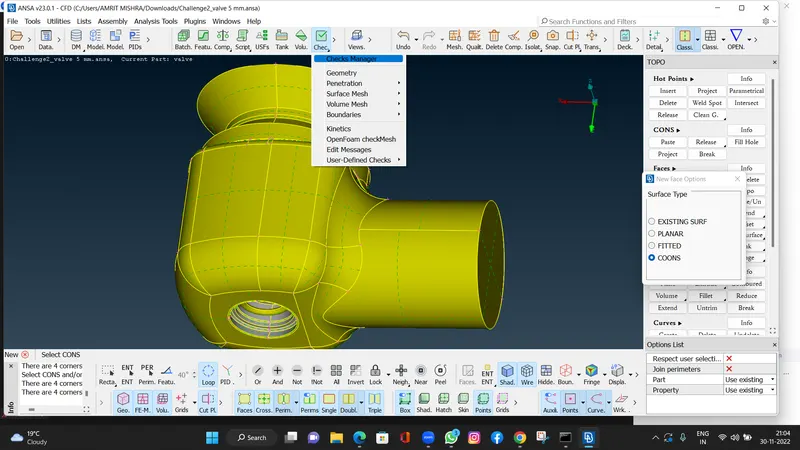
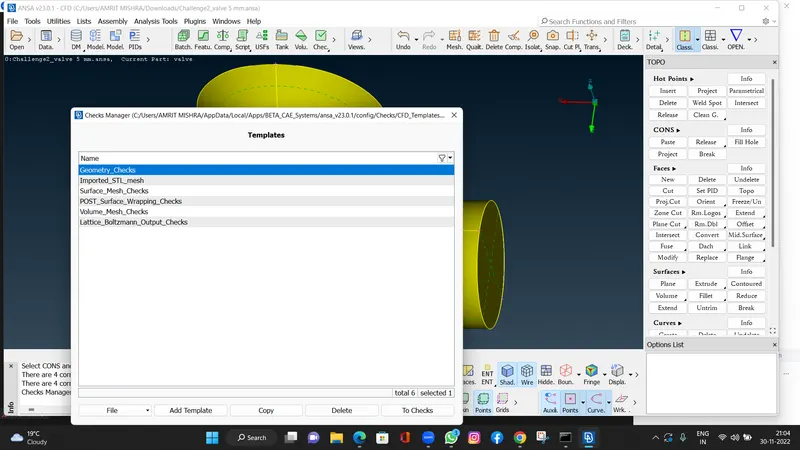
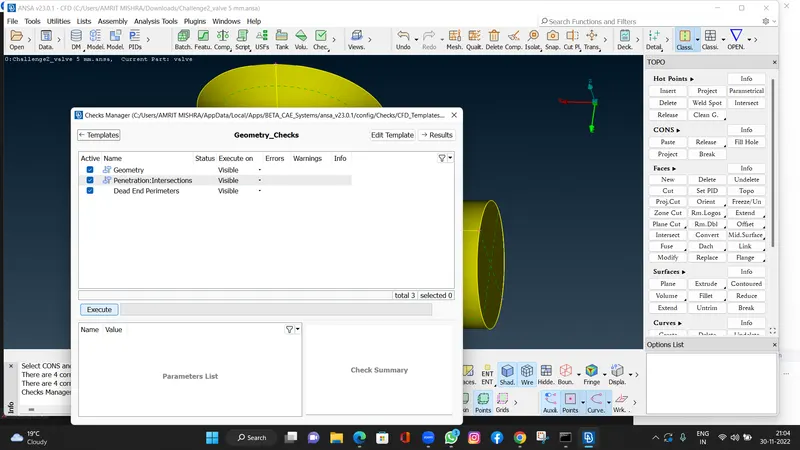
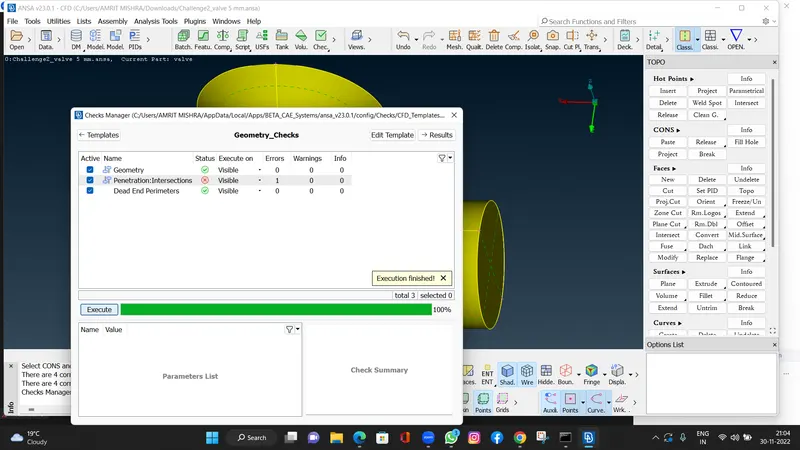
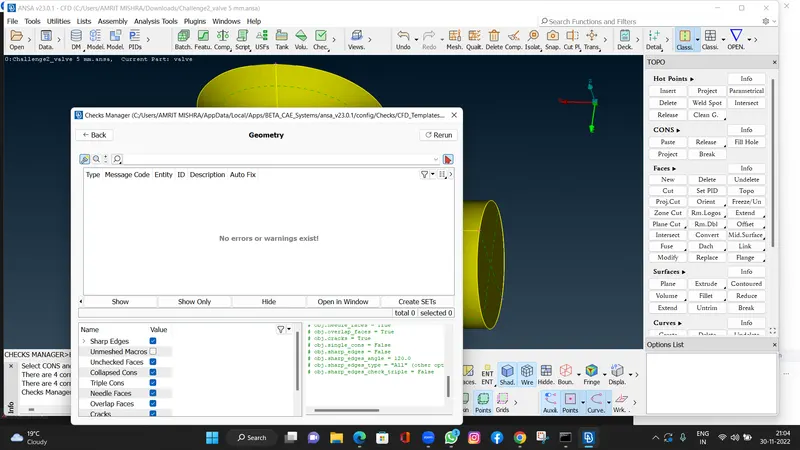
- In check manager whwn i will click on pentration :intersection it will shows in wirw frame mode there is penetration .
- Spring is inside the column
- And column is intersection with spring at down side.
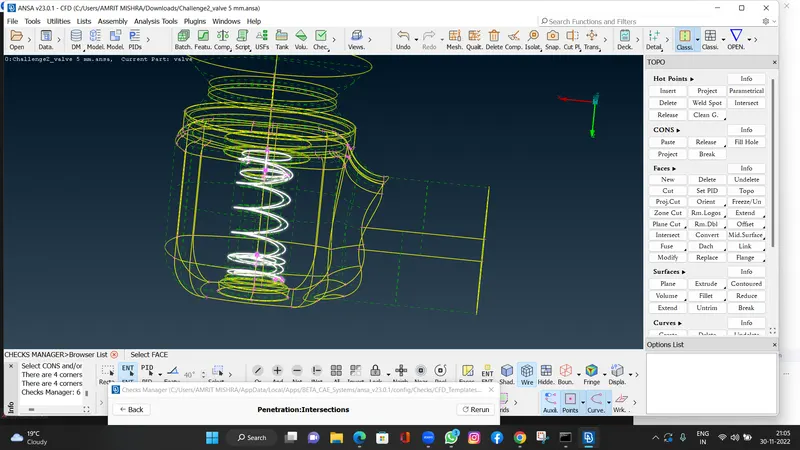
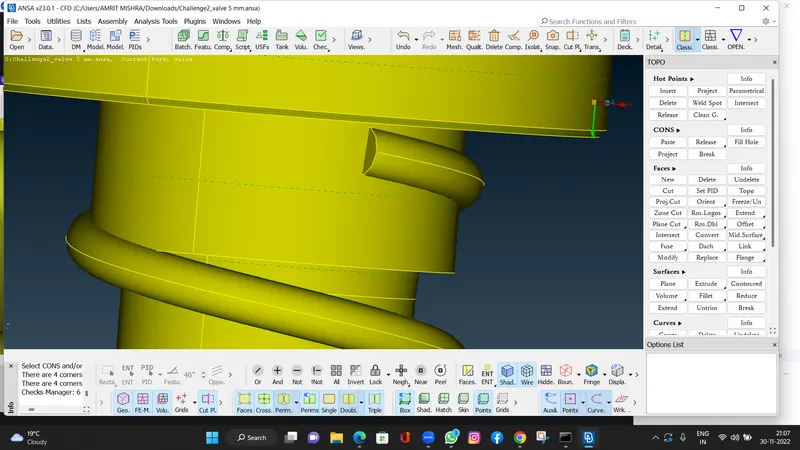
- It will be rectify by command Intersect in TOPO module > FACES > INTERSECT
- The command will ask for which part you want o keep and which one you want to delete .
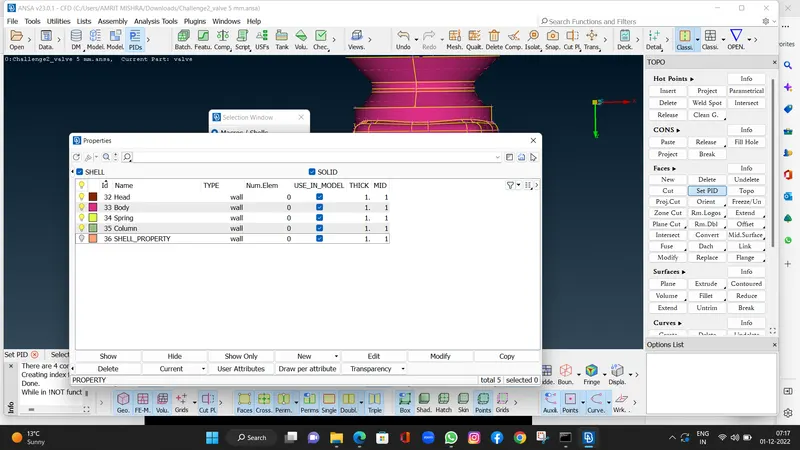
- Before this i have to assign the pids for classify the part br perticular name because we have to we have to take indivisual part in intersection command.
- so we will lock the geometry only on spring and column part.
- And by INOT command in pids resign mode select the spring and and middle click only coulmn will appear so we set the pids as name coulmn.
- Again select the column and do middle click by using INOT comaand and set the pids as name spring because only spring will appear.
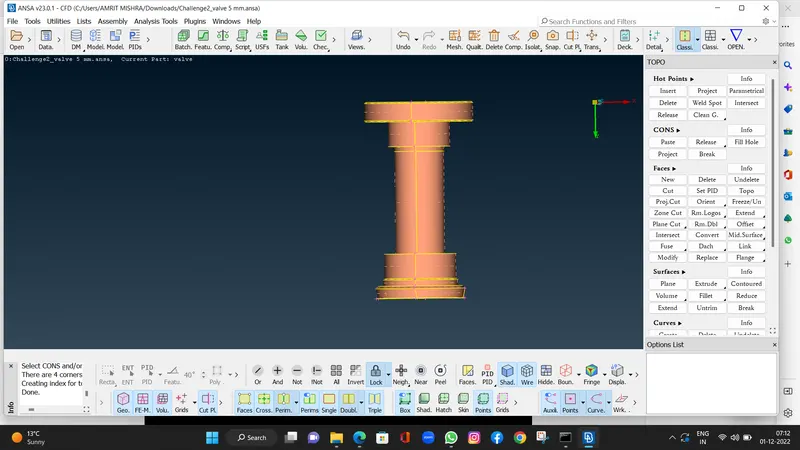
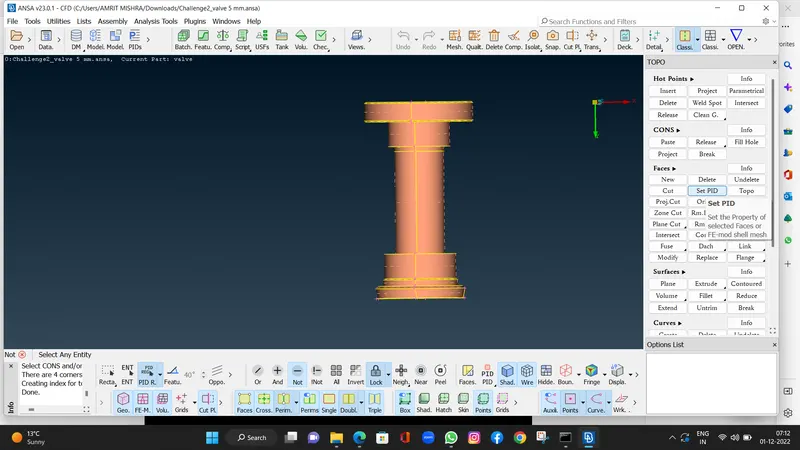
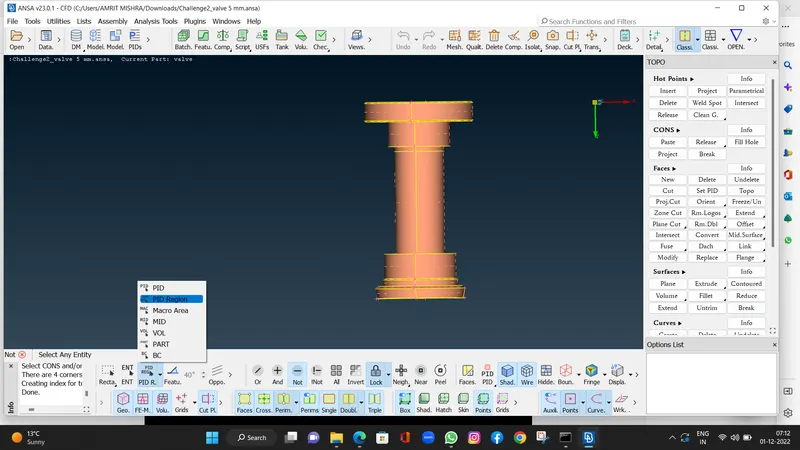
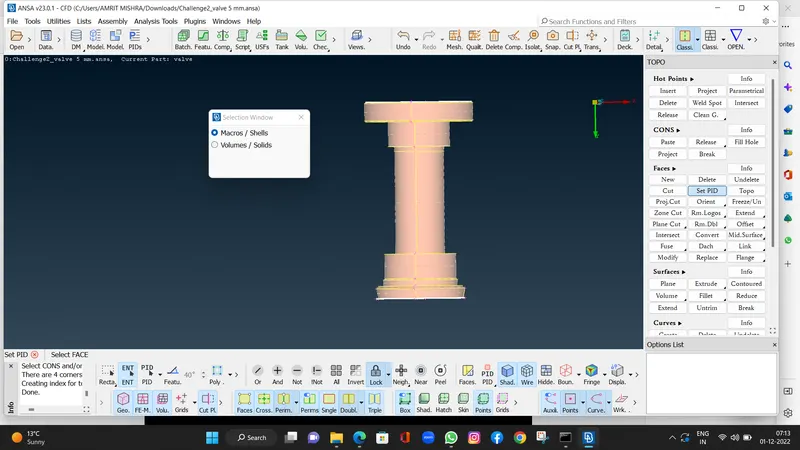
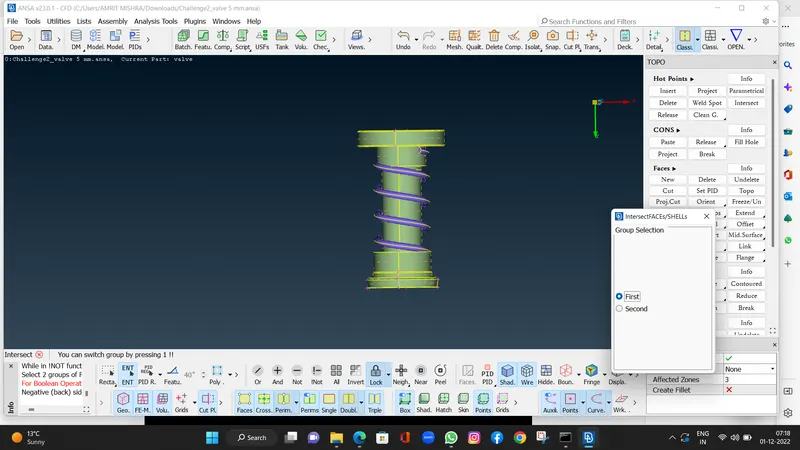
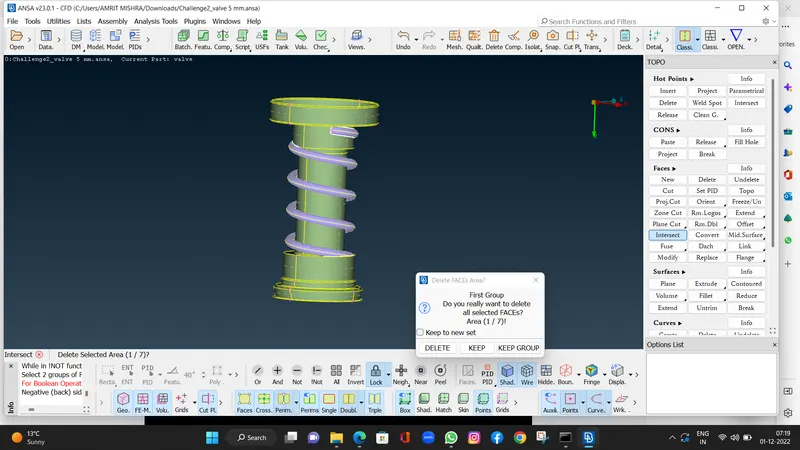
- After assigning the Pids we will use intersect command to rectify the penetration : intersection by spring in column.
- First select the first part as sprinf in pids mode and the column, after middle click he will ask for keep and delete the parts.
- After rectify the all errors we will check the geometry again , there is showing no intersection errors it means we solved the all geometrical errors.
- In this geometry error cons will rectify by using NEW in topo module Faces.
-
Select New then select the Coons in entity or loop mode and do middle click.command will ask for accept surfaces, click ok.
TOPO MODULE > FACES > NEW > SURFACETYPE (COONS) > SELECT CONS > MIDDLE CLICK > OK
So here we finished the geometry refining part.
Step 2 : Surface Meshing
The Surface meshing is here by three target length as given.
Case 1 : Target length 5 mm
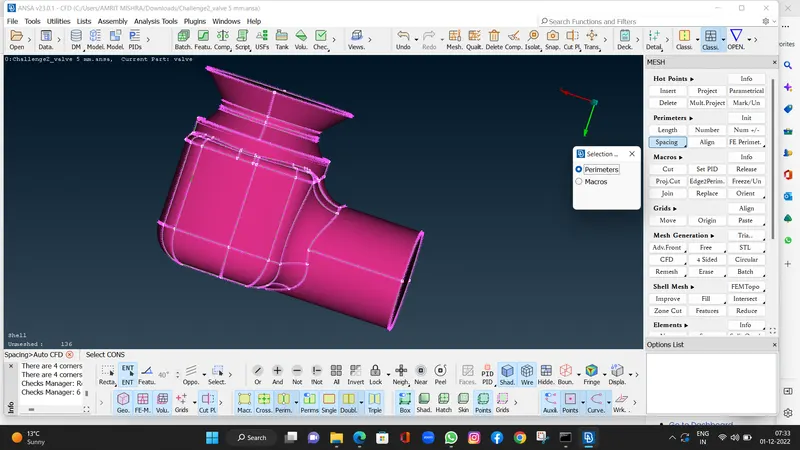
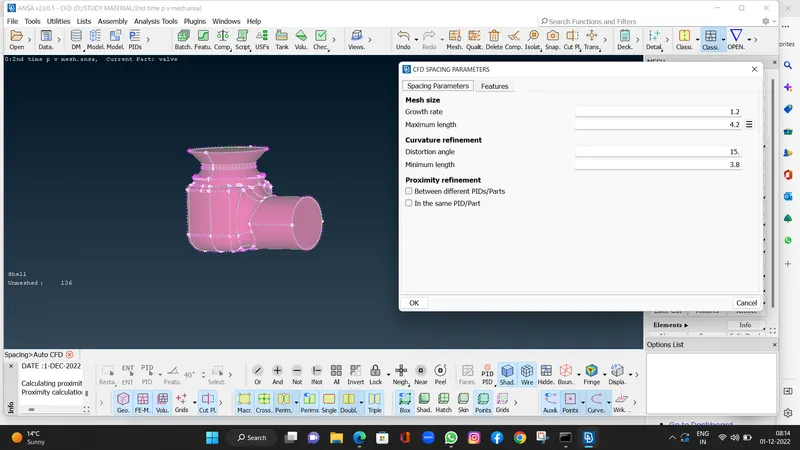
- We will use 5 mm target length by using tria elements in spacing Auto cfd mode .
- Then CFD spacing will ask for parameter for maximum and minimum target length for 5MM .
- Here i give 4.2mm as maximum target length and 3.8mm as minimum target length and then click ok.
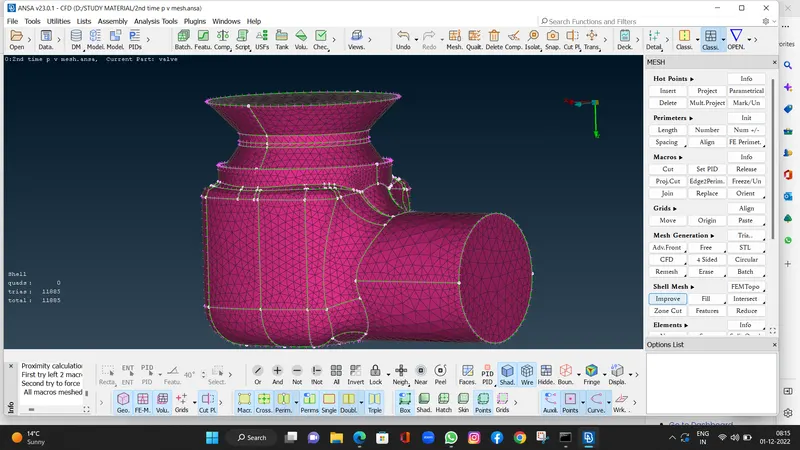
- And we will go for CFD visible .
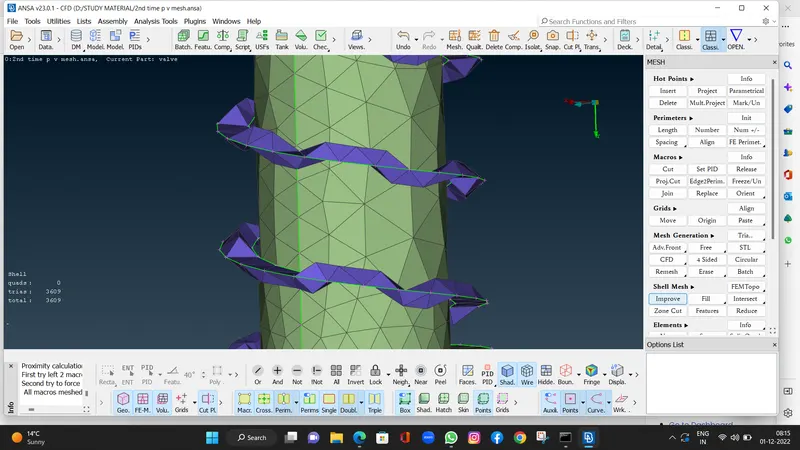
- Here we will see 11883 trais elements.
- But if we look on our spring its not look like refine as spring in this 5 mm target length.
Case 2 : Target length 3 mm
- We will use 3 mm target length by using tria elements in spacing Auto cfd mode .
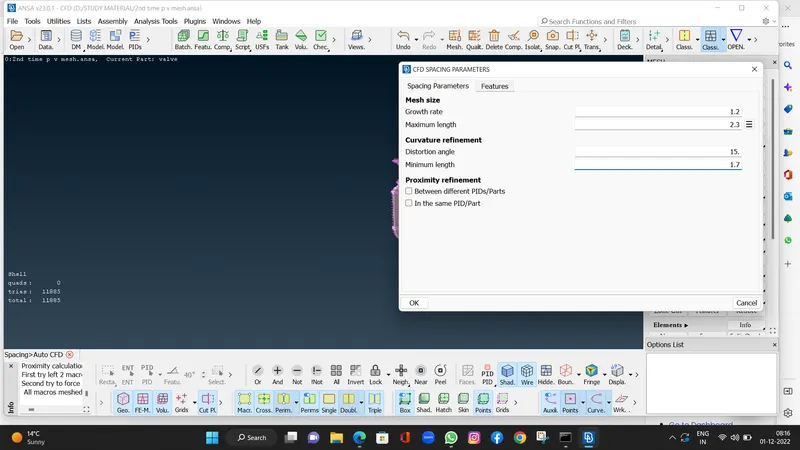
- Then CFD spacing will ask for parameter for maximum and minimum target length for 3 MM .
- Here i give 2.3 mm as maximum target length and 1.7 mm as minimum target length and then click ok.
- And we will go for CFD visible .
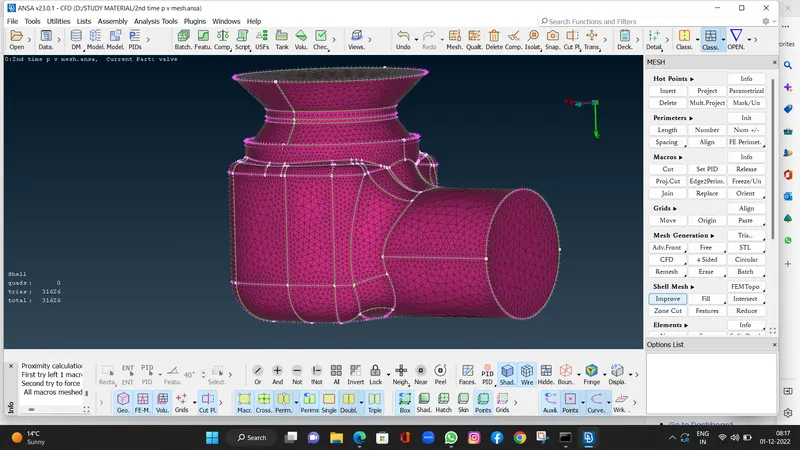
- Here we will see 31626 trais elements.
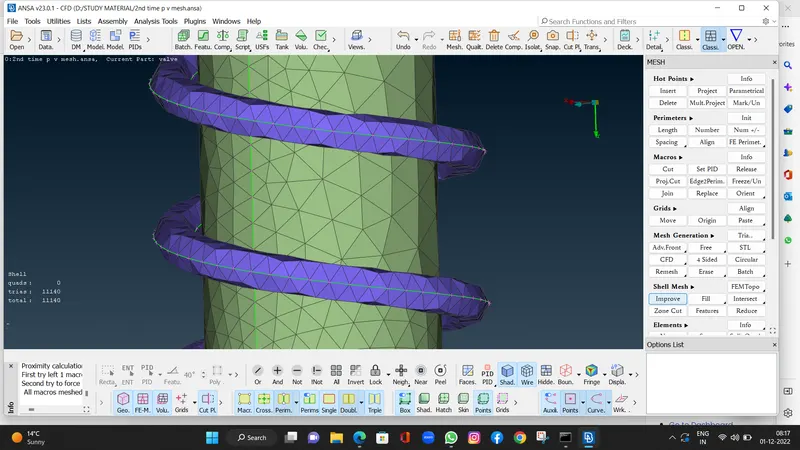
- But if we look on our spring its also not look like refine as spring in this 3 mm target length.
Case 3 : Target length 1 mm
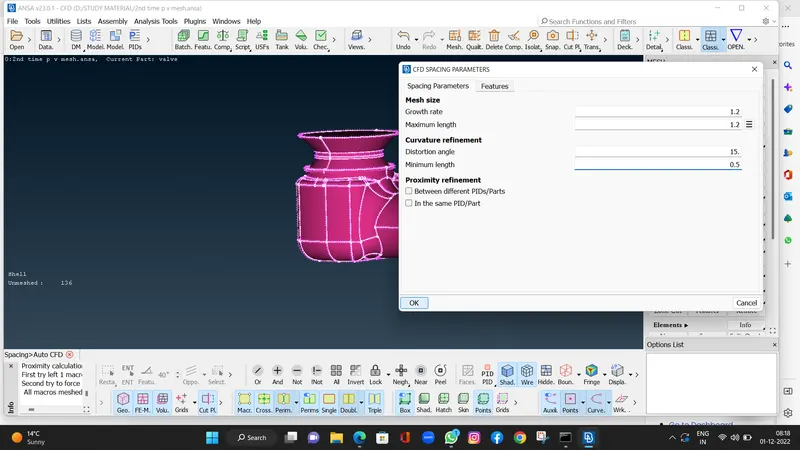
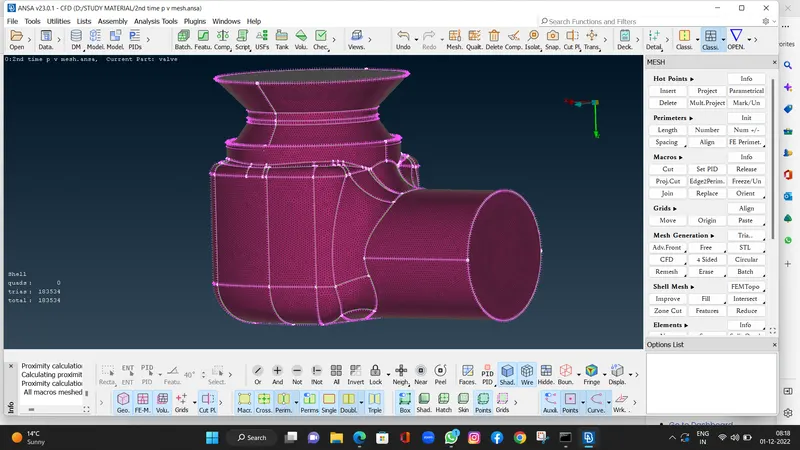
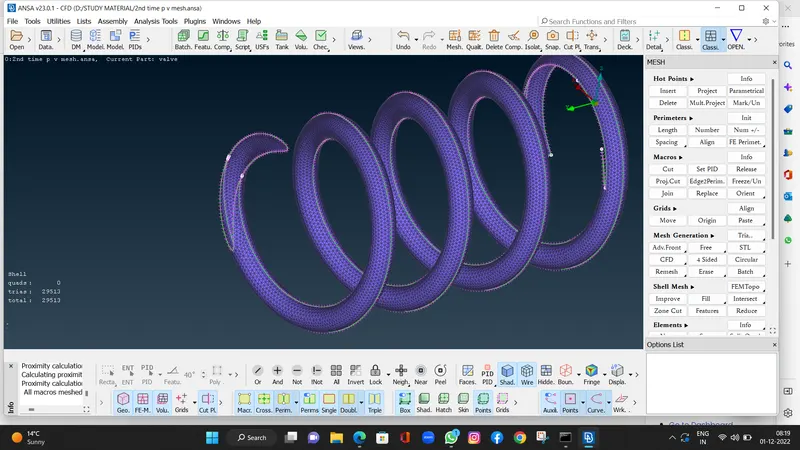
- We will use 1 mm target length by using tria elements in spacing Auto cfd mode .
- Then CFD spacing will ask for parameter for maximum and minimum target length for 1 MM .
- Here i give 1.2 mm as maximum target length and 0.5 mm as minimum target length and then click ok.
- And we will go for CFD visible .
- Here we will see 183534 trais elements.
- In this given target length if we look meshing geotry at spring its look very fine meshing.
Step 3 : Volumetric meshing
In the last step we will do volumetric meshing .
- After surface meshing then we can go for volumetric meshing.
- In meshing module drop down list click on volumetric meshing.
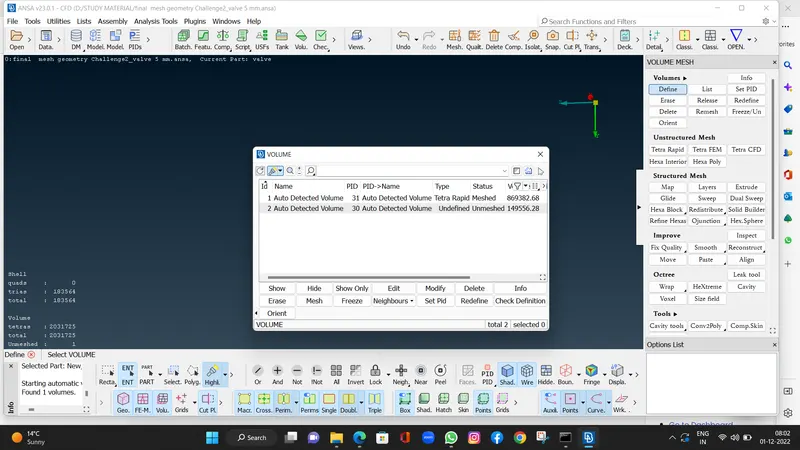
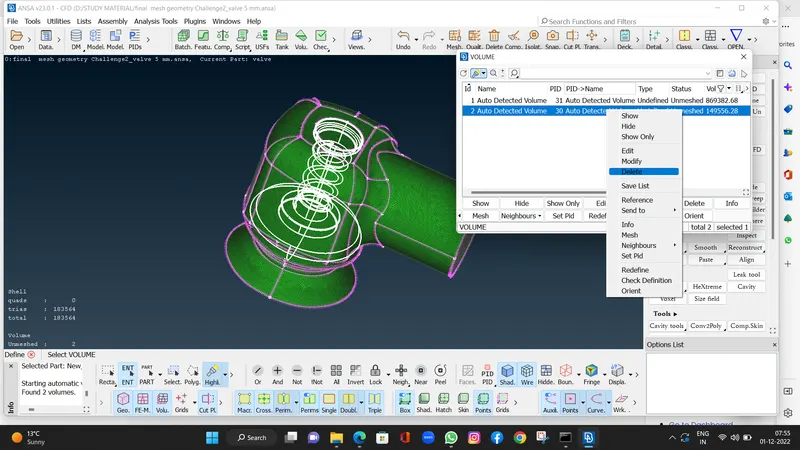
- And then in volumes there is Define , so it means we will define the volume for meshing.
- Here i will go only for internal part of the pressure volve so after define the mesh it will shows the 2 volumes.
- First one Internal shell of the volume and second one is internal volume of spring and column.
- So we don't need the internal volume of the spring , so here we delete it.
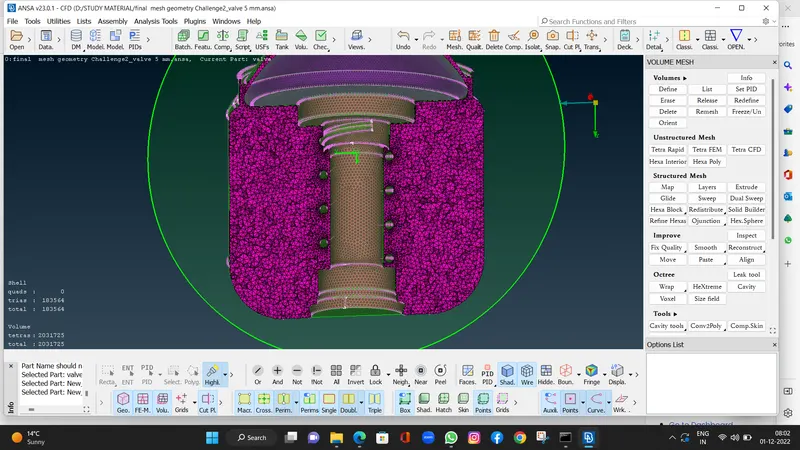
- Then we will go for volumetric meshing rigth click on defined volume and click on Remesh.
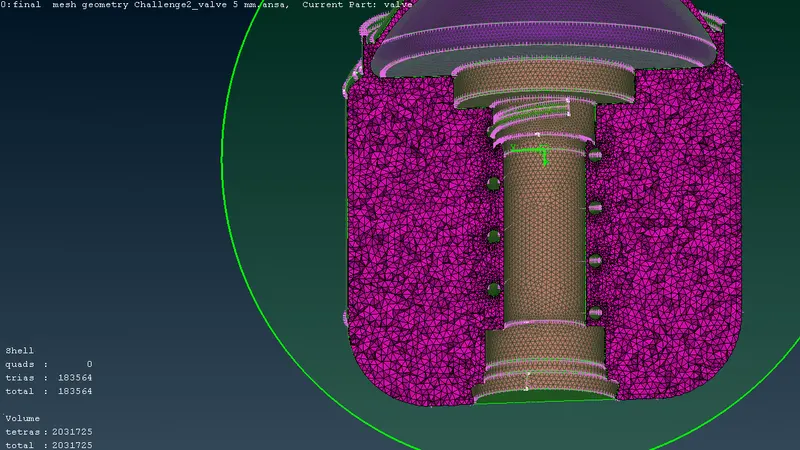
- After remeshing we will find 20317125 tetras elemets after remeshing.
- In cut plane section we can see the meshing of internal part of volume as we defined in the volumetric meshing.
Here are geometry links .
Analyse or Refine the geometry
https://drive.google.com/file/d/1e-BM1onEbbItGpmJa1RL2OKWbrMJ5NQ3/view?usp=share_link
Case 1 : Target length 5 mm
https://drive.google.com/file/d/1r2YFOfO94O9MGQb3OiNcjdNUeVqh7VUR/view?usp=share_link
Case 2 : Target length 3 mm
https://drive.google.com/file/d/1HoW1SHe1-HBzKkEukuvWeaQPcTpEiXqx/view?usp=share_link
Case 3 : Target length 1 mm
https://drive.google.com/file/d/1h5qMAiJ7wE4eFMNQ71EDsnOkKWqF4fuk/view?usp=share_link
Volumetric meshing
https://drive.google.com/file/d/1g_uFIJamBwjjMyBUxvt6JmrHvcSuQvaK/view?usp=share_link