Week 2 Challenge
1) What is BIM? Summarize the features of BIM and benefits of using BIM over 2D CAD tools.
BIM is a process which is supported by various tools, technologies and contracts involving the generation and managment of digital representations of physical and functional charecteristics of places. BIM is a concept but not a software. A team of architects, engineers work collaboratively to design and build a commercial building utilising the same database and computer model.
Benifits of using BIM over a 2D CAD tools:
1) faster design and construction
2) higher quality of performed work
3) increasing the efficiency and productivity
4) visualisation at the early stage of project
Benifits of BIM:
- BIM offers a more complete representation of a building's design.
- It makes better design decisions, improve building performance and collaborate more effectively throughout the project life cycle
- It uses the intelligent .connected workflows to help improve predictability, productivity, and profitability.
- It digitize your construction site and connects project information.
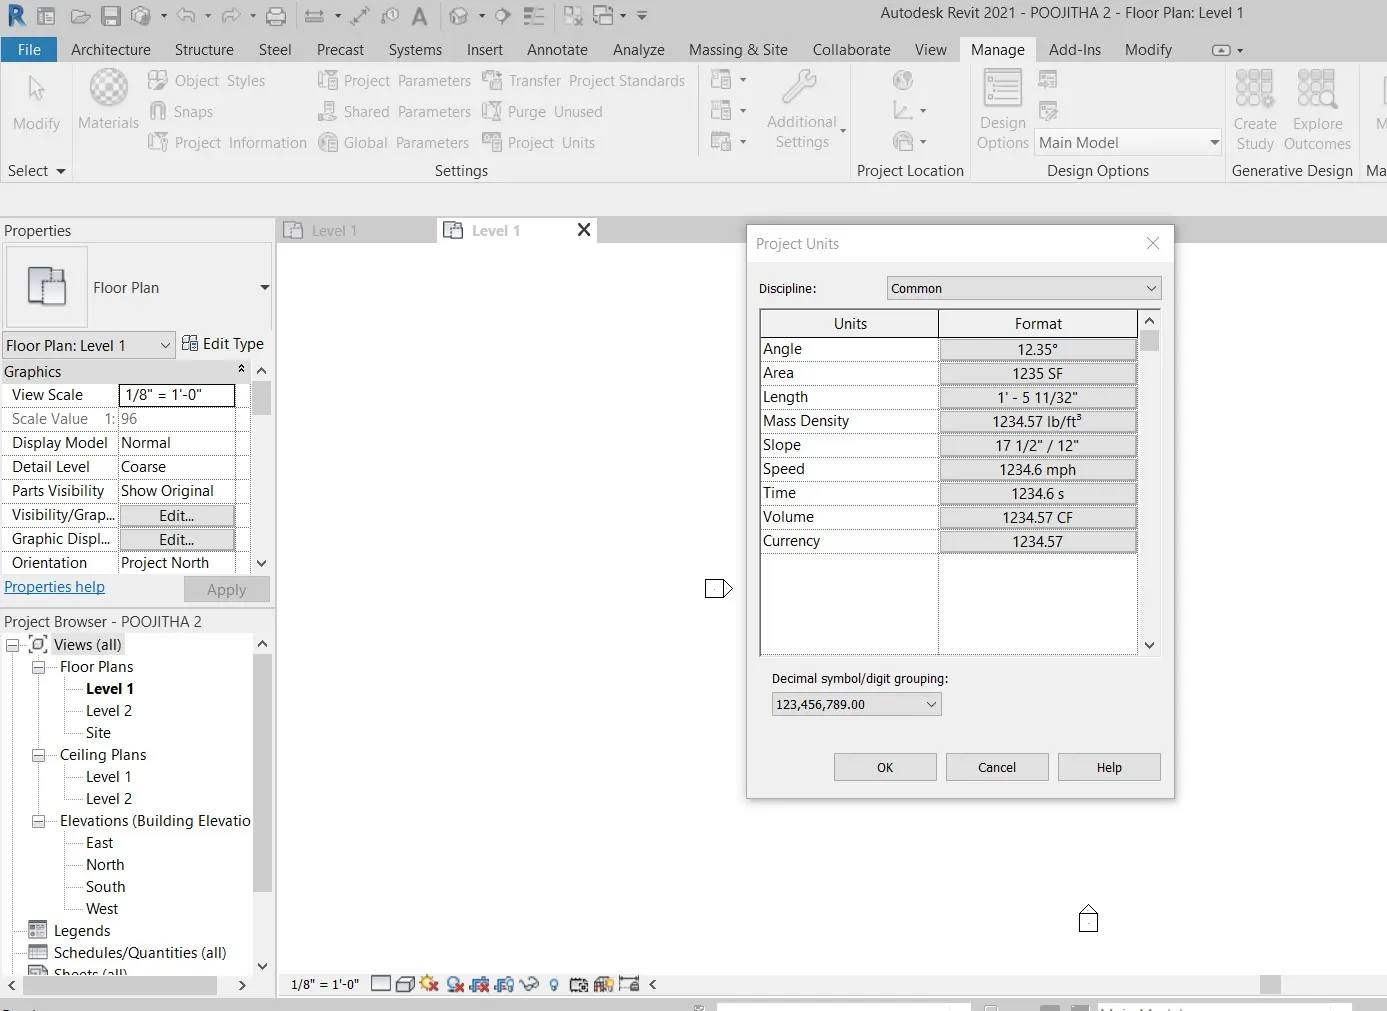
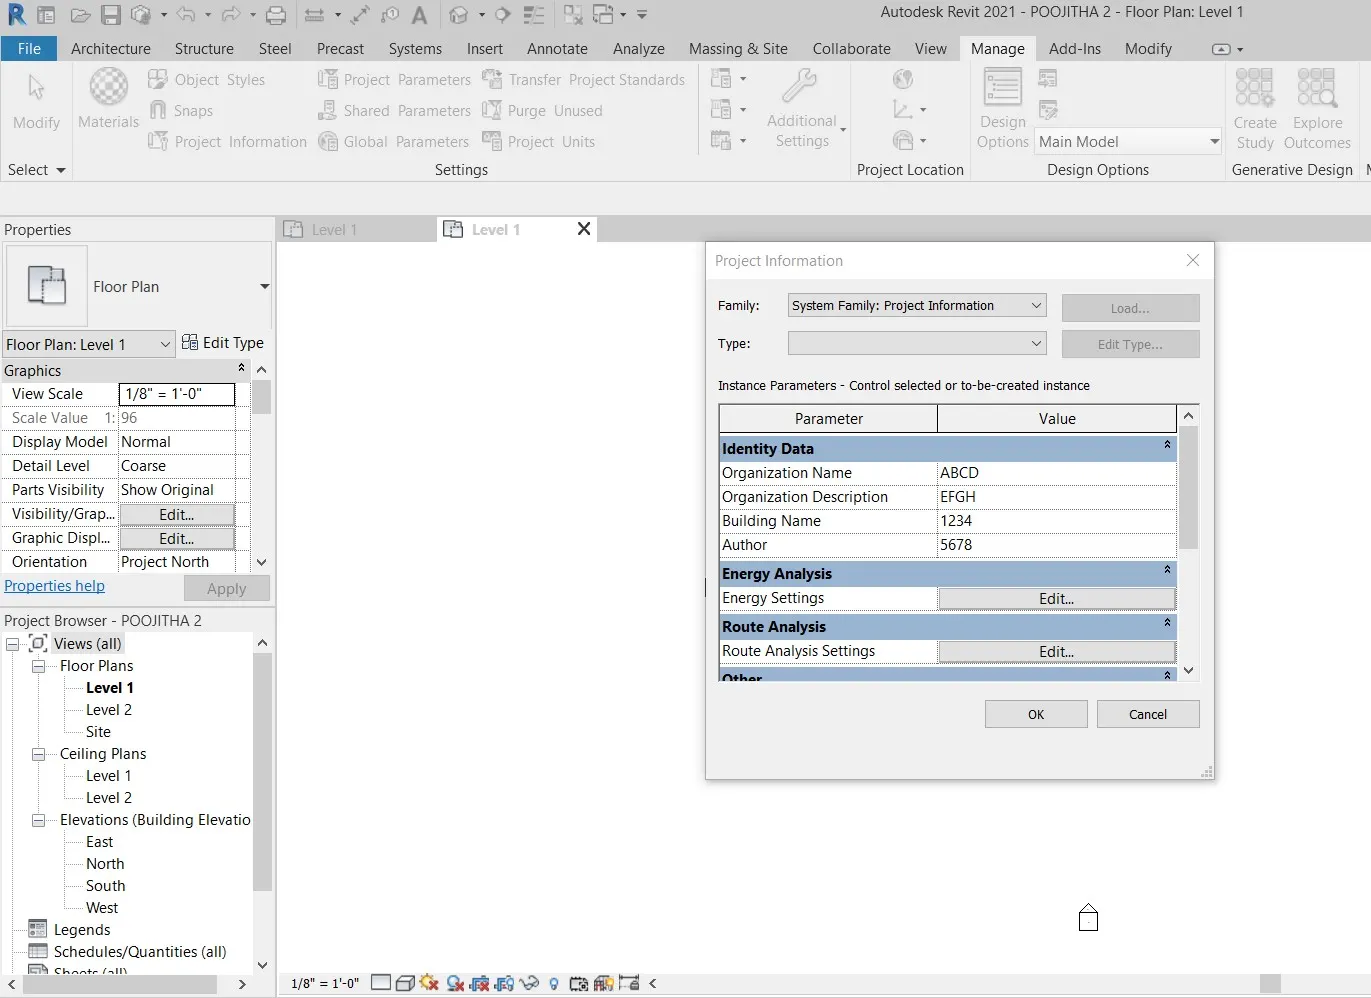
3) Setting up a Project – Open a project file with architectural template. Save the file with appropriate name. Set up the project units to Imperial / Metric based on your convenience of modelling. Complete the project information under Manage tab. Set up the maximum backups for project file to 3
AIM: To set up a project.
TOOLS REQUIRED: 1) file 2) manage tool 3) project information 4) save
PROCEDURE:
1) click on file and select new.
2) save the file with appropriate name.
3) select the manage tool and set the project units
4) click on the project information for giving the details of the project.
5) when clicked on save,it specifies the maximum number of backups. specify it as 3.
RESULT: Setting up the project is done.
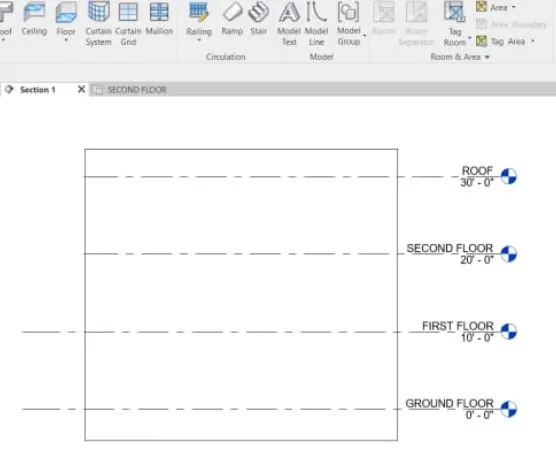
4) Understand the concept of Levels and Grids. Follow the naming and conventions. Create the following Levels: ( Convert to metric equivalents if metric is your units)
Ground Floor @ 0’
First Floor @ 10’
Second Floor @ 20’
Roof @ 30’
AIM: To create the following Levels:
Ground Floor @ 0’
First Floor @ 10’
Second Floor @ 20’
Roof @ 30’
TOOLS REQUIRED: 1) wall 2) view 3) level
PROCEDURE:
1) select the architectural template and draw a rectangular wall.
2) select the view option and select the section.
3) select the levels and give the name and distance to the levels.
RESULT: Levels are created.
2) Understand the concept of Categories, Families, Elements, Instances in Revit. Go to Insert Tab, choose a category. Pick a family and element. Understand the instances and insert it to Revit model
All the families will be available under the insert tab. the concept of families, elements etc are the objects under a specific family. for example in furniture family, allthe chairs and tables are the elements in that particular family.
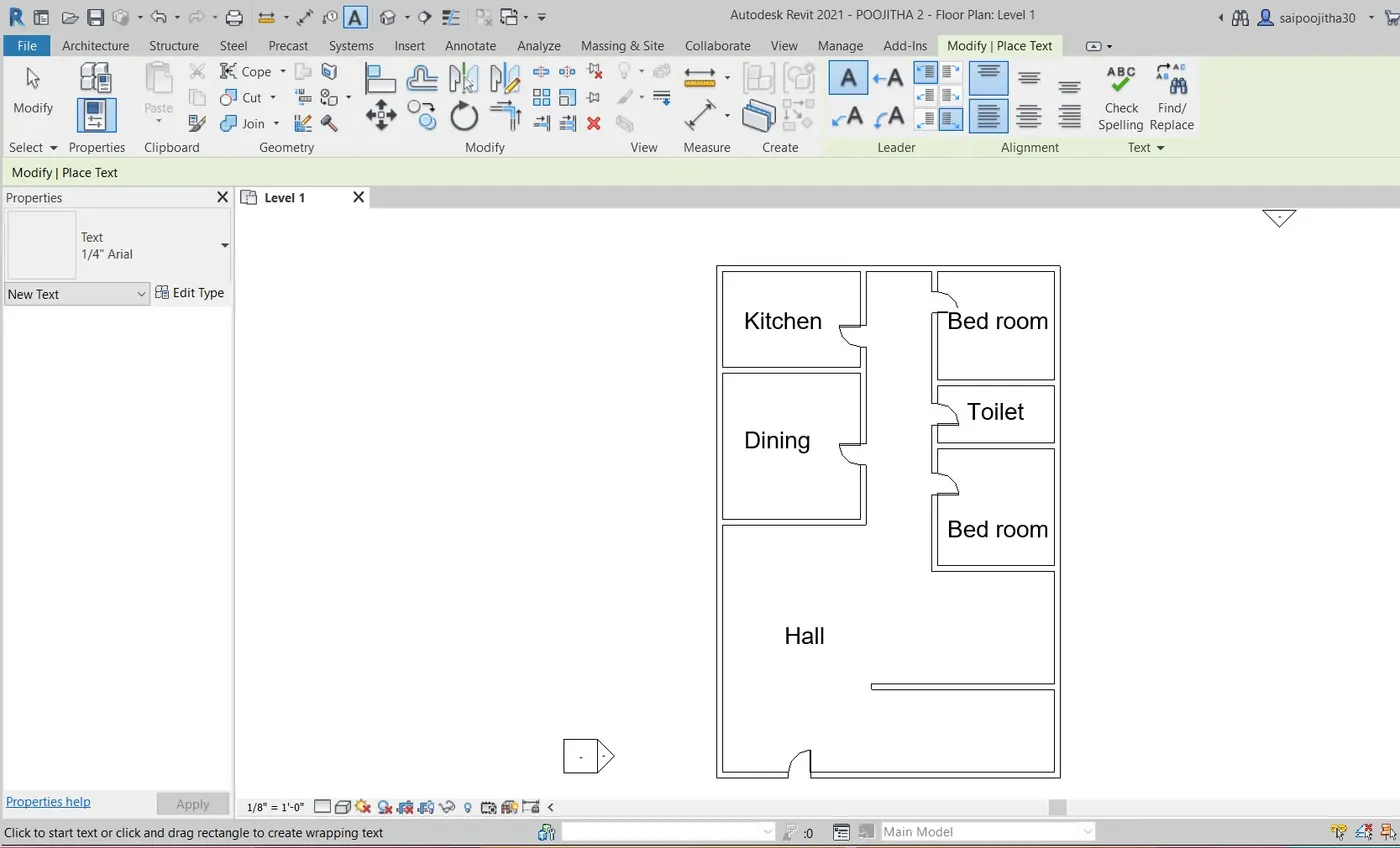
5) 3D modelling of residential unit – From looking at your house / or a place you aspire. Create a conceptual layout of the residential unit. You can measure using a tape or
you can access your residential plan to create a similar layout.
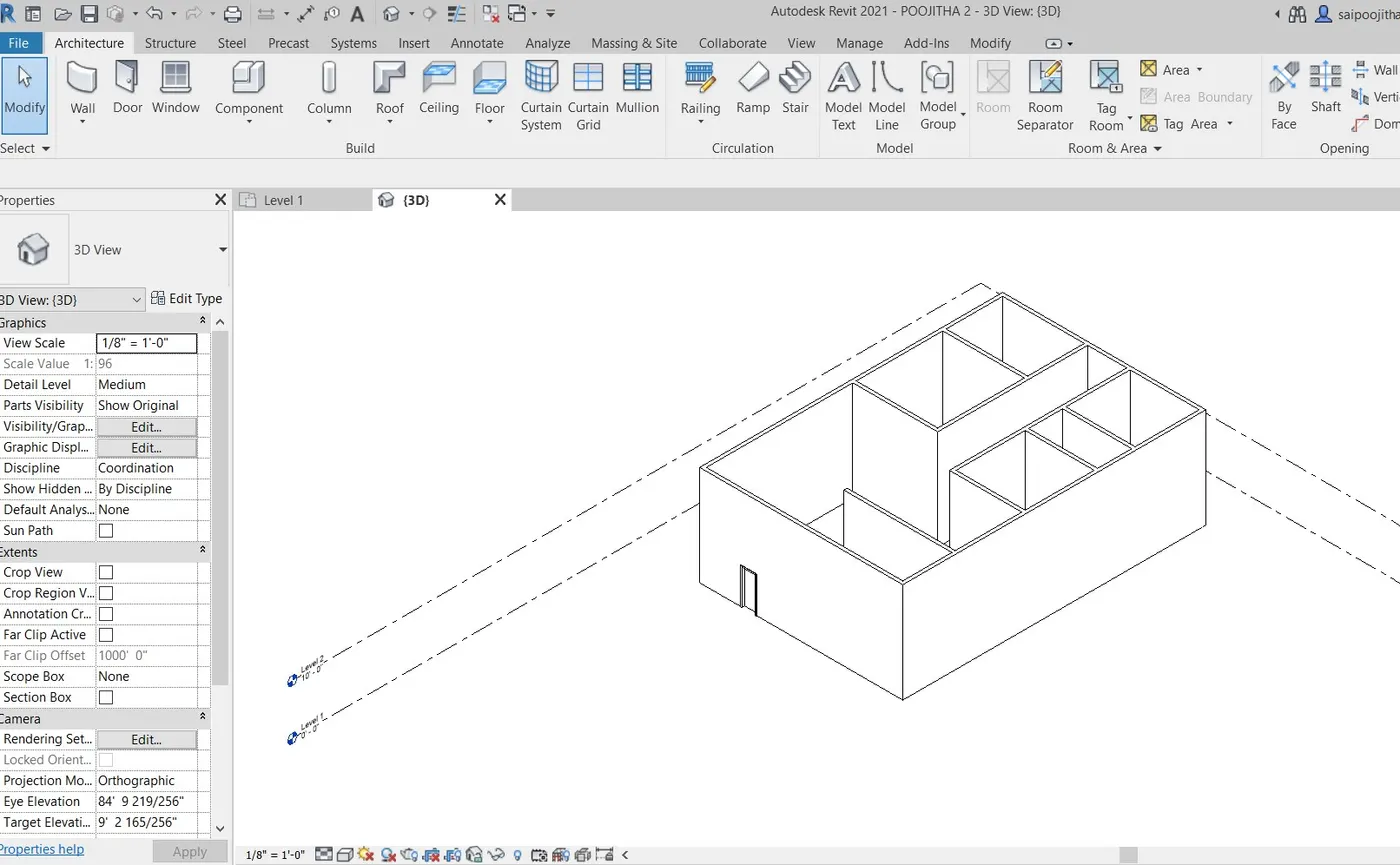
AIM : To create the layout of a residential building.
TOOLS REQUIRED: 1) walls
PROCEDURE:
1) open the file
2) select walls and make the layout of the plan.
3) place the doors by selecting the door comand from the top.
RESULT: Conceptual layout of residential building oid made using revit.
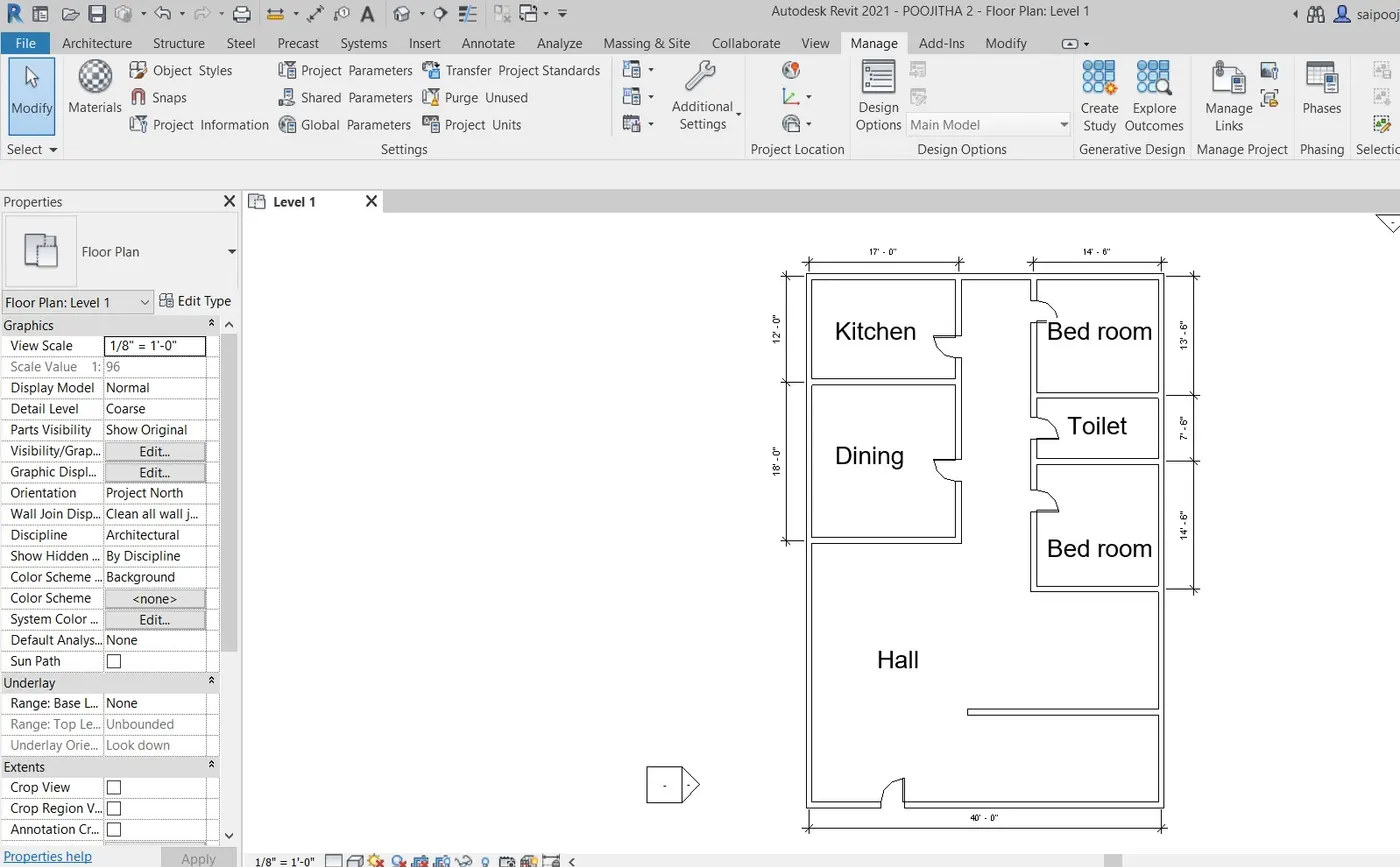
6) In the layout created draft the level of details you are planning to include – Dimensions of room, components you plan to add in the residential unit.
AIM: To show the dimensions of the room and the components.
TOOLS REQUIRED: 1) Walls 2) aligned 3) rooms
PROCEDURE:
1) Open the file where the layout is made.
2) select the aligned from the top bar and do the dimensions of the room.
3) select the tag room and do the tagging.
RESULT: Dimensions of the room are added to the layout
7) Identify the residential model elements such as Door, Windows, Tables, Chair, Couch, Bed, Lamps from the library and insert them to the model . Save the project for use
for Assignment 3
AIM: To identify the residential model elements and save the project
TOOLS REQUIRED: 1) Families 2) windows 3) save
PROCEDURE:
1) Open the revit file
2) select the windows whereever required
3) select the load families option and select the furniture and select the bed, chairs, table etc.
4) save the project by clicking the save option in the file option.
RESULT: the residential model elements are identified and the project is saved.